Ok, I have read everything I can find here and have tried everything I can think of and cannot figure out how to use the Multiply merge type. I think even @StephenCox gave up on it.
Based on this video, doing this with Vectric Aspire (https://youtu.be/lM_kJQwnFCk?si=ZJiTIIfgfwOV8eVS) I think I understand what it is supposed to be used for. It just doesn’t seem to work. It is supposed to use one of the components as a multiplier against another component to adjust the “height” of the pixels. It is just not at all obvious how to make this work.
Will someone from Carbide3D put a final nail in this thing. Out of all the posts I was able to find, nothing… Crickets…
That is something which a developer would have to speak to.
To turn it around — what sort of modeling might you be trying to do which the existing options do not enable which “Multiply” would plausibly effect? Could you provide an example file and a description of what you are having difficulty achieving?
I understand multiply in image editing when using a single multiplication factor. >1 lightens, <1 darkens.
It scales the brightness based on the current value rather than adding the same number to each pixel.
It brightens or darkens the image while maintaining more of the contrast.
So I suppose multiplying 2 images uses the corresponding pixels from both images to come up with a new value. What I really don’t understand is how or why you would use this to represent a solid object.
As it is, the current multiply function doesn’t appear to do anything. It doesn’t even create a new shape, or change the height of overlapping shapes. ??
I can think of one good case for using this. Consider the case where you want to carve a 3D element into a dished area. Using the multiply, and assuming the edges of the dish have a pixel value of zero, then multiplying anything by zero is zero. This would ensure that the 3D element is always below the top plane of the dished area.
So, in the same way that you can use a subtractive component to create the dish, I would think you apply the “multiply” to the 3D element within the dish to have the effect described above. But alas, such is not the case.
Now, having said that, there are other ways of using the tools to ensure this is the case. For example a combination of the add and angle, or using the equal with a fixed height. Just requires a bit more fiddling around.
I am just a fan of being able to understand and use the features that are offered. In this case, as you pointed out, does not appear to do anything.
For context… This is what happens when the spindle takes two weeks longer than the rest of the machine to arrive. Too much time to dive into the weeds of the software…
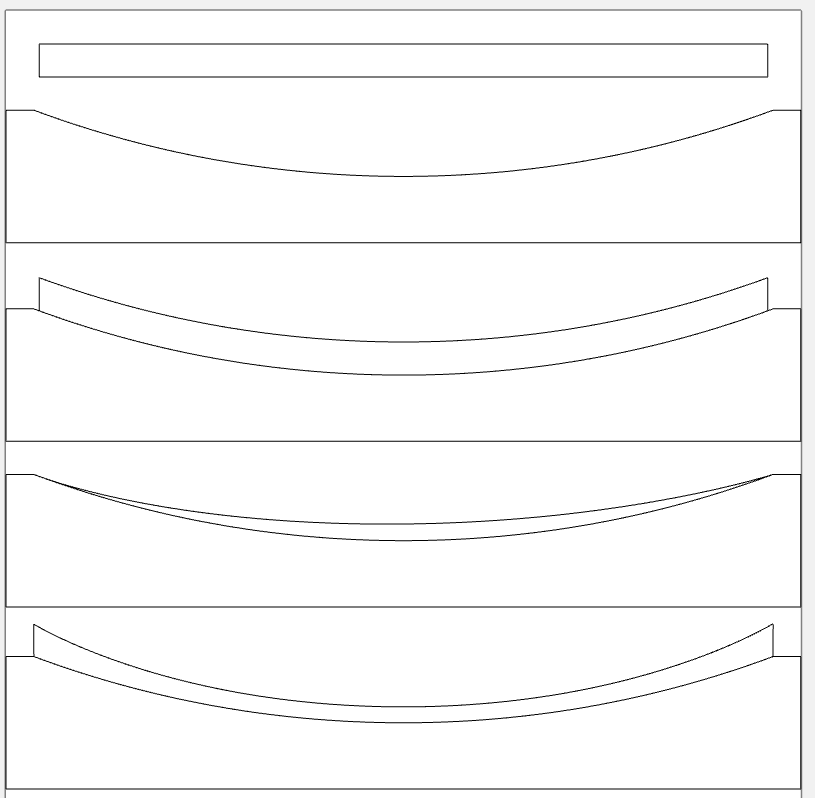
OK, so consider the top 2 shapes. The first combined shape would be an “Add”
The second combined shape is what I think you are suggesting.
The last combined shape is what I would expect translating the multiply function from image editing.
With the top of the stock being 1.0, and the bottom of the stock being 0.0, the bowl depth is half of the stock height, so the multiply at that point would be 50% of the new shape height, and the edges would be 100% of the new shape height.
This is all, of course speculation. I have no idea how you would translate image multiplication to representing a 3D shape. There would have to be some assumptions & a little magic built in.
I think your correct. What I forgot to mention is the video I watched actually inverted the dish so that the edge was zero the “bottom” (now the top because of the inversion) was 1. That was used to do the multiplication even though not visible. So, you could see where the affect in your last image would be reversed. Anyway, it gets convoluted and I am not sure it’s worth the headache in the end. I tend to nerd out on the technical details
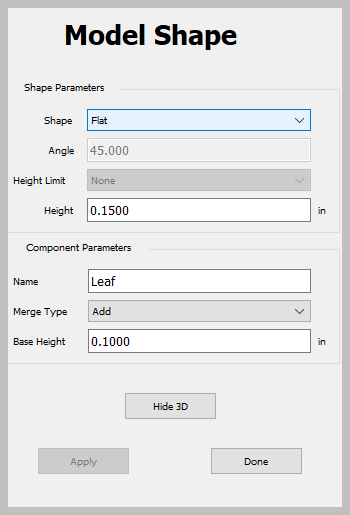
We can also get an approximation of the 3rd image you show above using the equal with a height adjustment. for example, I set my settings first as follows: