After drooling over some of the sign work posted here the past few years, I decided to design and build a more three dimensional sign to add some presence in the woodshop. My materials are PVC sheet, red oak from the big box store, and MDF for molding. There will be some electronics coming at a later phase in the project as well.
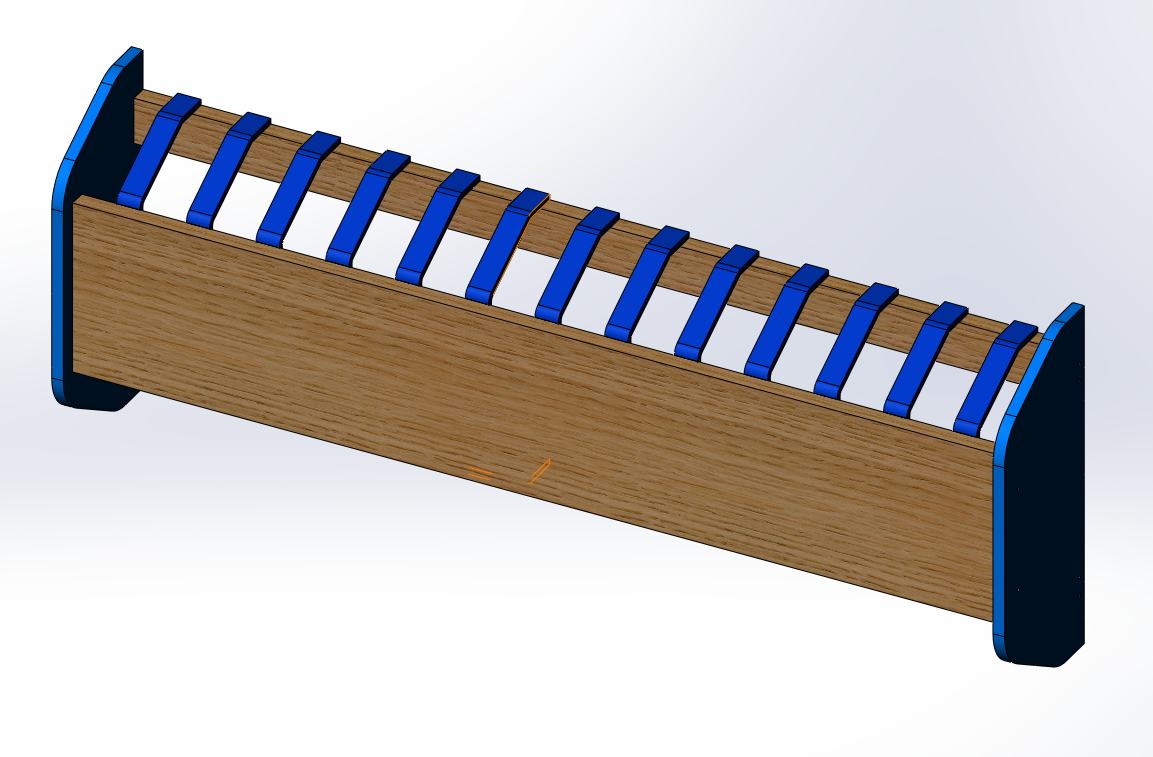
Got the basic design laid out in SolidWorks, incorporating a few elements of my branding. The slats and endcaps are hexagon profiles, and the coloring matches my shop colors and materials.
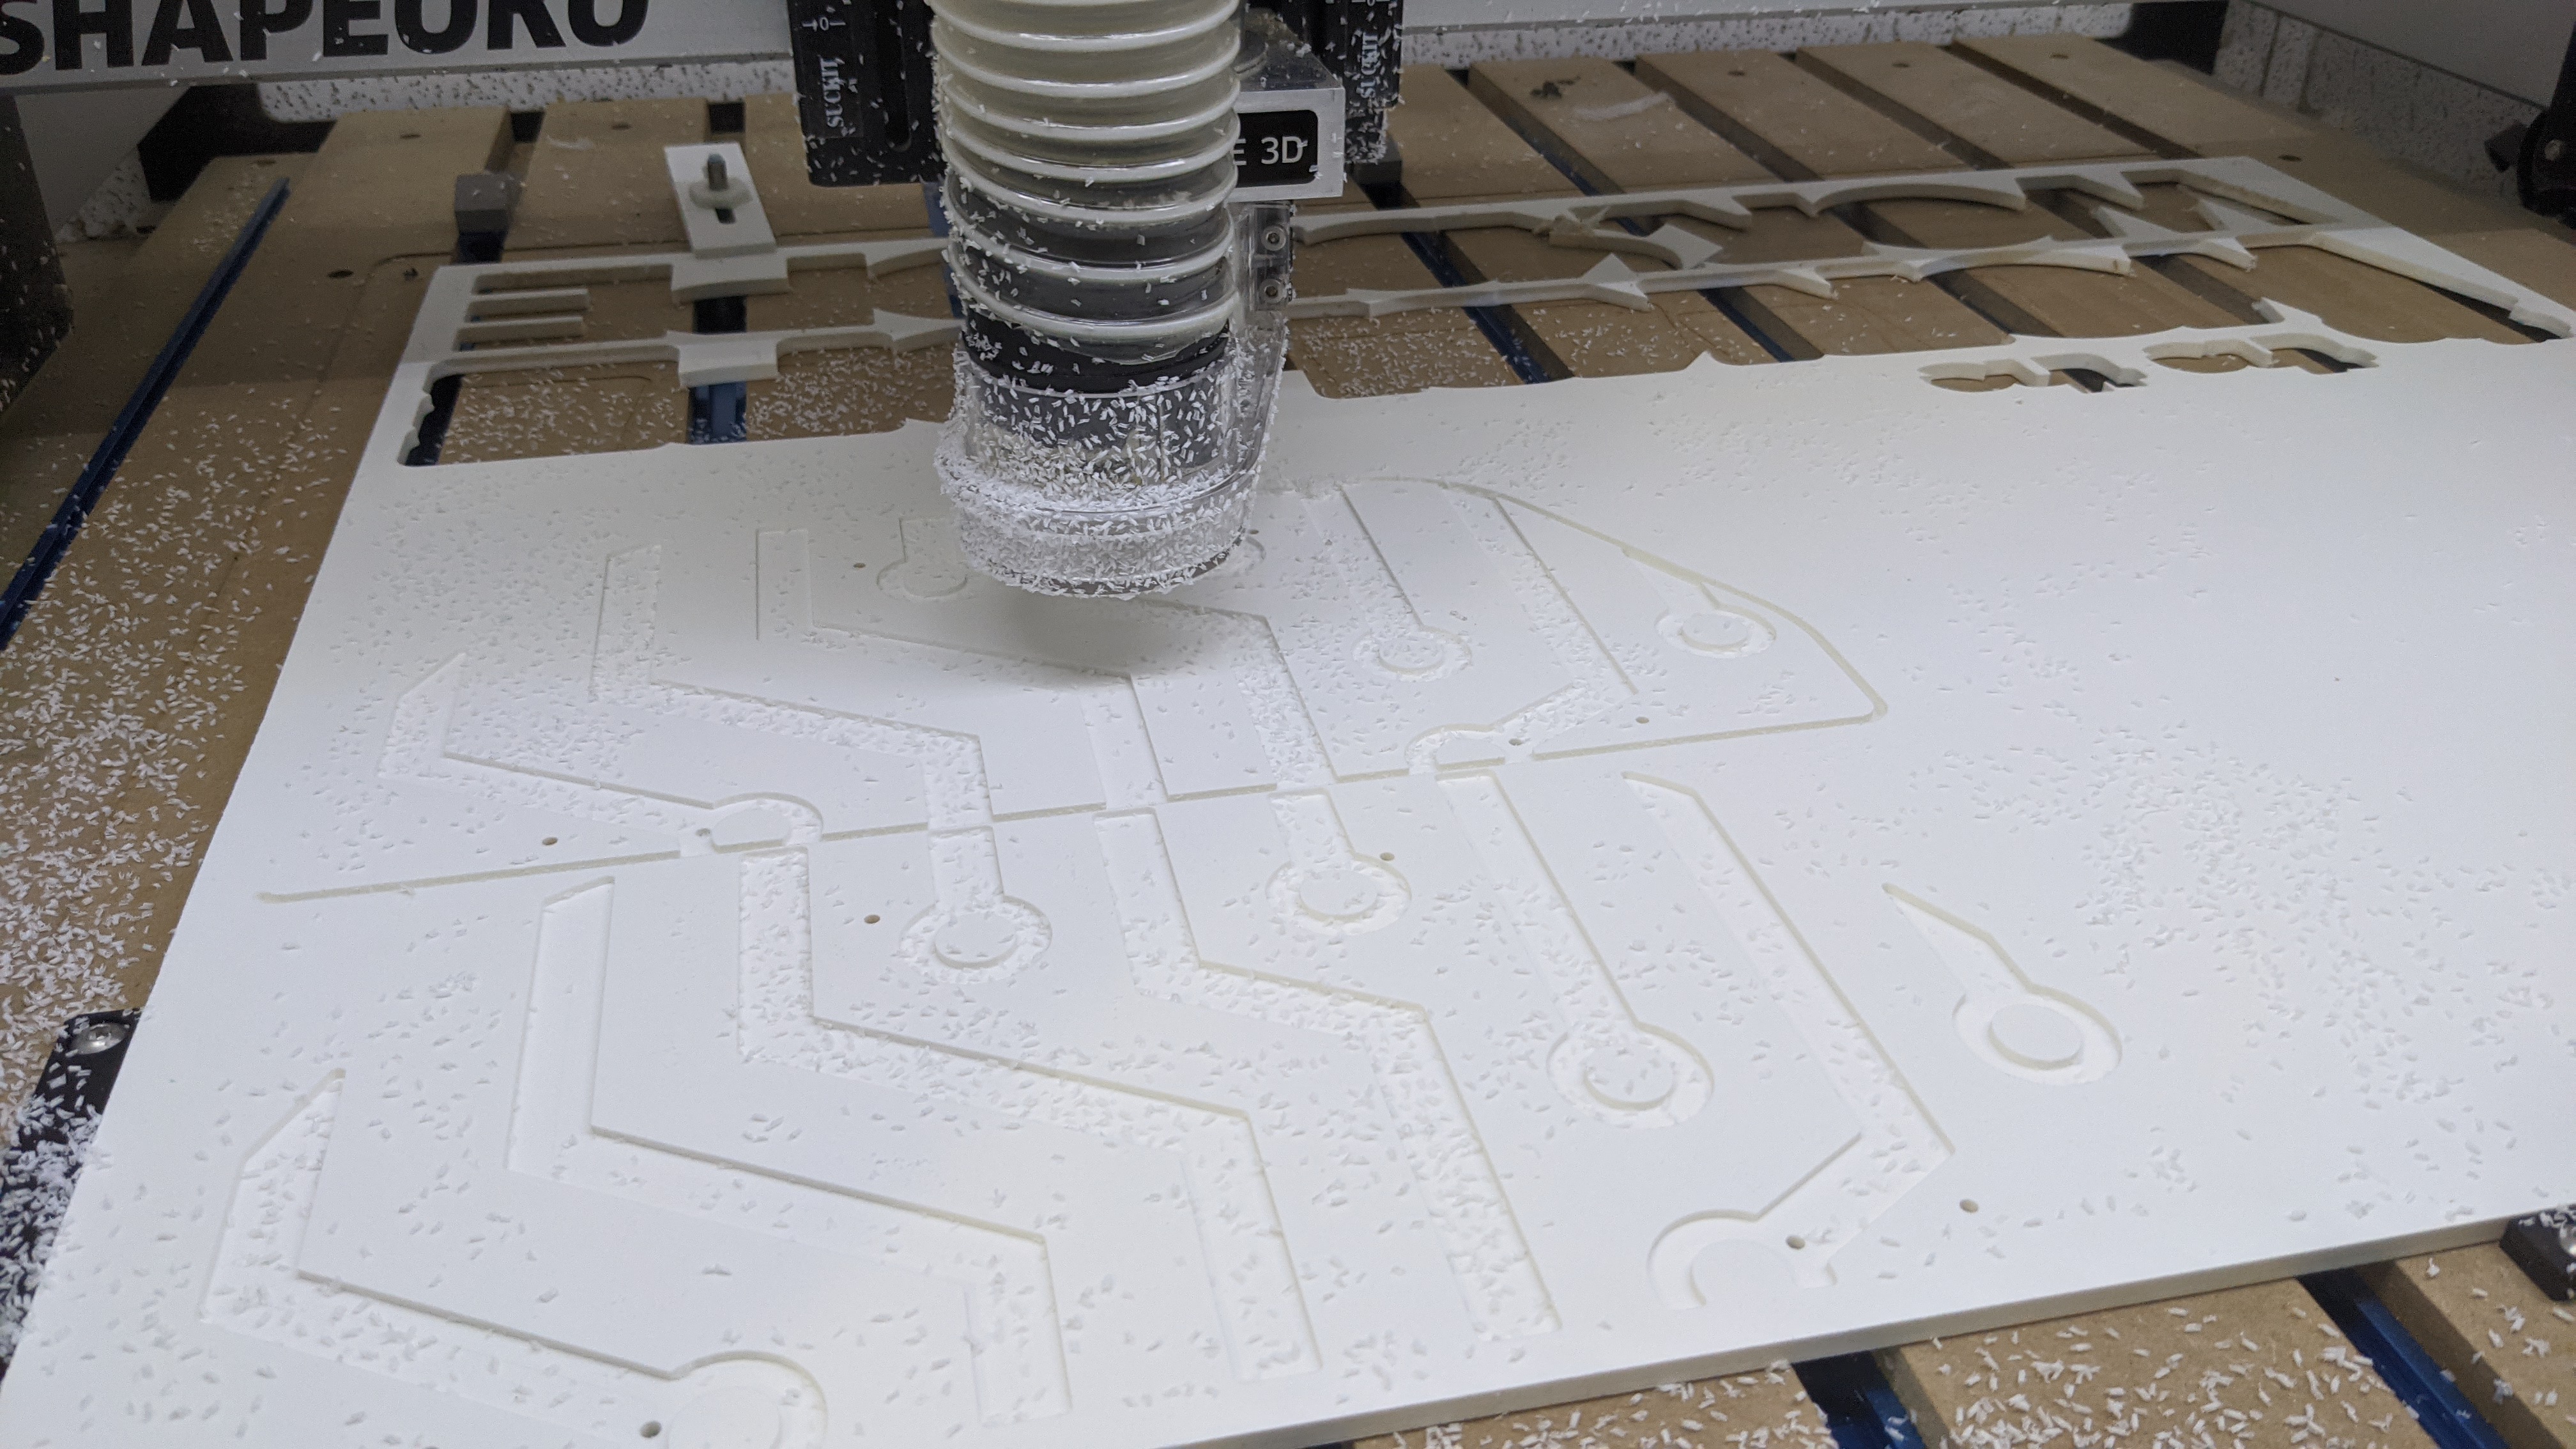
The slats needed spiced up a little so I shaped some curves and got to cutting on the XXL. The PVC cuts like butter and was a stress-free material, though sourcing it can be a little costly (find a local sign shop!).

I also milled the circuit traces from my logo into the endcaps. Boolean operations in Carbide Create were key here to trim the design to fit the panels since I did it oversized.
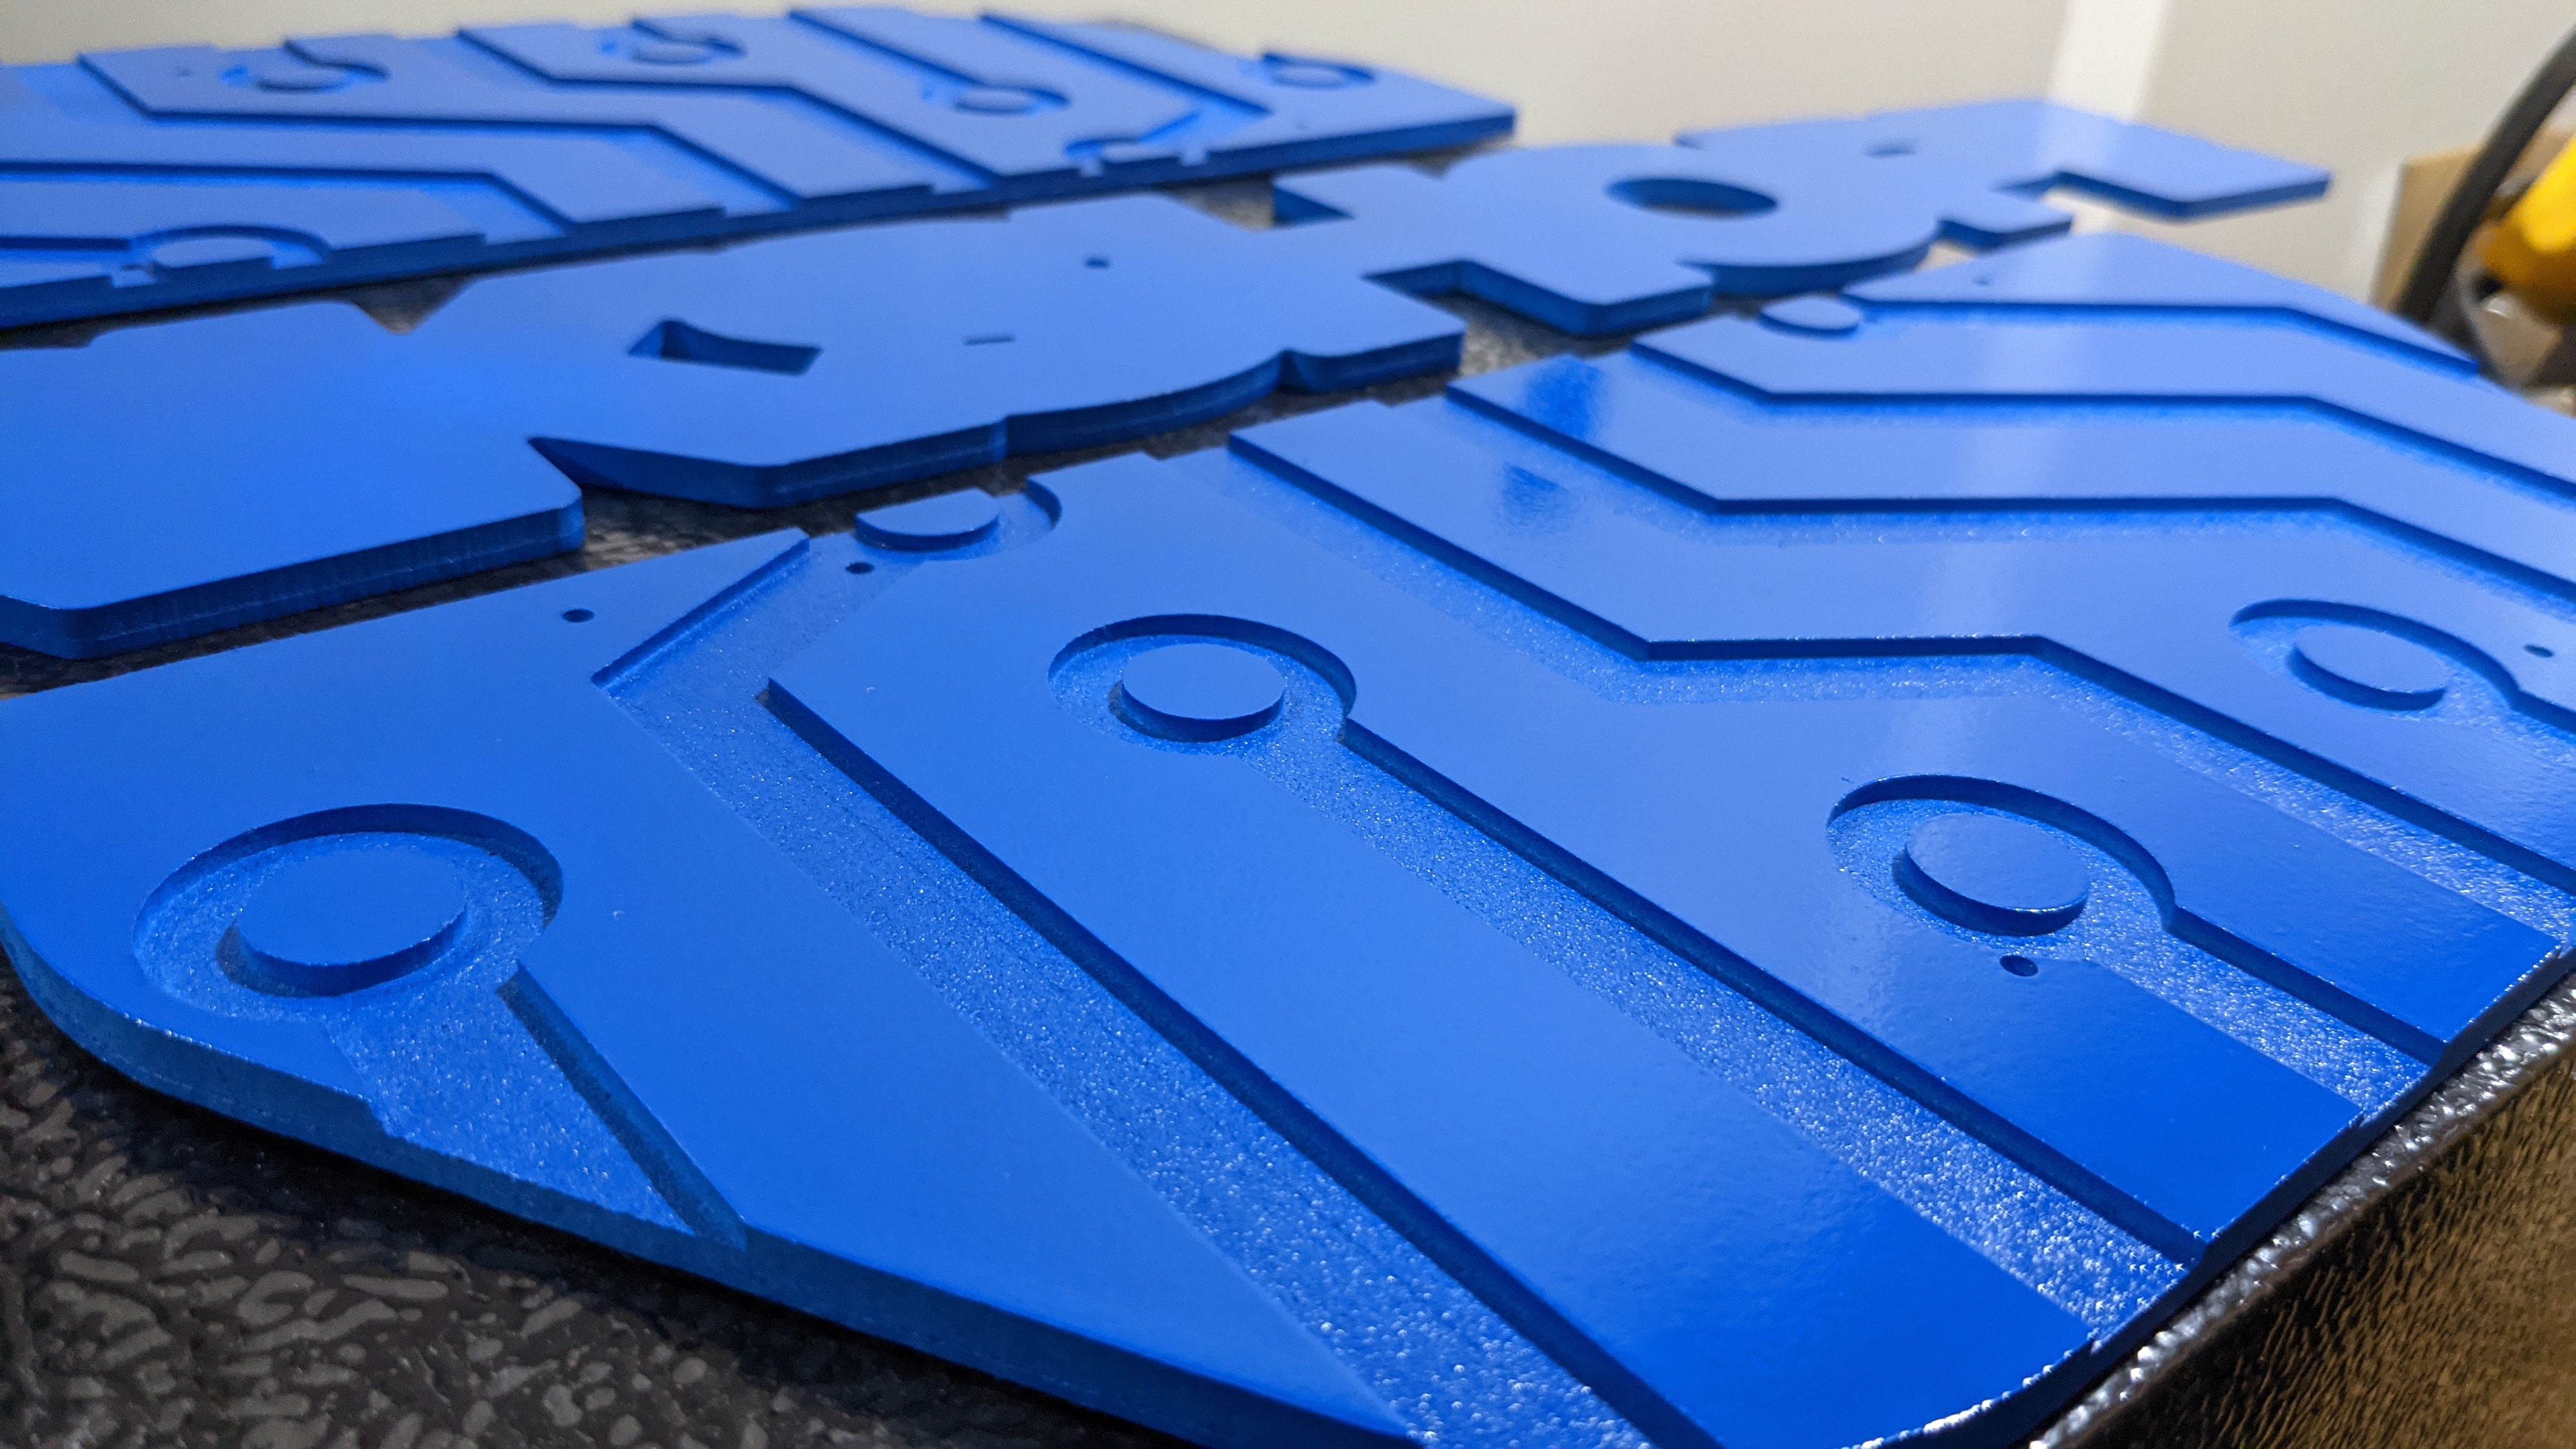
Paint teaser - the PVC finishes up beautifully, in my opinion.
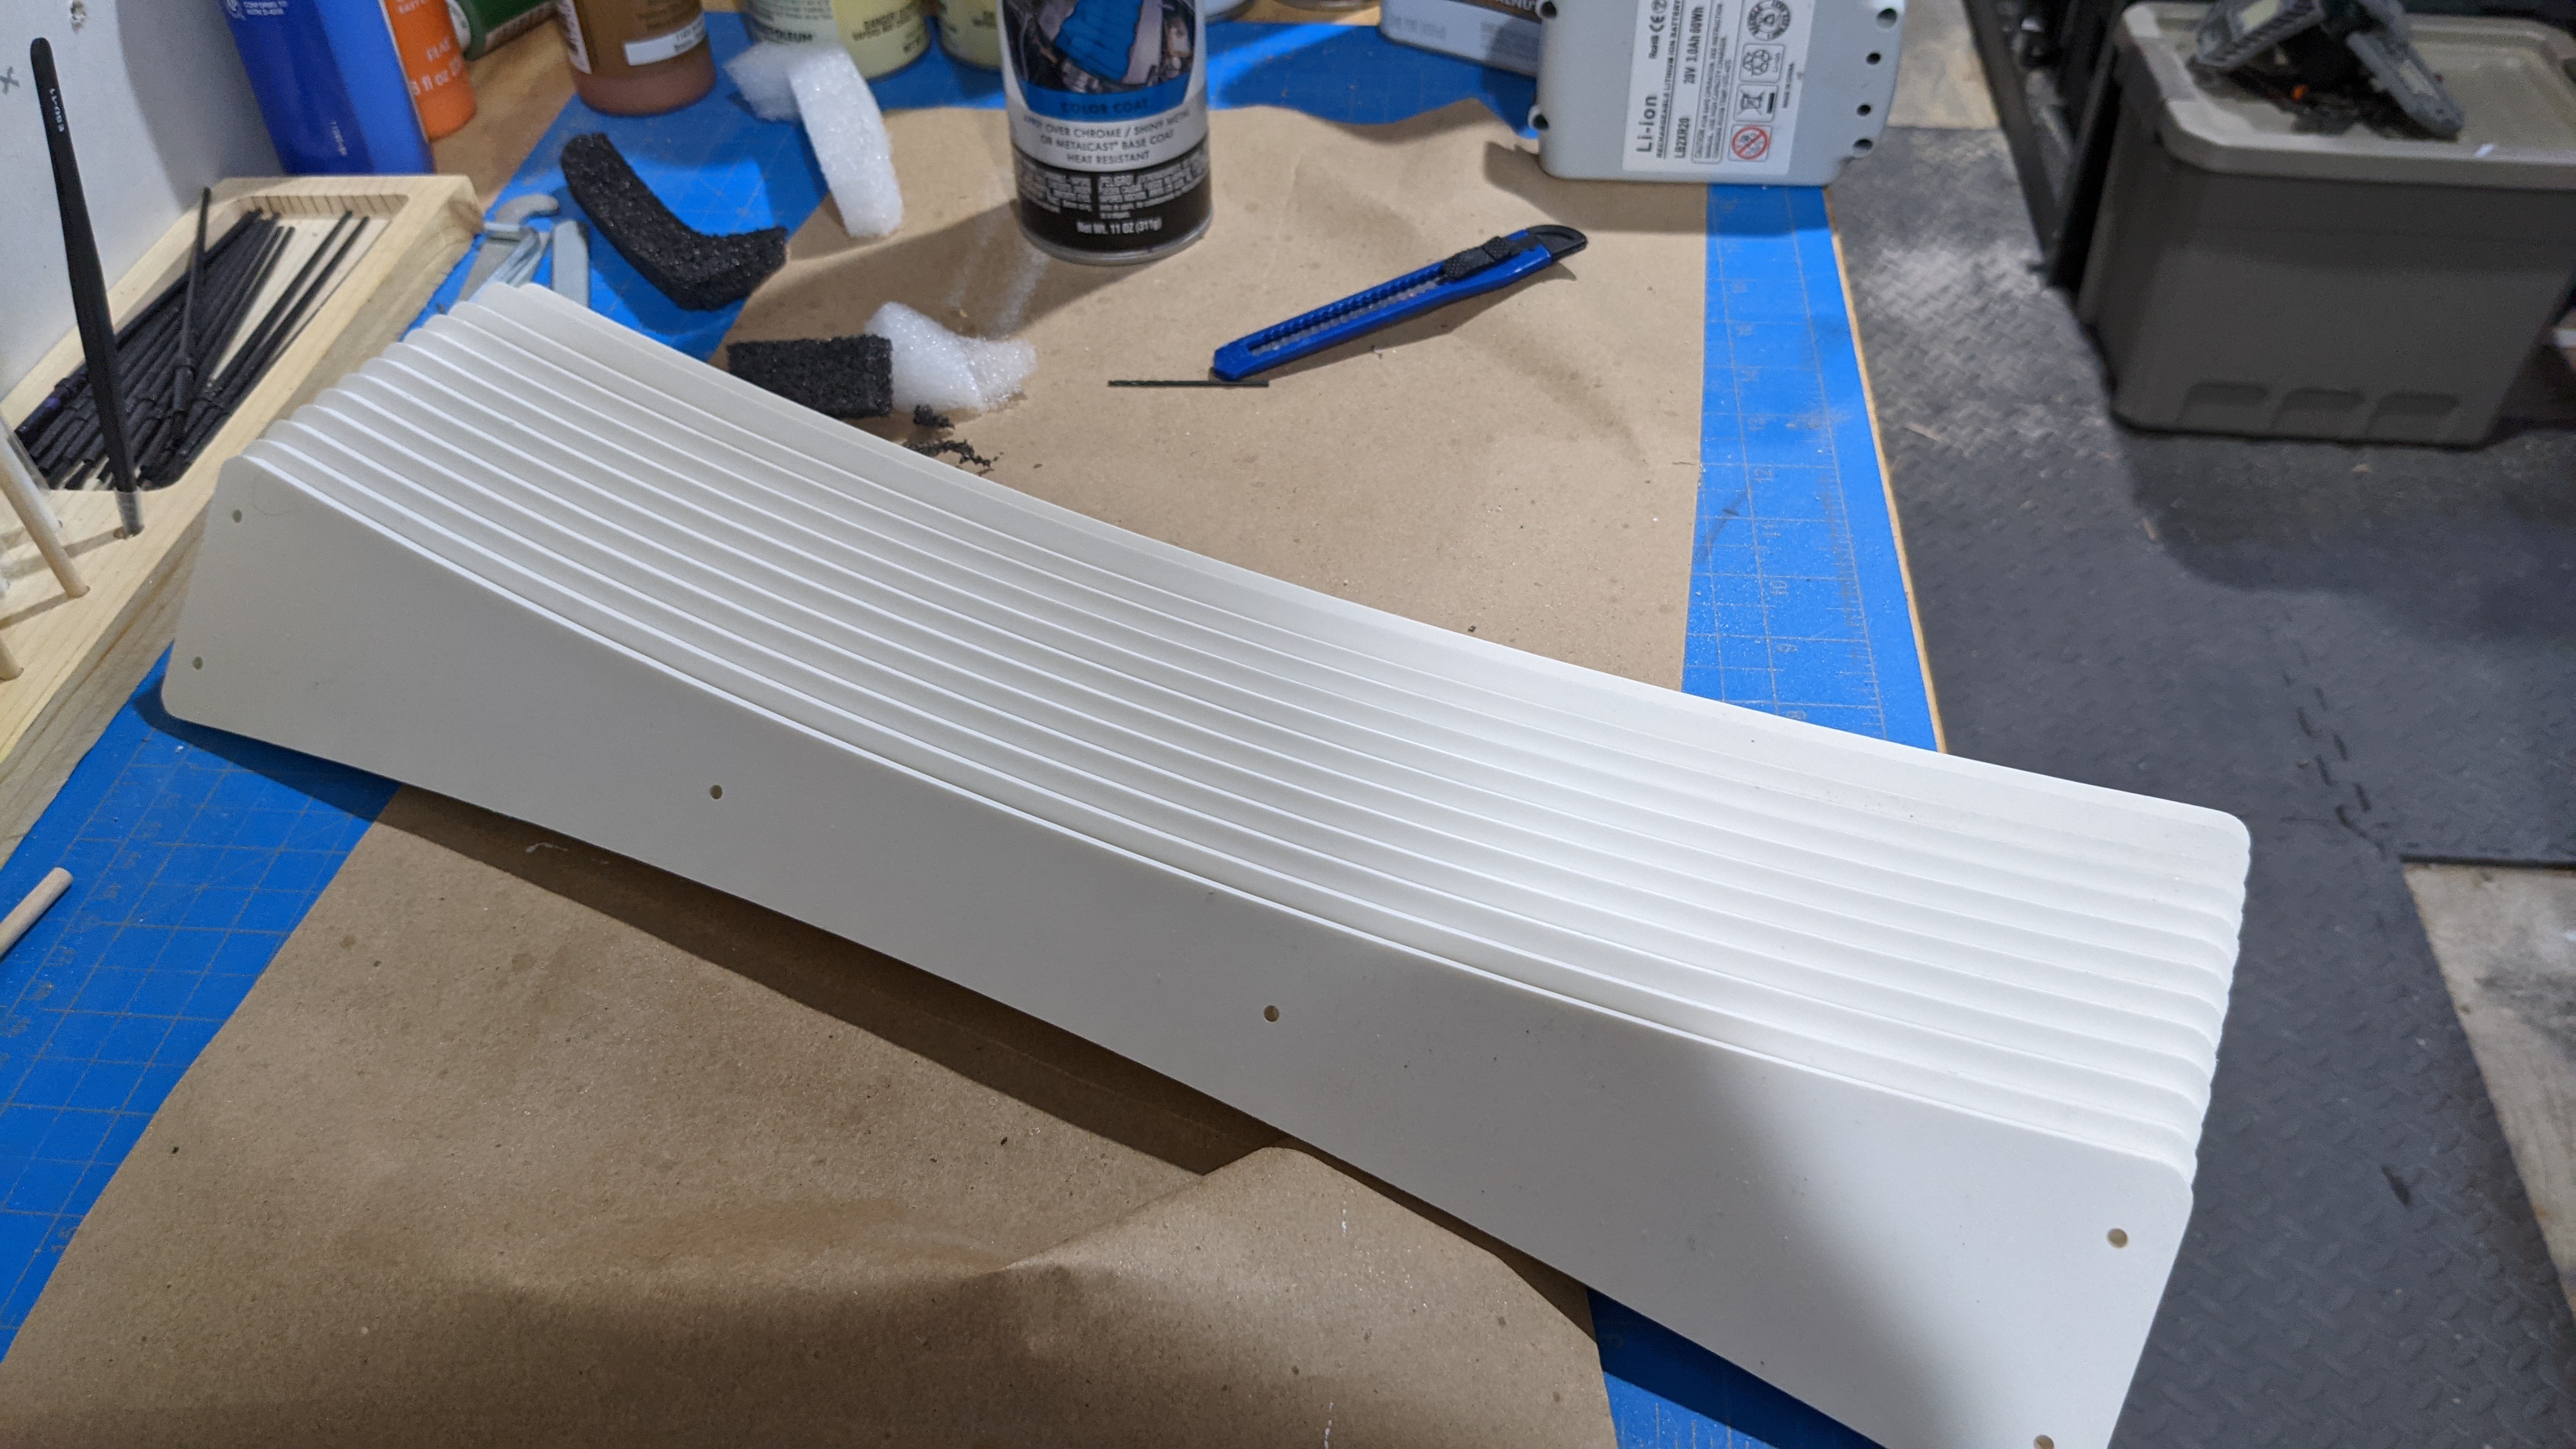
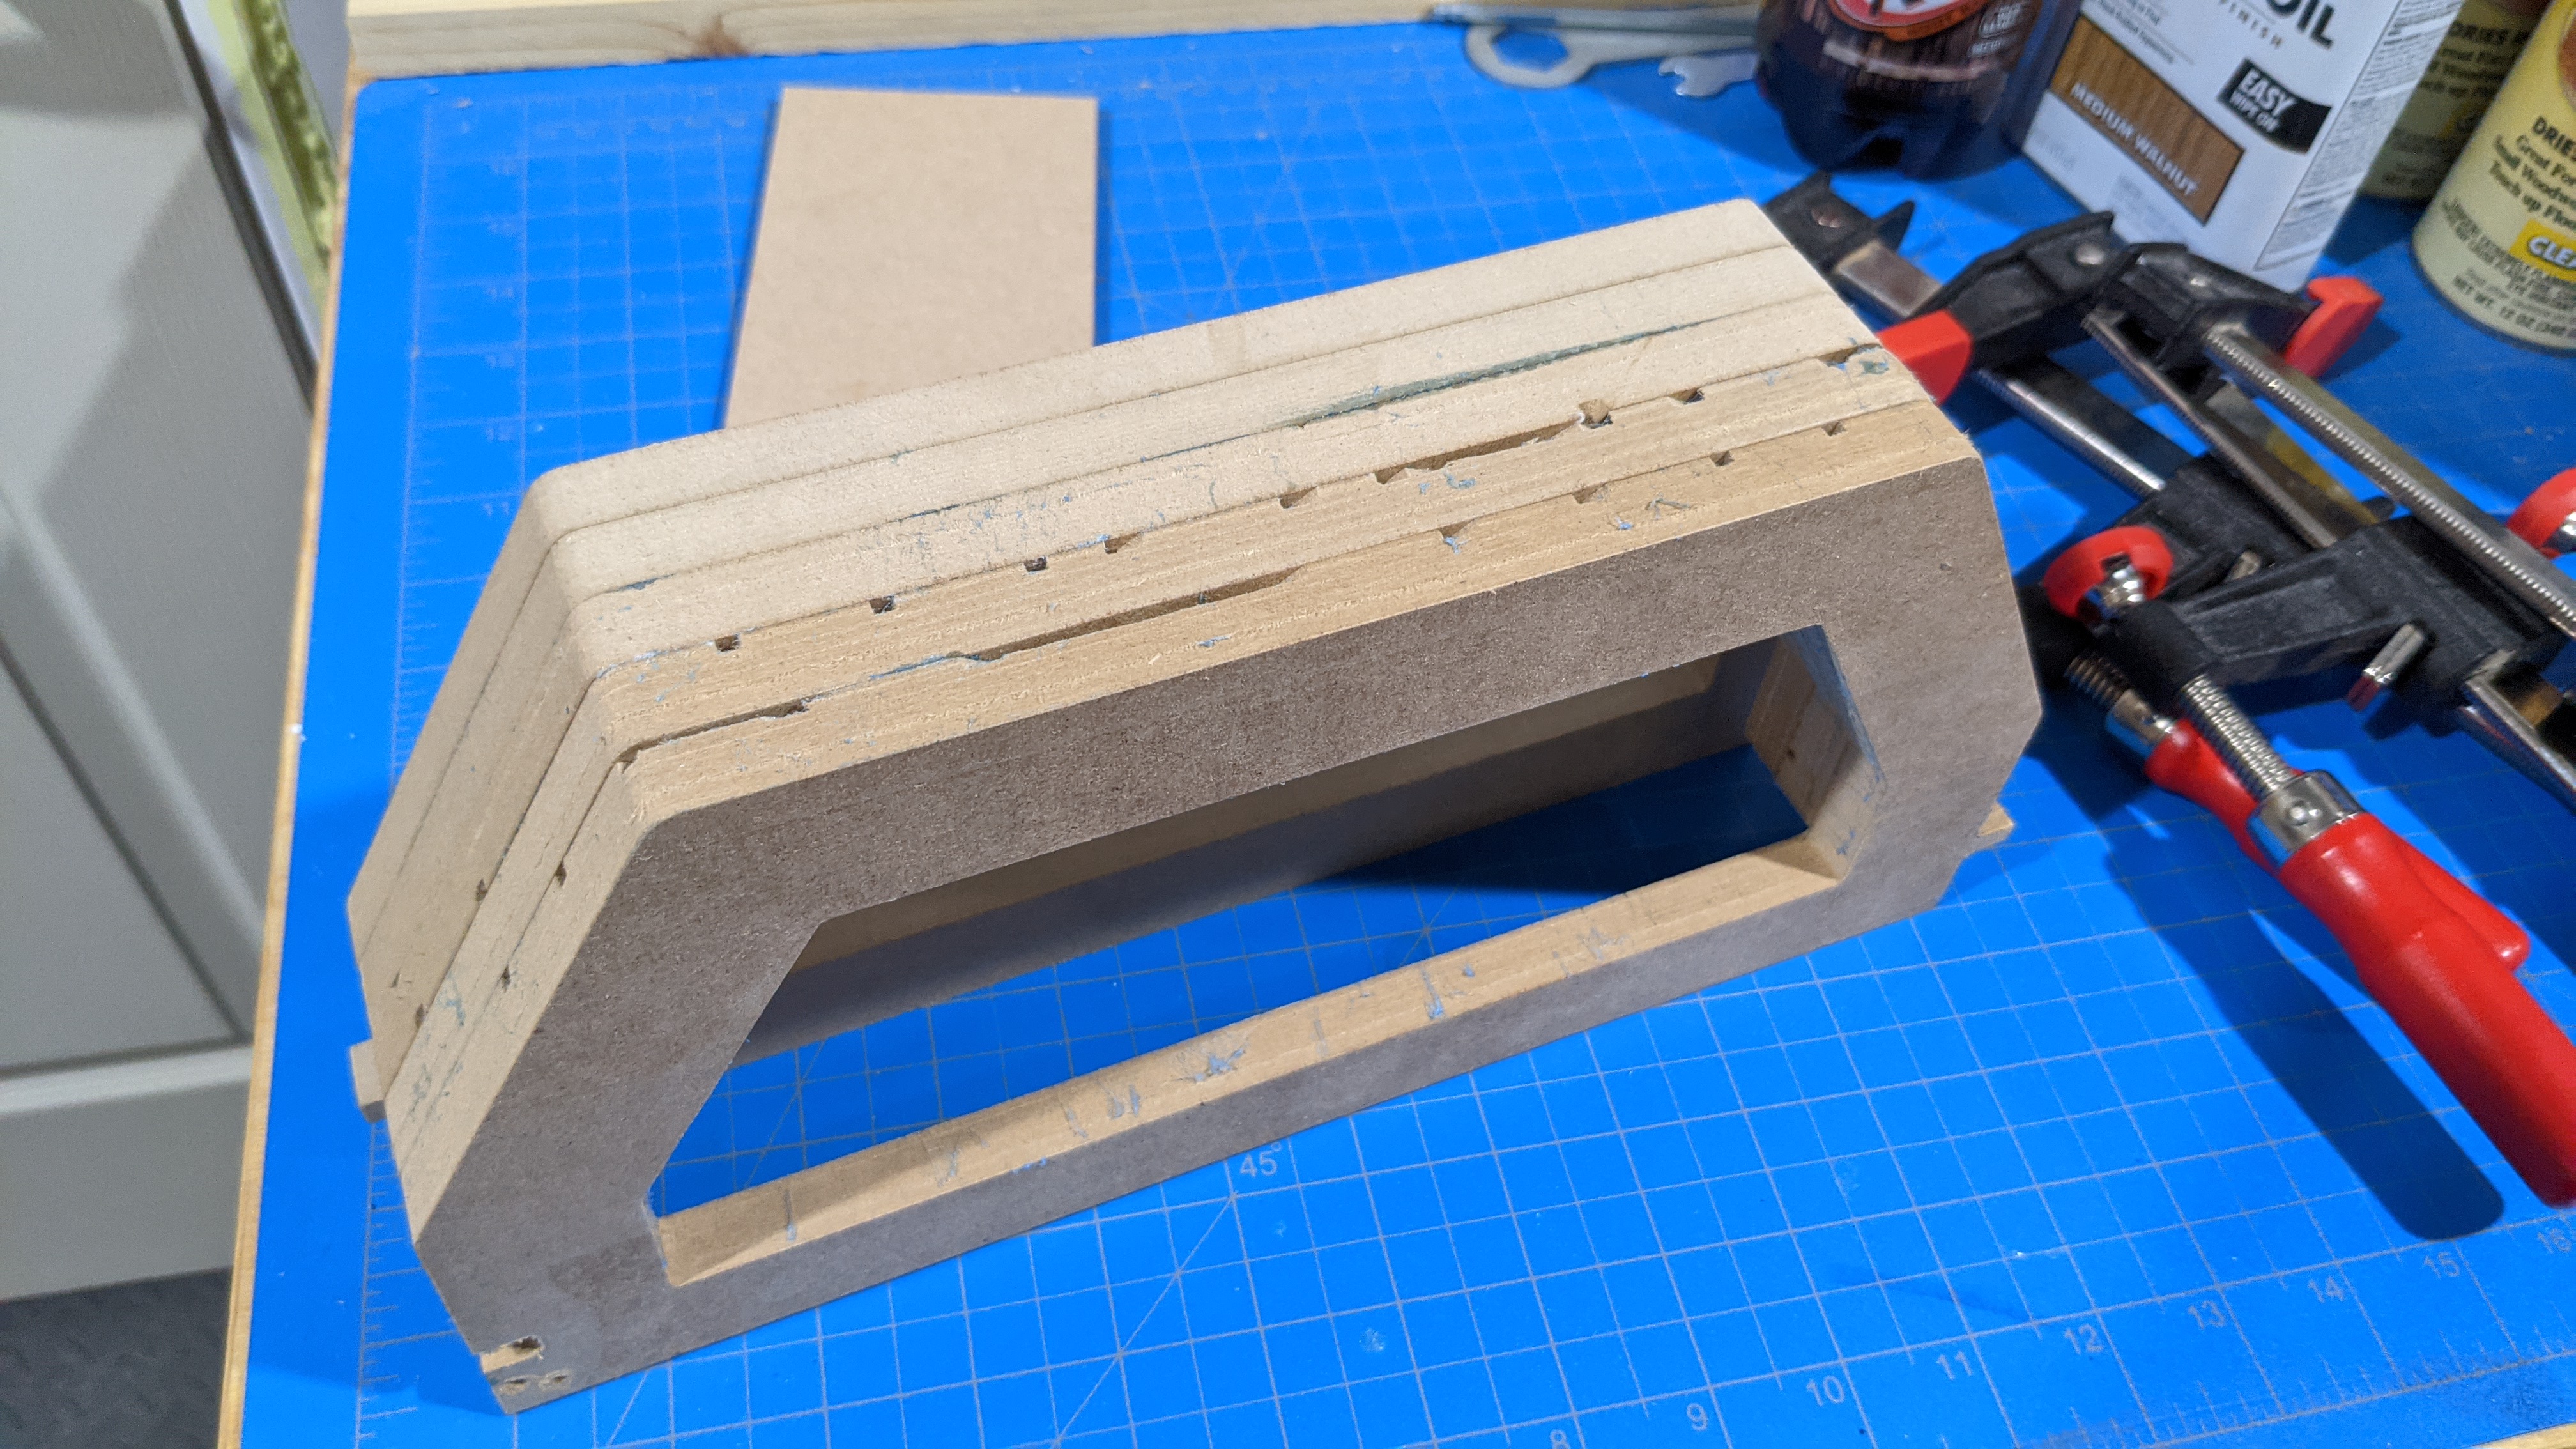
For those in the “you had me at thermoforming” camp, here is the buck I made from scrap 1/2" MDF. I designed it so I could use a bar clamp around each section as needed, and could clamp it to the table as well. The left and right edge have locating features for the raw PVC panel, and after bending a good one I traced pencil lines for better repeatability as well.
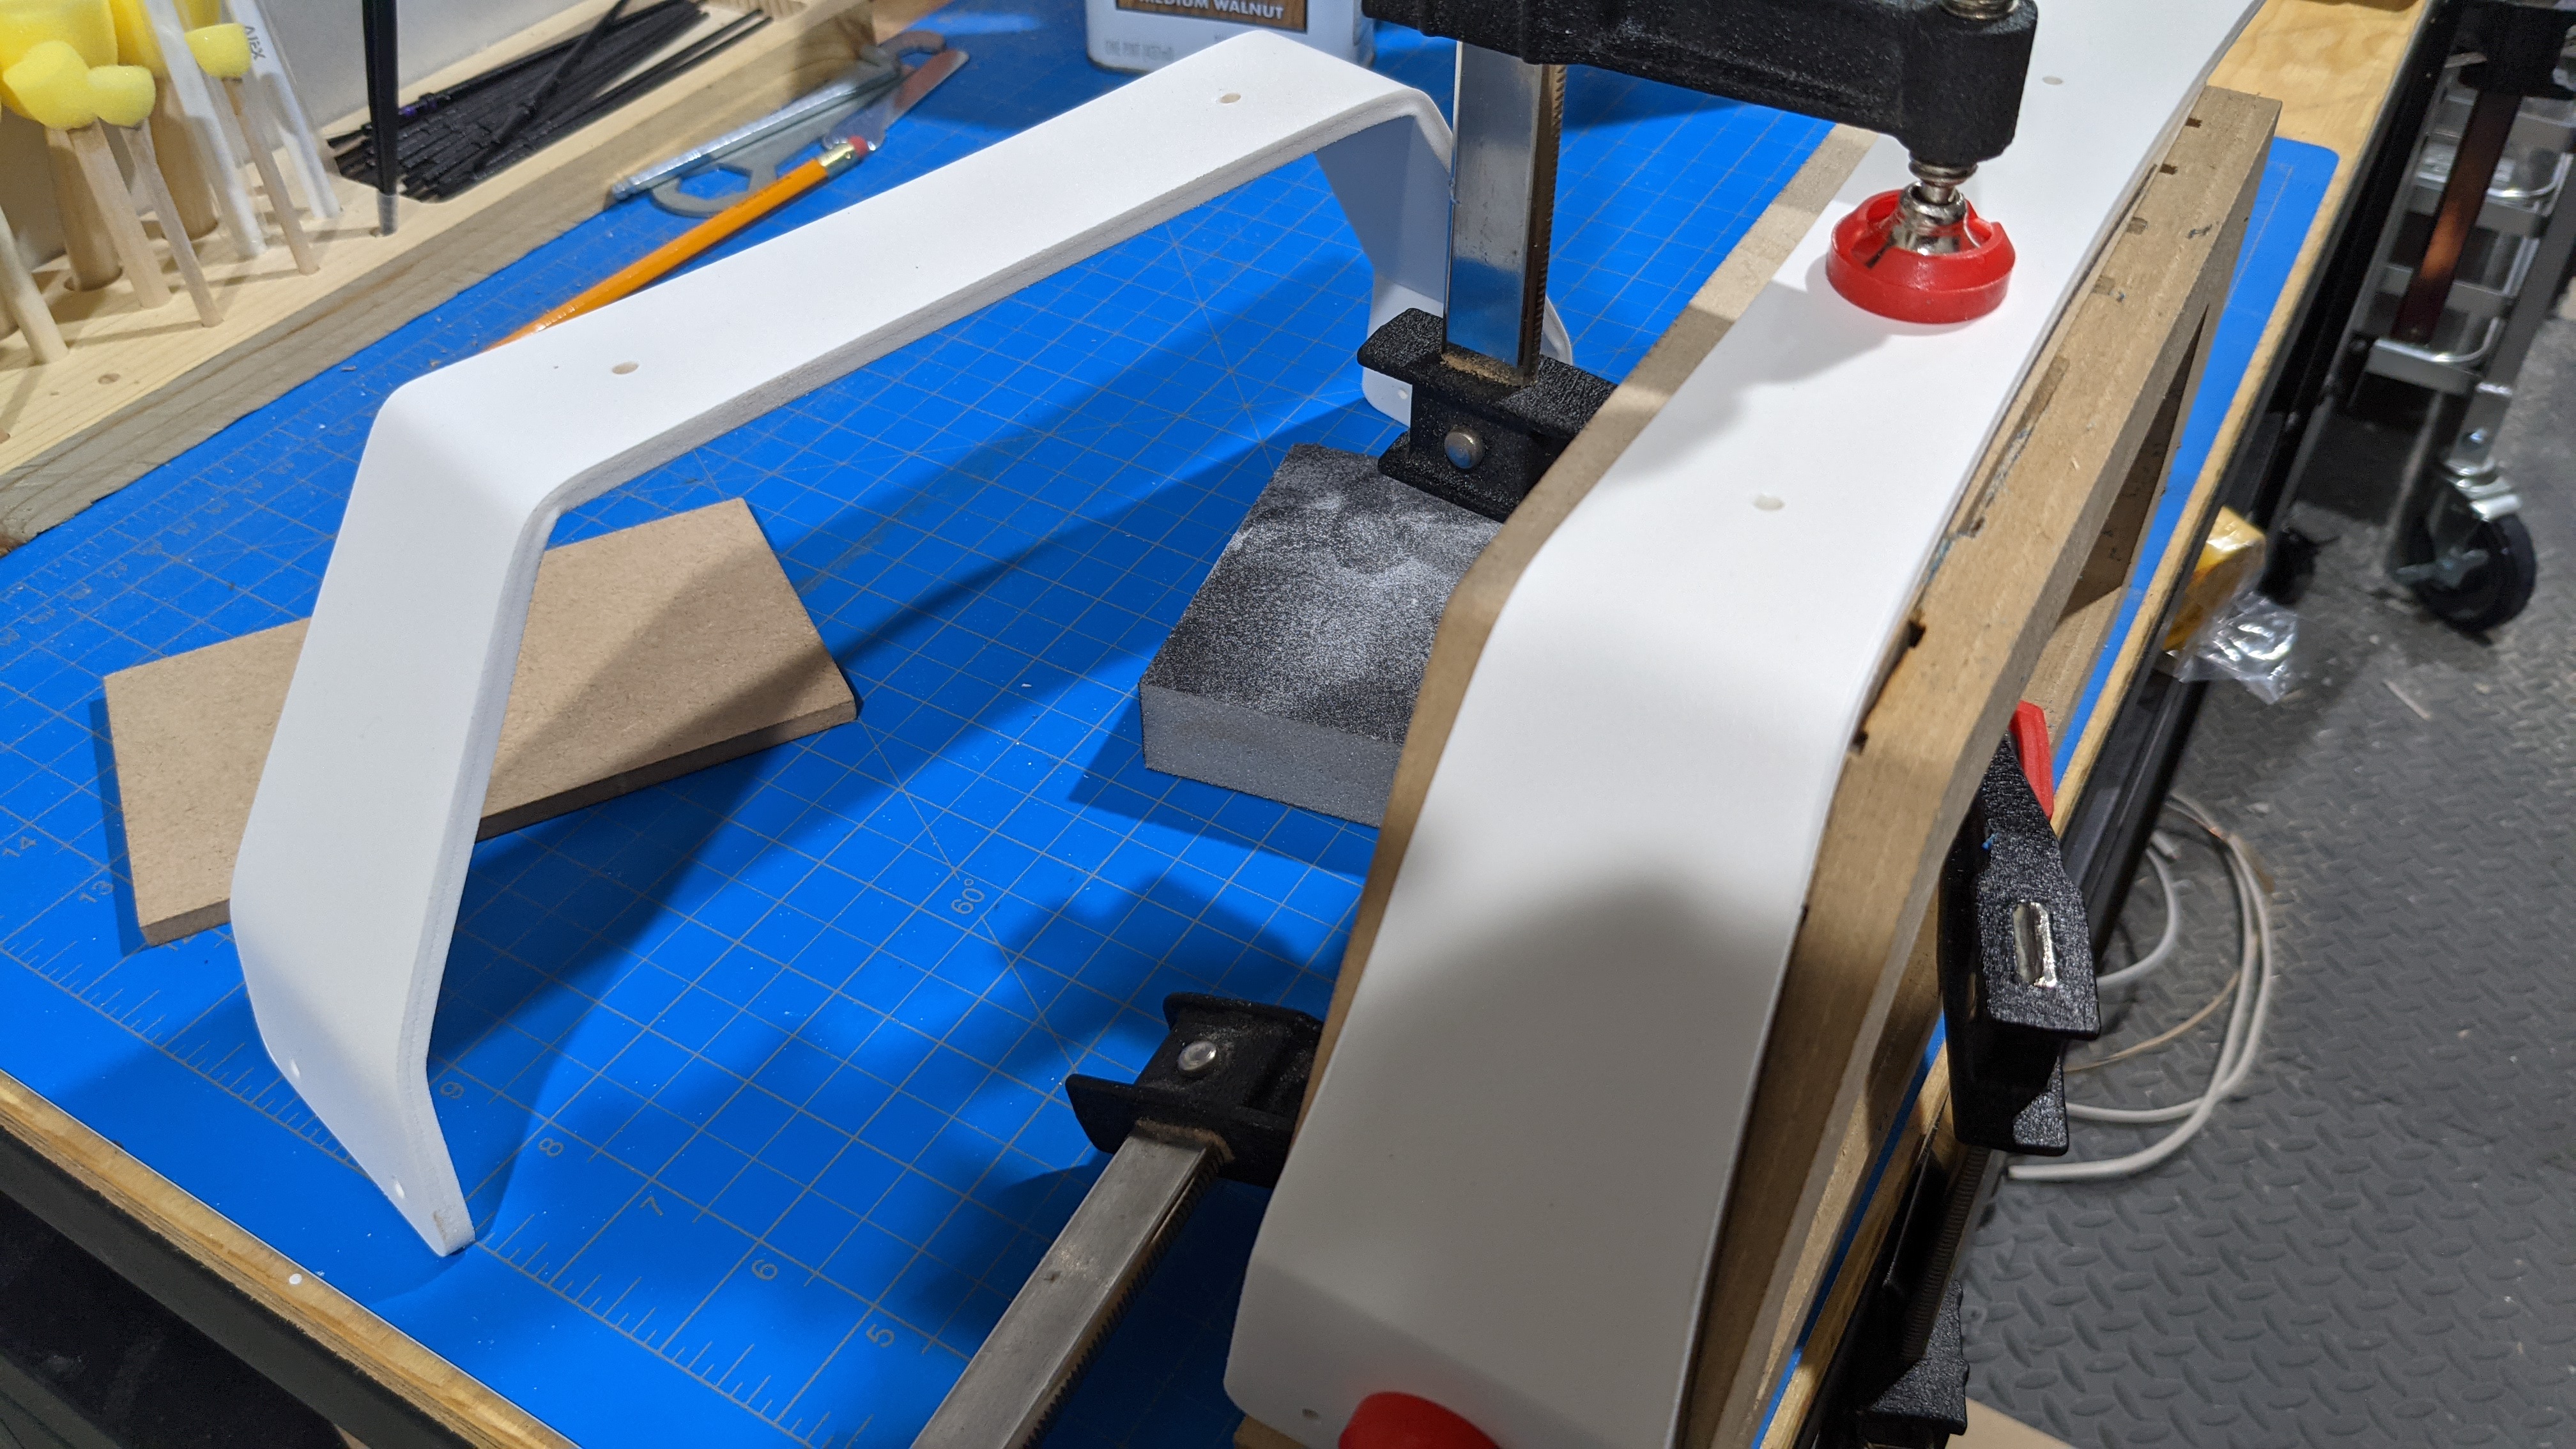
The bending process takes just a few minutes per rib, using a heat gun on both sides of the panel at each joint. The panel stays mounted to the buck until the last joint is cooled. I did have to re-apply heat a few times on joints that weren’t bending as tightly as I needed. This was probably the only part that benefited from something like SolidWorks, as I designed it using a Sheet Metal tool which automatically gives you a flat pattern for cutting. If you find the joints aren’t bending right you can tweak the flat pattern, or even incorporate features like spring-back into the buck.
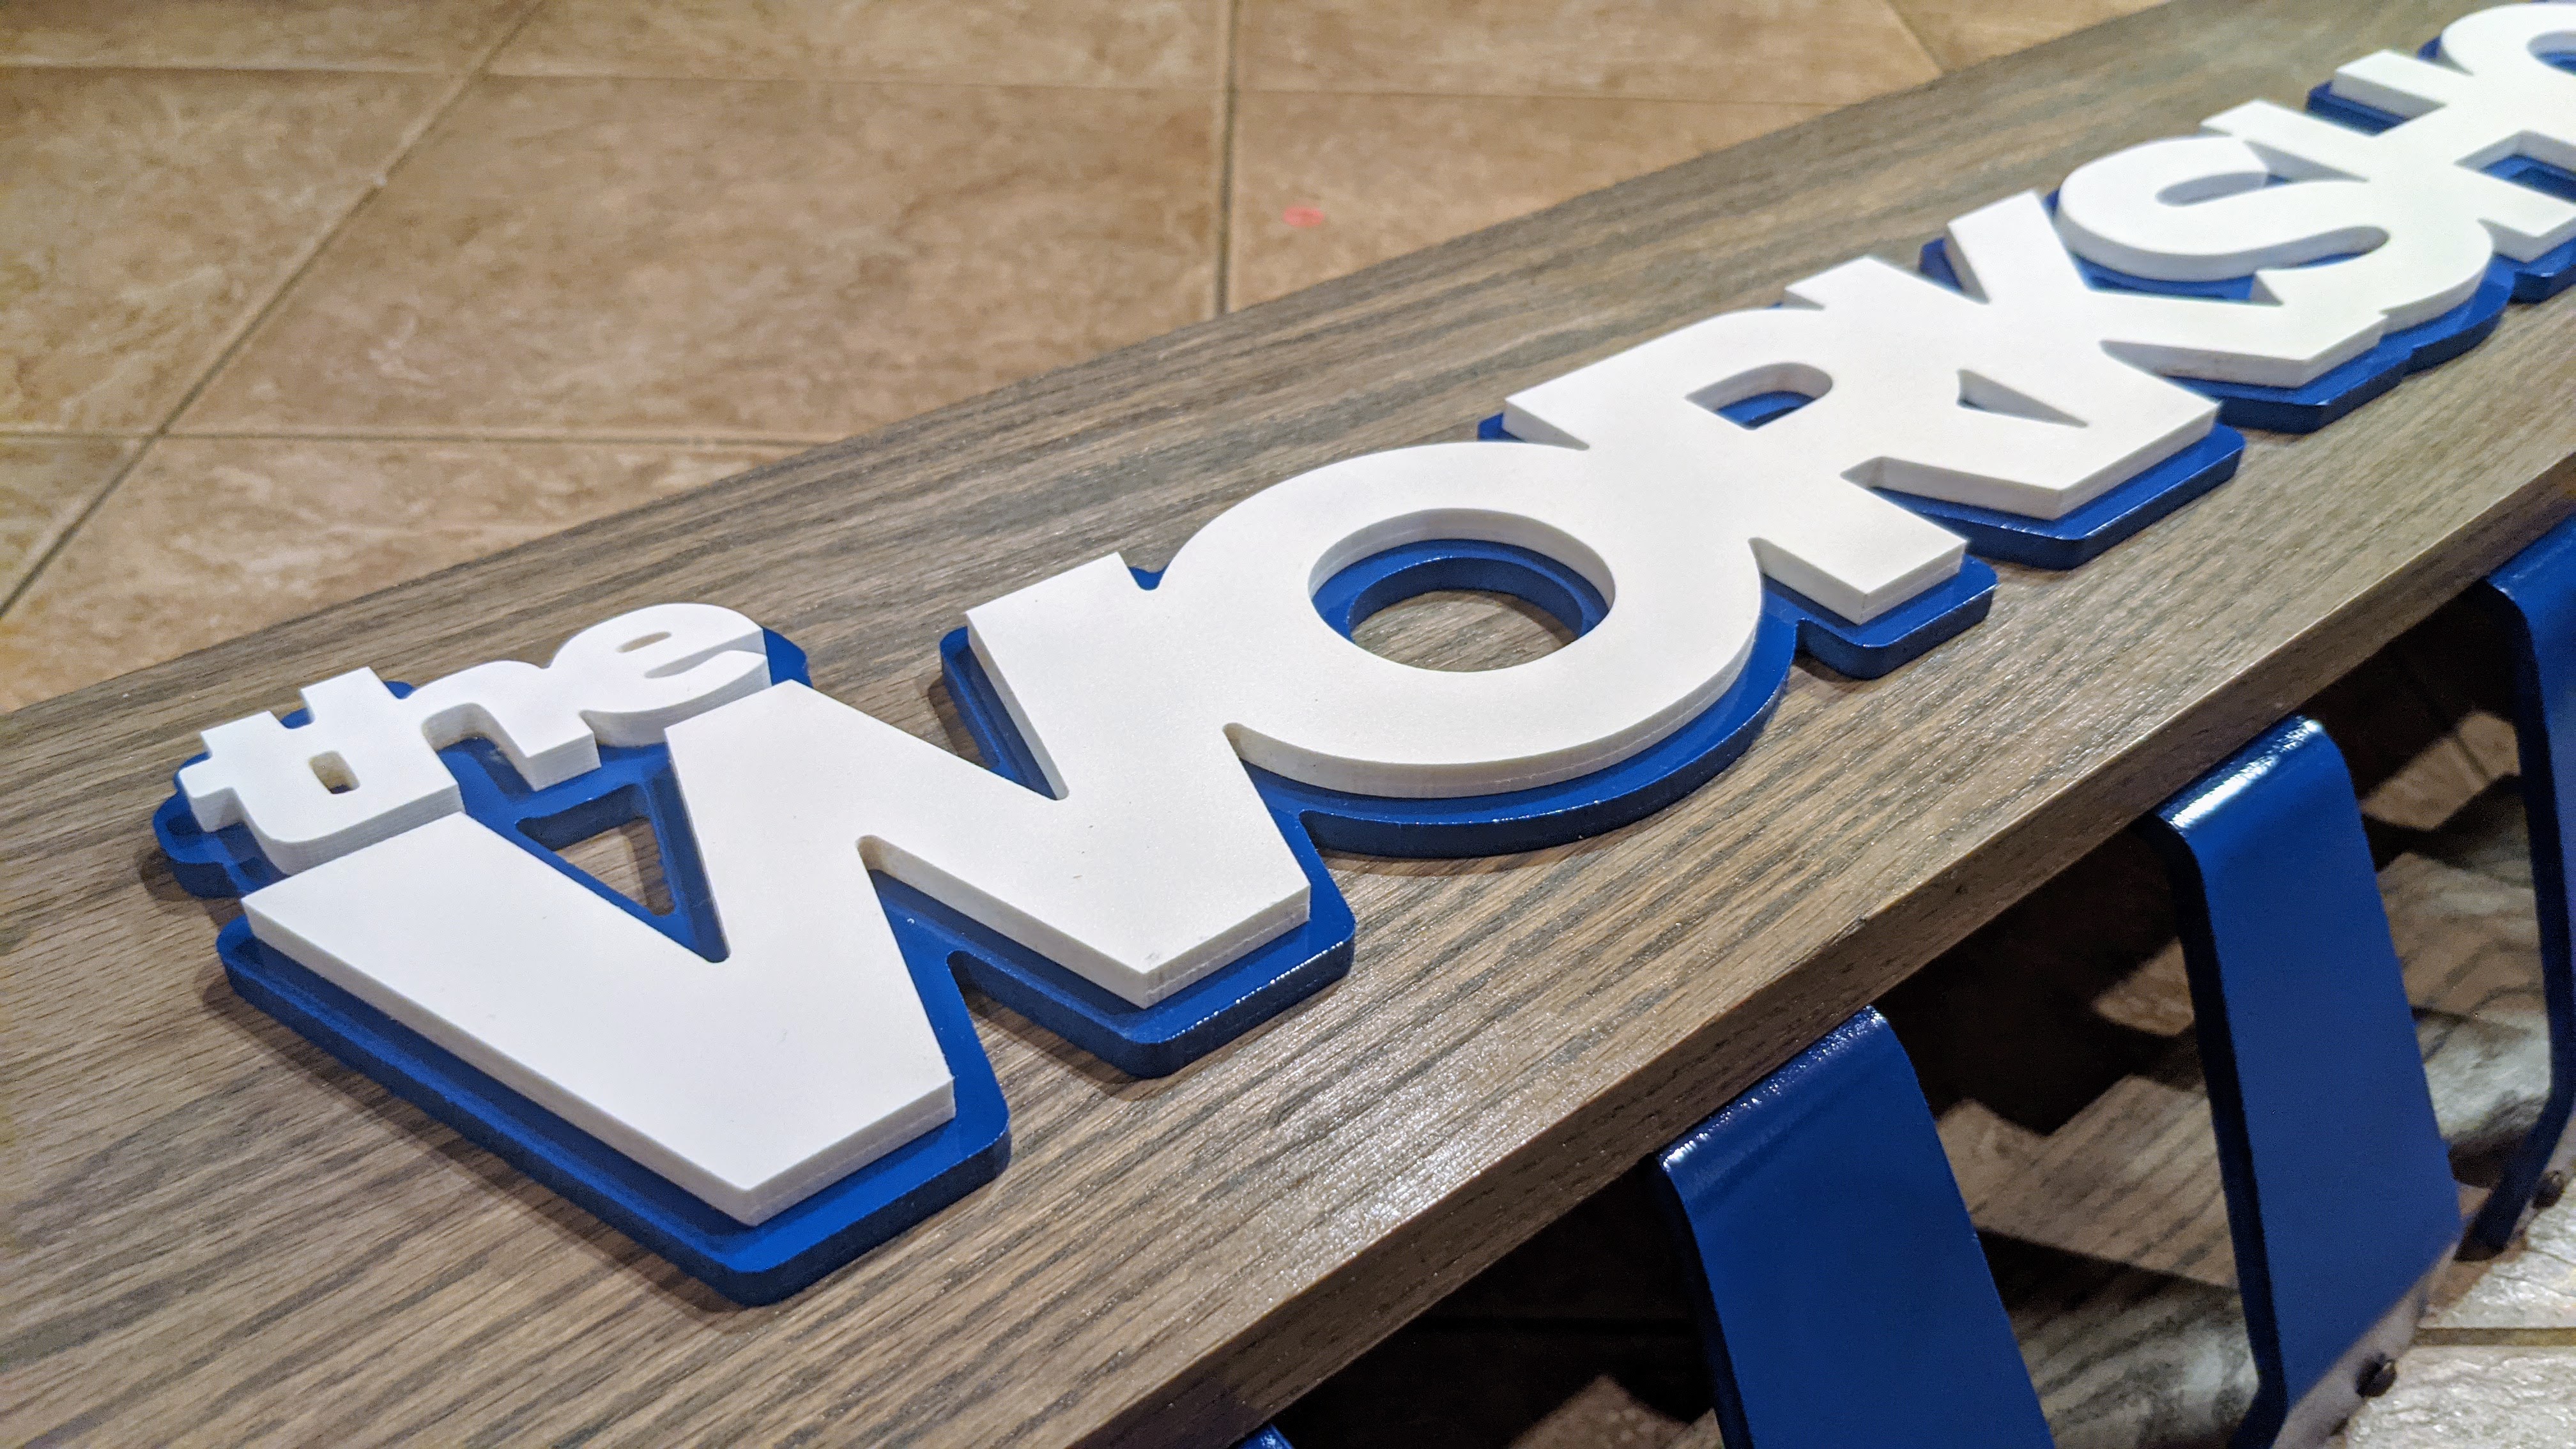
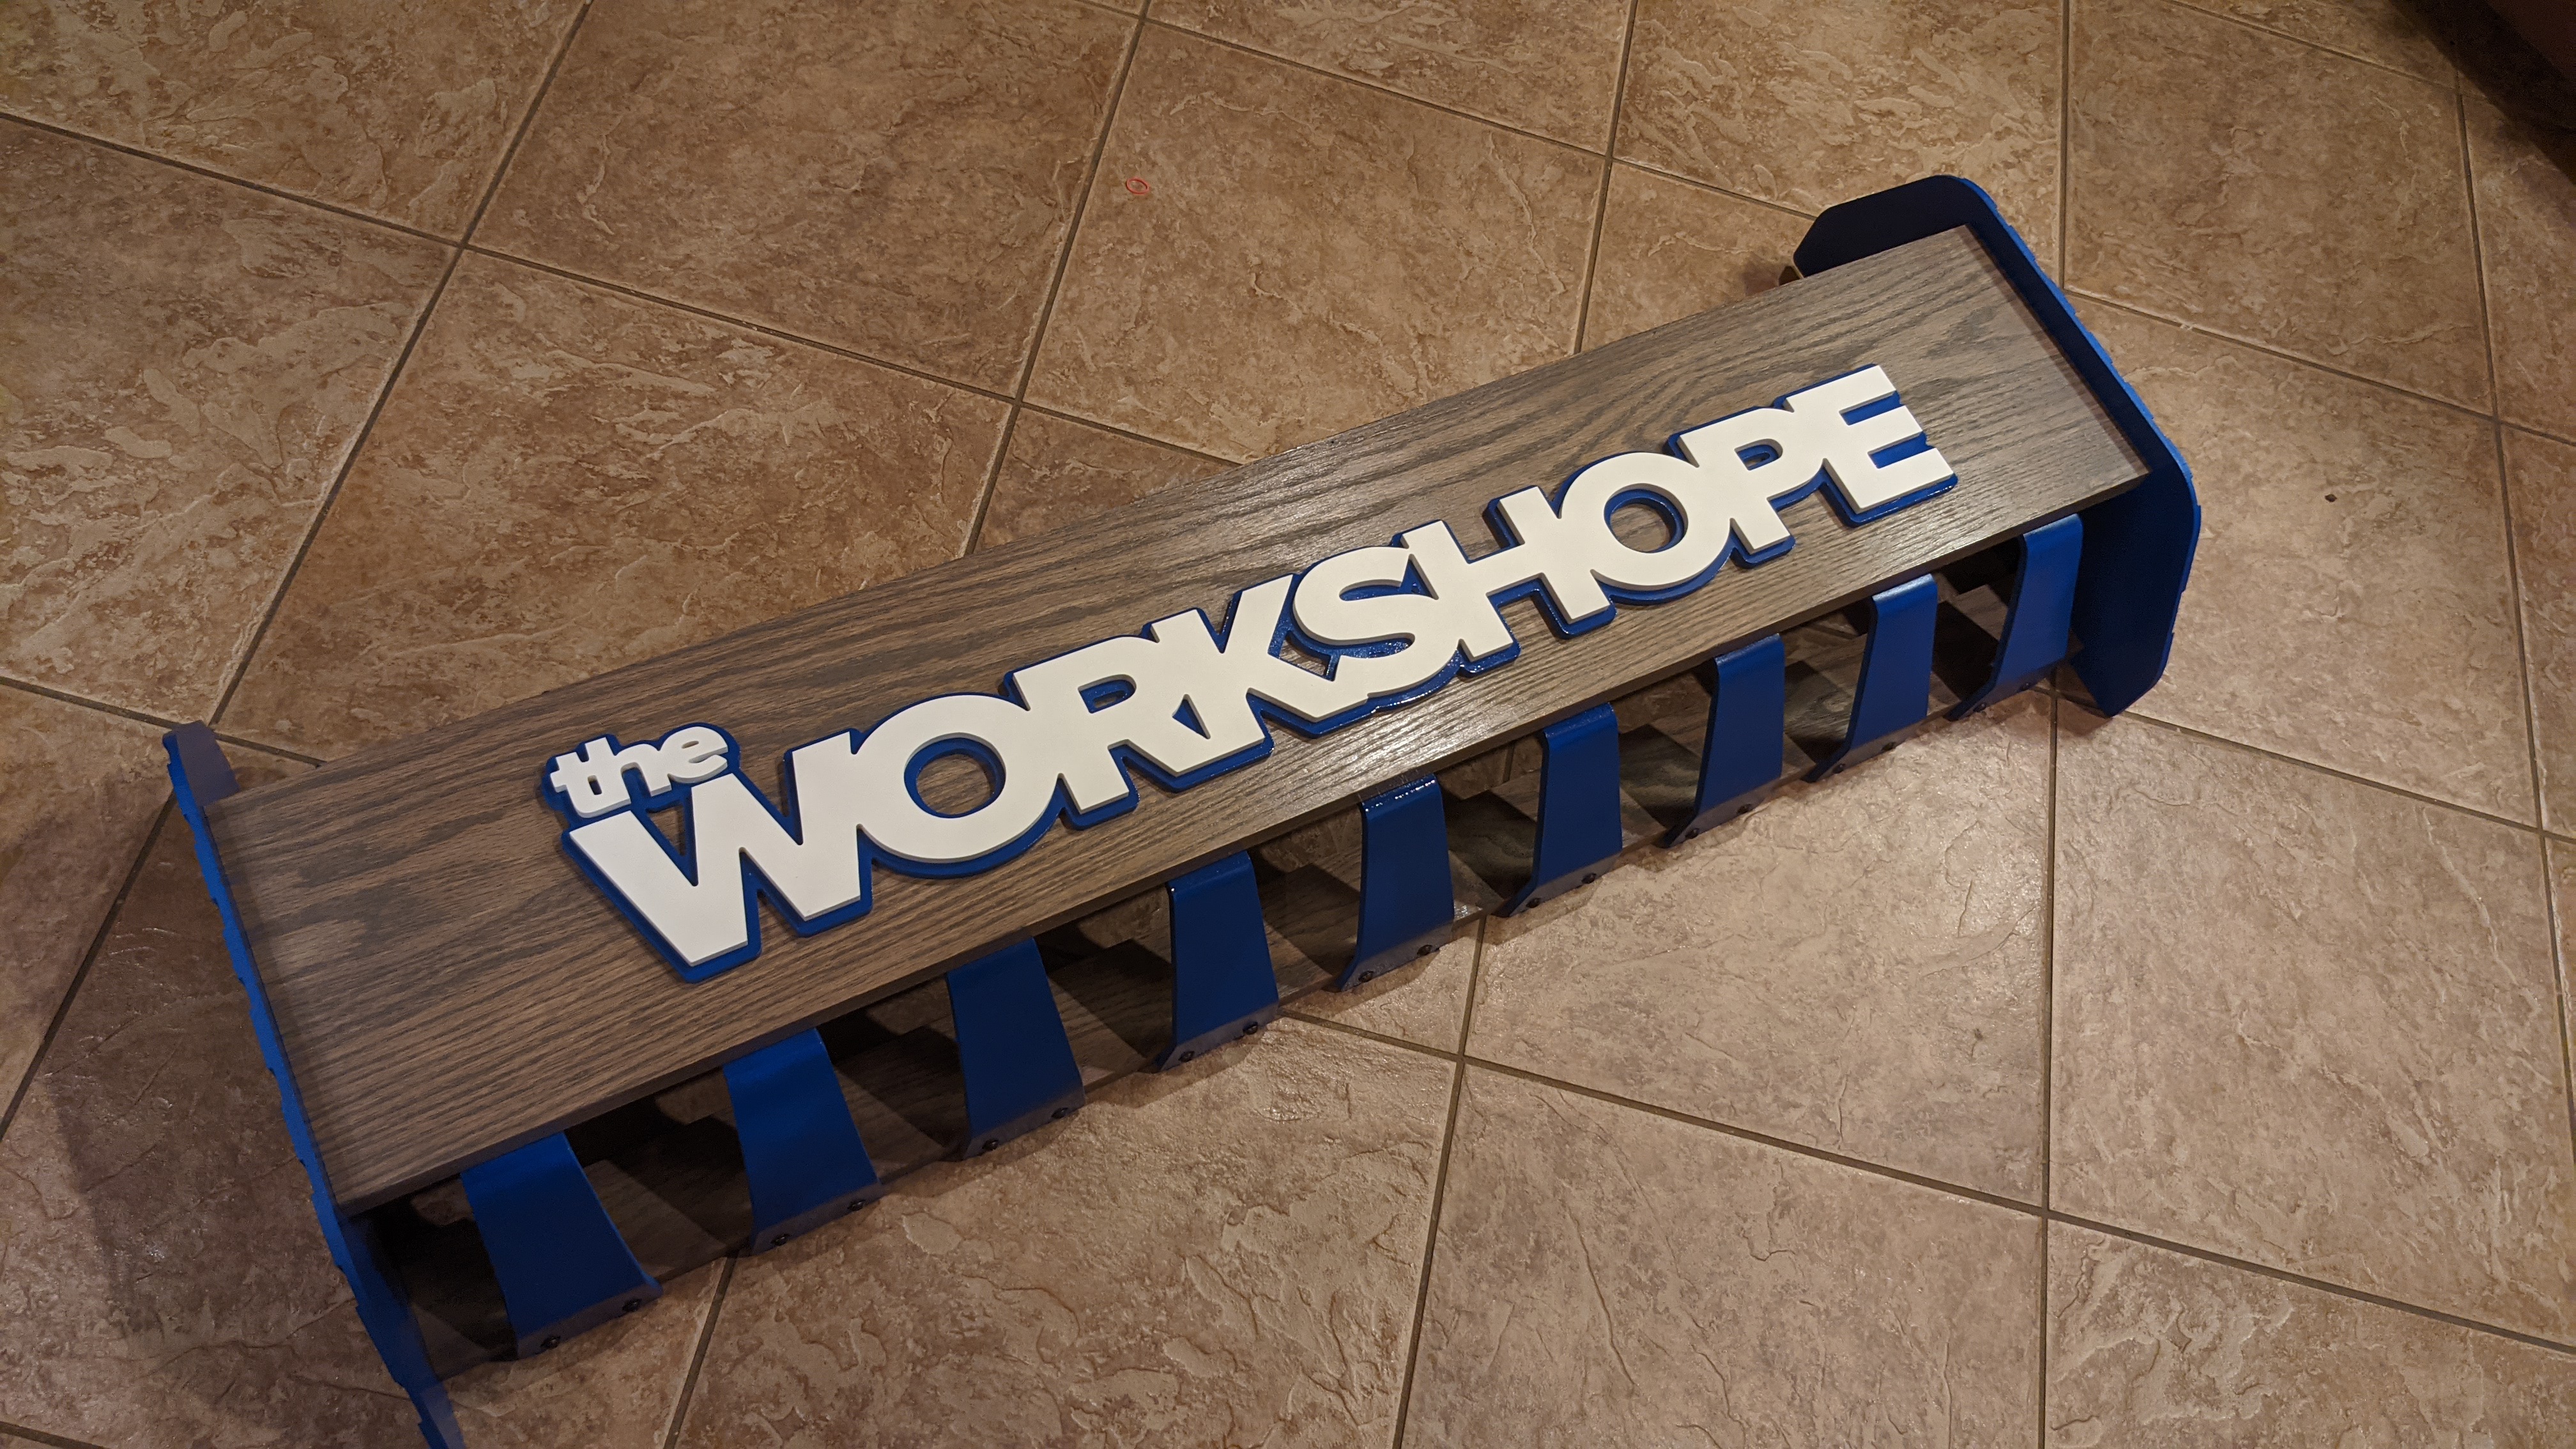
The letters were cut from PVC sheet, with the back panel painted and the front “raw” except for light sanding. I had to use a 1/16" bit on a few areas to get the pockets to work, but almost everything PVC was cut with a cheap 1/8" bit.
Assembly was a lot of measuring and aligning to get everything properly in place. Moment of truth was drilling through the front panel to mount all the letters.
Here is the mostly complete sign - I am quite happy with the finish. Final build is 40" wide by 15" high, will sit about 8" deep from the wall.

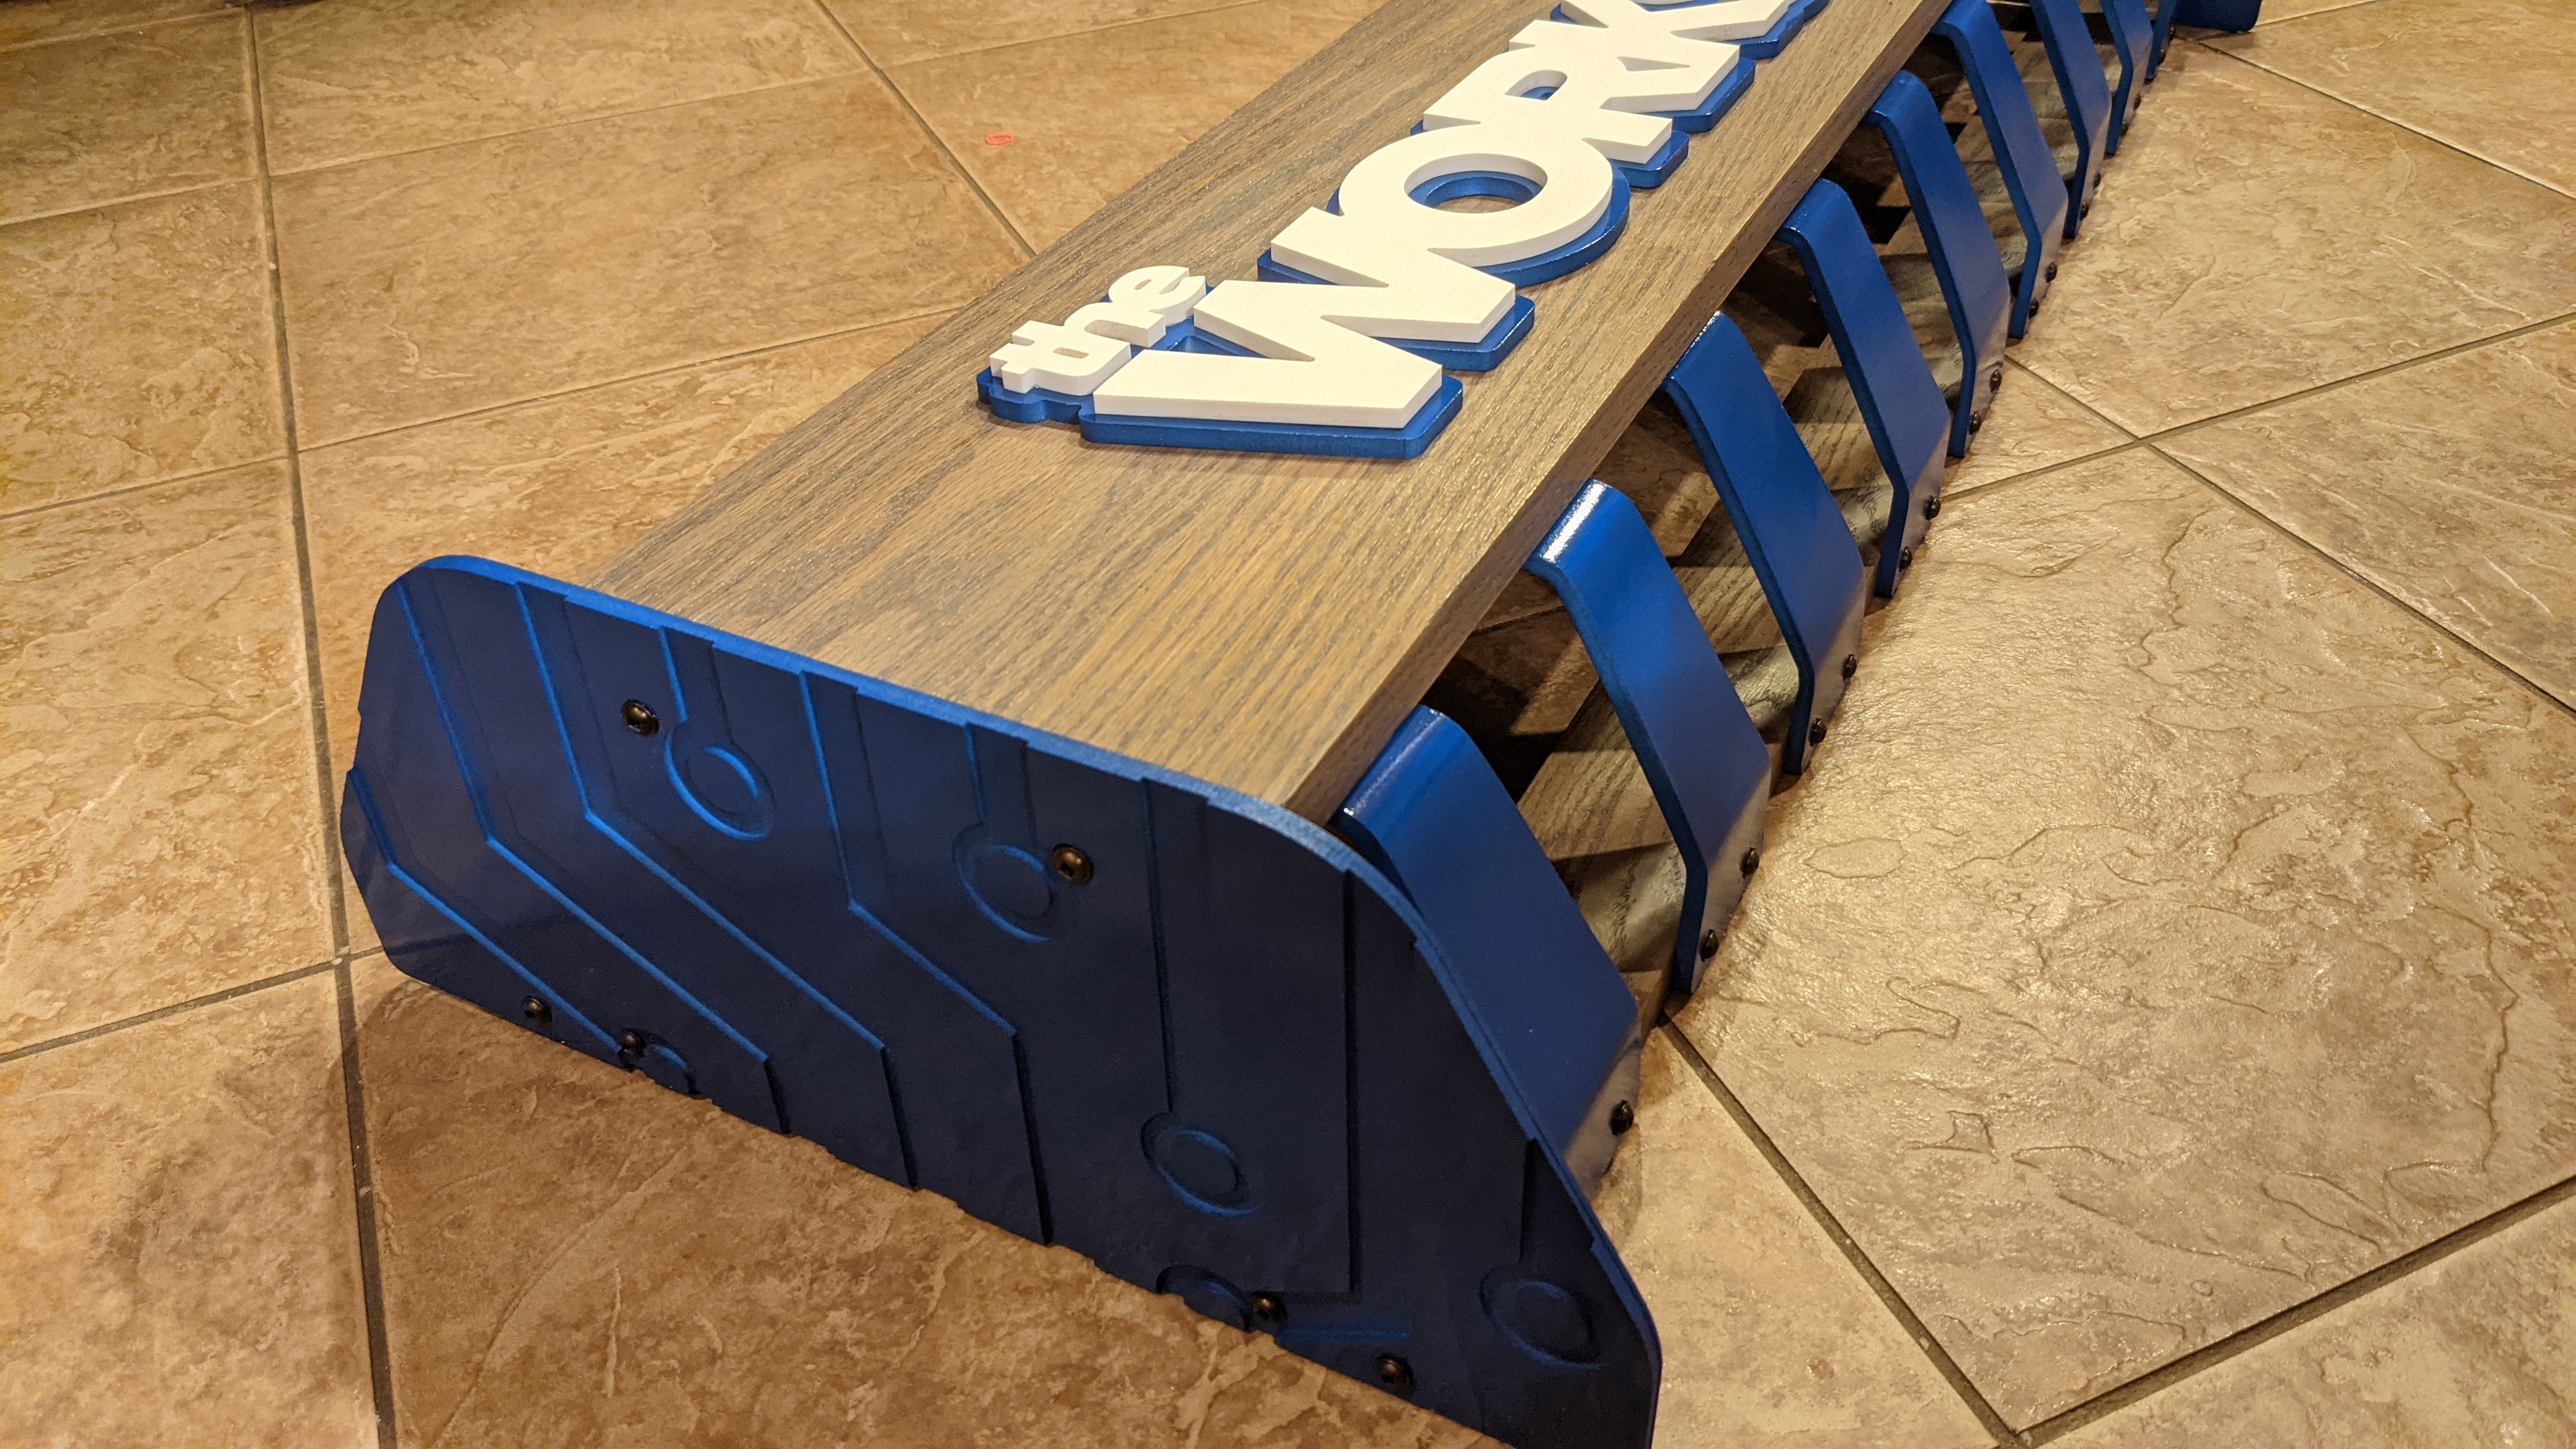
It’s a little tricky to photograph until I hang it up (with french cleats) and get the lighting + secret electronics installed  .
.
 . I was able to salvage it, but my heart sank as soon as I saw it.