A Hobbyist perspective of CCP

As a CNC hobbyist, I’ve experimented with many of the most widely used CAD programs, and found most of them to be targeted well beyond my needs (apart from their intolerably long learning curves). Do I really need Vectric’s digits of accuracy or Blender’s features for creating animations or Fusion’s multi-body components, when all I’m trying to do is cut holes in a hunk of walnut? :crazy_face:

So I applaud C3D for getting it right with Carbide Create. CC has all the tools needed for basic 2D design; things like basic regular closed figures, line drawing, text, repositioning, enlarging, rotating, reflecting, grouping, and aligning). More importantly these tools are presented in an intuitive way. (My grandson, who is ten, could learn to drive this user interface in minutes.) The 2D toolpaths of CC are similarly well suited for the hobbyist. Further, CC has the tools I need for somewhat more advanced 2D geometry. (I’m thinking of things like booleans, editing points, cornering, joining, advanced VCarving). Perhaps the most significant issue is that the CC user interface isn’t too cluttered.

to get to my point…
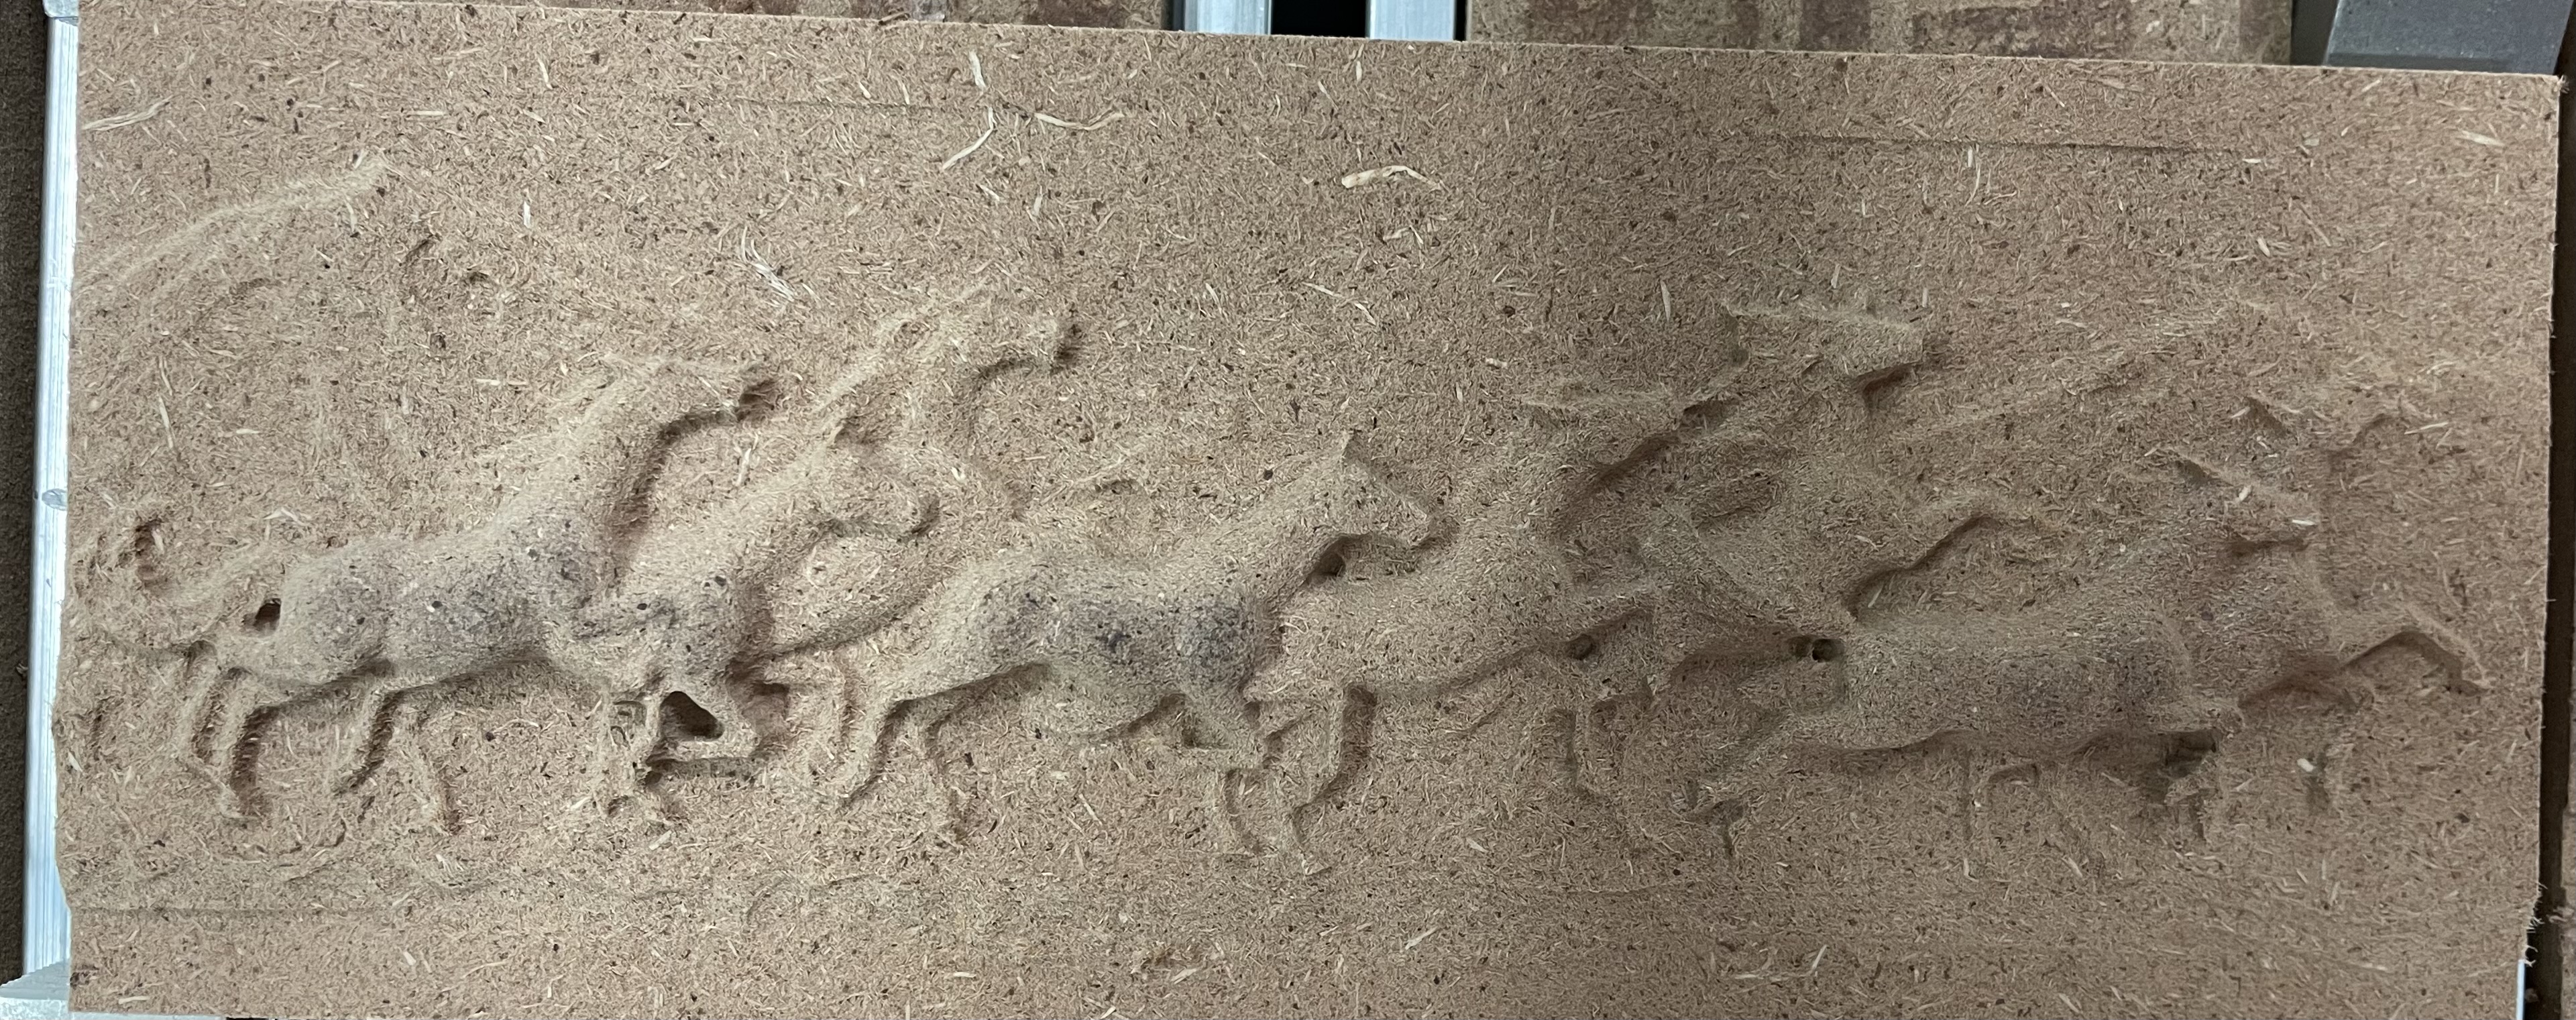
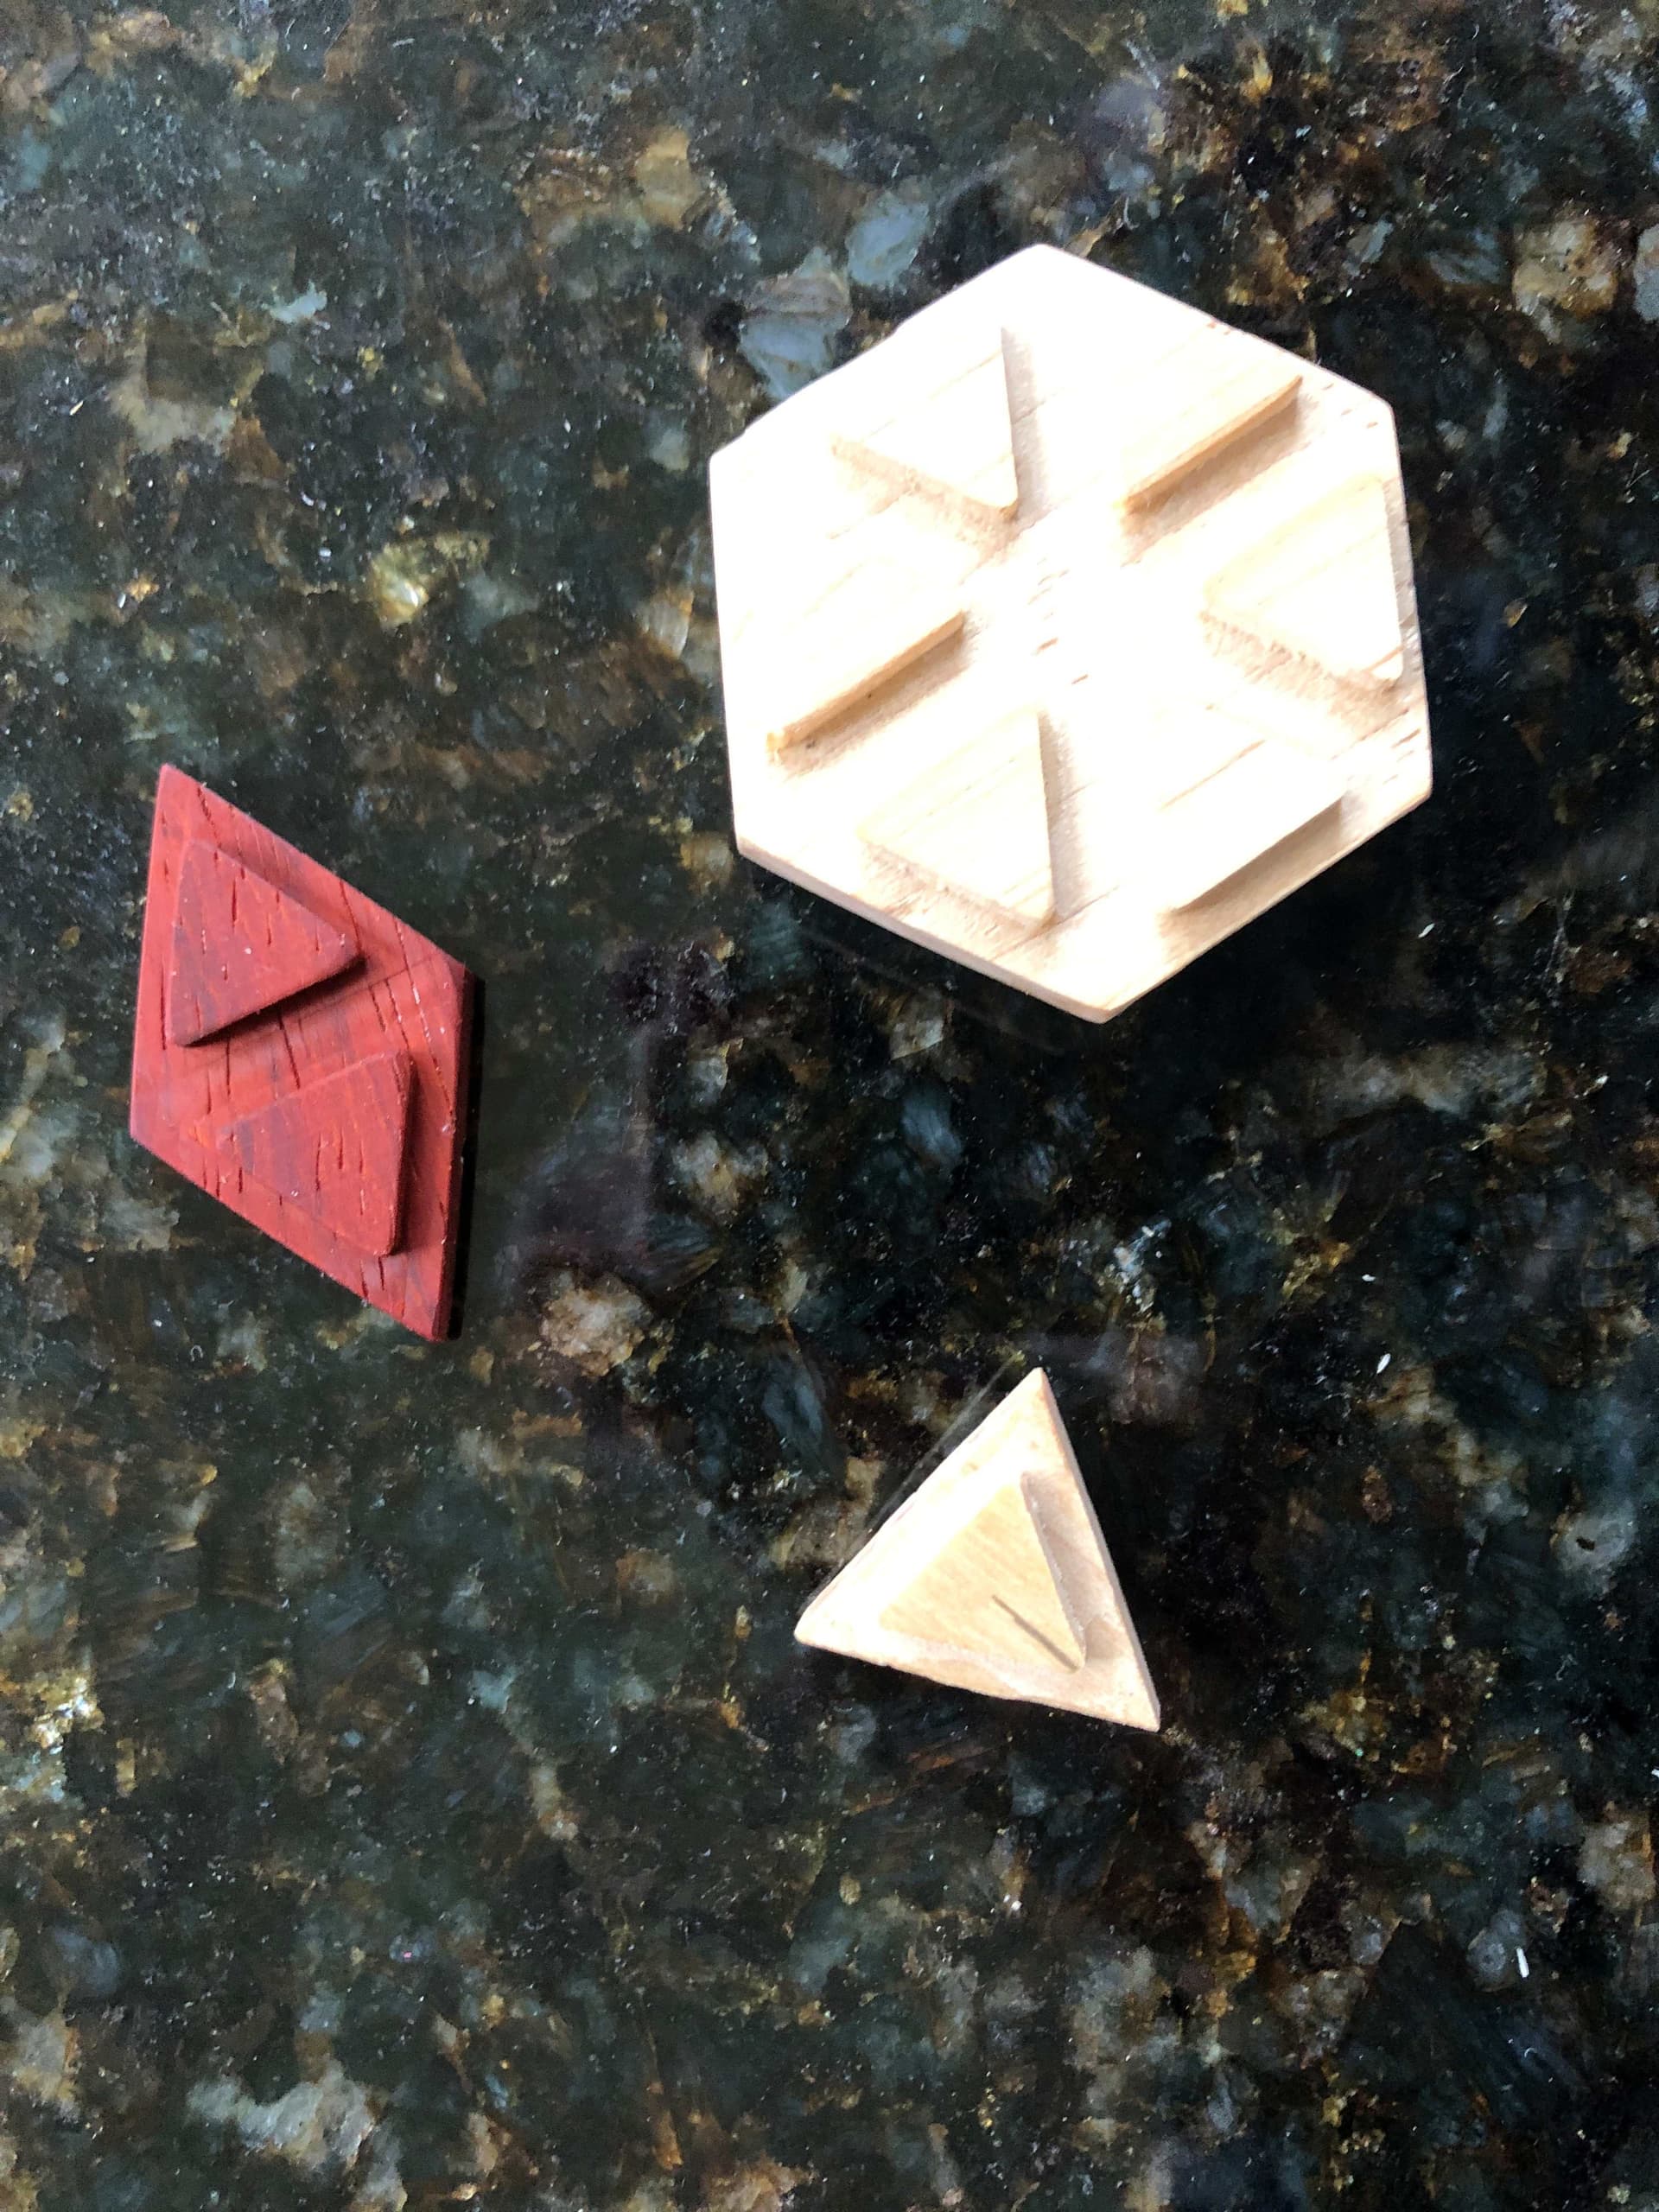
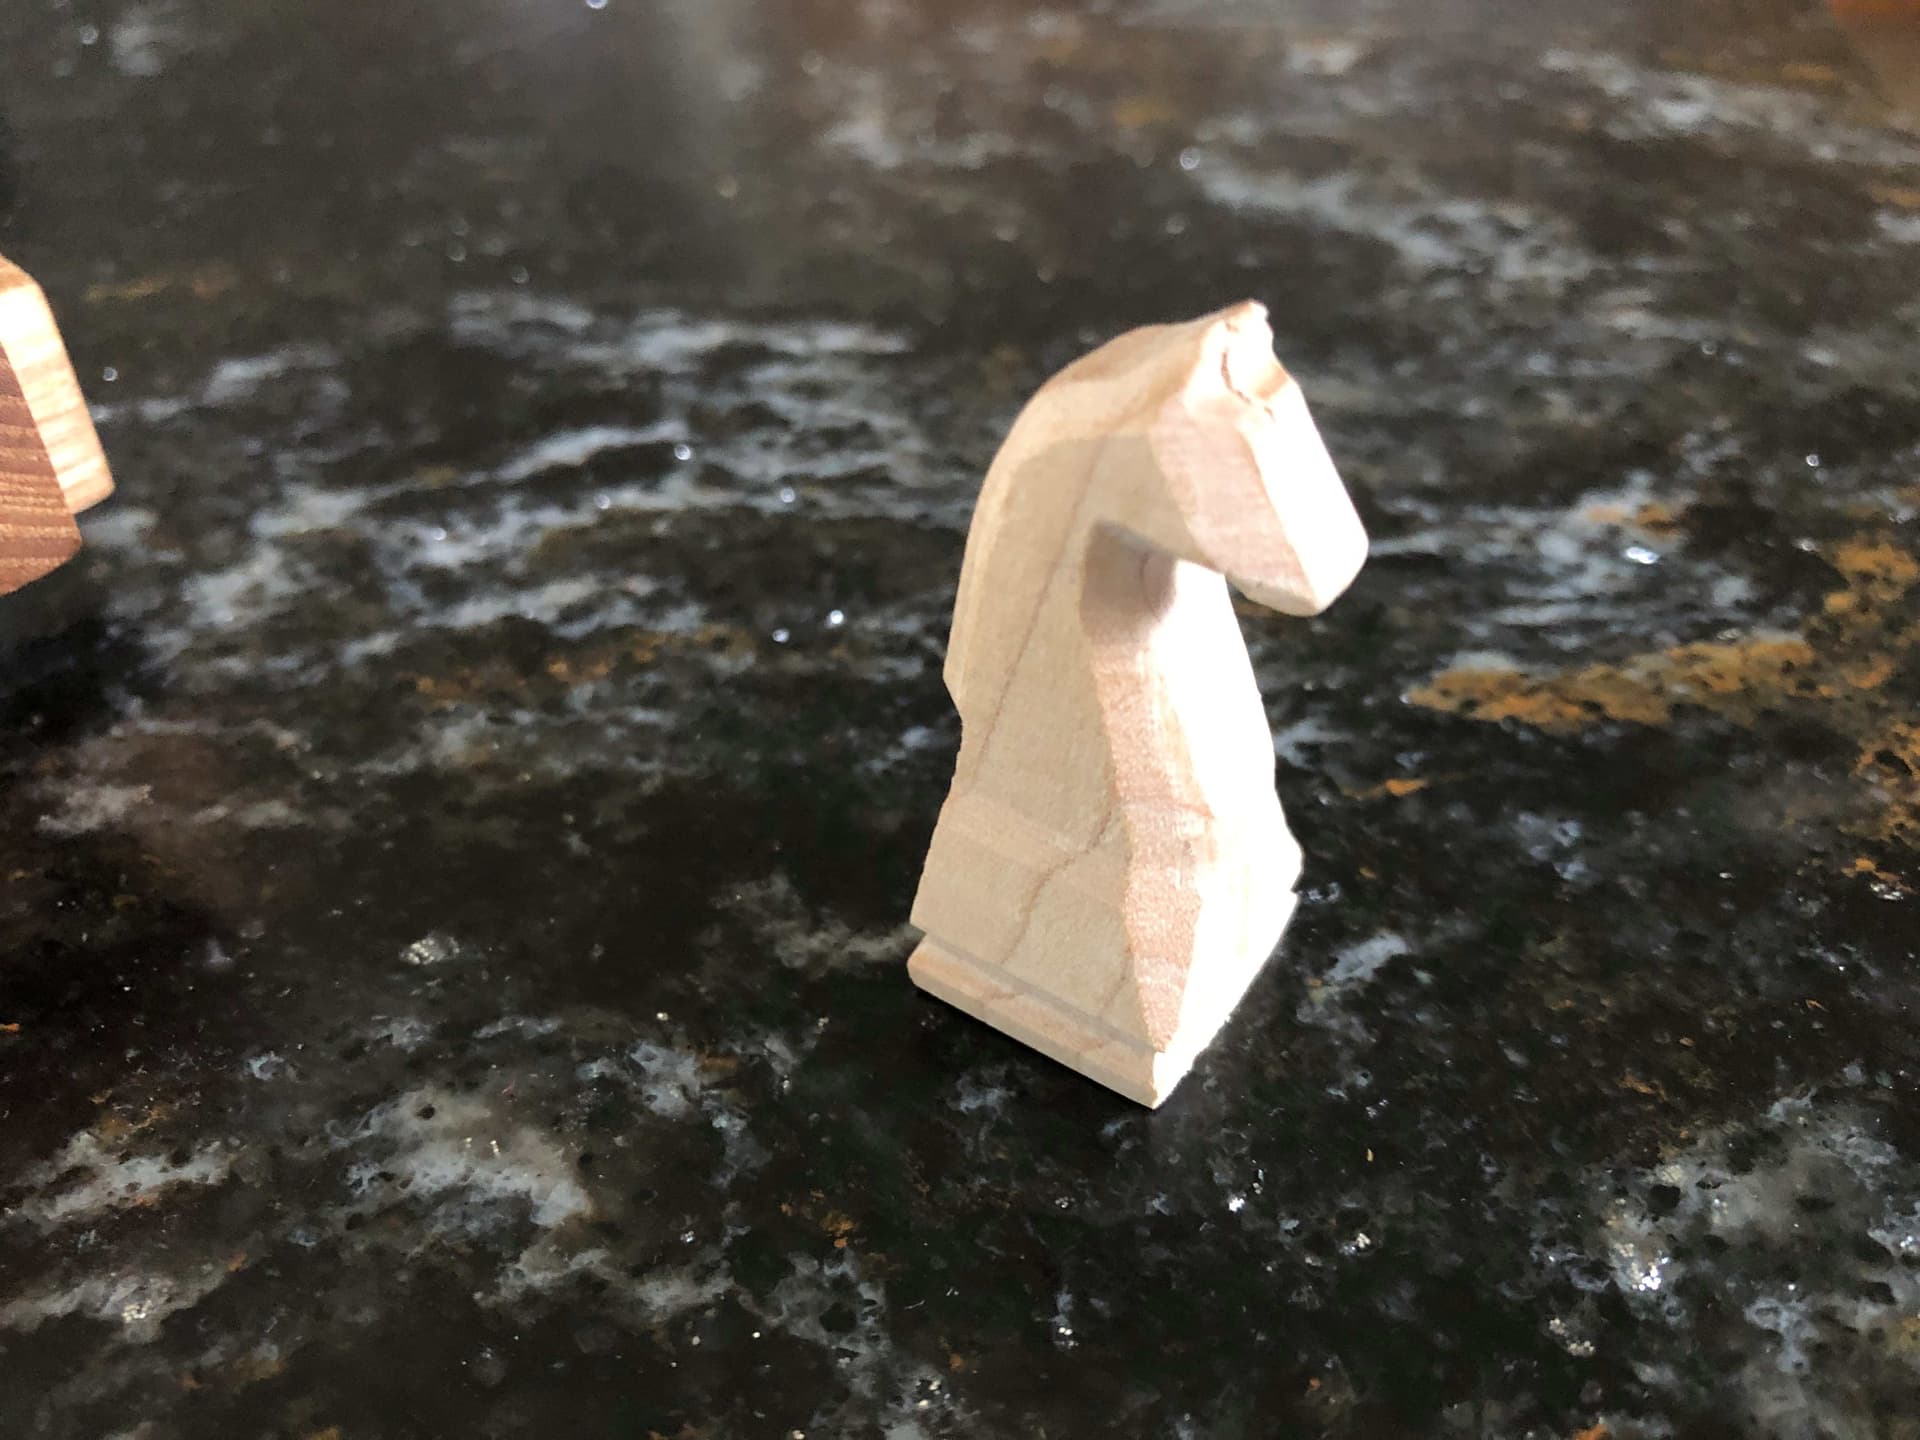
The Modeling tab is what really takes CCP to the next level. CNCs, at least for us hobbyists, carve into fixed material with a revolving cutter that always points straight down. Of course, that means that many 3D volumes simply cannot be produced as a single CNC object - a fact that 3D CAD packages largely ignore. (I do understand that CNC is only part of the user base for commercial CAD software, but my point is that all the unnecessary features and capabilities actually get in the way of CNC work, especially for a hobbyist.)

CCP modeling is truly unique in that it views the 3D world from the perspective of the CNC. That is, the modeling tab only supports adding/subtracting in layers along the Z axis. No, it can’t create many kinds of volumes, but the concept should work for constructing anything we can carve on a basic CNC setup. This modeling technique is truly unnusual, avoiding the awkwardness of extrusions in unnecessary directions, constraints, and mesh manipulations; along with the maddening difficulties of trying to position 3D parts on a 2D computer display.

So I’m hoping this message will encourage you C3D folk to continue with CCP. I’ve already suggested a couple of small improvements and will post others under the new feature request subject; I encourage other CCP users to do the same.

I believe that the pricing of CCP, at about an order of magnitude less than most CAD/CAM packages, is in the realm of hobbyists. I might also point out that CCP could be very useful to the 3D printer world given replacement of the toolpath component with slicer software.

9 Likes

Thanks David, we’re definitely going to keep at it.

Would you mind posting some images of what you’d like to make with Create Pro? Or, send them to me in a DM if they cannot be publicly shared.

As we look at where to go with Create Pro, we’re trying to focus on the things that people want to make, rather than features on their own, so we want all the input we can get.

4 Likes

I agree with everything @RedstoneCNC said. I have done a couple of rudimentary 3D projects and been pleased. I am working on a test cut in MDF as I write this for the lid of a walnut box. I am experimenting to see if the toolpaths and the tooling will work ok.

It looks good so far.

My wish list:

  1. support tapered ball nose geometry so that when you look in the simulation view you will have a better idea of the end result.

  2. more importantly, improve the ability to edit components. There is little ability to edit those now. For that image above I had to play with the height of the main carve area and then some added geometry at the top and bottom to smooth things out. Once you have hit “Done” on the 3D Model component panel if you want to change anything you have to delete the component and then re-add it unless I am missing something.

6 Likes

I’d like to echo a lot of the sentiments here. CCreate handles almost everything I want as a hobbiest when it comes to a primarily 2.5D machine. If I could be nit-picky and ask for features they’d be as follows:

  1. Tapered ball nose tool geometry support, as previously shared by @CullenS.

  2. Ability to move STL/Heightmaps around in the modeling tab, which coincides with the ability to edit components once they’ve been created.

  3. Two sided model view. I’ve tried to do some double sided 3D modeling thus far and a lot of it is guess and check when it comes to how thick or thin something is going to be. (My first spoon attempt was one thicc boi) I’d really like to model something entirely and then spit out the two sets of toolpathing for each side of the flip. I’ve watched some Vectric tutorials and it seems to do a great job at this.

  4. Animated toolpath simulations. It seems silly but it can really help anticipate what to expect when you’re doing a new job. It’s not always intuitive to see the order and direction of cuts with only the rapids.

  5. More toolpath options like adaptive clearing or changing the pocketing algorithm so you can have a spiral clear instead of a raster on the 3D toolpath for circular pockets.

  6. Ability to overlay a 2D vector across a 3D surface. (eg having a 3d curved pocket into the material and then coming in after with a Vcarve into that pocket.)

This is all that comes to mind, but I can add more if they come to me later. Thanks for everyone on the C3D team for getting us this far already. I am on a 1 year subscription to Pro right now and I believe I will renew again with the hope we’ll continue to grow as time goes on.

3 Likes

I was thinking about the list that would make CC perfect and you hit on most of them.

One other idea is multiple bits instead of just one for pocket clearing on an advanced VCarve.

1 Like

You requested CCP projects, so I’ll skip most of the endless projects that wouldn’t really require the CCP extensions beyond CC. Also, since your interest is in what people actually do, it’s easier for me to think about projects finished or underway, than to predict what I might do next. …not to mention that it’s pretty difficult to photograph my bizarre thoughts. :grinning:

I keep working on board games that we play with our grandchildren. One is a variation on Quoridor that is played on a 12-inch hexagonal grid. The most challenging parts are the playing tokens. The playing tokens are two parts; the top piece comes from a frog-like STL added to a curved base with a lillypad shape I created. The top is also a 2-sided carve with a center hole drilled on the under side. The bottom of the player is a pedestal built from an angled hexagon added to a subtracted curve. (This is one of the examples, where visualizing below the surface would have been hugely beneficial.) The dragonfly tokens are also 2-sided carves with an indented STL on top and a cutout on the bottom. (The cutout need to be extremely precise or the parts won’t fit.)

The second example are some Christmas ornaments that I built using CC shapes subtracted and added to a 45 degree rounded surface. It is a 2-sided carve but just to include a date on the reverse, so registration is not quite so touchy.

I’ve designed lots of tracks, geared elevators, tippy buckets, and so forth for a reconfigurable marble track system that uses 5/8ths inch marbles. It takes up a lot of space in the basement, and the grandchildren build all kinds of different tracks. Here is one of the parts that is a work in progress. You can see how the rounded surface is useful, but the absence of a tilted surface to add is a significant impediment for this project.

The next project was purely CC, but it raises an issue I’d like to point out. I really like advanced VCarve, but I design on one computer and carve on another. That means I export G-code (so that kind of makes it a Pro issue?). I prefer my G-code to be separated by end mill. So a G-code file containing both the pocket and the V bit is a nuisance. I’ve written a Python script to pull them apart, but C3D coul do me a huge favor by separating the export into two files.

There is a second board game I invented, and I’ve built three sets for different family members. The boards are hollowed out with a grid of advanced VCarves with 3D shapes glued on top. Once again, these parts need precise 2-sided carving (yes, there is a theme here). I created all of these parts from CCP without any STL import.


My apologies for this message getting out of hand, but there is one other project worth mentioning. It is really more of an experiment at this stage. I started playing with STL volumes that are essentially cut in half. So I import the left view of some STL mesh, then import the right view. Generally, using the 50% removal works nicely to produce the two halves and glue them together. CCP could make this much easier if it somehow kept or reported the proper ratio of XY to Z. STL doesn’t give up this info, and many sources, like Thigiverse and Printables, don’t report dimension info. (At least I’ve found it difficult to find it.)

9 Likes

When I want to have different files for different toolpaths, I right click and disable the paths I don’t want in the file, then save toolpath with the name of that bit used, then go back, enable the other toolpath, disable the first, and save a second file. Shouldn’t need gcode for that, the c2d files work fine.
I liked the ramping feature in CCP, but I found the 3D tab very unintuitive, and couldn’t figure it out before the trial ran out.

1 Like

JN, I do the same thing with toolpaths. In fact, I often use the disable feature selectively so that all toolpaths for the same bit are grouped together into one Gcode file. The problem is that advanced Vcarve groups the Gcode for two (usually different) bits into one. For editing purposes, this is useful. However, for me it would be really helpful to treat advanced Vcarve as the two toolpaths it actually is. I can live with a way to export Gcode as in two files, However, a better solution might be for CC to treat advanced VCarve like rest machining. That is, replacing the advanced Vcarve option with a checkbox in the VCarve window signifying this toolopath to be the pocket toolpath for a Vcarve - of course, this would mean repeating the V bit angle and depth.

1 Like

Ah, now I understand. You want separate tool paths for the vbit and pocket actions.

1 Like

This topic was automatically closed 30 days after the last reply. New replies are no longer allowed.