It should not be an issue. I export all my Vectric V-Carve gcode files in inches. It just adds the G20 command to tell your controller that the dimensions are in inches.
5 Likes
The skyline is cut from one piece. Before I got a BitSetter, I made sure to set my Z zero at an easily repeatable spot that doesn’t get cut away. Even doing that, it was hard to get perfect results with the little bit of error with every bit change and rezero. Now I zero my stock once and can forget about that stressful mess of rezeroing after every bit.
I have no experience with Vcarve Pro, but in Carbide Create I do a couple things to create my hackjob version of “rest machining”
So, let’s say I am making a skyline with a 1/32" or 1/16" endmill as my detail bit and a 1/8" or 1/4" endmill as my clearance bit. First, I add a path offset to the outside of the skyline by half the size of my detailing bit or somewhere in the realm of .005"-.02". Sometimes this requires multiple offset paths so your detail bit paths and clearance bit paths clear all material from the little inside corners. I set the detail paths as outside contour cuts to cut very shallow and slowly. And I set the clearance pocket to cut as fast as I am comfortable with. The key is to set the clearance bit to pocket to one off the offset paths I added earlier and not to the “original” path. This keeps any variation in manufacturer bit size or whatever from effecting my detail. I am not sure any of that helps you, but this might: before I got a BitSetter, I always ran the detail cut paths to cut to a depth just shy of the intended pocket depth. So if I wanted a pocket depth of .08" I would set the detail paths to .078". I did this for a few reasons, as I had a belt driven z with a dewalt router with some “slop” and I came to the conclusion (right or wrong) that the “slop” would allow a bit like a 1/32" to cut just a smidge deeper than a 1/8" or 1/4" bit. Setting the detail path minutely shallower helped solve my issues and worst case scenario the detail cuts would end up a smidge shallower and would take a lot less time to recut to proper depth than it would to repocket the larger areas if the detail was too deep and didn’t line up. I hope this helps, message me if you need any more help.
7 Likes
No fancy scripts. After laying out the pattern I went through and grouped certain pockets together and set each group for different depths.
Edit: and thank you for the compliment, your work is stellar!
1 Like
Thank you for taking the time to explain that. I am using a Dewalt w/ belt drive and just ordered the bit setter. Setting the clearance path off set is a good approach. I assume you still do this , even after getting the bit setter. This forces the clearance cut to be slightly closer than it normally would, right? VCarve can do this easily. I’ll have to use a smaller clearance tool to get in closer. I’ll give it a try, when I can get out for more material.
I forgot to mention (taking a total shot in the dark here) that keeping the size ratio of the “detail” bit (I typically use a 2 or 3 flute downcut endmill) to “clearance” bit (usually a 3 or 4 flute upcut endmill) to no more than maybe 3x. I usually run only a 2x ratio and add another one or two offset passes with the same small bit or with a third bit if the size of the project calls for it (which is way easier to handle in practice with a BitSetter or depth stop collars, frustrating without)…maybe doing that and slowing things down might solve your issue with Vcarve Pro’s way of doing things.
3 Likes
Oh boy, here we go!!!
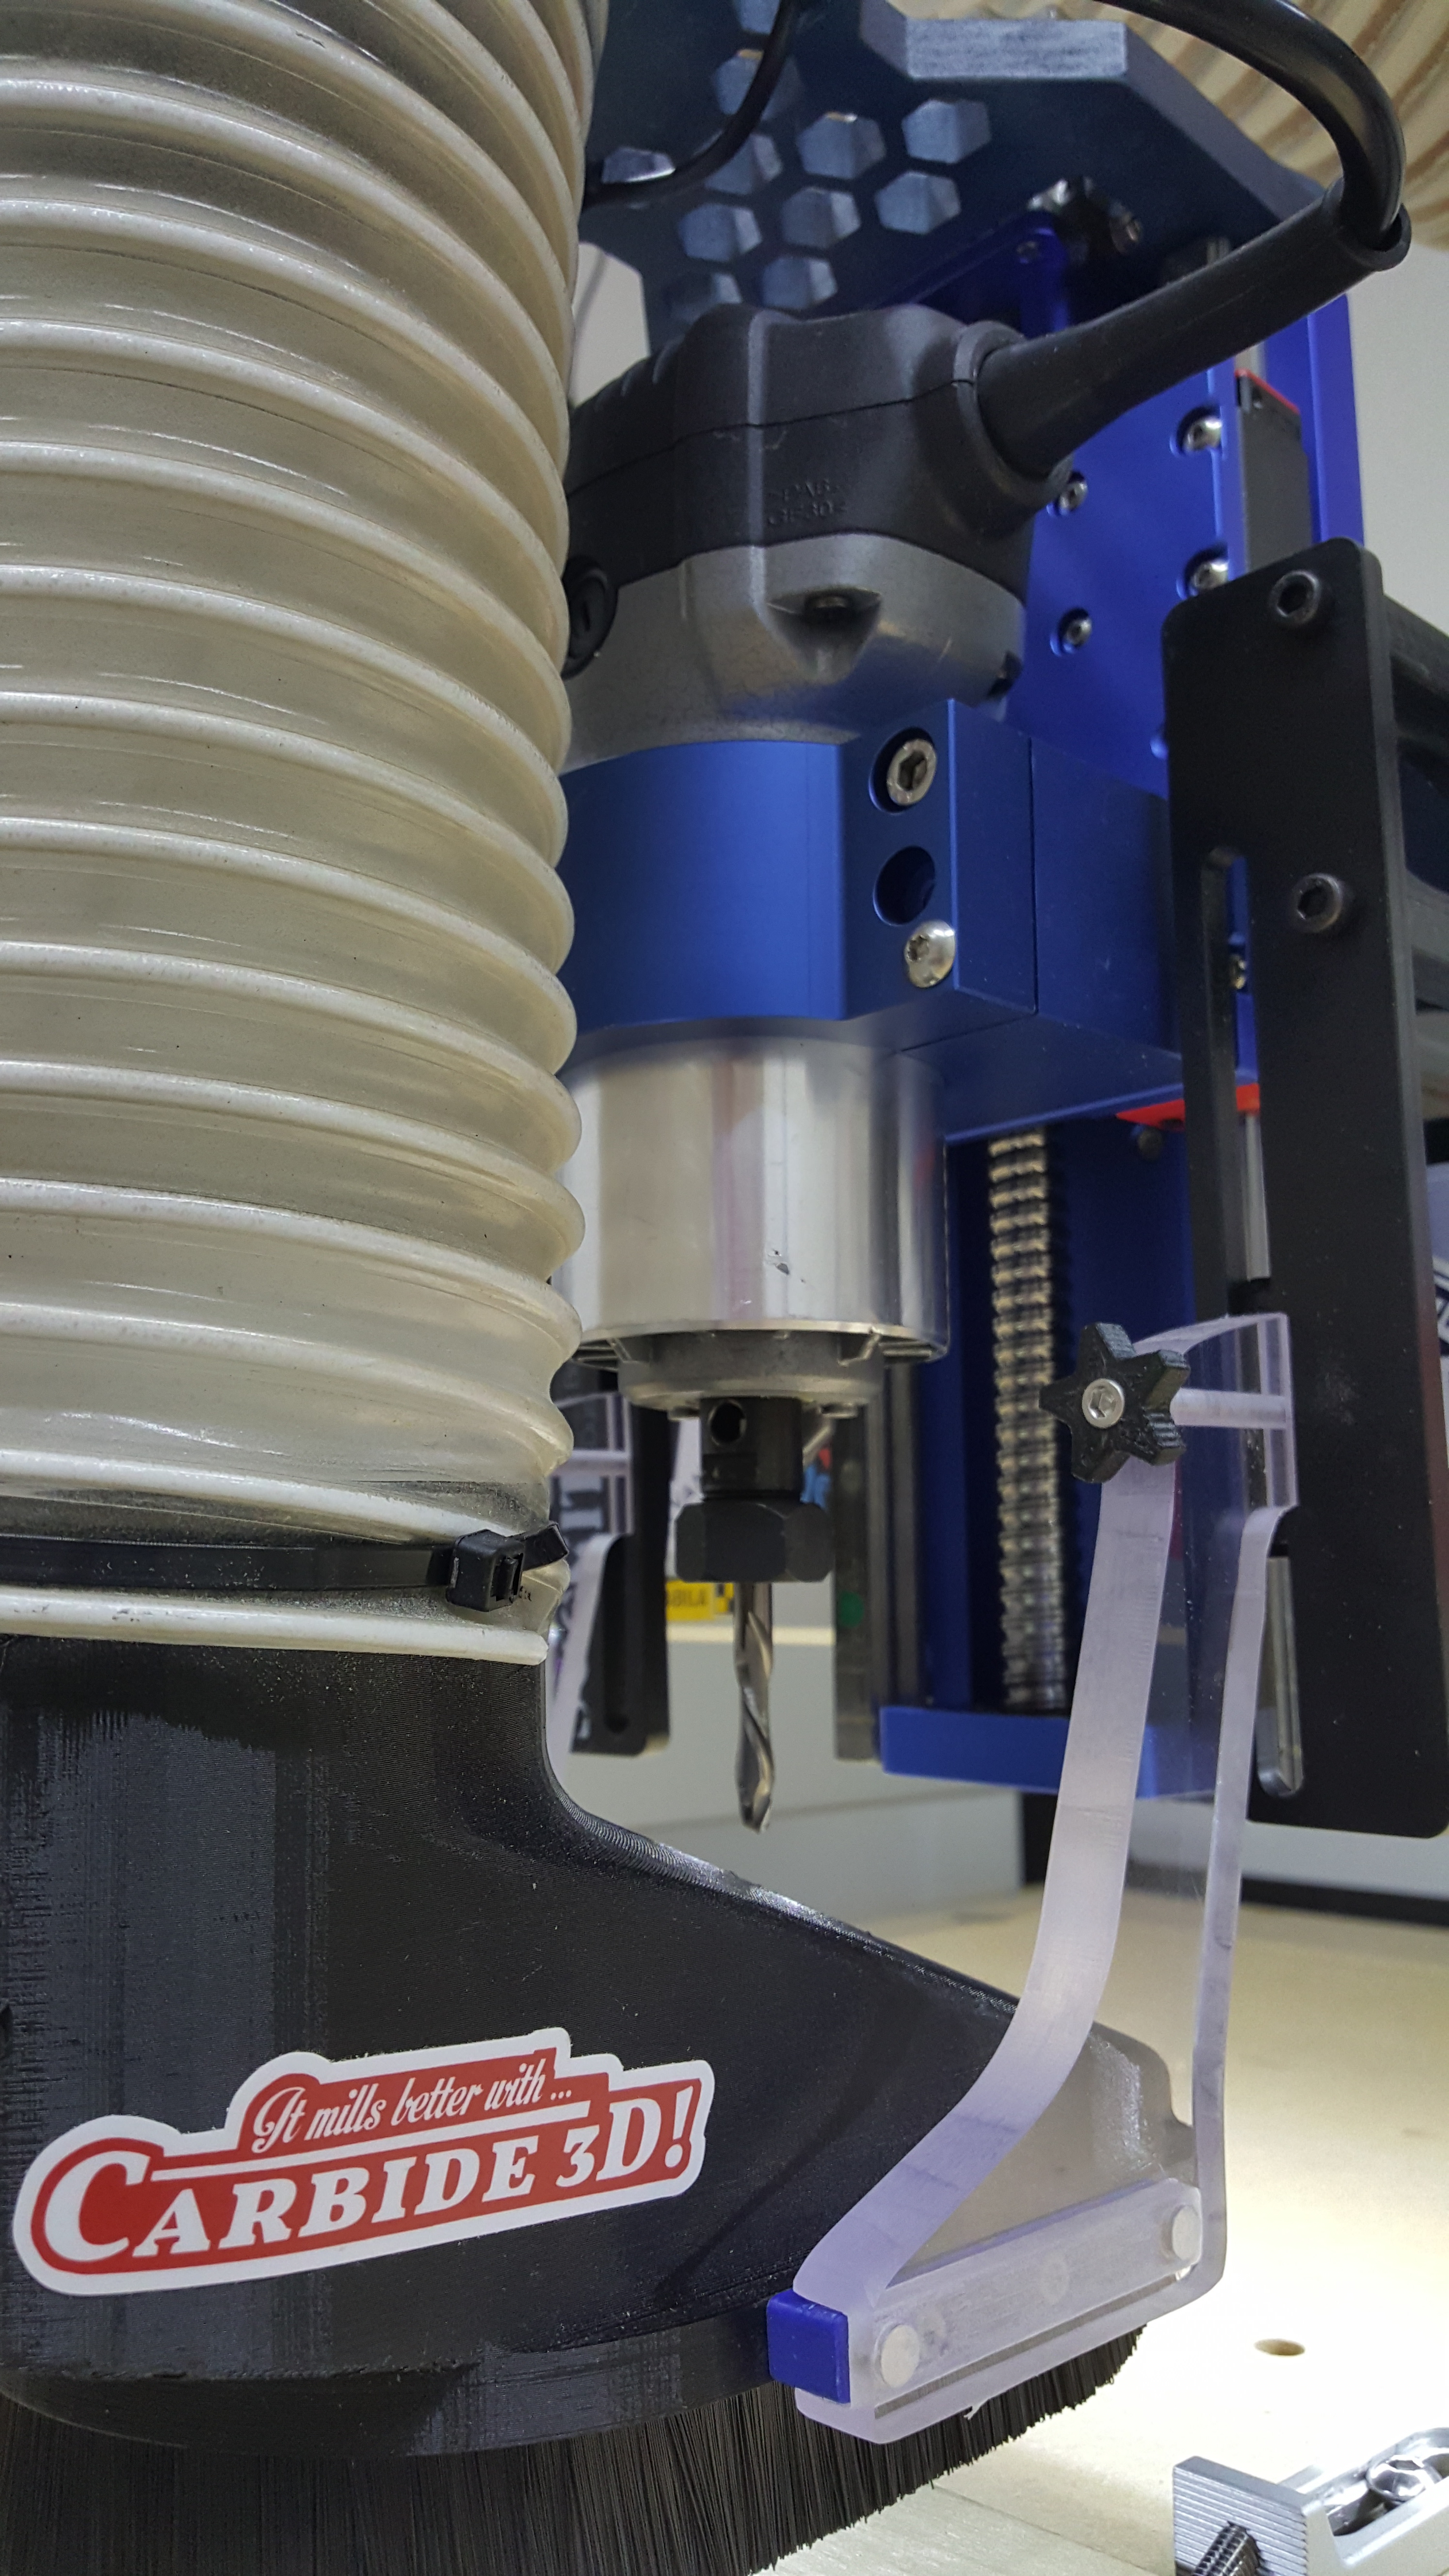
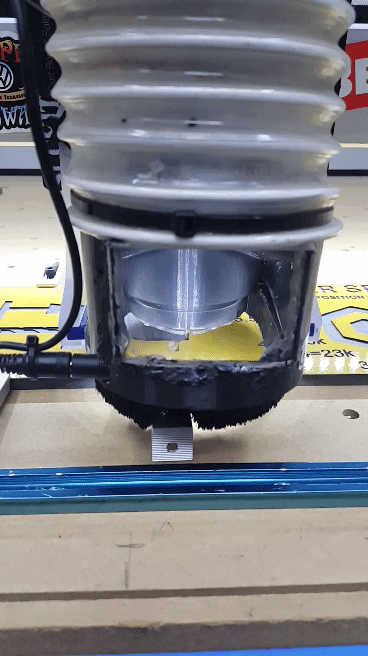
A “quick and dirty” bracket for holding the ungodly heavy 4" dust collection hose:
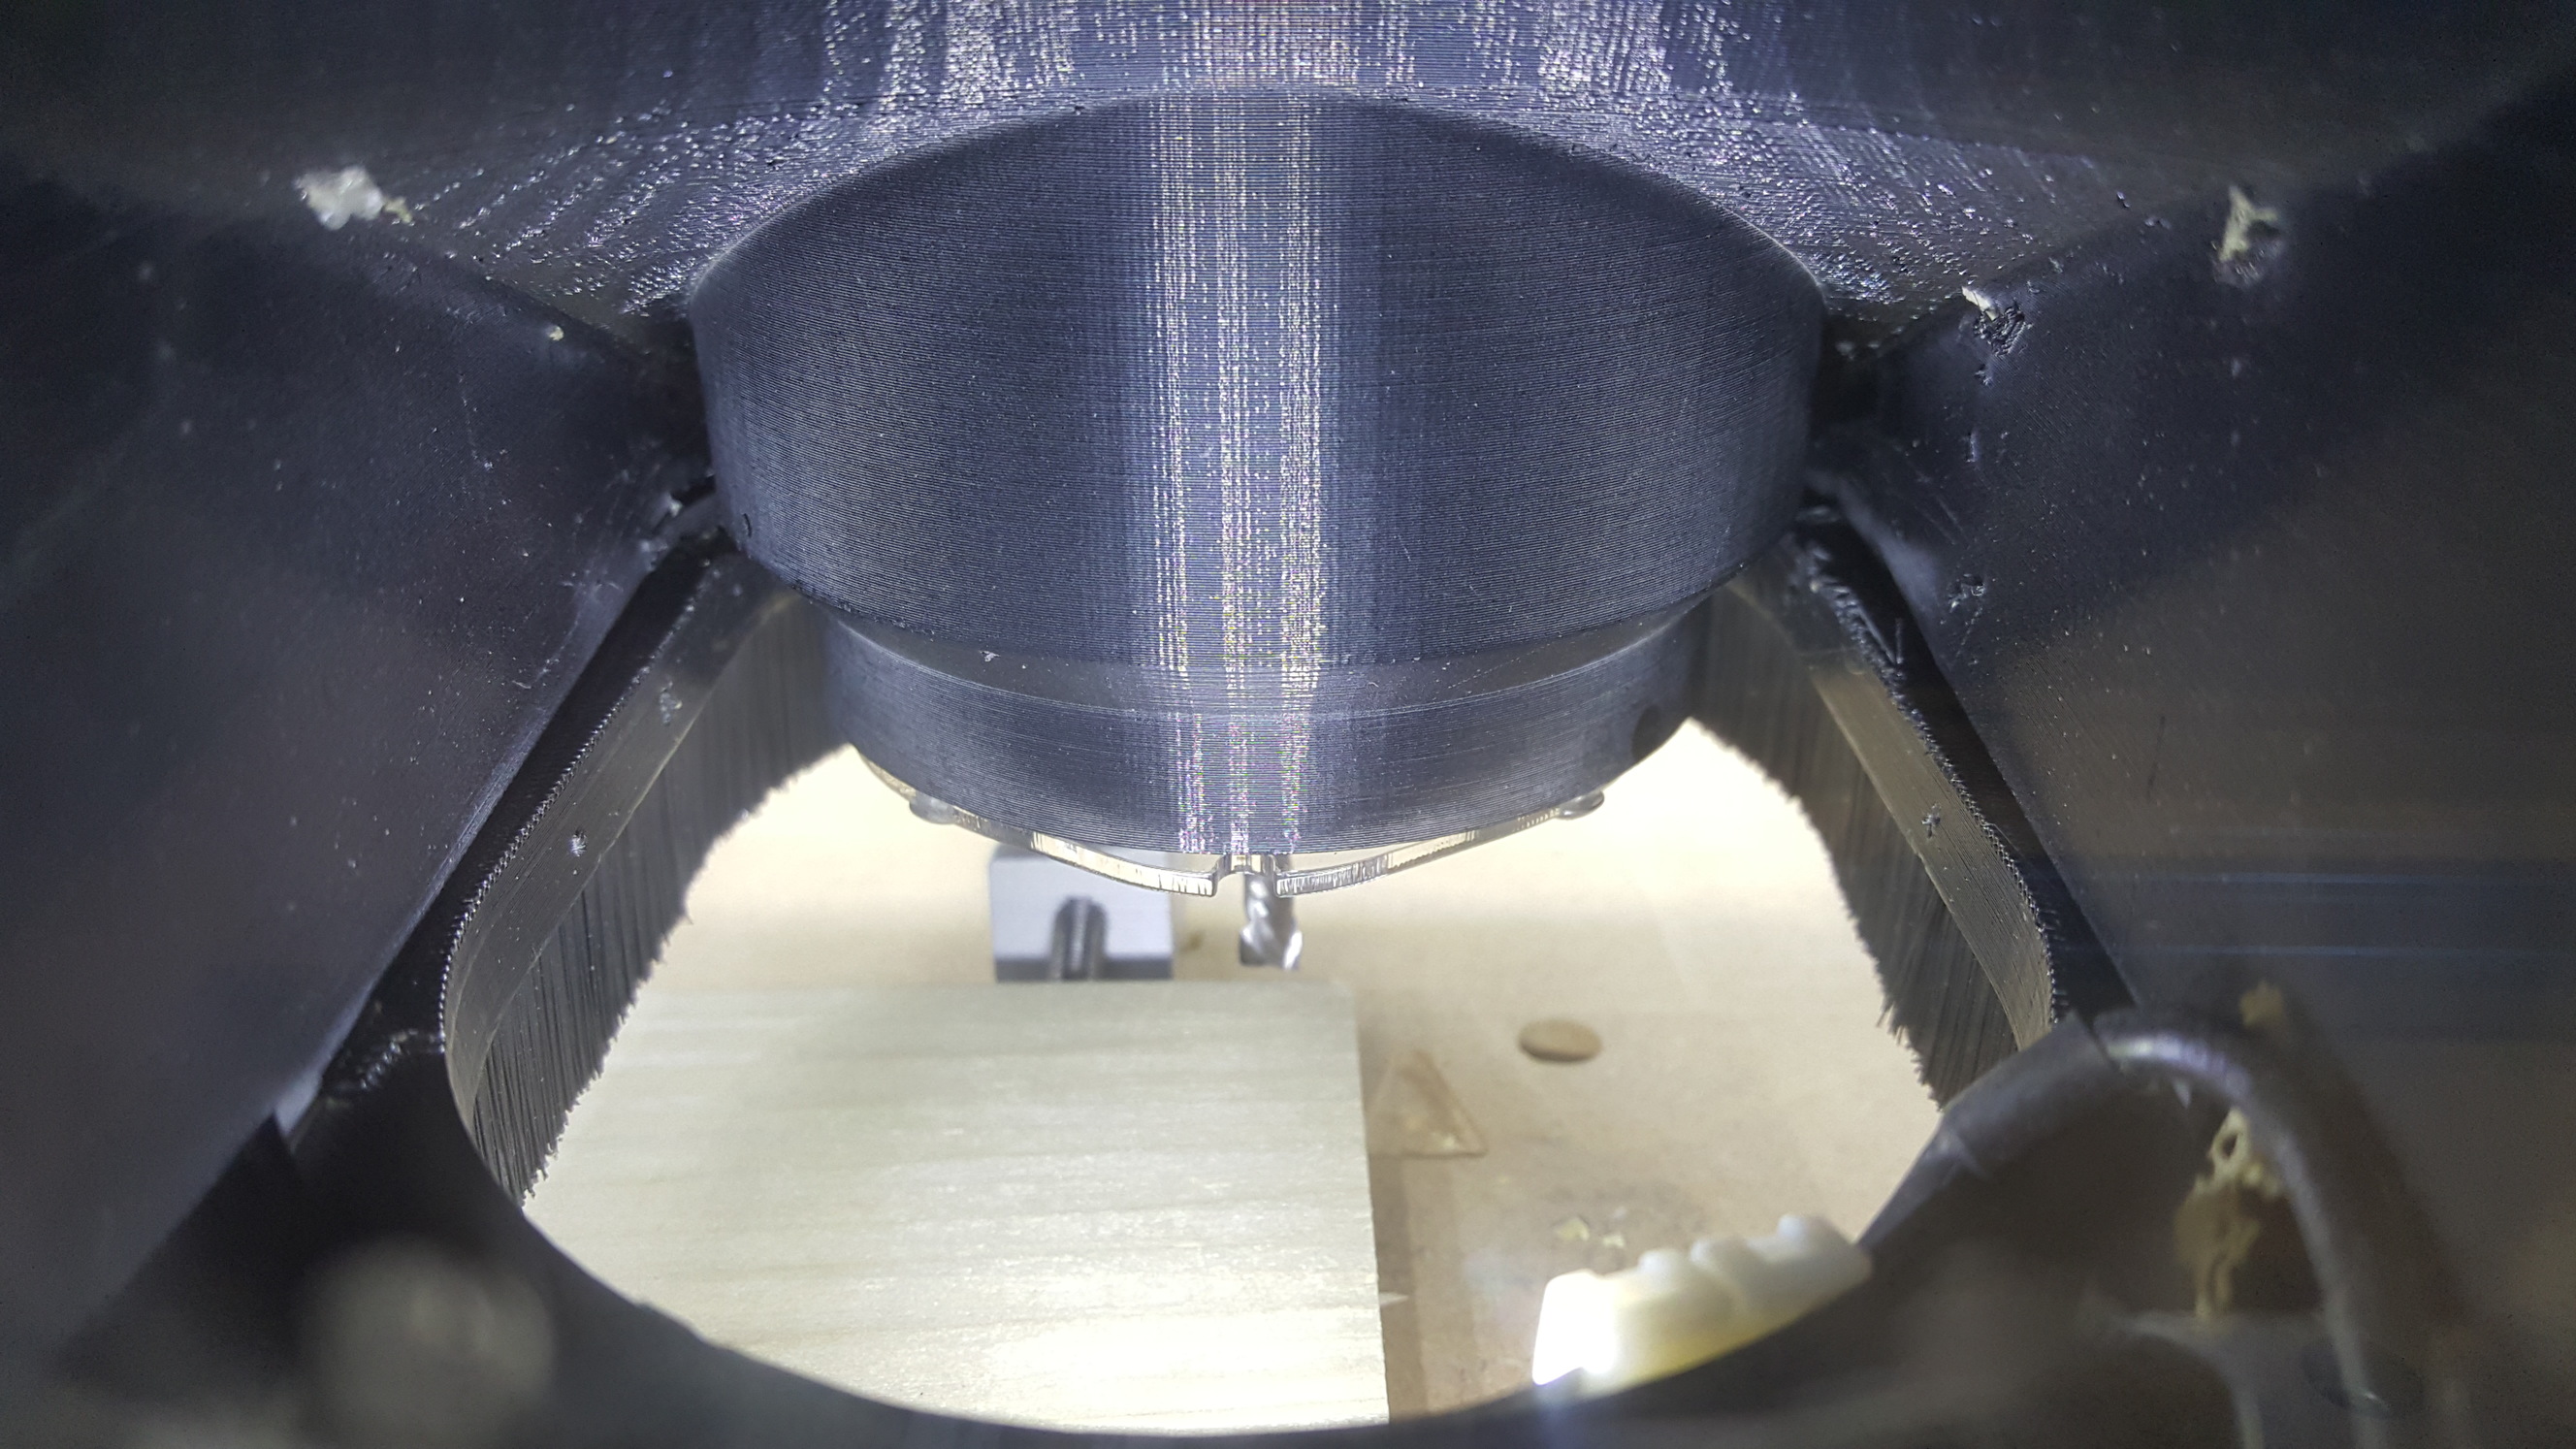
View from the hackjobbed dust boot “window”:
I started to dial in tram and such late last night and quickly found the HDZ and HD mount are astonishingly “true” upon initial installation. Does anyone have any tips for for shimming or adjusting the HDZ with HD mount that last tiny little bit? I’m going to go back and double check my table and machine for level and squareness as I had to pull it out of it’s “room” onto the uneven concrete in my shop where it sat for a couple days during install and clean up. And I have a feeling that may have thrown some things out of whack.
4 Likes
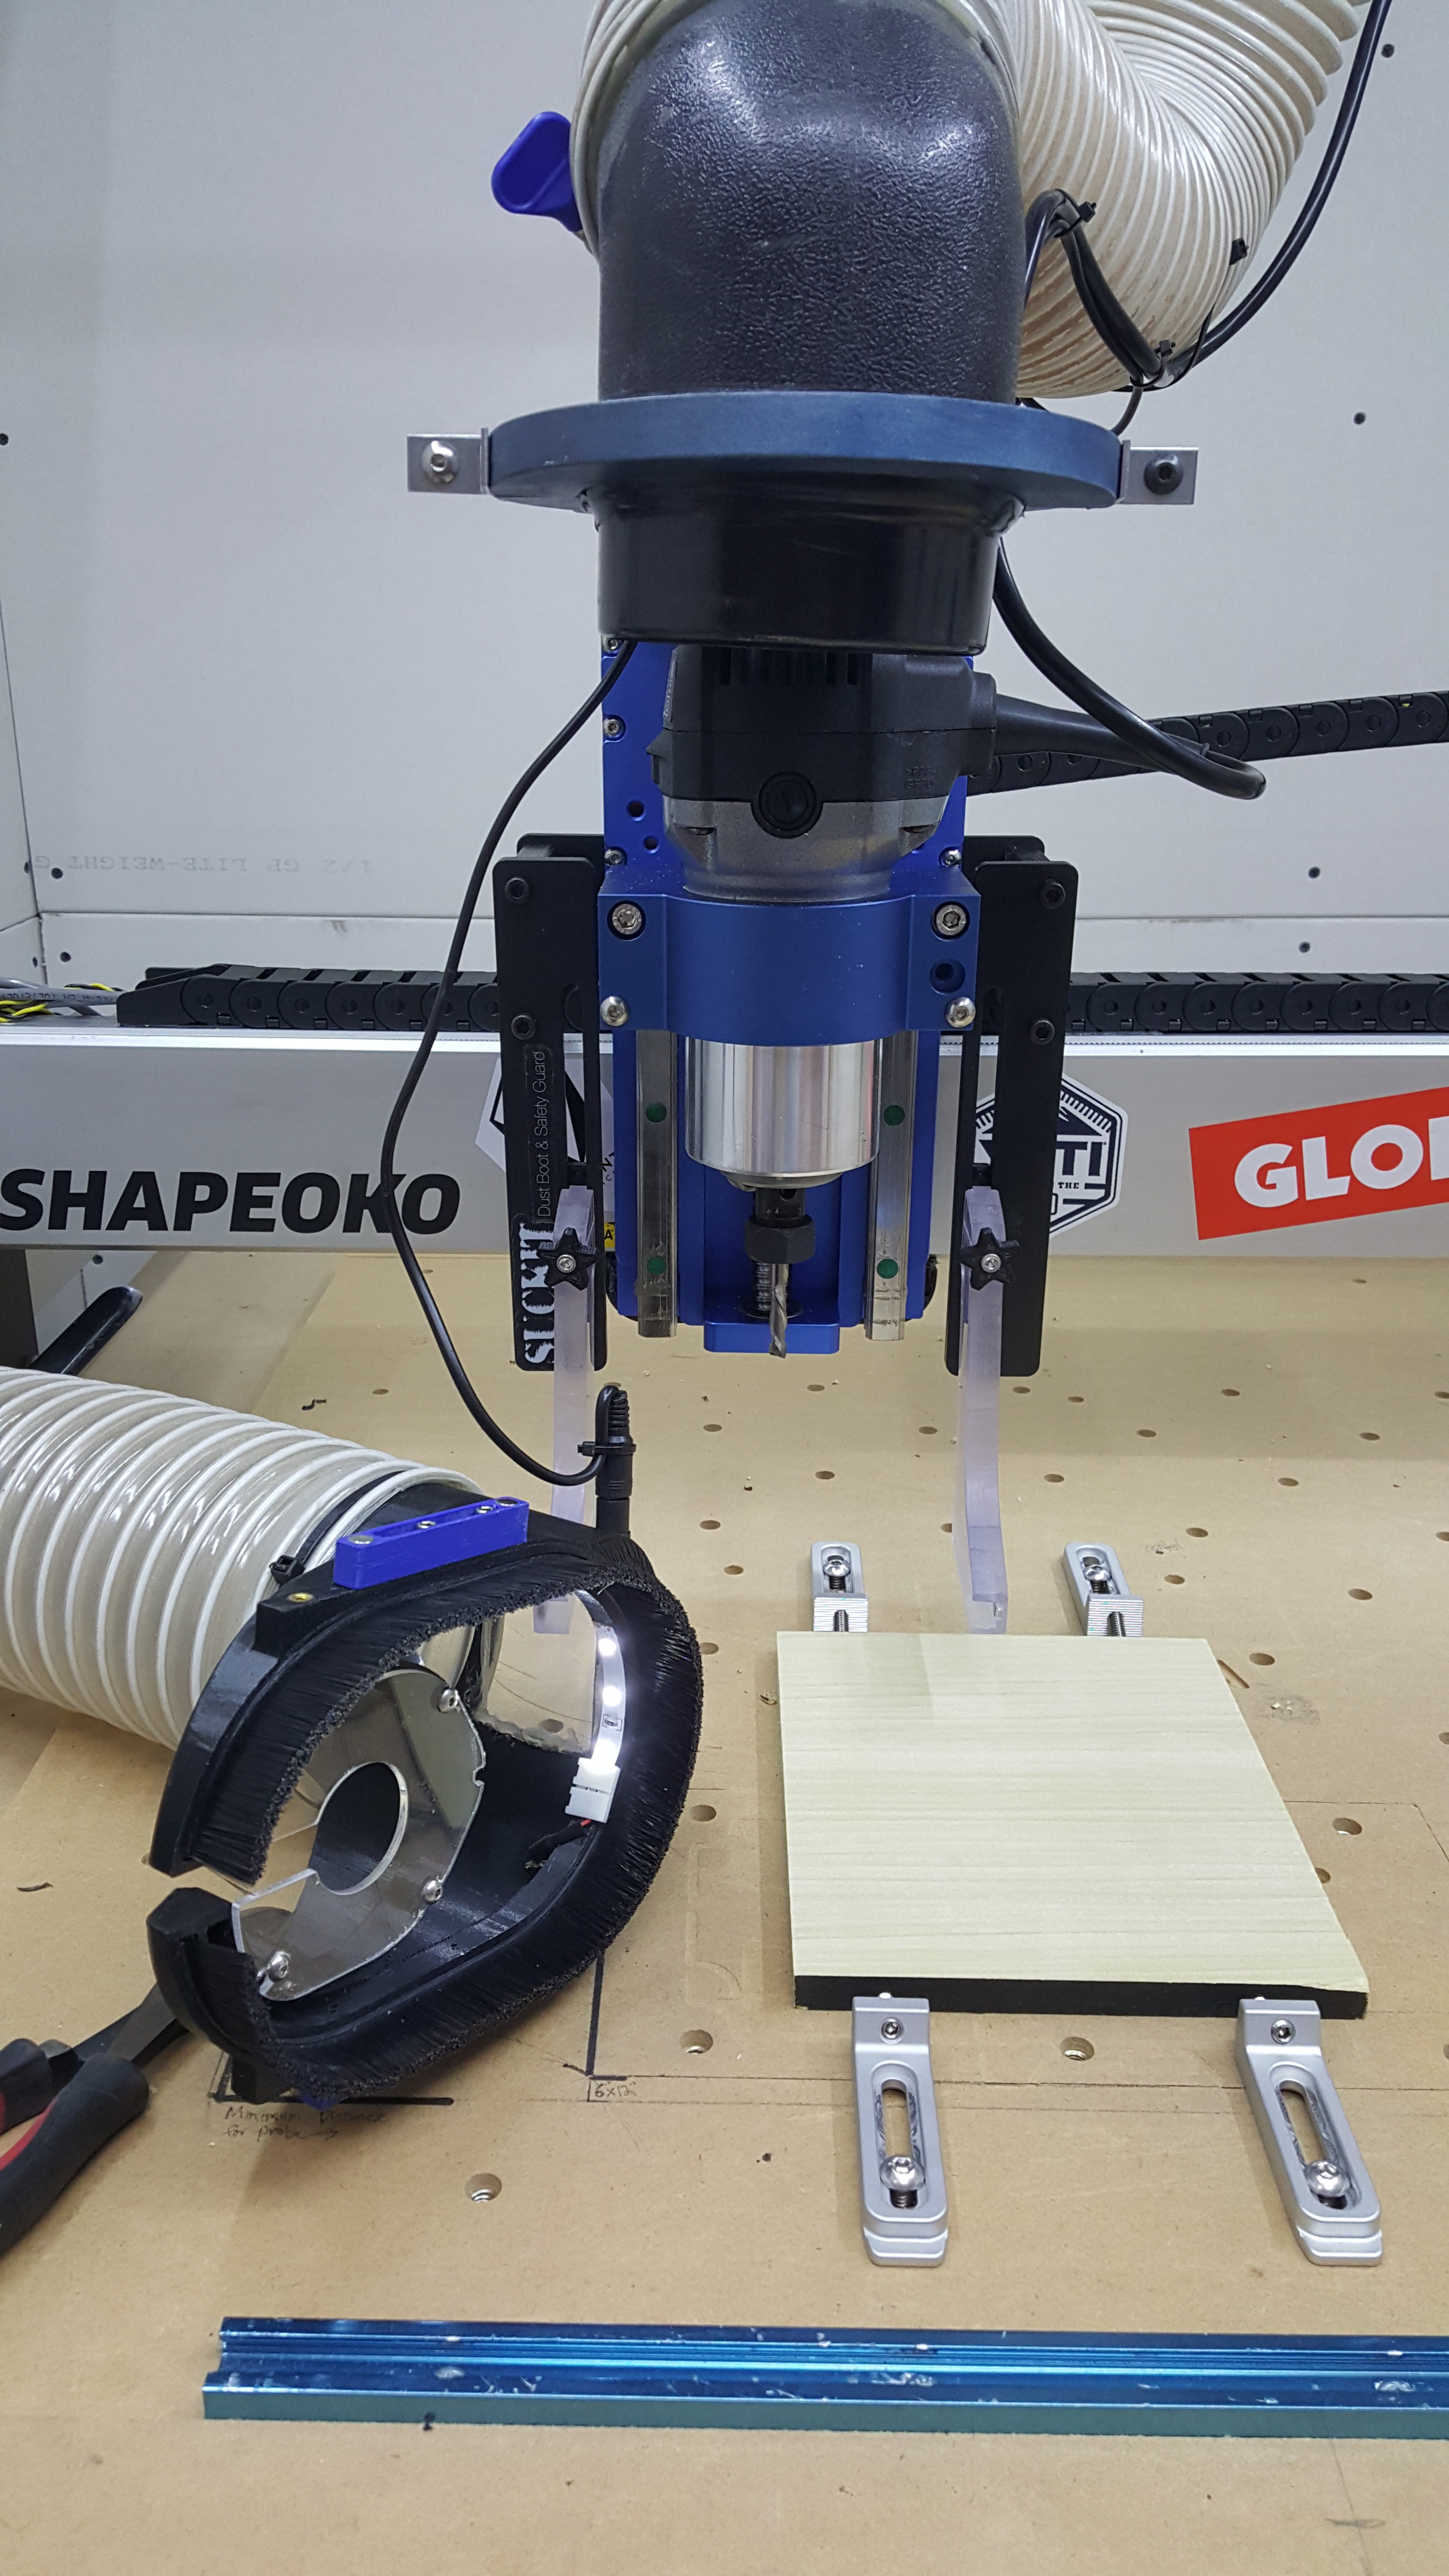
Oh my, such a GIANT dust hose, it dwarves the HDZ 
For tramming Z on the HD mount, I used aluminium foil folded over a few times, as I usually do, it worked perfectly.
4 Likes
Thanks @Julien! I was thinking the ol’ aluminum foil shim trick would work, as it did on my x-axis racking issue.
On the dust collection: I have some pretty severe allergic reactions (skin rashes and eye swelling mostly) to some of the most mundane materials (certain pine/firs and walnut of all things  ) and I have had enough dry, scratchy throat issues from mdf on jobsites in the past that I take no chances anymore. I have a 2hp dust collector in a “soundproof” enclosure pulling a very rough estimated 650-700cfm at the tool pumped through a ~MERV13-15 rated filter. Fine dust settling on top of my shapeoko is a non issue and chip clearance is great even with downcut endmills.
3 Likes
One is never too careful with wood dust, and I dig your setup!
4 Likes
walnut dust is brutal for me, so not so unusual to me!
beautiful setup!!
1 Like
Where do you get your files of rivers like this? I live in another state and would love to make one for me oof lakes.
It took a good while to find a high resolution image of a map that had the rivers and lakes shown simply and clearly with little to no text or other info, which then could be traced with any number of different image-to-svg converters or auto-tracers. I considered purchasing Vcarve Desktop just to see if the auto-trace feature was easier than my past attempts using various websites and Inkscape, as I am not good at this sort of thing. I settled on doing a simple bitmap trace in Inkscape and after lots and lots of node clean up and adjusting, I saved it as an svg and imported it into Carbide Create.
Once I get to turning on my shop computer I will try and find the website I found the map on and post a link here. I do remember it having maps of all 50 states.
5 Likes
I am not sure which type I ended up using for the trace, but I got the map from:
2 Likes
I have been using these 10mm barrel hinges for 5 years or so in my portable cribbage boards. I have purchased 235 of these so far (I had to look, just for fun). Yes, the odd number is from damaging a few learning how to install them. I now install them in the base and lid (with them open) simultaneously using an aluminum bar with a channel in it and hammer/tap both sides in at the same time.
They are solid brass (except for the steel pins in the hinges) and they work very nice. Since they are brass, the stamped plates that make up the hinge are easily deformed, but I like the idea that they will not rust, since they are solid brass.
4 Likes
Lol, of course I see your amazing 4" diameter setup after I finally made the purchase of a 2.5" hose for mine. 
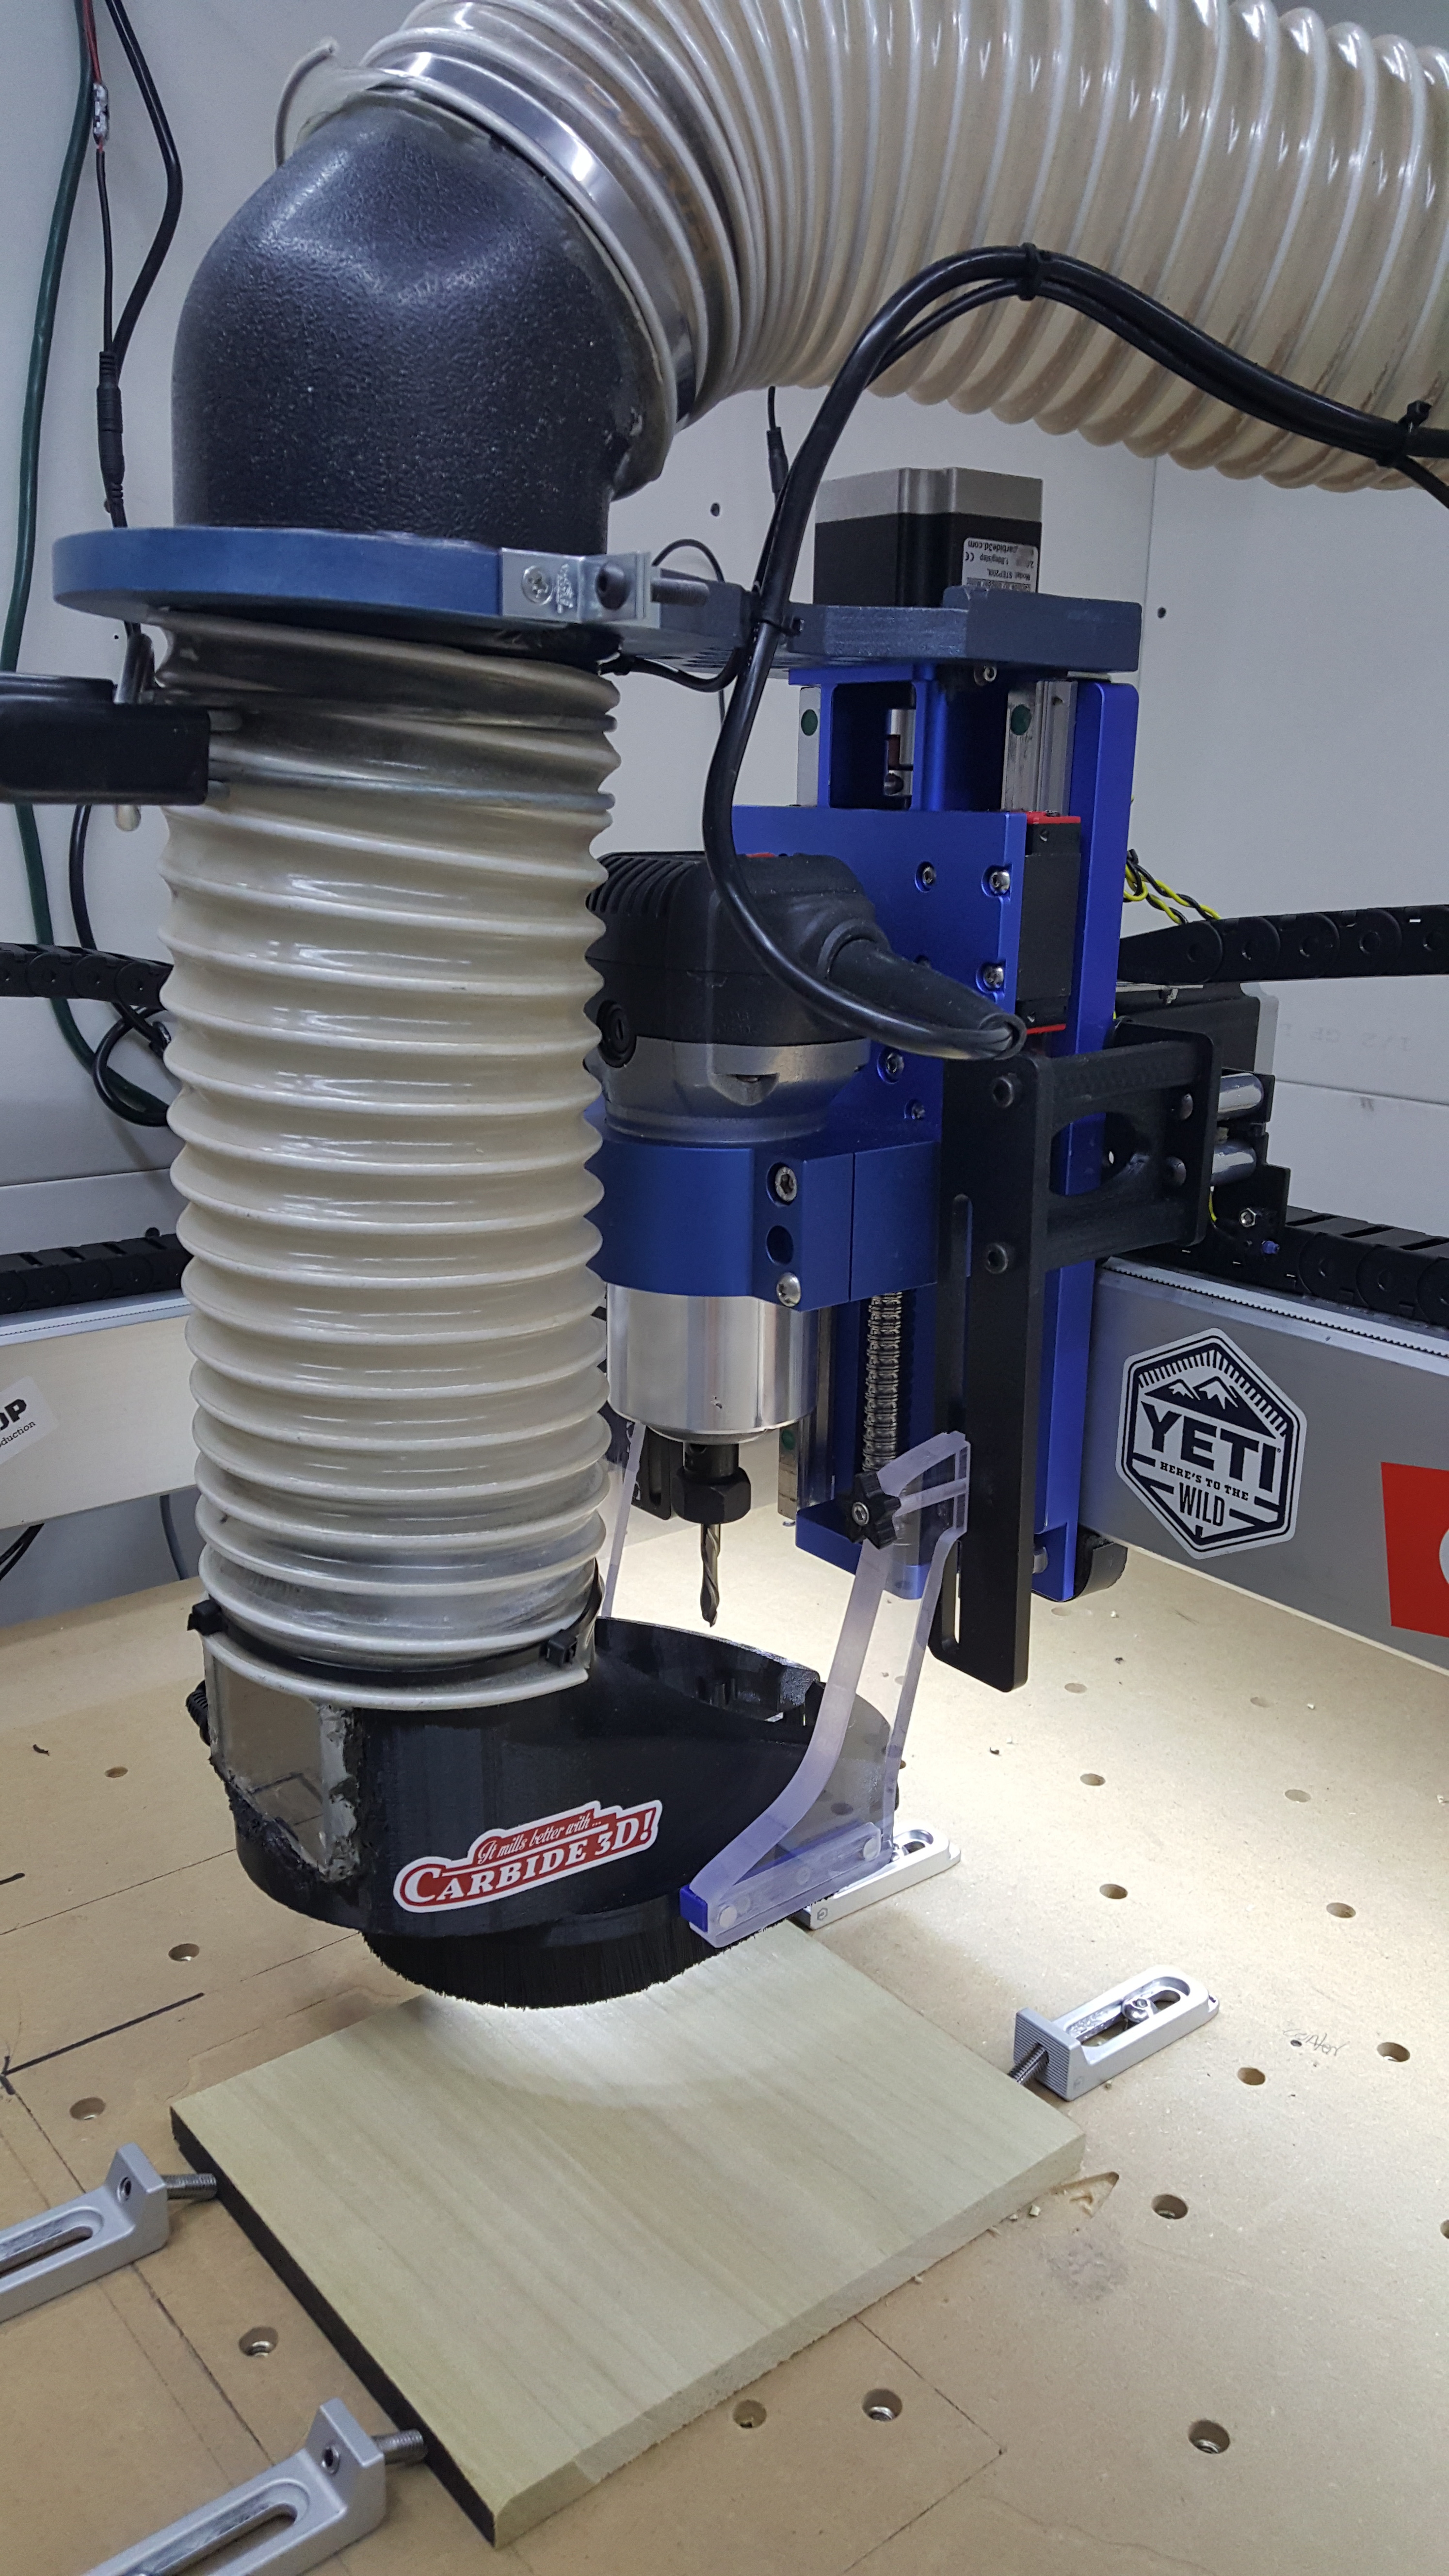
Do you have a flexible arm above the machine helping to carry some of the weight of the hose after it comes off the dust system pipe?
Amazing is not a word I would normally attach to anything in my garage shop, but thank you for the compliment @AllCustomGifts ! I repurposed a bracket that I had made for my old belt driven z-axis and mounted it like a “hanger” relatively centered above the work table. There is just enough slack so it can reach all four corners without pulling on the carriage in any significant way.
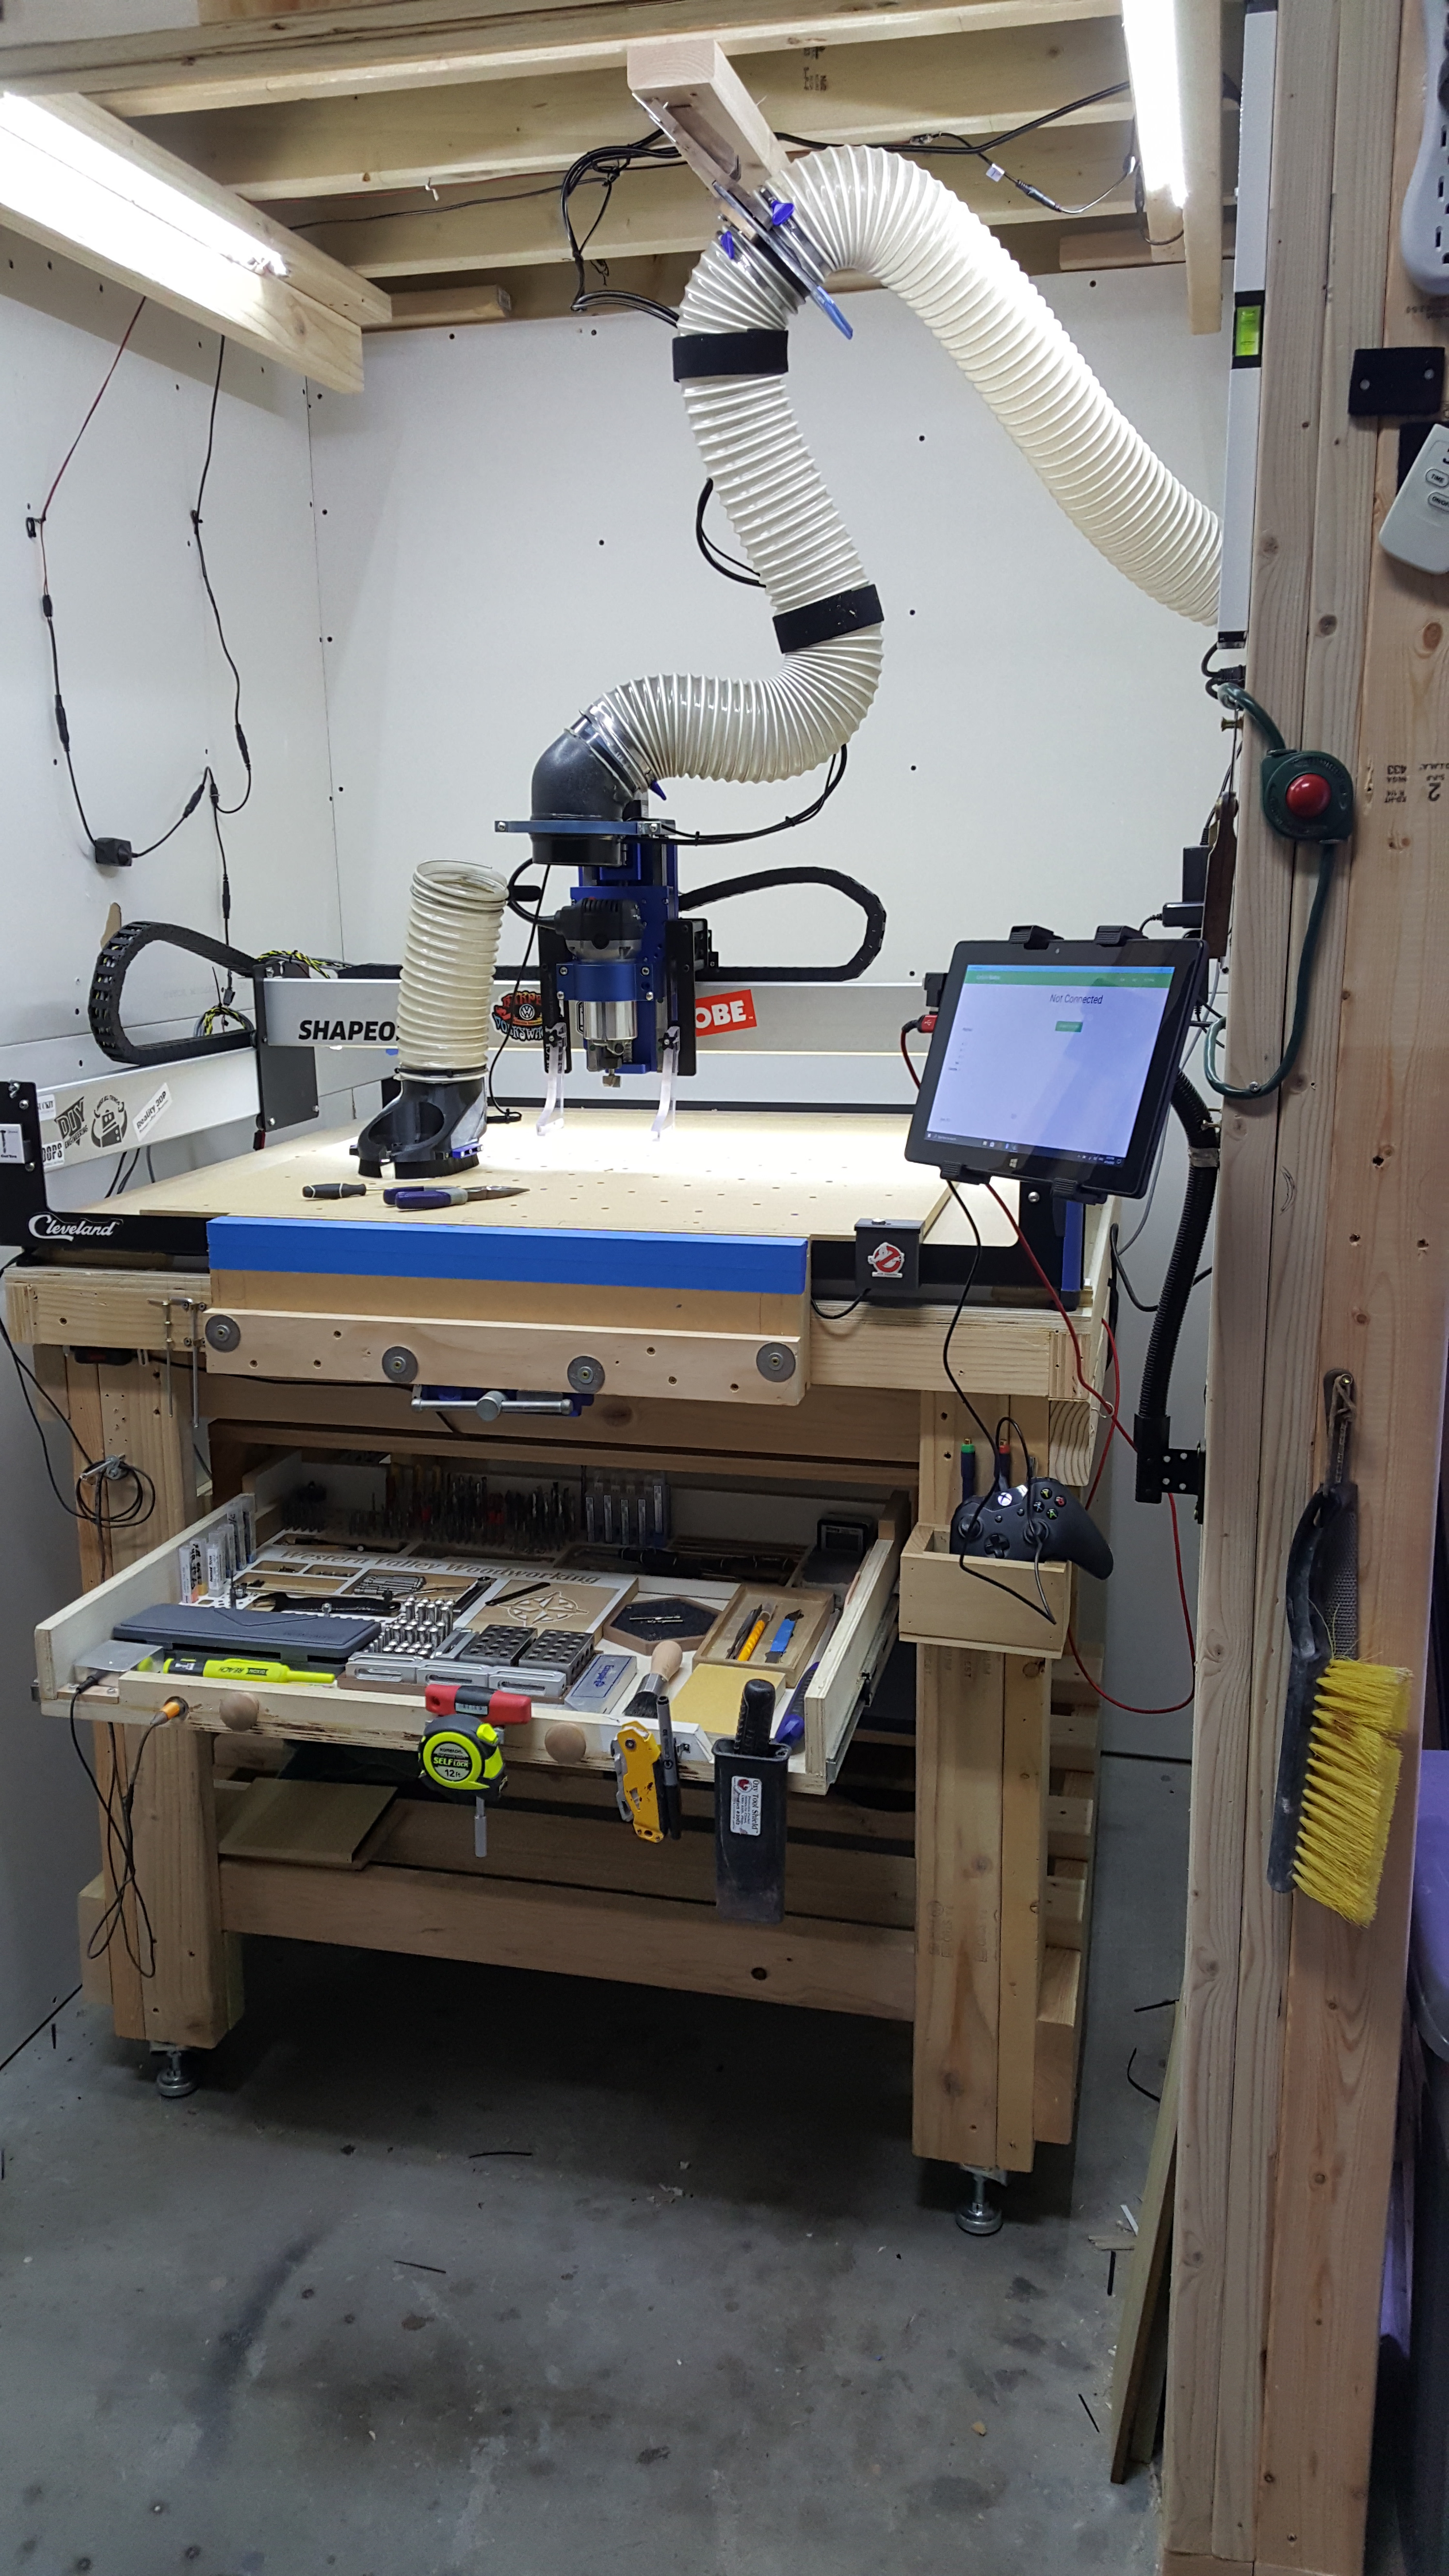
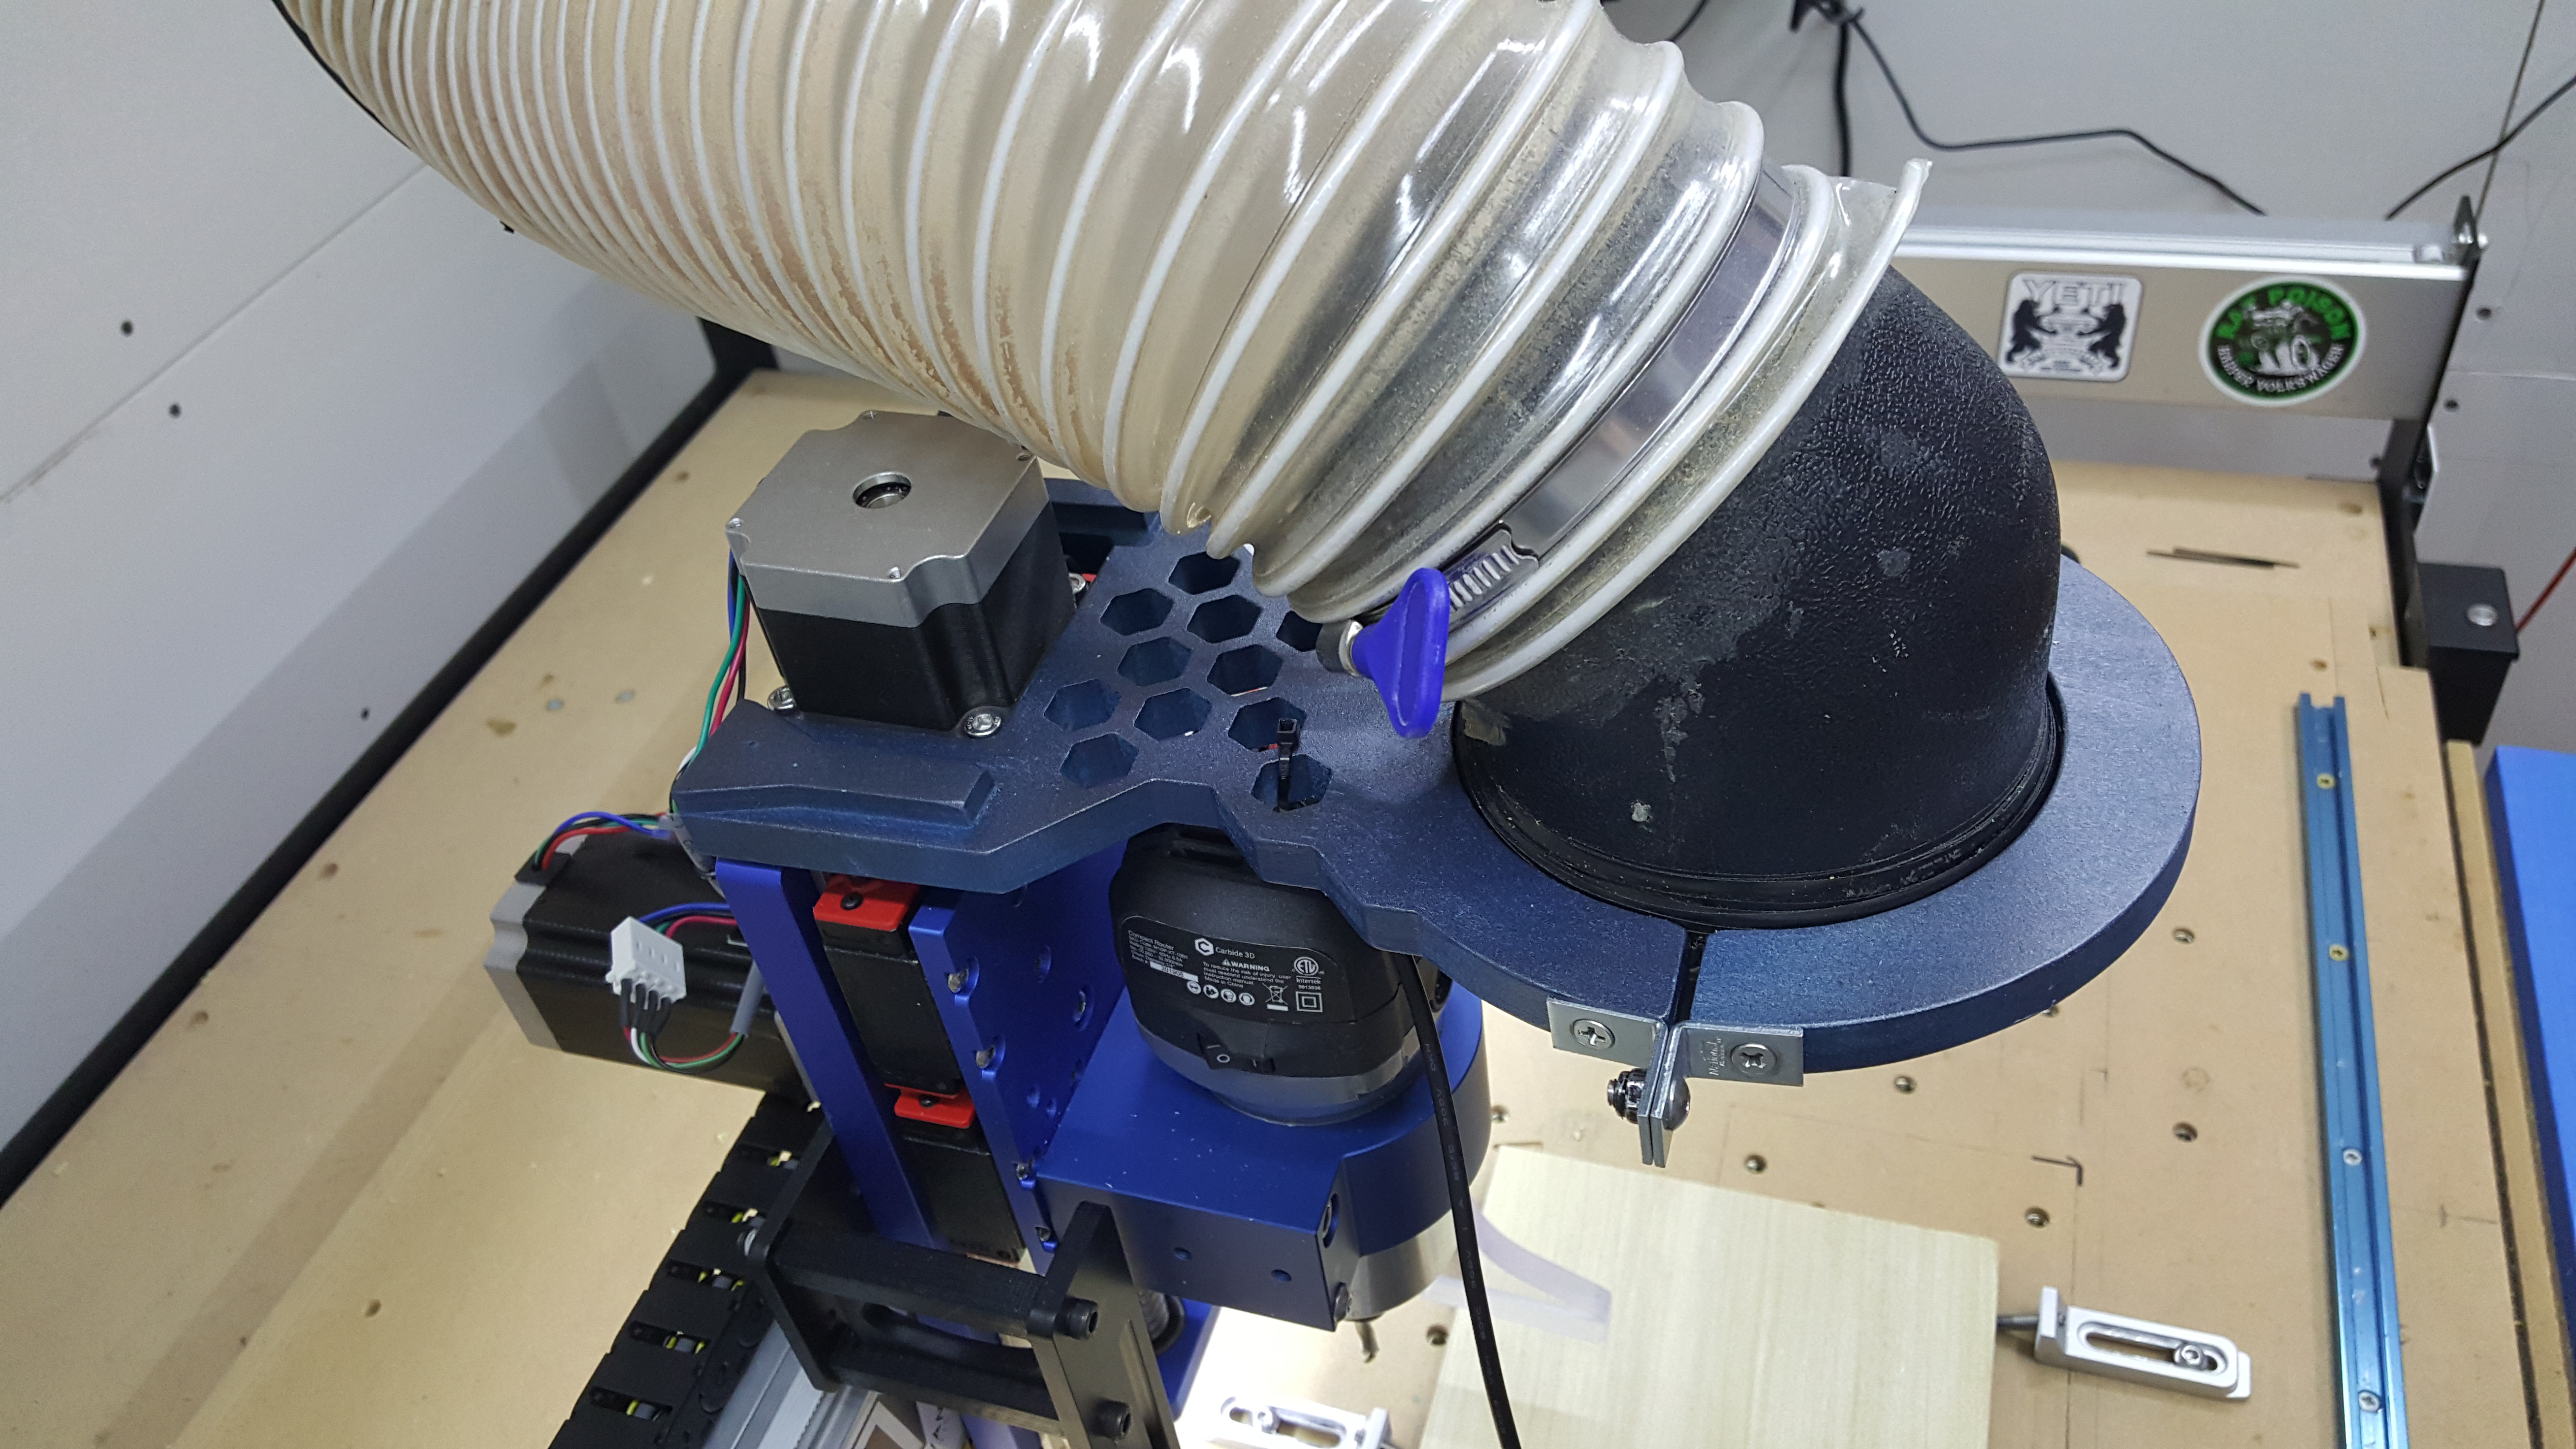
My shop is a constant (and incredibly slow) work in progress. The intended layout and design seems to change week to week! Currently, the hose runs directly through the wall into the dust collector closet. After some more soundproofing and drywall finishing, double doors, etc I plan on running a 5" or 6" diameter hard pipe from the connection directly above the machine all the way to the dust collector for maximum flow. In all honesty, a “clean room” for painting and finishing with proper carbon filtration and/or venting will probably supersede any more work on the cnc setup. Nothing aggravates me more than getting dust/debris in the finish coat after hours of work…and an angry monkey is of no use to anyone.
6 Likes
I share this feeling 100%. I’m in the process of rearranging my shop (1/2 of a two car garage), also with a focus on dust collection. I need to keep the dust off the wife’s car to keep the peace ![]() .
.
After seeing more of your setup, I stick with my original assessment of “amazing” for the setup you have developed. You’ve done a great job organizing and designing a solid work station. Looking forward to seeing more of your projects and ideas!
4 Likes
Out with the old:
In with the new:
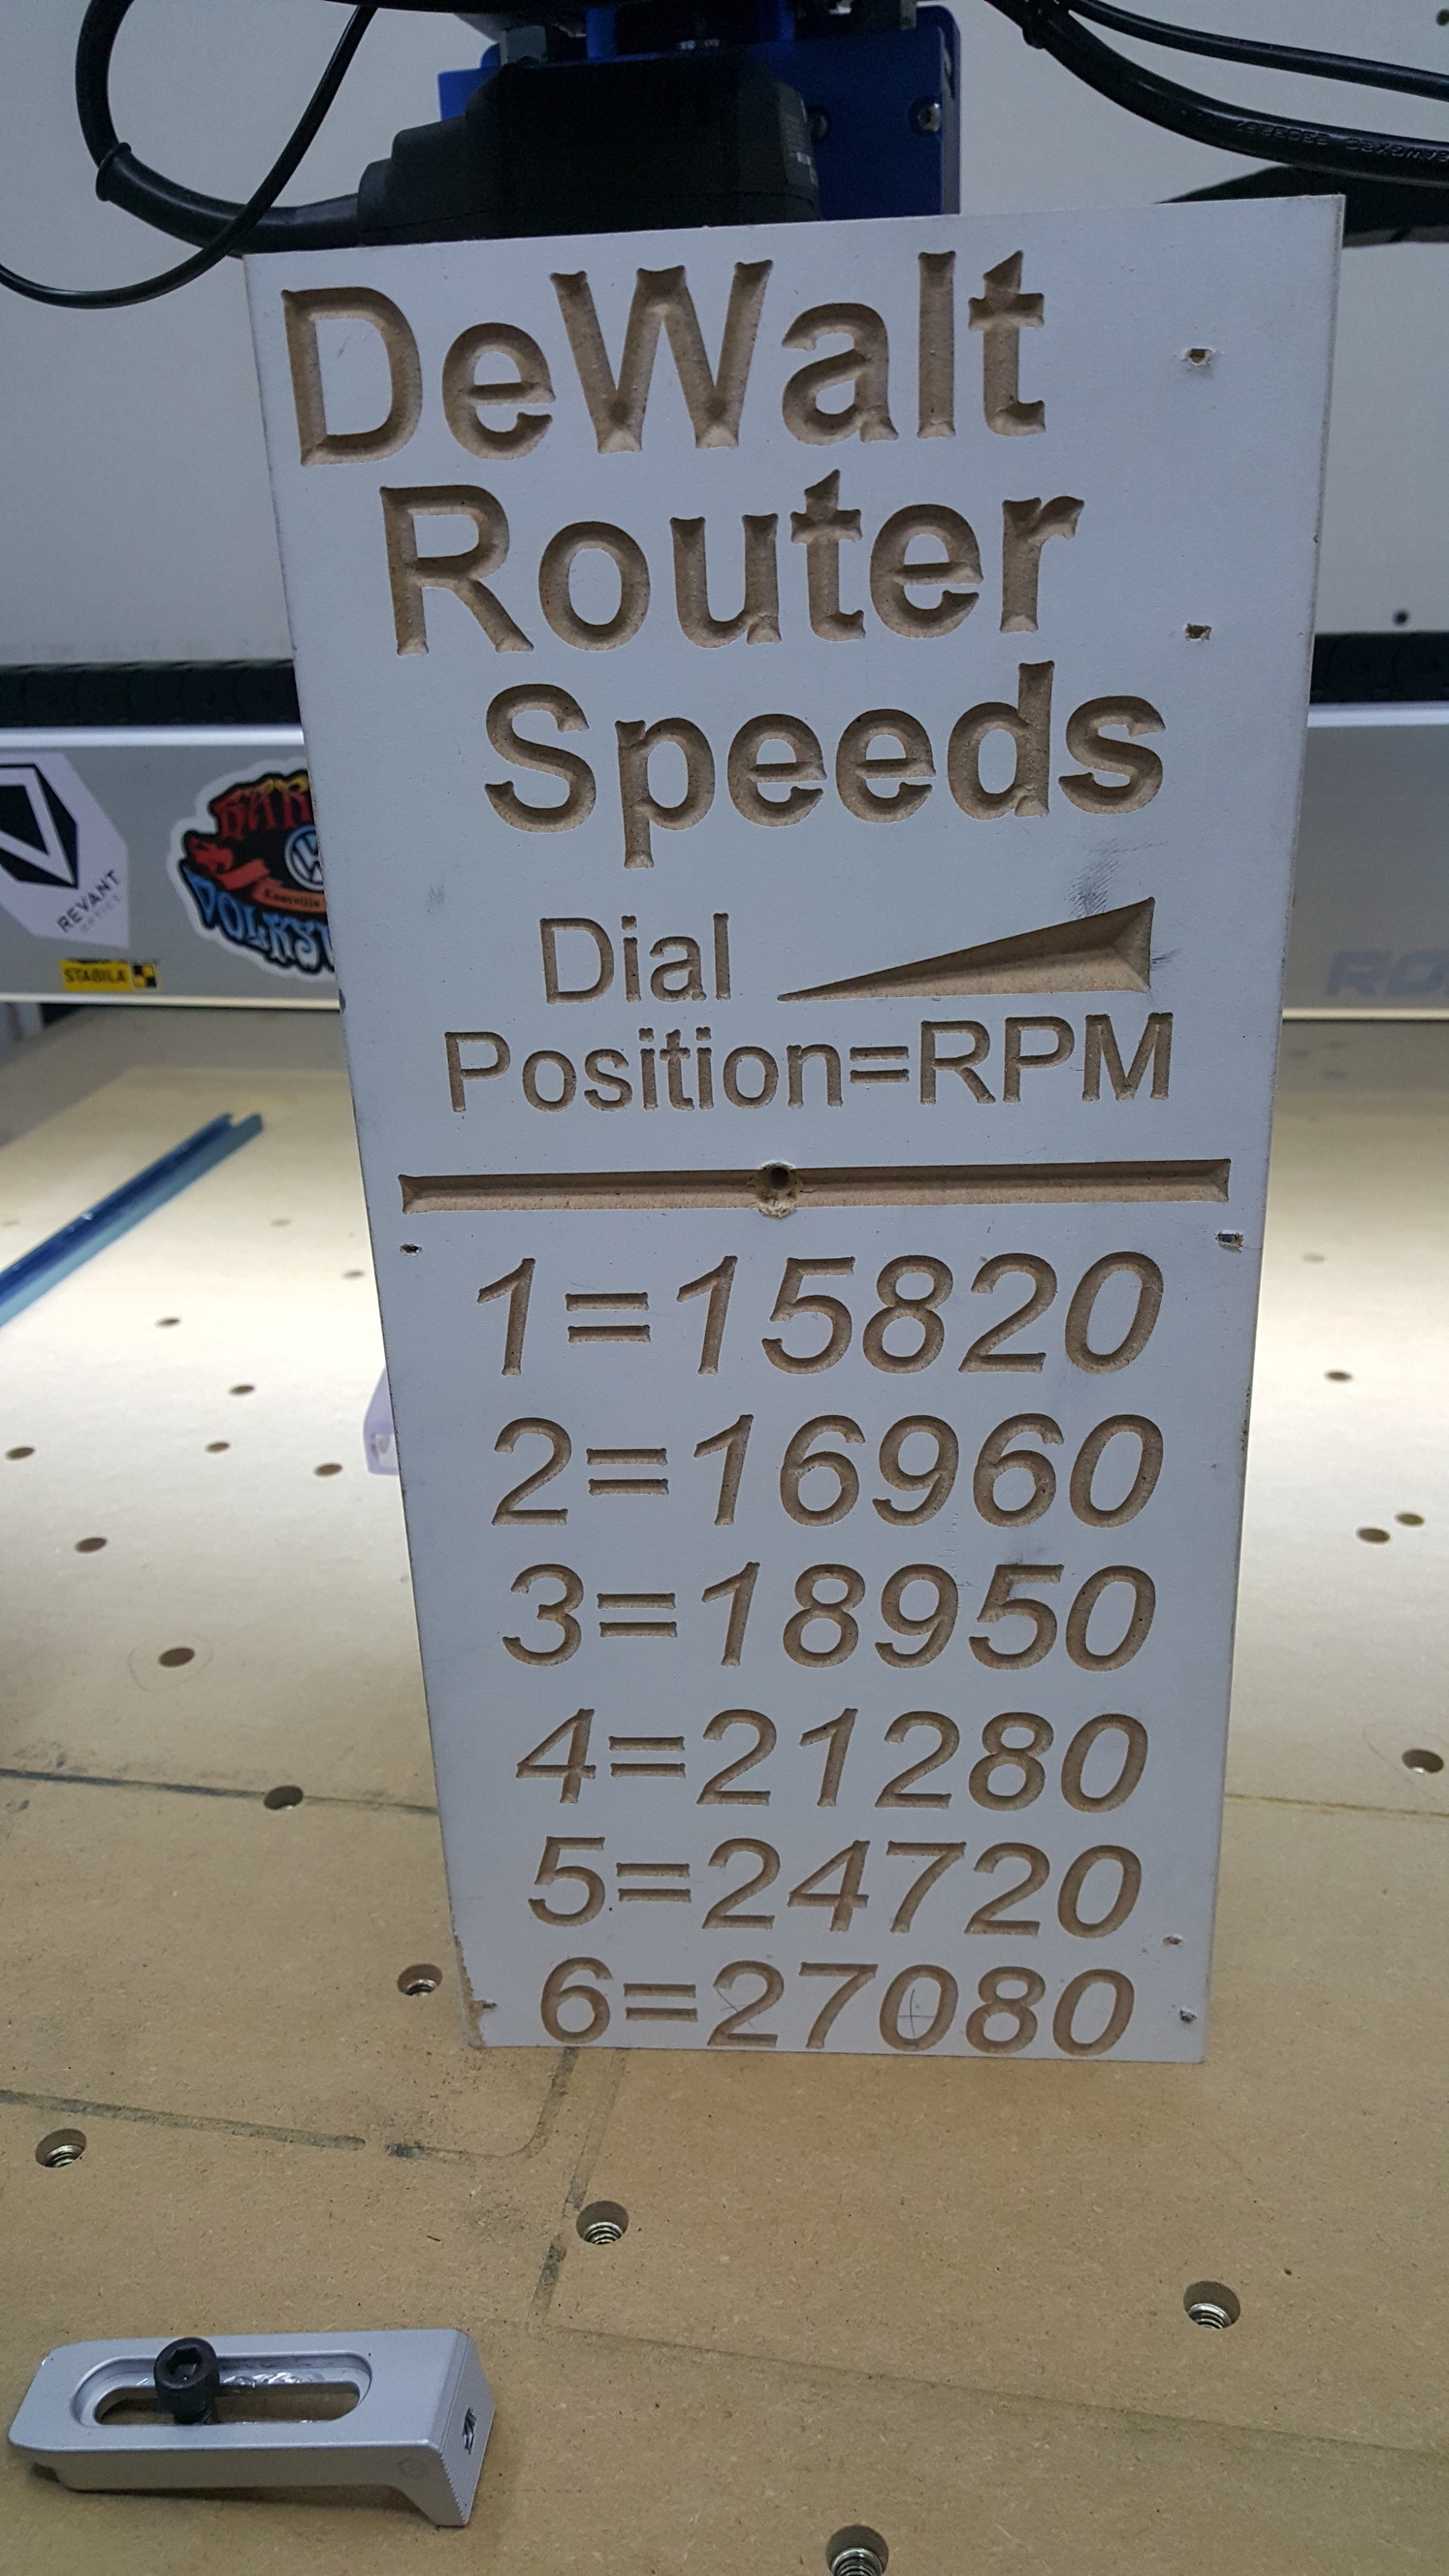
On a side note, the Carbide Compact Router is the exact opposite of the Dewalt 611. Let me explain… the 611 looks and feels very nice in hand and you can tell a lot of r&d went into that part of the design. After running one for the better part of a year, I have come to the conclusion that the 611 has fallen prey to that “all show, no go” type of design that uses cheap internals and lower grade manufacturing on moving parts. It resulted in a router that is not only loud, but menacingly so when the bearings very quickly start to degrade. It also had an unacceptable amount of slop in the drive shaft that I could not remedy by replacing it with a new one. 3 dif routers, same stupid issue that caused more than a few headaches and hoops that had to be jumped through to get consistent results. The Carbide compact router is nice in hand, but it is a very “no frills” generic design that doesnt exude as much of that “high end” feel as the Dewalt. But when you turn on the CCR you can immediately tell the difference in the internals and moving parts by the sound, even more so when you crank up the rpm and start chewing through stock. It is not only quieter, (literally near half the volume of the Dewalt at 20k rpm) but the lack of “play” in the internals immediately produced a better cut (even before properly tramming my setup). I am so glad I made the switch.
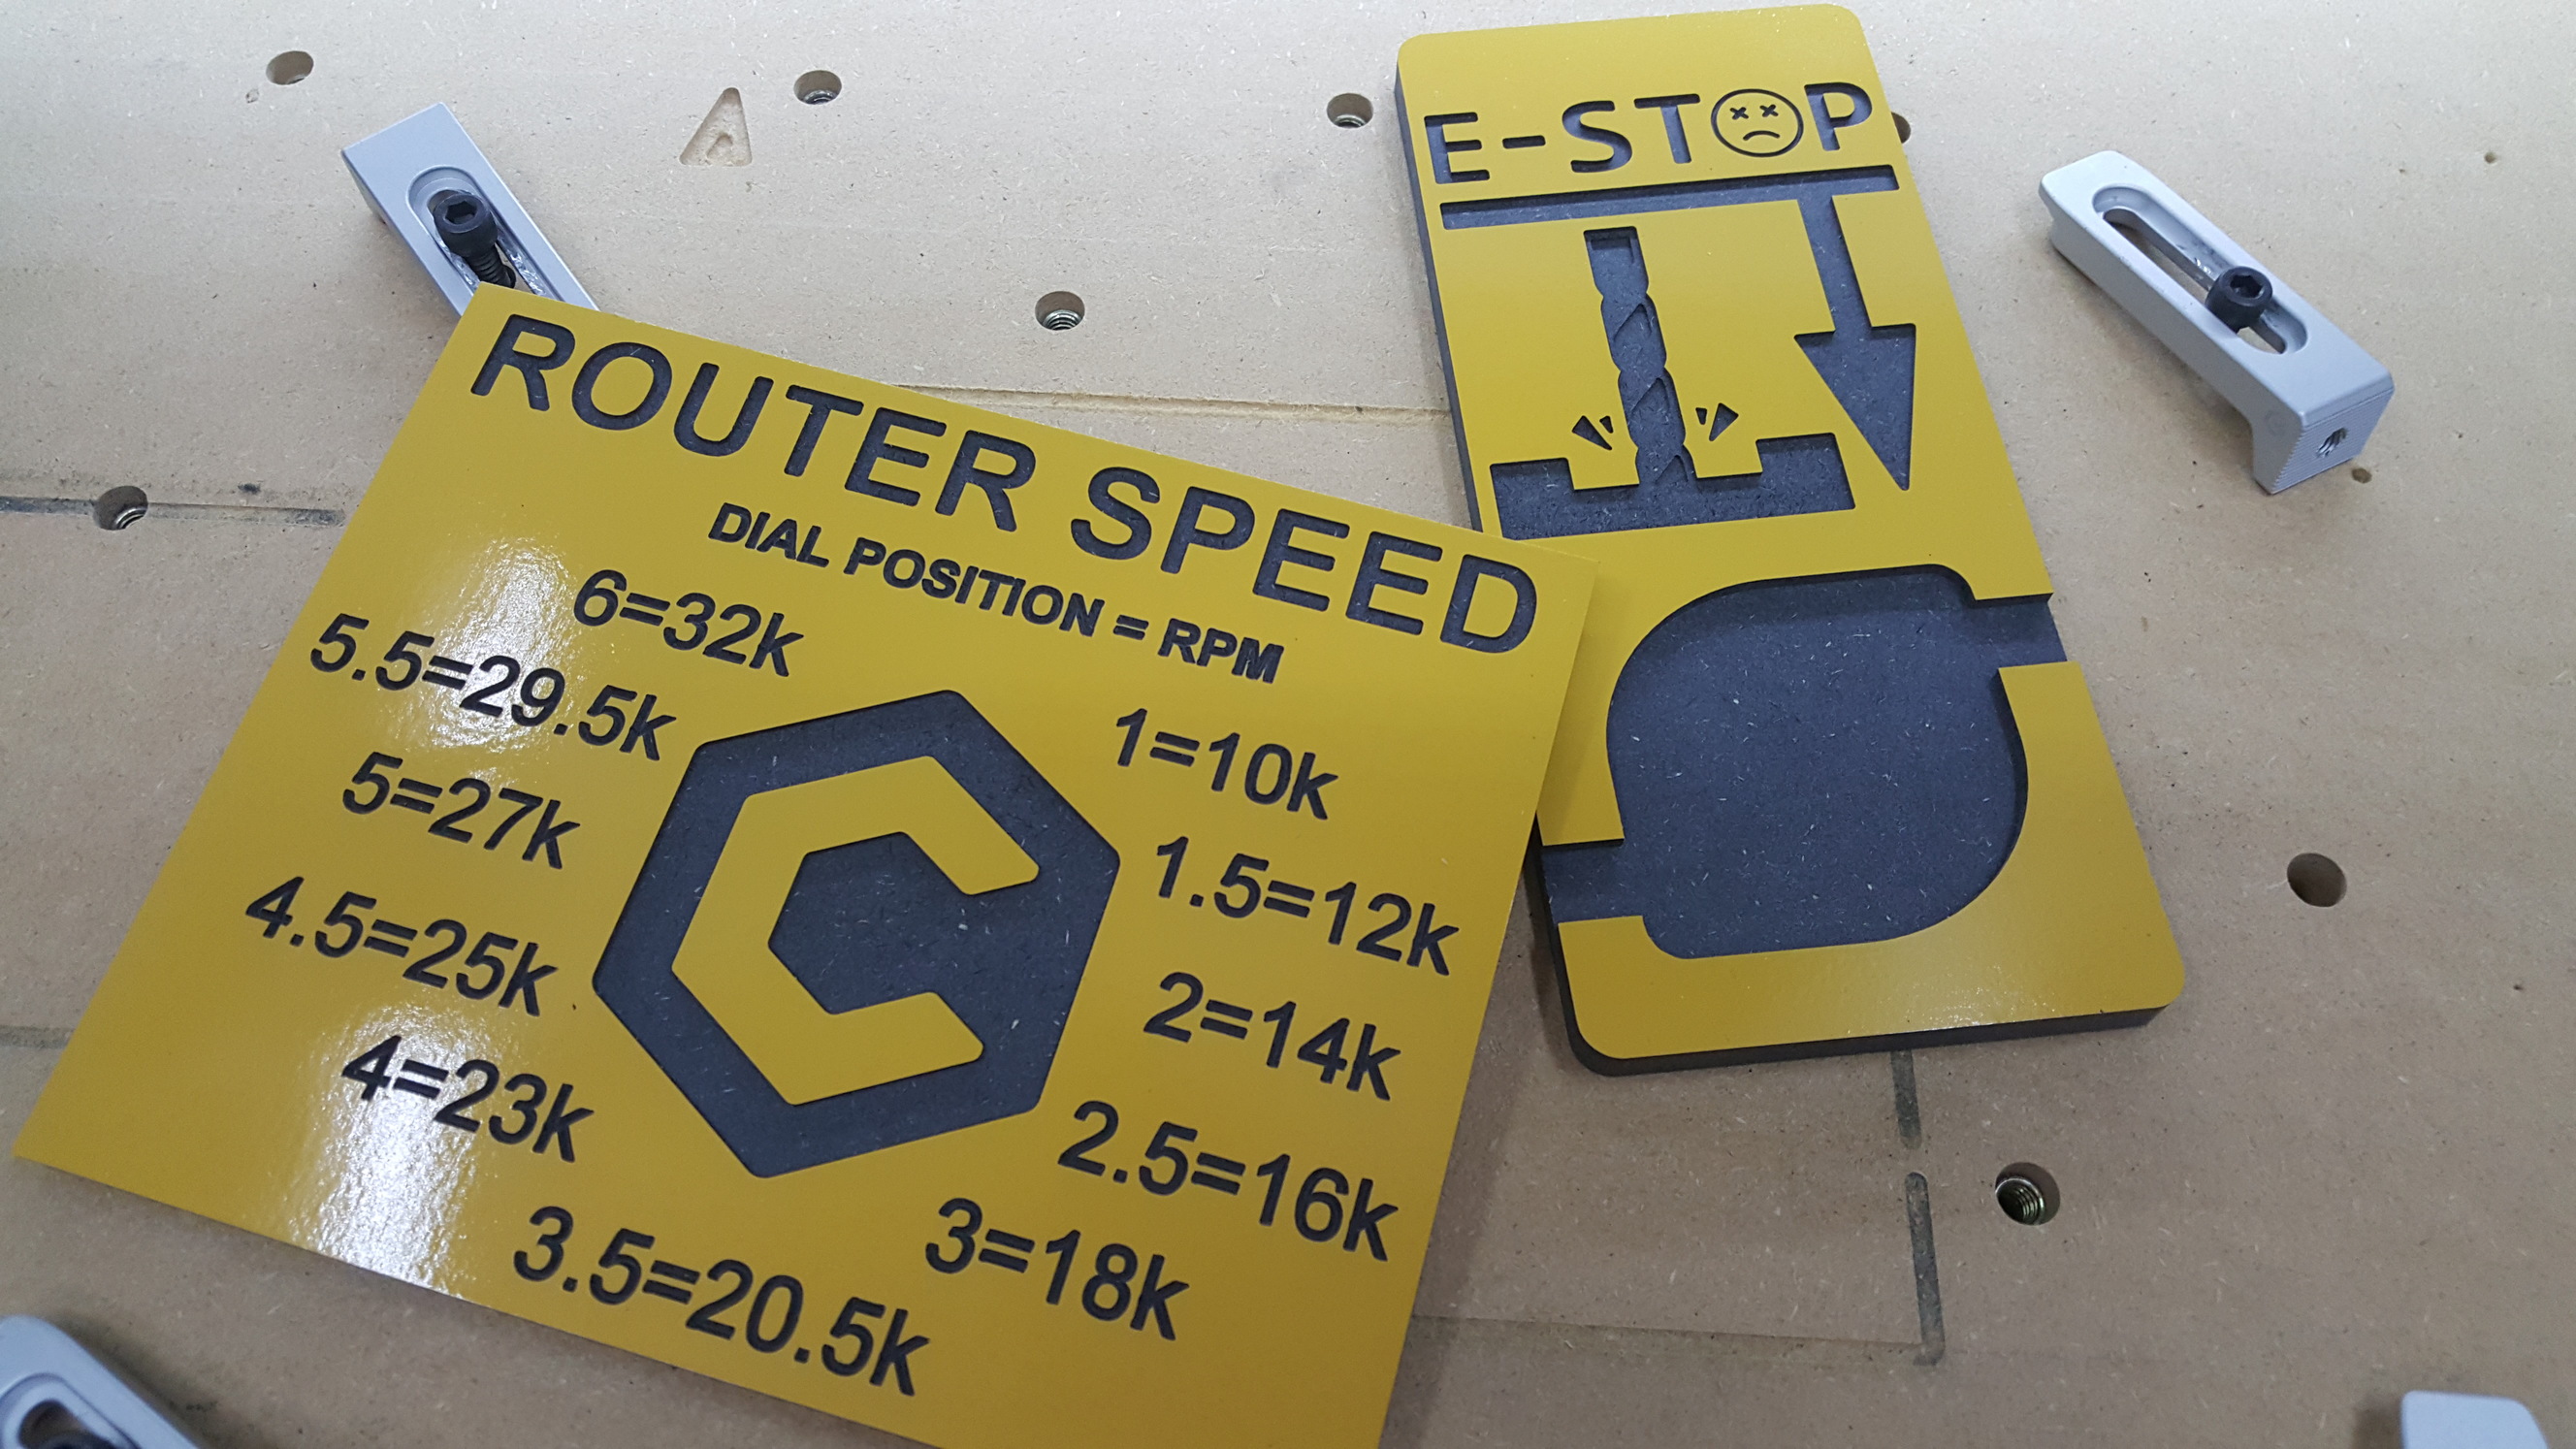
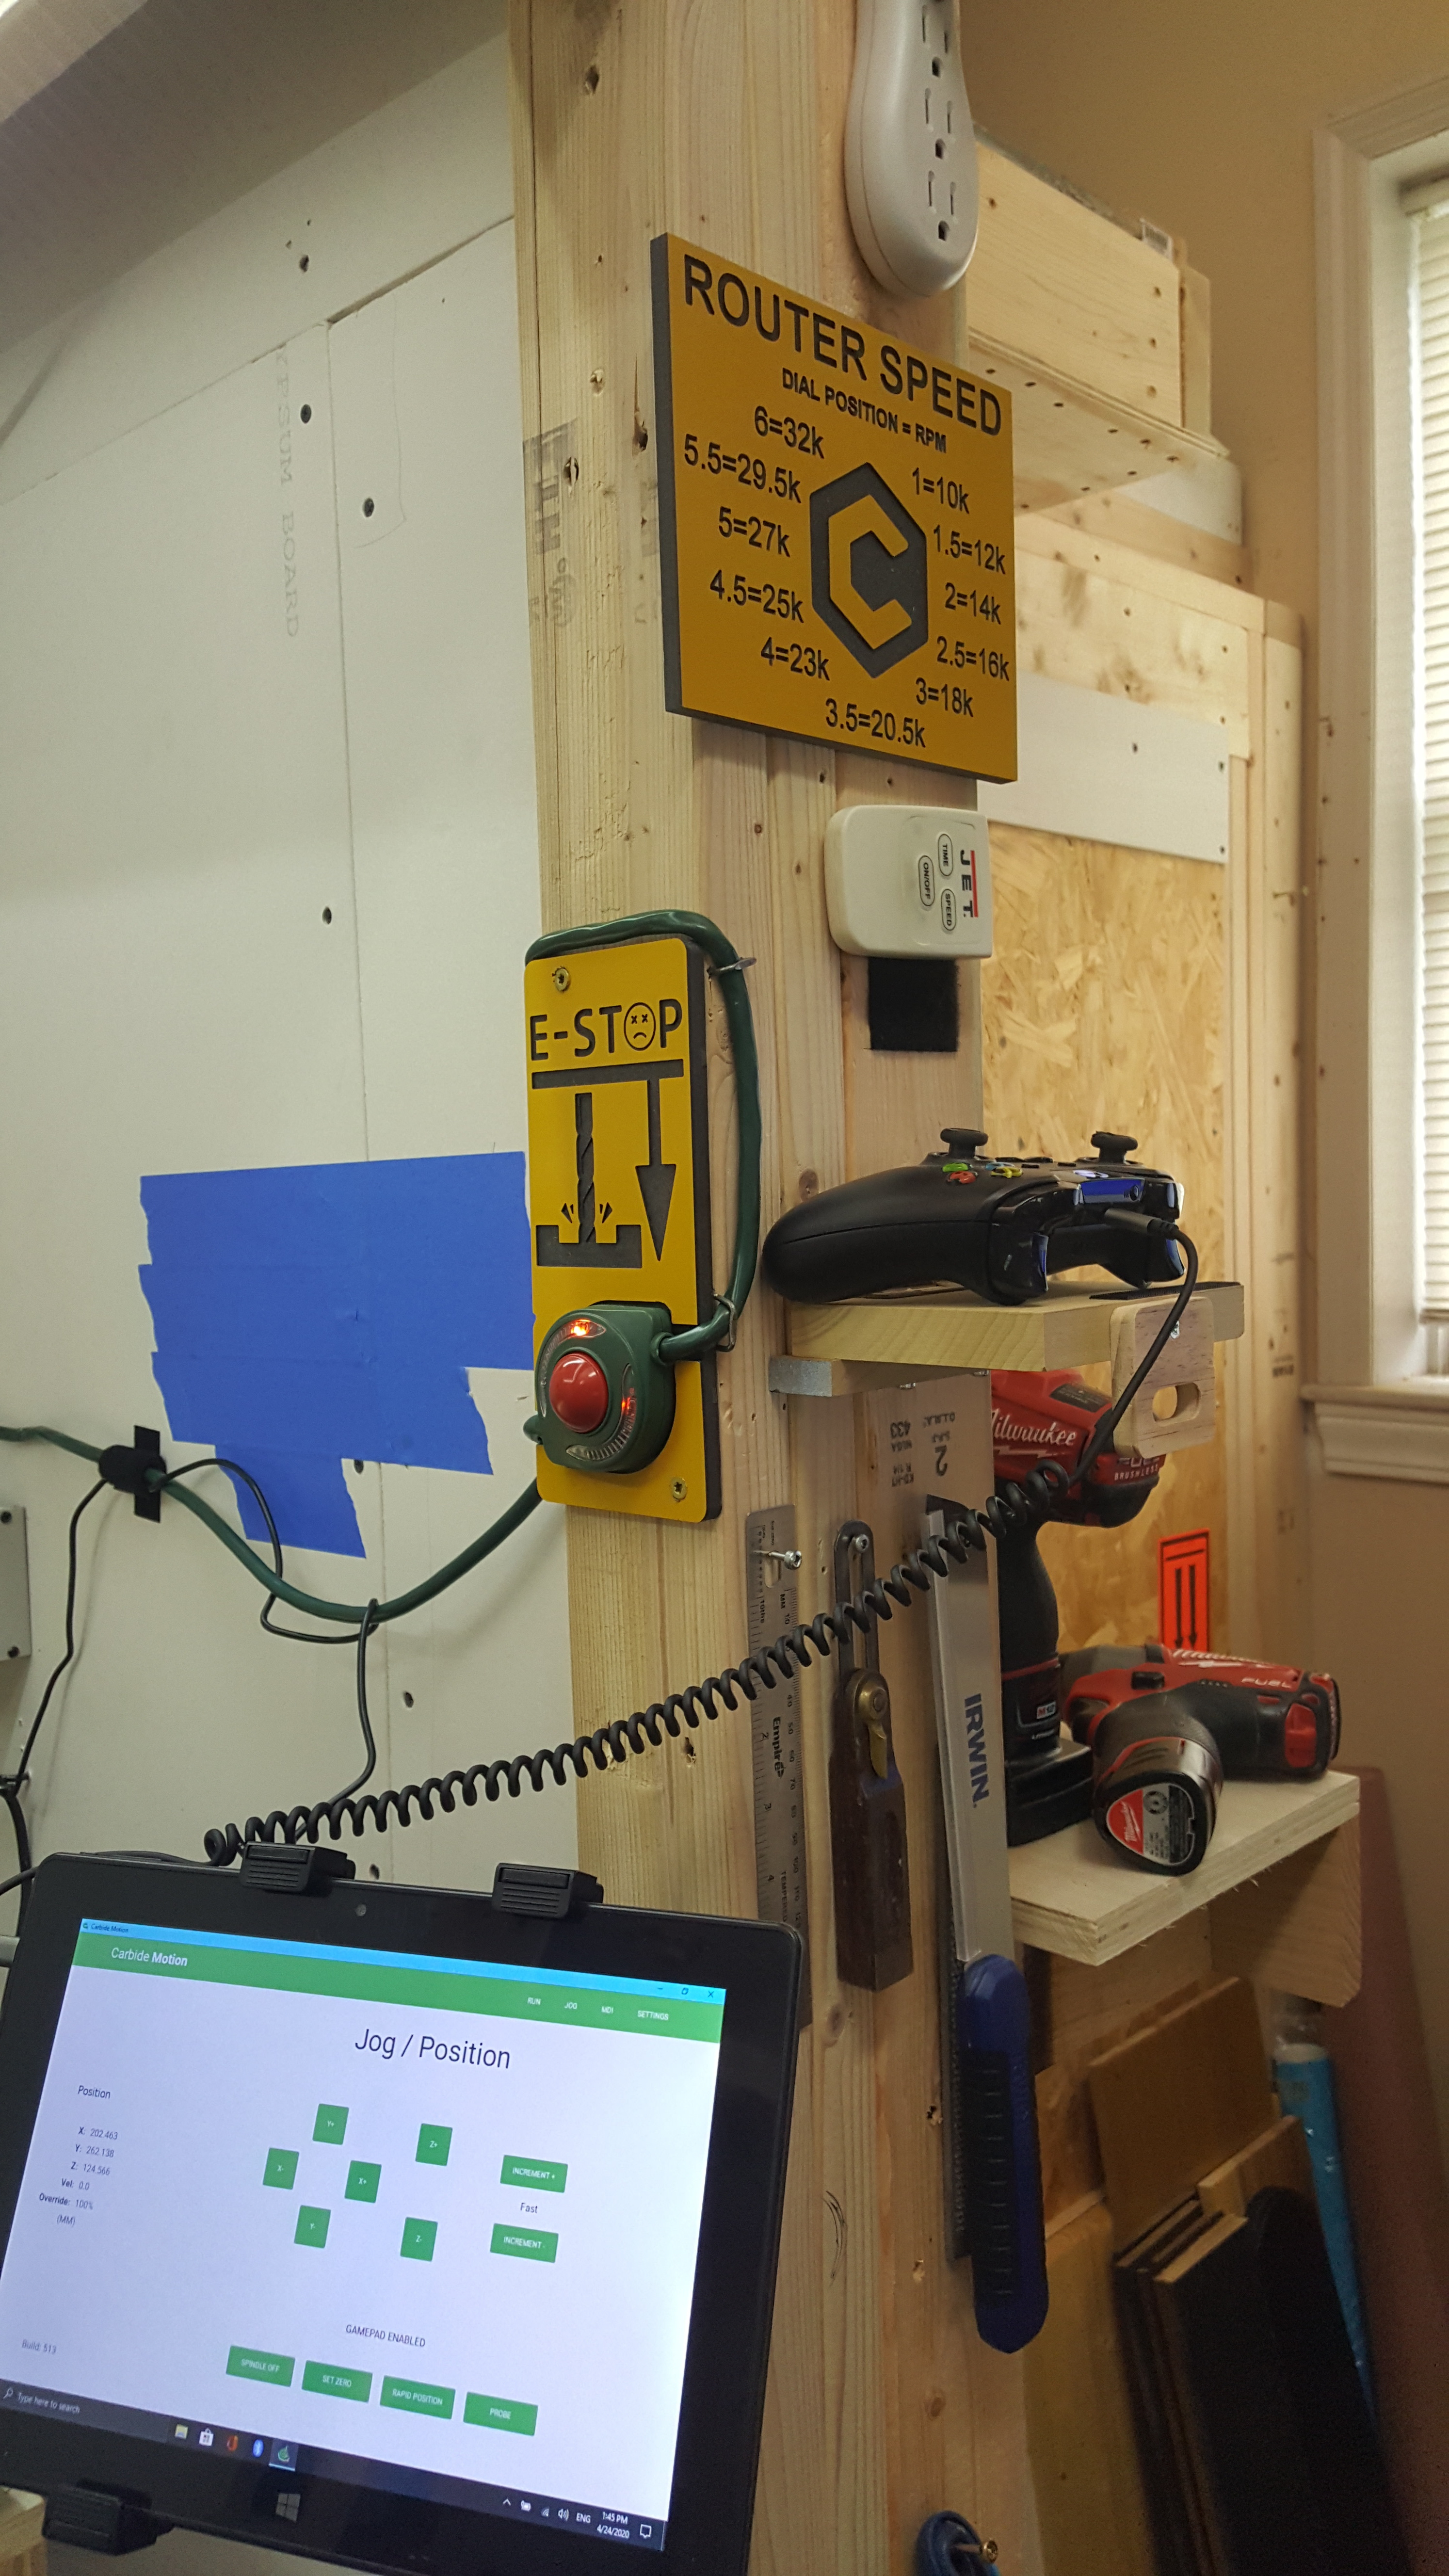
Happy cutting everyone, and most importantly, stay safe! I’ll post the files for the e-stop and CCR signs later today if anybody is interested.
8 Likes
Yeah, I was quite taken aback when it was mentioned that the bearings of the DeWalt are housed in plastic.
1 Like
Id like to make the CCR sign. I have a laminated piece of paper now, this would be much better!