A study of joinery

This type of joinery would be great to make an overhang knee to machine these awesome joints.

Ref:

2 Likes

Yeah, I put up a simpler design on Cutrocket:

2 Likes

Increase the stock size to 8" wide, flip and re-arrange things a bit to better match the image and preview:

Draw in geometry to trim off the cut geometry on the left:

Since the other geometry is already the correct size/orientation, duplicate it and drag the duplicate into alignment:

and then align with the other geometry:

Select each pair and Boolean Intersect:

1 Like

Going into the Toolpath pane and adjusting the selections we get:

2 Likes

Nice,

For people interested in the history of how and why the Japanese got so good at woodwork I can recommend the art of japanese joinery.

It’s not just their culture of respect for the world and natural things. Apparently Japan also did not have the natural materials easily available to build very much in stone and so the effort that Europeans put into masonry (see the Greeks and Romans) the Japanese put into perfecting joinery.

3 Likes

Figure 29b requires 3 pieces, so extend the stock area, duplicate things as necessary, and draw in a square the size of the central piece:

and align it with the original:

and set the size appropriately:

Duplicate it and set the size to be wide enough to cut and drag the duplicate into alignment:

and then duplicate the rounding geometry, rotate and drag it into alignment:

then Boolean Subtract it:

Duplicate, horizontal mirror:

and drag into alignment:

1 Like

Another consideration is the frequency of earthquakes — wooden structures would tend to give and be safer during them.

2 Likes

Draw in a square and set its width so that it will cut across the central section (at a different depth than the other cuts — merging a copy of this in with a replica of the other geometry is left as an exercise for the reader):

Adjust the size and eliminate unnecessary duplicates and rotate so as to get a good preview:

(note that the part on the right will need to be cut twice)

1 Like

The final joint requires 3 parts, so extend things again and make suitable rectangles:

Dupe the central square, set its height to a suitably large value, set the corner radius and drag into alignment:

Select the square which defines the end of the stock and offset by endmill radius

Boolean subtract the two aligned rectangles:

1 Like

Perform a similar set of placements and cuts for the other end cut:

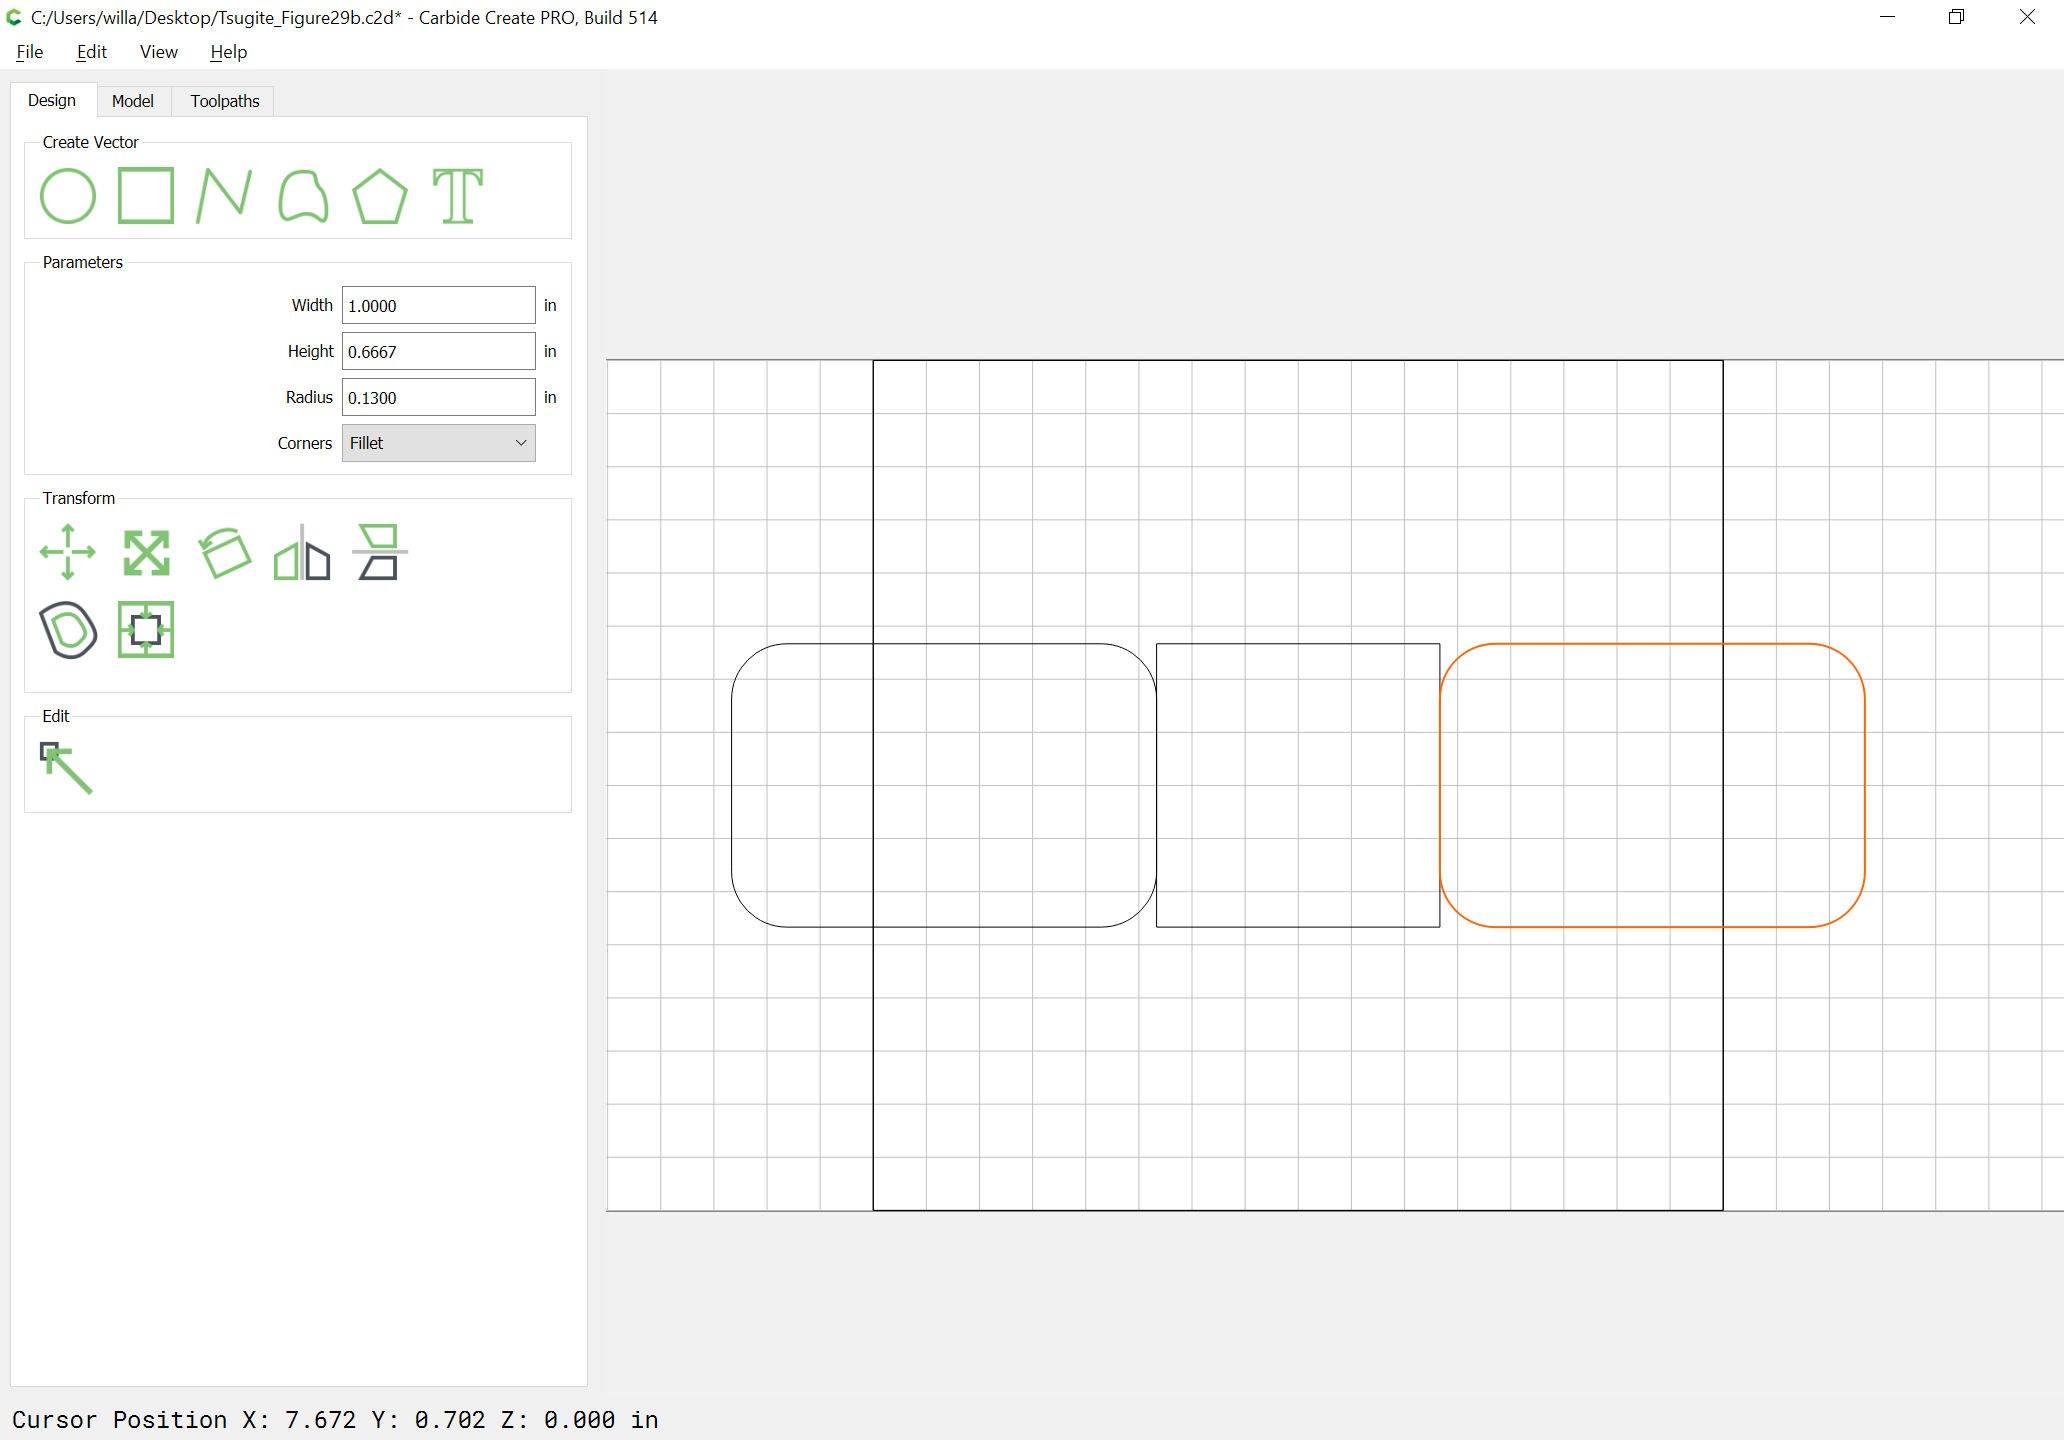
For the center part there will be two layers. For the first, drag in radiused rectangles and position them appropriately:

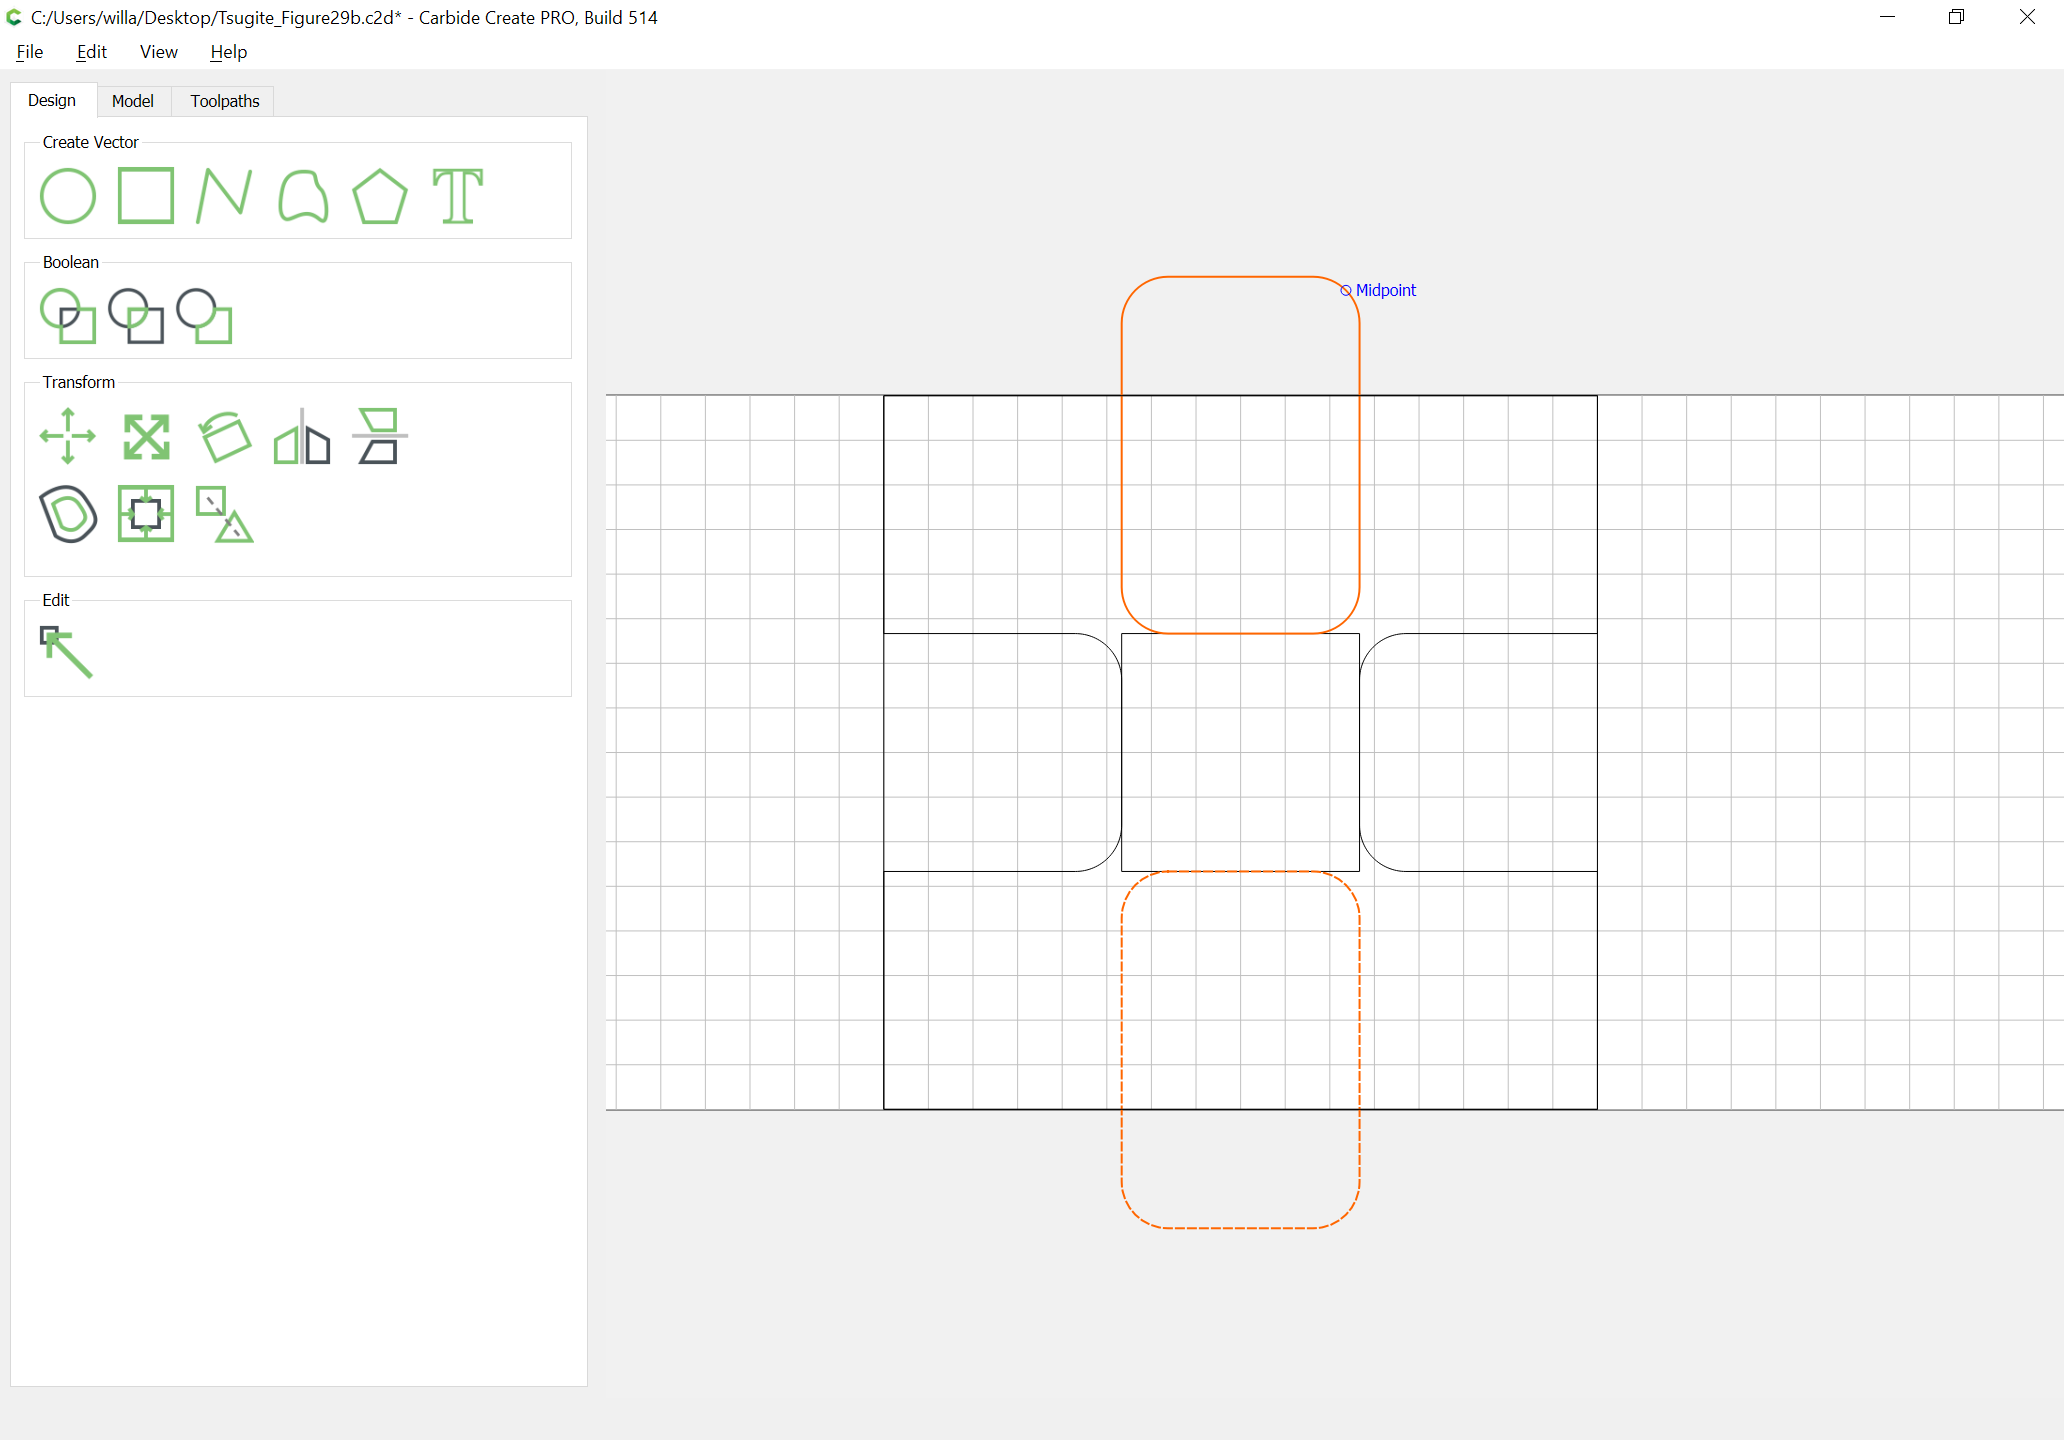
Then Boolean subtract from the square:

Placed radiused rectangles to finish the cuts:

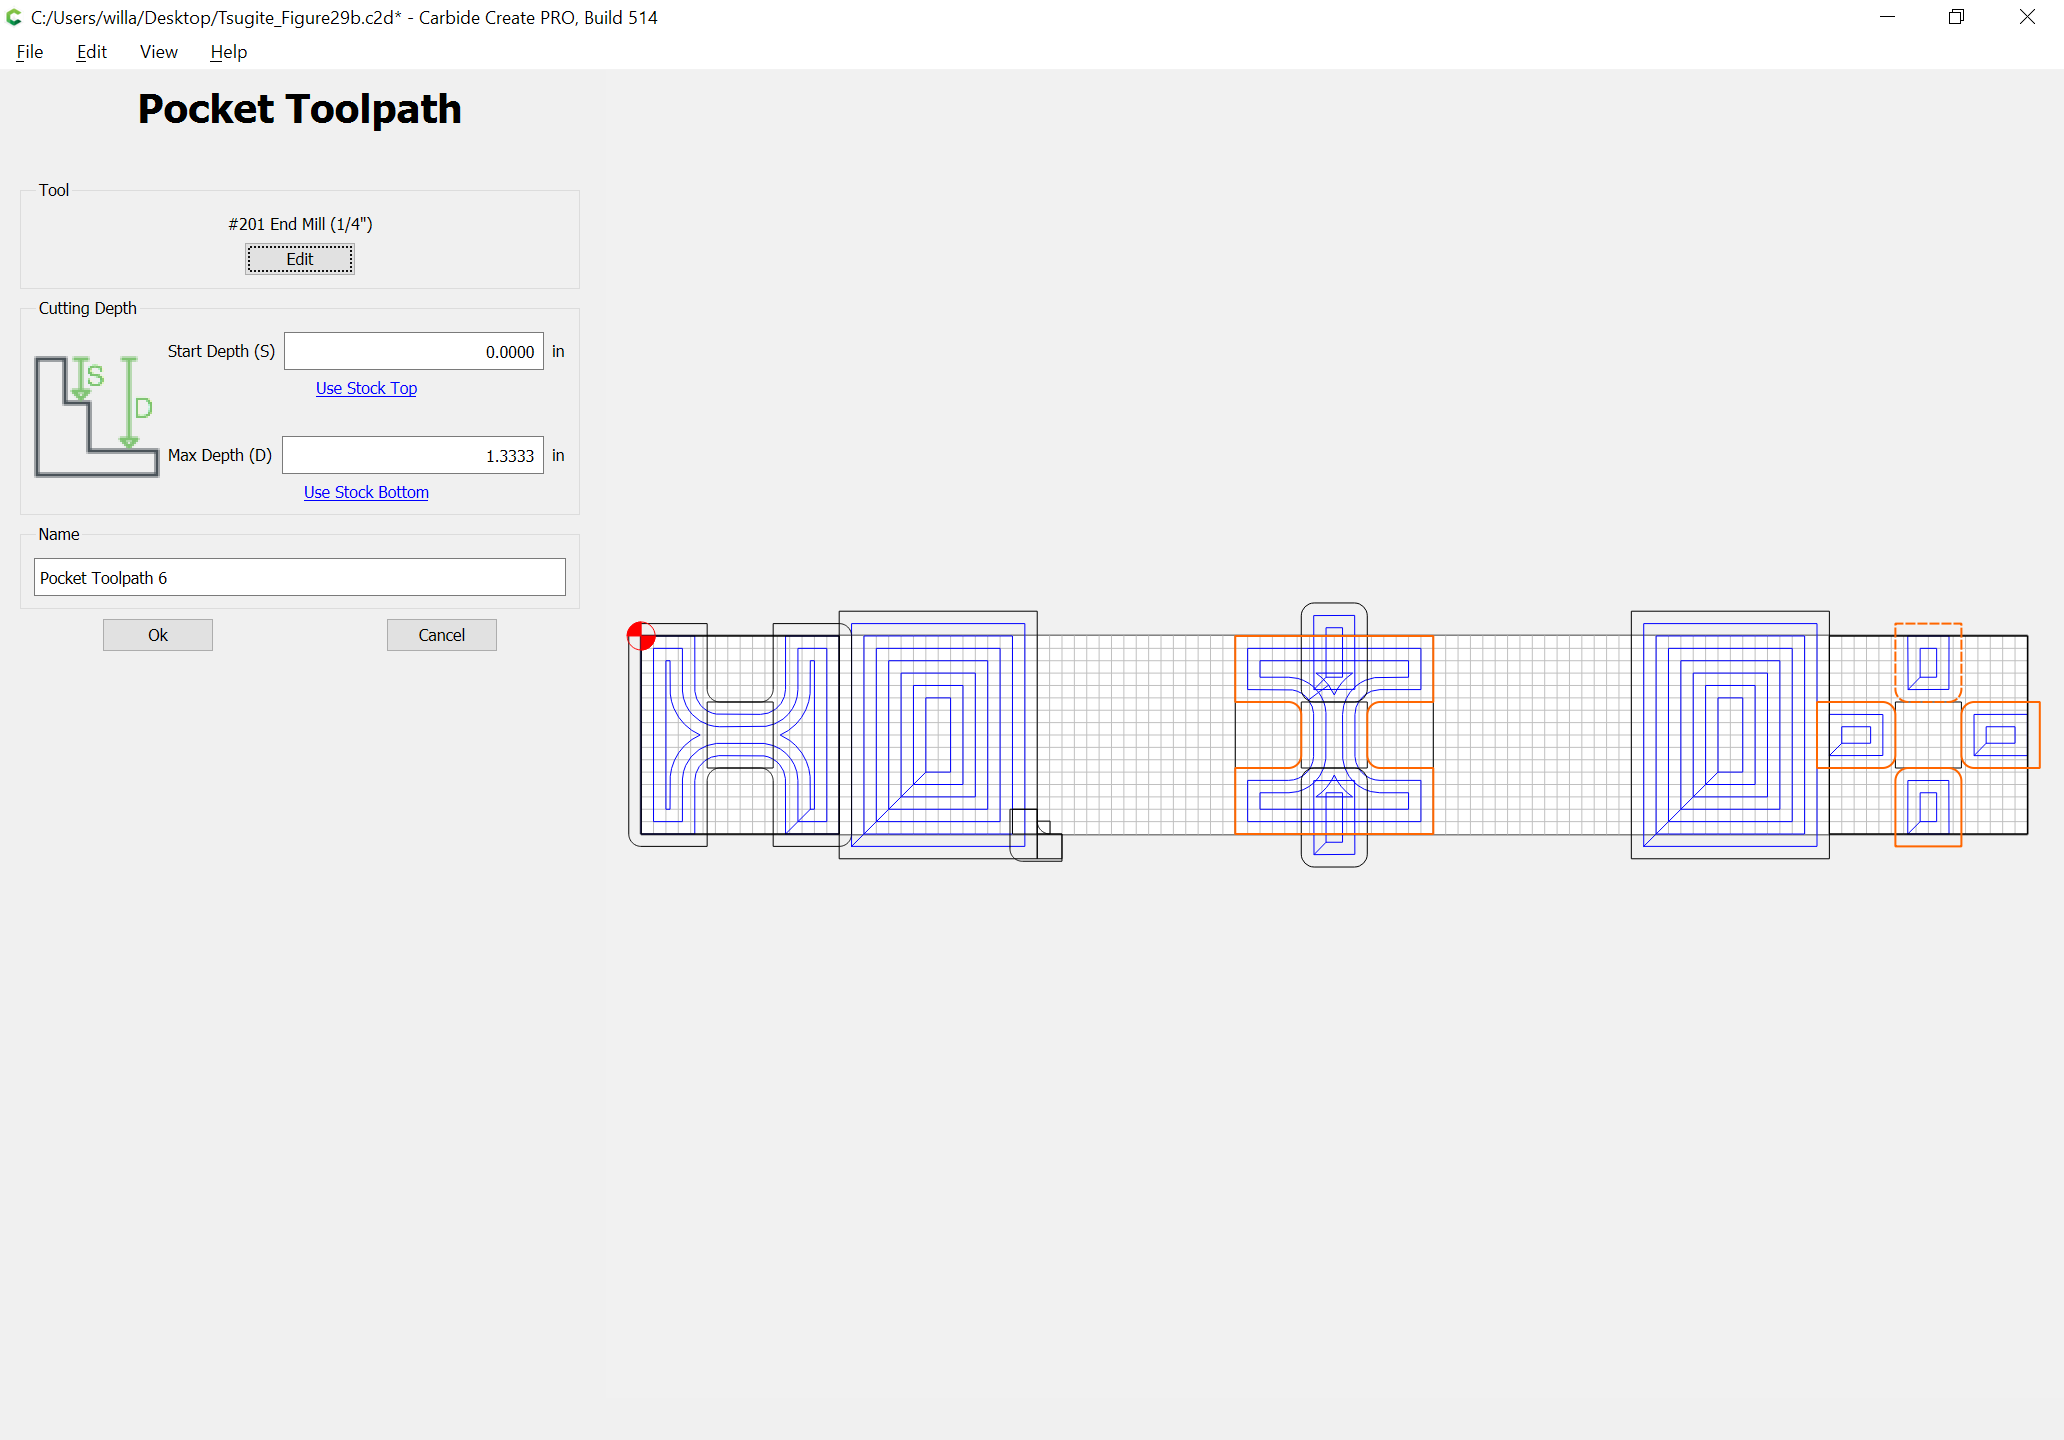
and then set up suitable toolpaths.

Note that it will be necessary to set the central part cut up in layers, so the first is 2/3rds the way through:

The first preview shows the end pieces well:

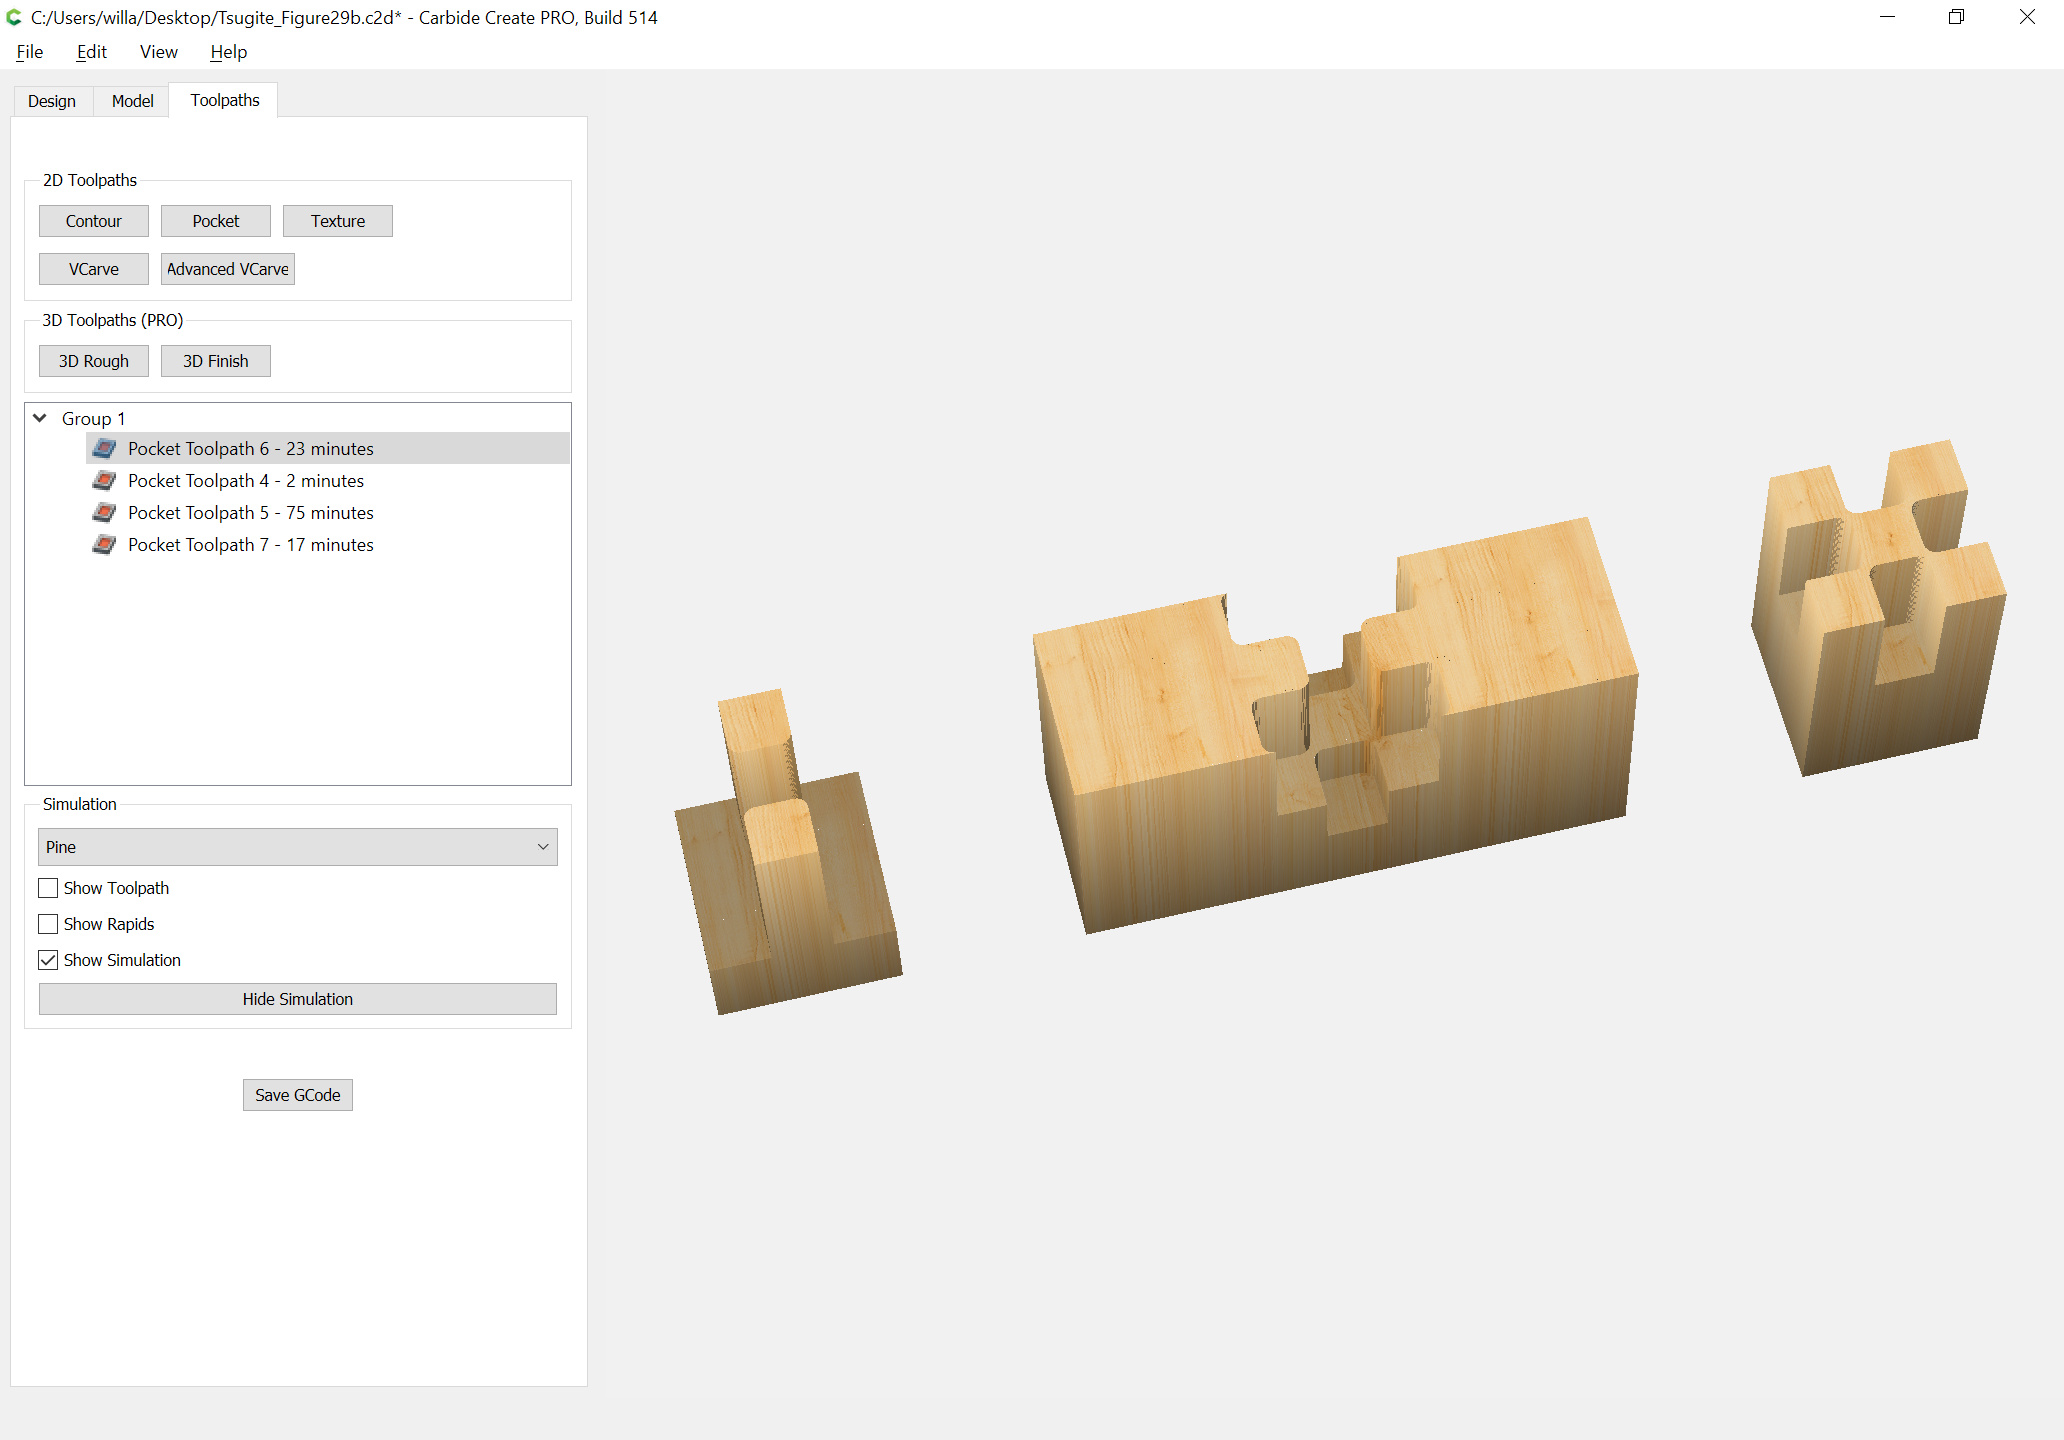
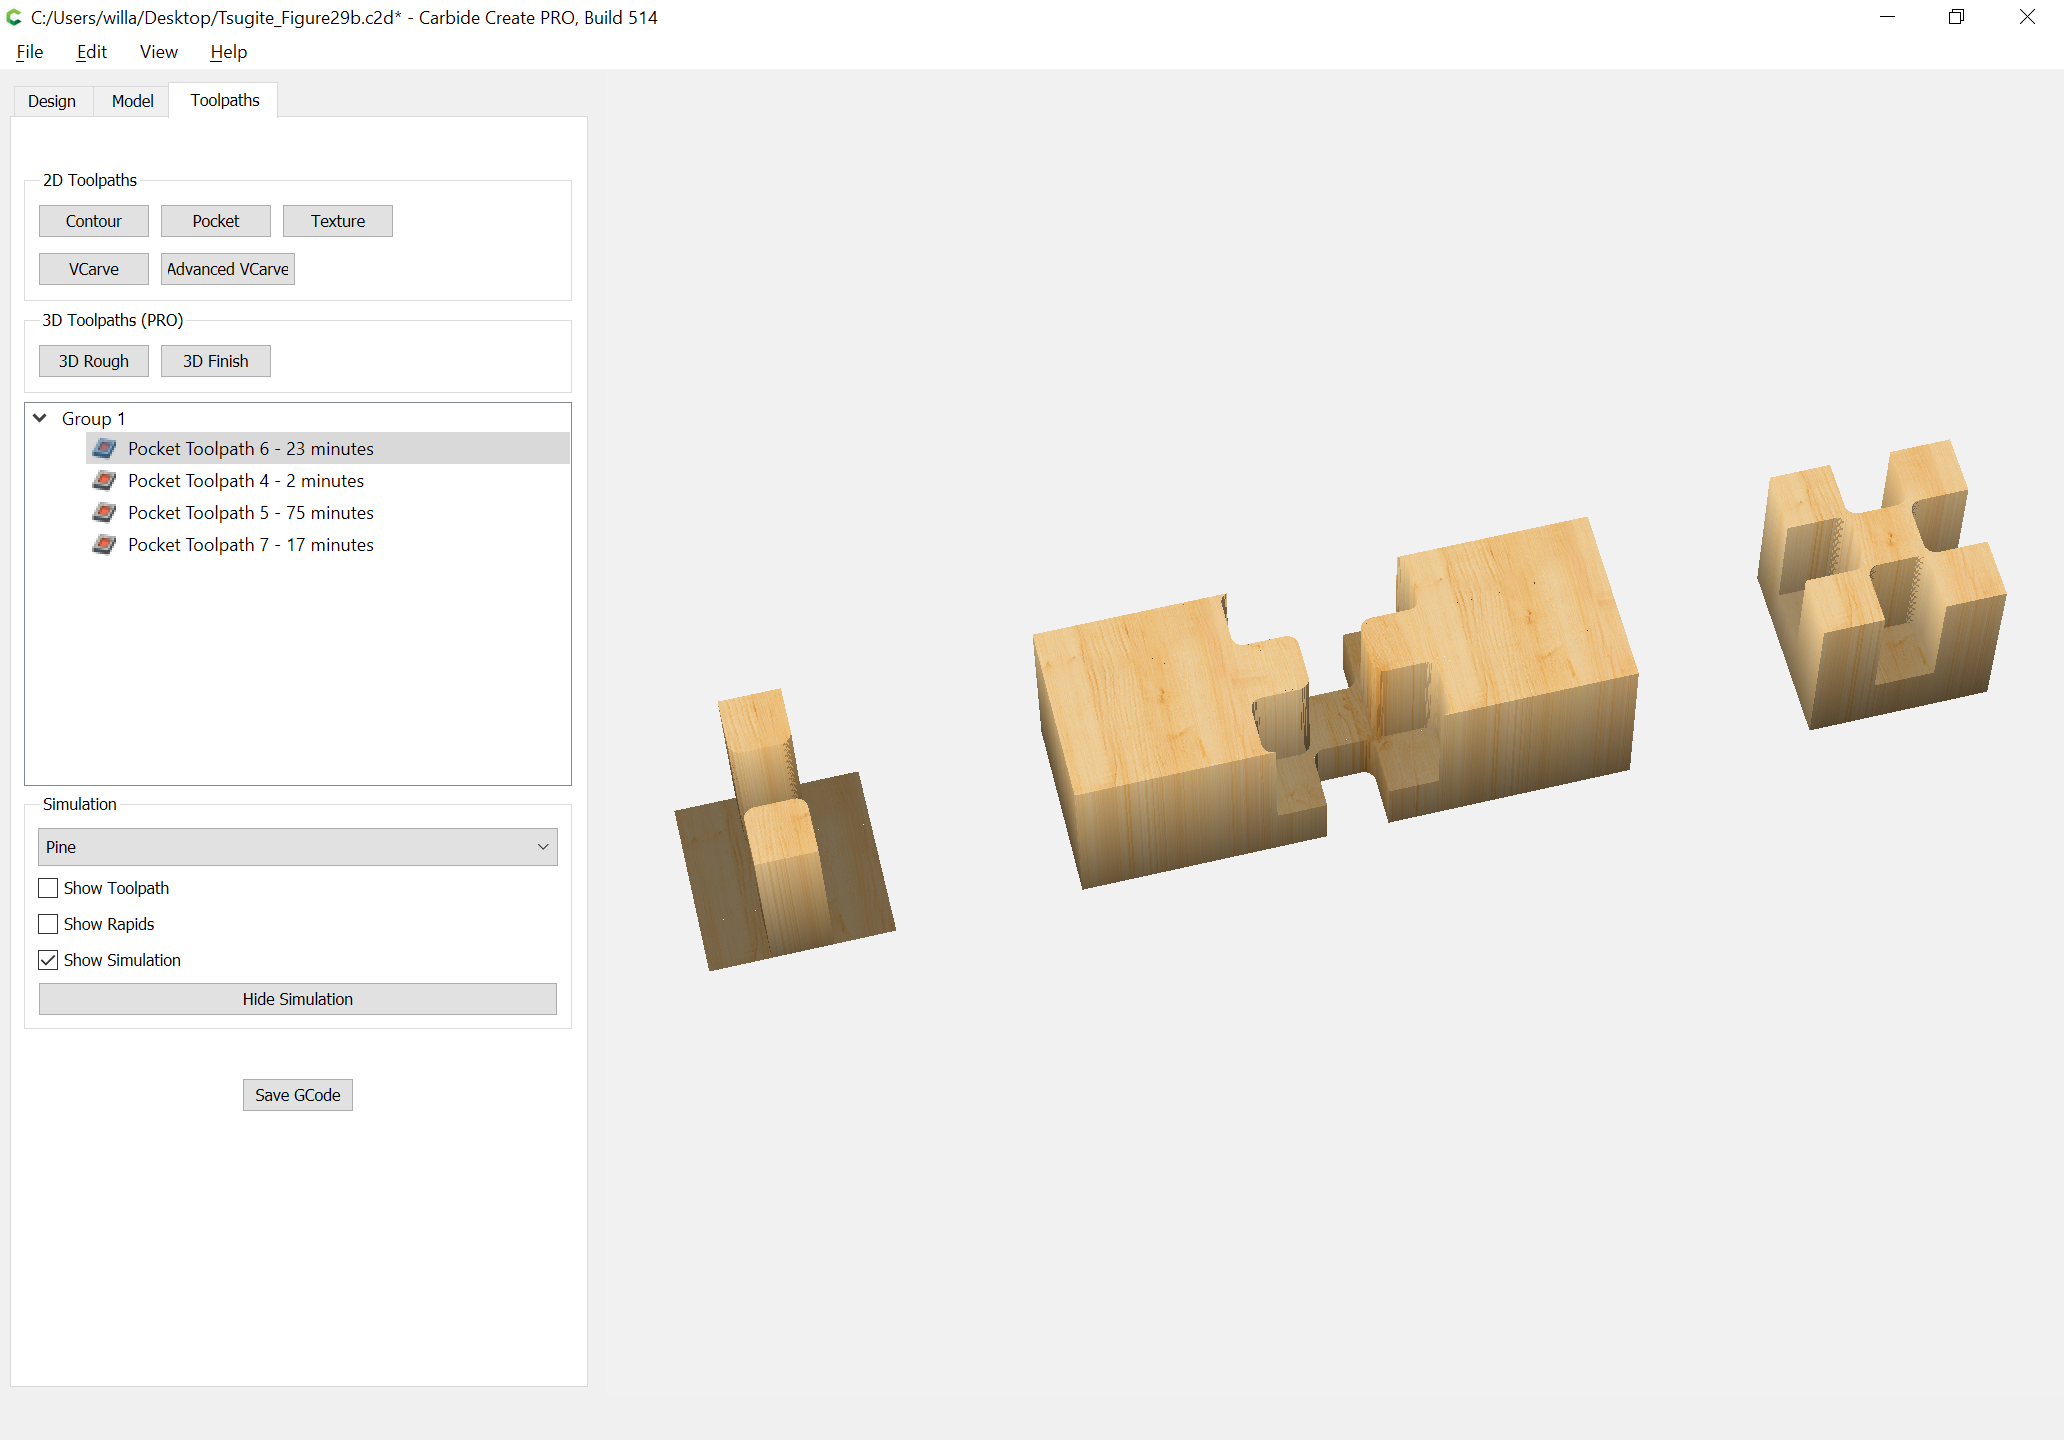
Here is one with adjusted stock thickness to show the central piece:

In case anyone wants the files:

Tsugite_Figure28.c2d (119.7 KB) Tsugite_Figure29a.c2d (197.0 KB) Tsugite_Figure29b.c2d (296.5 KB)

2 Likes

I found it a really interesting read, there was lots I didn’t know about Japanese history and their development of carpentry skills in there. Be careful though, you may end up buying Japaense planes and chisels and calling them dogu it could become an expensive habit :wink:

There’s not much about how the joints are actually made, for that I’d watch somebody like Dorian Bracht

He does introduce the major joint types and explain where they are used.

The other book, the genius of japanese carpentry, goes into a lot more detail about how a few specific buildings were built with photographs of the key construction joints as they’re being made.

Enjoy your reading.

2 Likes

My hat off to you @WillAdams, very good.

Funny this comes as I’m starting to read up on vertical work holding and CNC joinery.

Jay Bates has a great video on YouTube around templates for these jobs, the focus is more on mortise and tenon, and dovetailing but very applicable to Japanese joints

Mortise and tenon should be quite simple, and we’ve done dovetails:

That said, I find the vertical work holding fussy and annoying since it requires at a minimum three setups:

  • one to cut features and cut to length
  • one for a pair of corners cutting four boards at once
  • one for a the other pair of corners cutting the other ends of the four boards

I’ve got a couple of additional joinery techniques to try out which will hopefully be a bit more efficient and expedient — just have to find the machine time.

Rich,
Nice knee! I just made a similar one from scrap oak but have T-tracks instead of a fixed grid.
I am thinking about a way to extend the reach beyond 2 inches.

1 Like

Pictures or it didn’t happen…

Very funny. You made me go down to the shop to come up with some proof.
Okay, here is my initial version made from an old oak bed I found on the side of the road. Recycled wood is great for prototypes. The finger joints shown here are a quick test.

BTW . . . I was at a Maker Faire several years ago and you were at the Carbide 3D booth and talking to you convinced me to try this hobby. Edward Ford had just given a talk there and it seemed somewhat legitimate. So I bought a Shapeoko, Fun stuff. I am not a machinist or woodworker but am starting to feel like one.

2 Likes

This topic was automatically closed after 30 days. New replies are no longer allowed.

For mortise and tenon see:

https://willadams.gitbook.io/design-into-3d/mortise-and-tenon-joinery