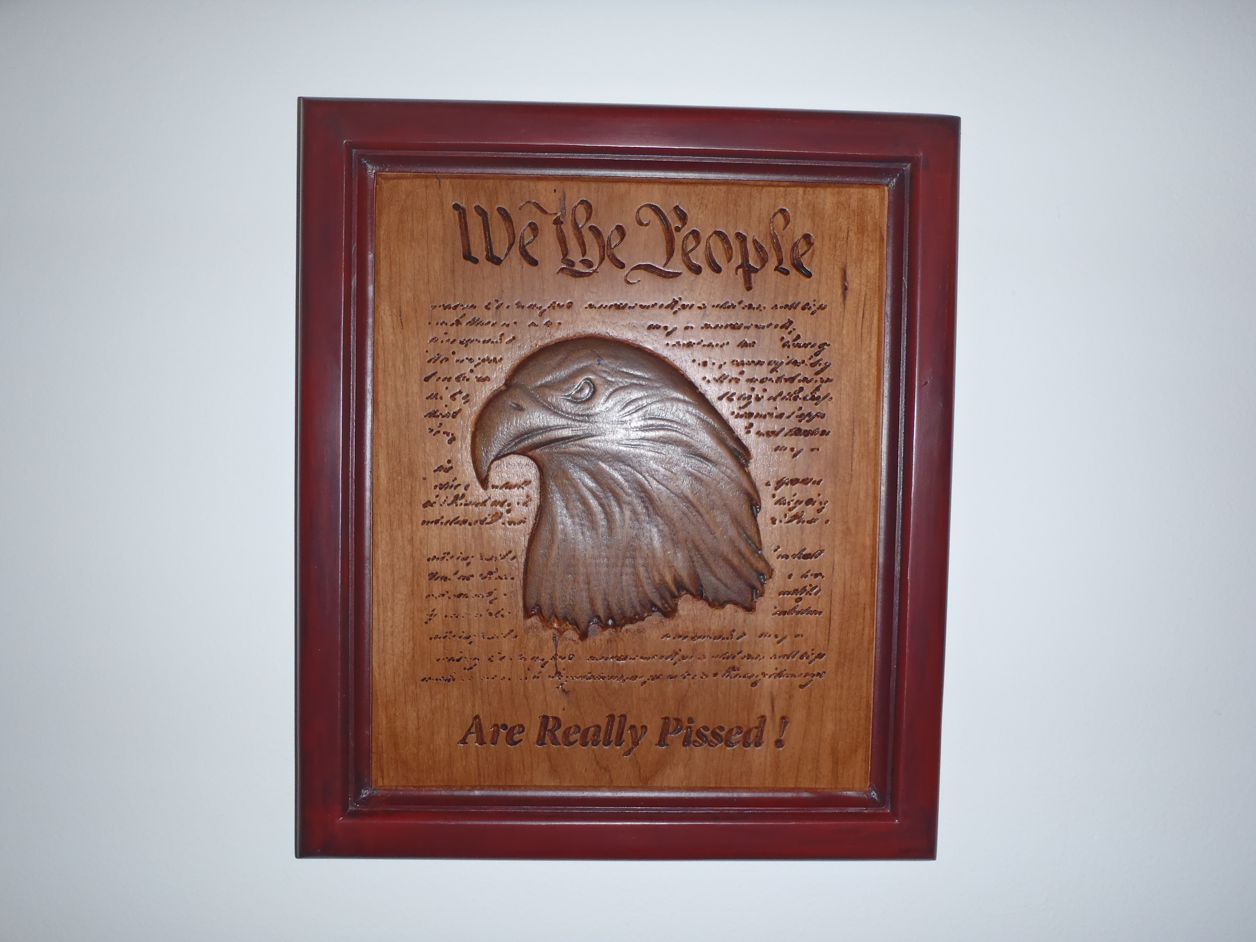
While I’ve had my Shapeoko 3 since June of 2016, I’ve always been somewhat disappointed in the accuracy and repeatability of it. I installed the new Z axis plate which helped a lot with the stability of the router, however the spindle was about 0.006 out of square. I removed the router mount and applied copper foil in layers to the bottom section of the mount where it contacted the Z axis plate. I got lucky. There was less than 0.001 out of square.
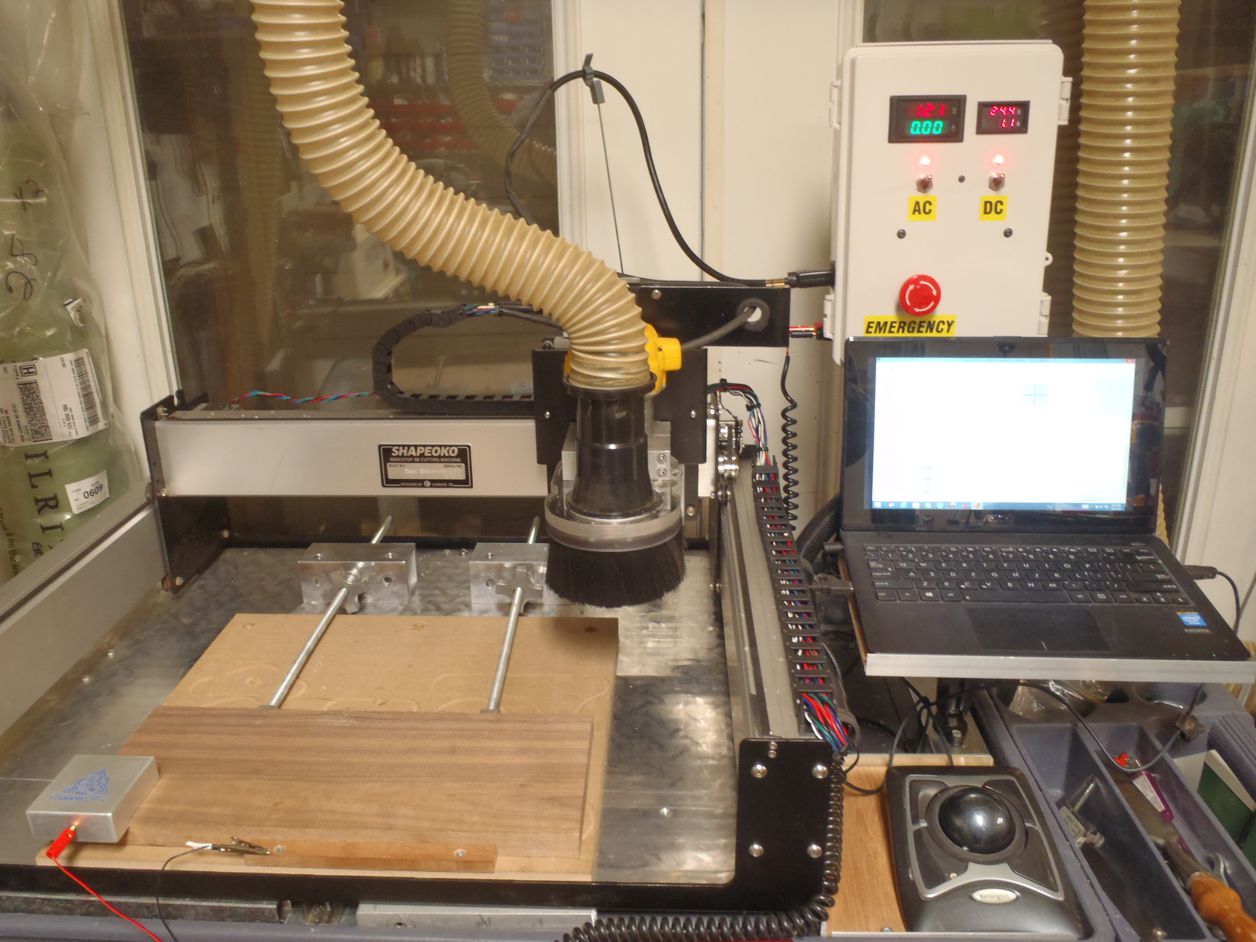
I had some leftover 1/4" diamond plate aluminum so I cut it to replace the MDF spoil board and, using the MDF boards as a template to drill the holes, I installed it on the machine (smooth side up), counter sinking the mounting bolts . While it was considerably better, I wanted more accuracy.
The cart I’m using is a standard item at Northern Tool. The open compartment was fine at all corners, all the way out 4" in the X and Y plane. Again, I had some leftover 2" square stock (1/4" walls) and made a perimeter frame as the base for the Shapeoko 3. I verified that it sat level in all directions and had enough support areas to maintain that configuration.
The cross bracing in both the X and Y directions that comes with the original Shapeoko 3 was flexing so badly that I installed a 1" piece of steel square stock that is bolted thru the diamond plate, the braces and the square stock. Once this was done, I measured my run out at .001" in all directions. I also added 1" aluminum square stock around the perimeter of the machine to support everything on the 2" square stock.
Realizing that the machine can only work in a roughly 16" x 16" area, I saw no reason to make a spoil board the entire size of the bed. I cut it to 16" wide by 17" tall. That way, when I surface the spoil board, I leave approximately a 1" ledge to butt my work stock against and the surfacing bit (1") cuts completely across the spoil board. The spoil board is mounted with counter sunk holes with 1/4 x 20 bolts that thread directly into the diamond plate. I also replaced the cap head screws that originally held the MDF in place with Hex Head bolts that are much easier to install/remove.
While cutting a part, the machine died. I traced it to the control board mounted on the gantry. Close inspection revealed 2 cold solder joints. With those repaired, I was back in business…However, still not completely satisfied and knowing I wanted to add ON/OFF control for my router and a 3 axis zeroing capability, I decided to make some major changes.
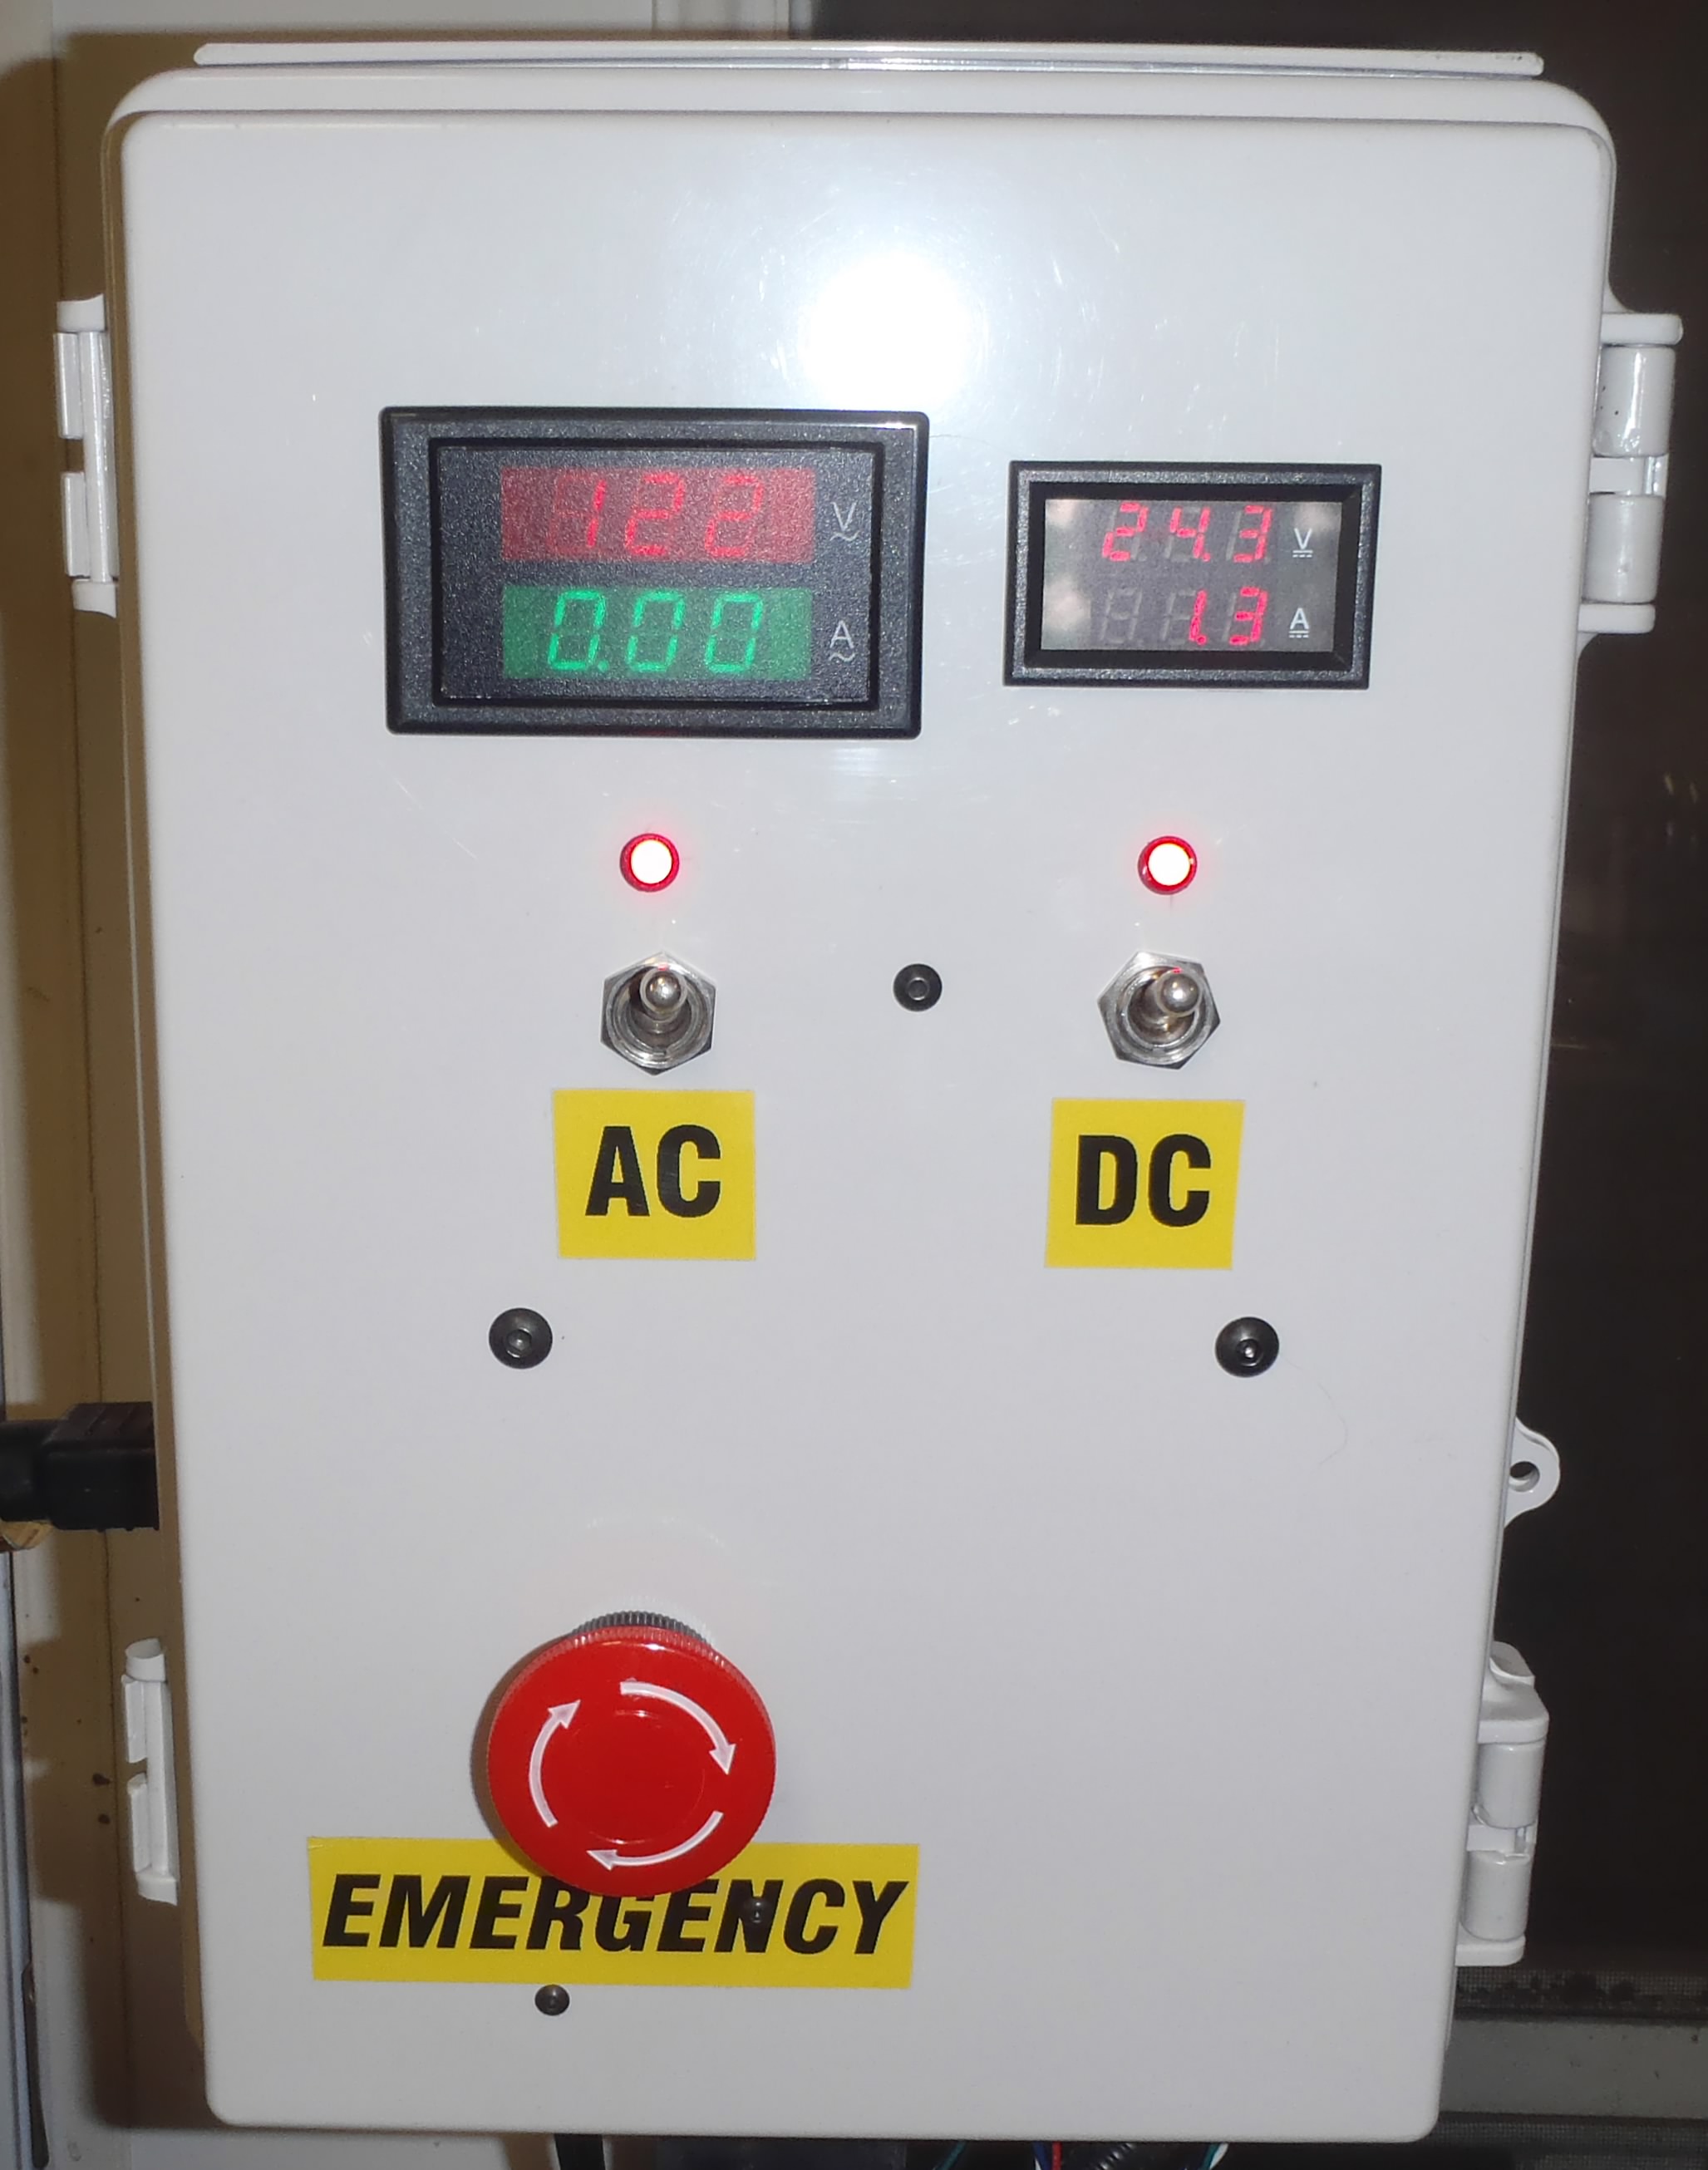
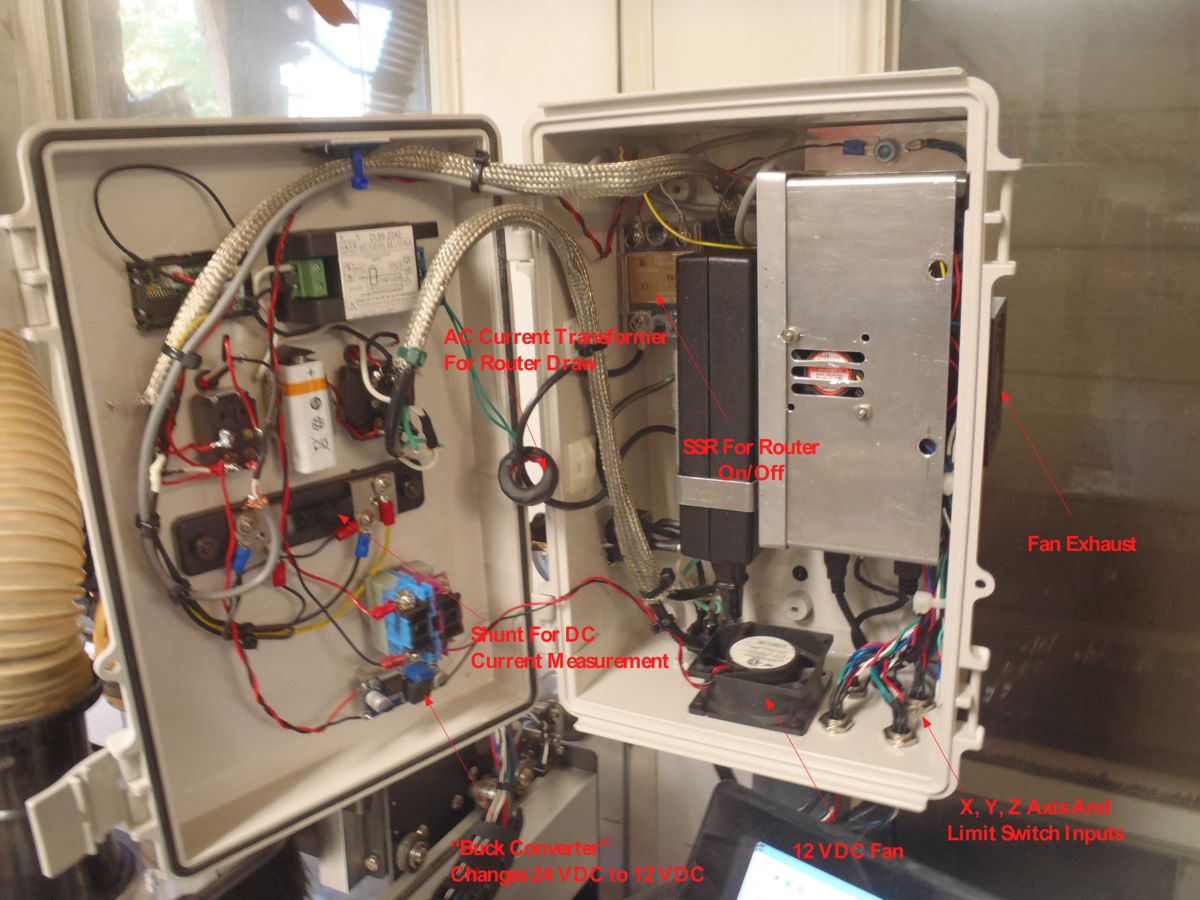
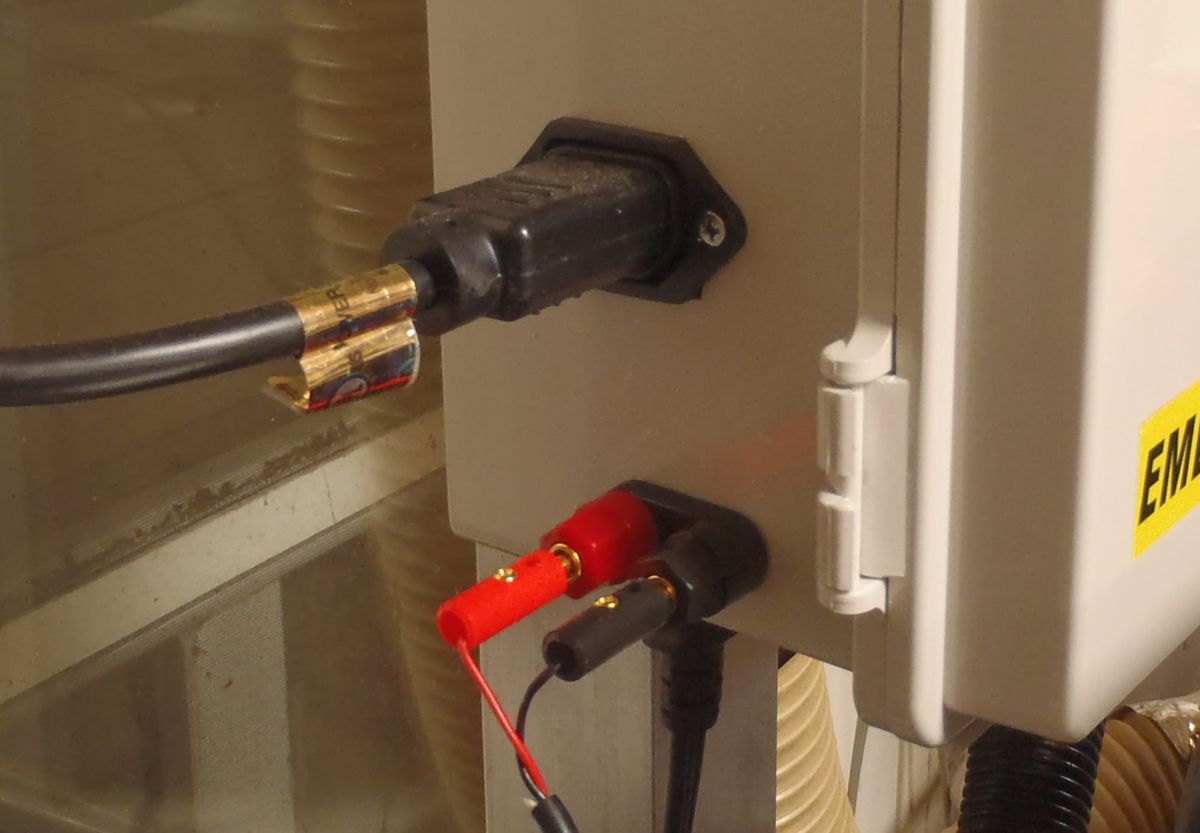
From the photos, you can see the control box I built to house the 24 volt power supply, the CarbideMotion control board, electrical connections for the main power and the router and installed connectors for a touch plate. While I was at it, I installed some meters (one for AC volts & amps and one for DC volts & amps. An additional 12 volt fan was installed to keep everything cool.
In testing the unit, when the router was turned on by the software, the router sputtered and stuttered and would not cut. The brushes were worn down, so I replaced those. While the brushes were necessary, that didn’t cure the problem. I posted the problem on the forum and within an hour, I got a solution. I pulled the control board and found a cold solder joint (mine) on pin 6 of the PWM port. Once corrected, it performed like a charm. Very thoughtful and talented folks on this website.
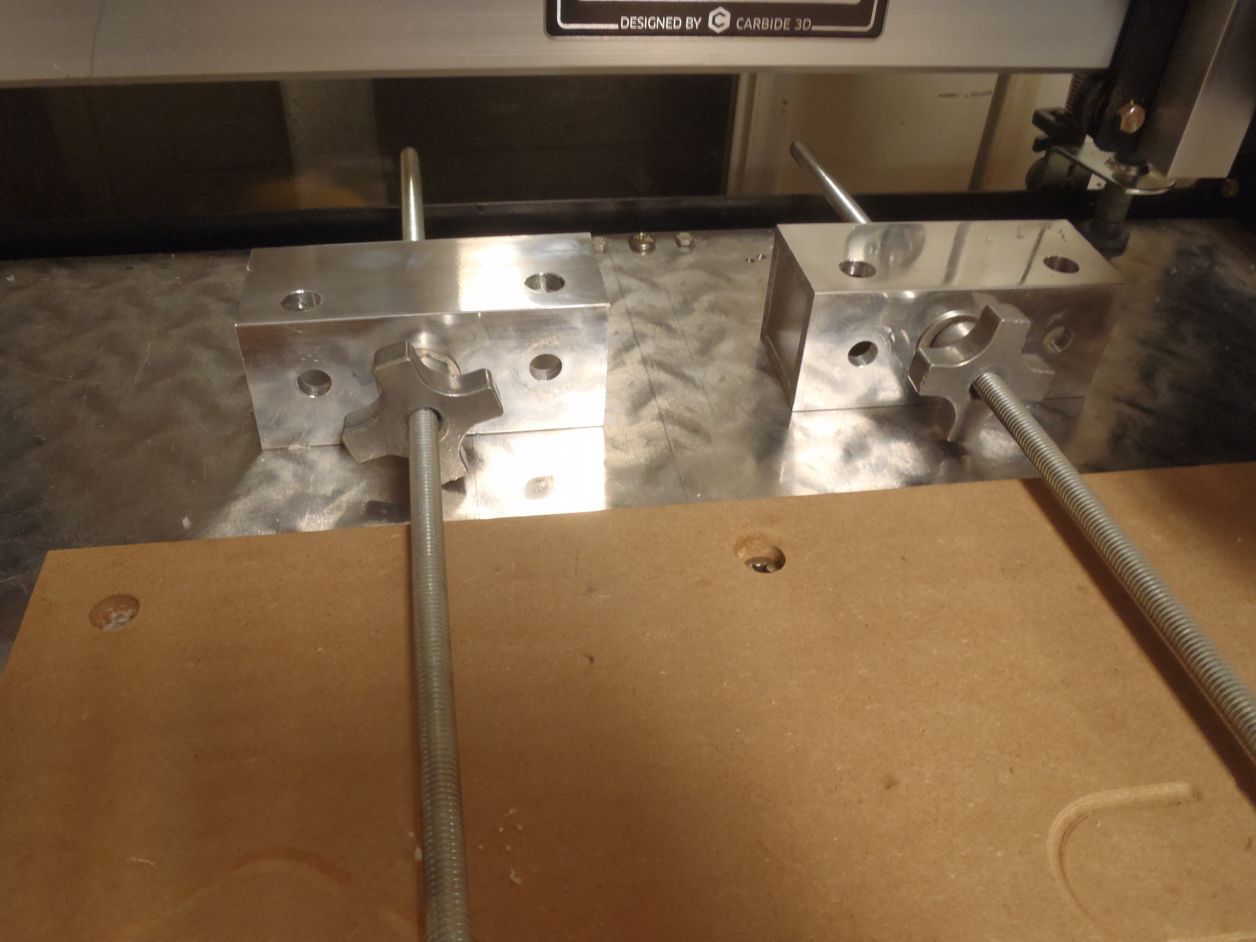
Many years ago, I purchased a set of clamps (I believe from Rockler) that have adjustment wheel-style handles that slide along a 3/8" threaded rod. They work much the same as a sliding jaw wood vise. With some left over 2" square stock, I made blocks for the threaded rod to pass thru, mounted the blocks to the aluminum base plate and I now have adjustable pressure clamps to hold the work piece against the 1" base of my MDF.
I also upgraded to GRBL 1.1 and the new Universal Gcode Sender program, which has MANY wonderful improvements in it. Adding a Triquetra touch plate and connecting it to the control box via an old coiled headphone extension cable completed the job.