Hi Guys I’m about to attempt doing my first inlay and I’d love to hear any tips or tricks before I ruin my project. The project is maple and inlay material is going to be black walnut. Curious what type of bit is suggested for the pocket? should I rough it out and then trim the edges with a smaller bit to get more detail? As for the cut out do I assume I should use the same bit as to doing the final pocket. Would like to hear some how to’s from the experts. Thanks for the assistance.
I assume you’re going to use a V bit?
If not… you might want to reconsider 
I was thinking a straight bit but if a v bit works better I can do that. What advantages does the V offer? how do you cut the inlay pcs to match a V carve? Thanks
if you use a straight bit (and I have done one or two inlays this way) the challenge is that the fit needs to be PERFECT. You also need to do some special treatment of the design so that you don;t get bad corners (remember that a round bit cannot cut square inside corners, with an inlay, ever corner is both inside and outside… so you just need to compensate the design for that). This is not easy to get right. assume you’ll be sanding the inlay pieces to size a bit
with a V bit, the slope of the V is what gives you tolerance for this fit, and your corners will be sharp (it;s a v carve). It’s more complicated.
for example see Using "Advanced VCarve" in Carbide Create 461 to make Inlays
I would start with a straight inlay - there are a lot less variables at play. Make the inlay piece first so that when you carve the pocket for it you can test fit it and if its too tight you can do an offset run on the vector while it is still fixtured to your machine. An offset of about .005-.008 should be about where it fits.
btw if you want to do the “not a V bit” approach, it’s still possible… I’ve done several of these and most came out quite well. (and one I had to use a little bit of wood filler to fill a little opening)
The easiest way (in carbide create) to prepare your work for the inside/outside corner problem is the following
(this assumes a 1/8th bit; scale the numbers up/down with the bit size you want to use, the smaller the more precise obviously)
- select and group all the vectors
- use the offset tool to make an outside offset of 1/16th of an inch
- group these new vectors
- use the offset tool to make an inside offset (from this new vector) of 1/8th of an inch
- group these new vectors
- use the offset tool to make an outside offset (from this 2nd new vector) of 1/16th of an inch
- group these new vectors
at the end if this, you have a new vector that is basically the same size/etc as your original, but all the corners are rounded such that the 1/8th bit can reach all corners perfectly on both sides of the cut.
As @i3oilermaker mentions, if you hate sanding, you can make the inlay a very tiny bit smaller.
But with the sanding approach, if you have patience, you can get a very tight fit
3 Likes
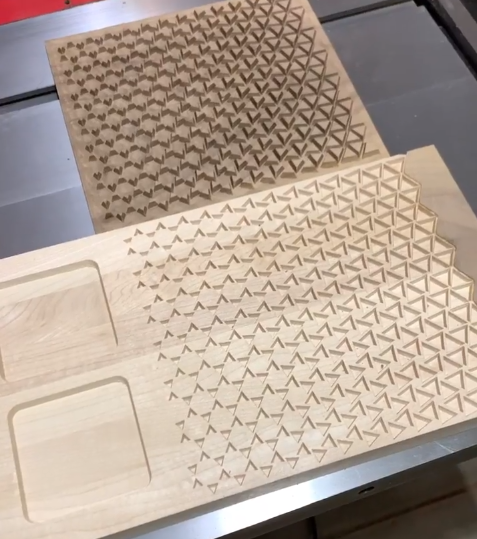
The only need to do V-Carve inlay (in my eyes) is if you you need sharp corners for your design (straight inlay corners are limited by bit diameter) or if you have a ton of little pieces like this:
The complication with the V-Carve inlay is the not so much the pocket but the plug. Challenges include:
- When you carve on thinner stock and leave just a small amount on the bottom, the board will want to warp. The stress can be enough to break a solid double-sided tape. Clamps or screws are needed.
- You need to set the artwork plane down below the surface and leave allowances for a glue gap (under the inlay) and gap above so the backer of the inlay board doesn’t come in contact with the base
- As a result of setting the artwork plane down, the first pass on the plug carve will be extra deep (start depth + first pass depth) I find this is too much for a V bit to handle typically and I usually set my Z height a bit higher than actual stock top and do a first pass then zero it properly and run a second pass. This is very time consuming
- Endgrain works best for this technique because of the orientation of wood fibers. Edge grain tends to tear out in sharp corners if you don’t have conservative speeds/feeds or sharp bits.
If you get all those right you can make some pretty amazing stuff:
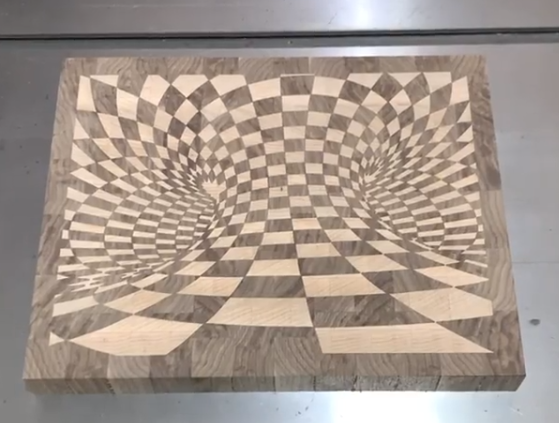
5 Likes
Wow great advice and amazing pics. I’m excited to give it a try.
This topic was automatically closed 30 days after the last reply. New replies are no longer allowed.