Follow me if you want to go down the tramming rabbit hole a little deeper than is adviseable. You need a few things to tram your spindle, and one of them is a good reference surface for your dial indicator to register against. Typically a flat spoilboard is used. How do you know the board is flat? You should probably flatten it first. A few issues I have with that.
I prefer to keep my MDF’s native top surface because it resists tape and wear better
flattening takes a while and always leaves a lip along the edges you can’t reach
If your tram is really bad you will leave a washboard surface which makes tramming harder
Again, that is totally legit, and I am probably just being way too particular. My solution is a glass bed. Big deal, that is a very common trick. How do you know your glass bed is parallel with your axis of travel though? If you plonk a glass bed down, and it isn’t, you will tram out of square. Enter the “3 points make a plane” solution.
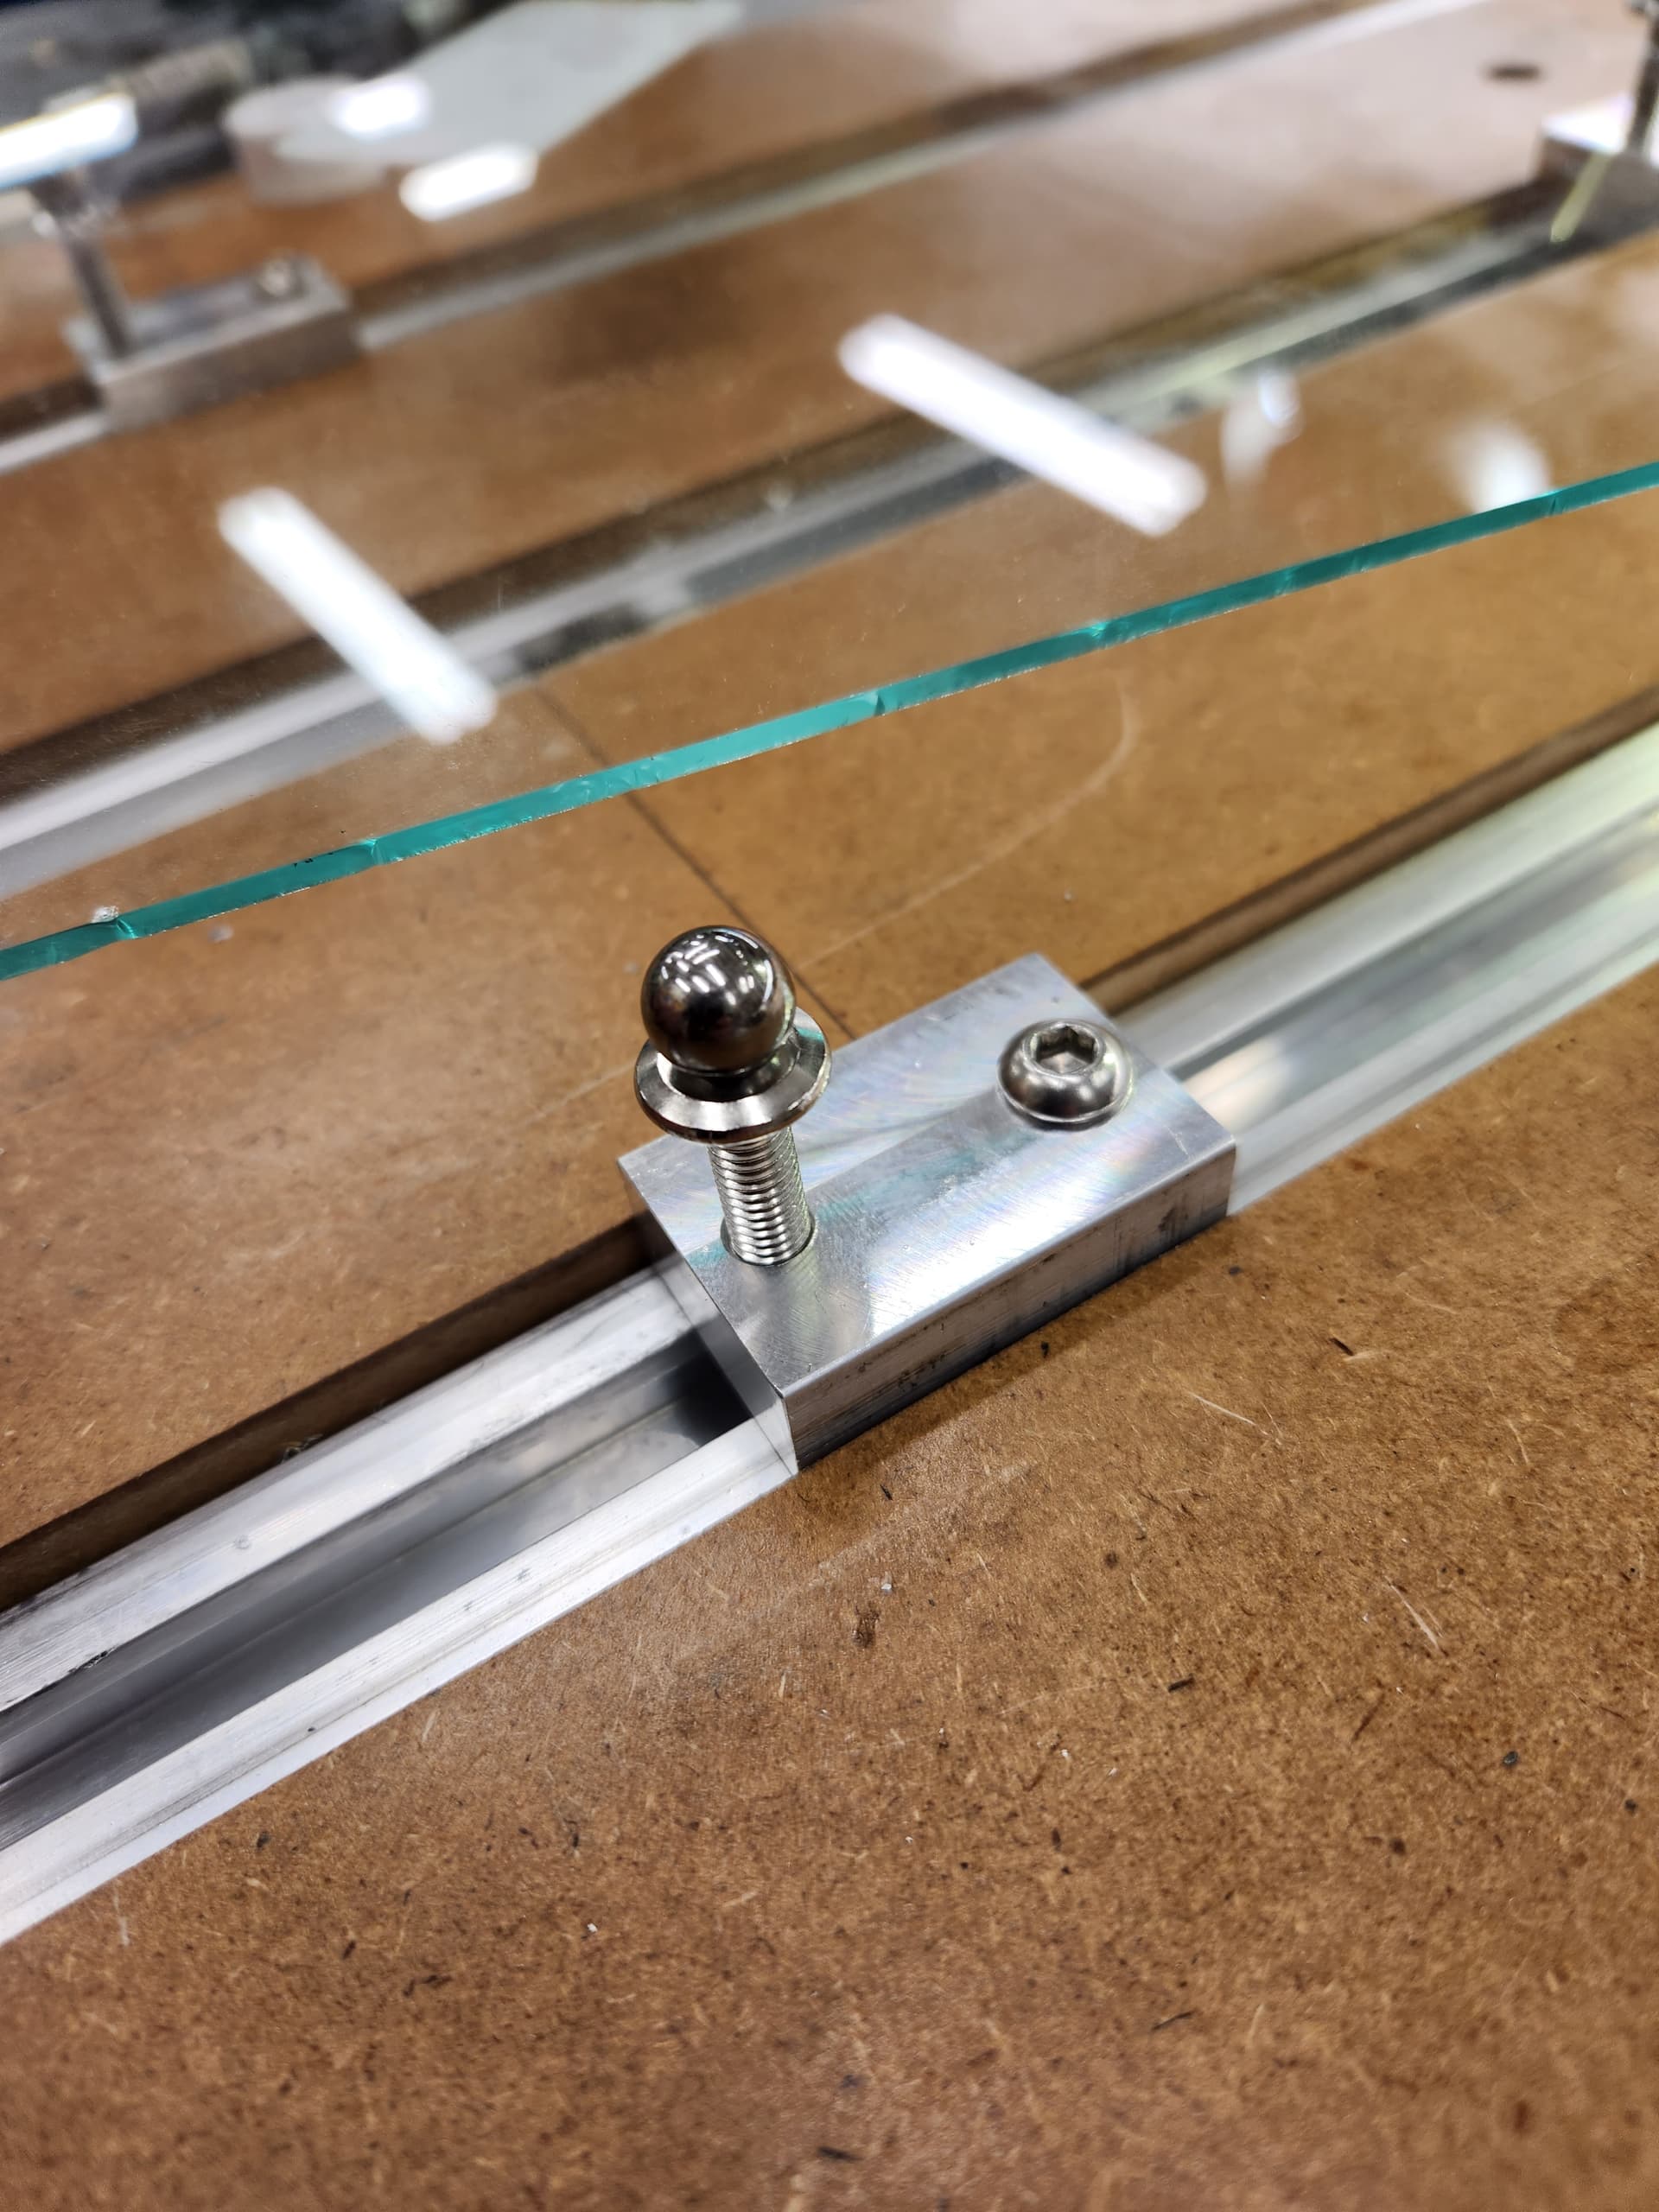
What we have here is a set of 3 blocks that clamp down firmly to the t-track. I put an M6 threaded hole in each, and used a ball bearing on top of each M6 bolt to provide a 3 point plane for my glass bed. My screws happened to have a little chamfer lead in to the hex, so the ball bearings are very stable.
To use, place the glass bed down, break out your dial indicator, and move in X between the two front points. Initially you will see a rise or fall. Adjust one screw until the dial reads flat left to right. Do the same front to back, and adjust the back screw. This gives you a reference surface that is super flat, smooth, and now guaranteed parallel to your X and Y axis.
Some lessons learned:
The M6 was a little coarse for adjusting, I might go with a finer pitch screw next time
The screw rattled and shifted a tiny bit. Some wax in the threads would help tighten that up
Having some kind of nut under the head or large thumb wheel would make reaching under and adjusting easier
I set the bed a little too high and could barely get the dial gauge on my spindle without running out of Z travel. Go low with the bed if you attempt this.
The metal blocks are optional, you could use wood with threaded inserts, thread some plastic blocks, or 3D print something. Again, this is 100% over the top, but if you love getting everything really square and aligned like I do this could provide hours of tramming torture/entertainment.
It would, but the spring will compress if you touch the top surface with anything. A strong enough one would make that pretty moot. Ideally there would be a spring pulling the screw down. That would be a bit more complex though. Maybe counterbore the bottom of my aluminum blocks to accommodate a spring and put a nylon nut on the bottom.
I love a good deep-dive and your method is totally valid. But I’m also particular, but I also want to get it done as fast as possible and get to making.
My ways to use some MDF that gets around your issues using a surfaced MDF spoilboard.
A - Use a second spoilboard that gets counter bored holes for bolts into the hybrid bed. I only make this big enough to fully utilize my tramming arm. This gets around both surfacing your factory spoilboard, and having a recessed area. The counter bored holes let me bolt it down and still surface the entire thing. I made one a while back and has helped me tram 3 Shapeoko machines. I just do a light resurface every time.
B - Ridges. I use a 1/4" endmill and a 0.050" stepover to surface my tramming board with a raster path. That way the ridges are so small as to be inconsequential and are only in one direction.
I would only add, your tram is only good at that spot on your table unless you level your machine base first. For your machine base to be level, you must be sitting on a flat and level surface.
If the XY motion of the machine is in a perfect (or near perfect) plane, the machine is “in tram” everywhere.
If the table is bowed or twisted & the XY movement is not in a plane, you have bigger problems to solve first.
My point exactly. In order for the XY motion to be in a near perfect plane, it has to be on a near perfect flat surface. Now, I only need to keep it in level and I should be able to maintain tram.
Which brings up a good question, “What is the best way for these machines to dial in the parallelism of the 2 Y axes?”
I think to do a complete calibration, you should
Parallel the Y axes.
Parallel the spindle to the Z axis
Perpendicular the Z axis to the XY plane (Tramming)
3 we’ve discussed ad nauseum
2 Can be done with an indicator on a dowel / drill blank in the spindle & moving the Z axis up & down.
1 I think is typically done now by making sure the surface the machine sits on is flat. (the table).
I had my table top (2 1/2" thick maple bowling alley) machined flat on a larger CNC. Even then it flexes when mounted to the “not perfect” table legs / base, so I shimmed it to get it as close as I could.
I have a 48" precision straight edge I can position corner to corner to dial it in flat. But I expect I’m in the neighborhood of ±0.010 or more over the work envelope on the machine (27" in my case on the HDM). My best guess is to use the same process on the wasteboard after surfacing. But no idea other than shimming the base of the machine to make adjustments.??
I have been watching some used granite counter tops on FB. My 5 axis mill here at work is mounted to a 3" floating granite block and holds +/- .0002 all day long. (exception to Z axis thermal growth)
Don’t get me wrong…I have my HDM dialed in to hold tight tolerances, and I love good mental exercises in over thinking things…but…
I think y’all are going way to deep for the intended purposes of the machine. What are y’all making… literal rocket parts? Do you know how expensive a machine that will do better than a Shapeoko in precision costs for that size?
0.010" is 0.040% of 24"
0.010" is 0.030% of 33"
0.010" is 0.020% of 48"
For the projects we’re running across the S04/SO4Pro/SO5Pro a half of a quarter of a percent of deviation from nominal (before surfacing the wasteboard) seems like it would work for what we’re doing. We literally make scientific experiment components on a SO4Pro at work. It is sitting on two large, bench height cabinets with butcher block style tops, sitting on the floor.
Don’t apologize in the slightest. Again, mental exercises are awesome and make for some great ideas. If someone has a counter-point, I’d love to hear it. And if you’re going down the rabbit-hole just to go down a rabbit-hole that you find fun and/or informative, then I wholeheartedly encourage such things. I got into this because I turn into a horrible person if I’m not being creative and learning. And if someone has a thing that works for them…keep on keeping on.
Just trying to give some perspective to the conversation. I have a habit of what machinists call “chasing zeros” too. And sometimes I get so caught up in the details, I don’t get to doing the things I intend to do.
We should make a shirt “Chasing zeros club” on the back it could be a list of things we have built and it would just list all the checks and alignments we have done without actually having made anything.