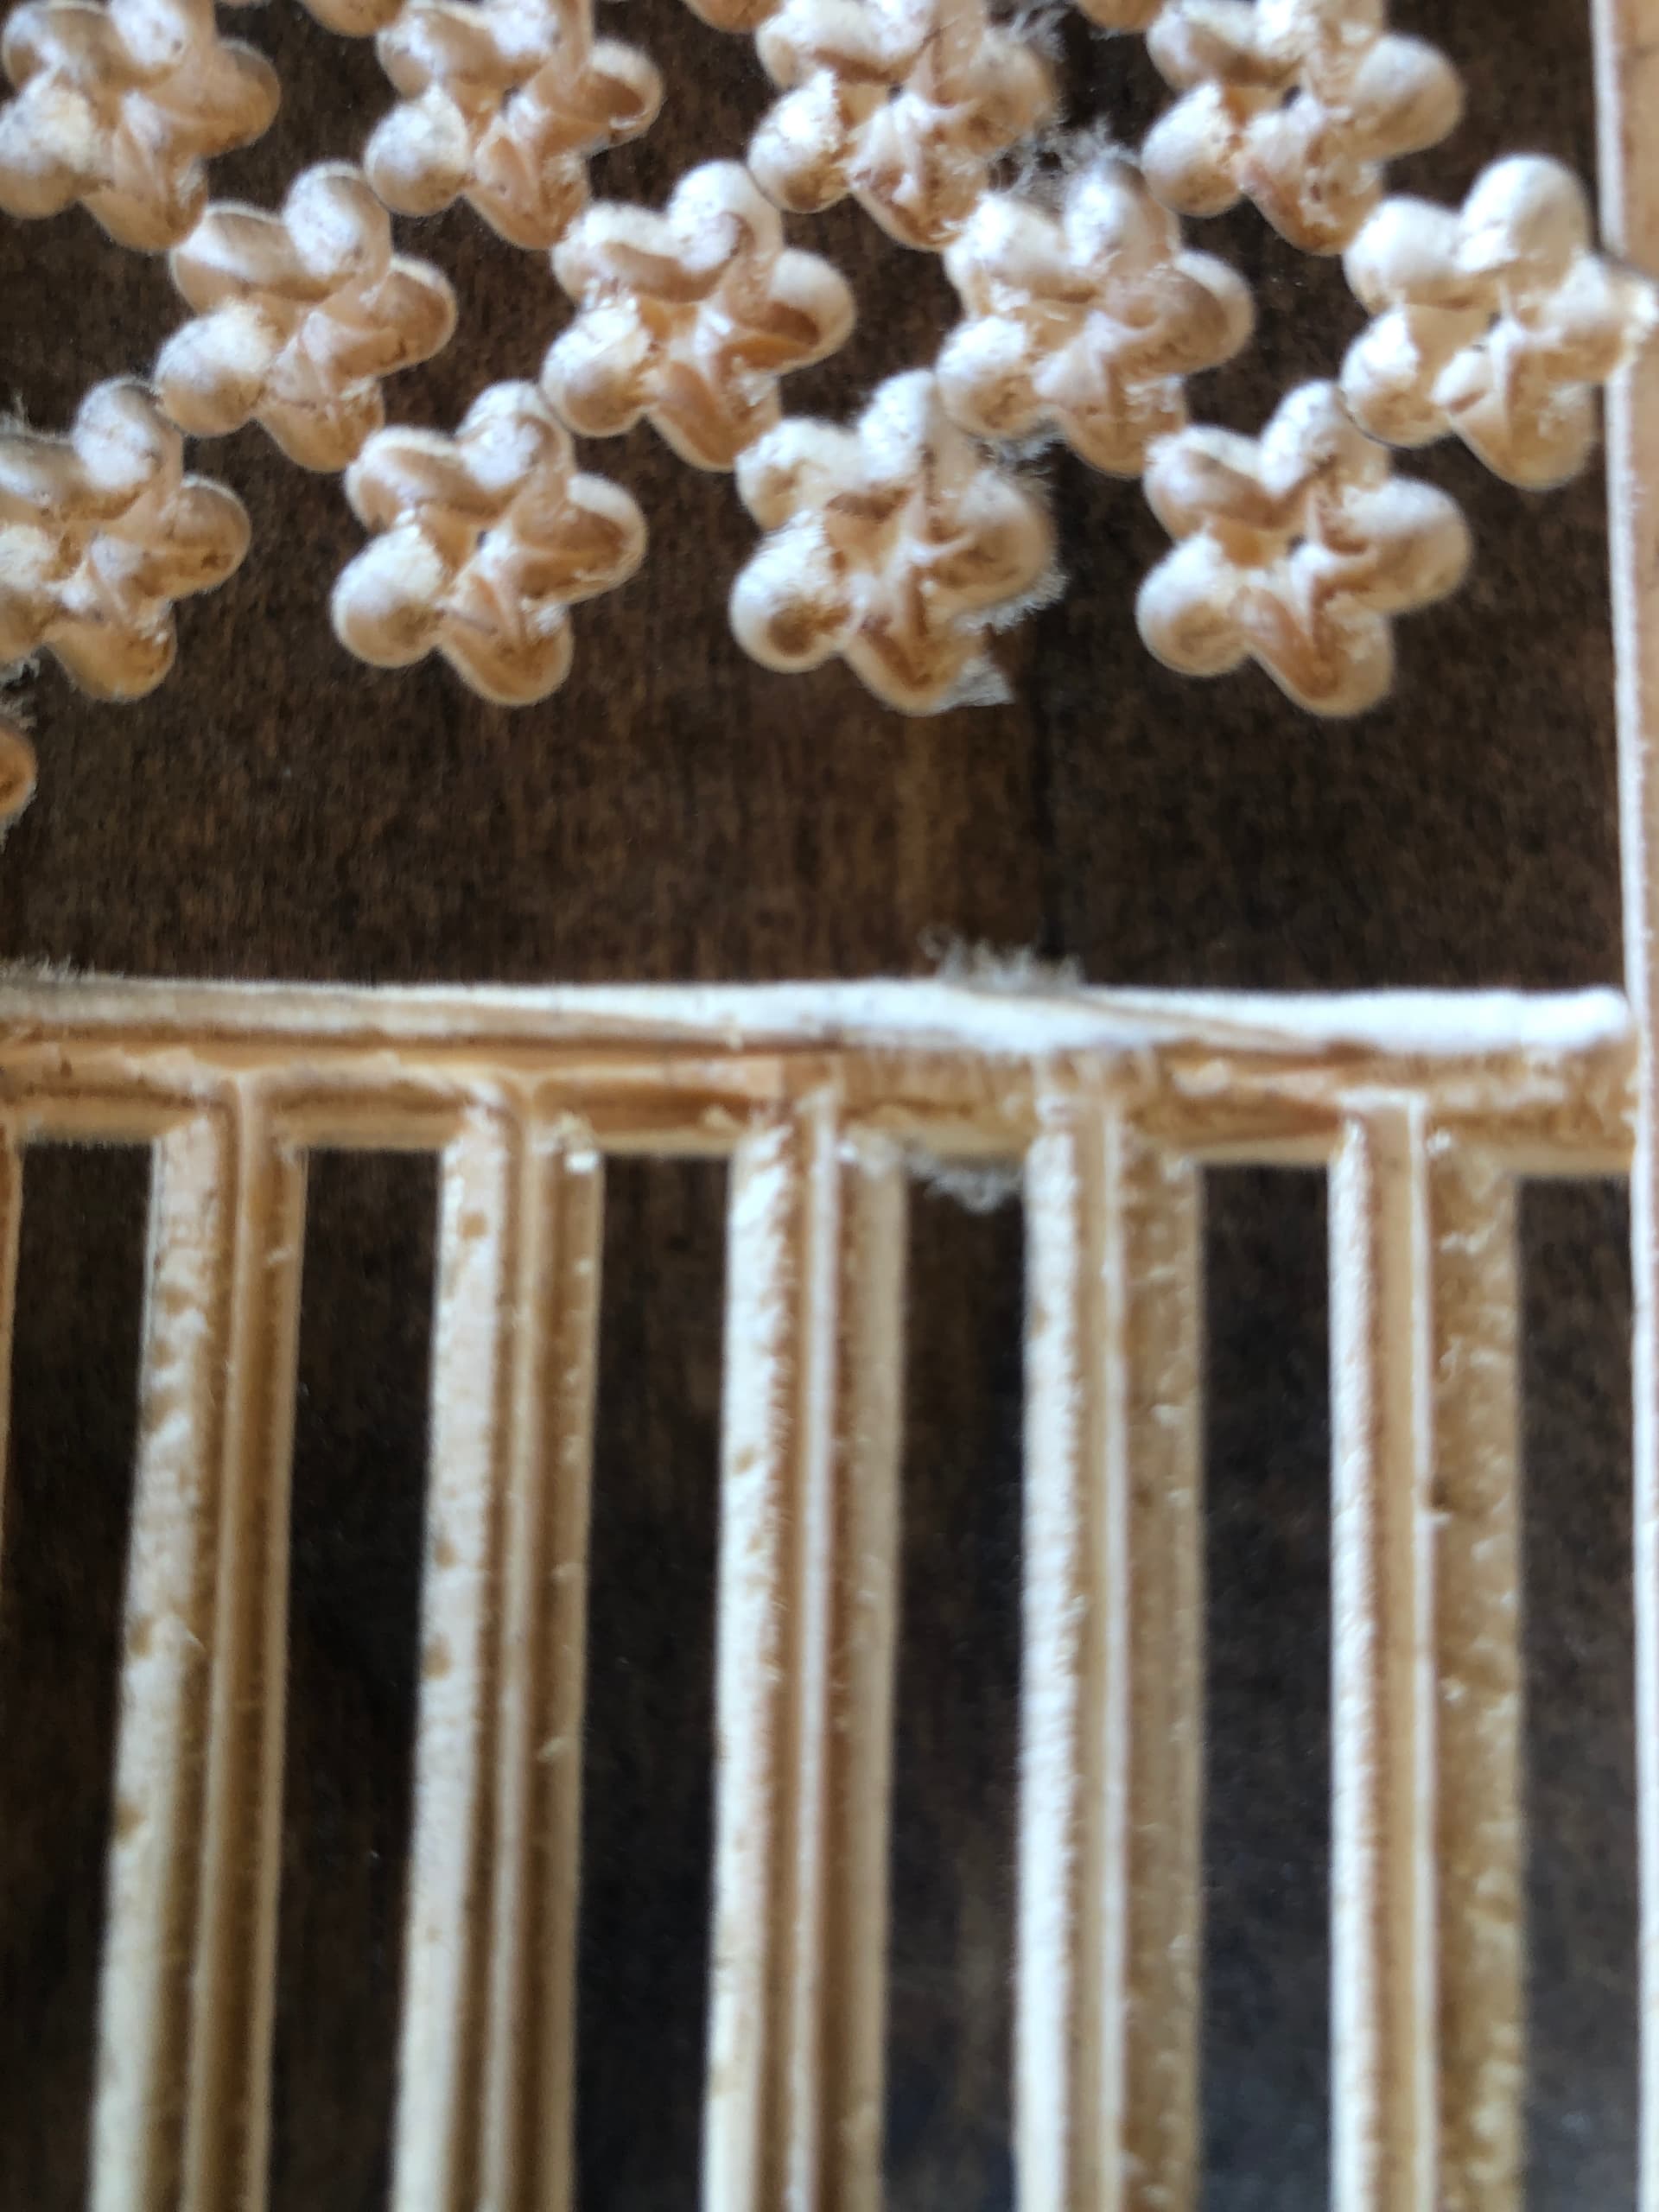
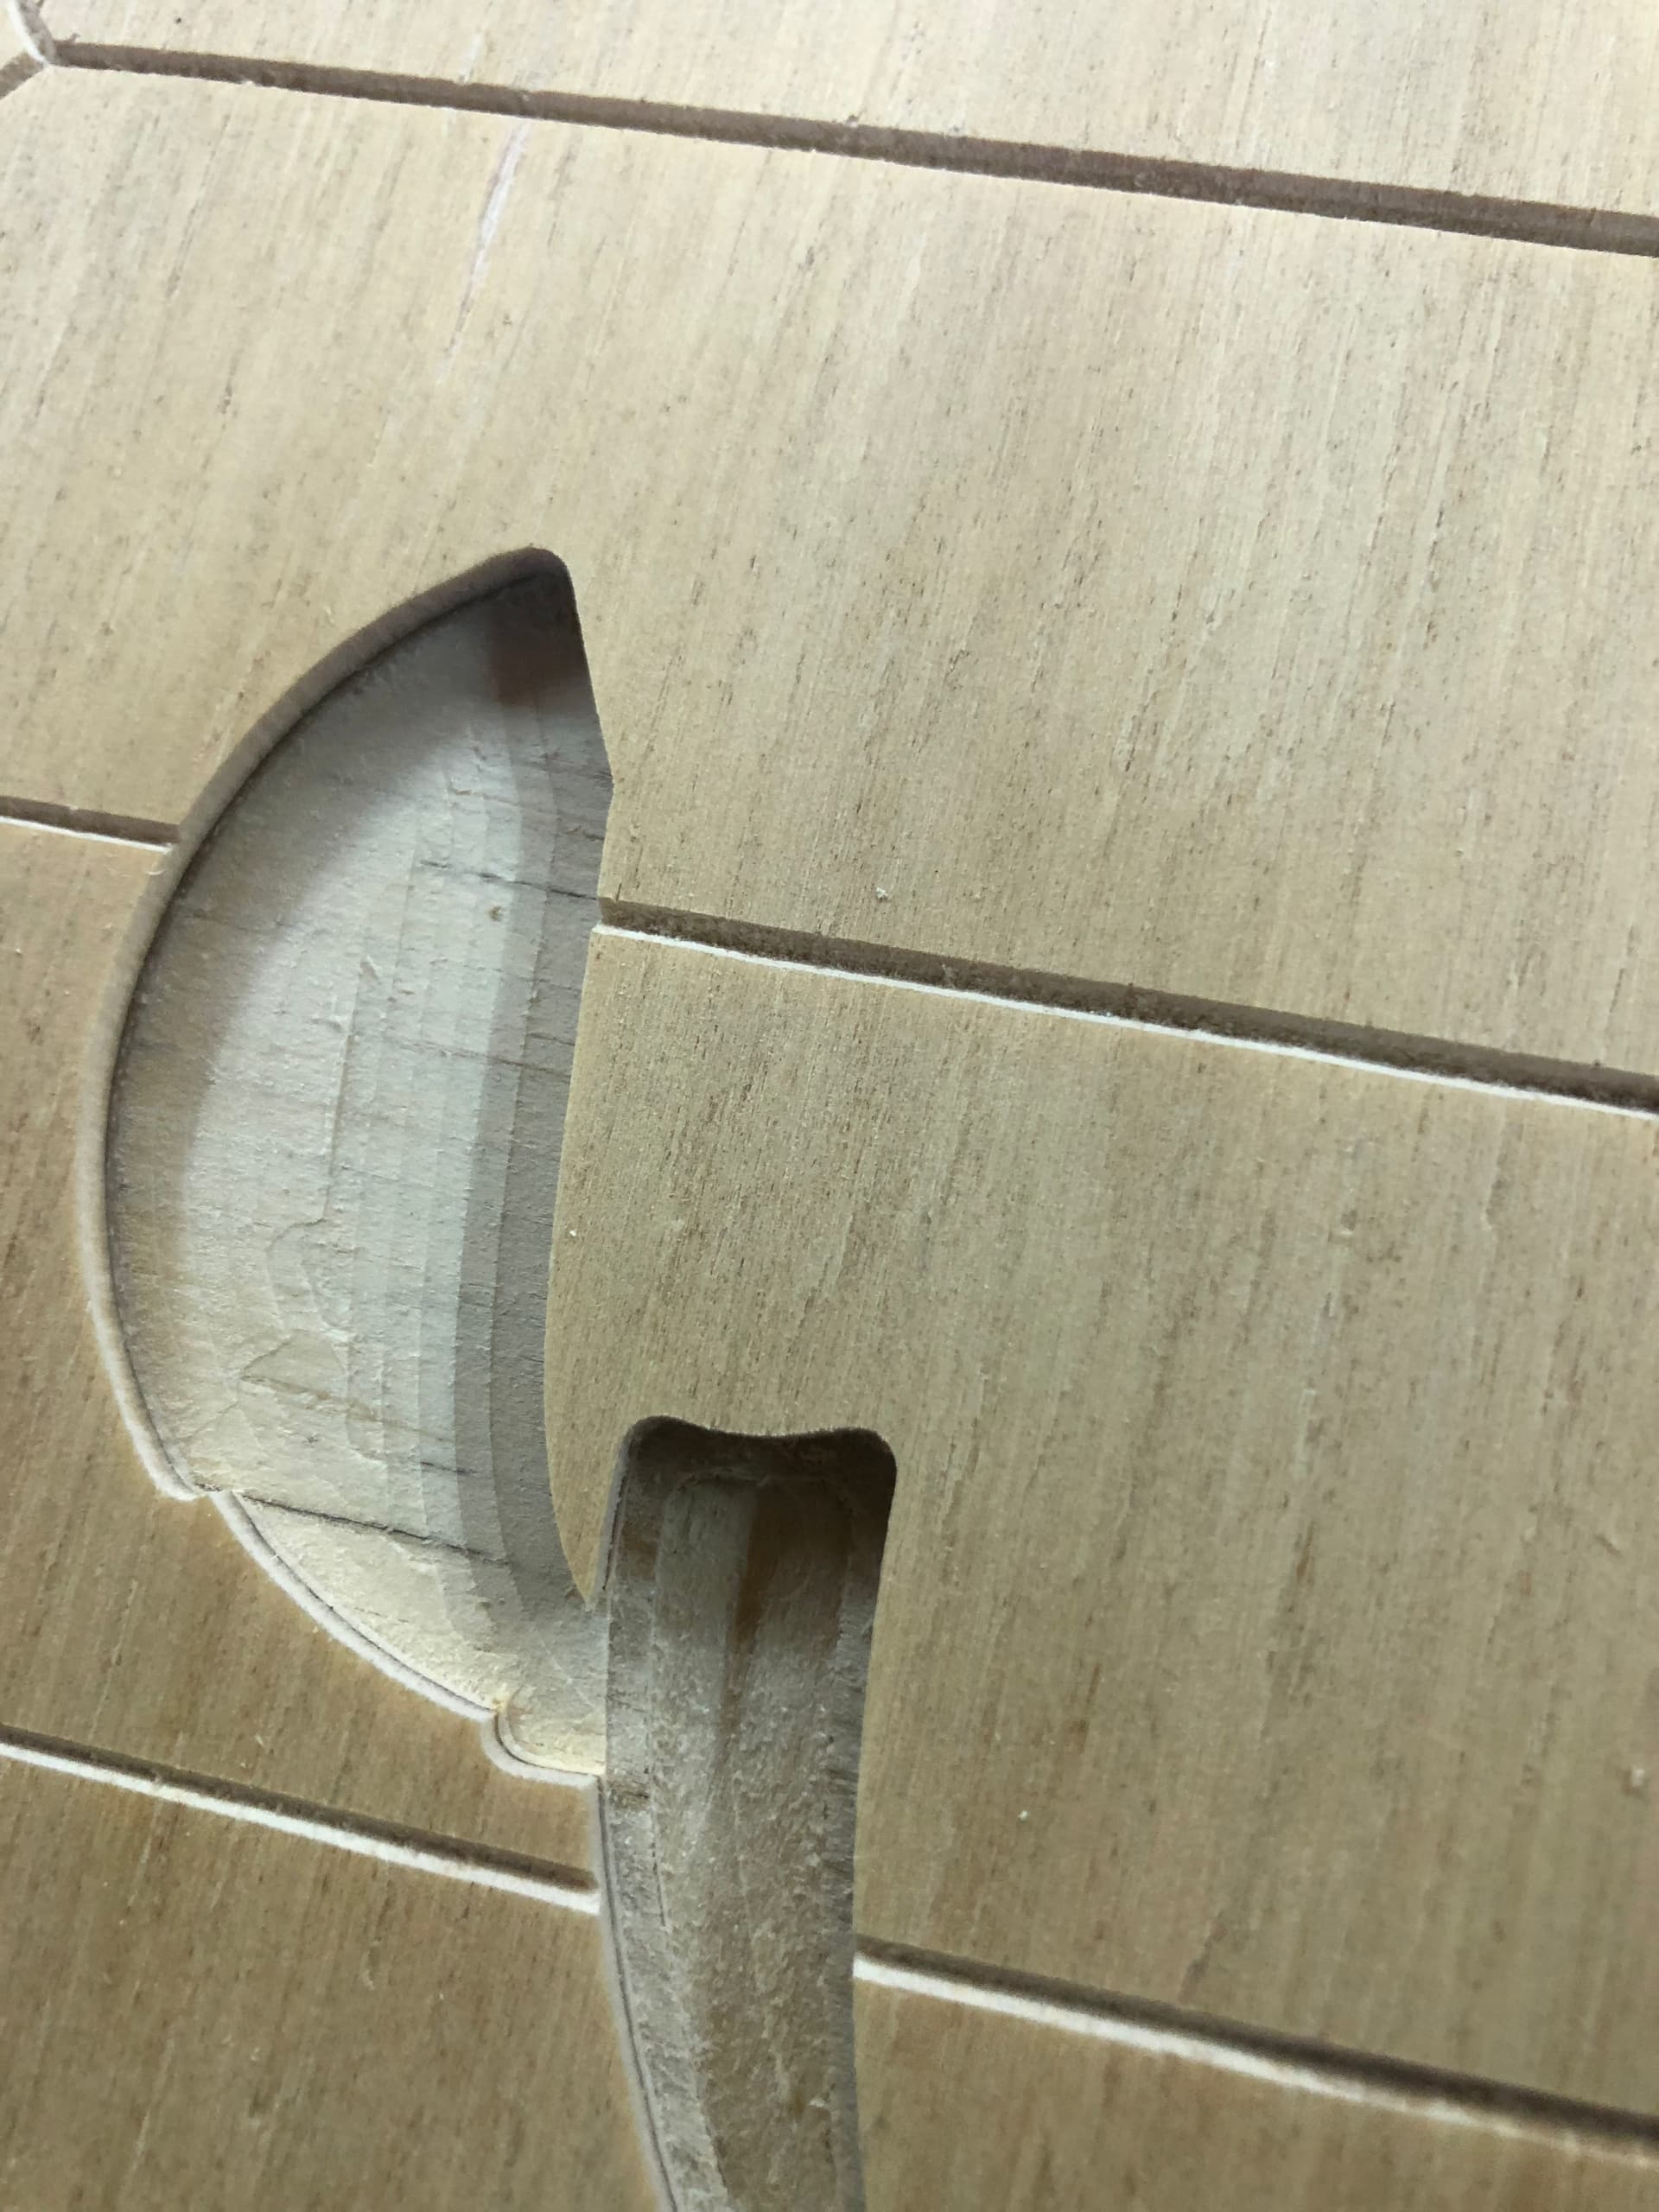
*I just finished carving a US flag. I downloaded the file from esty. SVG file using a 60degree bit from start to finish. I brought the fine into carbide create made no changes. Set up toolpath in advance Vcarve and started carving. As you can see there is a small line in the valley of each carve for stripes. Don’t
know why this happened. Is it my bit or ? What? Also I don’t think the stars are a detailed as should be. Really need help cause this is really not good.
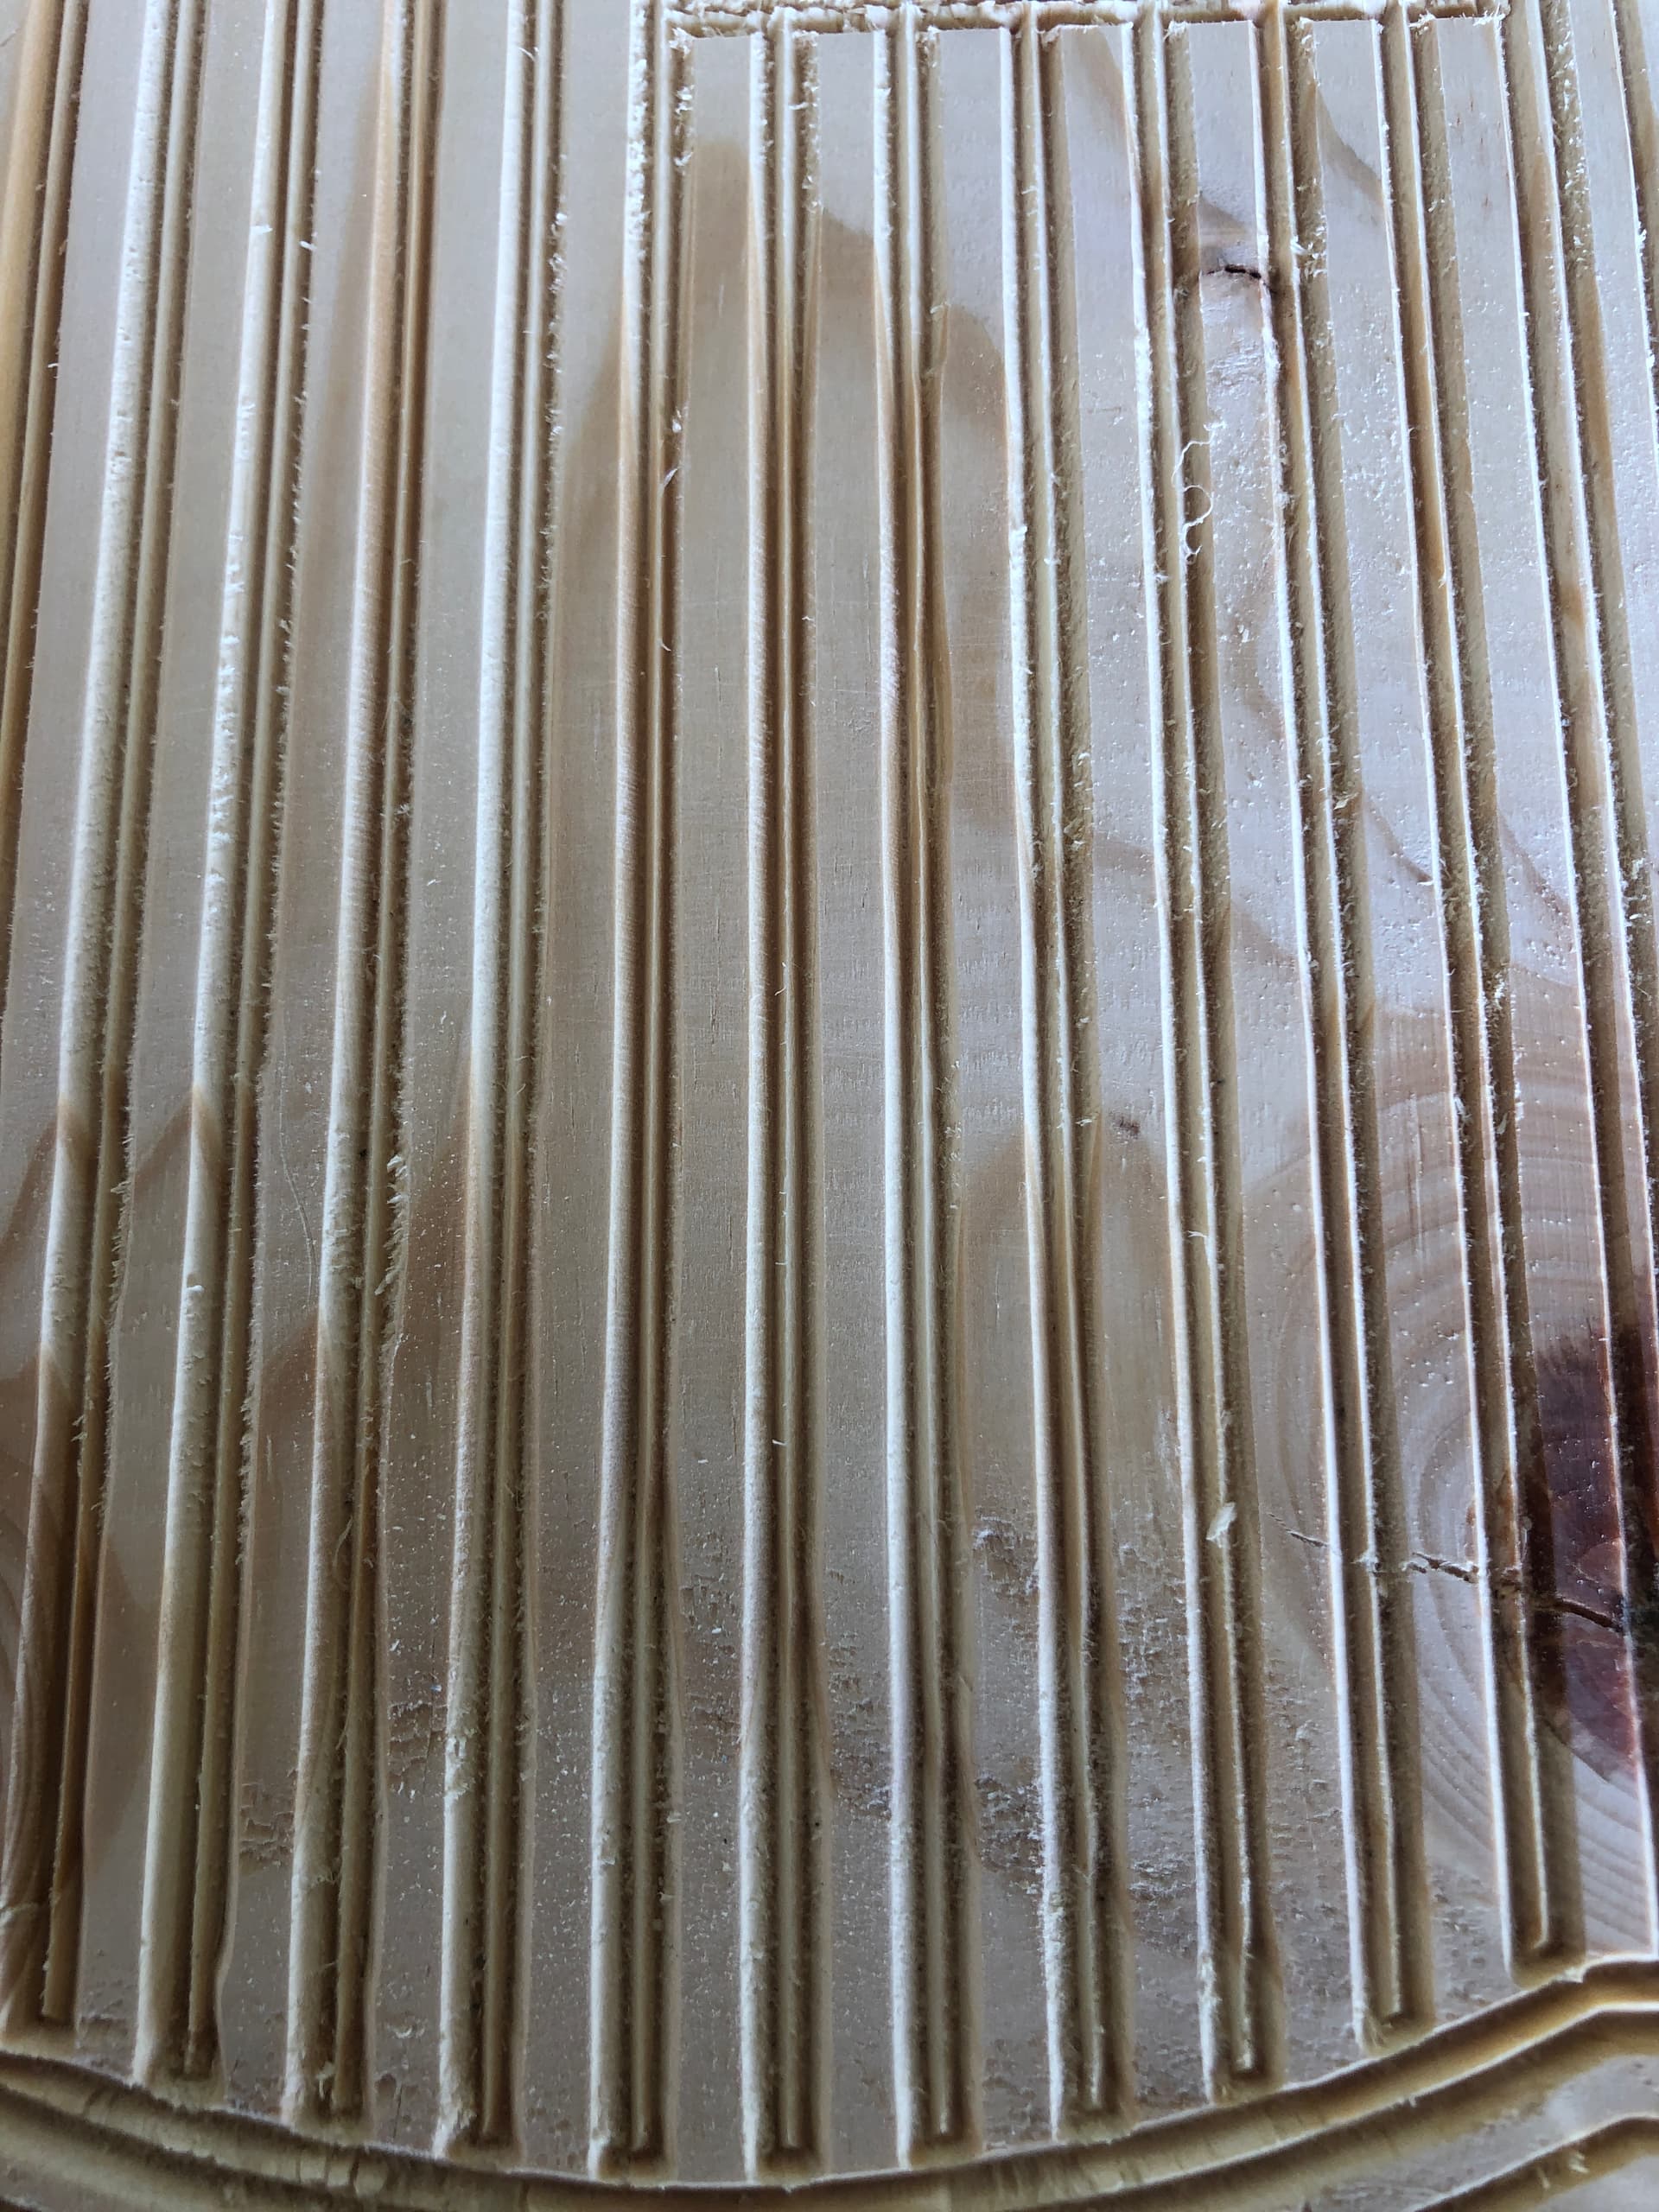
Without seeing the file I would say that you probably have an offset on each Vector. Which makes Carbide think you only want to cut in between those lines. It looks like you are just doing an outline of each vector. IDK, but that’s my guess.
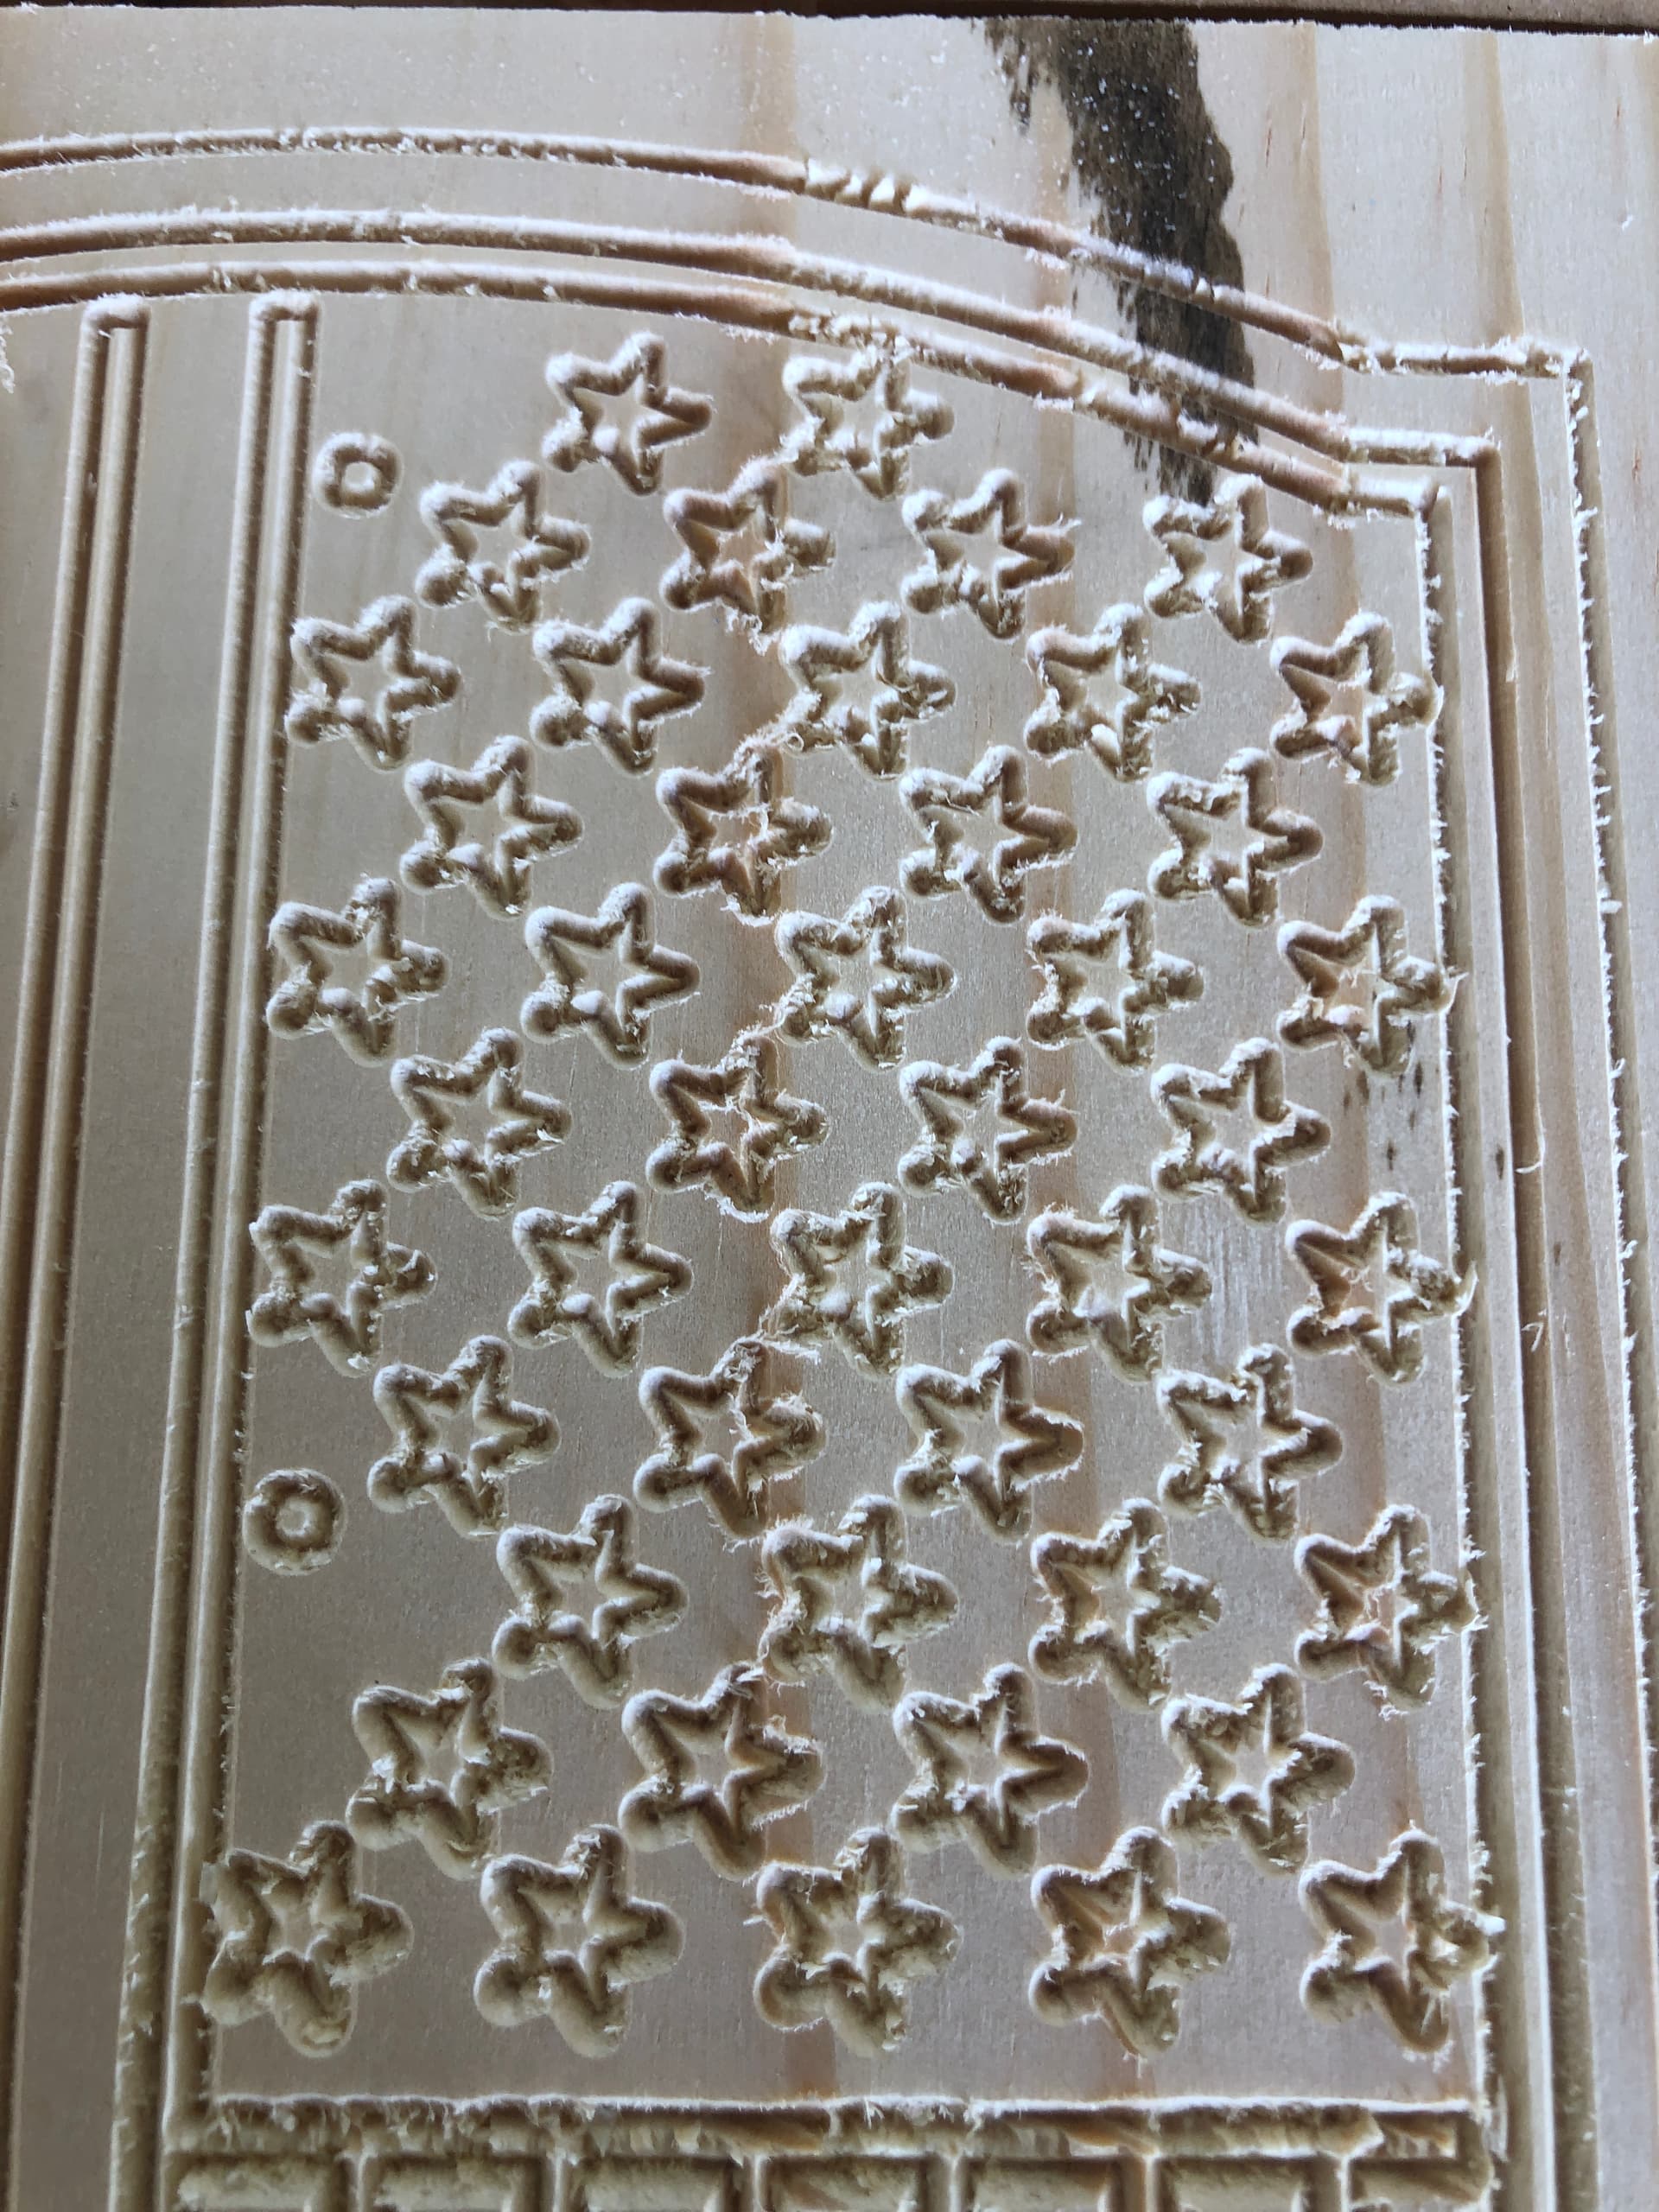
The way the Vectors for the Strips are laid out, the results you got look accurate. I think you just selected too many Vectors. The stars in your version look like they are Positive to the workpiece. I bet you didn’t let the Clearance tool do its work.
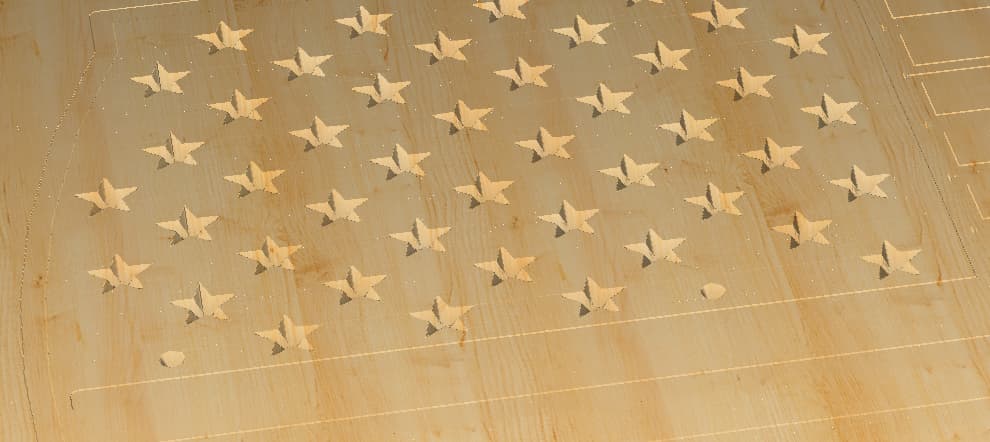
Here is the file after I did the tool paths etc.
I hope it works for you. US Flag for CC forum.c2d (320.8 KB)
I adjusted the Outside lines a bit and changed the toolpaths to be an advanced V Carve. US Flag for CC forum 2.c2d (340.5 KB)
I really appreciate your help…you files look completely different and I will study them to make sure I understand what you did. Will there be any problems if I change the size to a smaller flag.
You are welcome.
I resized the flag to be about 11.25 x 22.
If you resize the file you will run into problems. After you resize the file, the distance between the lines in the strips will be too small for the tool. You will have to adjust the tool you want to use to a very small end mill. Like 1/32 or smaller.
Or you can change the tool paths around to only use the V Bit. What size do you want the flag?
I can resize it and redo the tool paths for you.
I resized it to 11.00 x 5.62.
Updated 1:05 PDT to include Drill out for the Bottle opener holes. I couldn’t figure out what those were for but I found the project on Etsy. Now I know. Flag resized for Bakofly1 (1).c2d (120 KB)
One other question. Is there any way to control the depth of cut when I resize some of the files that I buy? I definitely will break the tool paths into more manageable steps. Thanks again for all your help. I really appreciate it.
Ken aka bakofly
I understand the depth of cut setting however is there another setting that will override the depth of cut. I have ruined many pieces because the depth of cut was too deep especially using the advance V Carve feature. I’m sure some of the time it was my mistake in using the wrong depth but in most cases I triple check the depth setting and am surprised when the first cut is so deep. Let me say that I am a new user in the CNC world and I learn something new every day. Most of the work I do is from downloaded files I find on various web sites. So I don’t know if the downloads are part of the problem or not. Thanks for all comments cause I’m here to learn.
Does the depth of cut you are getting match the preview?
If it does, adjust the parameters in the file until you get the desired 3D preview.
If it doesn’t, check the machine mechanically, and also verify all the wiring and connectors — if you don’t find anything obvious to address, write in to support@carbide3d.com
I am doing a project this morning and will check all settings before I make first cut. Since I bought the shapeoko already built I am unfamiliar with how to check setup. I did make sure machine was levelafter I brought it home. So any suggestions on what steps I should take to verify mechanical setup will be appreciated. As you can tell I’m learning as I go. I can’t find anyone local that has a CNC machine so I’m learning by trial and error and with help here.
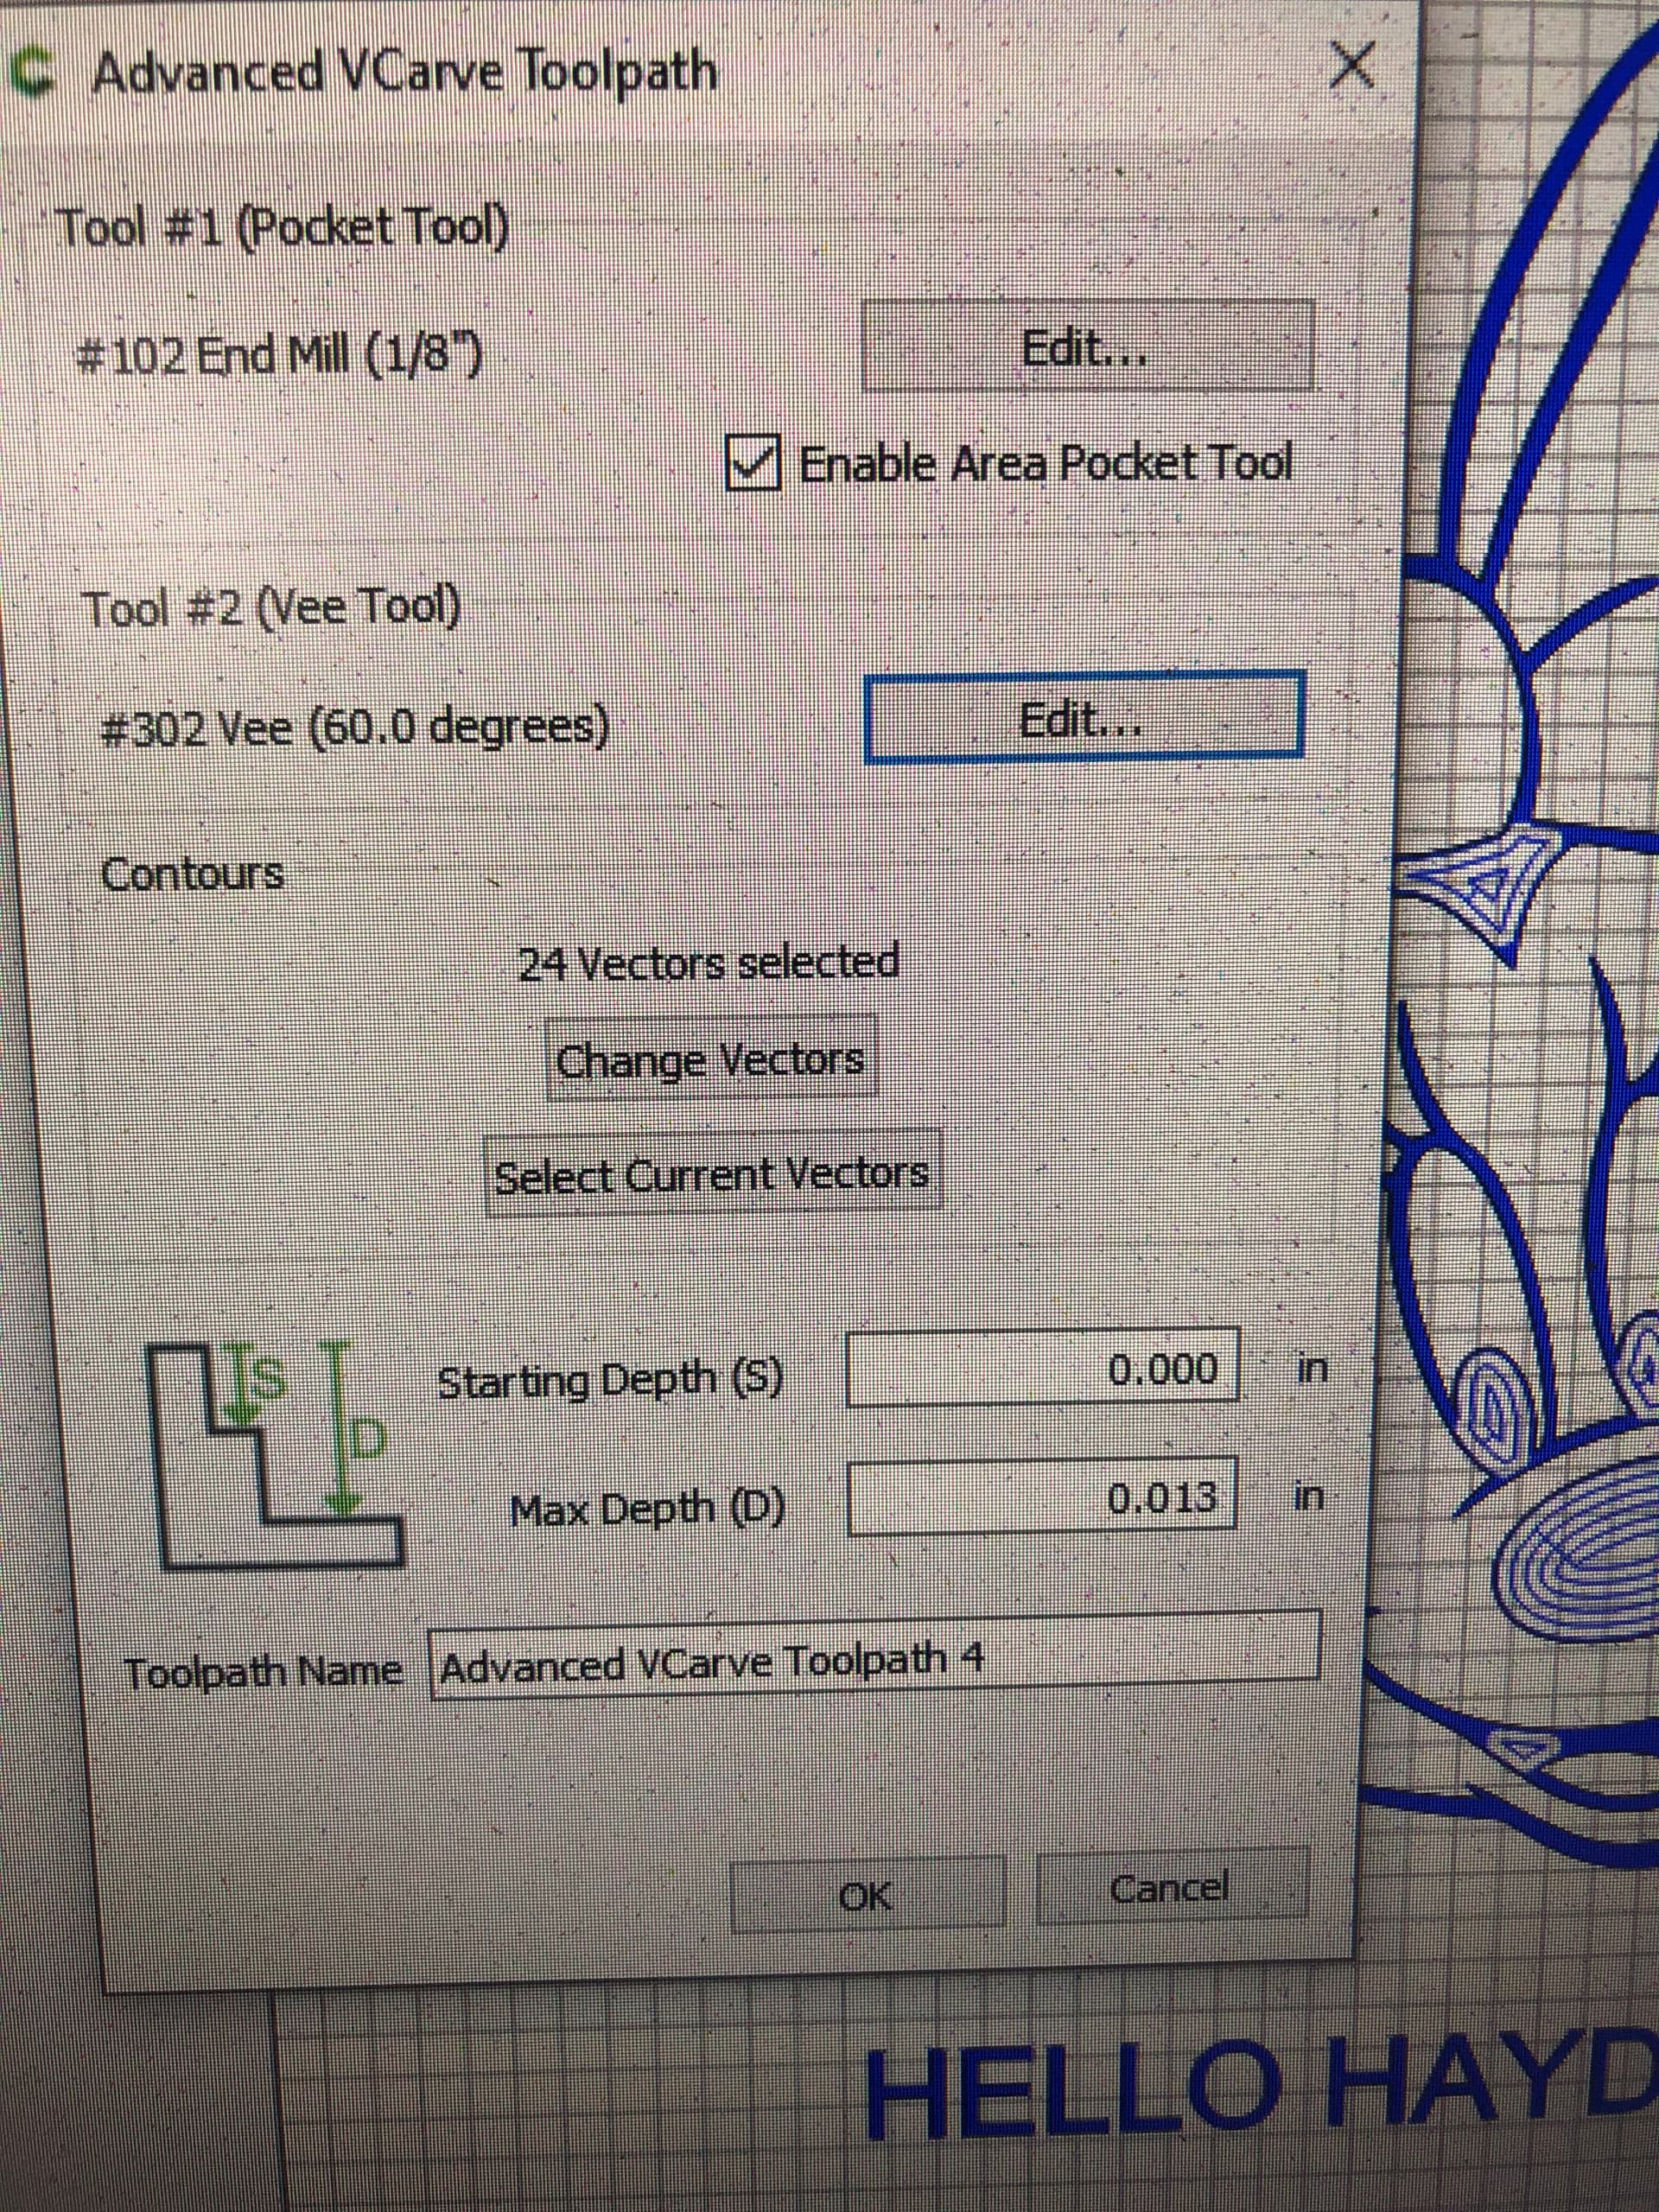
Hello again. My project this morning is a simple cut of Minnie Mouse. I had my max depth of cut at 0.013 and all other cuts at same 0.013. My first cut was 0.155. Shouldn’t my depth be 0.013?