I have sketched a rectangle around my model to keep the adaptive toolpath from removing more material than necessary. However, it seems like adaptive toolpaths do not allow tabs. My thought is to have some axial stock to leave in the adaptive toolpath, and then use a 2D contour w/ tabs. However, the 2D contour on the remaining materials is not ideal since I did not have the benefit of the adaptive toolpath, right?
Btw, I also plan on making a small pocket for those two holes, then using a drill press for better accuracy. I then plan on hand-tapping those two holes.
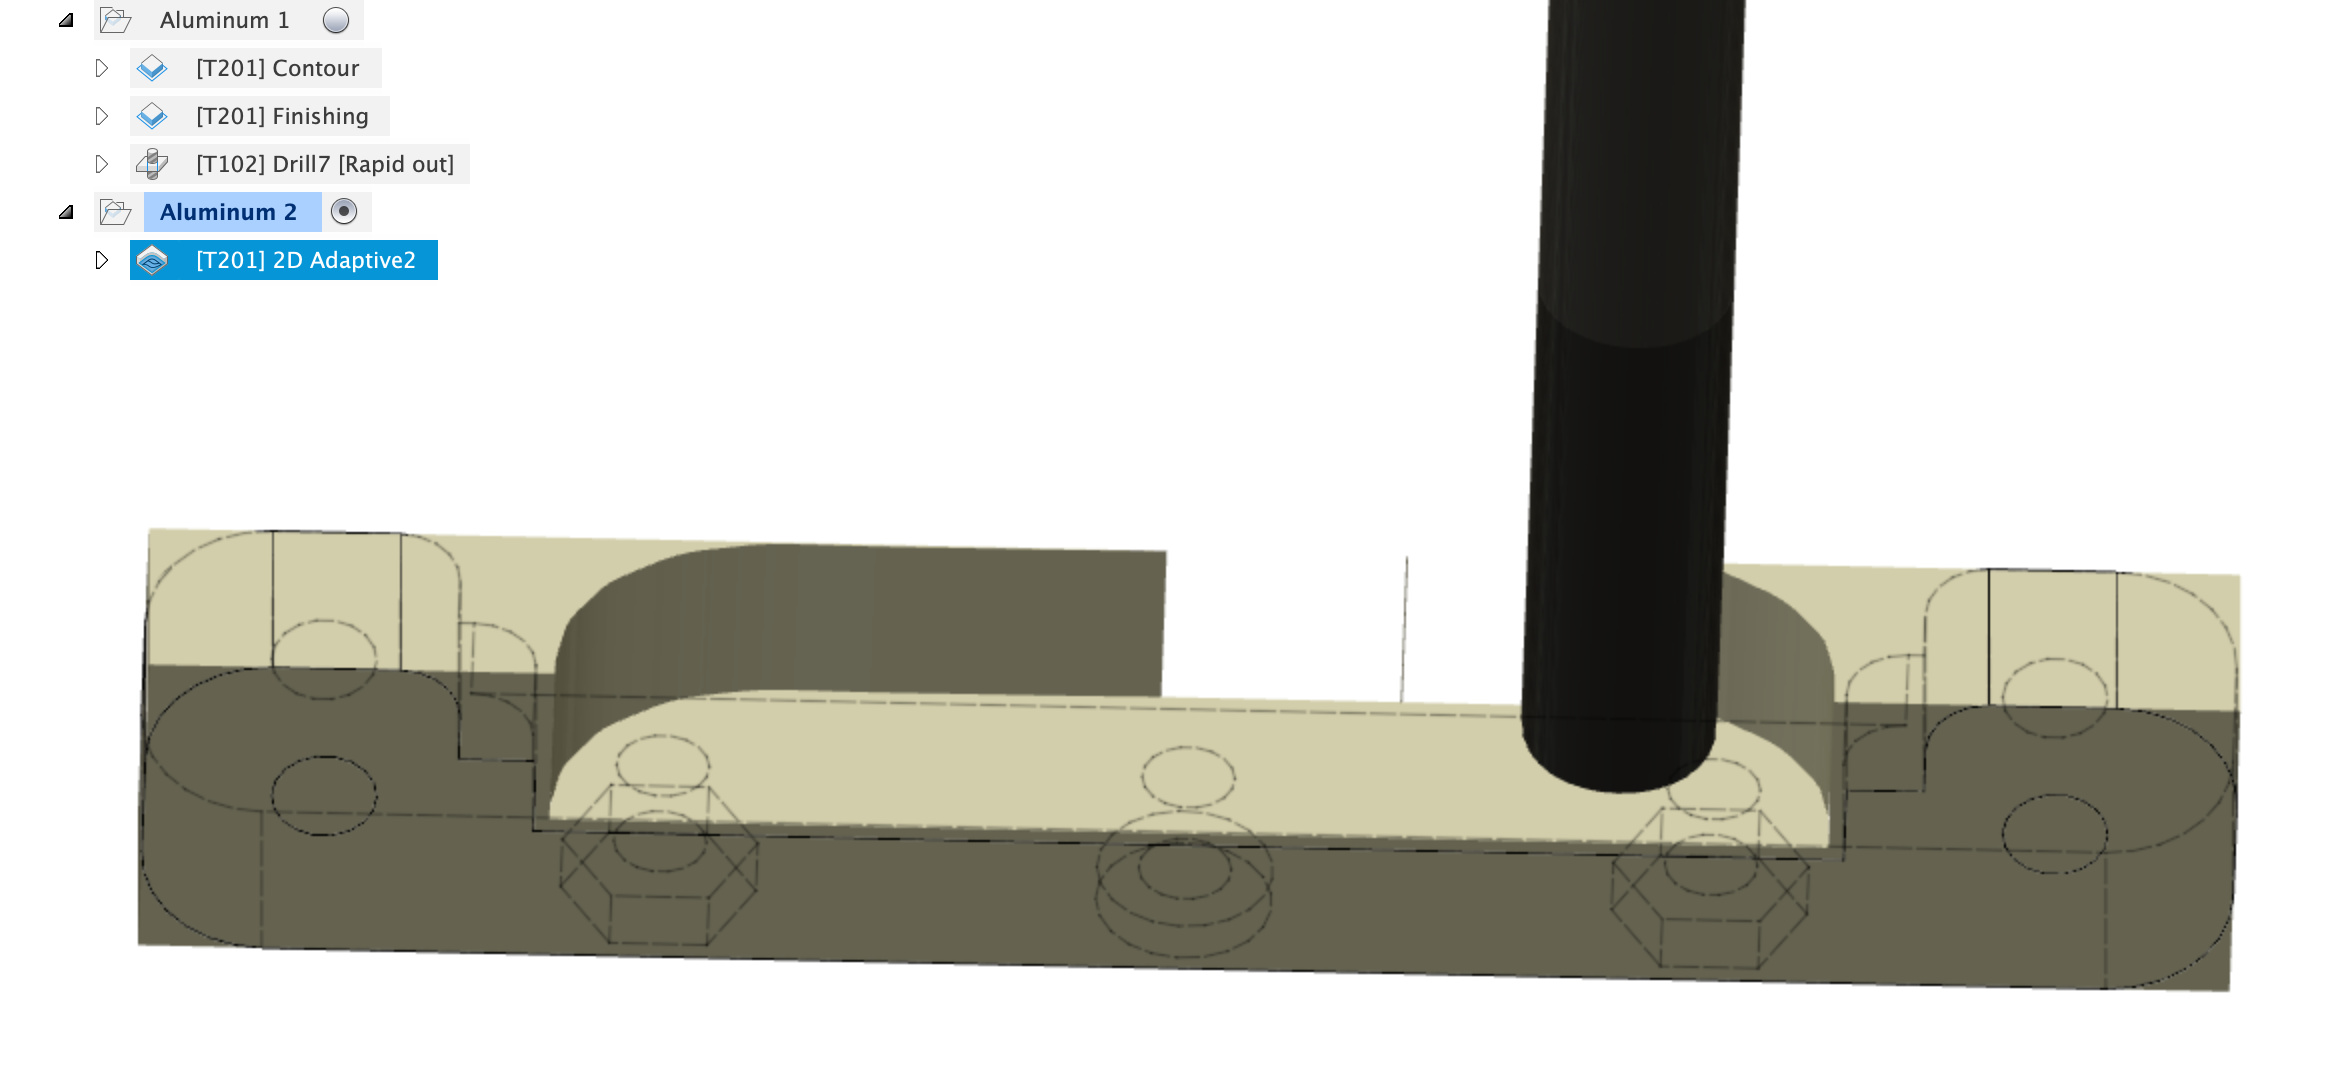
Leave axial and radial. You’ll want to do a finish pass anyway. If your axial stick left is thin enough, you’ll have no problem cutting through with a contour.
What’s your workholding plan? I’d use CA glue and tape in that general area and then clamp the areas away from from there.
I always surface aluminum to ensure I’m starting with a flat top and a true zero.
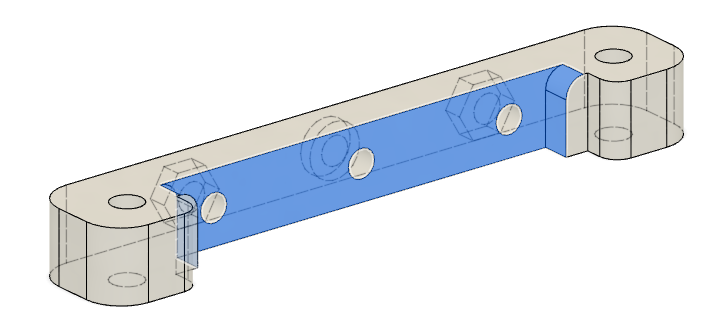
Do those internal corners matter? What about the radius/fillet in the XZ plane?
If you’re drilling on a press, I’d just use a V-bit for a shallow locating dimple.
@neilferreri has it. The only other option I would do is run a separate toolpath for the two holes and then use the holes with 2 screws to screw down the part and then run your toolpath all the way to the stock bottom.
@neilferreri
If your axial stick left is thin enough, you’ll have no problem cutting through with a contour.
I wanted it thick enough for tabs to be effective, but was afraid that thickness would not making a contour toolpath very ideal.
I’ve tried CA glue and tape before, but the adhesive from the tape would get gummed up on my endmill. Does this happen to you? If so, how do you clean the endmill? And was your recommendation to use CA glue/tape AND tabs? Or no tabs? I didn’t think CA glue/tape would be strong enough to hold that small piece down without tabs.
The internal corners matter. I think I will have to rotate the piece 90º and make another pass with a flat endmill to create those internal corners. The workholding for that will be tricky though…
The dimensions of the radius/fillet are not significant.
@PhilG
The only other option I would do is run a separate toolpath for the two holes and then use the holes with 2 screws to screw down the part and then run your toolpath all the way to the stock bottom.
You can limit how much you cut into the tape by setting zero on stock bottom in the F360 setup, and then zeroing Z manually on the wasteboard + two layers of tape. The satisfaction when you cut through the piece but leave the tape intact…priceless
Anyway sooner or later you will cut into the tape and glue, but it comes off very easily with acetone. Actually when I cut multiple parts all the way through from a single piece of stock, after one piece has been cut through, I will pause the job which will retract the router, stop the router, clean the tip of the endmill with a cloth wet with acetone, and then resume.
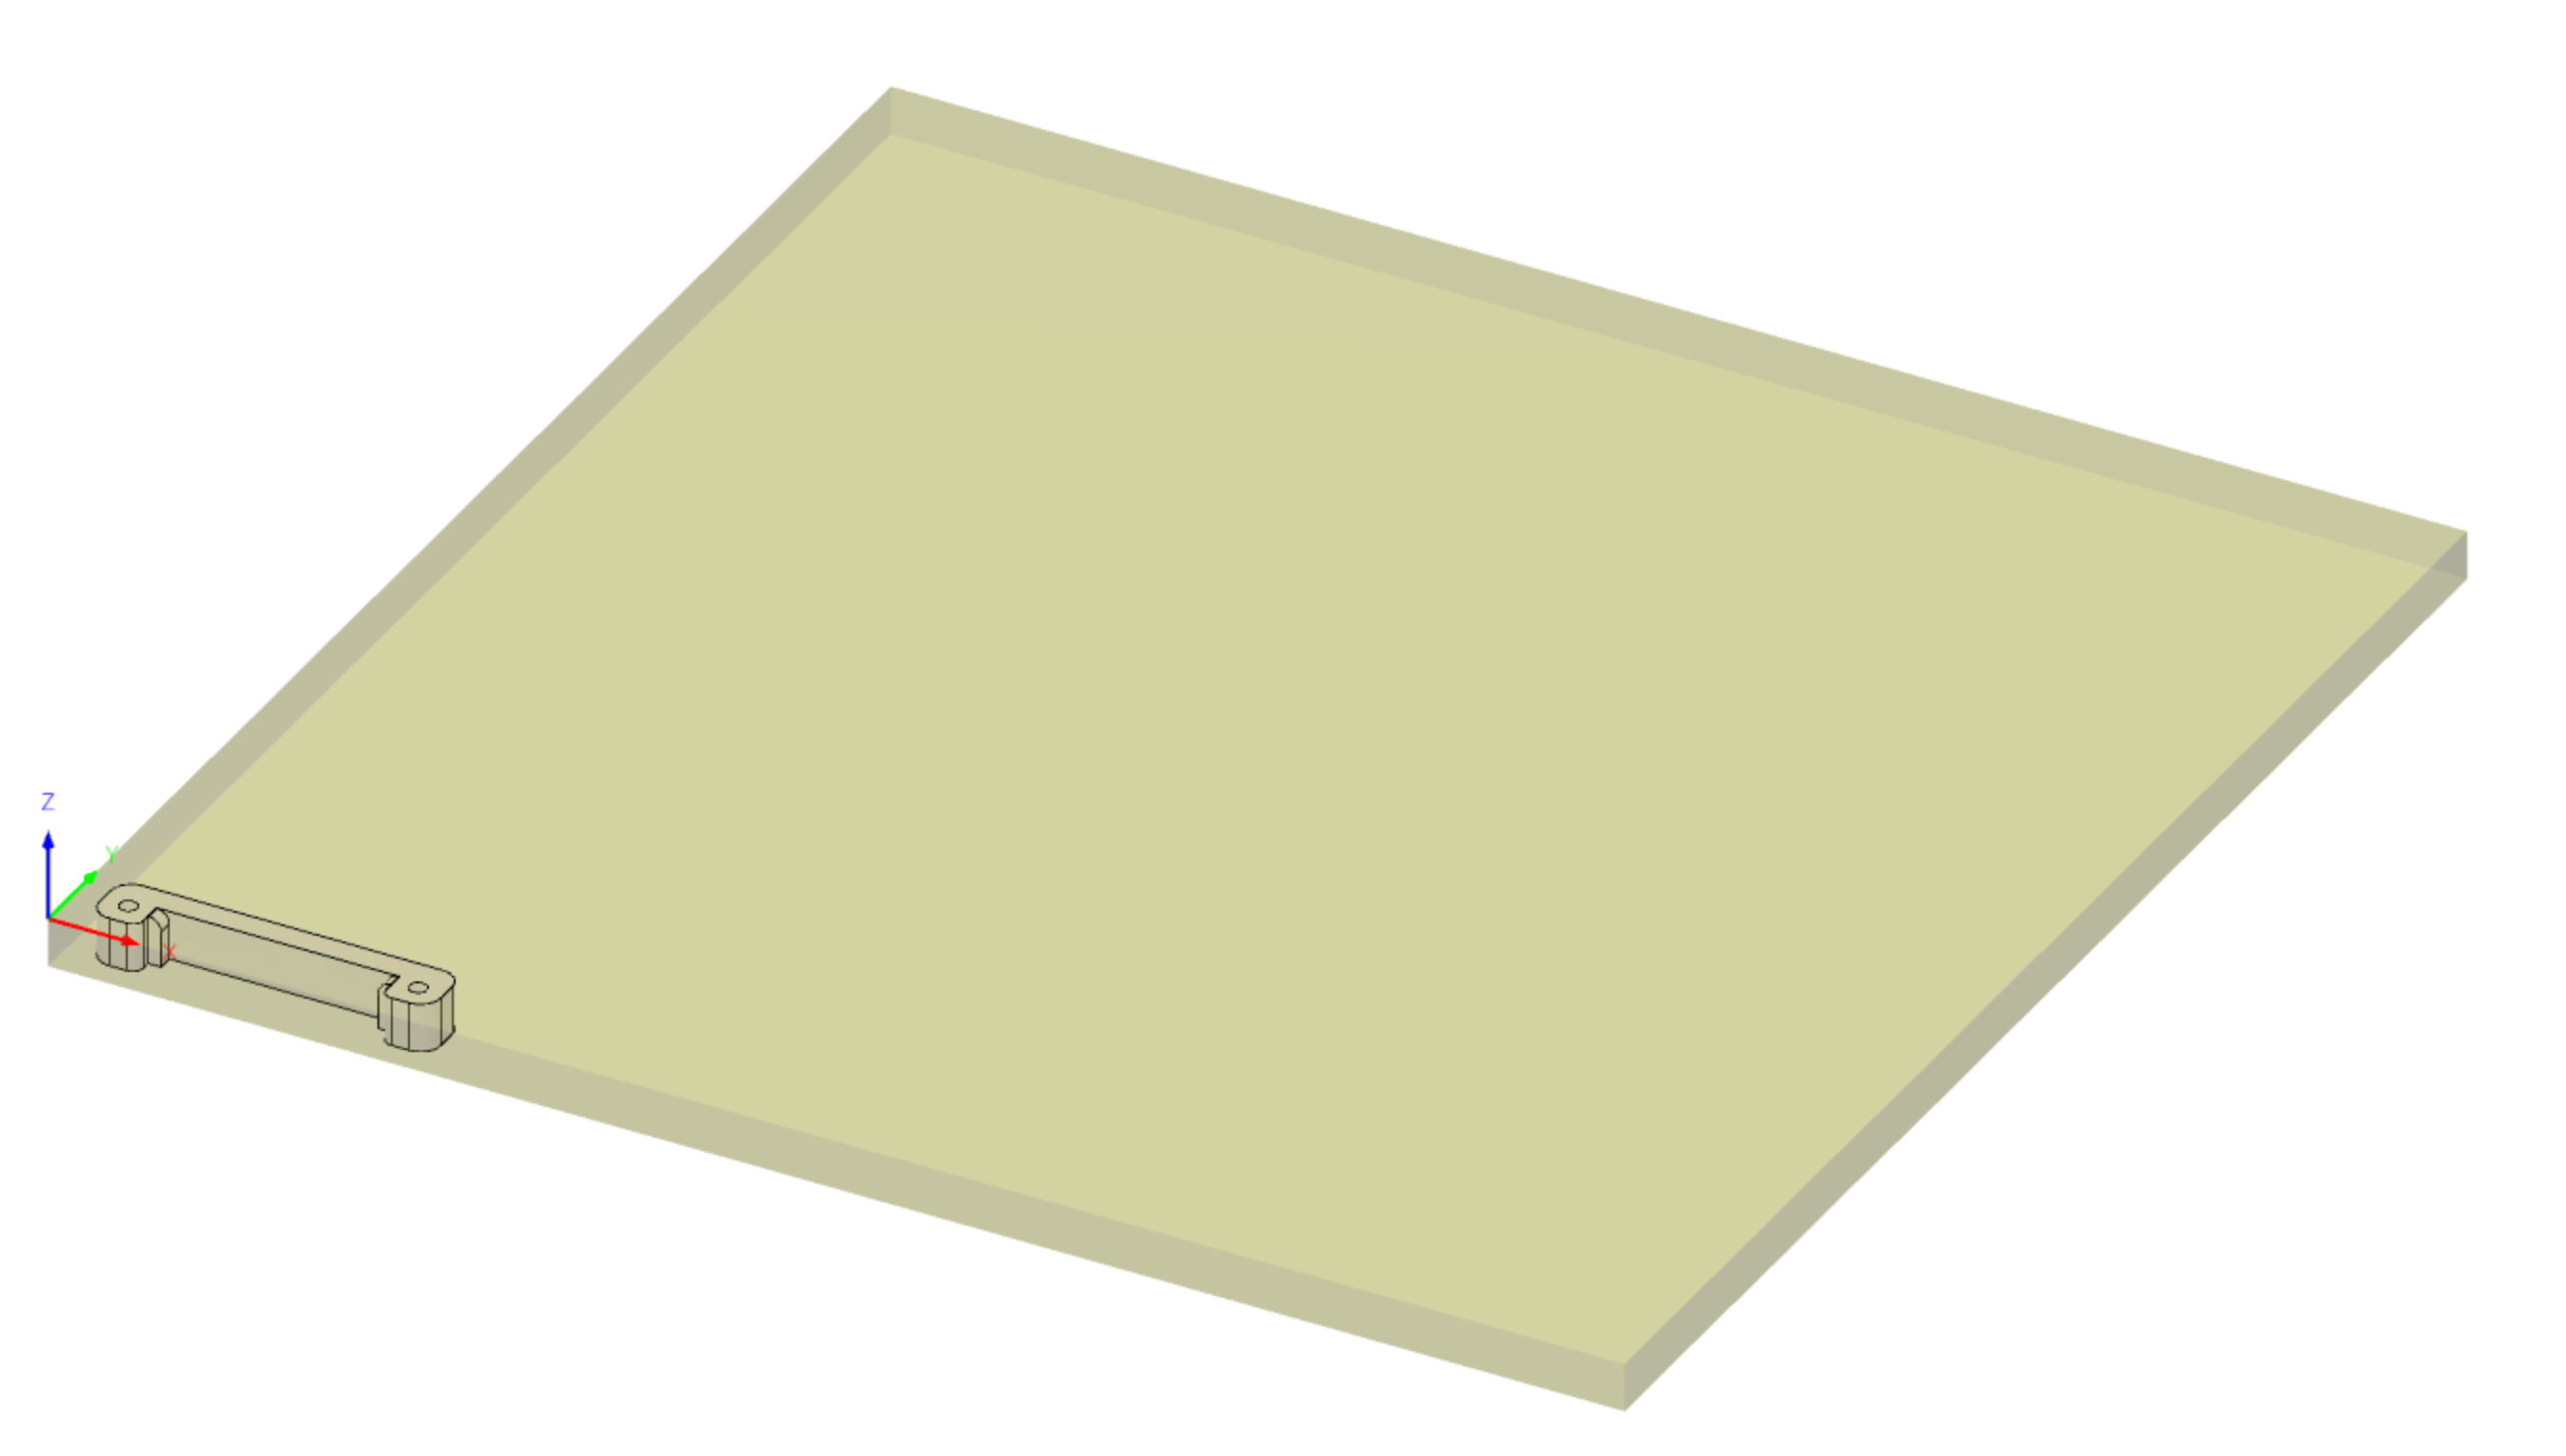
Can I ask a few of you veterans to show me the toolpaths you would use for this part (as in actually do it and send me the file)? I would like to learn by comparing my approach to that of someone more experienced. I am using 3/8" aluminum stock (same thickness as the part). Here is the Fusion 360 file:
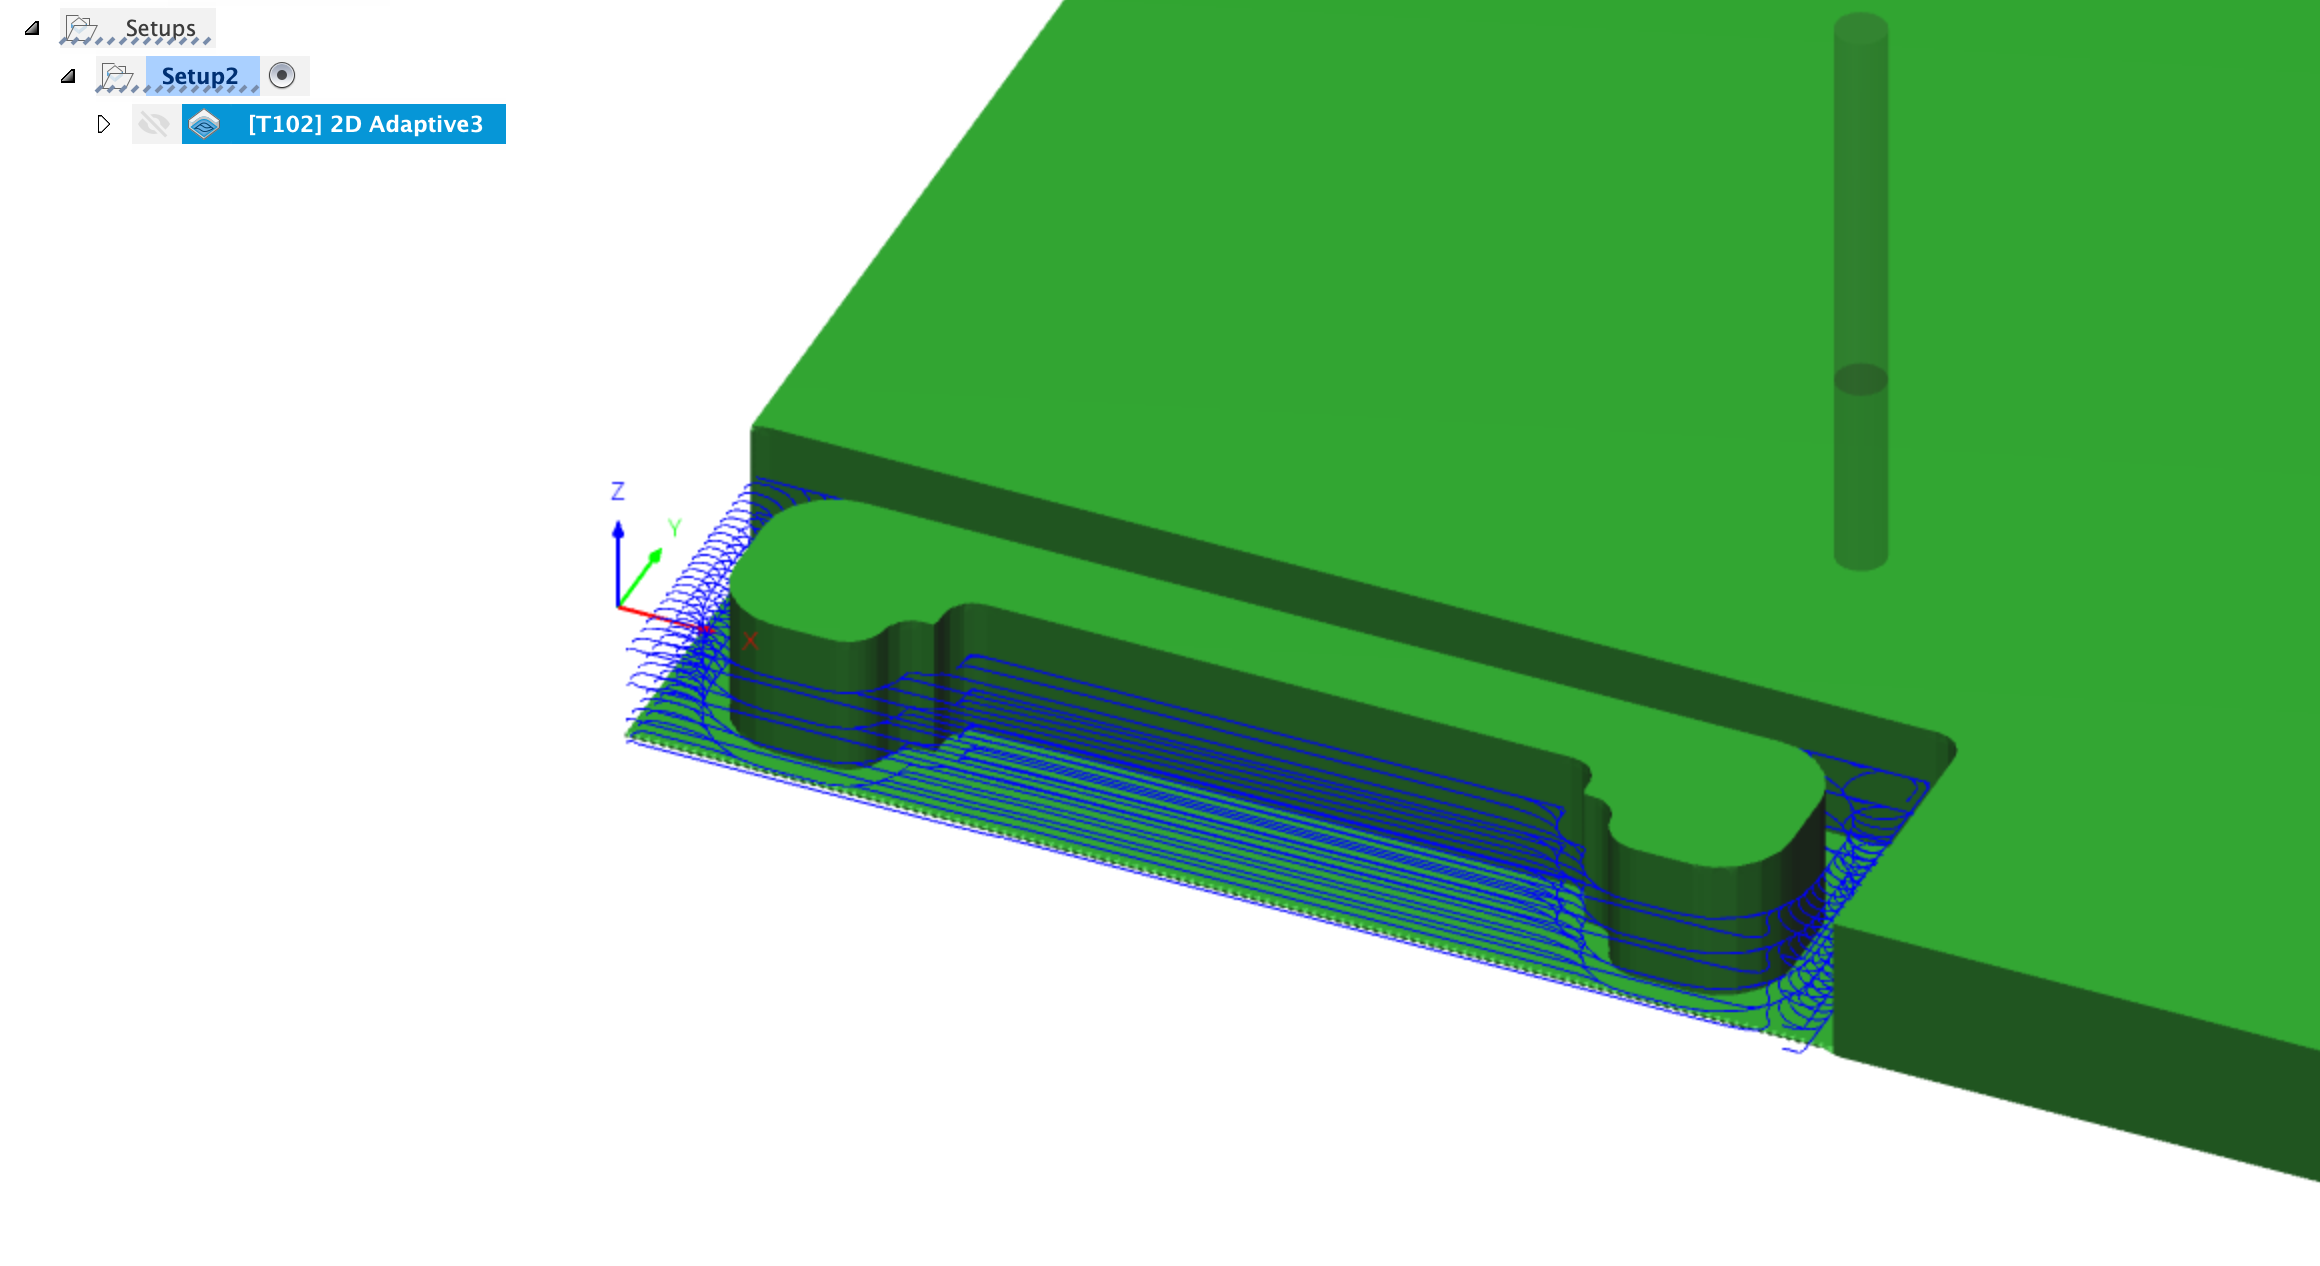
My approach is to use two setups. However, I’m not sure which toolpath is best for my second setup. I’m trying the adaptive clearing, but it leaves a thin wall at one point as you can see below. I’m afraid that wall is going to break off before it gets cut.
Keep in mind that I don’t know your experience level with your Shapeoko 3 or the CNC world in general. I am not trying to be rude in anything I say here.
Here are the questions I would have if I was to try and set up tool paths for this part:
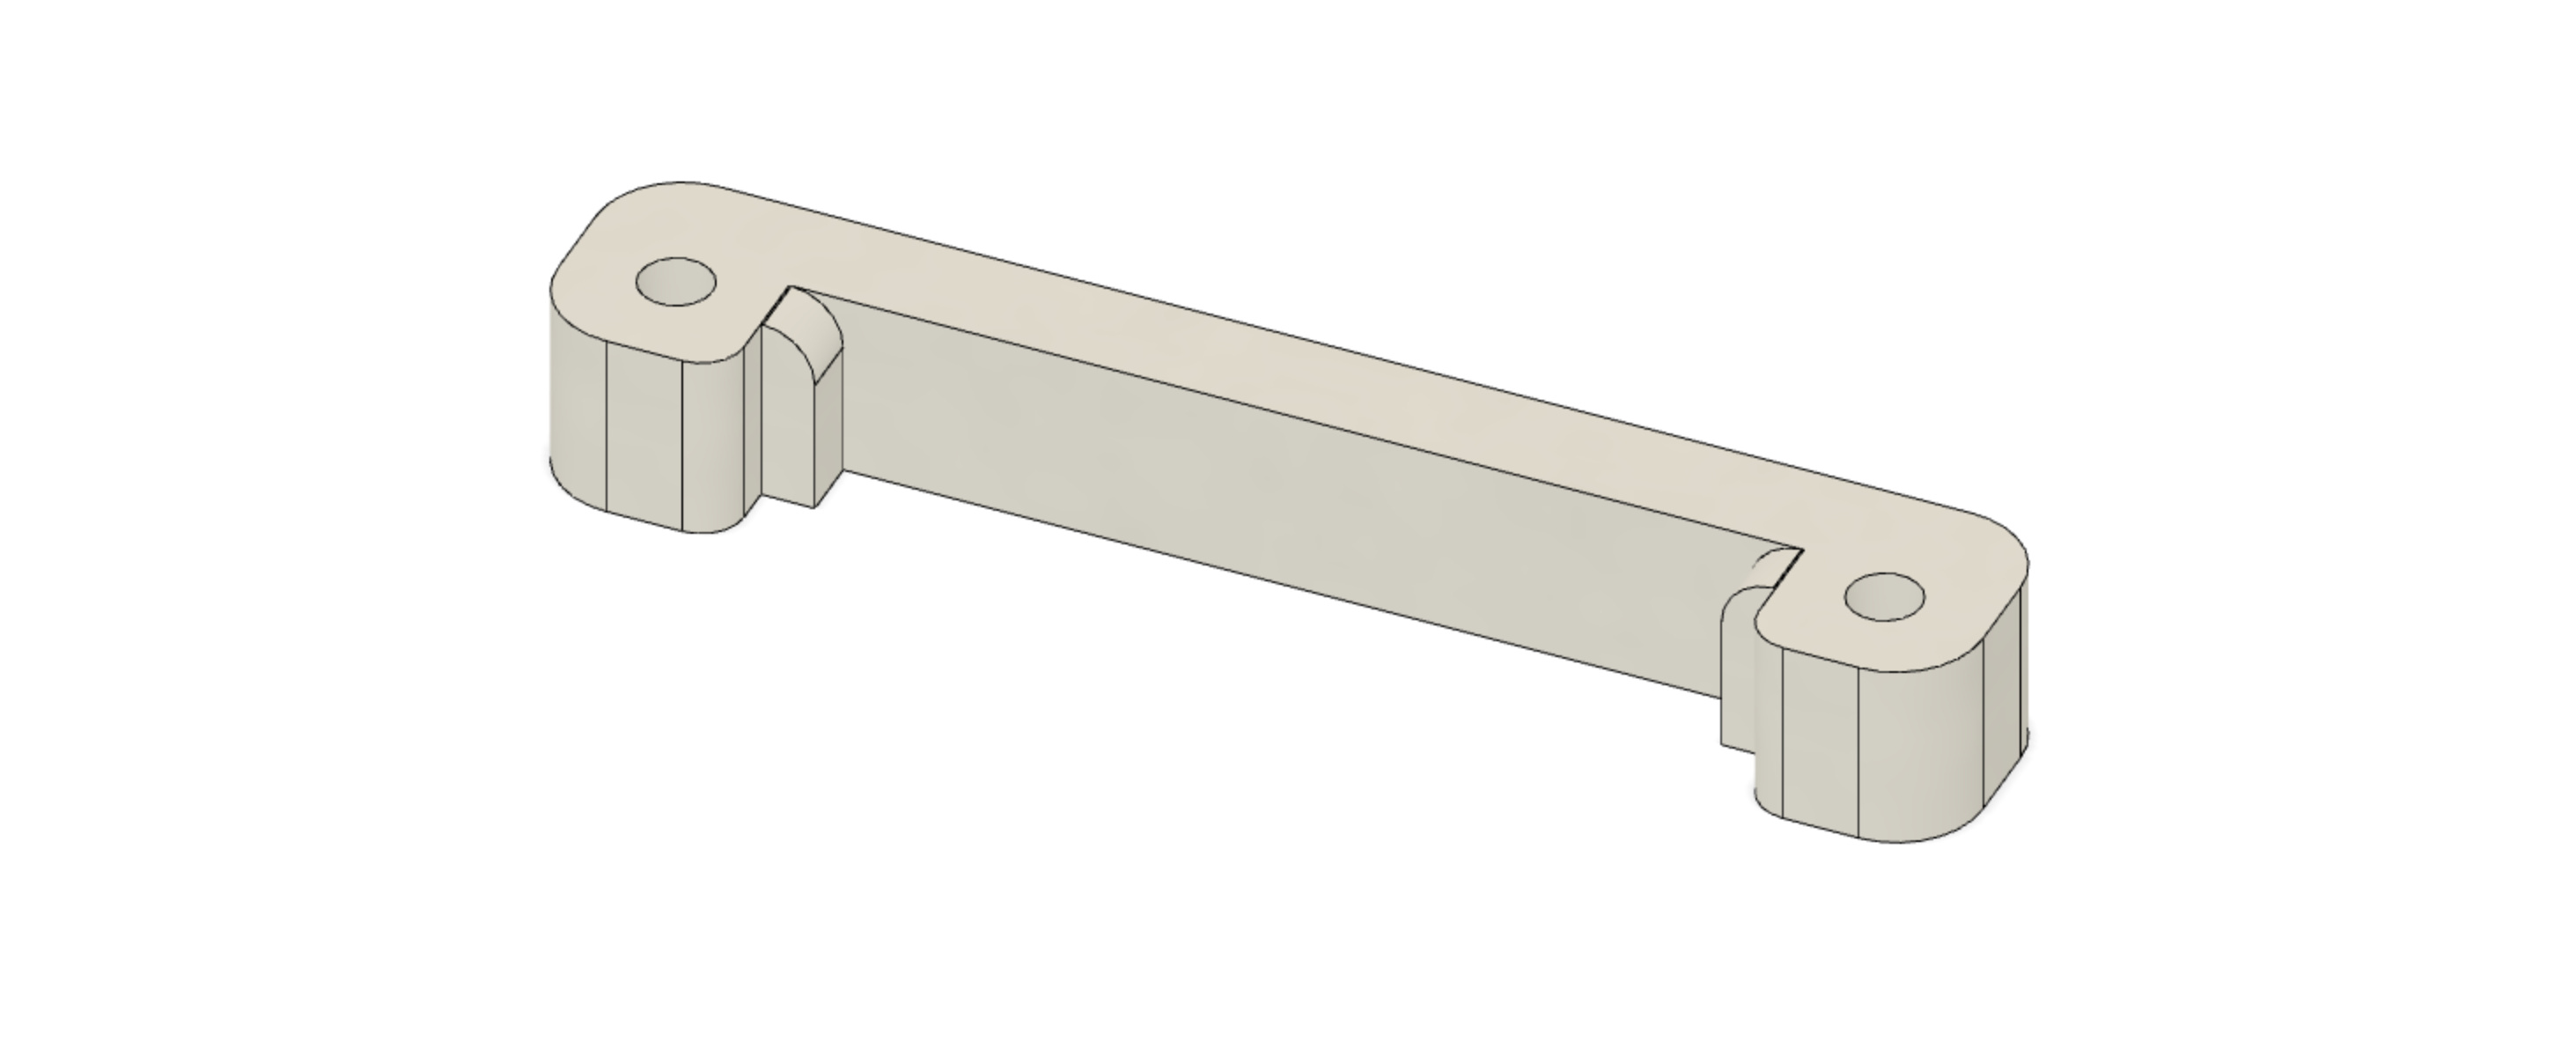
Must the part have that exact geometry? There are several features that significantly complicate or increase the machining required.
Are you planning to make more than one of these? If yes, how many? Does it justify making a fixture?
What are the critical dimensions to be worried about?
I don’t think there is really a right or wrong way to machine parts for a hobby as long as you don’t break things. The only slightly complicated bit I see to this particular case is work holding. This looks to me to be a good candidate for a low profile vise and a different piece of stock. I personally wouldn’t use the stock you have selected. I would use some oversized bar stock and a low profile vise with 3 setups if I only had to make one. I very much dislike tabs, especially in aluminum. Reason is that the tool path that creates them requires plunging into aluminum which I hate doing. Triangular tabs slightly improve this but still require a very steep ramp down into the material in order to have a tab that is strong enough to hold and narrow enough not to defeat the purpose of a tab.
Have you cut aluminum before? What end mills do you have access to? Any single flute cutters? I ask because you appear to be using the 201 and 102 Carbide 3D tools which are not ideal for cutting aluminum.
Are you planning to make more than one of these? If yes, how many? Does it justify making a fixture?
No, just one. I have a vice to clamp the part to for the second setup.
Have you cut aluminum before? What end mills do you have access to? Any single flute cutters?
Only a couple times. I know enough to keep my chipload between .0005" and .002" depending the endmill. I have the 201-Z, 102-Z, and 112-Z. No single flute cutters.
Would you think masking tape and super glue is strong enough to hold down a small piece like this? I would also prefer not to use tabs if I can avoid it.
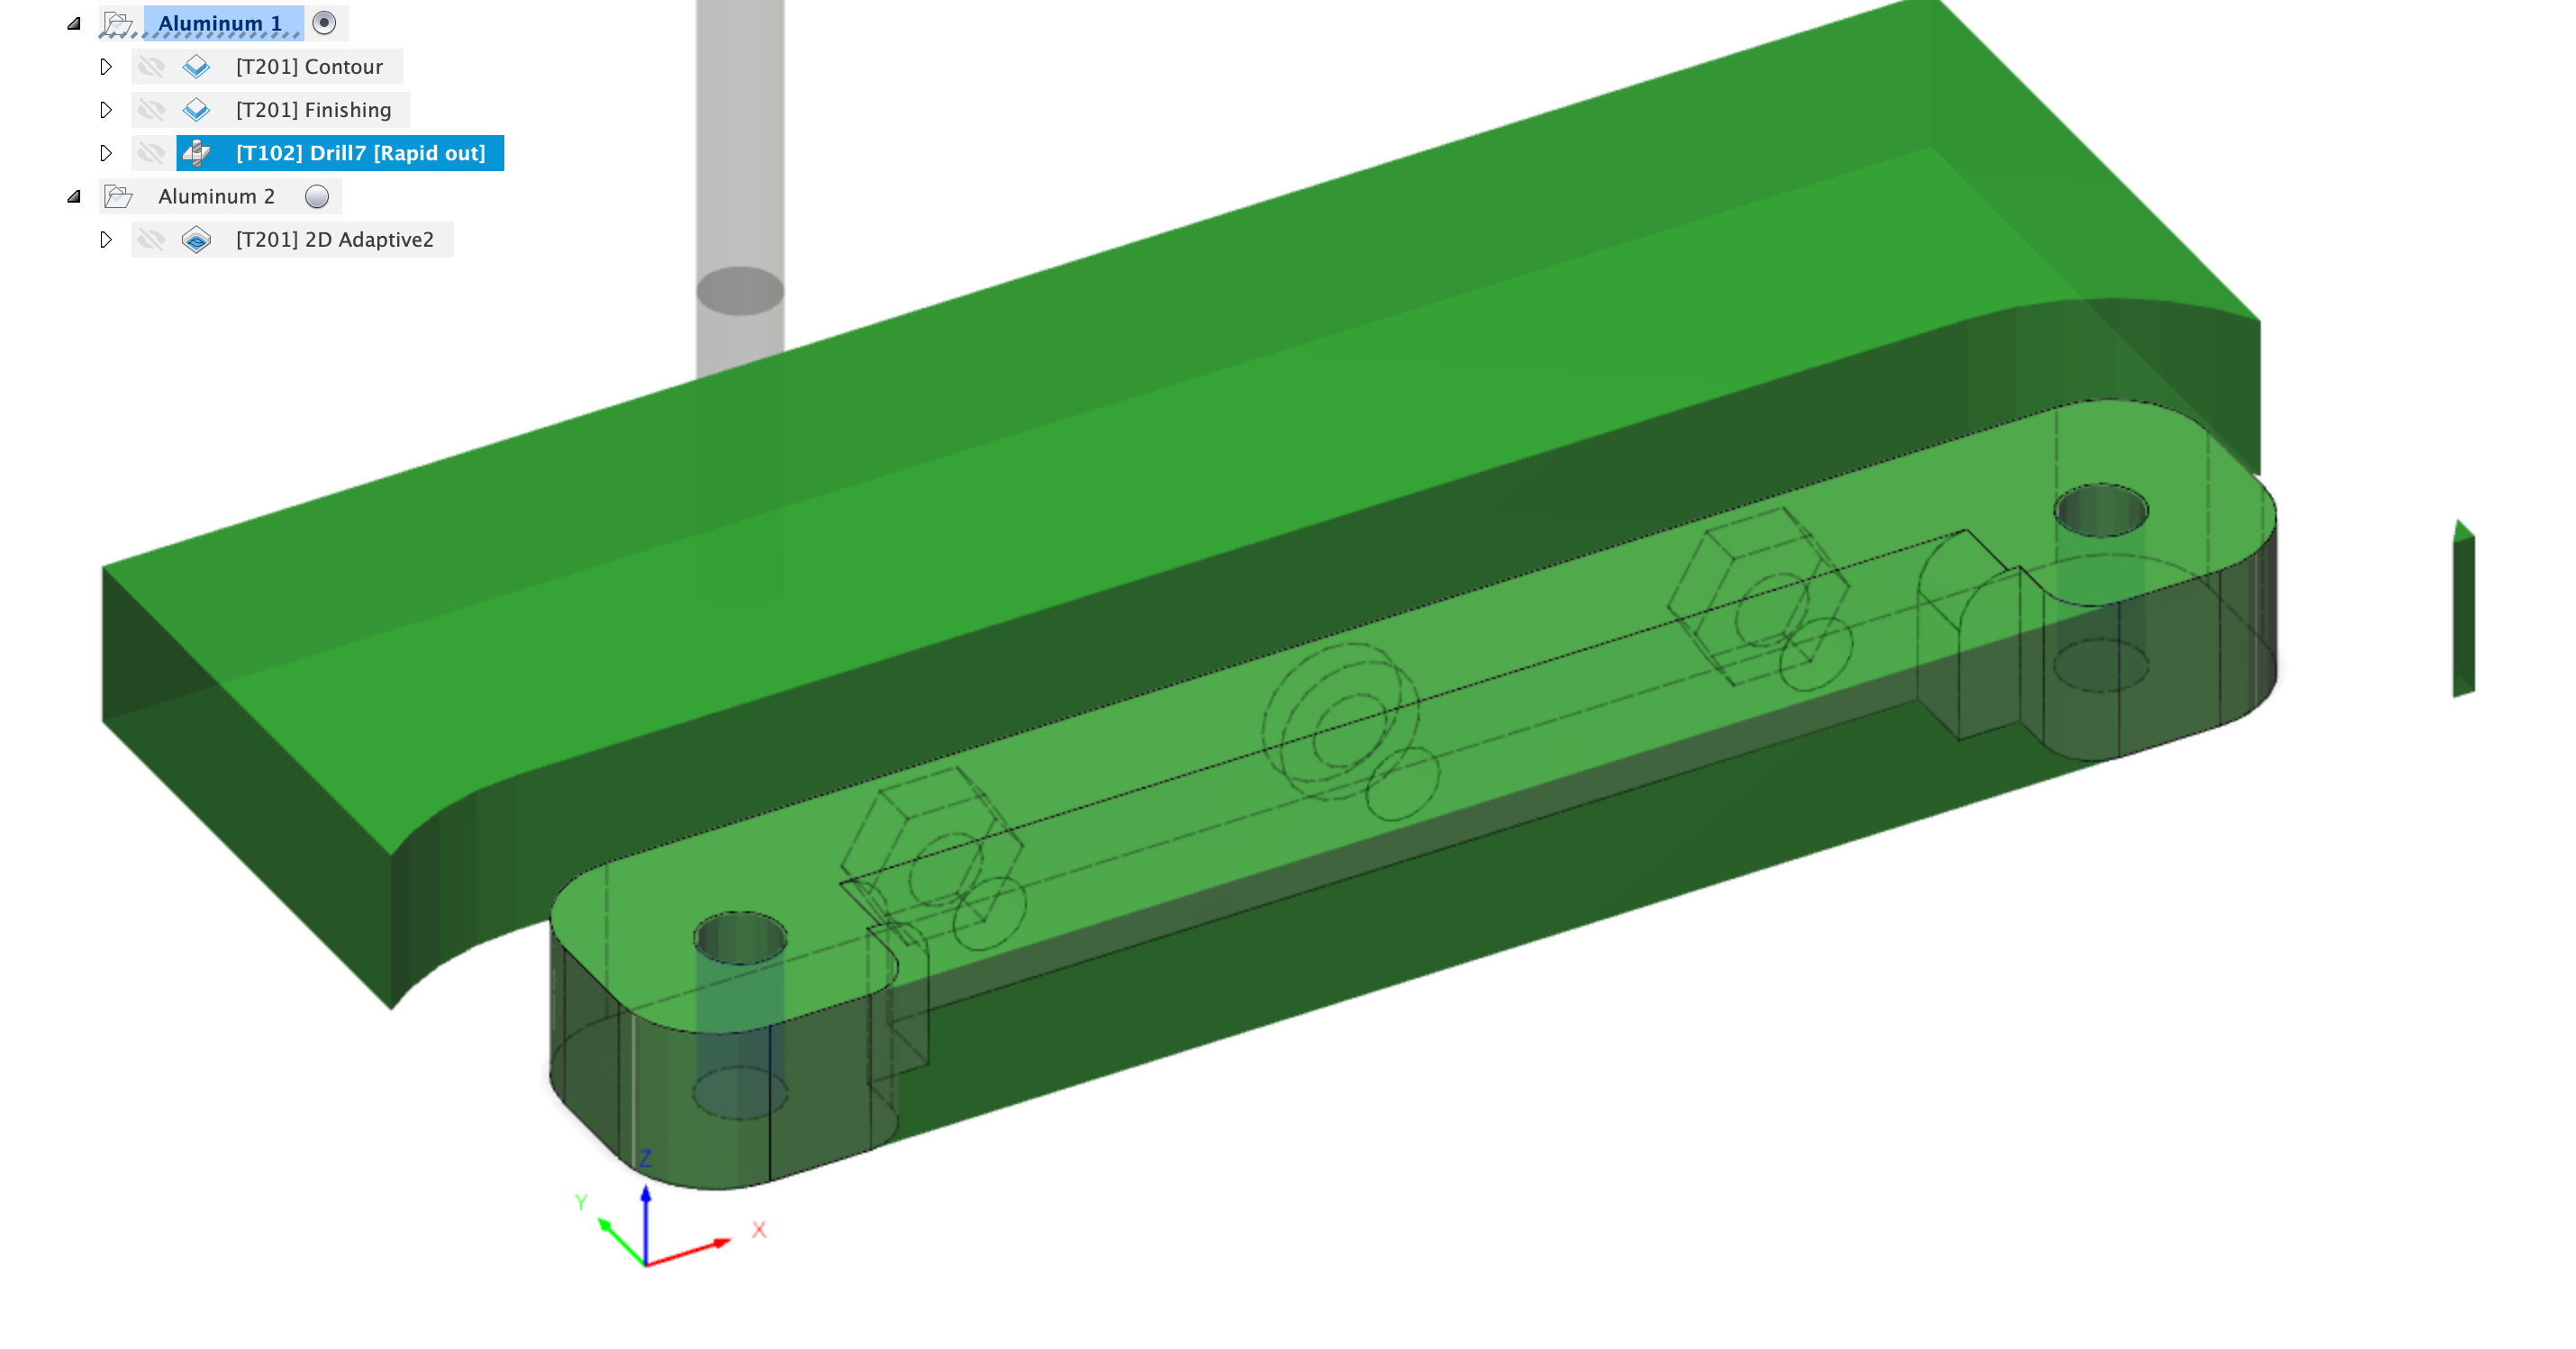
Take a look at how I would start. It is not perfect or complete but it is a good starting point. I removed the extra fillets but you could probably add the 4 outside ones back. I used a gator clamp https://shop.carbide3d.com/products/gatortooth?variant=31475366461501 (or something similar) in the first setup but after the adaptive to hold it during the contour. The second setup is intended to be in a vice. I did not even look at the speeds and feeds and only briefly at the depth of cut on each operation. One thing to be aware of if you intend to bore out those holes is this:
I would not bore them any more than 1x the cutter diameter when using less than a 3/16ths diameter tool or any tool that isn’t a single flute. Some people do more but I find that I break tools often doing that.