@edzacly1, your summary is essentially correct, except that after taking the photos and before putting them into Photoscan, I had to modify them to replace everything that wasn’t the tiki with white. (Btw, the Photoscan docs say not to do any other manipulation–color correction, compression, scaling, etc.–before importing them into Photoscan.) I think there are tools in Photoscan for doing this modification, but I didn’t want to take the time to figure out their tools, so I used Gimp for that.
Oh, and the Shimpo was perfectly stable, but I think that’s really not that important (if at all), since based on other photos, Photoscan will try to figure where the camera had to be to take the picture. I mean, some people apparently take pictures of environments (e.g., the village square) with their cell phones and get at least some results from Photoscan. So my Shimpo comment was almost an irrelevant detail I guess.
As far as the Arduino connection, I realized my D200 doesn’t have an IR sensor, so the plans outlined in the link a few messages back wouldn’t apply in my case. If you go that route, make sure your camera has a way for the Arduino to trigger it.
As far as depth maps go, I believe Photoscan can produce them… Found it–yes indeed:
Anyway, I’m only about six hours ahead of you in terms of Photoscan experience (got a lot of hours of Photoshop, Maya, and Evolve though which probably help), so take everything I’ve written with that pound of salt.
Edit: The depth maps are as seen through a particular camera as placed by Photoscan based on one of your photos. I don’t know if it can produce arbitrary depth maps (like perfectly orthogonal ones) de novo. But many 3D modeling and rendering packages certainly can if it comes to that.
Well I have to say for 6 hours ahead …You learn fast …
I use Corel Draw a lot for photo editing, removing backgrounds etc… I didn’t see the white issue as being pivotal in the process given that your initial result was off white… I gathered that you wanted a pristine series of elements which is a good precaution… thorough …
Now I would assume that the more photos the better the resulting file… I’m wondering if was there a minimum number of images necessary to support a full 360 view? I will have to read up…
I have a few questions given your depth of knowledge…
What do you think would be a minimum resolution for a picture to be in order for the depth map to work properly in Photoscan?
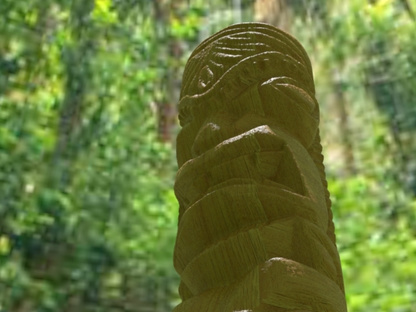
As a single file / image - I am assuming that the Depth Map from a single image would have varying depth which would be dictated by the placement of the camera relative to the object… For instance: Let’s say we downloaded (off the internet) the image of your scary Tiki friend below (as a single image) and then processed it via Photoscan, again as one image …… now when you machine it on a CNC router (as a bas relief) would it be thicker at the bottom than at the top due to the perspective of the shot, I am thinking that once machined as a bas relief it might be a ½ thick at the bottom and a ¼ thick at the top…( depending on how you scaled it)…. Or is it of a consistent thickness ? not sure how that works …
While I am still looking at the digital scanning via a probe as a backup I am ( With many thanks to you) looking at this more and more as I can readily see that it could really shorten the development cycle…
Sorry if my explanation was confusing but I have to clarify: depth maps are produced from 3-dimensional data and not from simply a single photo. What I Meant to say is that a single photo in Photoscan is used to pick the perspective from which the depth map will be generated from the 3D model that you generated earlier in Photoscan from a set of photos taken around that object. Hope that’s more clear.
As for the minimum resolution of you source photos, the docs say (IIRC) at least 5MP, but more is better, all else being equal.
if the example below was generated from bas relief art then your reasoning stands because the file would likely have ben generated from multiple shots…
However I think some depth maps are based strictly on the grey scale from a color or black and white picture, case in point …if the item below was generated from a flat 2D painting then the only means of creating depth map are from the grey scale… once the image is converted from color to black and white… I am speculating… anyway this is what is gnawing at me…if this is the case then possibly if you took one of the images from your Tiki sequence it might render a similar result to what is pictured below…
(below) I am not sure if it was a Bas Relief to begin with or a painting and if multiple images contributed to the Depth Map image… PicEngrave did not elaborate, however what I did find really interesting was that you could according to Pic Engrave edit a depth map…as a result I am getting more and more interested in this process particularly if you can edit the topography… it’s an amazing capability…
Anyway I am going to get the software from PicEngrave after I get the Shapeoko… and will do more research in the meantime …
Thanks as always for your input I would not have looked at this if you had not persisted as I was operating on information that was close to 5 years old… and had no idea that it had evolved to this extent…
So what’s your take on this? did it start out as Bas relief Art or was it a painting?
I’m no expert, but I don’t see how one can go from a painting to bas relief. Doesn’t mean it’s not being done–for all I know maybe it’s super easy and I just don’t understand.
I saw that bas relief on their web site–but all I found was a video of it being rotated a little back and forth so you could see it was a bas relief. I didn’t see any further explanation.
And of course, one can create depth maps from scratch by making illustrations in grey scale. But all this does is makes the things that are white have the highest elevation, the things that are black the lowest, and the greys are in between depending on their brightness.
That image will not work AS IS very well because it has no definition around the parts that you need to have good definition for. All the ones they print over there start with that and they manipulate it in Corel Photo Paint.
Ok a few things MDF is not good for this, it tears like paper so it doesn’t hold definition well.
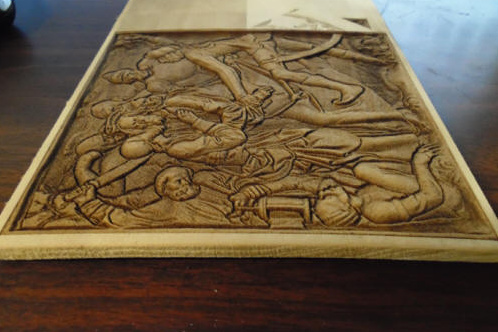
On the other hand the top picture I used the modified photo, the bottom I used the one posted. You can see the lack of detail on the second one and this is due to the lines not being darker like they are in the first one.
This was done through IntelliG-Code Picture 2 GCode generator and it generates Laser codes as well.
Hope that helps!
First, thank you for the input… I could not progress with out it.
In both instances It would be interesting to see what the original image looked like … I am assuming that these were paintings…?
As I use Corel… Are there any tutorials that you can think of for editing the depth map in Corel? I would like to get a feel for the nuances of editing process…
With respect to Intelli G-Code , Picture 2 GCode are both of these are standalone GCode applications or are they incorporated into Pic Engrave software …?.
Sorry I am new to the software side of this process. and I would really like to explore it as it could replace or augment some of my conventional methods for producing patterns. .to that end I could use an illustrated overview can you suggest anything ?
One more question: if you had the choice of choosing between an original 3d object or a hi res image would you prefer generate your file from an image or would you prefer to to physically digitize a 3d object ?
Again thank you…and thanks to Tito for pointing me in this direction to begin with…
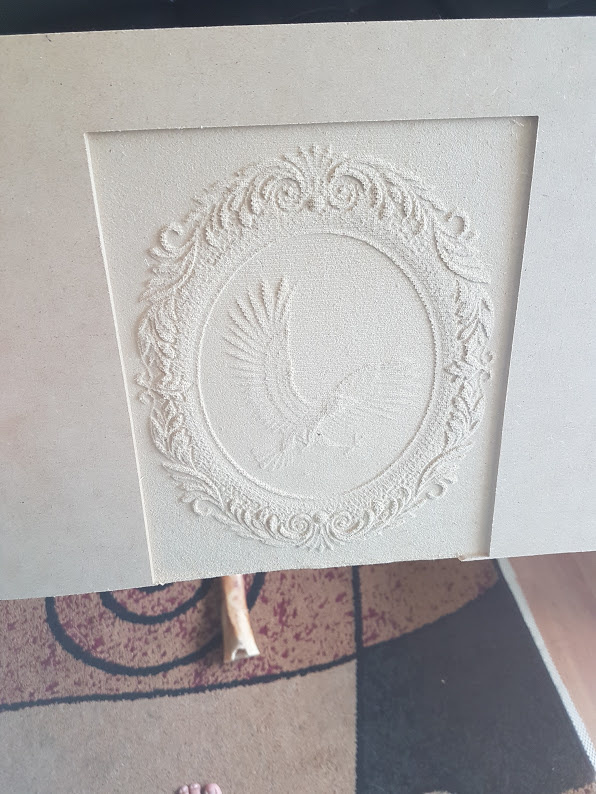
Ok so I don’t know how they edited the picture in Corel, I just went to the forum in PicEngrave website and I copied the photos shown in the prior post. For the bird I used the second picture I posted. This was some how manipulated in Corel based on what was stated in the forum, (The link is in the above post of mine as well if you want to read further on that).
The drawing that was posted by you was used to create the second carving. you can see that it is not as defined and the reason being is there is no DARK lines on the edges where as the one that I found in the Forum that was edited in Corel had clear dark lines defining the edges which makes for definition on a carving.
So I’m sorry I don’t know how to edit them, it was just something I thought I would bring up because I tried one in the past and then realized I could share my same issue with someone else. If you figure out how to edit it in Corel please share as I am interested also.
IntelliG-Code is a GRBL controller software that I wrote and it includes many G-Code generators built into it. It does both router and laser G-Code generation. It works similar to PicEngrave but it doesn’t have all the same features, however I have been adding more features quite often recently.
As far as digitizing objects, I have not done much of that. I have designed objects quite often in CAD software. I have also 3D printed and CNC’d many things. I have tried the ReCAP program by autodesk, it’s pretty cool but I just used the trial version.
I haven’t bought the Shapeoko yet but I’m planning to purchase it in June…
If you’ve read some of my previous post then you’ll see that I’m trying to figure out whether or not I should produce artwork conventionally or if I should try to embrace this type of software to do it… I’d like to try to go to the software route because it would reduce my product development cycle… substantially… while allowing for greater experimentation.
In the meantime I plan to acquaint myself thoroughly with this process so whatever I find out I will pass on to you through this forum… if you’re interested.
I’m reasonably good with Corel so I should be able to figure some of it out. I found this link it’s very brief but does give some insights with respect to the method…
As I said I will continue to research as I need to understand the workflow associated with the process…
Ran into this… thought you might find these youtube videos interesting…
I am slowly compiling a process for Bitmap to bas-relief…
Fascinating stuff cant believe what’s out there … I am still doing a lot of research and will start to attempt creating some files this weekend … Thanks for getting me started …
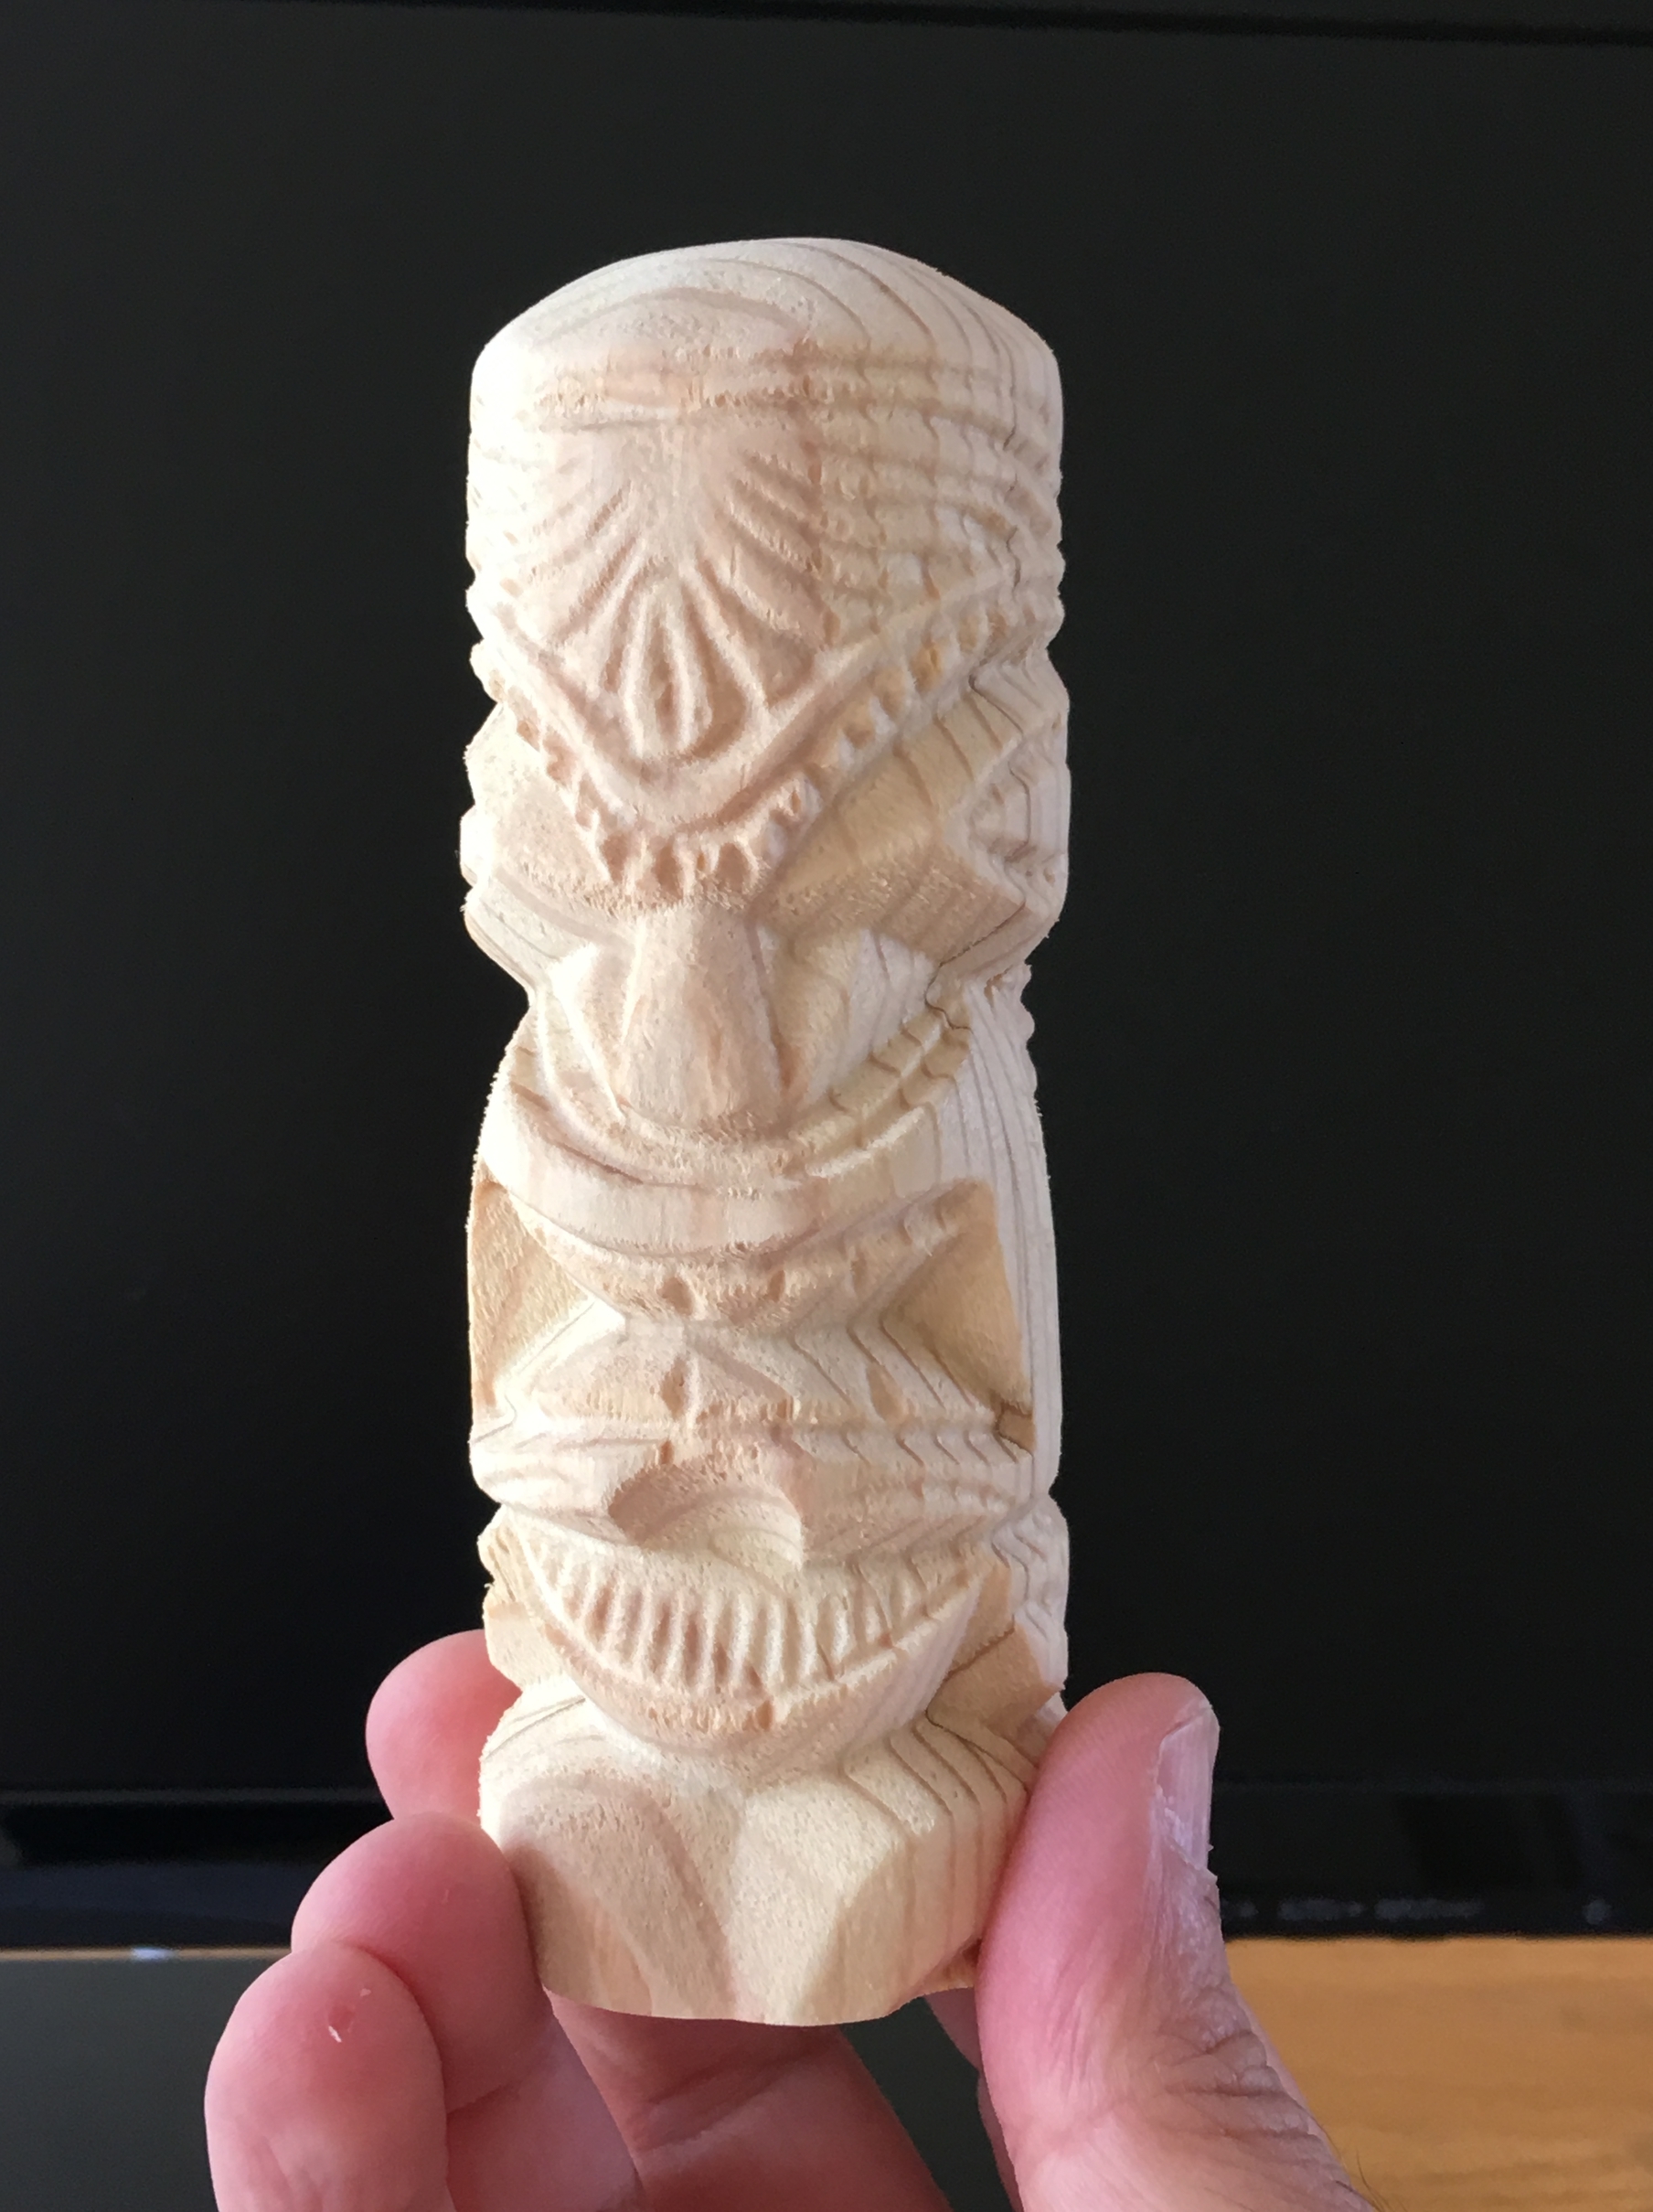
And now coming full circle, here it is. It’s in pine (easy to cut but poor at retaining detail), and by the time I worked out how I was going to secure the stock I had, I scaled it to about 5". Cut one side then flipped and cut the other.