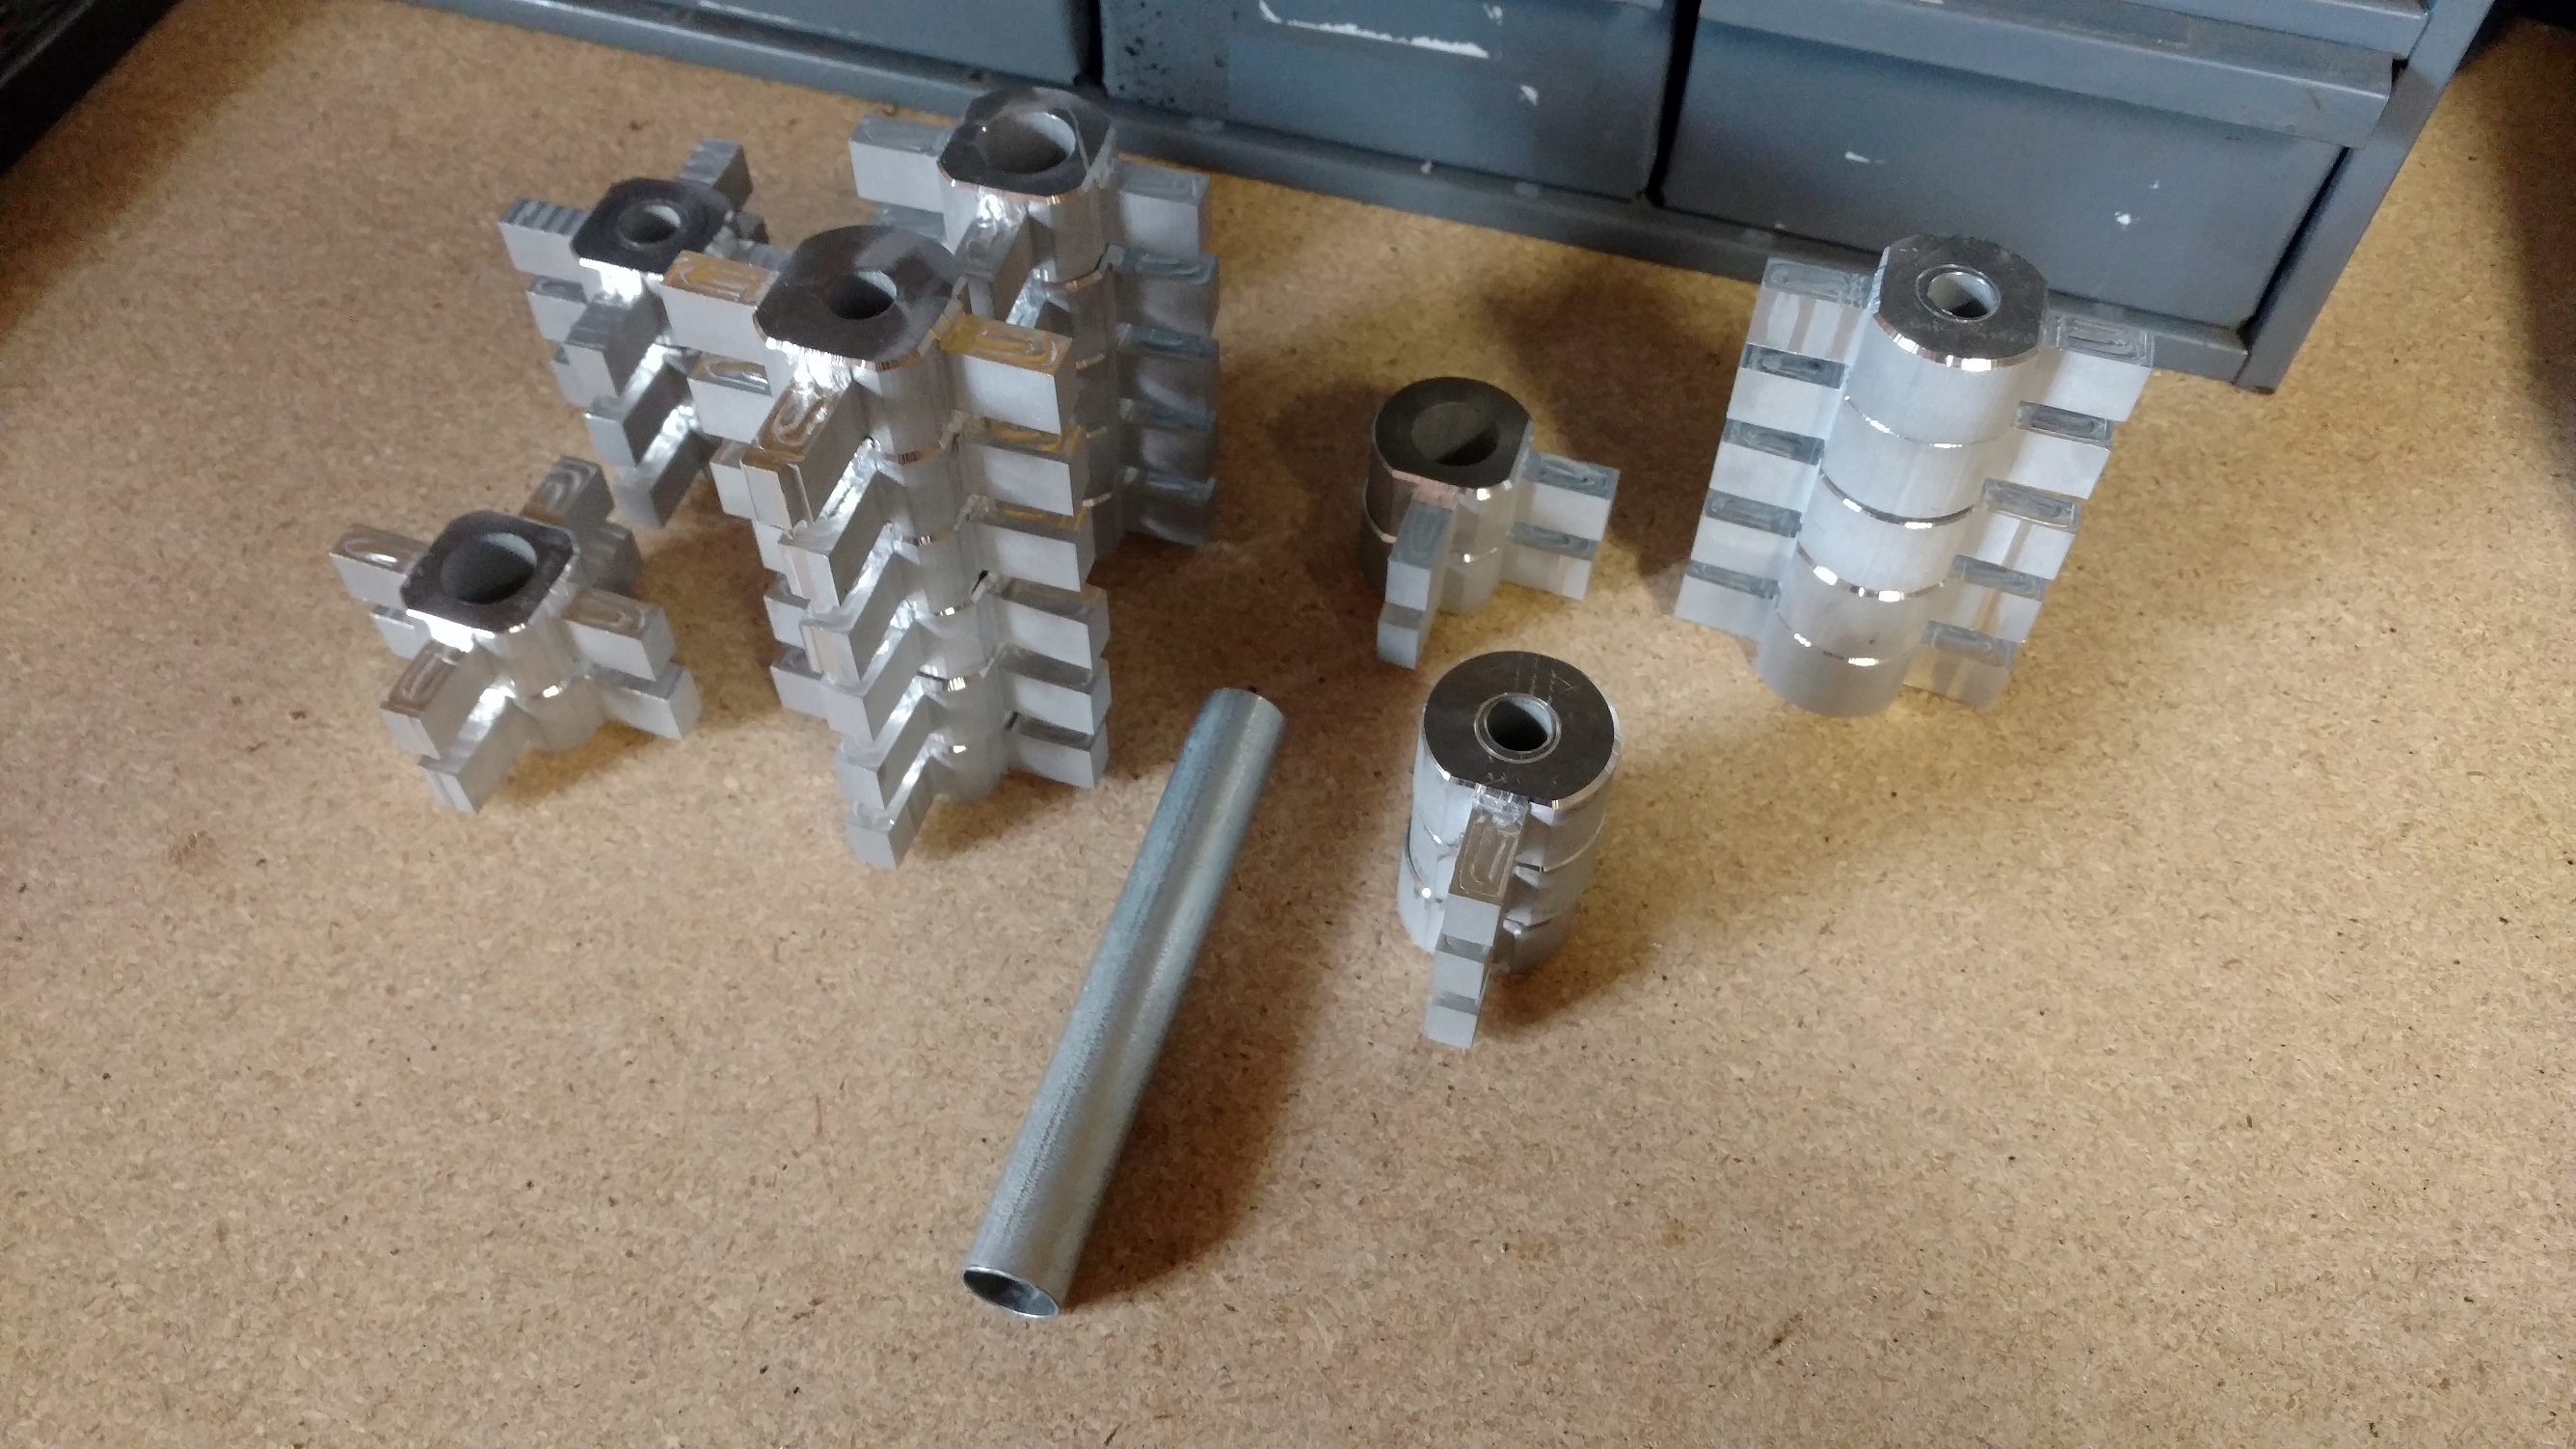
This is my second aluminum project. These are custom connecting blocks for a large custom lighting fixture made from conduit. There are several versions… crosses, tees, elbows, etc.
I made a few mistakes. The first was assuming that my .750" aluminum was actually .750" - it was not (it was about .780"), and I caught it after machining one side of the entire set, so I had to run an extra finishing pass on each.
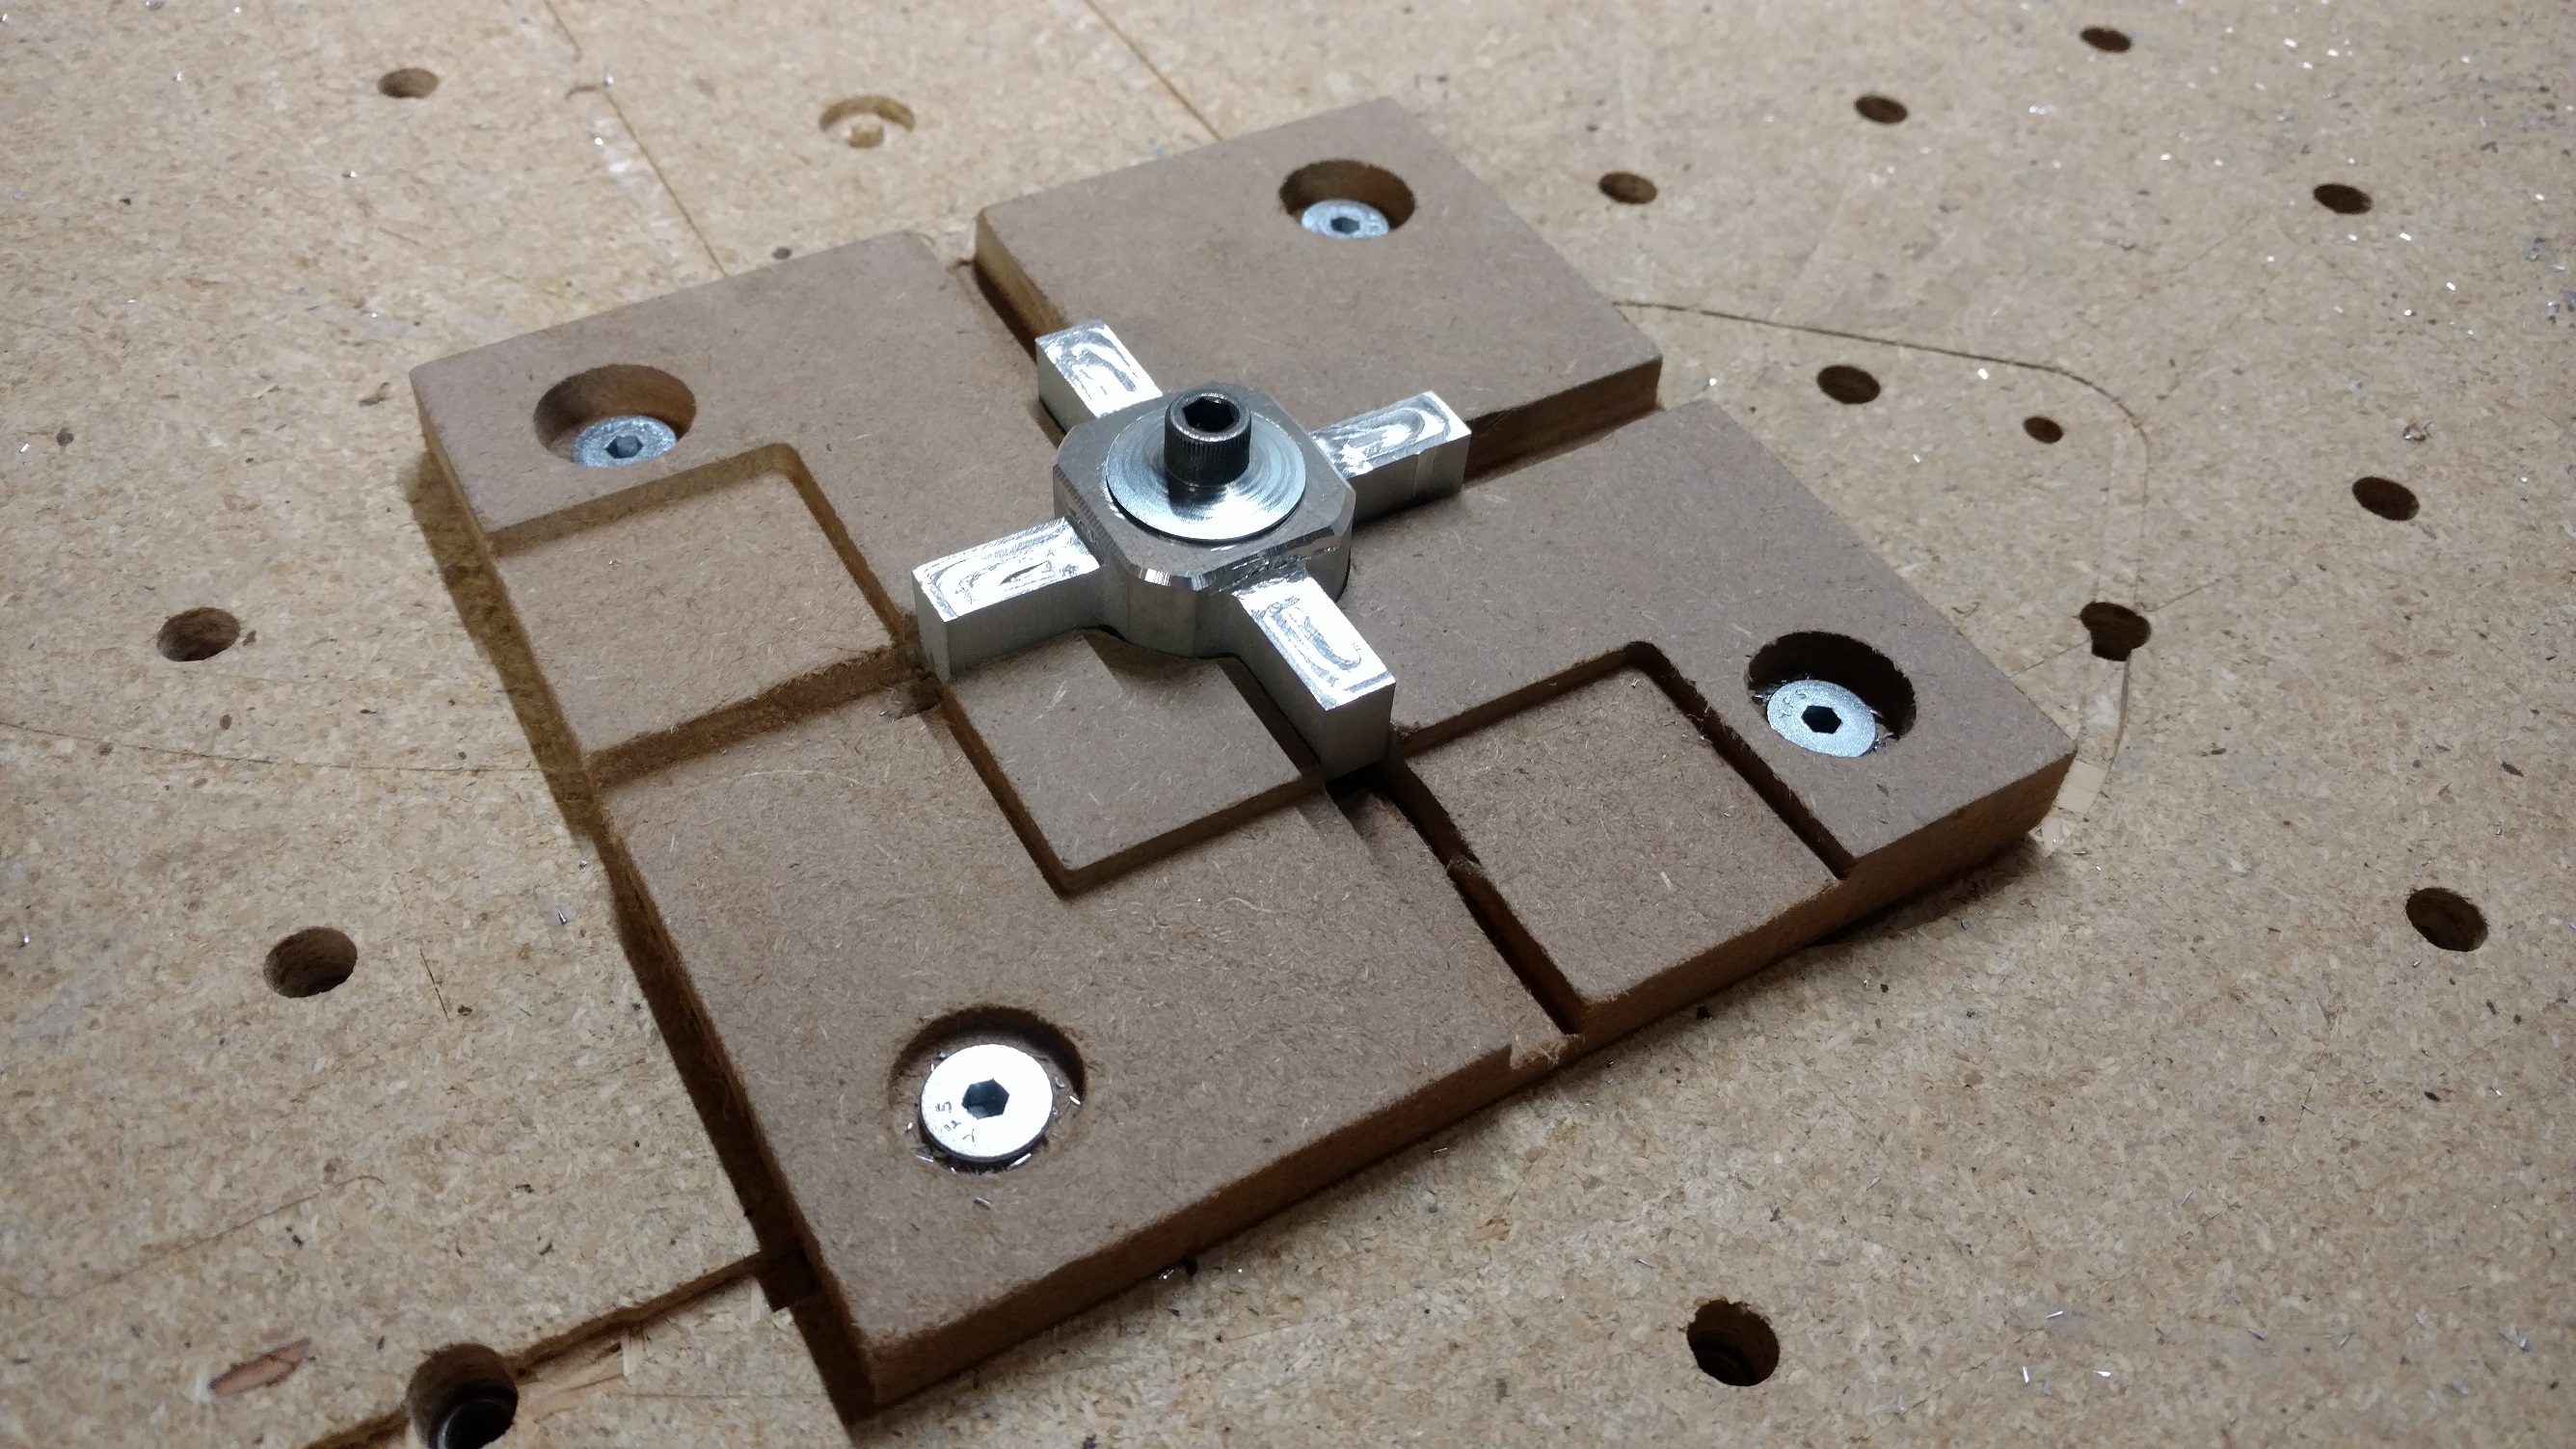
The second was my fixture. The first design supported the parts on the end. Once machined & flipped, it needed re-zeroed. it also didn’t support some of the parts well. The second (shown below) was supported in the center on the unmachined surface so flipping the part didn’t change Z0. I also built a ledge into the fixture for the touch probe.
I used Fusion & 2D adaptive. It worked well, except that it created a U-shaped cut path & the bit kind of jumped around the U-bend. Sometimes it left a little nub of aluminum that I had to knock off. I tried tweaking Adaptive settings but couldn’t get anything that worked much differently, so I just stuck with it.
Each leg of each of these parts gets an 8-32 tapped hole. I can’t put those in on the Shapeoko but would’ve at least liked to spot the parts to make secondary drilling easier. Maybe next time.
They’re not perfect but I’m happy with them. Working this all out was tricky but fun. I’ll be months from now, but I’ll post pictures of the light fixture once it’s installed