I have had this issue before. I have no clue how I resolved in before, or if I ever did, but now it’s happening on another specific job. I’ve been messing with this for 3 days, and wasted a lot of material.
There seems to be a weird stepover happening on the first pass of all these parts. I have programmed, reprogrammed, check belts, checked wheels, tested static, all I can think of. It’s ruining parts and I need these done!
Material is polycarbonate. Machine is an XXL. Programmed in Fusion360. I have made these before without issue, but it’s been about a year.
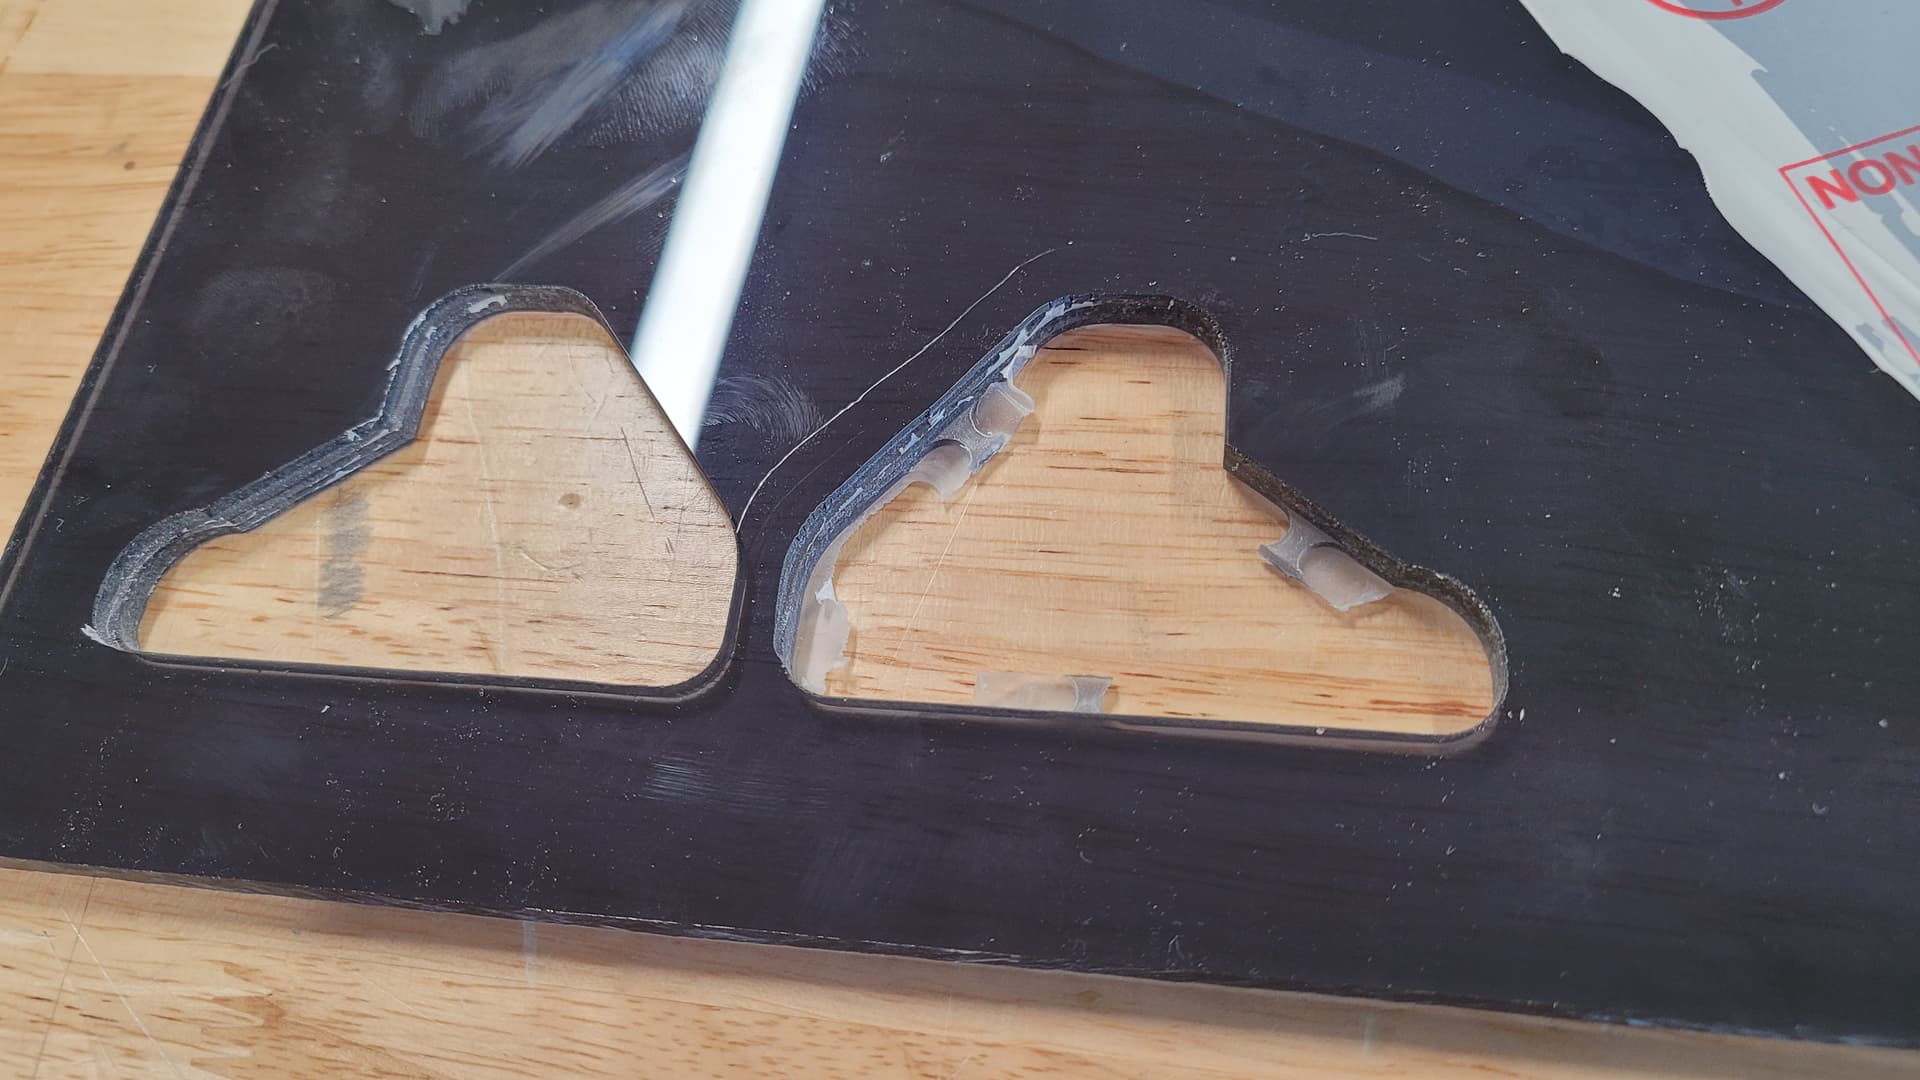
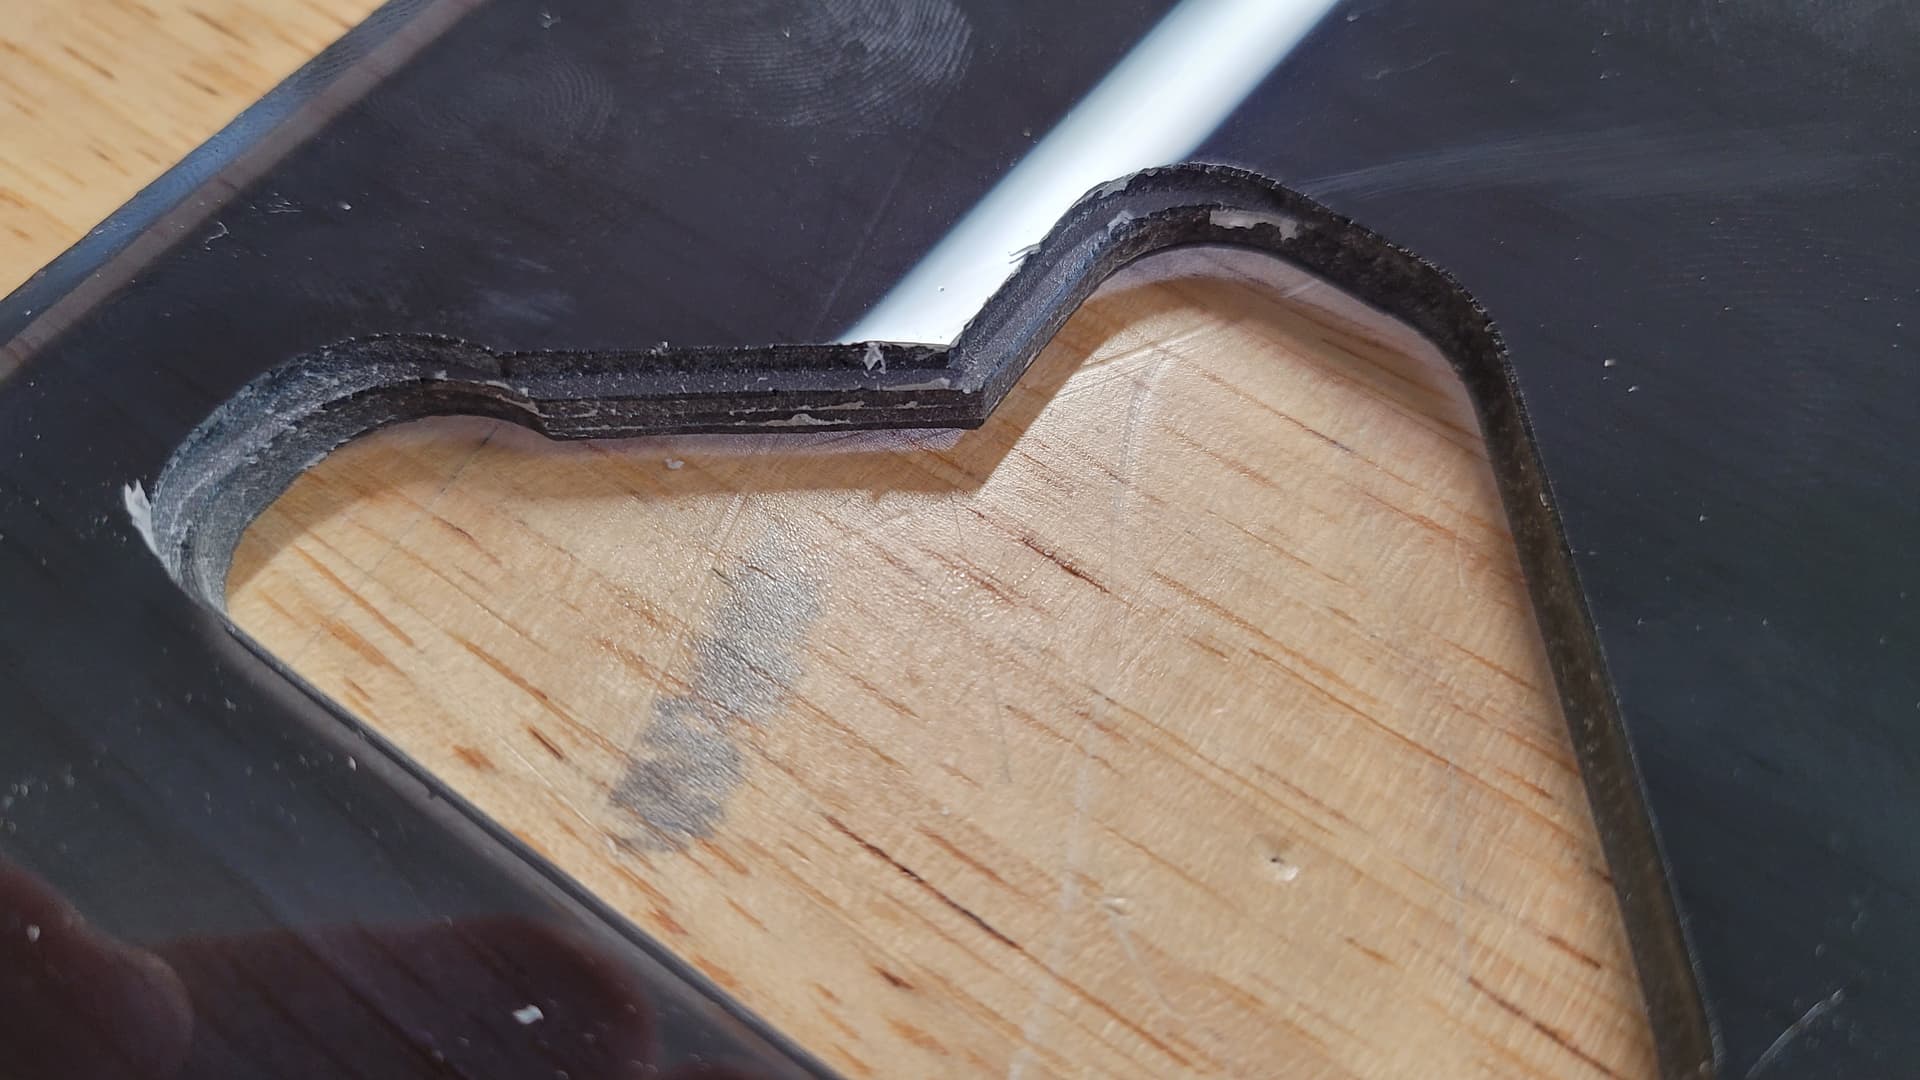
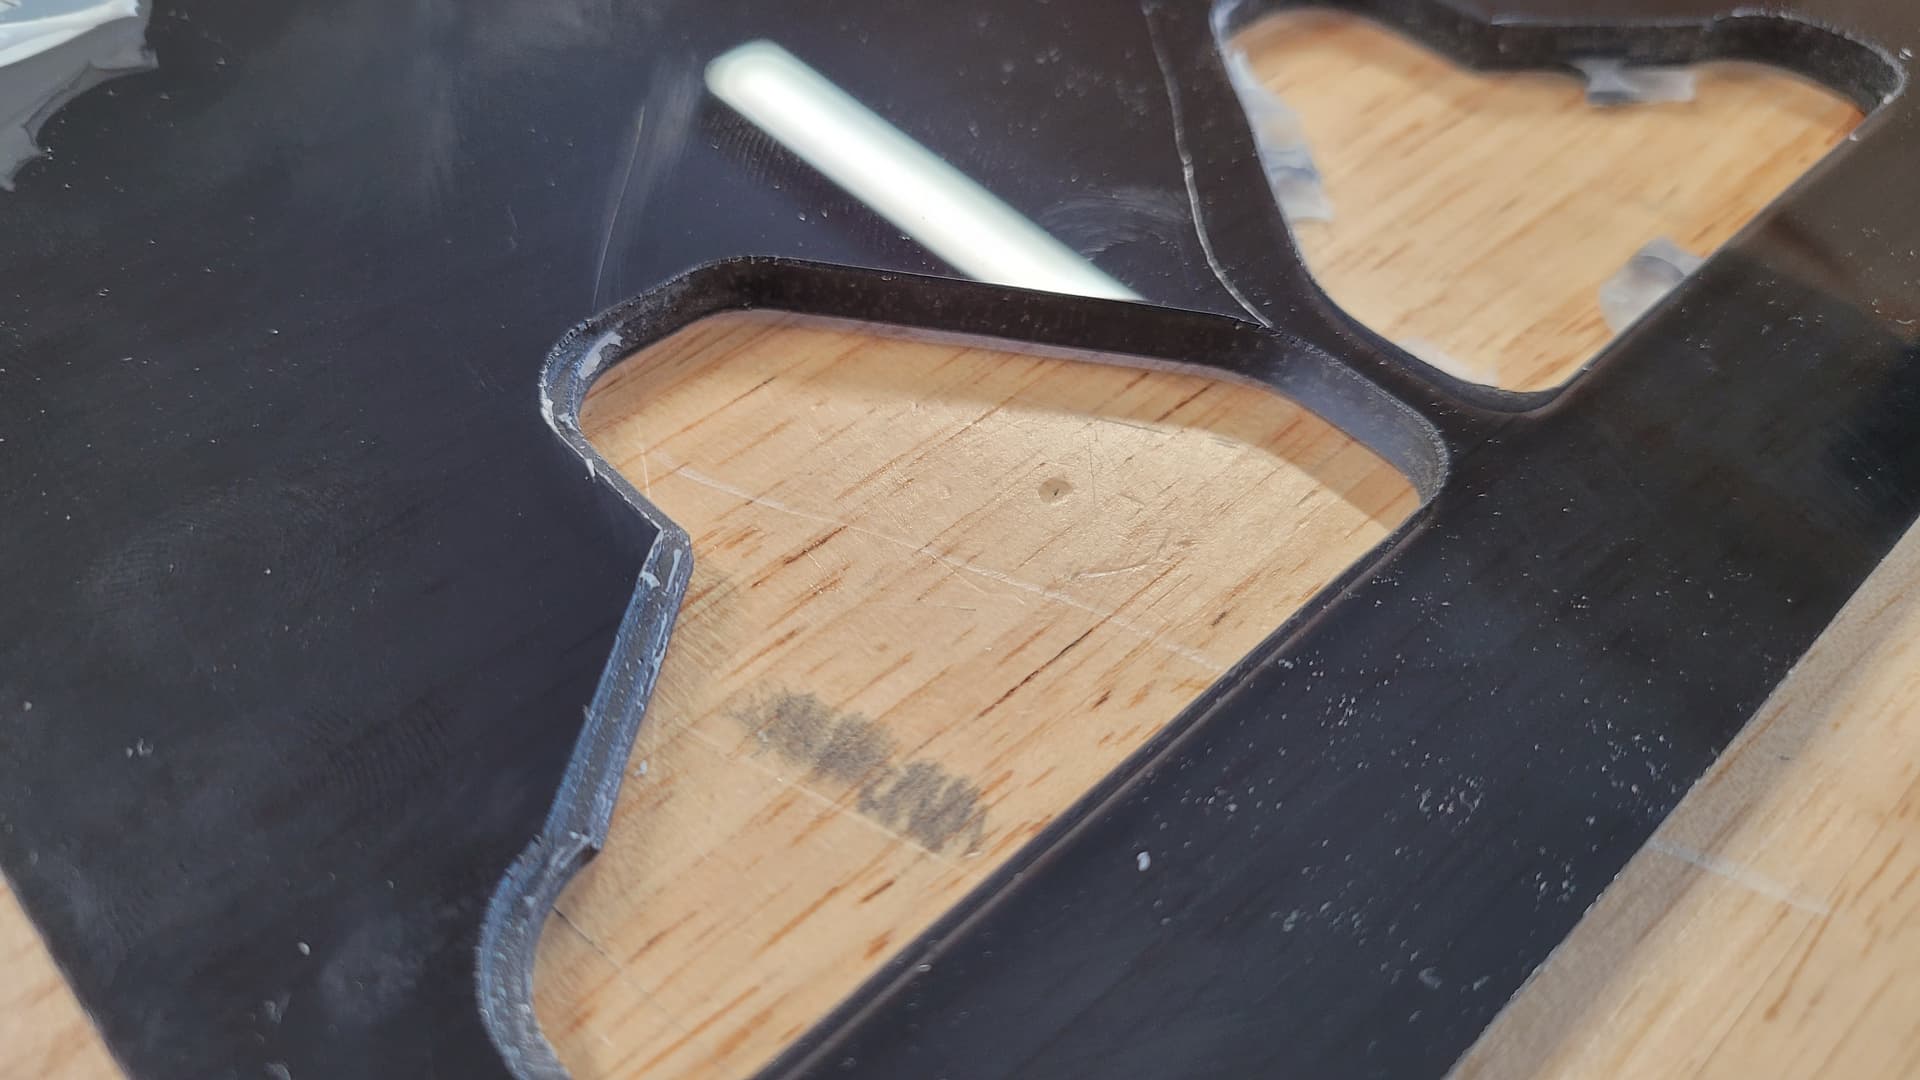
This is a right handed set. There is a mirror copy that is left. Both have this step as you can see in the picture. The step is ONLY on the first pass and IS the correct position, then for some reason it shifts and cuts INSIDE where it should, making the part too small.
Here is the latest attempt and wow what a mess. It’s all over the place.
All the same part, all have some sort of step.
The two circled are the most correct of the batch, and then you can see how the sides pointed at are cut super thin, in different spots. WHY???
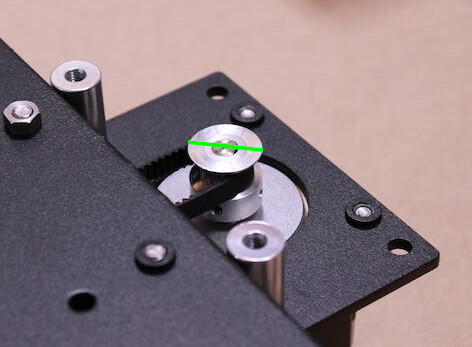
I’m with @Steve.Mc on first double-checking whether the pulleys intermittently slip on the motor shafts.
Draw a line like so on the X motor pulley (the slip seems to be along X axis in your pic)
re-run the job, and observe the pulley: does the marker line gets dis-aligned, even temporarily ?
I just removed the x motor and pulled out the screws, cleaned and reset them. I’ll run one pair and see what happens. I’ll feel like a complete idiot if thats all it was. Might need to come up with a larger flat and screw if its that simple.
Hehe, yeah I know. I replaced that one with a longer one, checking both Y axis while I’m at it. Some day I’d love to figure out how to replace the belts with Pro parts…since I will eventually attempt to make this thing bigger.
Running a new test here in a minute.