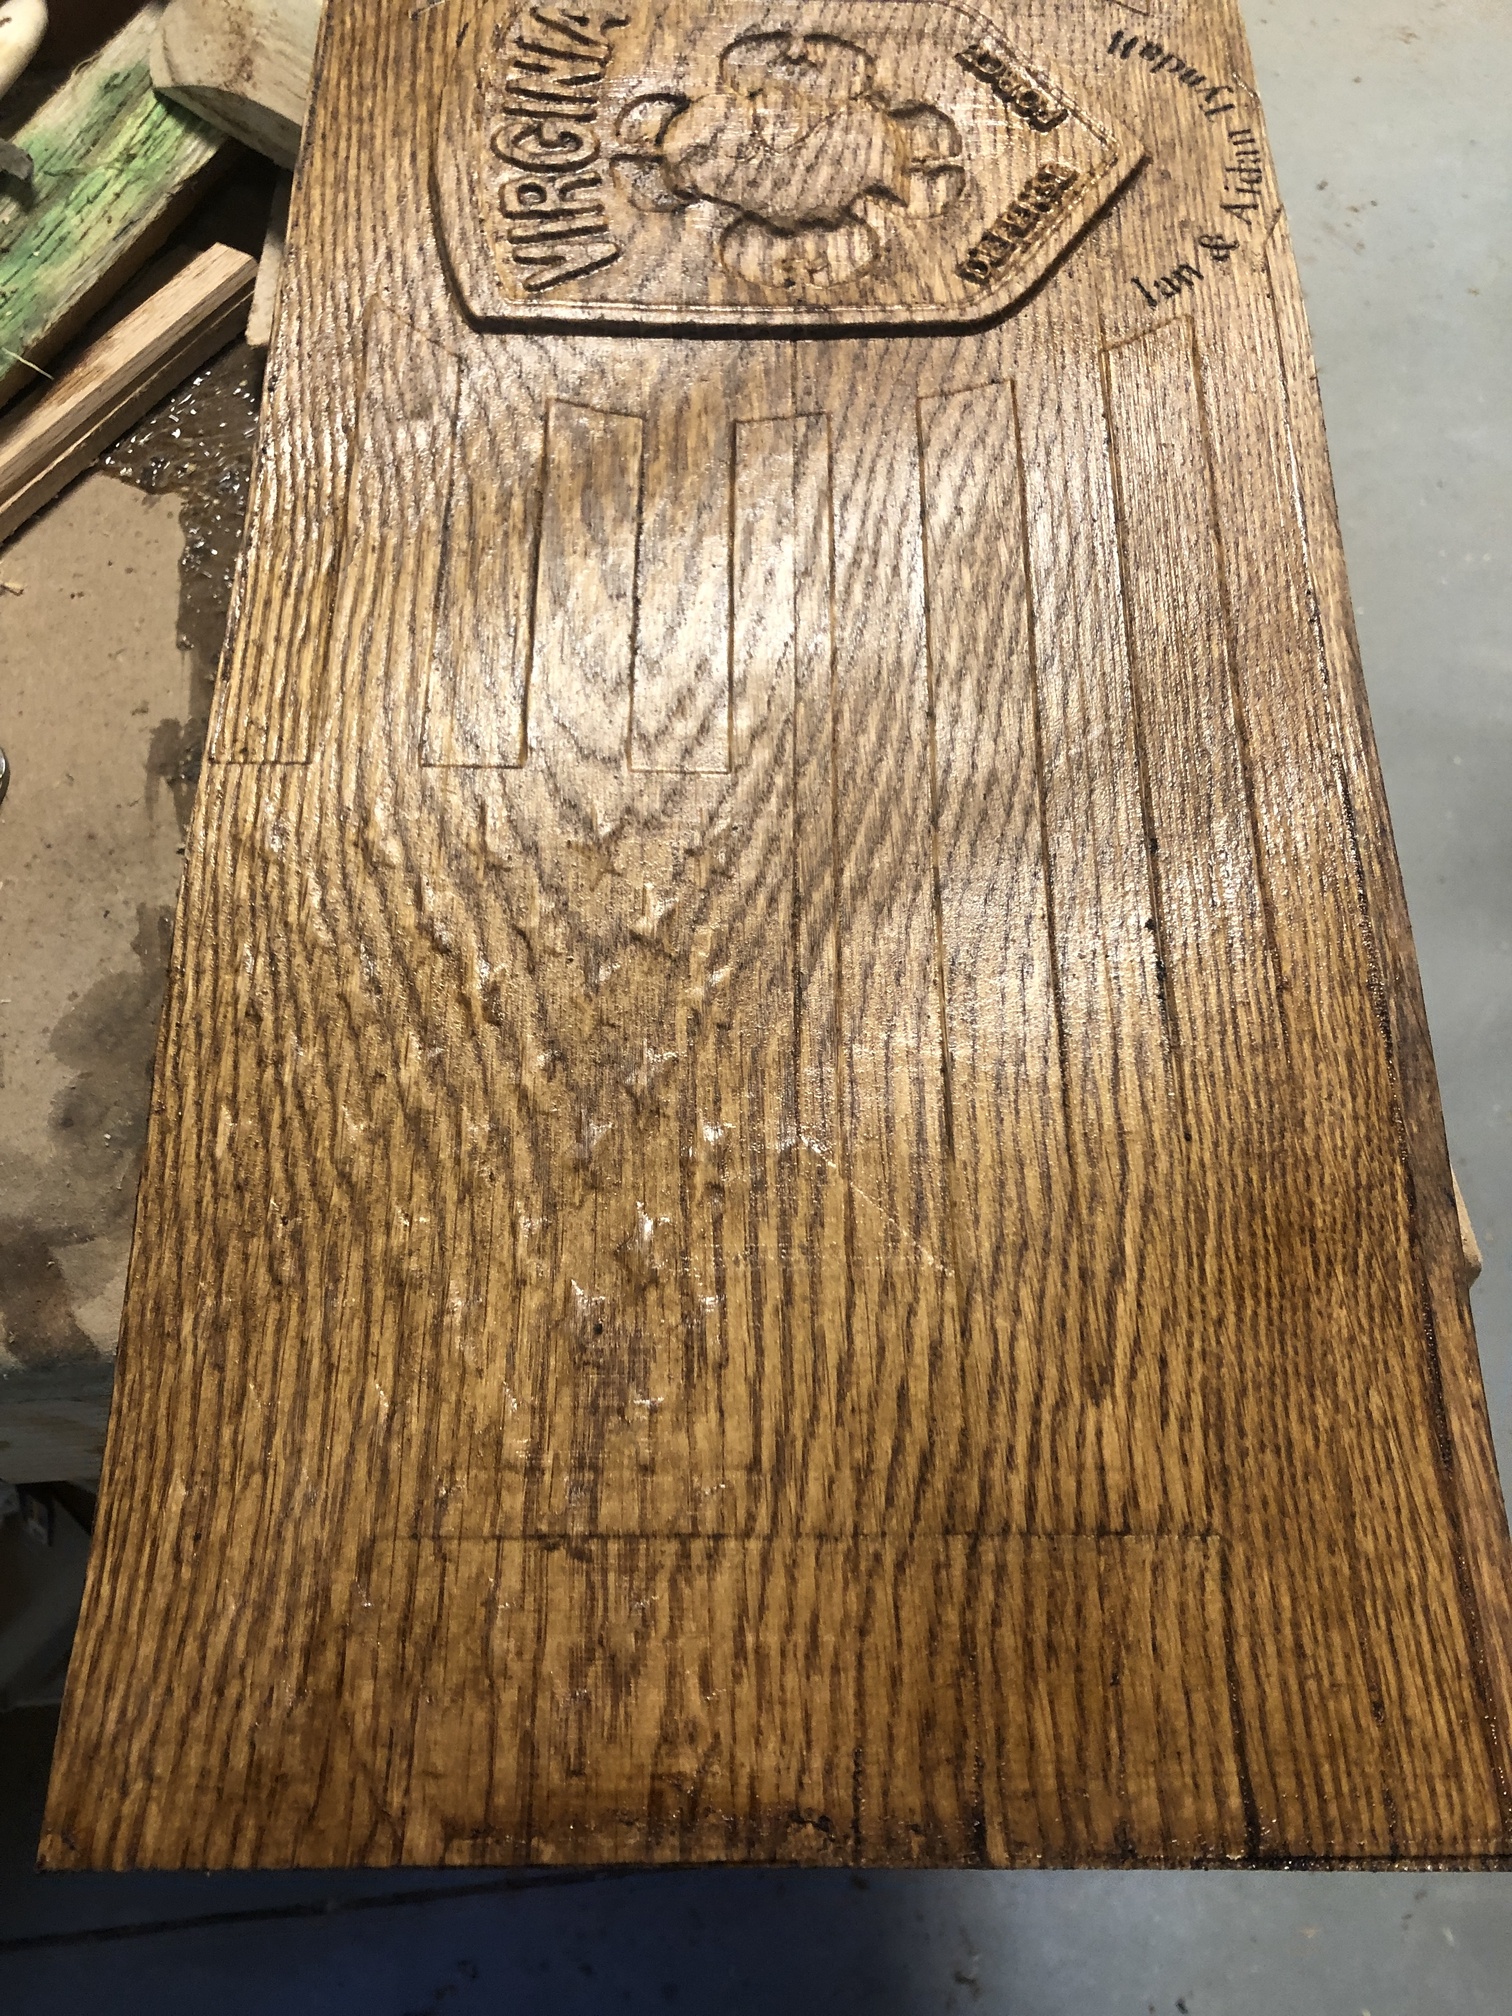
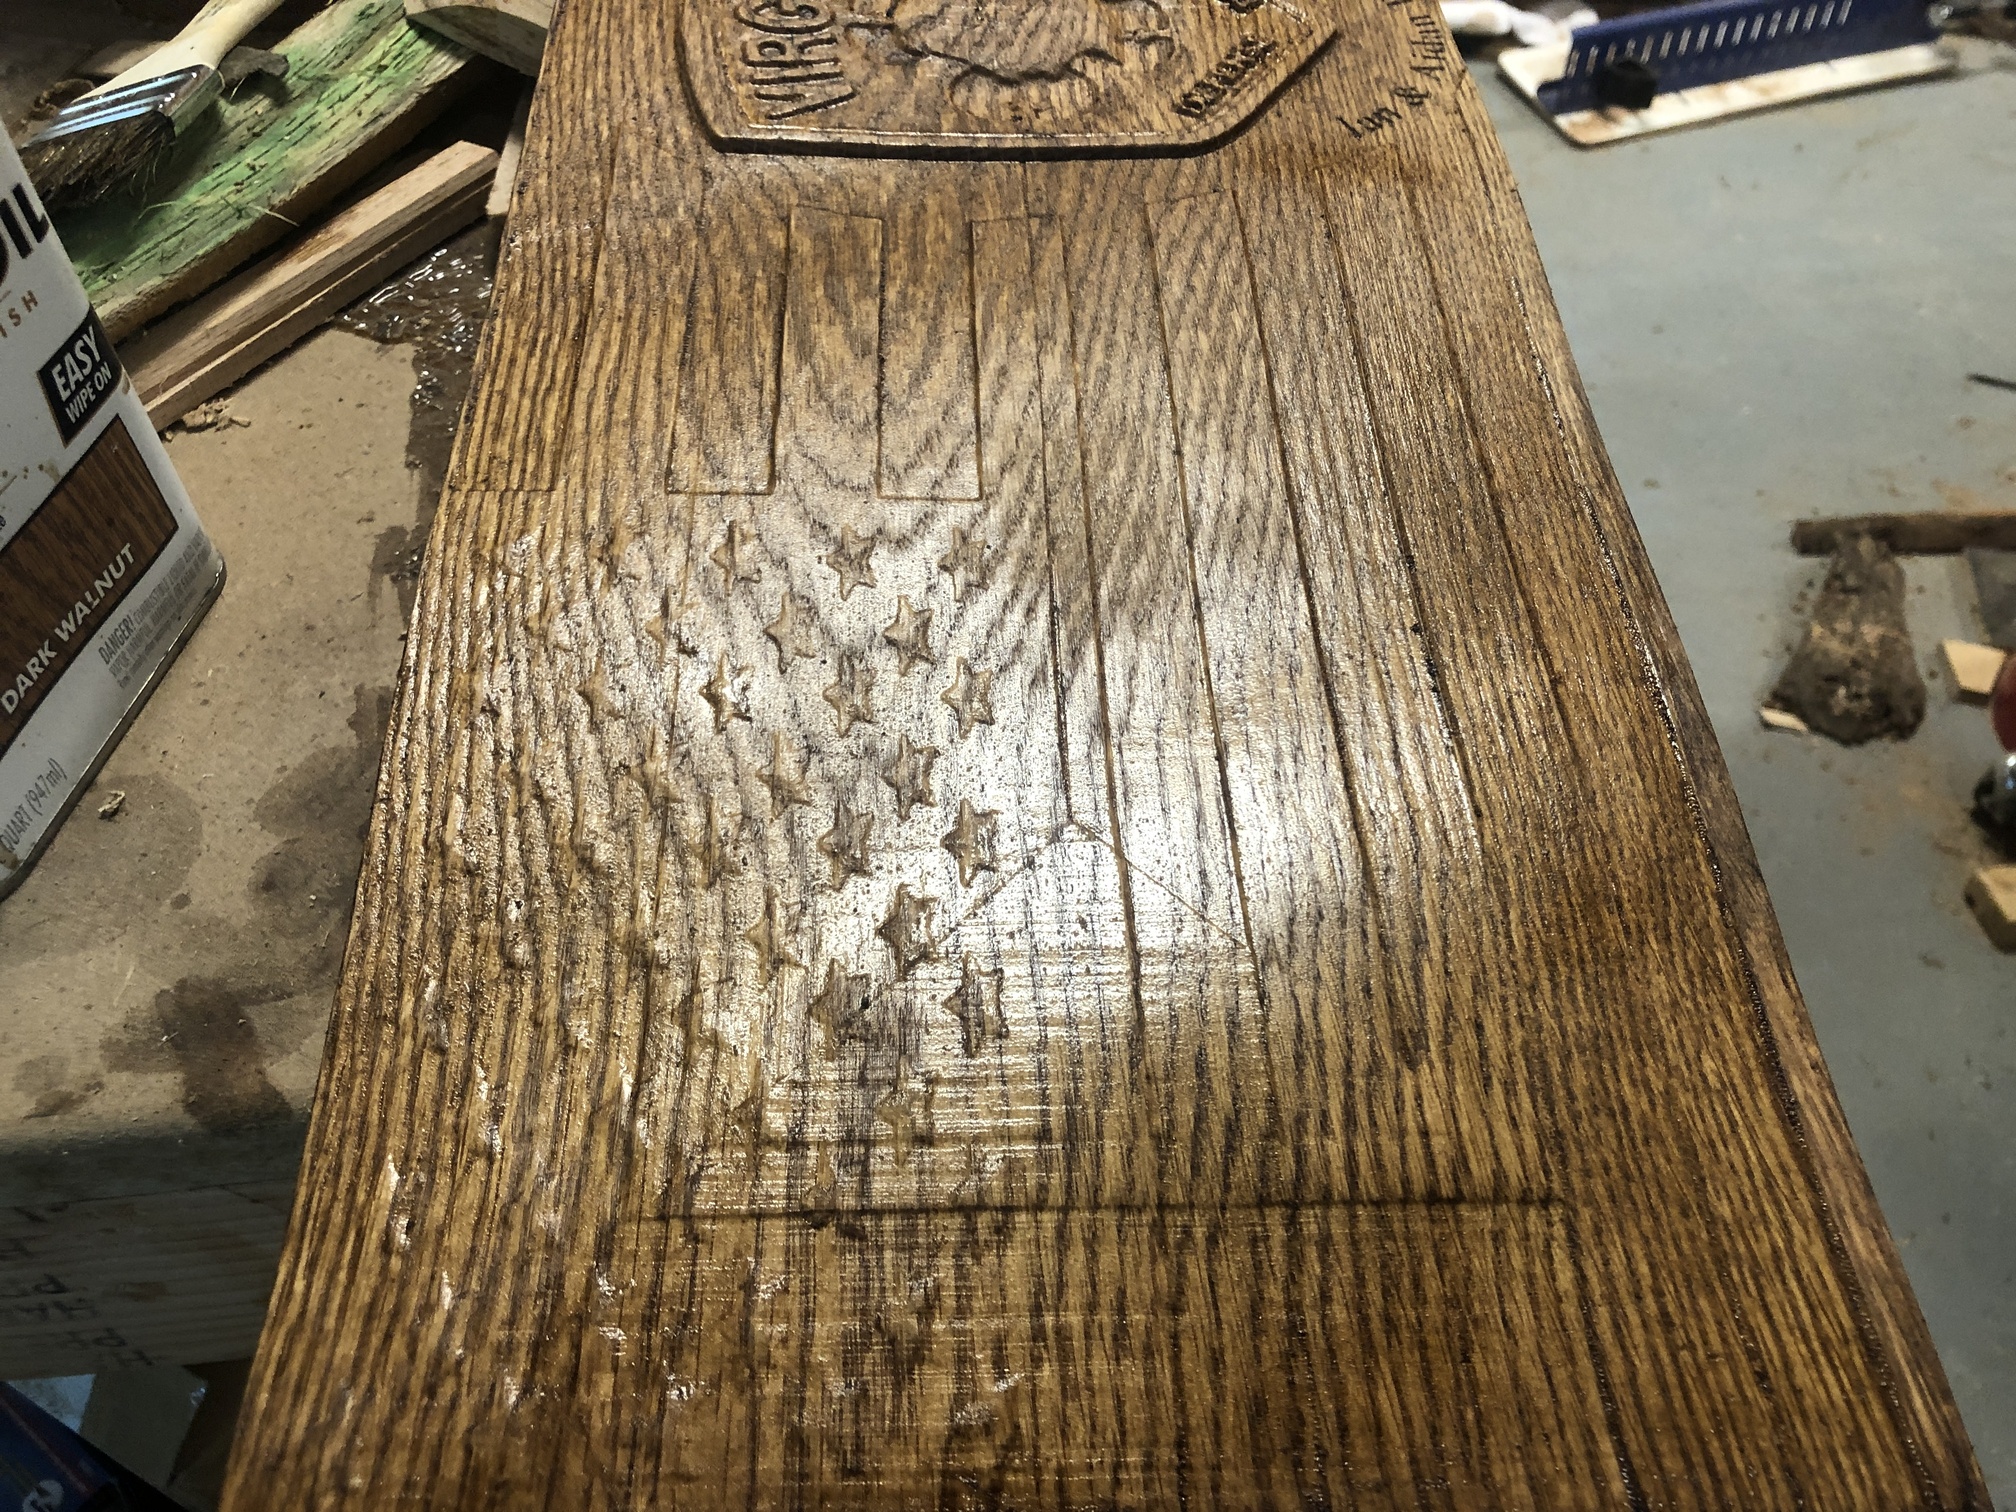
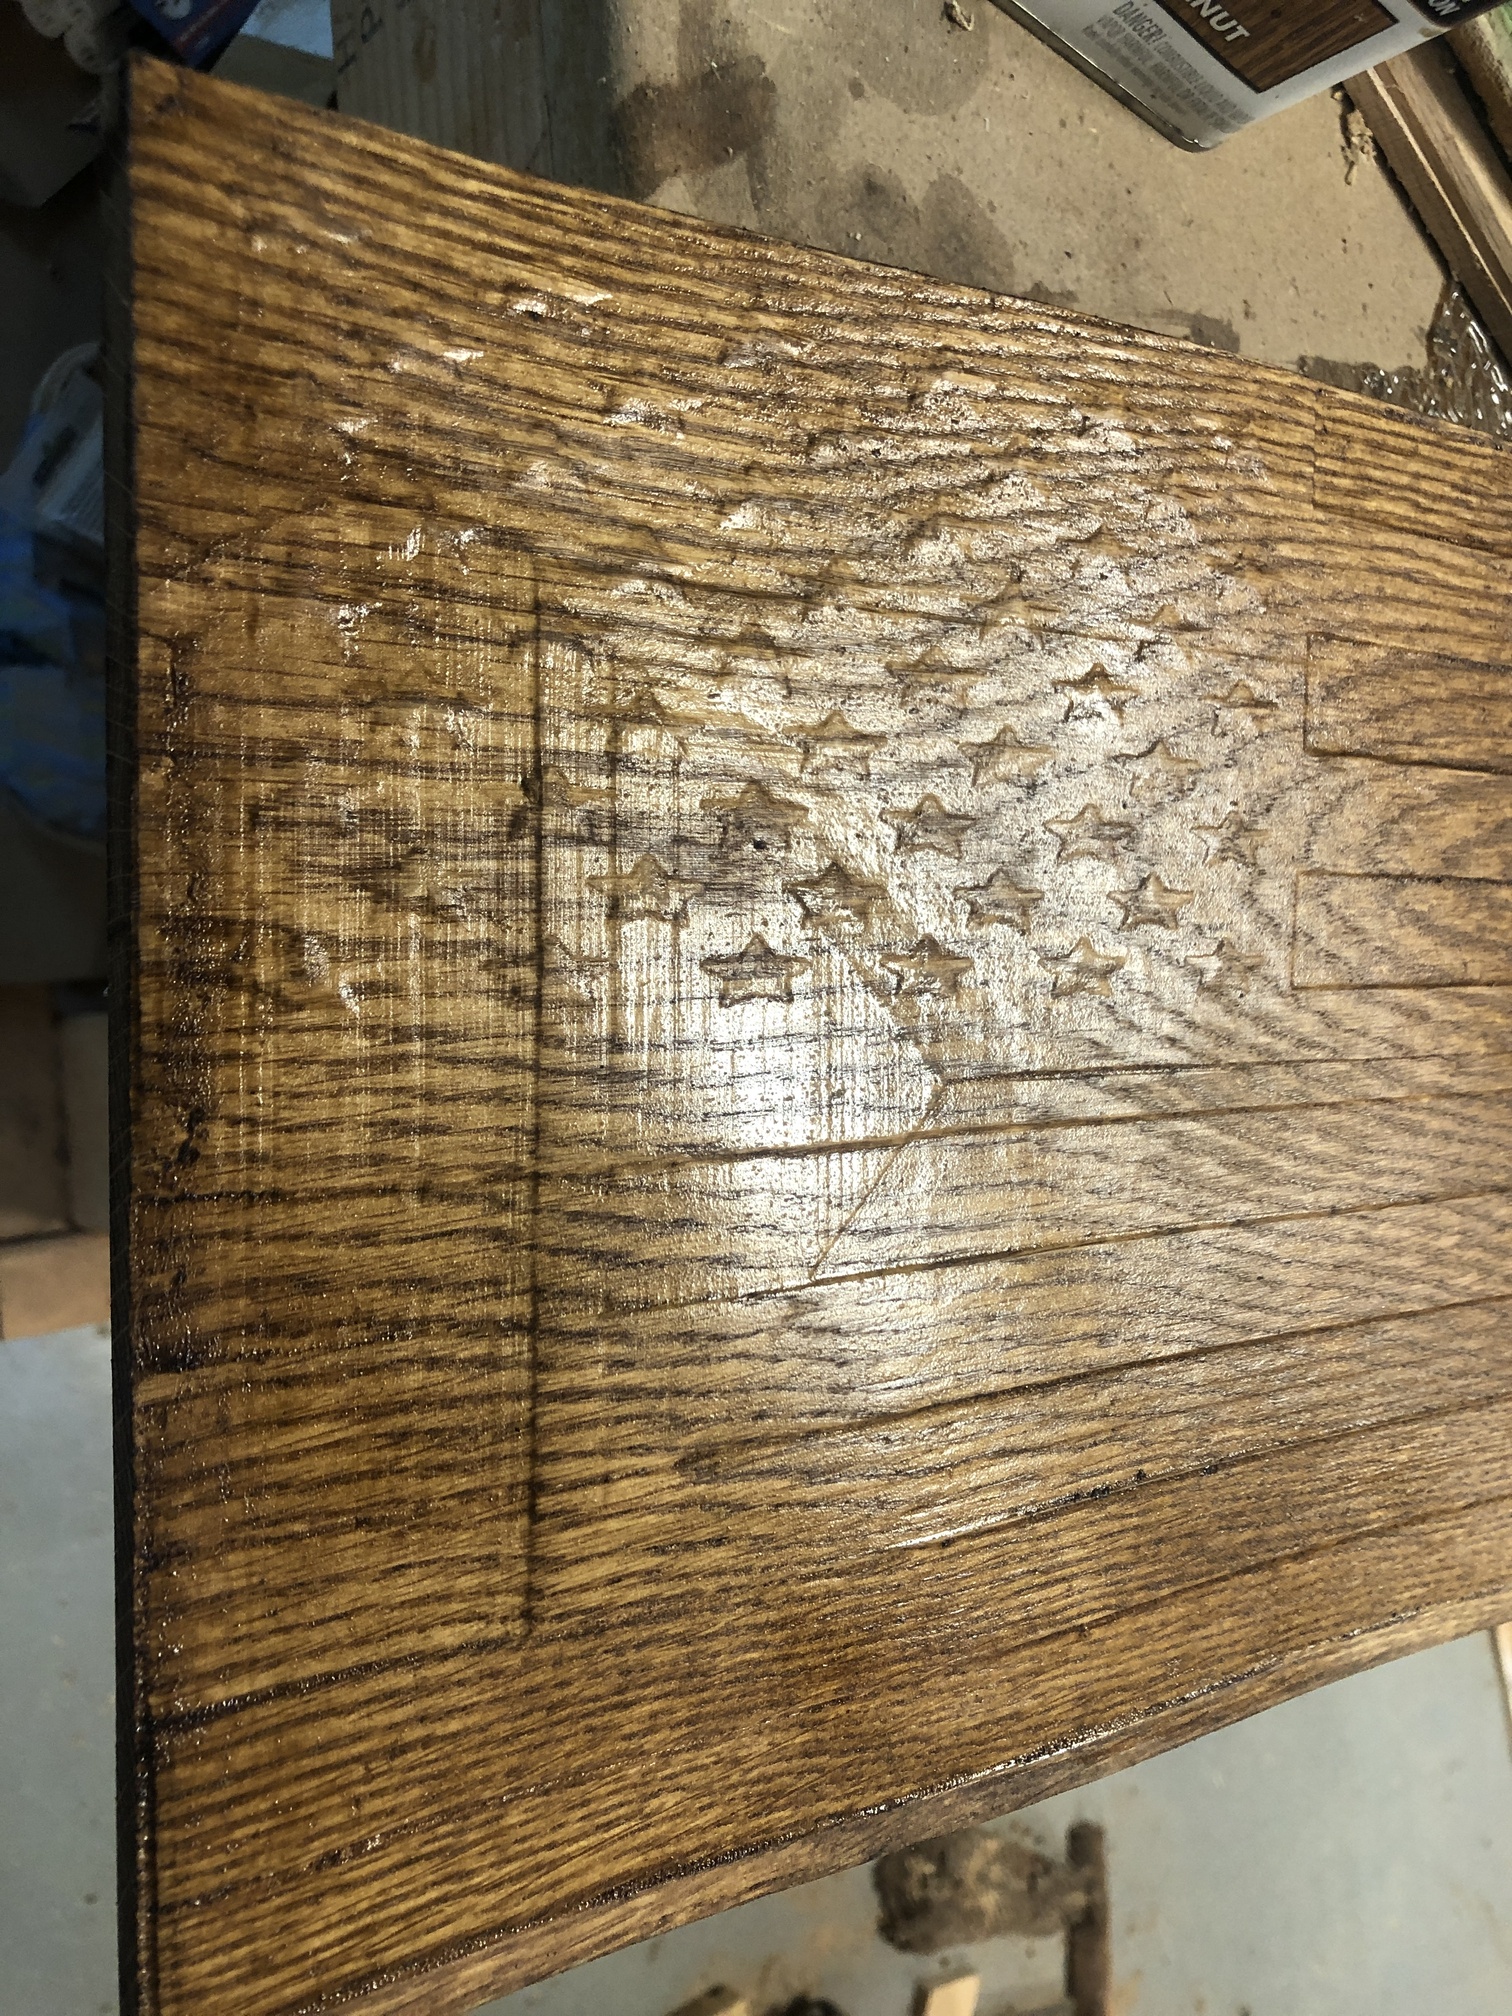
Any tips for avoiding ball nose lines in the finished piece?
I roughed our this white oak piece with a 201 mill and then did a 3D finishing path with the 101 ball nose cutter.
Any tips for avoiding ball nose lines in the finished piece?
I roughed our this white oak piece with a 201 mill and then did a 3D finishing path with the 101 ball nose cutter.
Nice piece, how big is it? If it’s able to do the cutting along the length (with the grain) that will go a long way to hiding tool marks. The other thing is to reduce the step over to about 8%. It takes longer but there’s very little clean up
Thank you. It was a pretty big piece. 17x24.
The horizontal cuts on the X axis were with the grain, but the Y effect in the photo came from the cuts going out from the center to the corners. I guess a smaller step over would be better but I was impatient. This cut took about 8 hours as it was given its size.
Larger tool, work with the grain where you can, and smaller stepover are a start with a ball-end.
Depending on the geometry and software, using a bull nose tool can make a HUGE difference, if your software will let you have the toolpaths run up/down hill, rather than level curves. A bullnose with small-ish corner radius will nearly eliminate the scalloping for slopes that are not too steep. On a Shapoko, 1/4" or 3/8" diameter, with 1/32" corner radius, with stepover of 25% to 50% tool diameter will leave a surface better than the grain.
I see little in this piece that isn’t substantially flat other than the middle of the seal. If that is the case, that would give a fine finish.
What software are you using?
As a general rule if you make the stepover smaller you can increase the RPM and feedrate because the machine is taking smaller cuts - this could help with your cut times
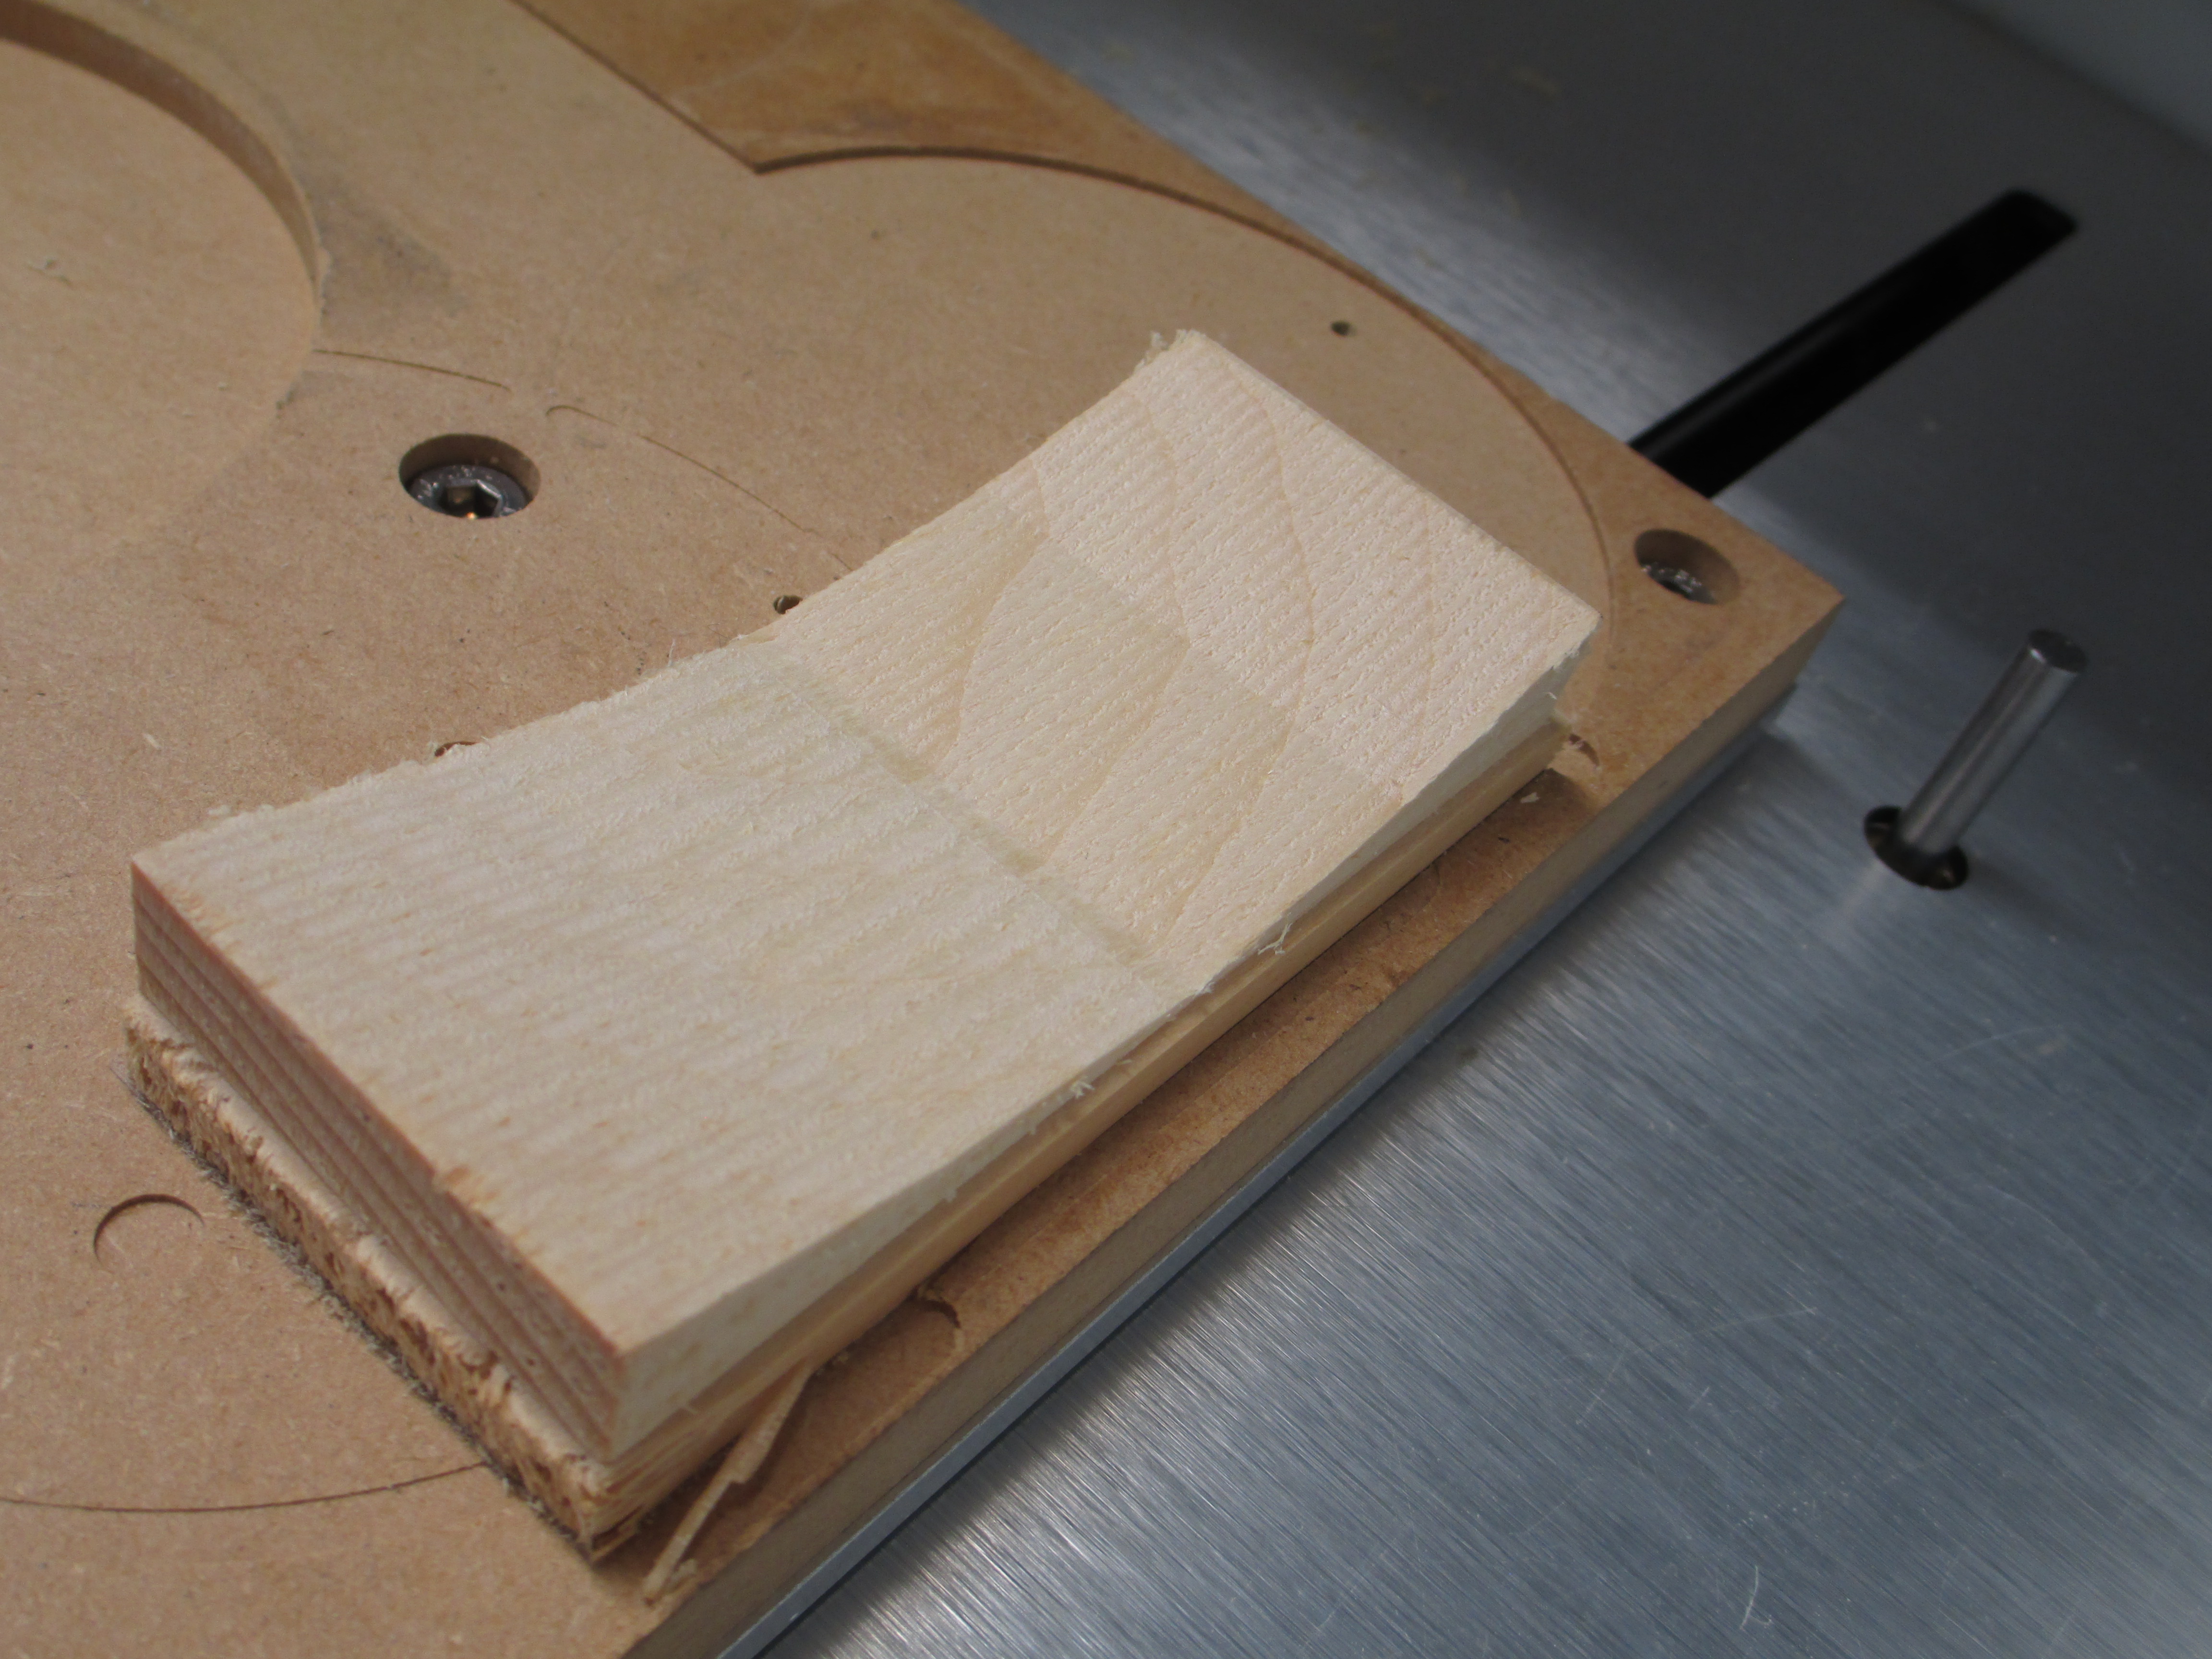
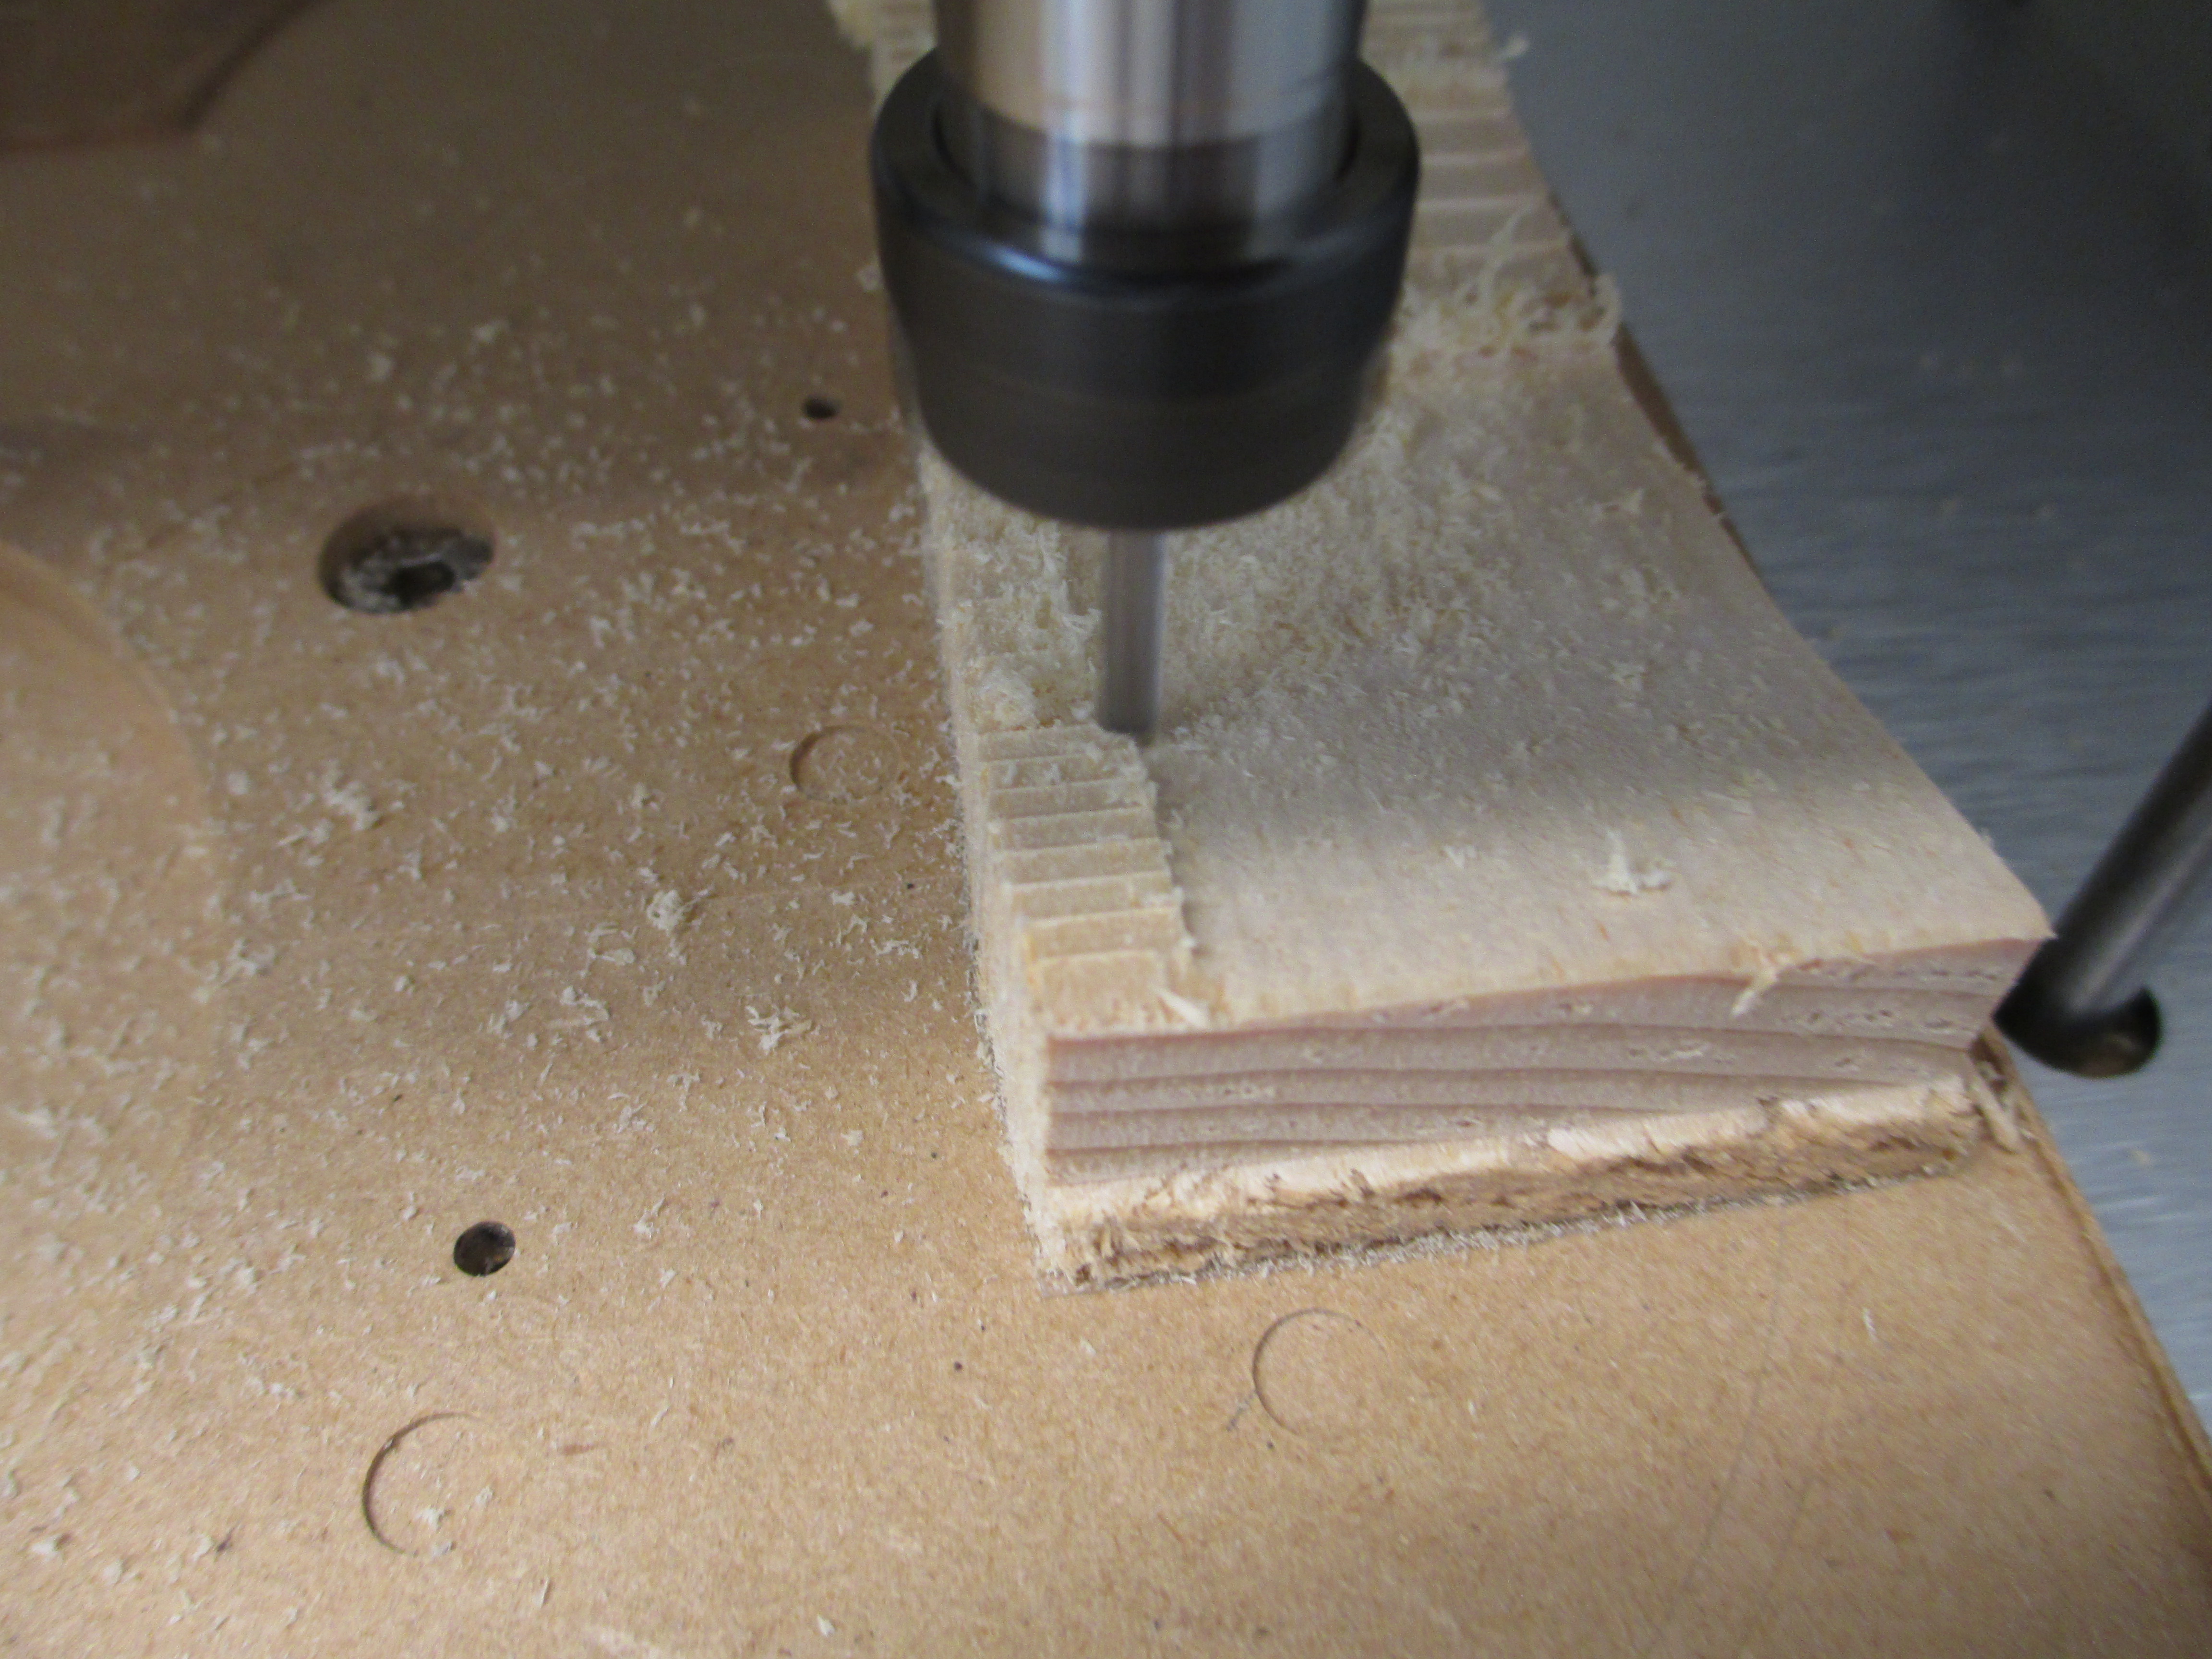
Ok. Short demo piece. This wood is a chunk of furring lumber (lowest grade conifer) 1X2 nominal from the scrap bucket. It machines horribly, but demonstrates several things well.
The form is 7.5 and 15 degree slopes, roughed with a flat end, finished with a bull nose in the grain direction machining both directions.
The finish tool is 3.175mm dia with a 0.3mm corner radius. It isn’t the sharpest tool. It has seen a lot of use, but the corner radius of the bull nose still improves the finish a LOT relative to a square end. The near side is at 1.6mm stepover, and the far side is 0.8mm. The far side is DEAD smooth to touch. The apparent texture is due to machining both directions opening the grain- it is lowest grade fir, after all.
The larger stepover end
and a short vid of the machining:
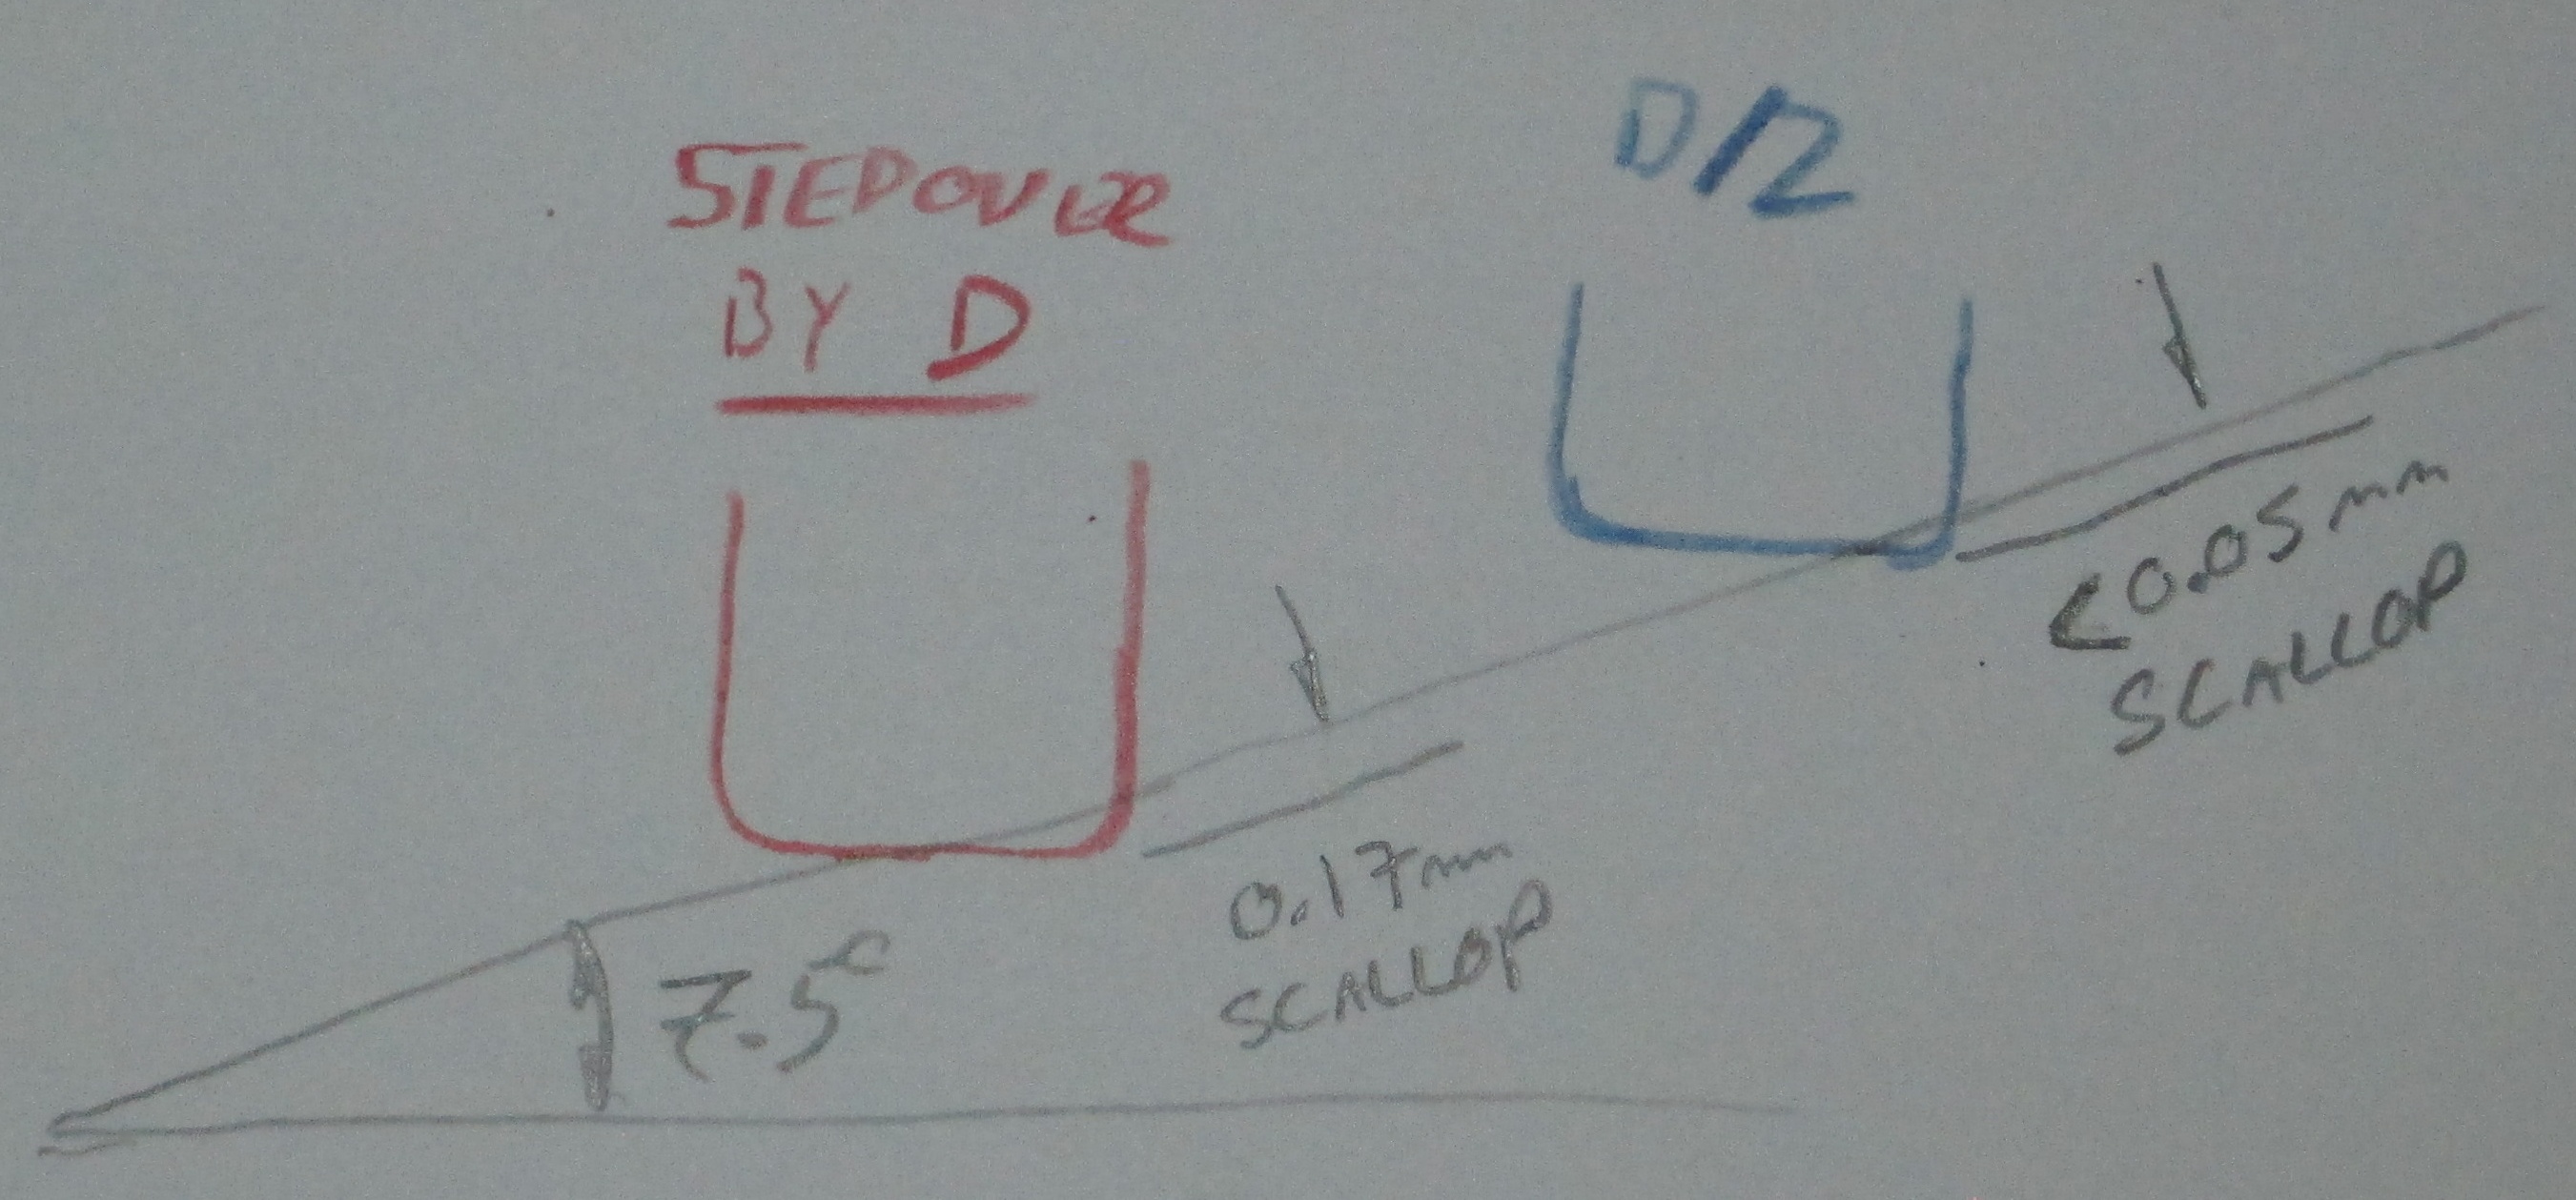
The key here is that by working up and down the slope with the bull nose (a square end will do it too, but the corners tend to leave more fingerprinting in the finish) is that the end of the tool presents as a much larger radius to the work surface than the tool radius. In this case, at 7.5deg slope, the tool end 2.575 effective diameter (the flat diameter is smaller than the tool by twice the corner radius, which I will refer to here as D, about 80% of the tool diameter for this tool) presents as an ellipse 2.575mm wide and 0.339mm deep. Stepover of the full end diameter, which is 80% of the tool diameter, will give scalloping 0.17mm deep (half of the effective ellipse minor diameter)
Dealing with the ellipse for partial stepover is easiest with calculus, and matching curvatures gives an actual equivalent diameter of just over 80mm for a stepover of D/2 (the radius of curvature for the ellipse will be 44.3mm at the greatest. For the D/2 stepover, the minimum radius of curvature for the engaged portion is about 39mm, so the net of this is an effective ball end diameter of about 80mm). The scalloping is less than 0.05mm deep, or about 0.002 inches. At D/4, the scalloping is about 1/4 of that.
The error due to the tool corner radius is in favour of the finish on steeper slopes (increases the effective diameter of the tool) so on the 15 degree portion, the scalloping is still only about 0.1mm for the larger stepover, and 0.025mm for the smaller.
If this was run cutting only one direction for the finish, it would look a lot better, since the tool load opening the grain would have been the same for each traversal, rather than in opposite directions. On a better wood, it probably wouldn’t show in any case
The point?
For a fixed stepover, use the largest effective diameter you can. If using a ball end, the larges one possible. For other tool geometries, select the machining strategy to give the largest effective diameter.
Smaller stepovers improve finish
When finishing shallow slopes, use a bull nose, or even a flat end, and finish passes should be in the direction of the slope, rather than across it. The shallower the slope, the larger the effective tool diameter (though stepover much larger than half of the tool end diameter begins to show that the cut is elliptical section). A ball end will have the same effective diameter as the tool diameter, always, no matter the direction (except vertical surface where they side cut). This makes computation easy for finishing surfaces, but requires small stepovers to reduce scalloping.
Edit: forgot this: direction matters in the surface finish-uphill vs downhill travel. Bidirectional WILL tattoo the surface
Bull nose tools are awesome.
Furring strip lumber is the lowest grade stuff you can get, and machines horribly. One-use form lumber is better.
If anyone catches mistakes here, let me know. I threw this together in less than an hour, timeshared with a very attention-seeking cat)
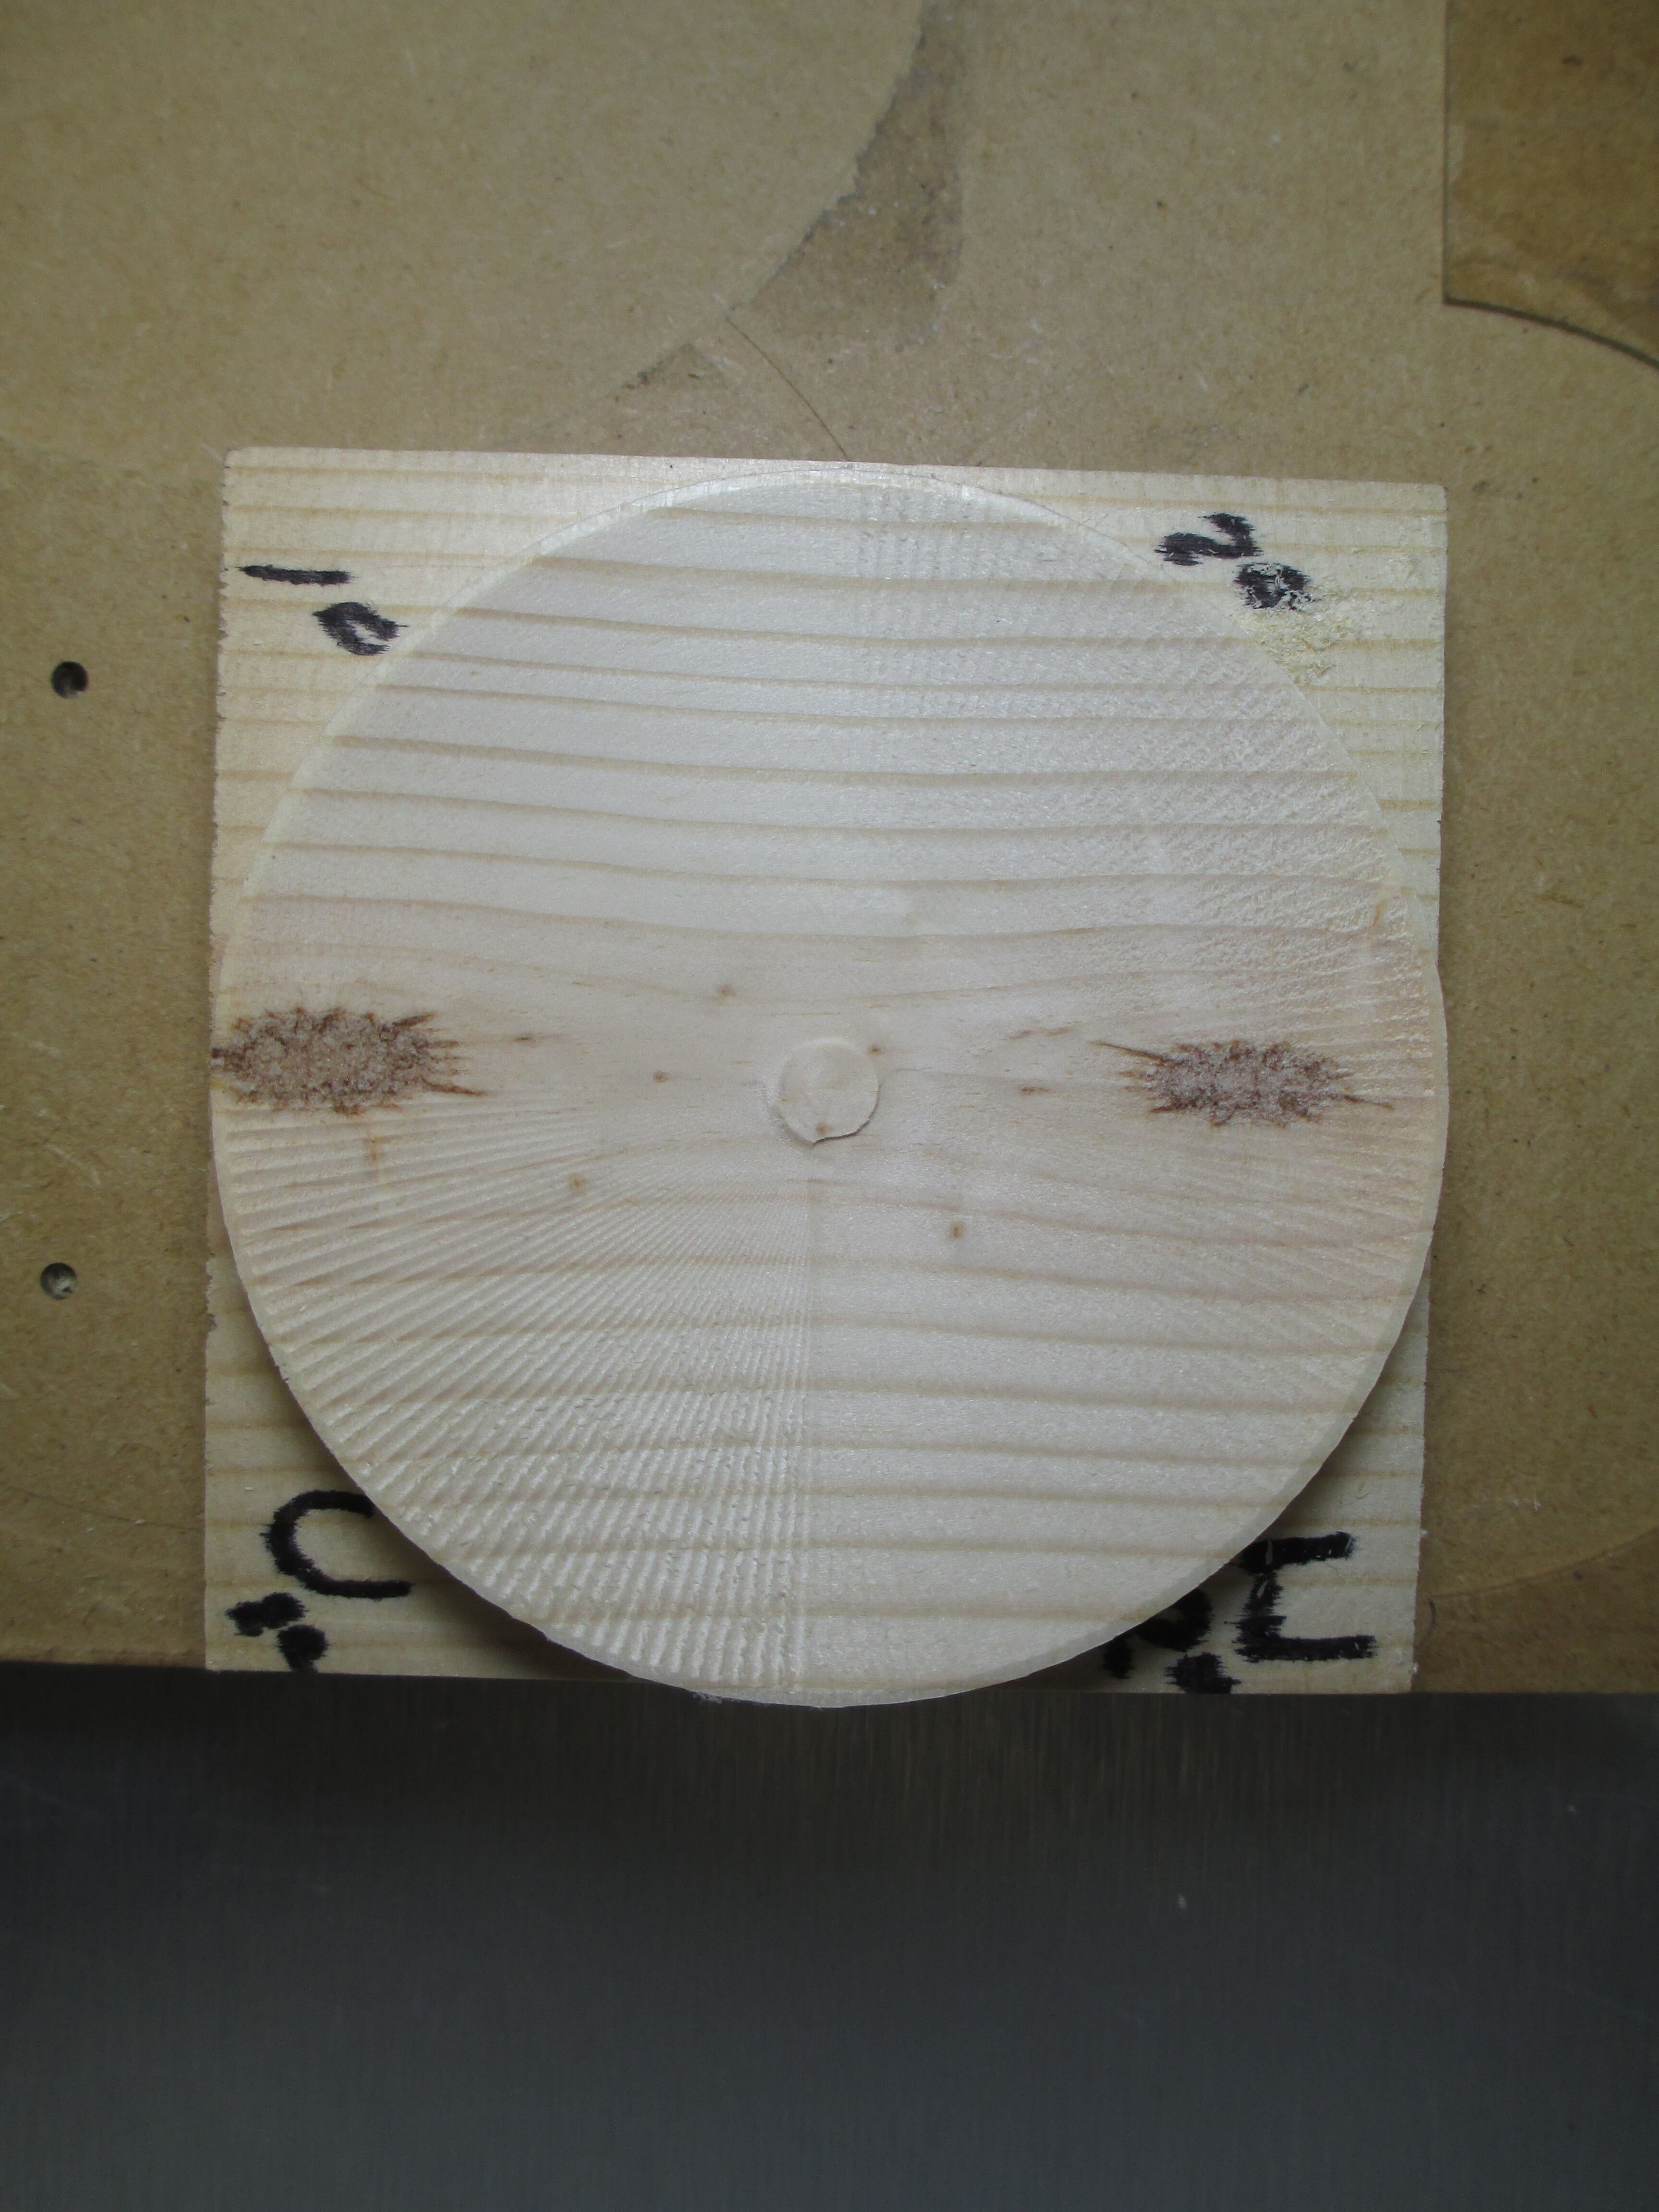
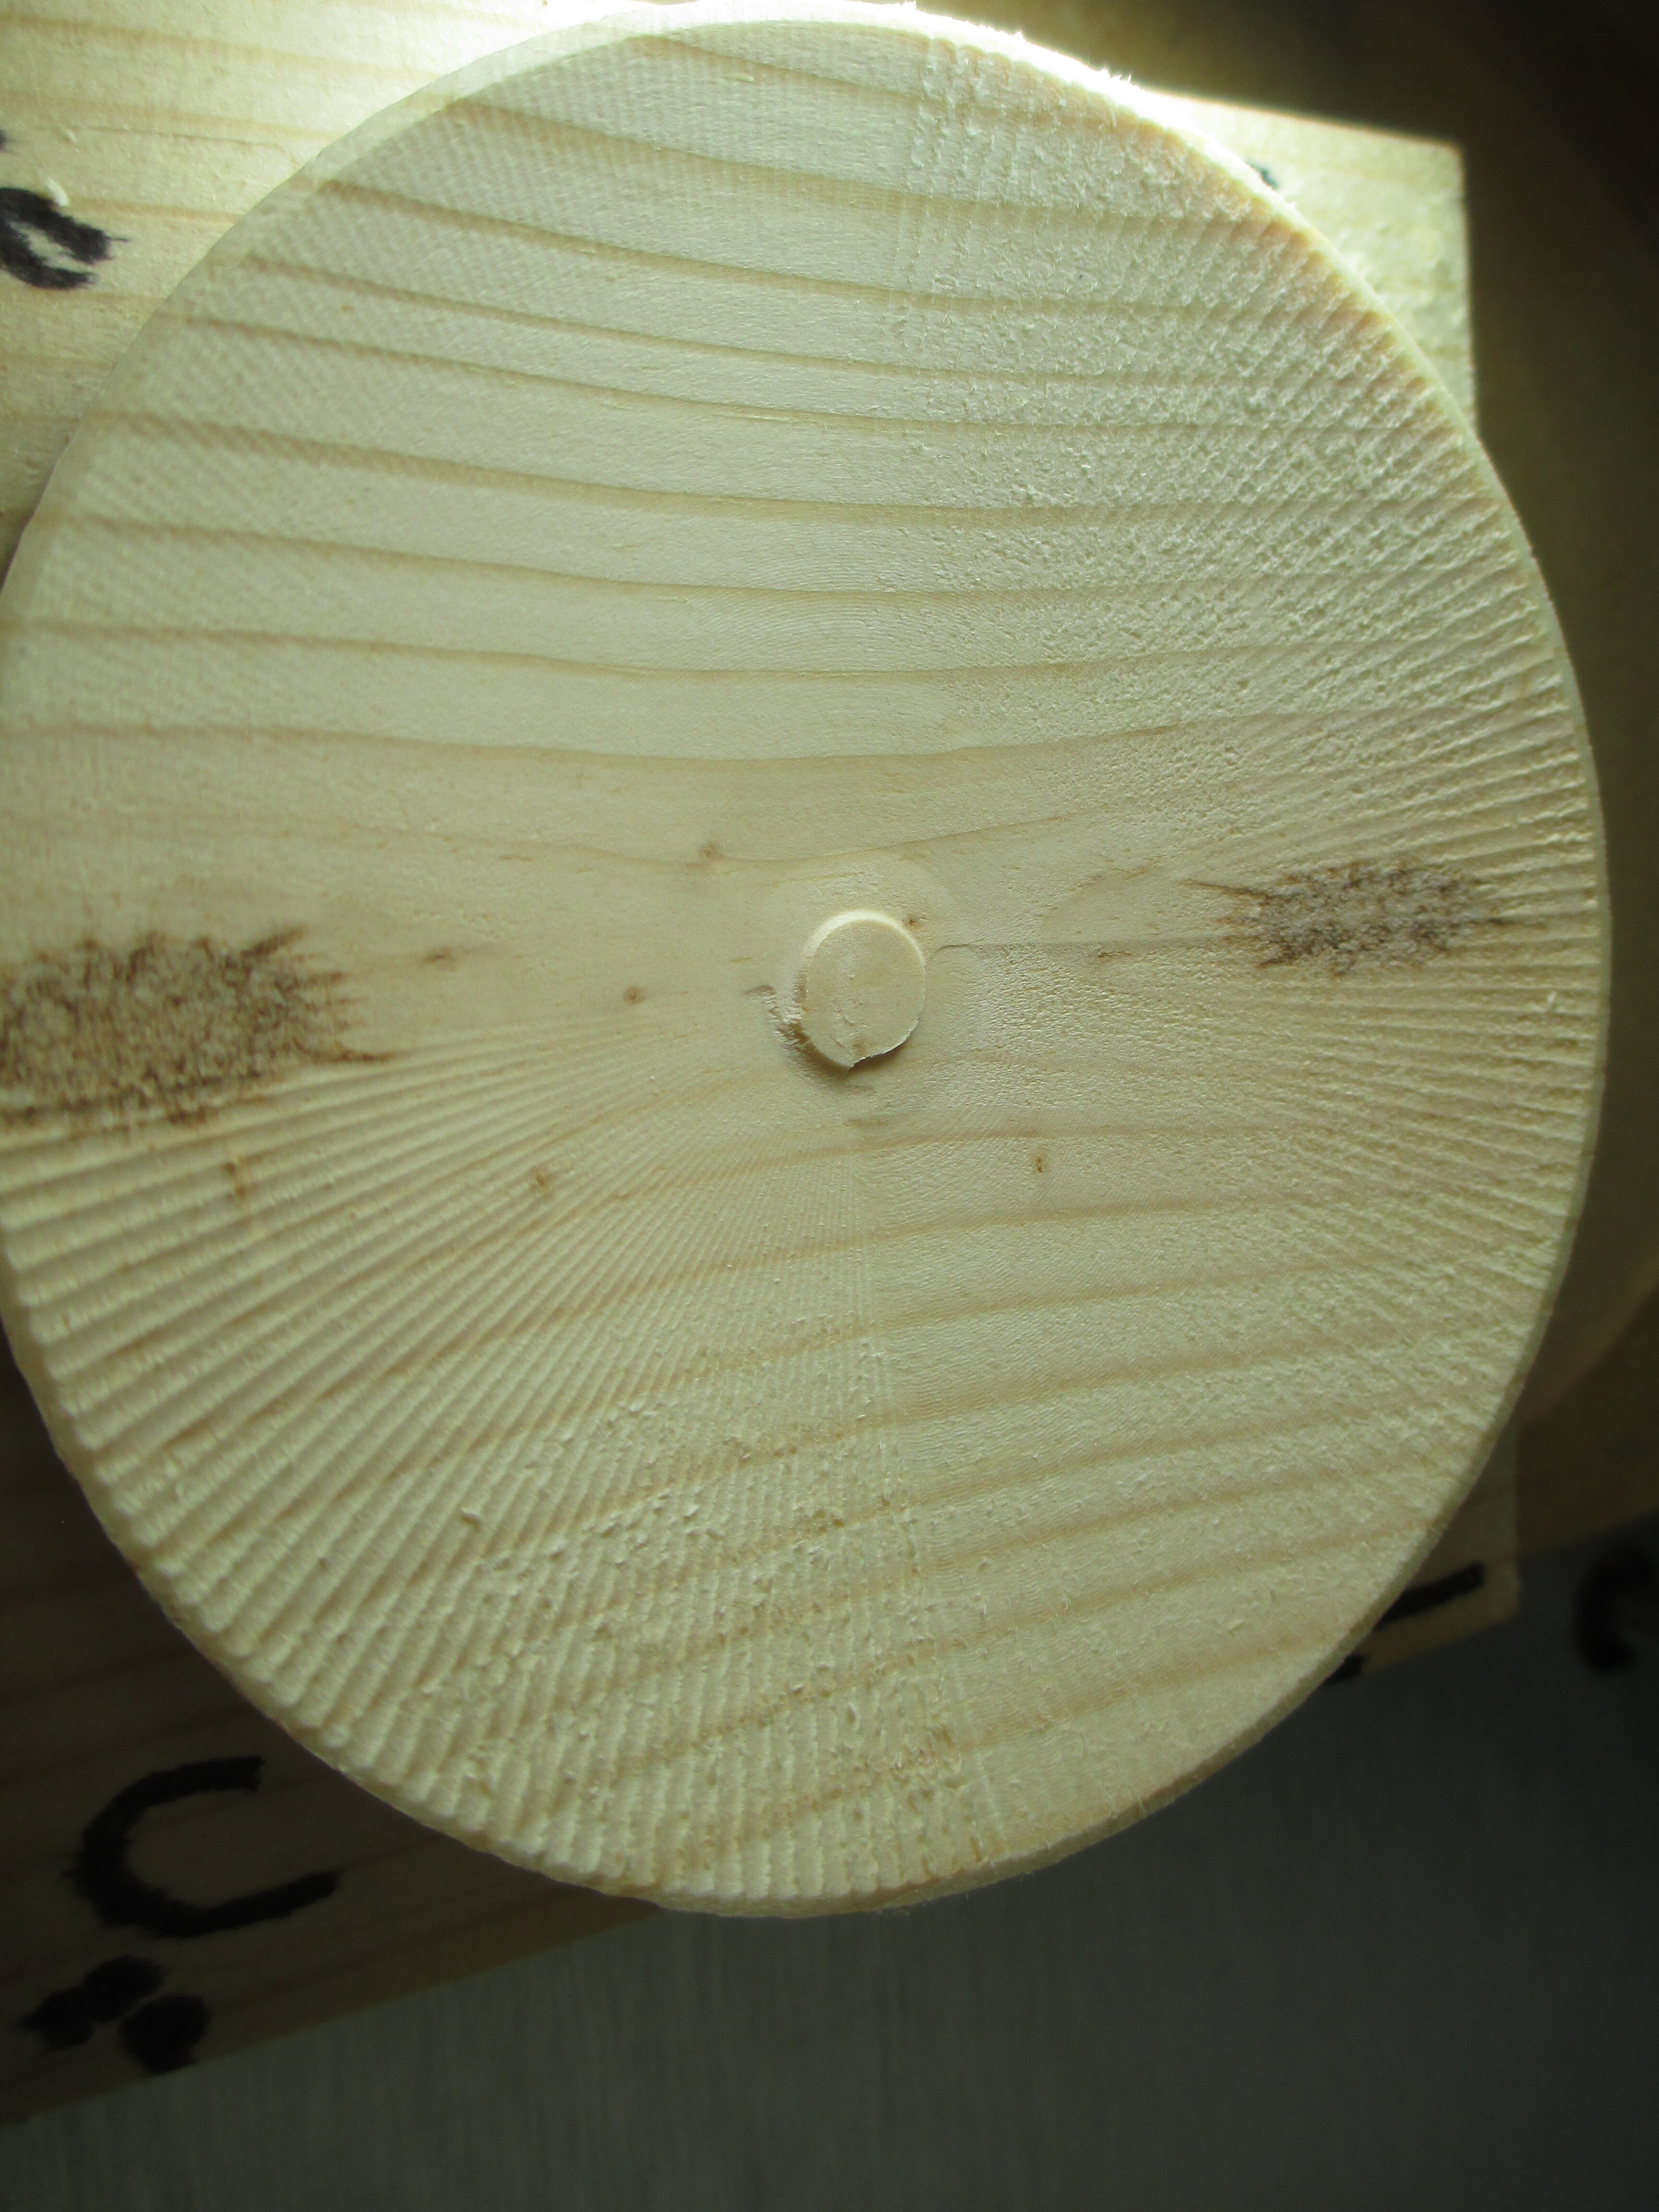
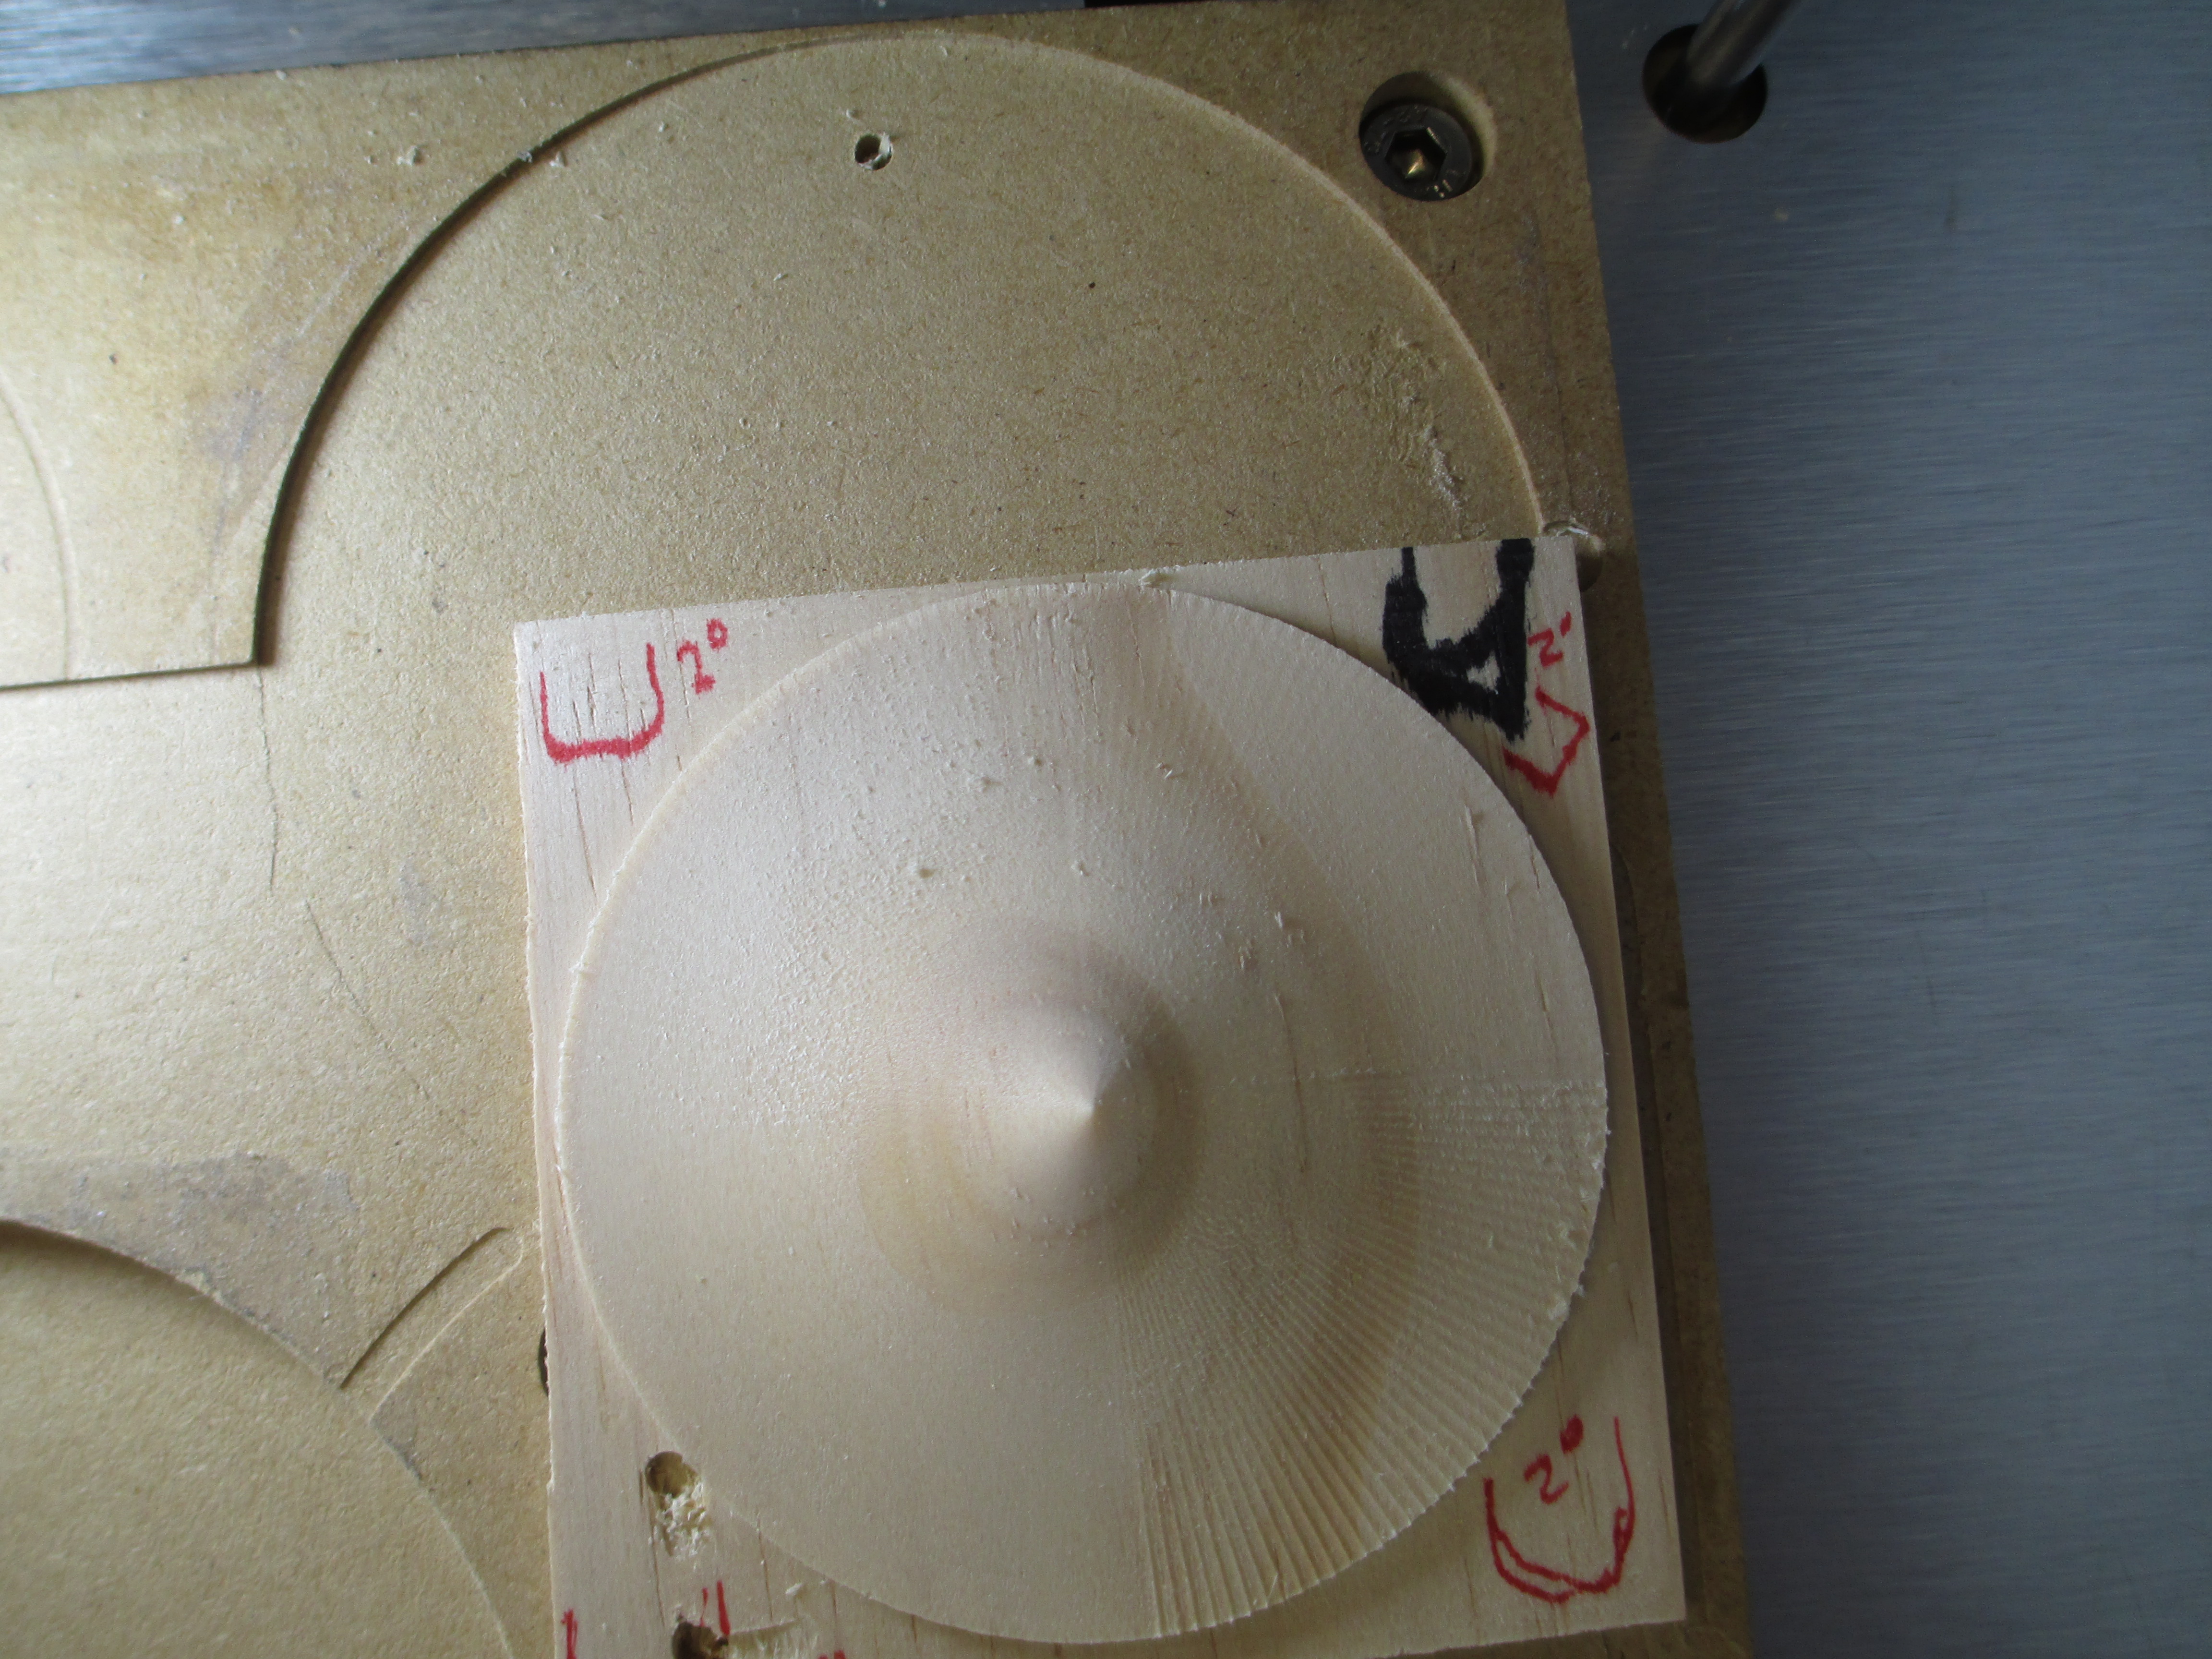
Another demo piece for sloped surfaces.This is a bowl in the form of a sphere segment. The OD of the part is 75mm and the depth at the center is 10mm, giving a 30 degree slope at the rim (29.something to be more exact)
The machining was done by quadrant using radial machining, so each tool/parameter got with and across grain. All cuts were toward the center (downhill). The stepover is an angle around the center, so at the perimeter, the stepover is greater than near the middle.
Flat end tool, bull nose, and ball end, all 3.2mm diameter. Steps were 2 degrees for all tools, and a 1 degree with the bullnose to make the fourth quadrant.
Looking straight on, with ner axial light, we see clearly that the ball end is by far the ugliest (lower left). The flat end is comparable to the bullnose, maybe slightly better. Tough to tell for sure, as the cut was not the same orientation to the grain, but the finish passes were fairly light (0.5mm) and consistent, so close. Bith much, much better than the ball end. The square end mill was new, and the bullnose somewhat used. The ball end was brand new.
The nicest, by far, is the 1 degree stepover bullnose. It is near perfect.
The 2 degree stepover gives 1.3mm at the perimeter, which is about 40% of the tool diameter.
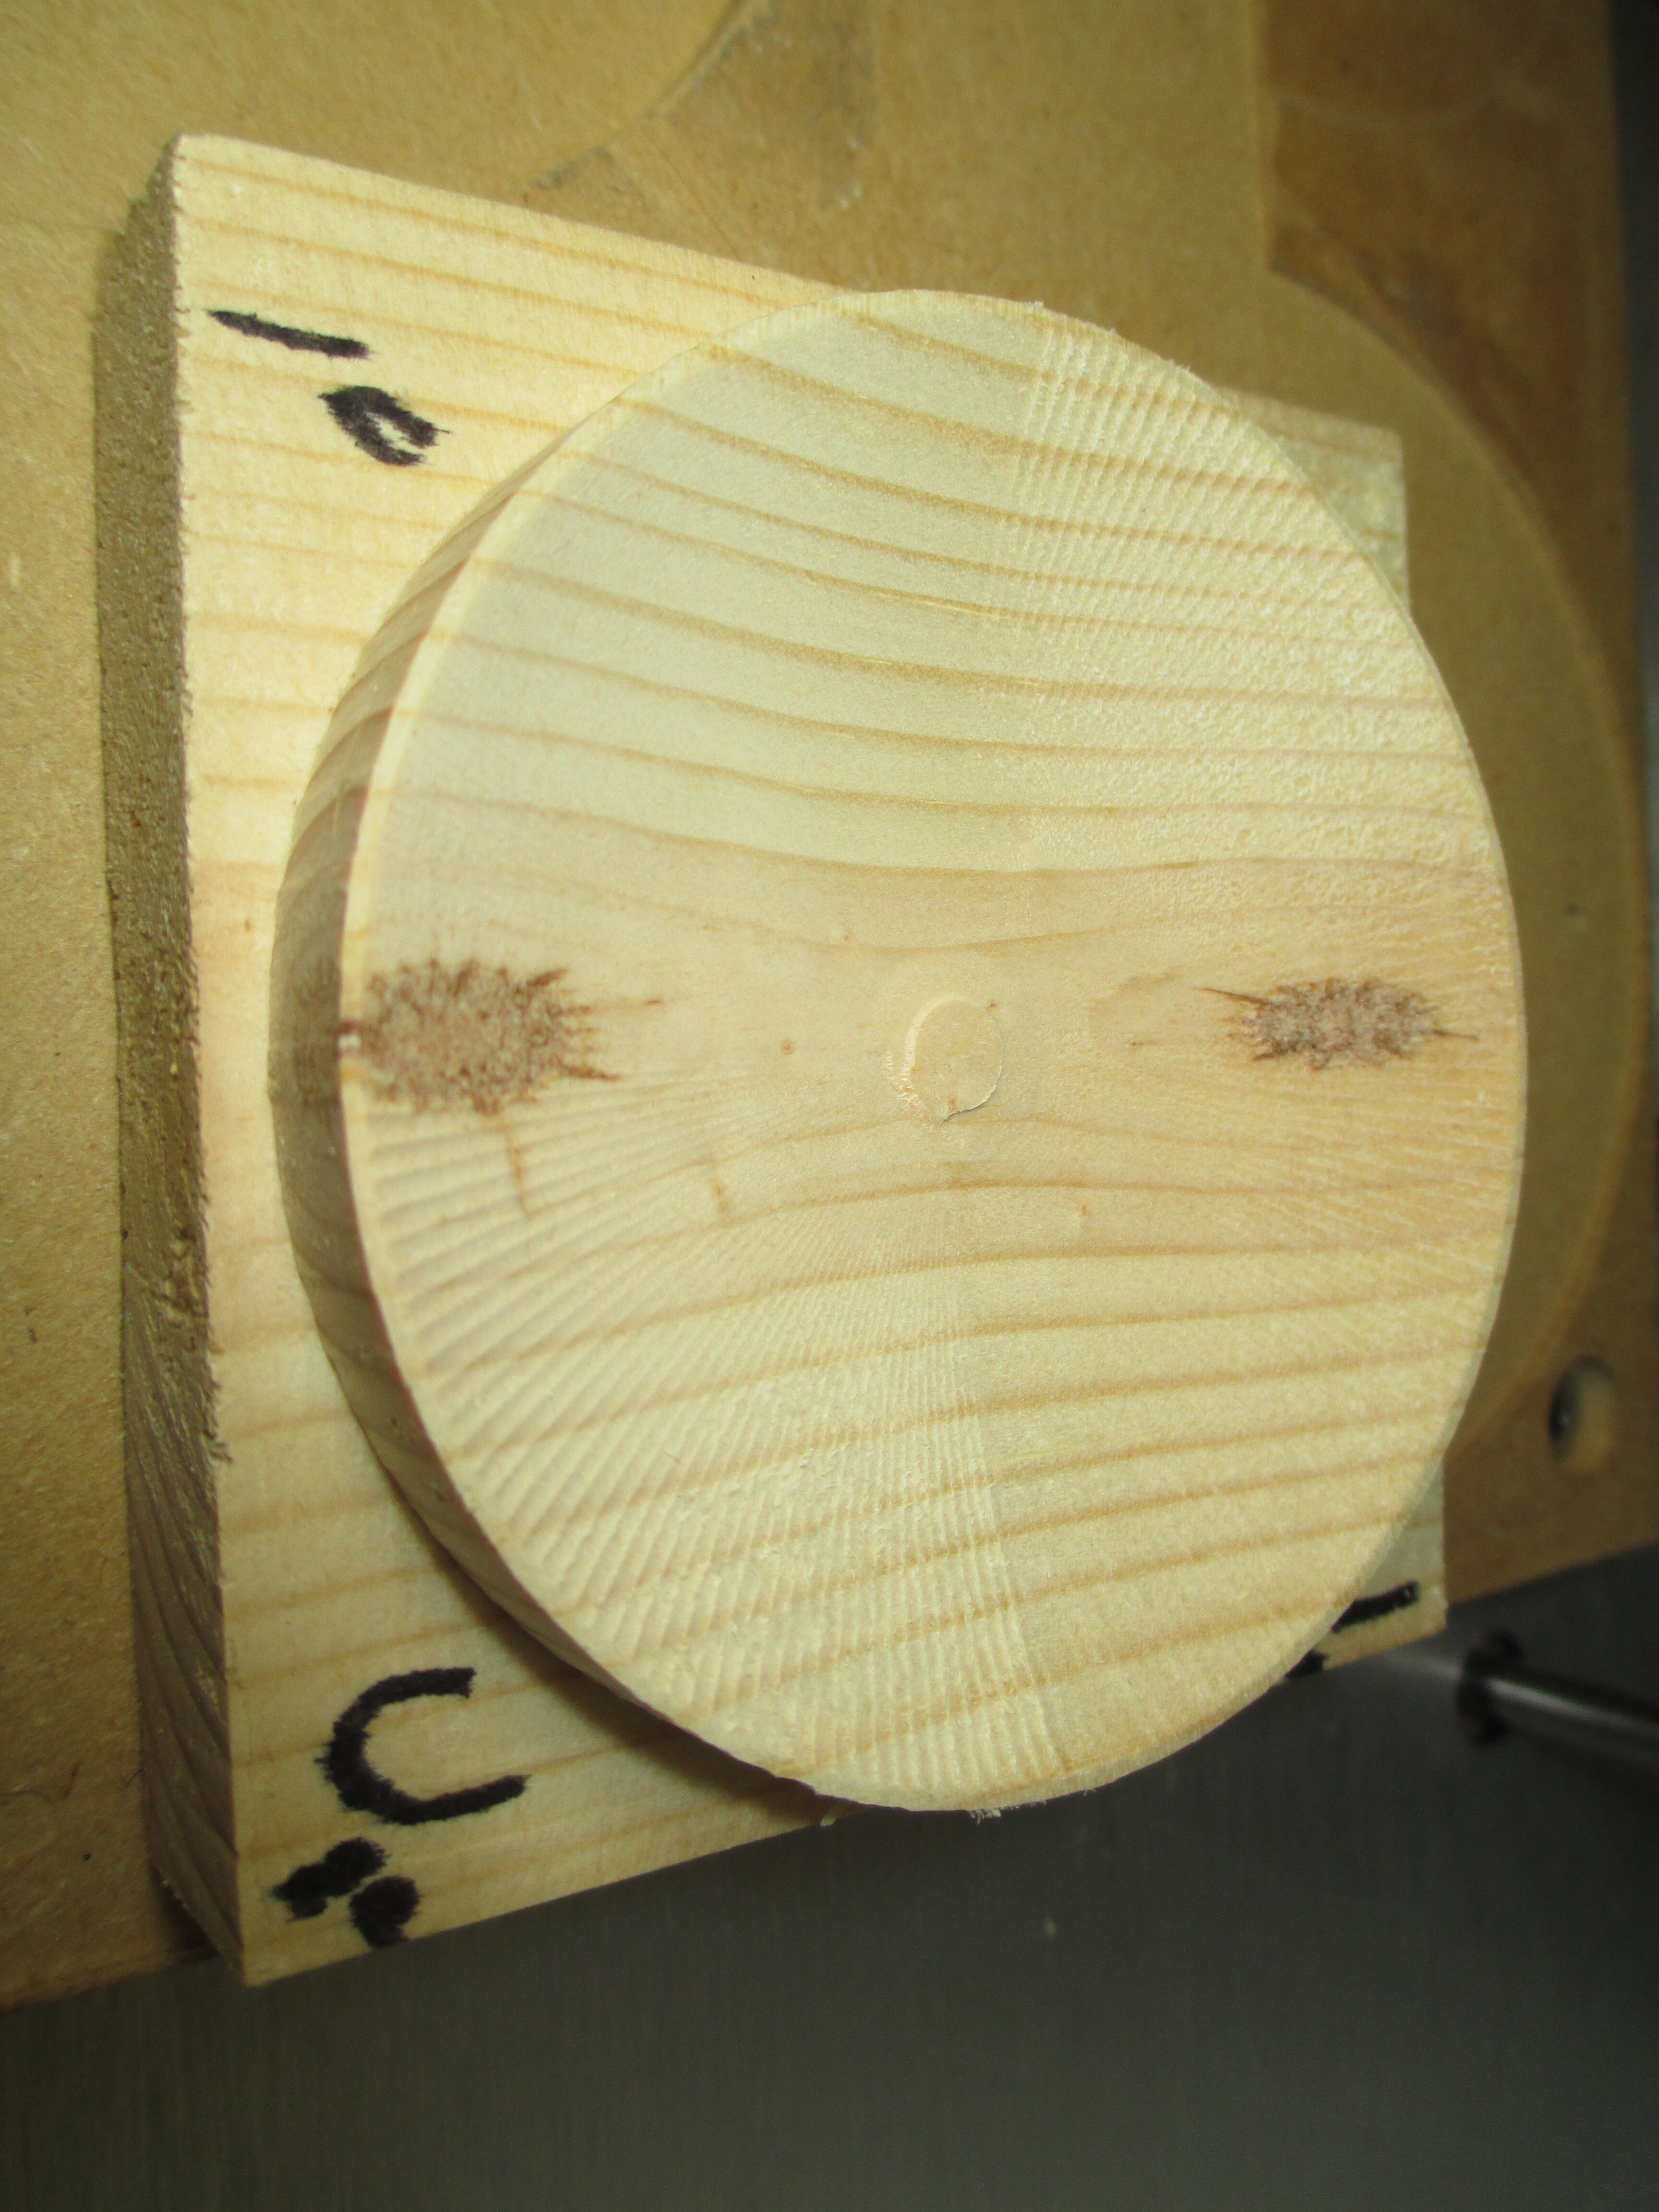
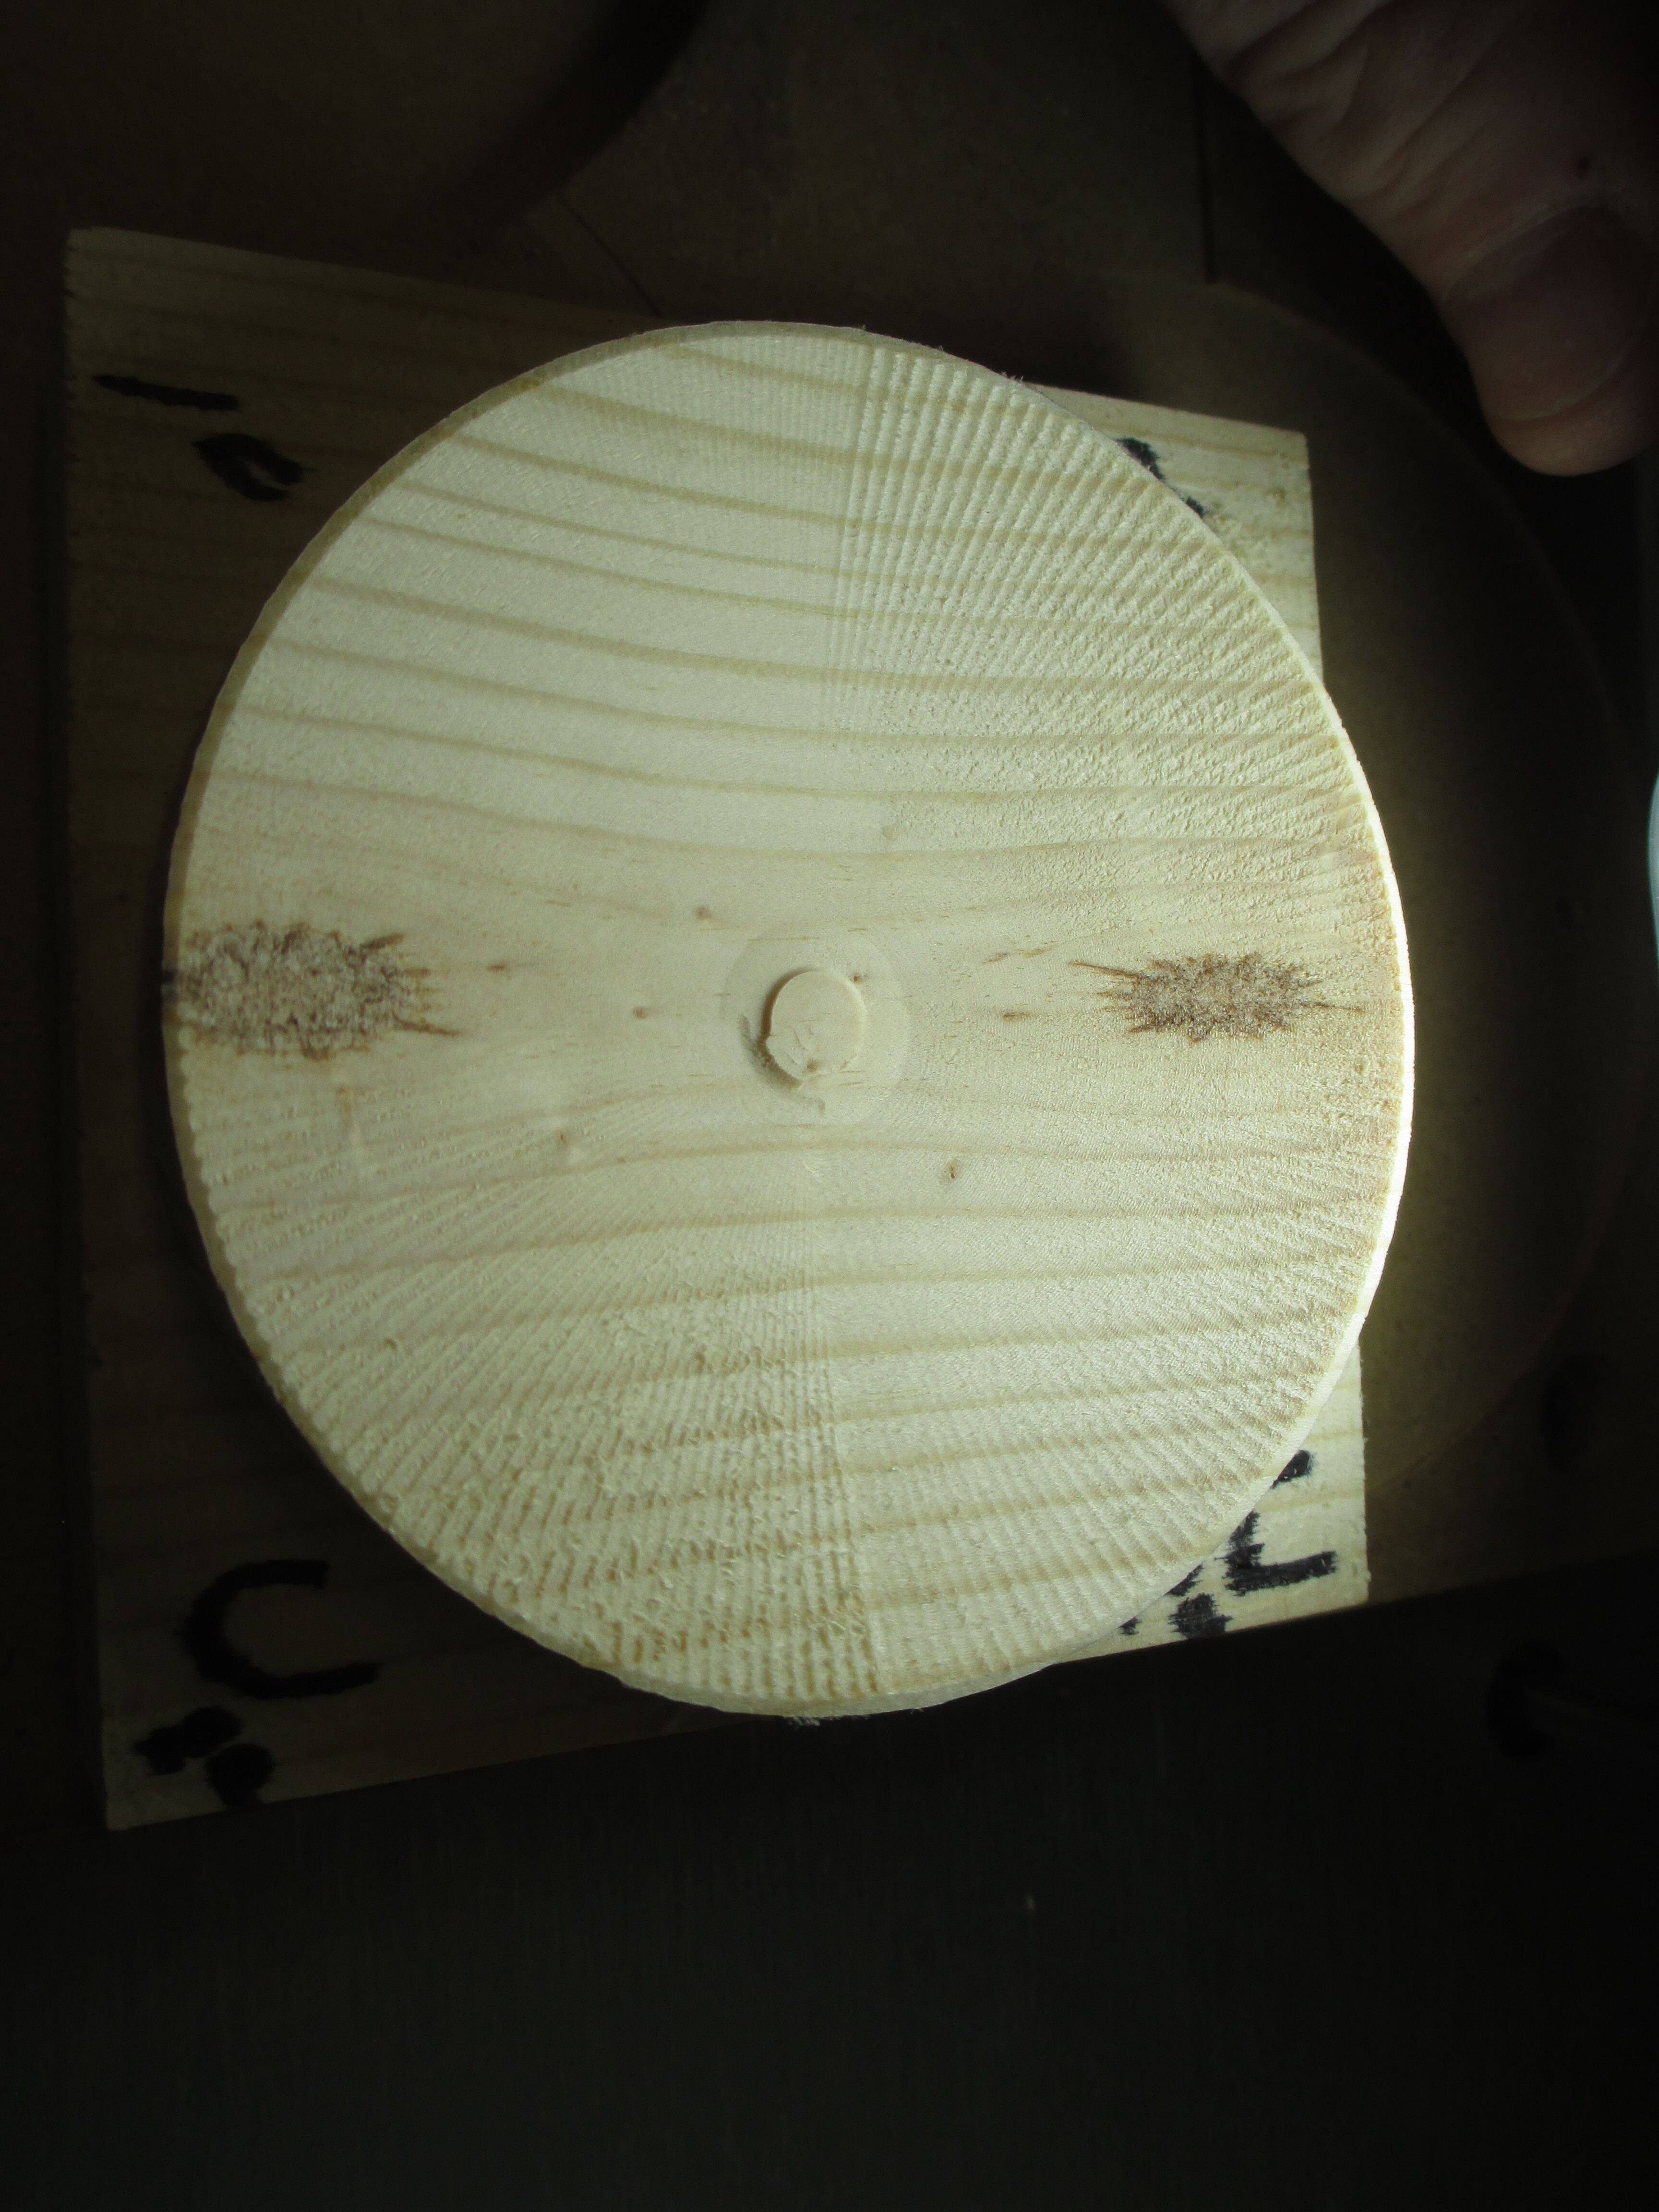
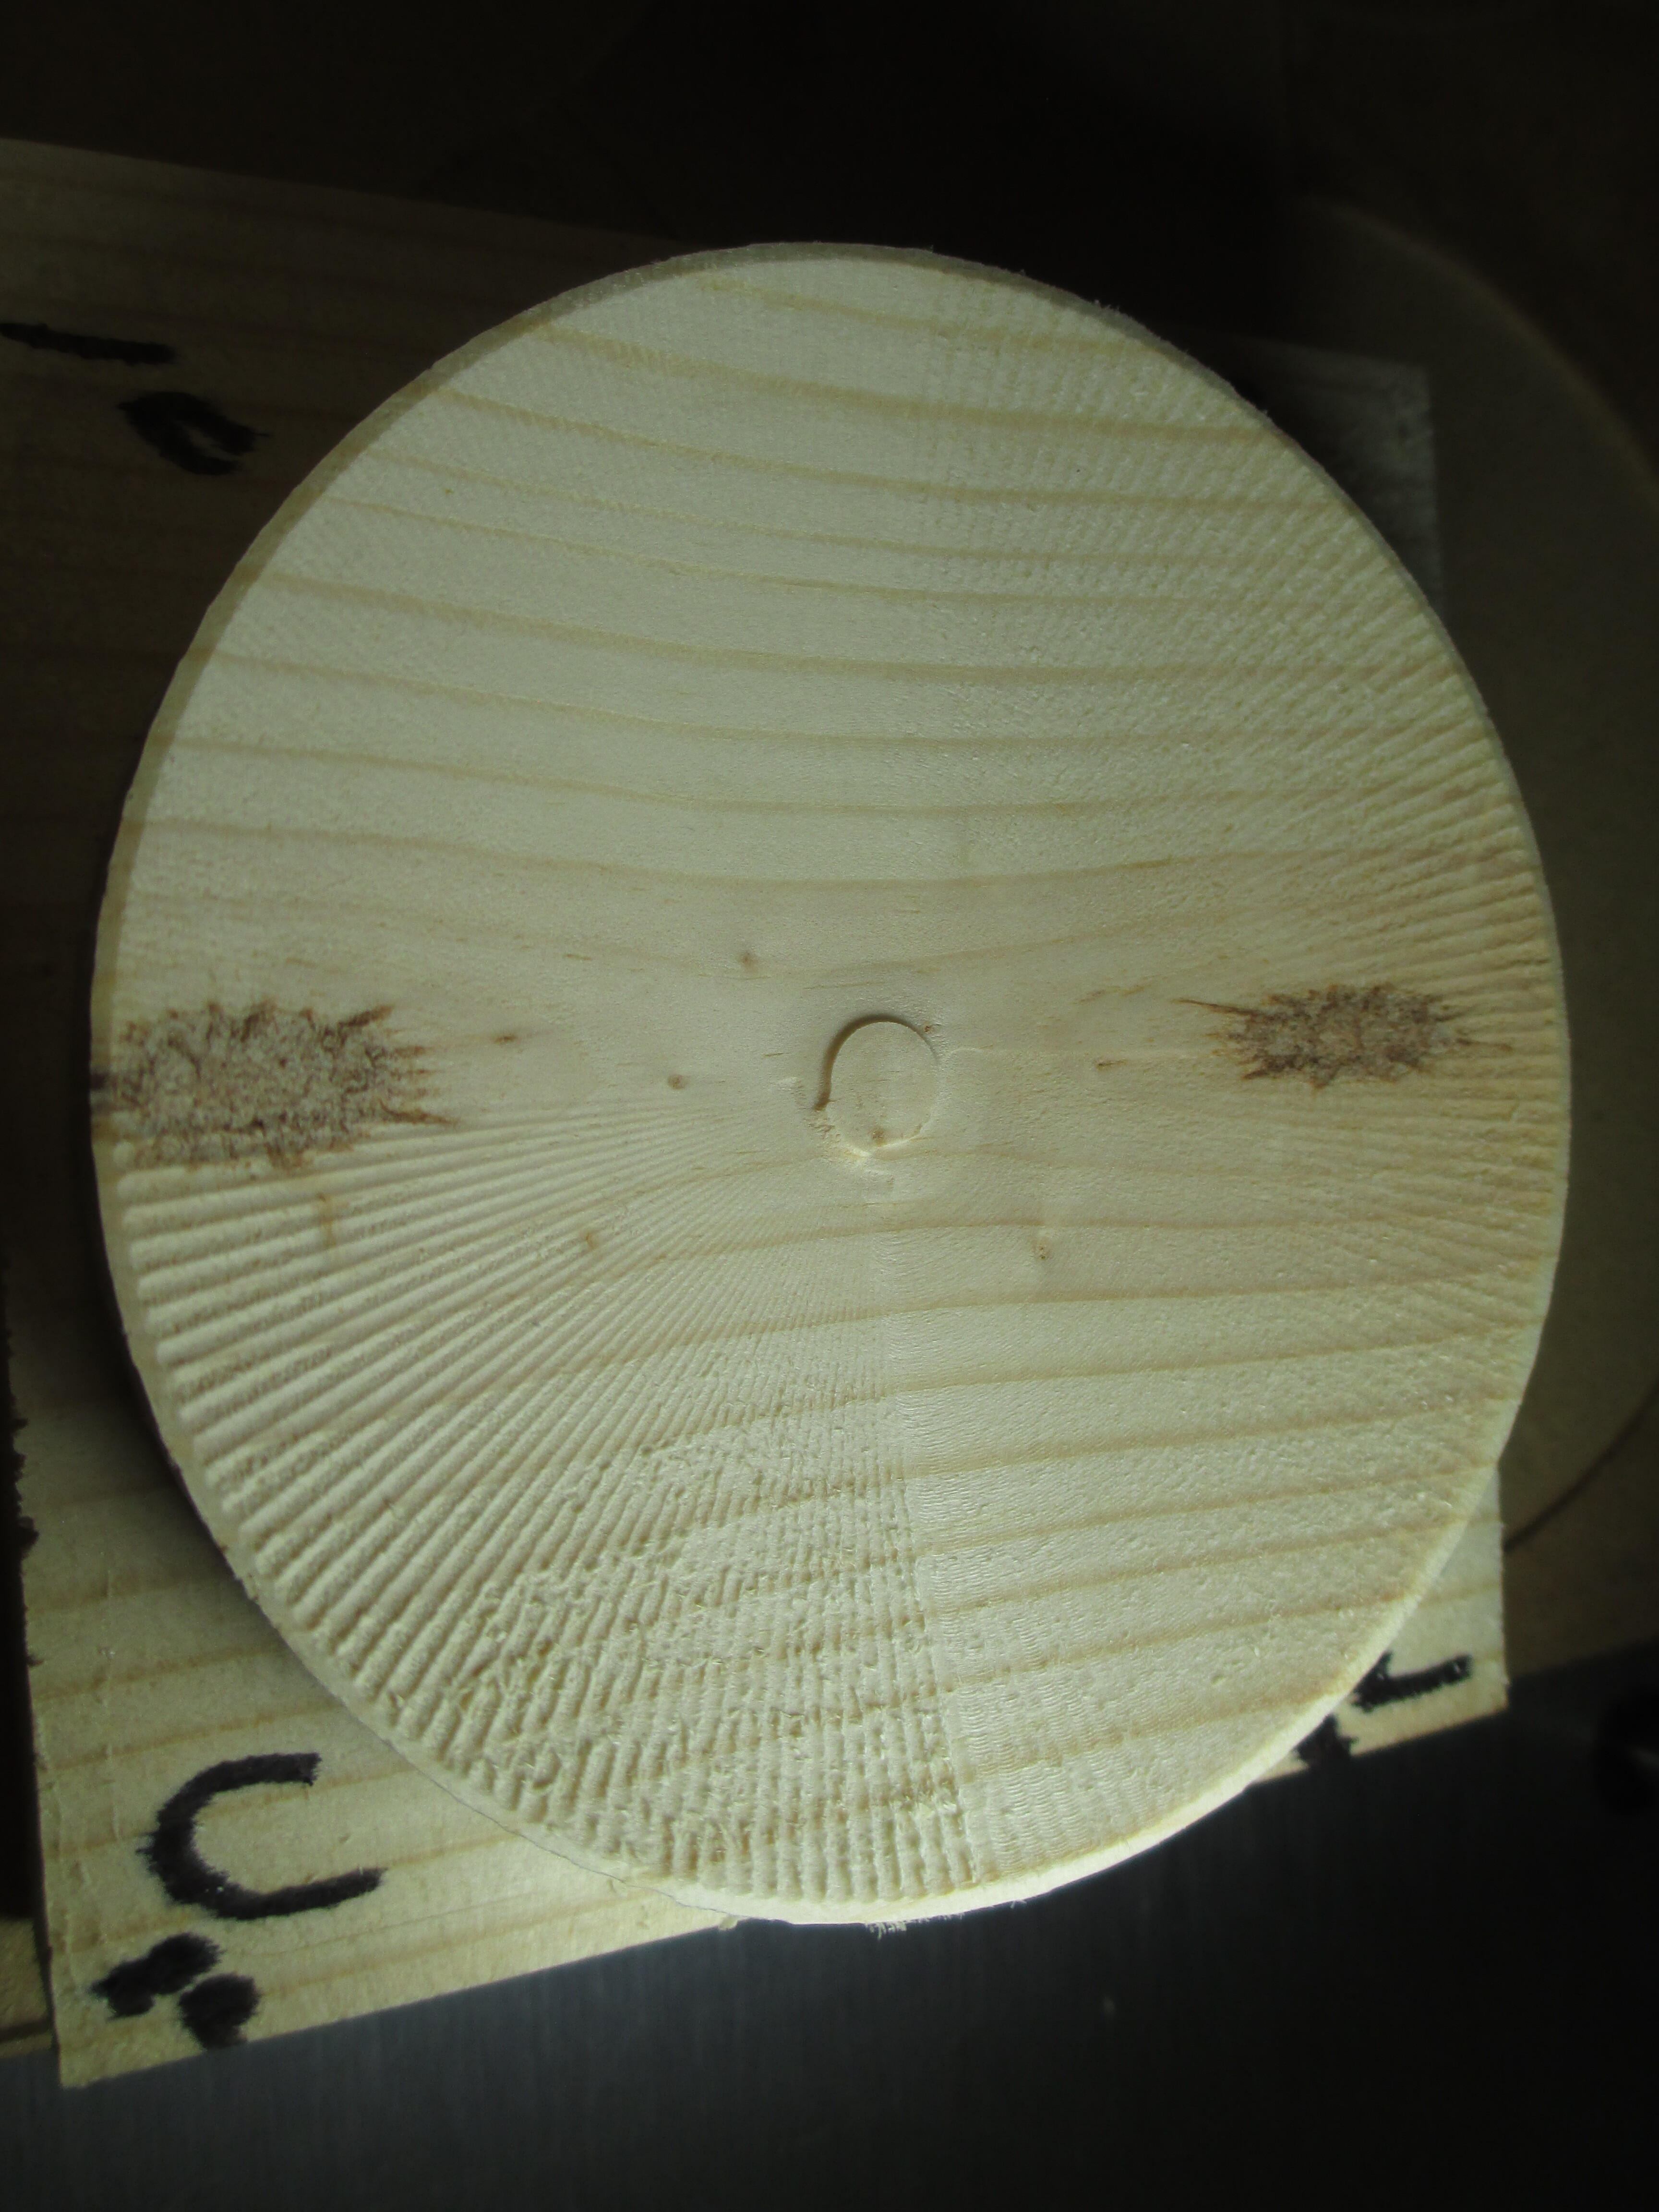
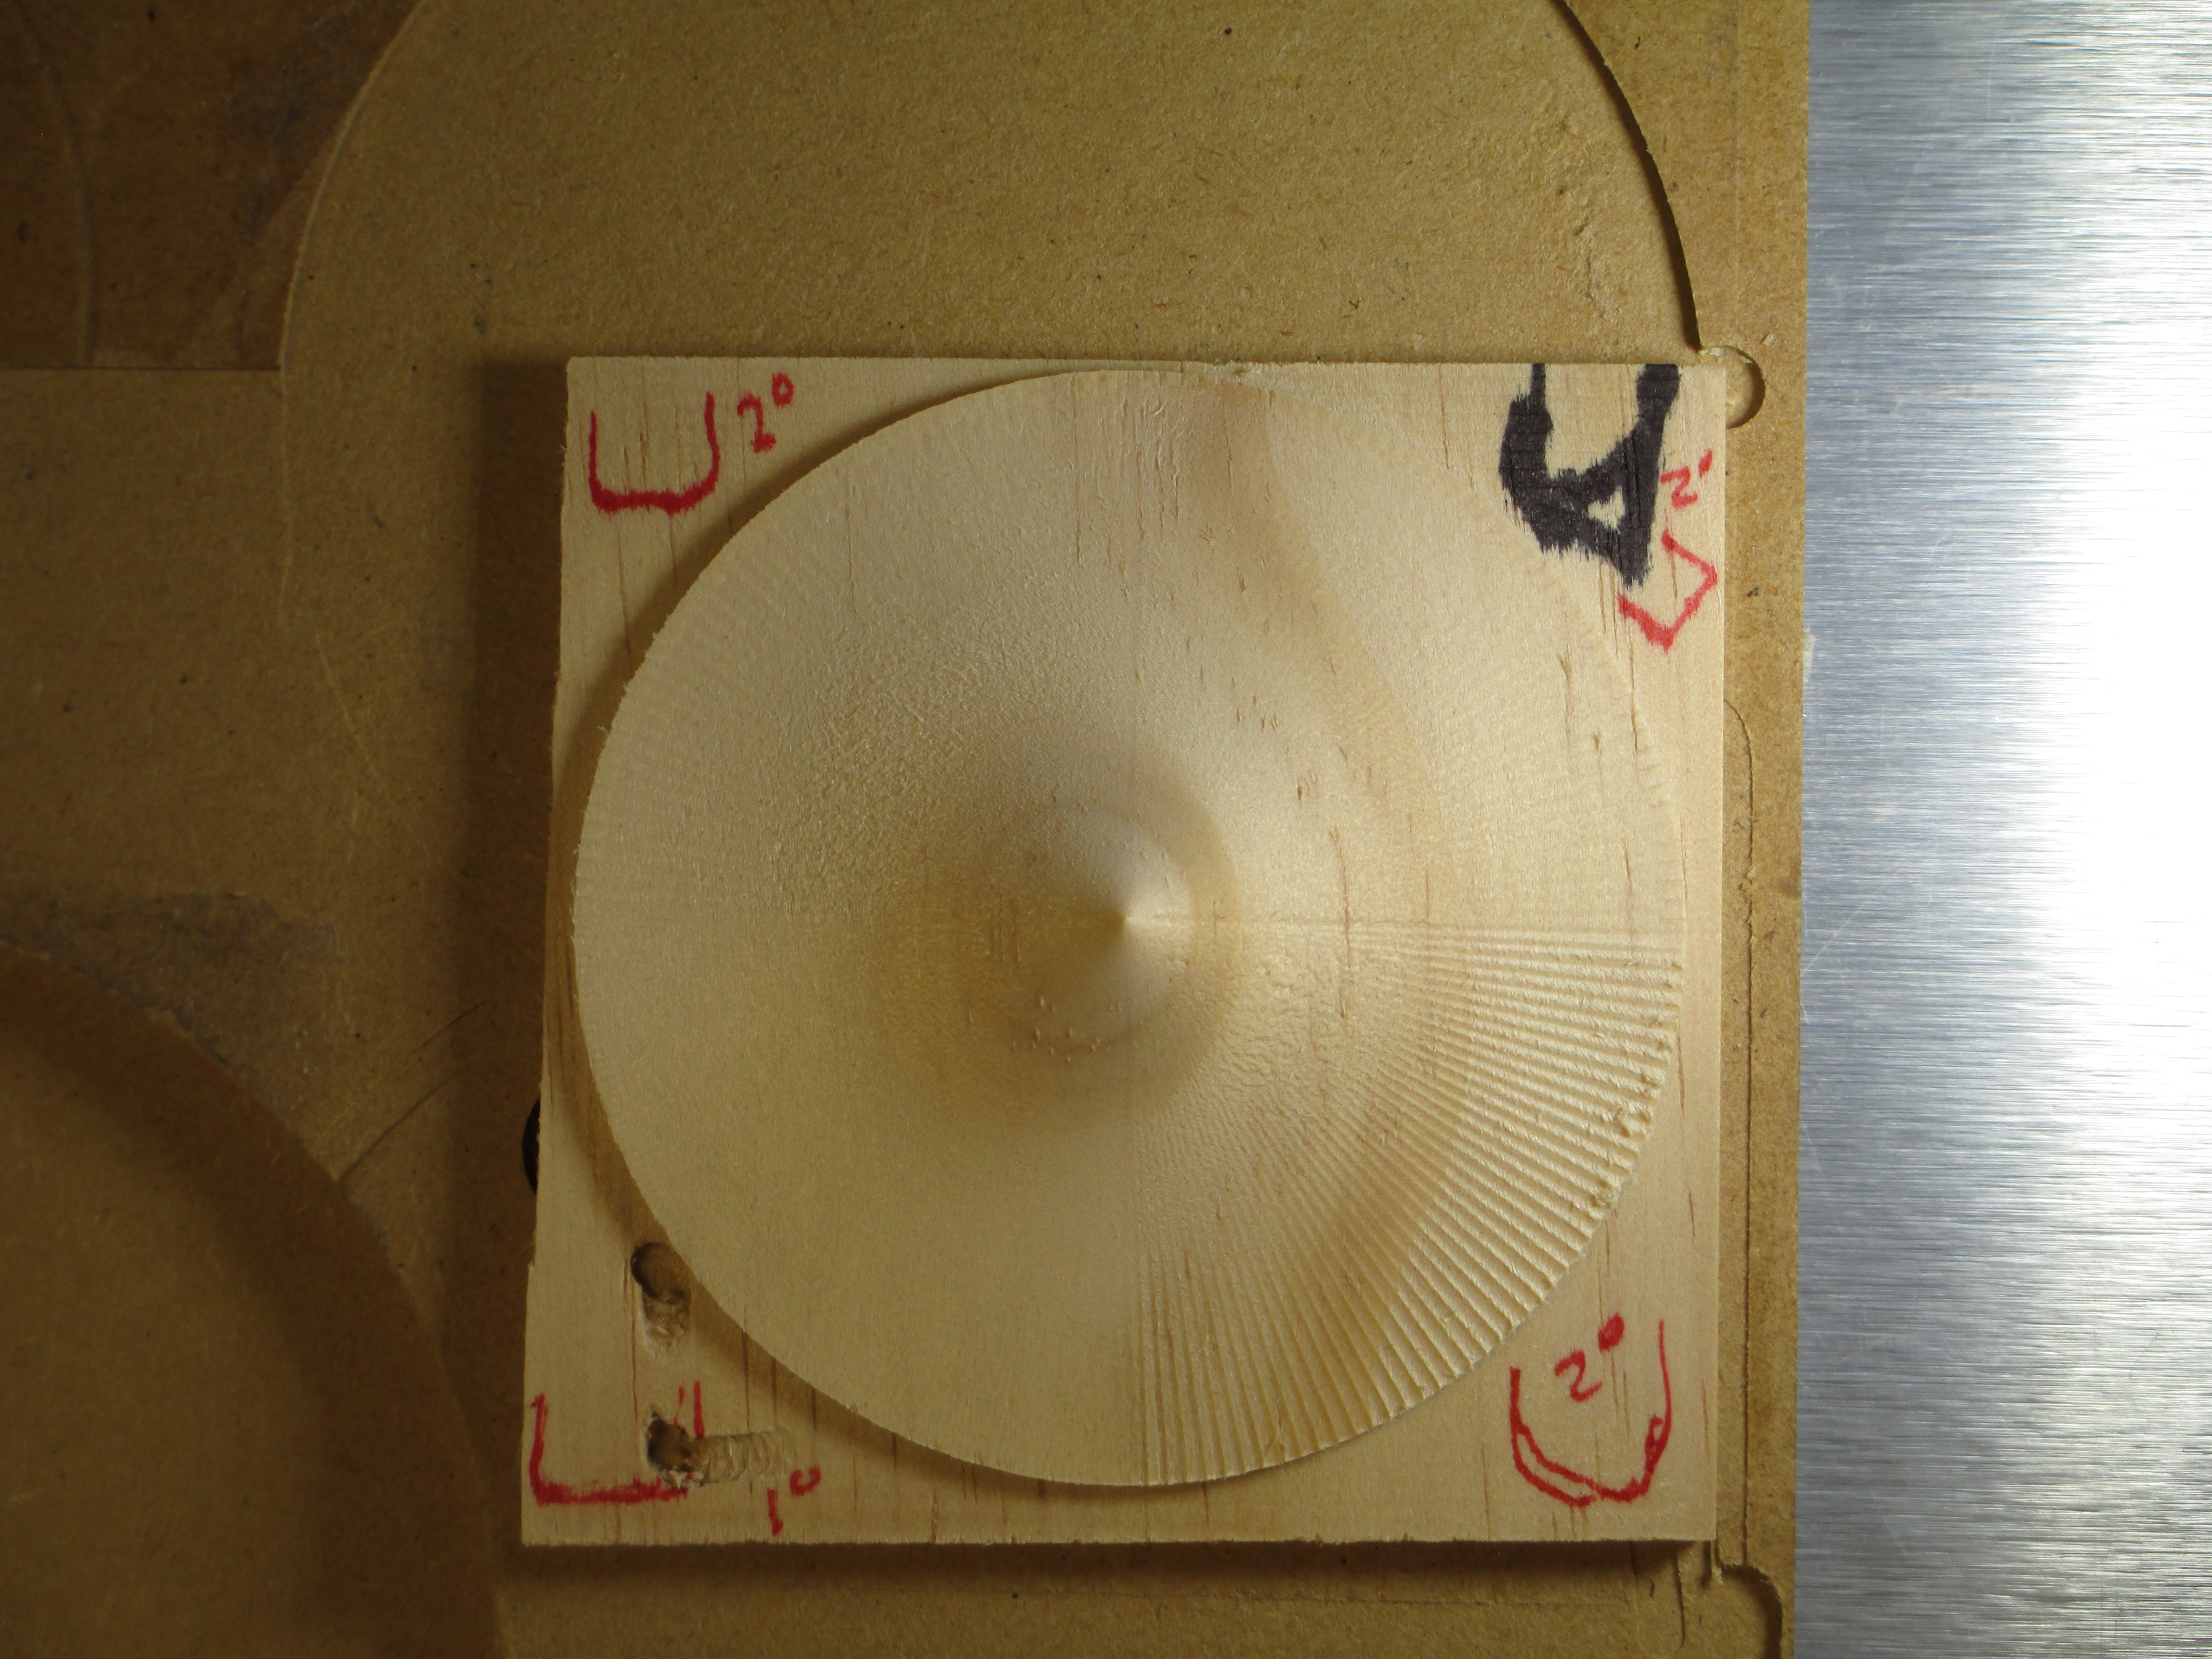
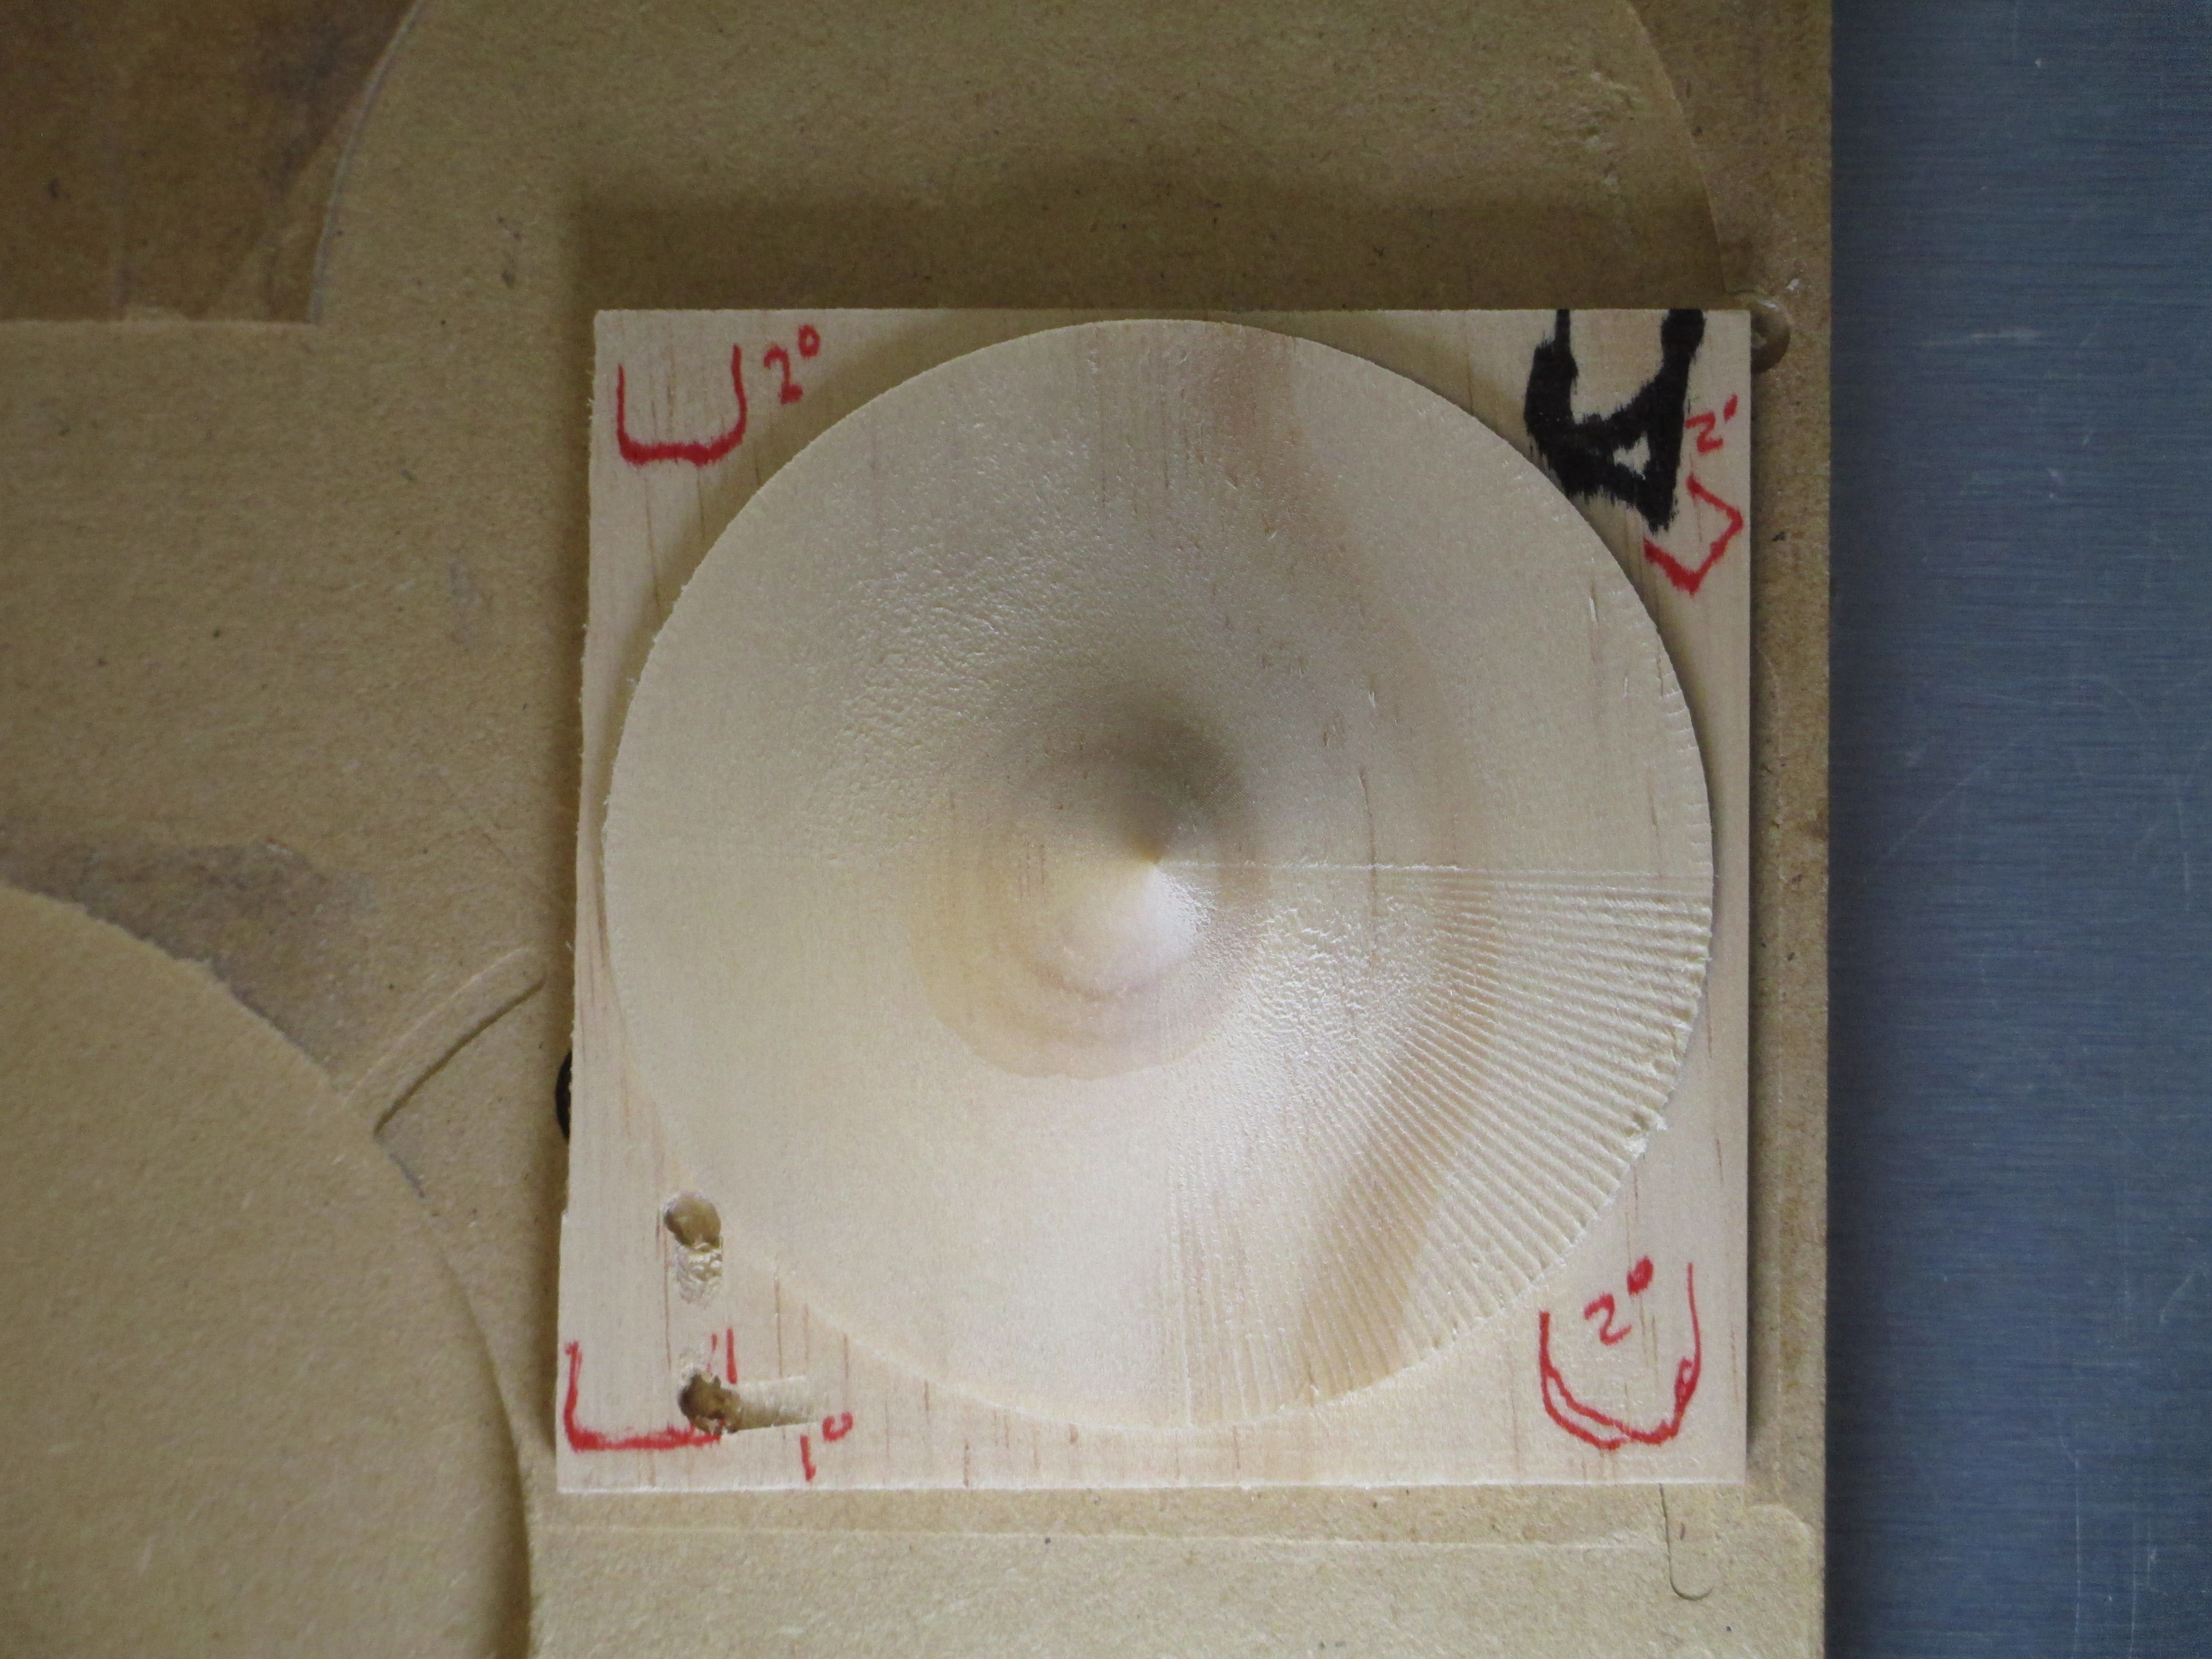
Four more shots with the light oblique from different directions:
If you are dealing with fairly shallow angles, and can control the direction of machining, a ball end is not your friend for contouring to a fine surface.
EDIT: vid link to part rotating as the light is swept from axial to surface-tangent. Shows the textures under various lighting. I gave a sweep with a toothbrush (Oral-B, soft) to get loose dust and fuzz off first.
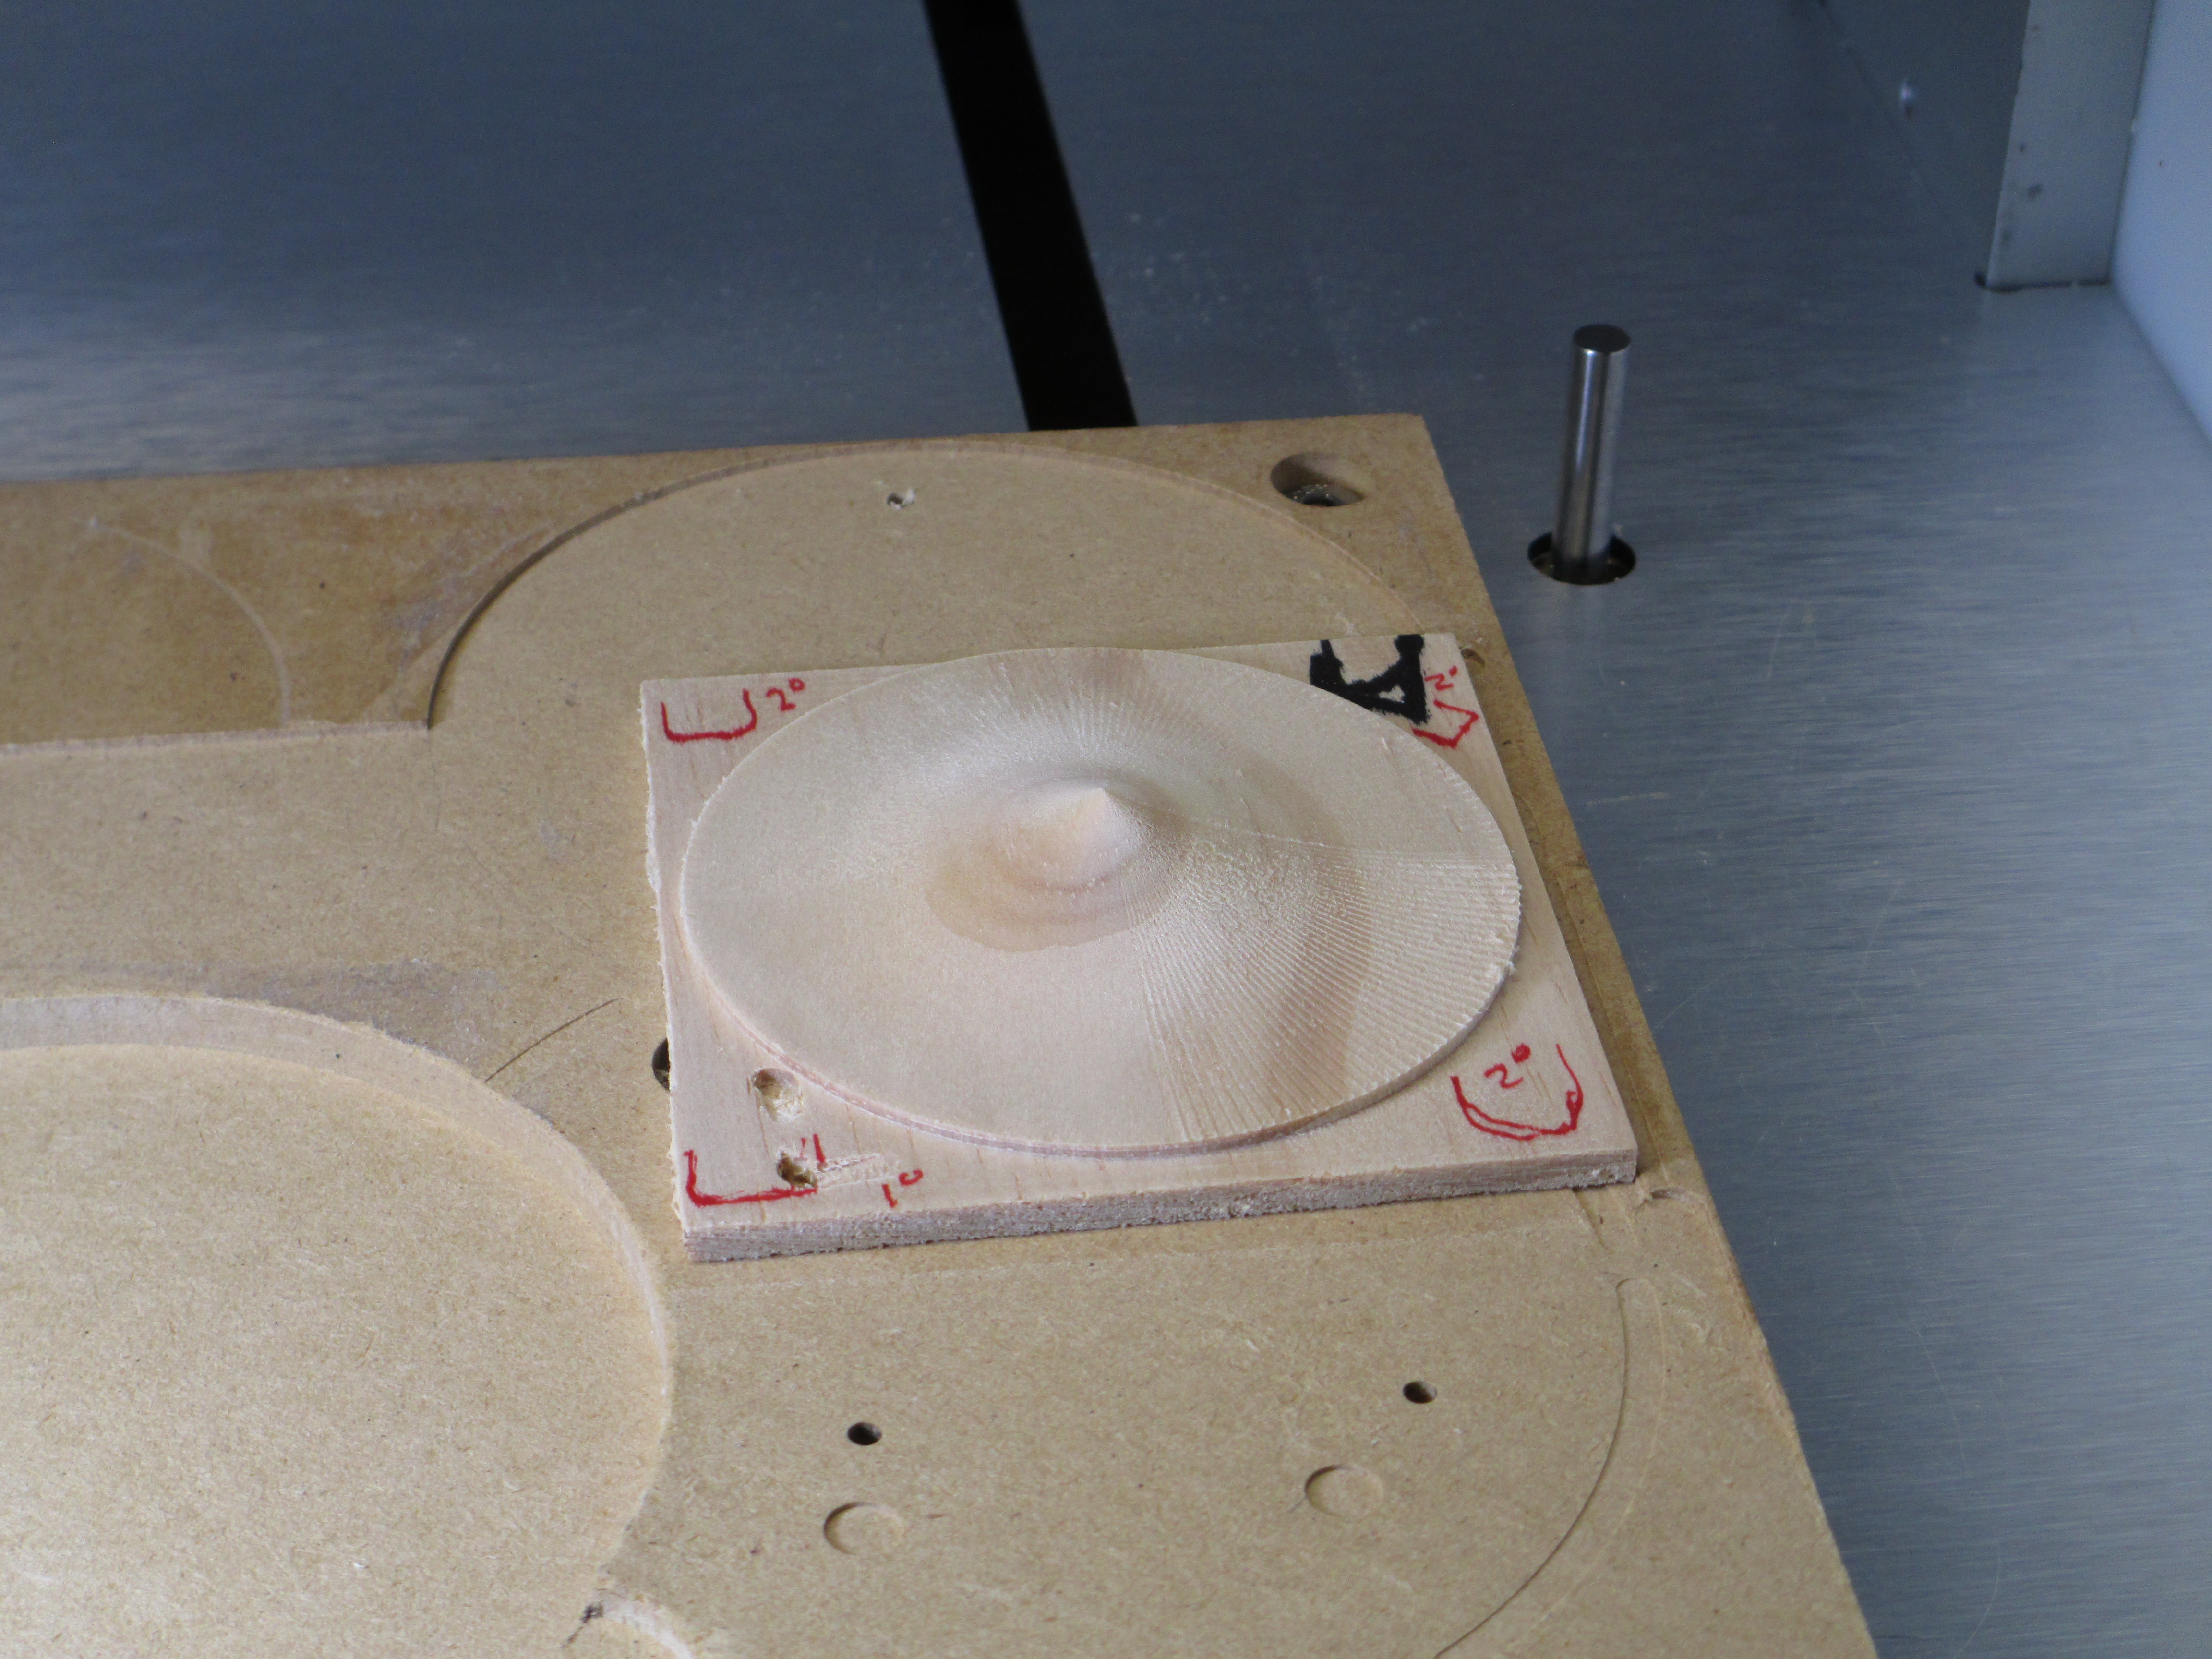
And, one more, because why not. This is kind of the converse of the previous. Same operations, still cutting down, but here the form is kind of a mountain shape with a sharp cusp, so here it is steep, the stepover will be small, and where it is flatish, the stepover larger. (form of revolution of an arc of a circle, cusp is 10mm above perimeter)
We see that the flat and the bullnose leave excellent finish all over, the bullnose maybe slightly better than the flat this time, the 1 degree stepover for the bullnose is gorgeous, and the ball end is totally out of its league here.
Again, ligth straight on, then from down low each way
This topic was automatically closed 30 days after the last reply. New replies are no longer allowed.