Should I be using Up or down cut end mills to prevent tear out on the top of my baltic birch project? I have read using down cut ones will help, wondering your opinions. I ran a test with 1/8 endmills I have (not sure up or down) with a inner 3.8" diameter pocket .100 deep then a 4" outer cut through, leaving a lip that had tear out on top. Any opinions to stop the tear out?
So you are not milling all the way through the board? If that is the case I would look at a downcut bit.
If you are cutting all the way through you can look at a compression bit.
I’m sure this isn’t recommended, but try some blue painters tape on the piece you are milling. Same idea as cutting plywood on the table saw. Note of safety, make sure it doesn’t get caught in the spindle. Perhaps a thin piece of MDF would do a better job applying pressure to that top layer of veneer.
Here is a very good article on the types of bits. http://blog.cnccookbook.com/2012/04/06/cnc-router-cutters-types-and-how-to-use-them/
Thanks, the 4" would be a cut all the way through. Don’t know why I didn’t think of painters tape. I have been using poplar for these coasters, but I was look for slight cheaper and heavier wood, I have a good source for baltic birch, but if it doesn’t work good i will move on to different wood. If you use compression bits, do you have a good source?
I would be interested to see what people who have been doing a lot of finish work such as for signs will say here.
I stumbled upon one way that may give the benefits of both the upcut and downcut bits. I typically am unconcerned about the finish of the parts I make and this happened one time by accident but I think it will work…
Take a very light pass for 2-3 layers. Just enough to skim the skin and break through the veneer of the plywood. Then start taking your normal cuts. I didn’t have my z zero set correctly one time and I saw it skimming that top layer and since it wasn’t taking out much material the edges looked very sharp with no tear out. I don’t know if that was a fluke but it seems logical that would let you use an upcut bit and still not get a lot of tear out.
1 Like
The key to what @Tshulthise is suggesting is that you then don’t want the tooling to come in contact with the top edge again, so those light passes need to be ever so slightly wider than the following roughing & finishing passes, otherwise the tool will re-engage at the end of the cutting process for finishing and muck up your hard work 
Also, at the start of the cuts your tool will be sharper than the end by definition, so doing that skim-cut first is indeed wise to do.
1 Like
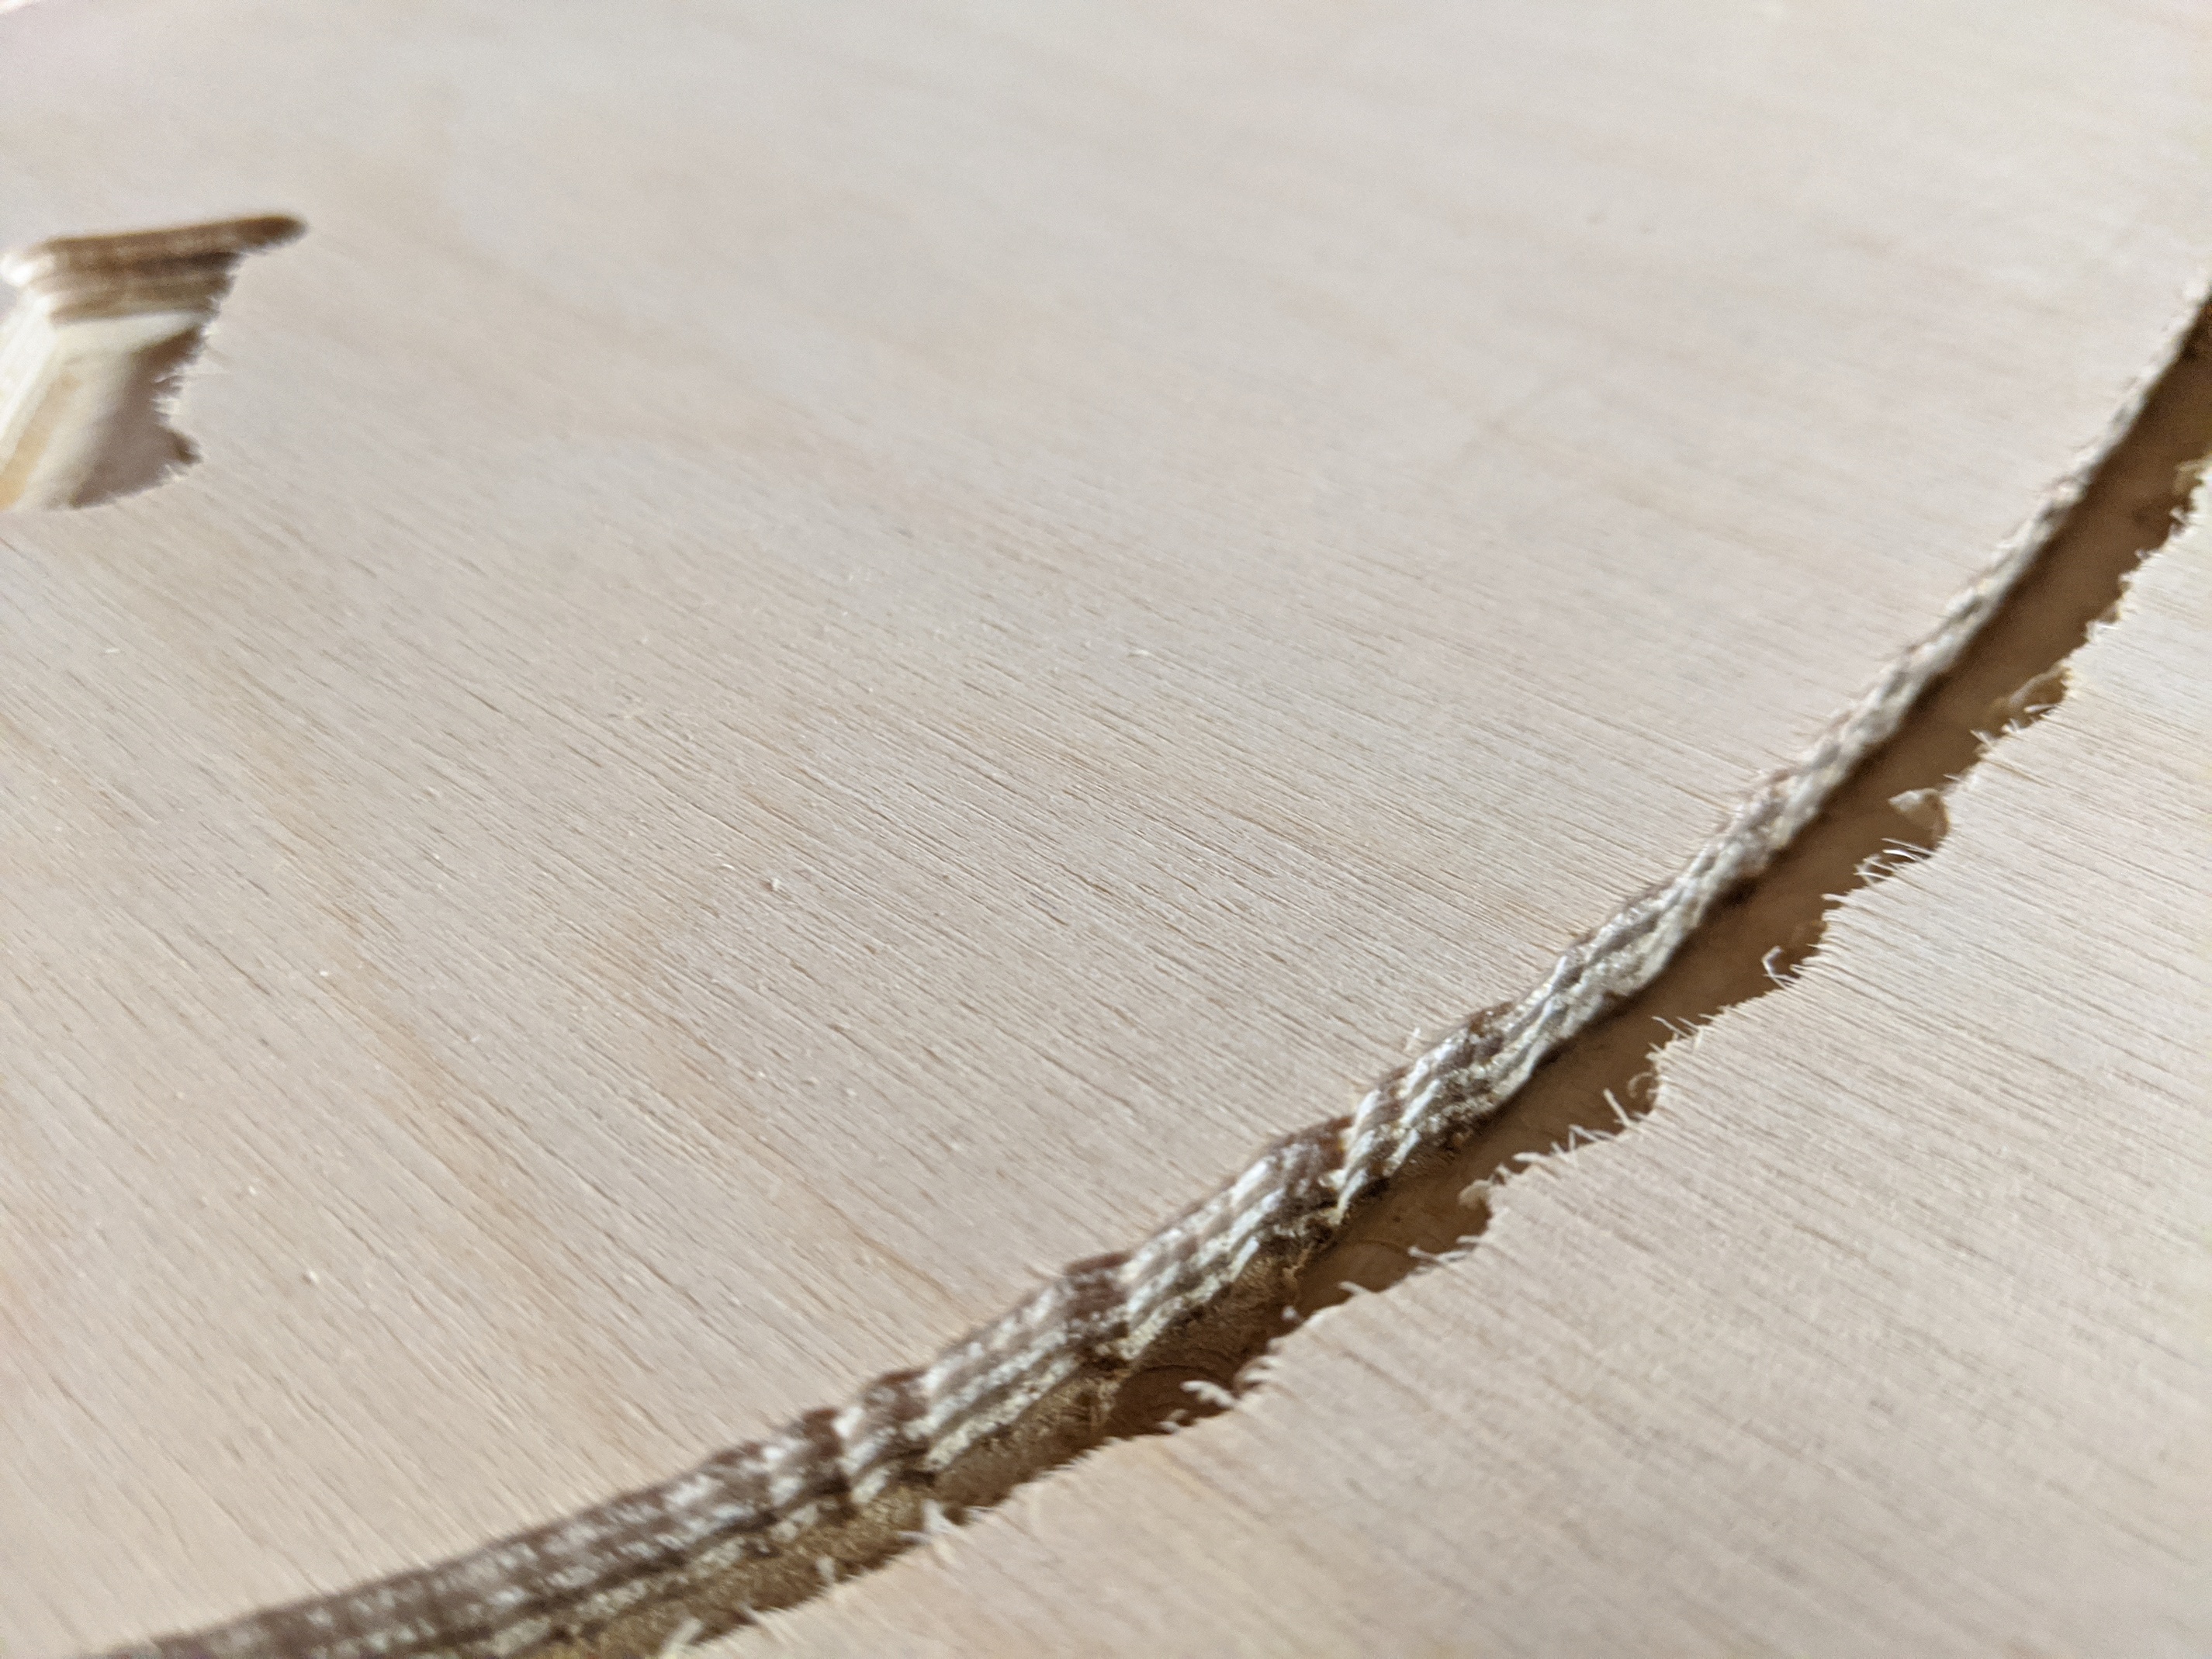
I know this is an old topic, but I am new to CNC and have been using my Shapeoko XXL for about a month. My goal with it is to use Baltic Birch ply pretty much exclusively, so I’m trying to master how to cut the material. I started with the #201 .25" endmill that came with the machine but experienced a lot of tearout and really fuzzy finishes on all of the edges. I’ve tried several other endmills and finally had a breakthrough yesterday with the Amana 4630 .25" Mortise Compression bit. I started with the feeds and speeds set to the manufacturer’s specs, and also the suggestions from GWizard calculator and it was WAY too fast and deep - 110 IPM Feed Rate, Spindle at 18000 RPM, pass depth at .25". The cuts looked terrible - lots of chatter from the bit and not straight or smooth at all:
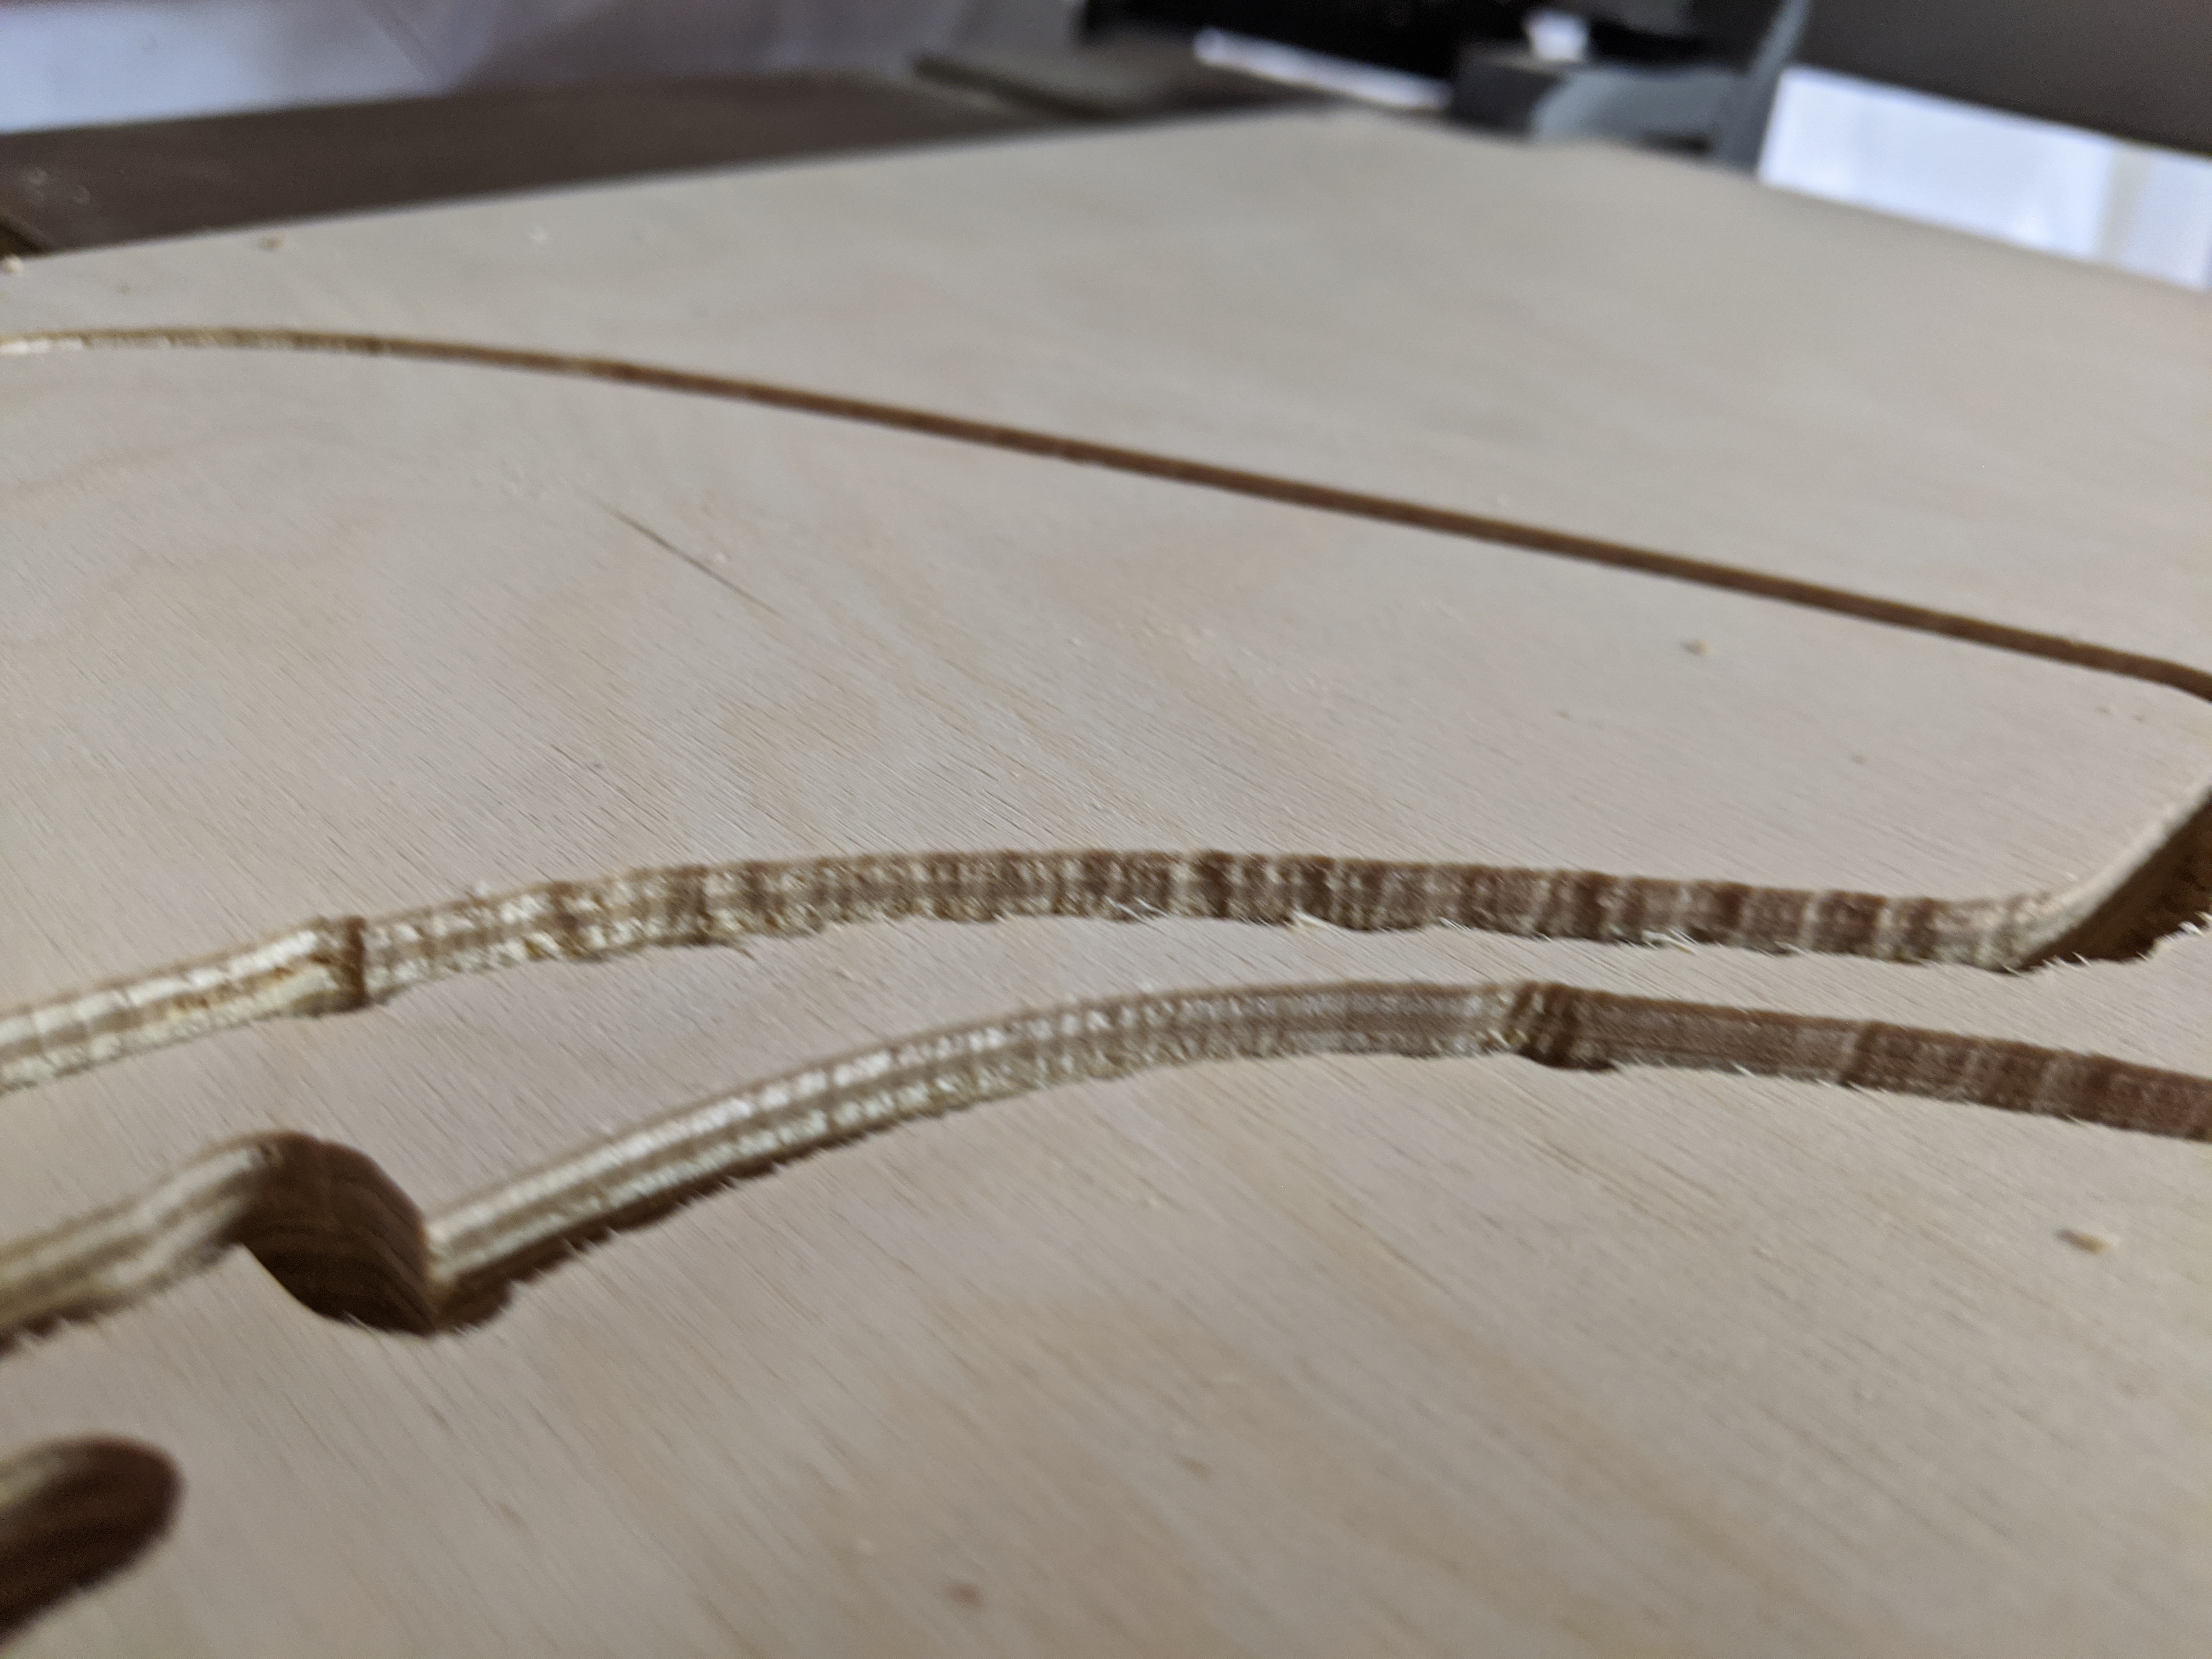
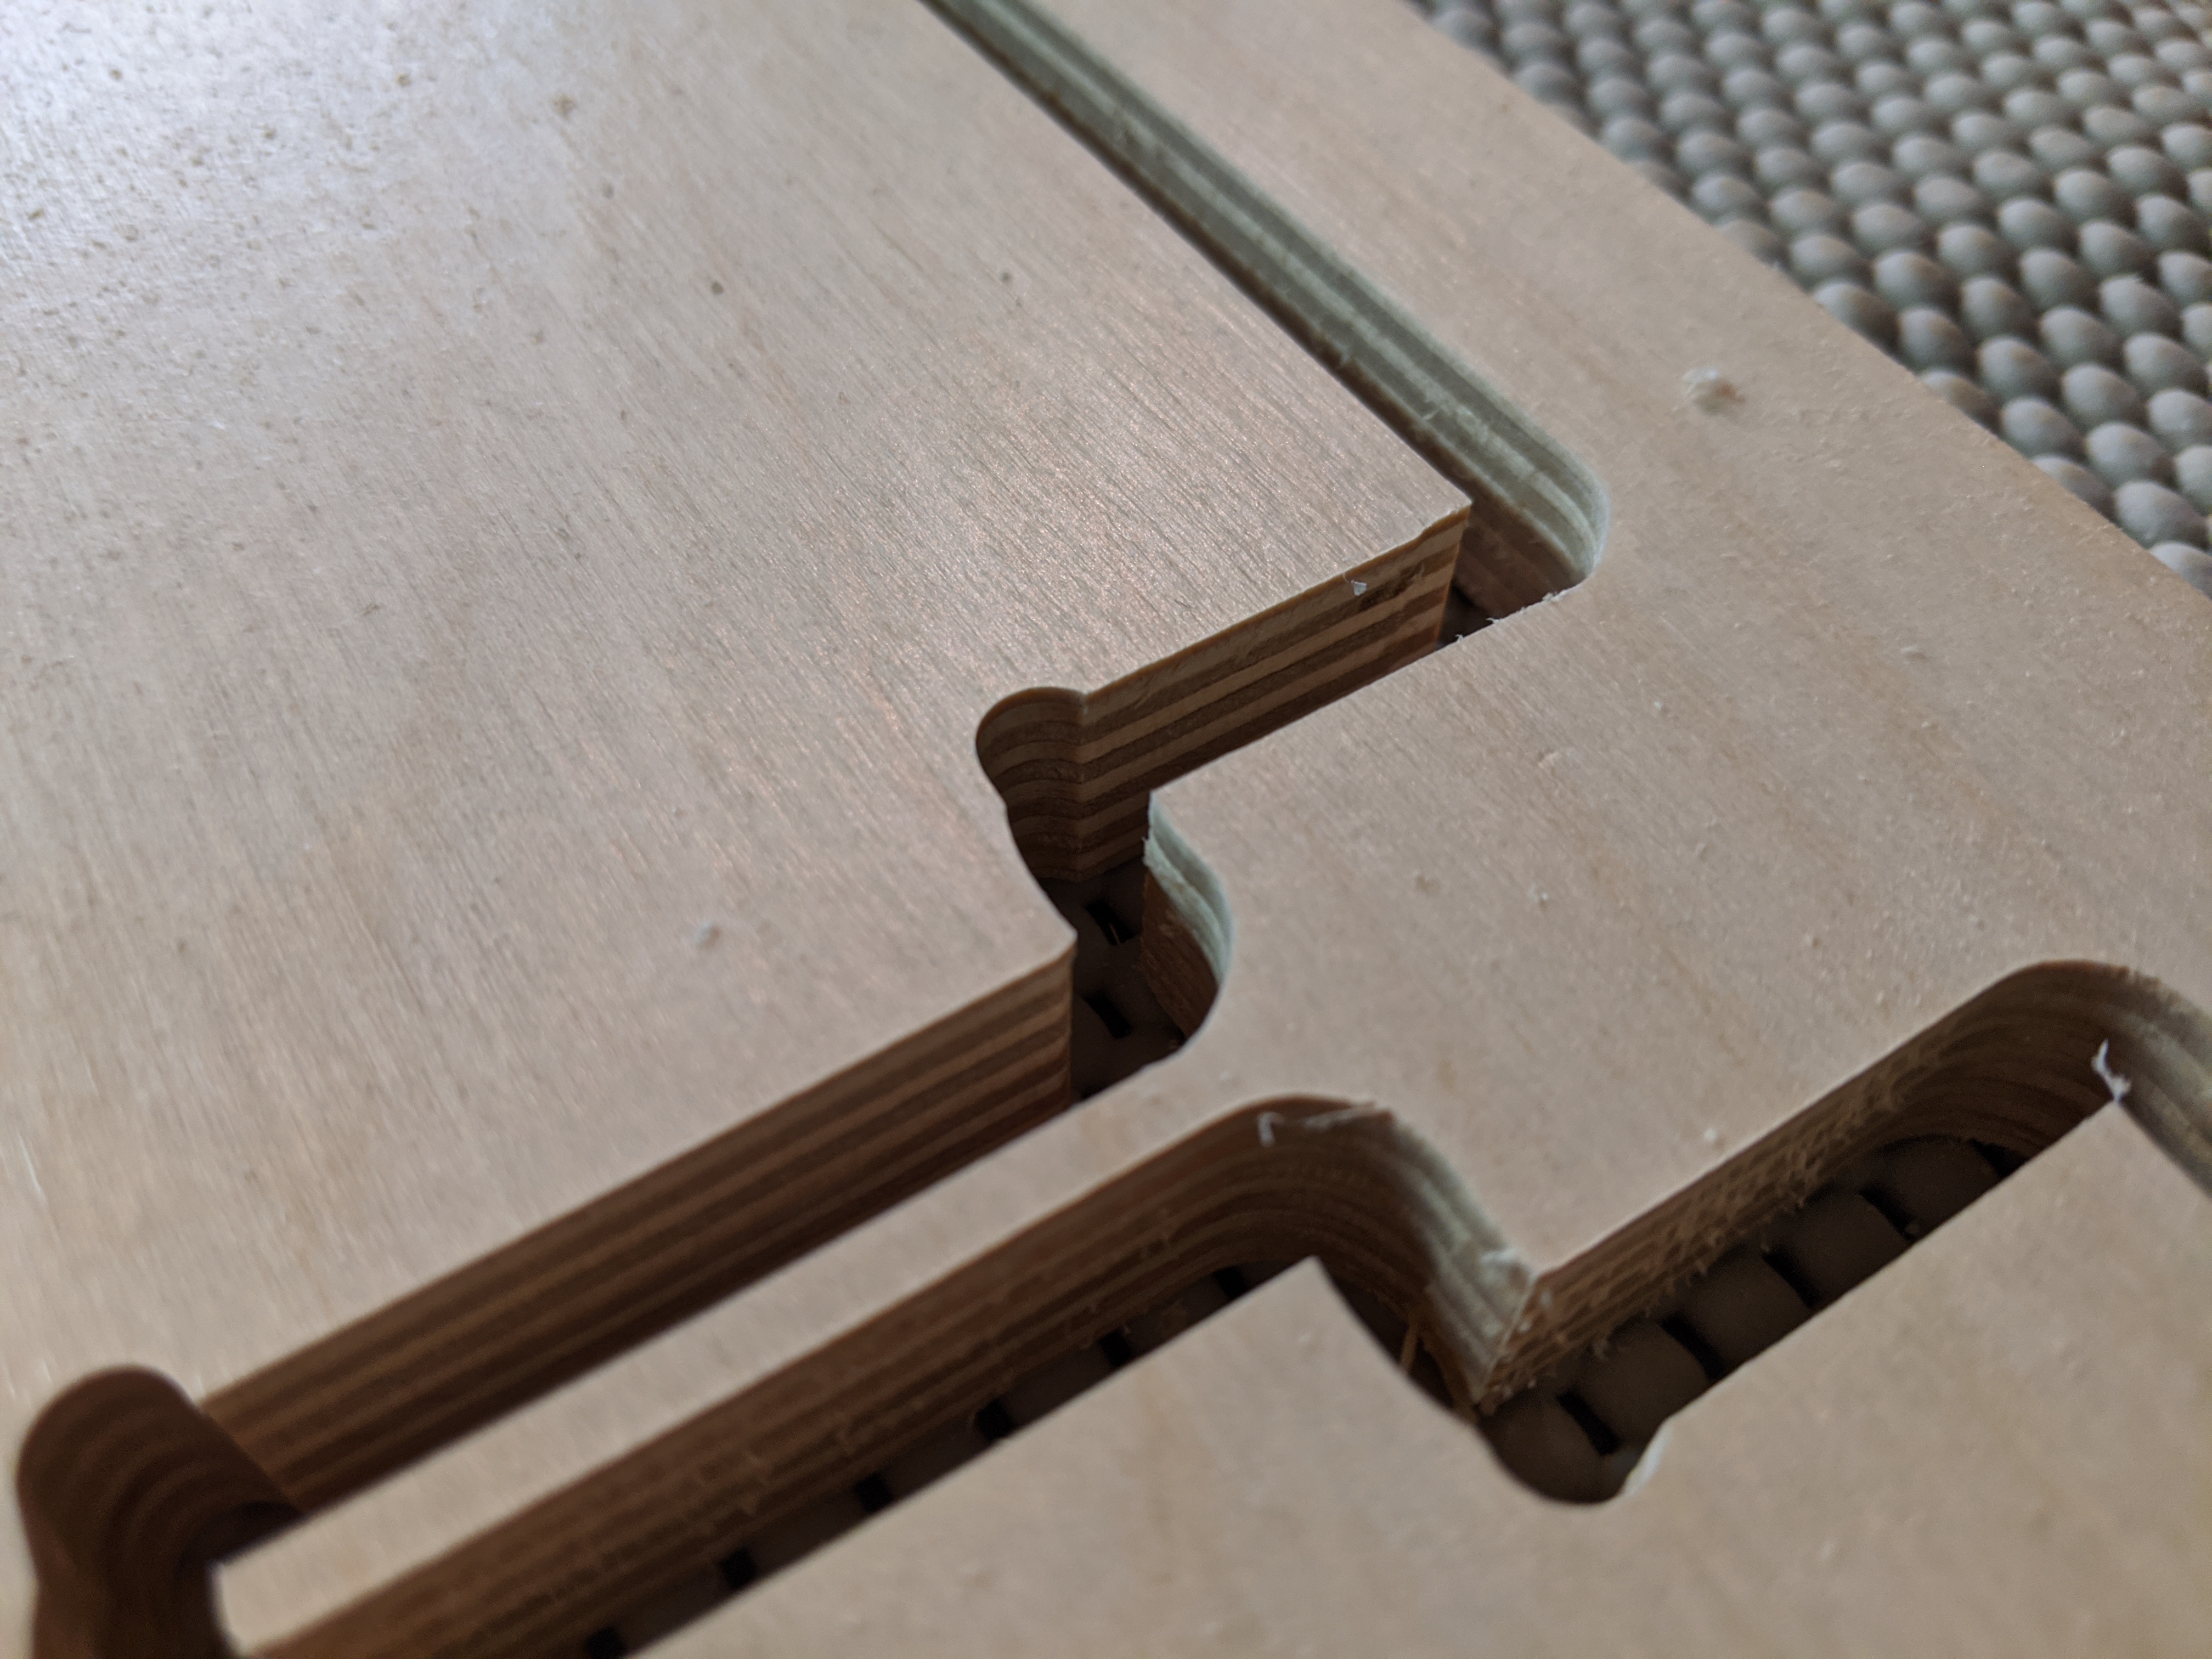
I switched the feeds and speeds to the default settings for the Carbide3D #201 .25" endmill while still using the Amana bit and got very good results for the finish of the cuts. Those settings are 75 IPM feed rate, .092" depth per pass, and I set the RPM to what Amana recommends, 18,000. Now, though, I am getting some really distorted shapes in some areas that should be very straightforward:
Here’s what those areas look like in Carbide Create:
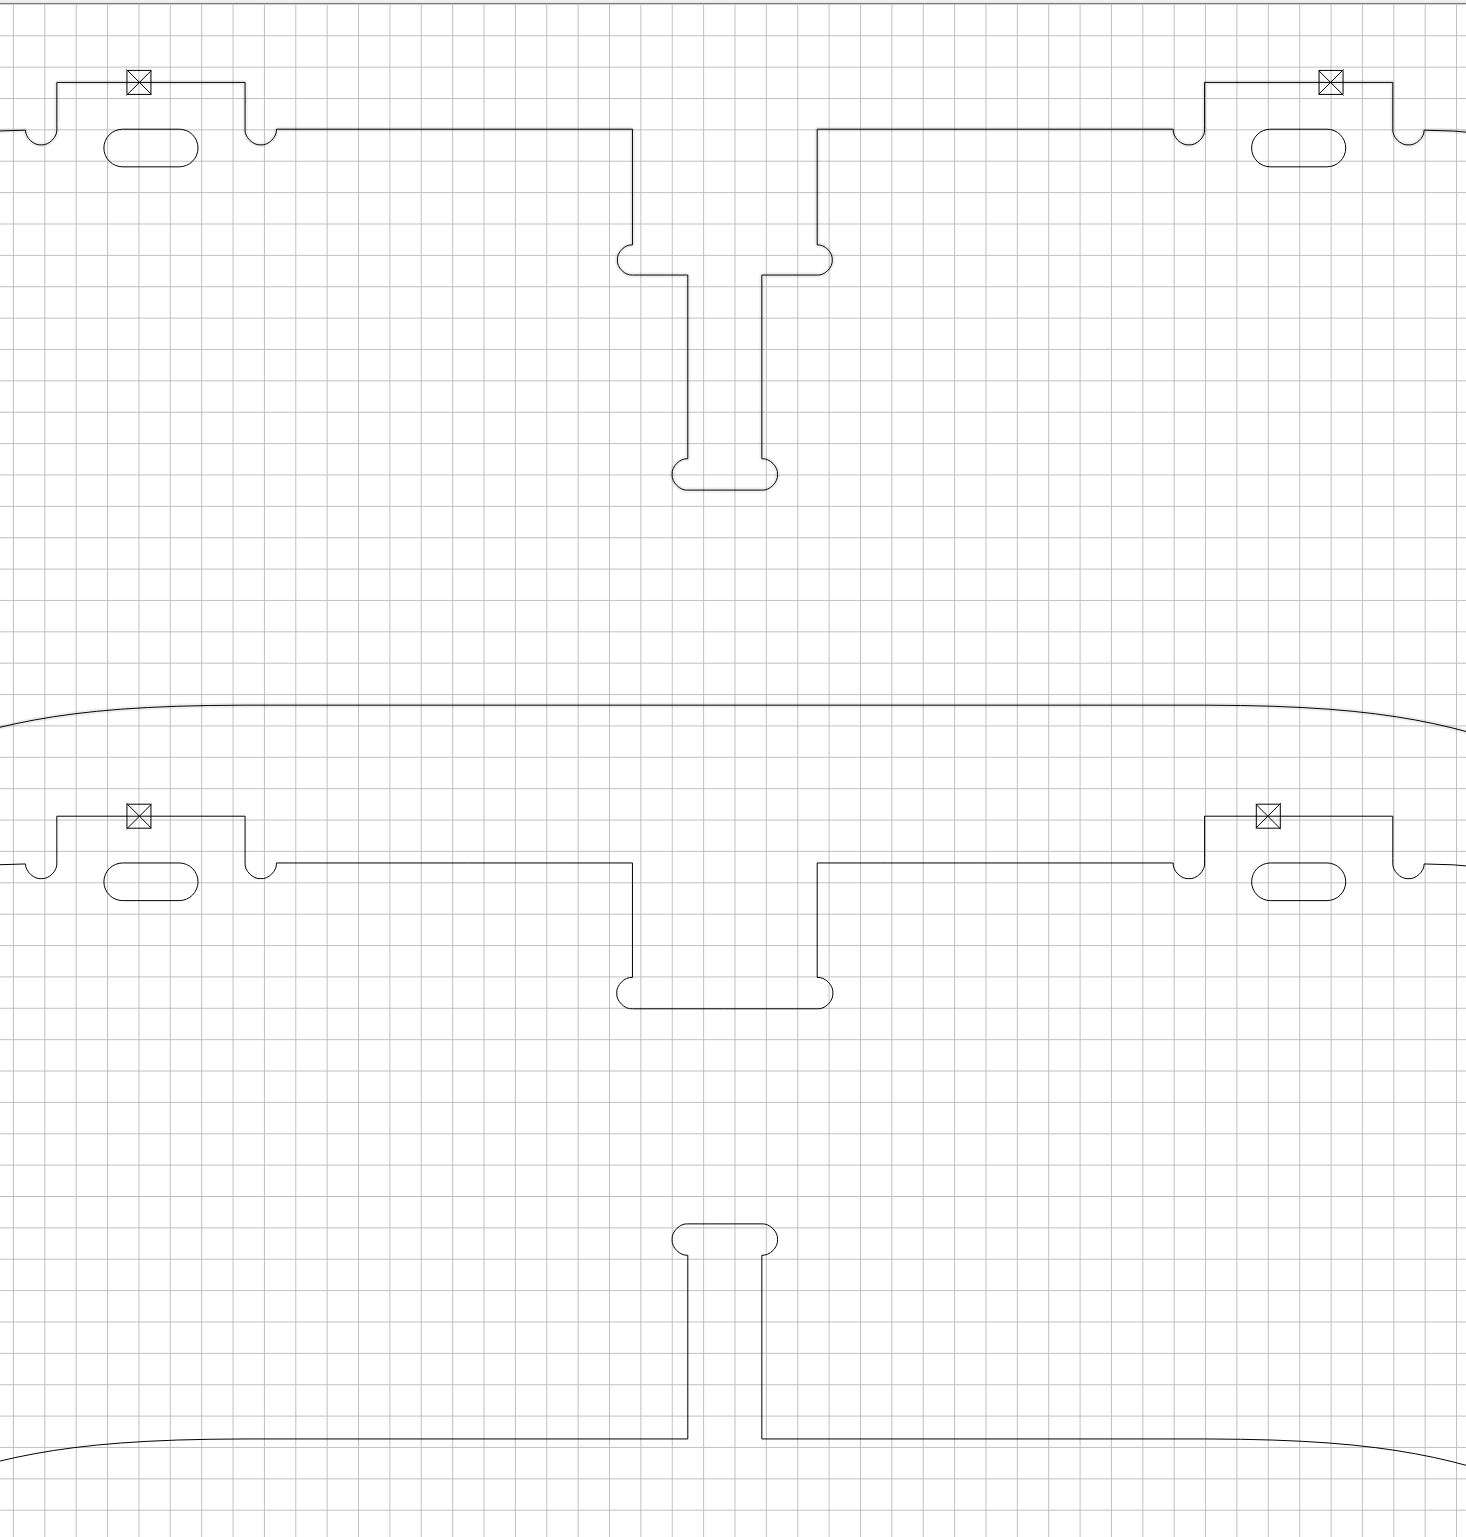
Should I slow the feed rate down even more to get more precise outlines? Any advice would be greatly appreciated. I’ve been going through a LOT of plywood trying to dial this process in and feel like I’m getting close.
Just as an FYI, I’m doing all of my drawings in Rhino and using CC to set up the toolpaths, then Carbide Motion to run the operations.
1 Like
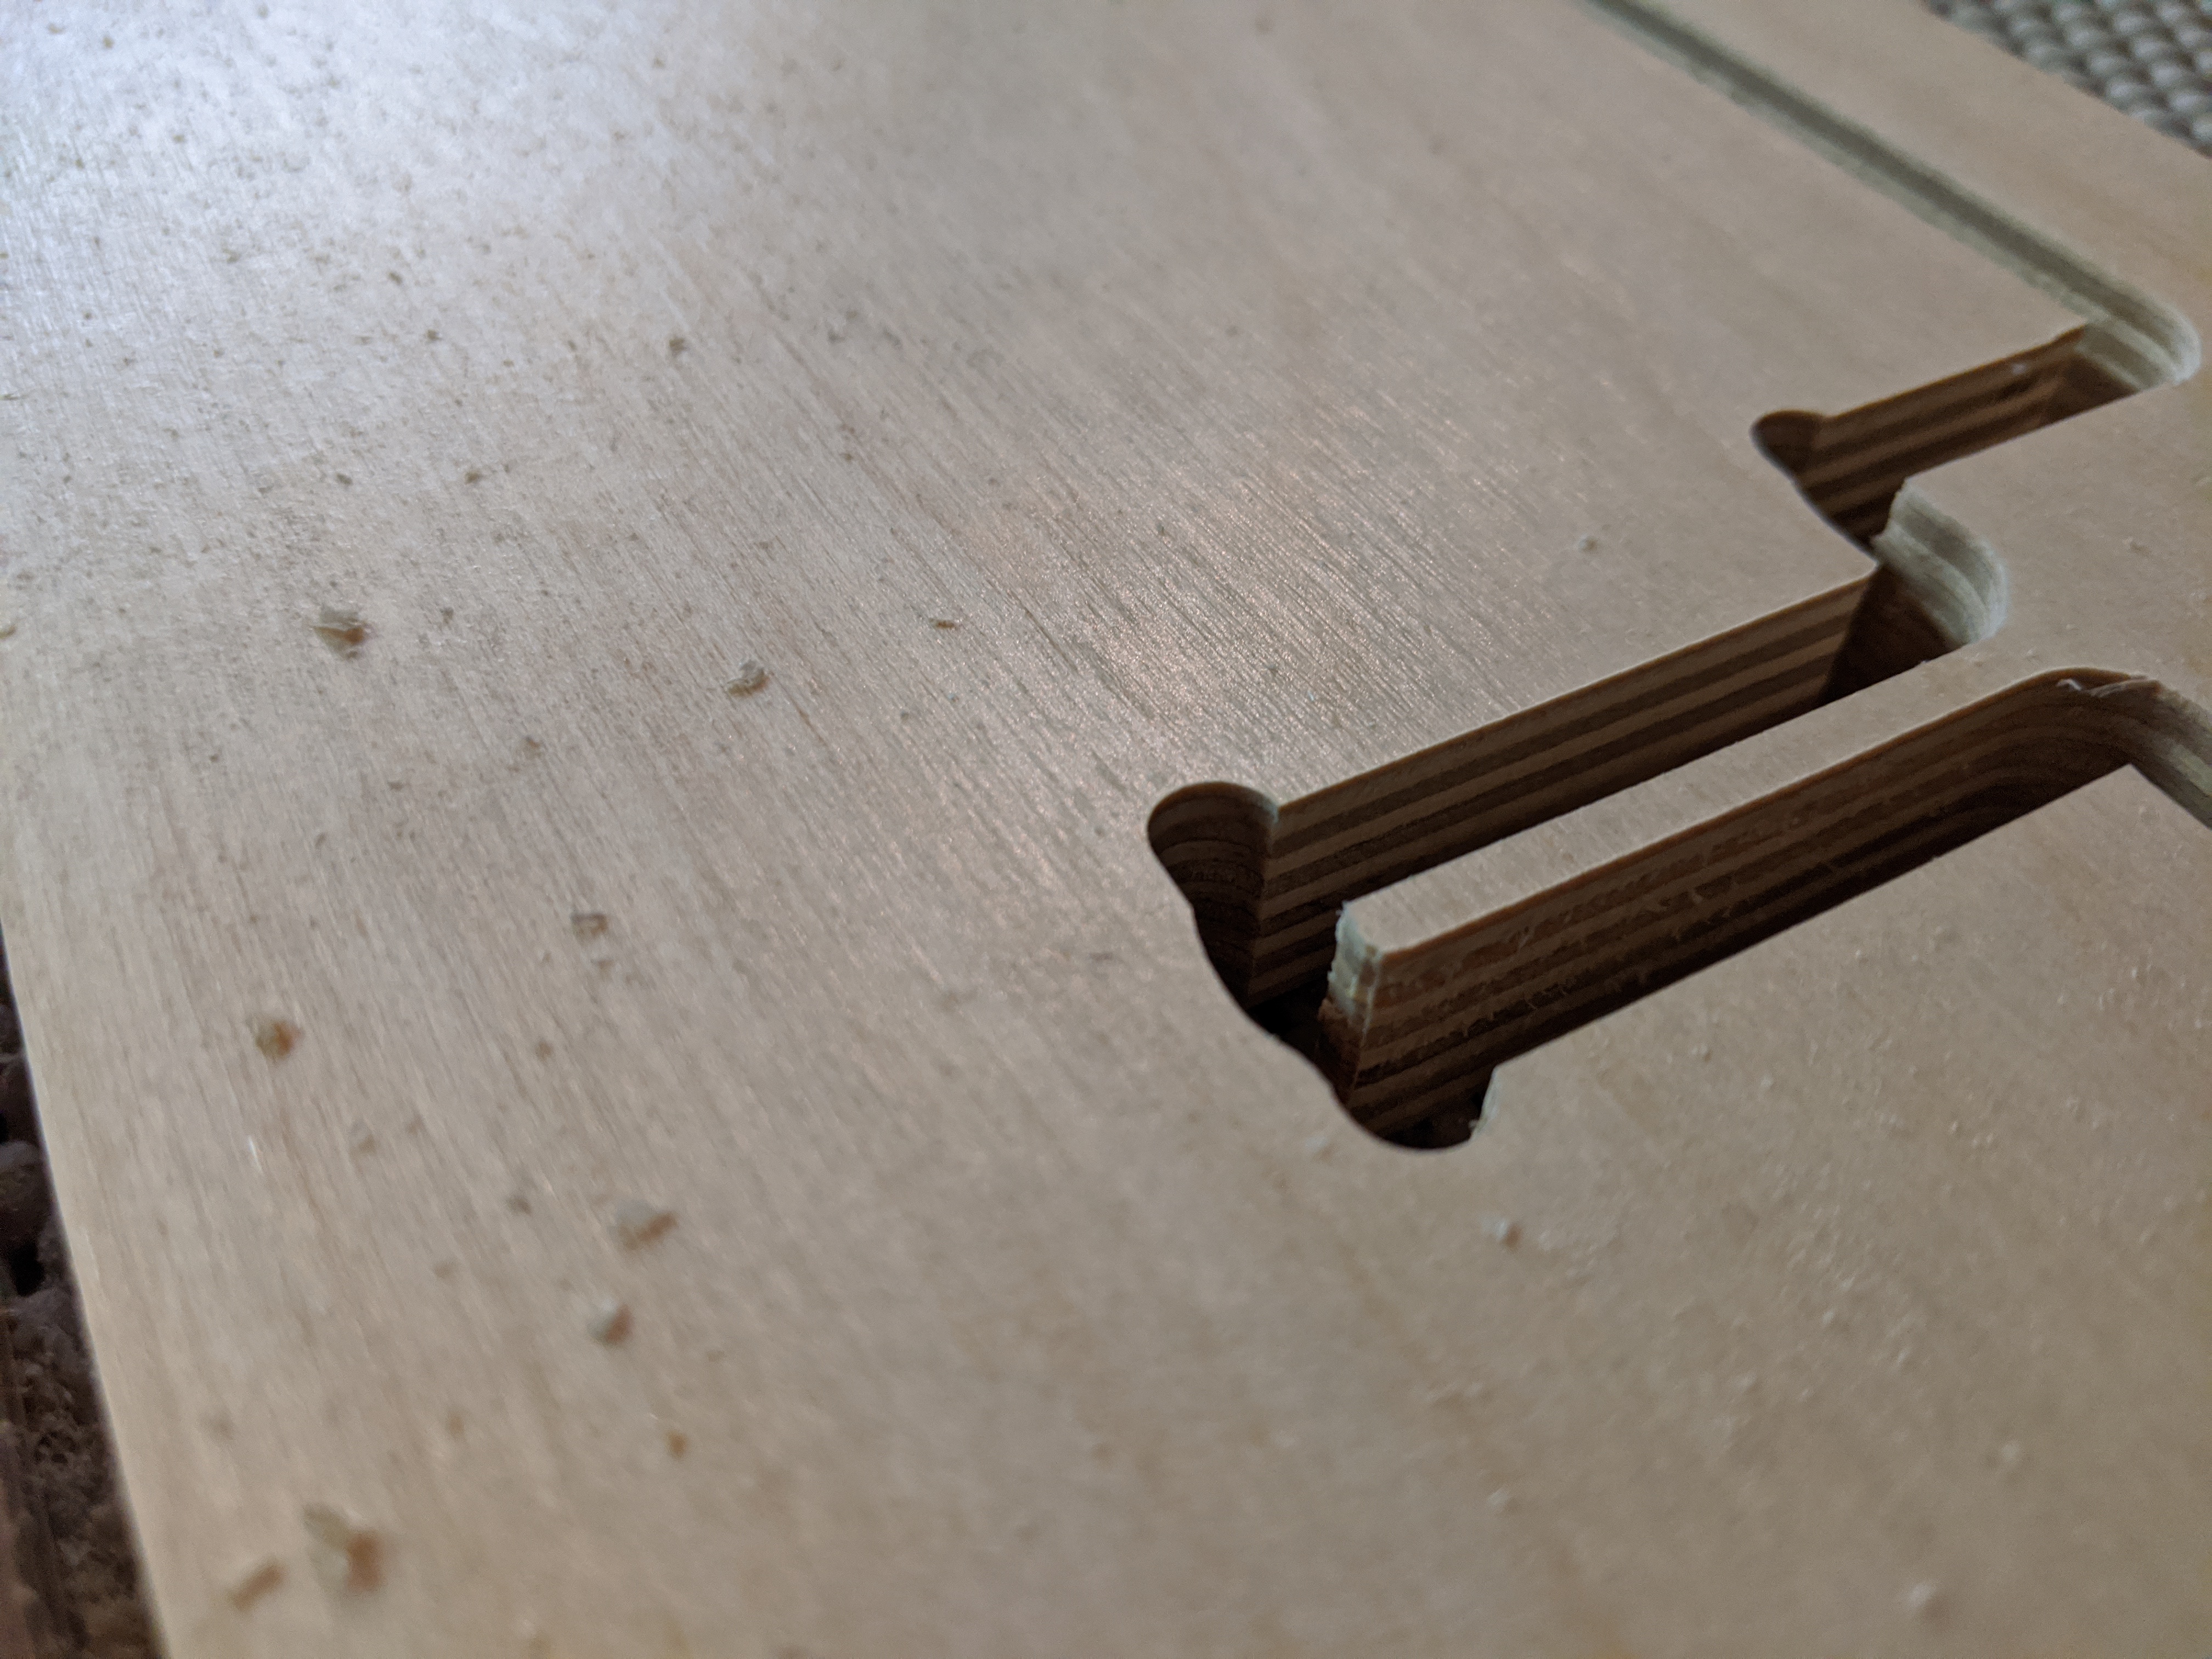
I don’t know but it looks like there is a mechanical issue like slop and your bit cannot follow a precise path. Have you checked your machine for unwanted movement? Are the V wheels and belts tight?
4 Likes
Try adding geometry and cutting as a pocket down to tab depth or the final pass: Adding geometry to cut as a pocket with a finishing pass
1 Like
I haven’t had this issue on other cuts, but maybe something loosened up with the first carve I mentioned. I’ll go through and check everything, thanks for the reply.
It was a V-Wheel after all - the one hiding behind the spindle. I went through and tightened everything up including the belts and it’s cutting Birch Ply like a dream now. This Amana 46350 bit is really amazing - super clean surfaces top & bottom with no tear-out.
6 Likes
I’m having the same issue with Baltic Birch, using the 201 bit, recommended feeds and speeds. Some of my cuts are pocket but most thru-cuts.
Anybody fall down on a good solution?
I’ve found three things that worked for me on Baltic Birch;
-
Run a chamfer pass to clean off the hairy bits
-
Use a shallow angle spiral downcut bit and avoid plunges, lots of slow ramps, but you’ll need a clean baseboard to cut into to avoid hairy bits on the bottom
-
Run a roughing pass with a 201 type bit leaving 0.5 to 1mm stock and then come back with a compression cutter taking about 0.2mm off in each finishing pass. Those have an upcut for about the bottom 6mm and then downcut the rest of the way up so you get clean shearing on both top and bottom, at the expense of tool changes and more CAM time setting up your toolpaths.
HTH
5 Likes
I usually do #2 of what @LiamN does, but inaddition I will just hit the surface with a 5" RO sander with either 120 or 220 grit to get rid of the fuzzies.
4 Likes
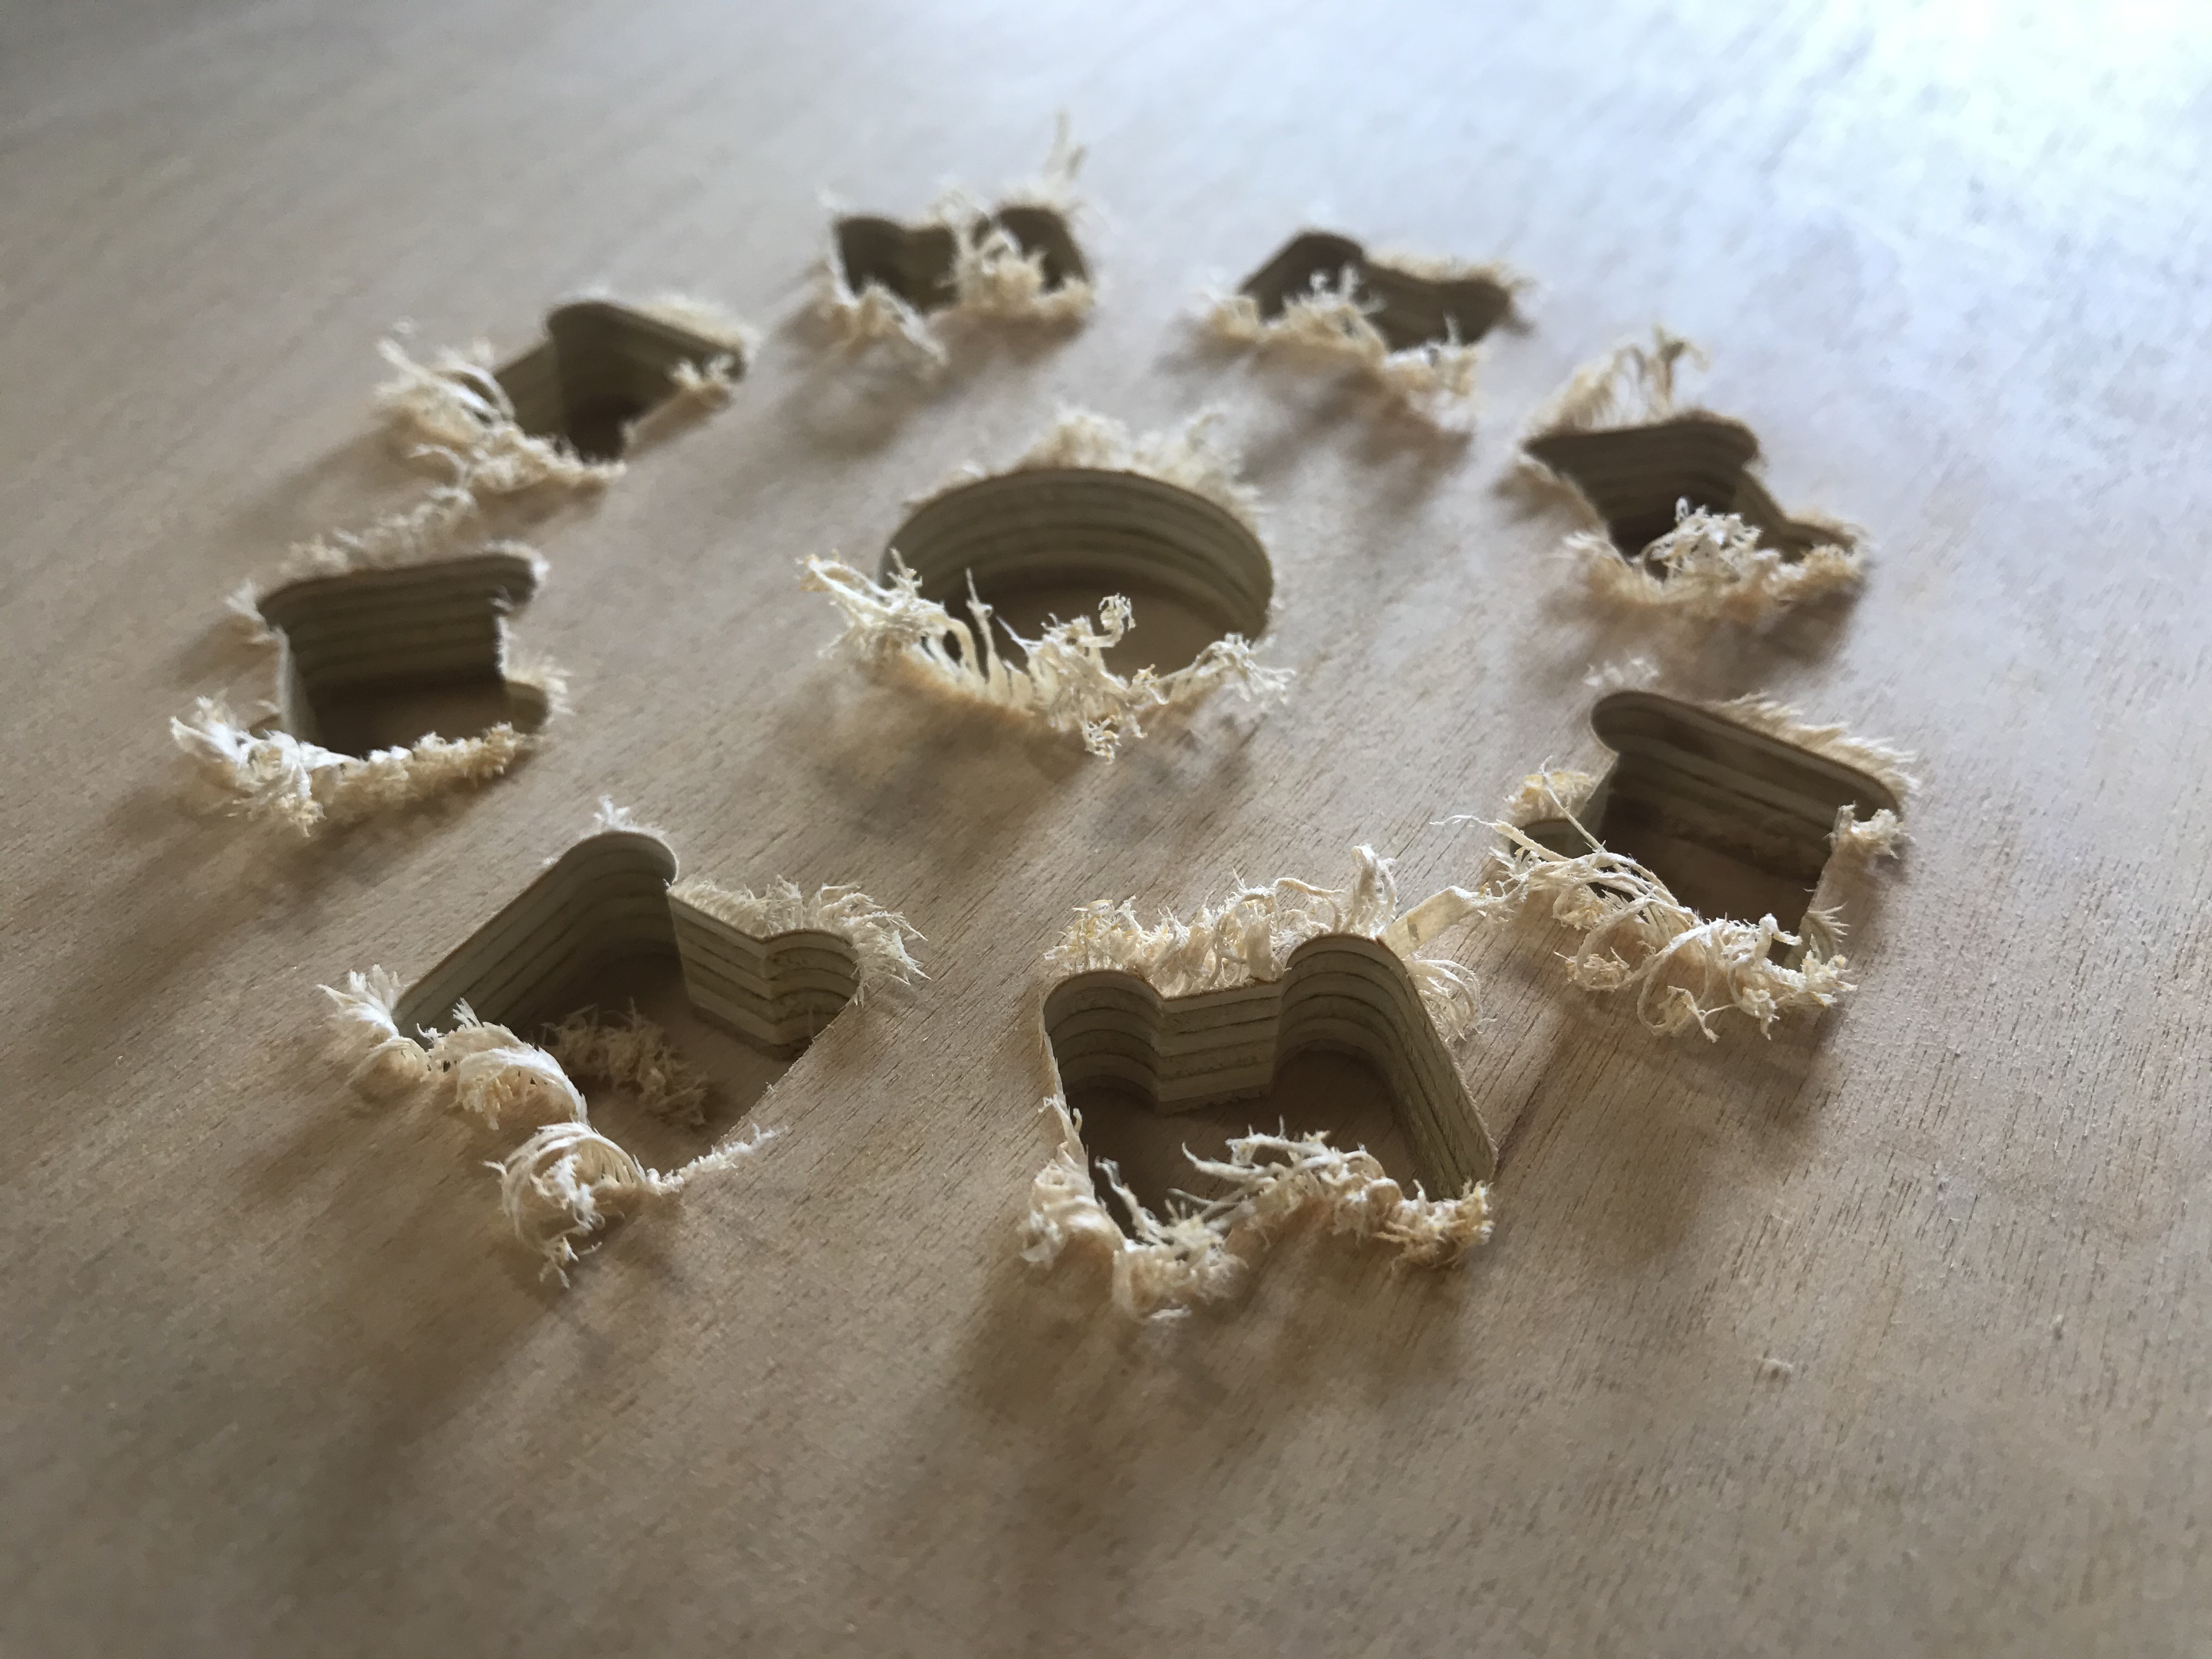
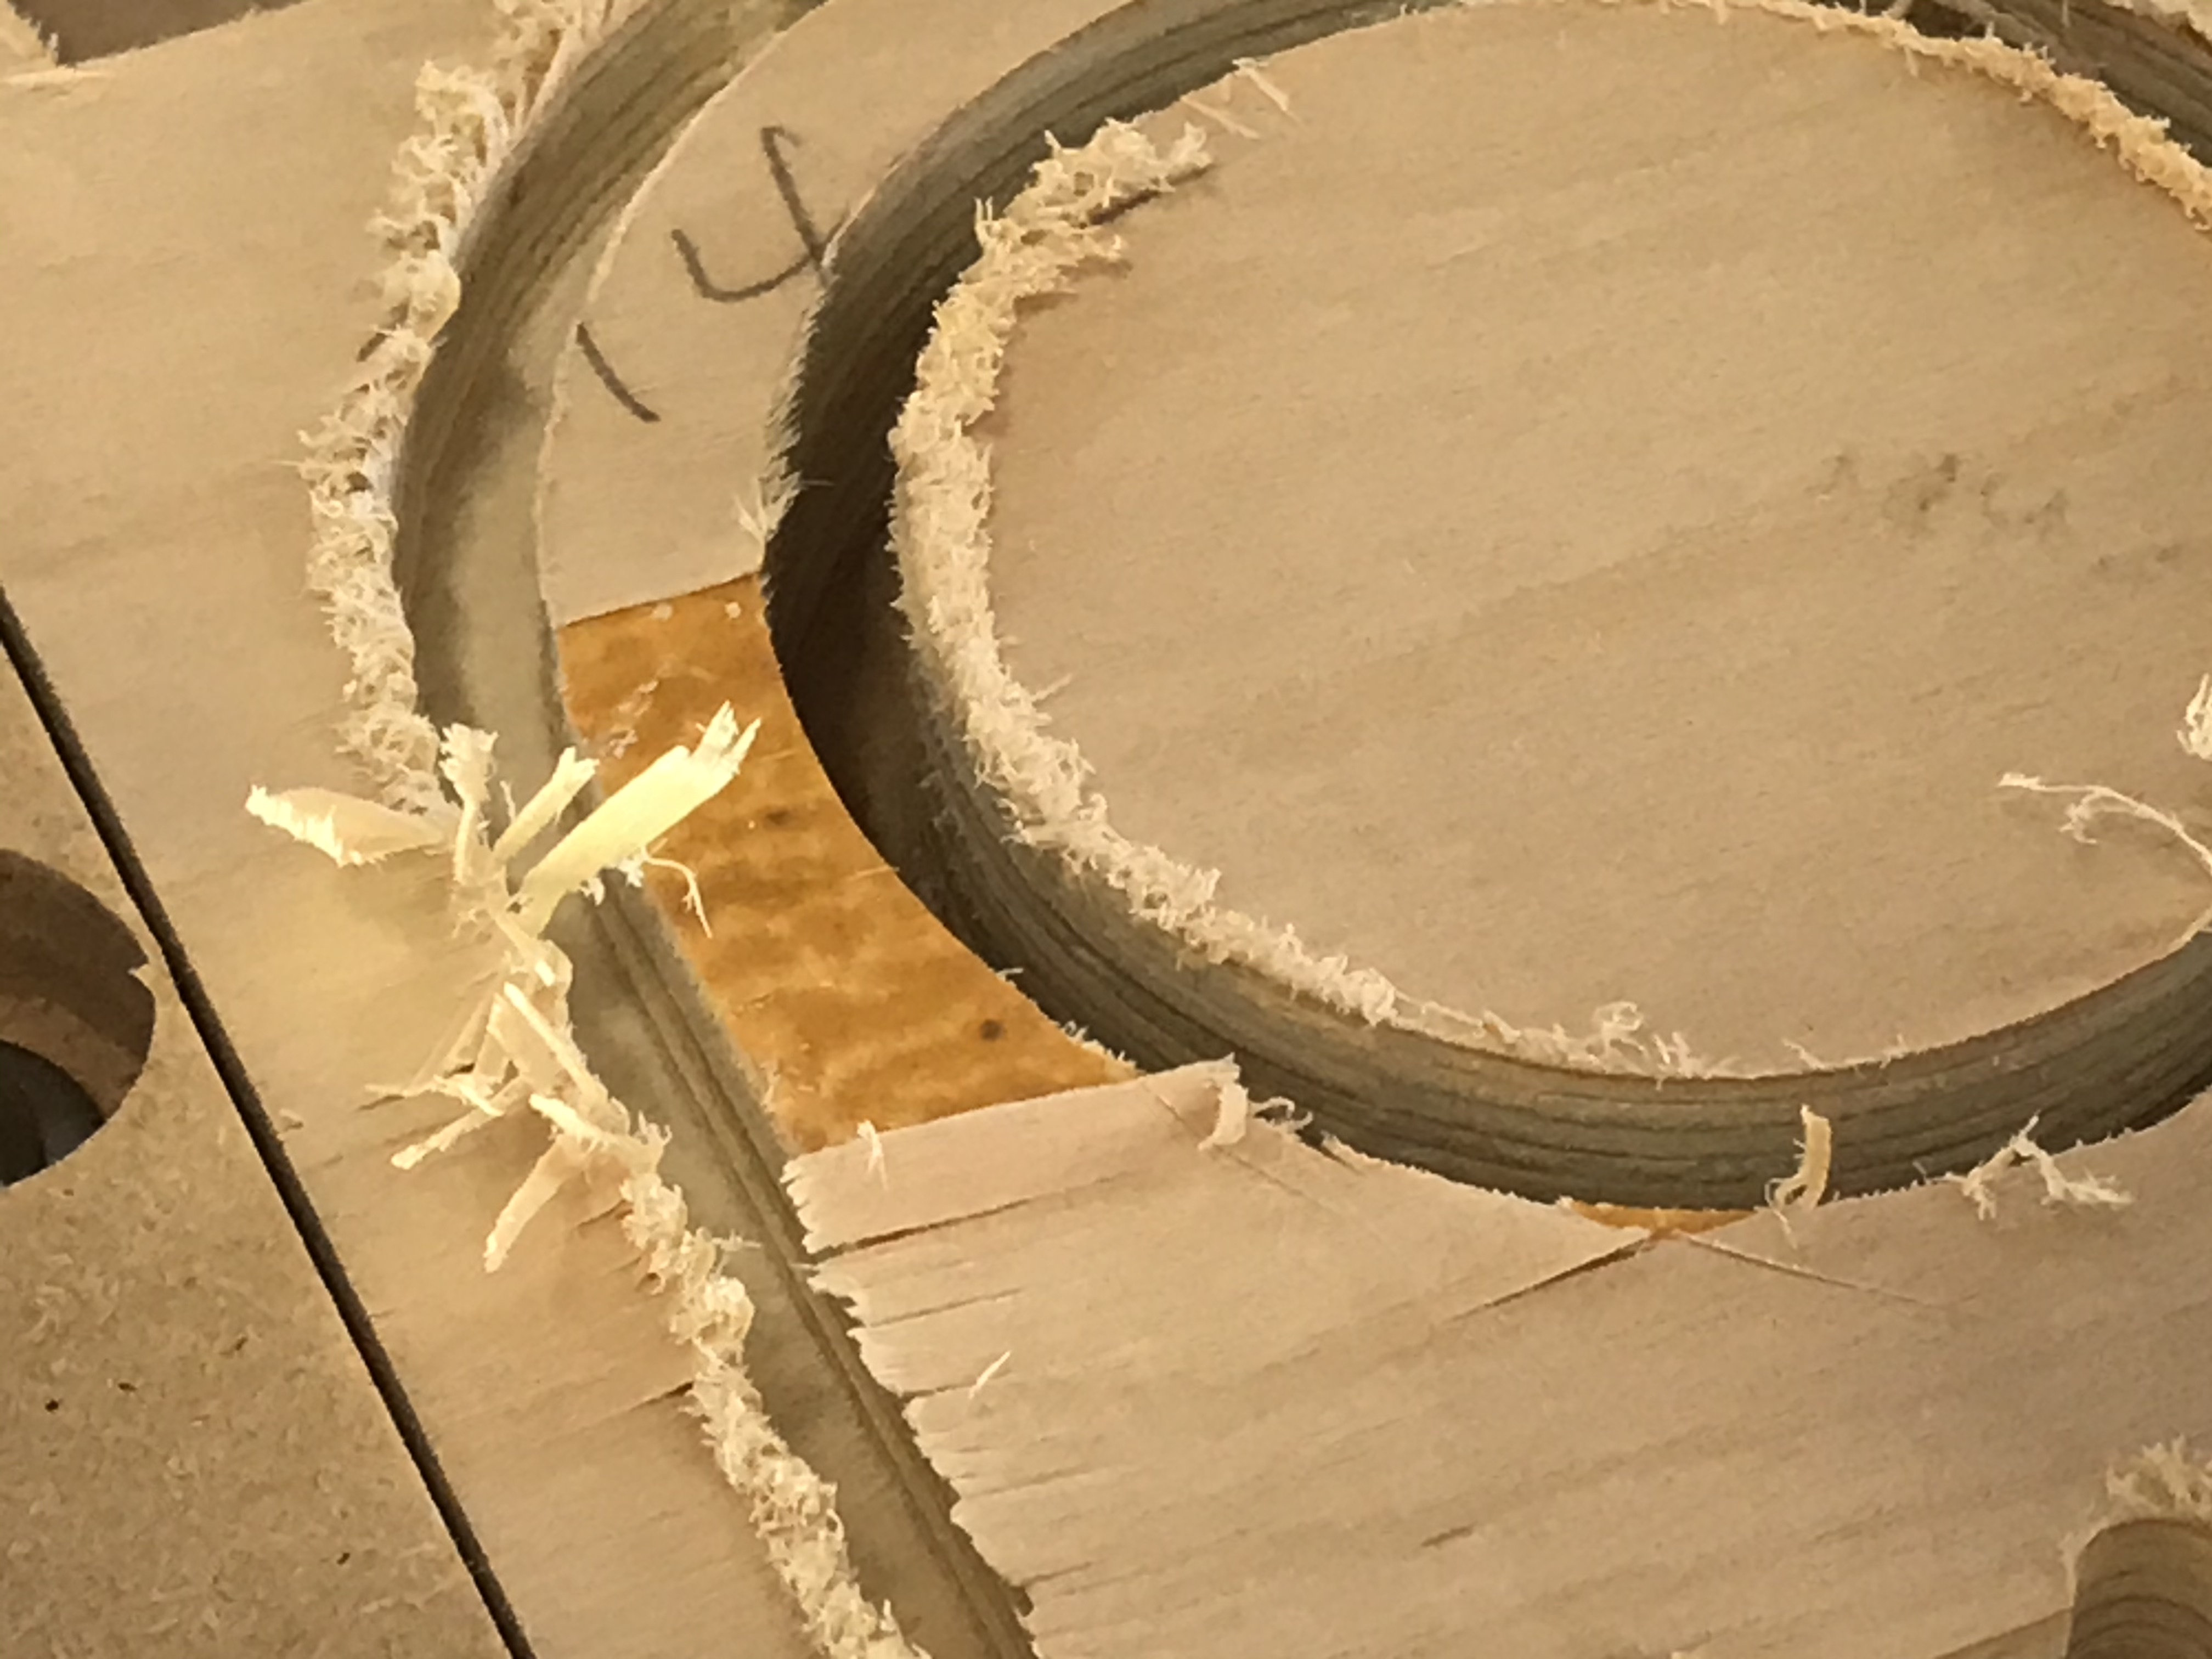
Then there is this! *@#$%^. Luckily this is a shop project. I also have been hitting it with a RO sander and then a slight roundover. But I can’t do that on every project. Thanks for the advise.
Ouch,
I’ve not had good baltic ply pull apart like that, are those contour cuts? Might be worth running shallower or slower passes, have you tried a new, sharp cutter? This can happen when the cutter edges get dull too.
4 Likes
My eye was caught recently by this recommendation @themillertree for a Yonico downcut (in the context of another plywood cutting discussion):
I just received it, didn’t have the opportunity to test it yet, but it “feels” right and high quality, so if you are looking for a downcut (which I think is an invaluable tool to have anyway for finishing walls in wood), maybe that’s an option. I also love using my compression bits in plywood (=@LiamN #3)
6 Likes
Definitely worth trying out a downcut router bit. I use these 2.5in OAL as well as these - 3.0in OAL for those jobs that need it.
Just don’t try to use a downcut bit while peck drilling - trust me - it’s not pretty.
6 Likes
Yeah, perhaps the cutter. It has probably 20 hours on it - I’d think it would last longer than that. I was using the standard feeds and speeds, but yeah, maybe slow it down.
Oh, yes, I’d also be surprised if it’s dull after just 20 hours, I abused my original Carbide Nomad 201 for longer than that in birch ply and even some MDF, I’ve put the cheap Yonico 21315-SC through even more and they’ve lost their initial sharp but the surface is only a bit hairy.
Is there any heat marking or wood deposit goo on the bit?
How deep / fast are you contour cutting through that ply?
Checking some of my contour (not adaptive clearing) cuts with full engagement across the whole bit, run with my router spindle on the standard Z I was using;
15-18k RPM
3mm depth of cut per pass
1500 mm / min cutting feedrate
I was also doing a 3mm stepover so I was cutting a slot 6.35 + 3mm = 9.35mm wide so I had lots of room for chips to come out.
That roughing pass left 0.5mm stock so I could come back with a finishing pass which was full depth and taking 0.2mm, 0.2mm and finally 0.1mm off the edge to get to the actual cut line.
I found that was an OK early balance between cut speed and nasty vibration as I’d still not got all my V wheels, belts, etc. as tight and sorted as they could be.
HTH
3 Likes
No, the bit looks clean. I usually just go with the recommended feeds and speeds.
Hum. I’m gonna have to try that roughing pass/finishing pass technique. That may be my best solution until I investigate an compression or down cut bit. I’m trying to do it all in one bit at one time, but it seems I may have to apply some clearing/finishing techniques.
4 Likes