Benchtop injection molds on nomad

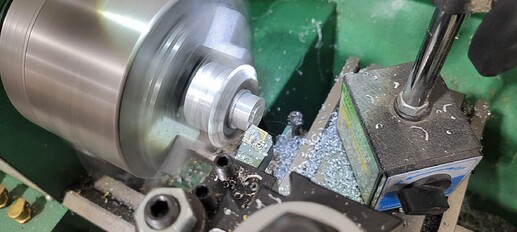
Goodness how the time flies. I’ve been putzing around but overall I’m still putting out the occasional mold. The nomad has been a great little machine in the mean time.

I suppose it depends on what you’re trying to accomplish with a shop class and how closely you’ll be involved. Machining aluminum is certainly possible but it’s not at all forgiving. Best case, you blow up a tool and scrap a part, worst case you put the machine out of commission for awhile.

If you’re just trying to teach the general concepts of CNC and injection mold design, it may be worth using softer materials. HDPE or Delrin/acetal will be much more forgiving and “injecting” something like a two part resin will simulate the same problem space when it comes to mold design.

If you really want to pursue metal molds and real plastic injections, I’d recommend thoroughly testing a handful of tools and building out some design guide lines that fit the tools you’ve tested.
A huge lesson learned for me when it comes to design is that using a new endmill is anything but simple. So reusing tools as much as possible is a big win. (No more sub 2mm ball nose tool paths for me, if the feature can be 2mm…it will be 2mm :stuck_out_tongue_closed_eyes:)
Keeping a small but reasonable set of tools will make your life much easier all around and probably teaches some other important design lessons…namely that you can’t just design without tooling in mind in the real world.

Anyway, I’m sure there that’s plenty of words for now. Feel free to keep the reply chain going here or message me if you’ve got any questions you want to keep close to the chest :slightly_smiling_face:

1 Like

My real problem is coolant. I have only two options with the Nomads. Air or a light mister system.
What do you use? I am buying 6061 aluminum from a local vender that gives me a break on costs. I am looking at mostly 2 flute carbide endmills for cutting and contouring. We are also adapting Fussion/Inventor to create the post. Most of my students are low end users and mike simple things out of plastic or wood., but I have some that have risen in my enrichment and afterschool organizations that will be focusing on making new molds.
We have 3D printed a few low use molds, and also used plaster of Paris, clay, and JB weld.
I make some simple aluminum ones at home using my manual mill and shaper, but the Nomad 3 should be a good system for making new molds and customizing them for student ideas. We want to make a school spirited challenge coin for each class, and other things like custom FOBS and mouse/ear bud cord wraps for selling to help pay for new tooling and plastic.
We would only make a few molds a semester, but it would be nice to not have to remake many to save on the cost of tools and supplies.

What type of coolant do you use?
How do you polish after? I have a bead blaster and a vibration medium polisher. Small but big enough.
Do you use powdered pigment, or do you buy pre-colored plastic?

Thank you for your time!

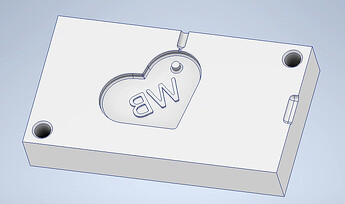
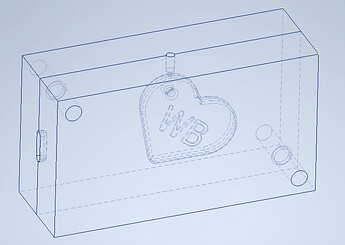
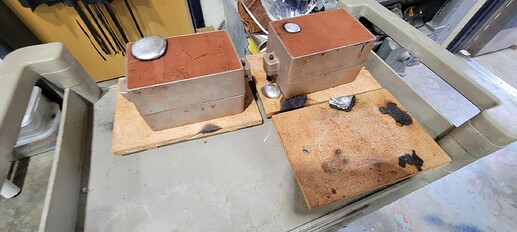
Example of mold.


That sounds like a blast. If I had access to this kind of stuff in high school, who knows what sort of trouble I’d get up to :slight_smile:

Cutters are an interesting topic, the forums will tell you that a good coating on a single flute 1/8" is the best you can get on the nomad. I’d tend to agree but they’re expensive.
For roughing I’ve had good results with the corn cob style roughing endmills. This requires a tool change for finishing though so I’m not sure it’s worth it for you. (I imagine tool changes are going to be the bane of your existence given your setting…probably not popping by the school at 9pm to change a tool :stuck_out_tongue_winking_eye: )

Single flute coated endmills are sold by Carbide3d and they’ve been great in my experience. Plus the built in carbide create tool library has decent feeds and speeds already for your students not quite up to the fusion level. They’re pretty conservative but I can say they’ve never broken a tool and they get the job done.
If you’re looking to cut costs I’ve also had good experiences with Thriftybot (a site that provides low cost supplies for robotics clubs and such: QTY 2 - 1/8" Carbide Single Flute Endmill )
To be honest…the thriftybot cutters are not quite on size but for strictly aesthetic parts, the fractions of a mm might not matter.

For very small features, I tend to use pcb mills. They can be had for a few USD a piece from the right supplier. I use Drillman1/OliverToolCompany on ebay for most of my disposable bits. Lots of trial and error but once you find the right recipes, they’re pretty reliable tools even into the sub mm range.

Ok, coolant! With a single flute and a good coating, you don’t need coolant. Really, honestly, it’s not strictly necessary. If it’s going to be a big hassle, I’d recommend testing pretty thoroughly without coolant to see if you agree.
If you do want coolant though, I use a Fogbuster Mini with isopropyl alcohol. It’s expensive but it does exactly what it’s supposed to do.
That said, you probably get 80% of that benefit from just a very low pressure air assist. There are tons of threads on how to retrofit your nomad with inexpensive air assist options. I commented on one recently

Finishing is another entire topic on its own. I’d recommend a nice flex shaft rotary tool as a bare minimum. I went with a Foredom SR years ago and it’s still going strong. Changed my outlook on polishing :sweat_smile:
I like the heavy metal foot pedal and if you get the hanging shaft, the students can’t run around the shop with it while flinging abbrasives everywhere :grin:
If the expense throws you off, just pick up a few cheap ones. They’ll die but you can see if you like em before investing in a nice industrial one.

My favorite finish so far is to remove the tool marks from the mold with the rotary polishing and then bead blast it with fine glass beads. That provides an end product with a nice smooth touch surface and diffuses light really well to cut down on glare. (I’m no professional, so I can’t speak to RA or any of the more technical mold finishing stuffs)

Ok, plastics. I buy all of my colors premixed and always have, so I don’t have experience with mixing. Most entry level mold machines do not have a screw so the plastics will not mix well in the barrel. That’s why I stick to the premixed colors.
It’s hard to find plastics in quantaties that are reasonable for a home shop. My go to is usually 10lbs bags from ebay. I’ve had good experiences with boyplastics/edwardsindustrialsurplus but you can find also source plastics from most of the entry level mold machine makers.

Thanks for taking an interest and trying to pass the knowledge along to your students. Super happy to share what I’ve learned and hopefully save you some headache!

P.S. For your example mold, I’d maybe recommend a few things:

  1. Move your injection point to one of the flat sides of the heart. This will make trimming with flush cutters much cleaner than trying to cut along that curve.
  2. The current injeciton point puts the pillar for your hole directly in the path of the incoming plastic. I’d usually try to get as smooth a flow as possible for your molten plastic.
  3. You might find tht your pillar for making the hole starts to degrade over time. If that happens, you could try drilling it out and press fitting a hardend steel pin in its place.
  4. You’ll want to make your pry area much larger and pattern it around the part…trust me on that one.
  5. I didn’t think there would be 5 P.S.s or I woudn’t have said P.S :upside_down_face:

P.P.S all of the links I’ve put are just for reference and there may be better alternatives depending on your region :slightly_smiling_face:

1 Like

Thank you for your information. I currently am forced to buy from specific suppliers, but I and working out some new options with my purchasing department. I find myself purchasing a few tools with my own money to save on costs. Luckily I have an understanding wife. :slight_smile:

Those prices look good. I will try them out. I appreciate the assistance with tooling. It’s been hit or miss on eBay for me. I have found a good supplier for bits of wood and plastic.

I have a good supplier for plastic. But I’m always looking for more. I pay about $20 for 5lb bags of natural (no-color)polystyrene, Polypropylene, HD polystyrene and we add pigment. It’s messy, but since we are using vertical ram injectors it comes out pretty good. We can mix and make some neat colors of blends. I want to get into TAU and some of the more rubbery stuff soon. But I think the pre-colored might make it less messy. We are looking to make gaskets and other o-rings for projects we are starting to get into. We need higher numbers that would take too long with 3D printer.

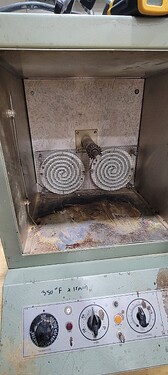
I love geeking out on these things in my classroom. We are blending new tech with older. I was in the industry for a long time, but enjoy teaching the next generations of manufacturing and materials with tradecraft and engineering. I have been able to pull this off with help from people like you. I am currently almost done bringing back a benchtop rotational molding oven from the 60ies. I have some molds and I plan to start using it next semester.

I think I will try air at first and see where that gets us. Unfortunately, we have to change tools, but the Nomad at least is consistent with that for my students. We do not have to worry about making money.

I might make this one, and then another like you say as a comparison for learning with the gating and flash removal.

Thank you for sharing your experience and ideas. I will try to post more moving forward.

Question are you using soft polishing wheels like for a Dremel or something else?

Man a rotational machine has been on my wishlist for ages!
I feel your pain on the approved vendor list, a bunch of friends are teachers and the earth sciences fella literally buys dirt with his personal funds…his wife is a teacher as well so she understands :melting_face:

It’s good to know you’ve got some industry experience, now I know who to direct my questions towards. Always better to know more folks.

For the polishing, I’ve got just about every tool and method I could get my hands on. The only thing I haven’t tried yet is a micromotor…they’re just so expensive. Soon though…

The soft polishing wheels work ok.
Standard sand paper and 3d printed little holders are also fine (think like popsicle sticks)
If you need to get into really fine details my favorite approach is basically a toothpick with diamond grit embedded. I really enjoy the diamond paste to be honest but it’s all personal preference.

There are also mold specific tools that seem ok but getting your hands on them can be tough. Apparently folks really like the polishing sticks, basically very firm erasers with diamond grit embedded throughout…a metal eraser if you will :yum:

Sometimes the decision is made for you by the geometry of the mold. If you want to keep a sharp edge somewhere, you probably aren’t using a big soft wheel. On the other hand, if you’ve got lots of 3d contours to polish, a good soft tool is just the ticket.

Some of the best resources I’ve found on mold polishing come from youtube videos shot on some dudes phone in the far east. You gotta search but they’re out there and full of little tips and tricks. (Some of which just doesn’t apply to non-ferrous molds)

For another resource on general benchtop mold making that’s more approachable, you can check out ~everything JohnSL has on YouTube. Here’s an example for mold polishing

I’ll endeavor to post more as well. Always something in the works :slightly_smiling_face:

I appreciate your wealth of knowledge. It helps me from making too many poor choices when setting up for students to actually do the work. Even though I have my experience to pull from, its people like you that help out in many more ways. Even though I have been teaching for a long time now, trying to do an industry process on a shoestring budget is challenging. And I have to admit my creativity can come and go. And you get exhausted trying to vet out 50 different processes. So you usually do a few each year, and add it to the mix. I also recently moved to another high school in my district so I am building up from scratch again. And building my student’s confidence and experience. I also had to leave a lot of good equipment at my old high school. My school now really had not had a dedicated industrial arts teacher for a while. I’m not complaining, Im just building and understanding it’s a long haul. But this time I can focus on the quality of the curriculum while offering many more experiences. I hope to make making a real thing for the students to do and explore it with my students for the next semester. Thus adding to the injection molding experience. I also want them to be able to make long-term capstone projects where they design molds for use on a capstone semester project along with vacuum forming, metal casting, and fabrication. Currently, we make a marble stepper machine using parts from many processes including 3D printing, fab, and woodworking. But every year we want to add new projects of more complexity and design changes. That way they get the whole experience.
My background is more in machining and fabrication for machine design and integration. But I am now 15 years removed from that industry.
My overall dream is to start a recycling program at the school with PET (plastic bottles) to make parts and things to sell. PET is higher temperature stuff, but we could integrate it with new processes. I have already modified my old injection molder to the the heat required and tested out some PET molding. Then we can also have a continuous supply of plastic for injection molding, and vacuum forming. This summer I want to make a rudimentary plastic sheet press while finishing anything with regards to the rotational molder.

Question- What are you injection molding?

That does sound like a blast of a curriculum and the PET recycling is an interesting approach to getting raw material. Sounds like you may want to build a bottle shredder into the fabrication curriculum :stuck_out_tongue_winking_eye:

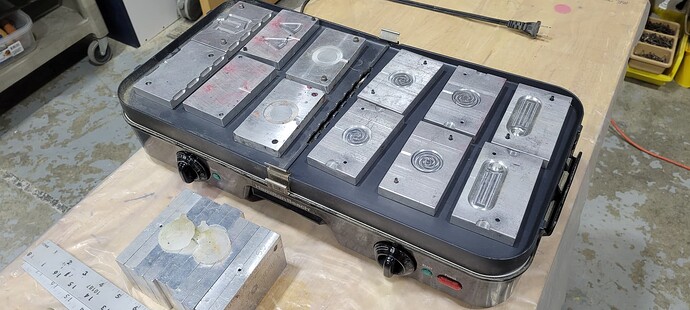
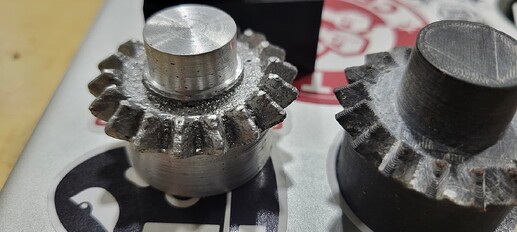
Oh I’m just doing little things like checker pieces, guitar picks, some custom parts for various small jigs. Small pieces that are easy to shoot but the value comes from the design work. I’ll see about better documentation for my next mold, whenever that comes around.