I am going to start documenting my little journey in making small injection molds on my nomad 3.
If there is anything in particular you folks would be interested in just let me know and I’ll do my best to cover them. (Reply here or send a dm)
Should be a lot of fun and I’m hoping that documenting the process for others makes it less daunting… and that others will tell me when I’m doing something stupid
Just a quick description of sizing and material I’m planning on working with:
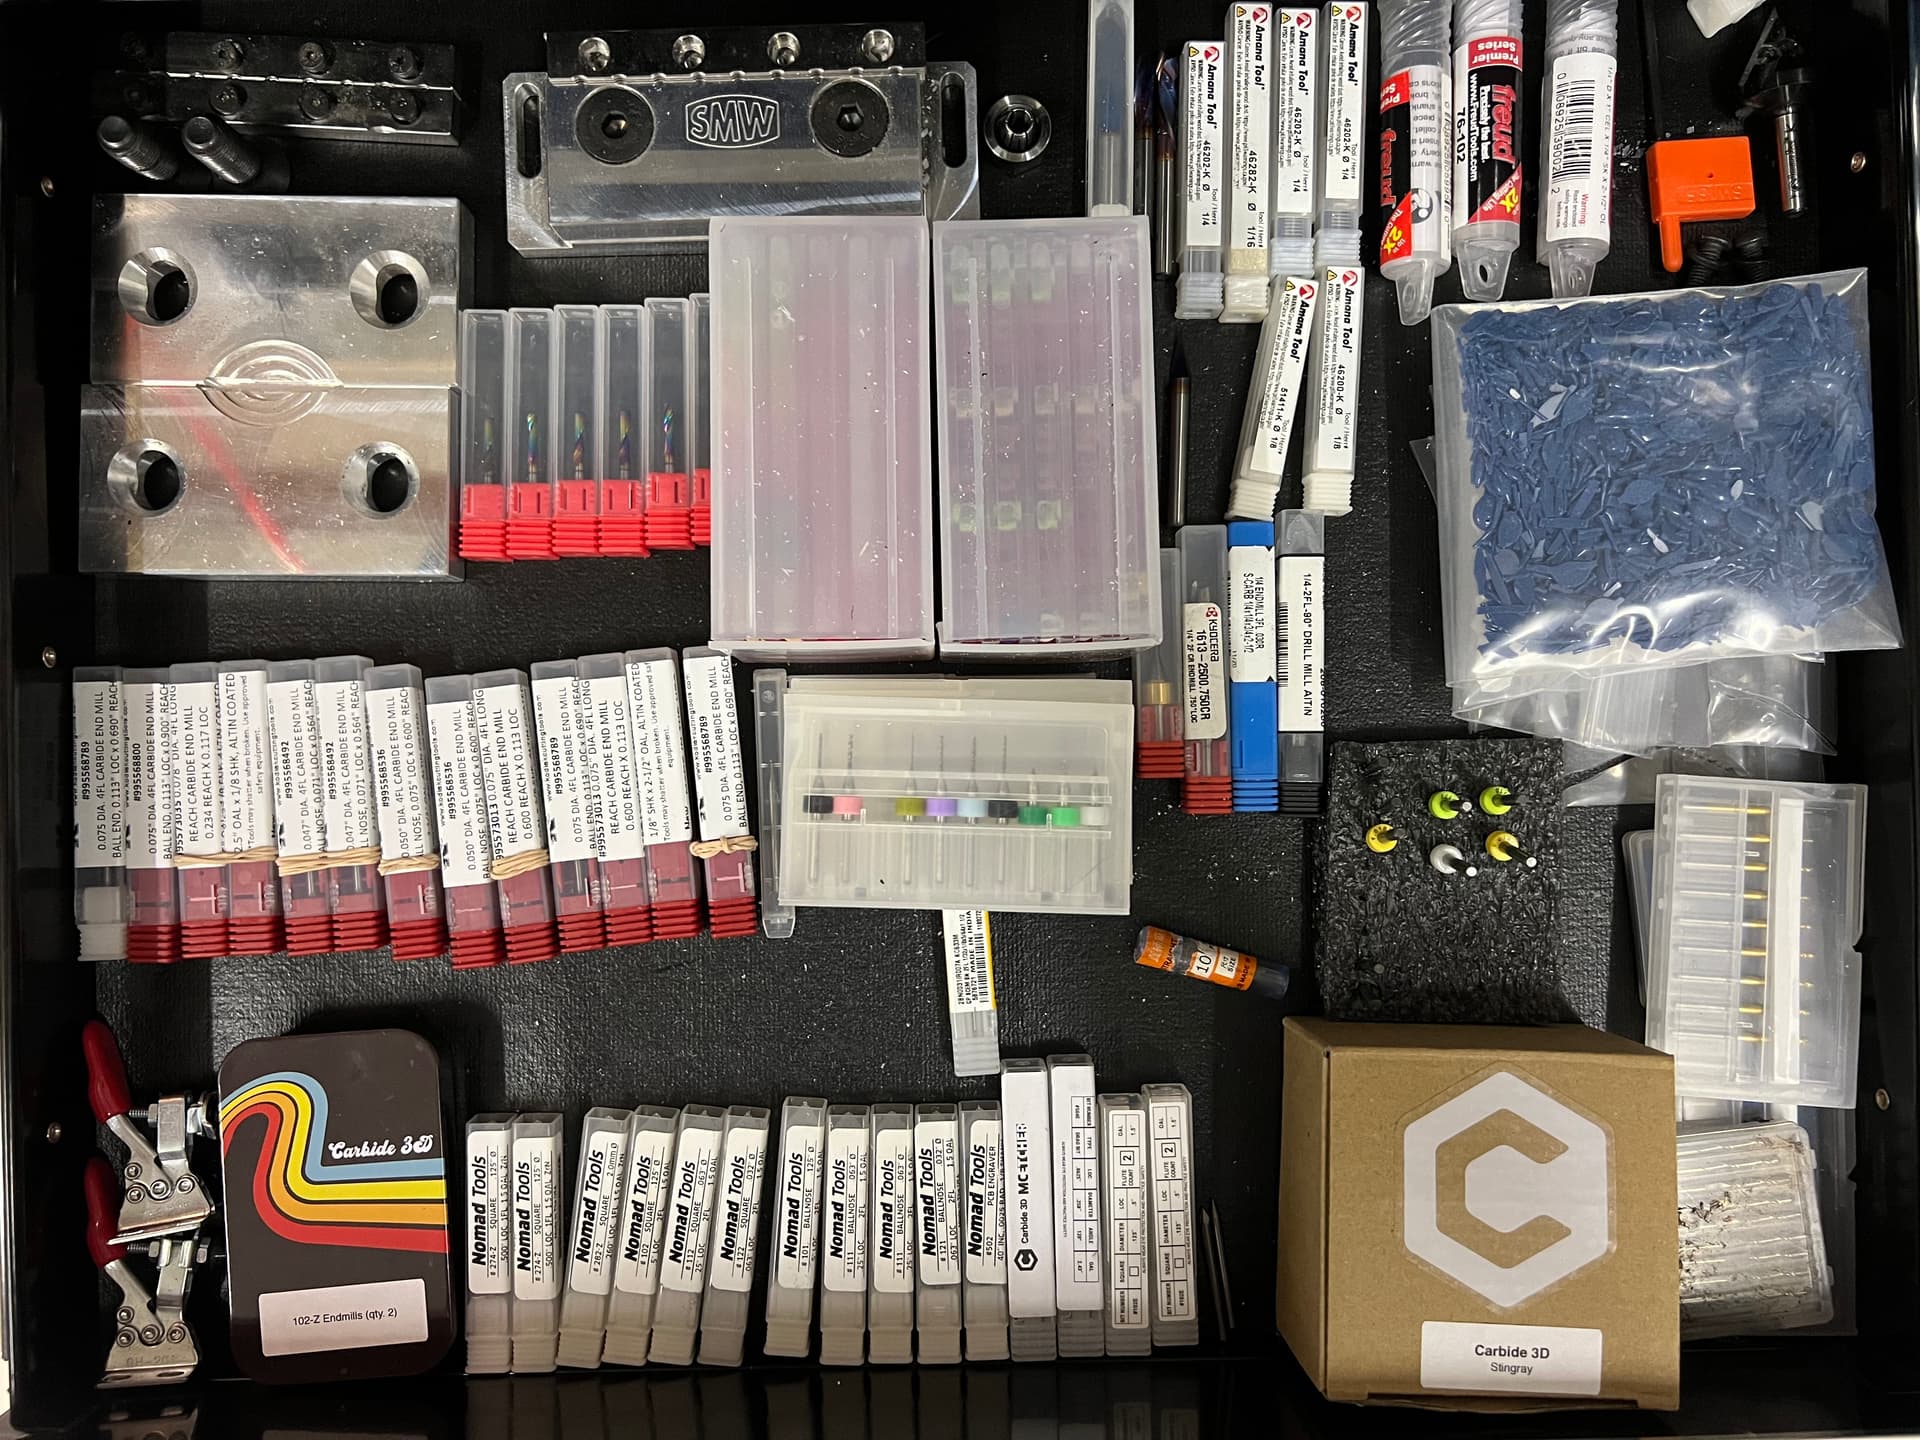
Tooling: I want to standardize on coated single flute 1/8" square and ball nose. Though I am also interested in corner radius tooling as you usually want to avoid sharp corners in injection molds anyway.
For smaller features i have a healthy selection of 0.5mm to 1.5mm uncoated carbide tooling.
Material: i am using mic 6 cast aluminum plates for now. This should save me an incredible amount of machine time just cleaning up raw stock. It’s not usually used for injection molds as it’s pretty soft compared to the more commonly used 7075.
On a desktop machine i just don’t think it’s going to make an appreciable difference.
Size: my injection machine can do molds of about 3.5" square with a max shot size of…1.5 cubic inches…i think.
CAD/CAM: Fusion 360. (Carbide create is great but for this type of work fusion beautiful. The integrated CAD/CAM workflow “just works”)
CNC: Nomad 3!
I’ve got a Saunders Machine Works hobby 6mm table on it and a set of their hobby mod vices. These are an incredible addition, especially if you are interested in milling metals.
I’ve also got a fogbuster mini to act as an air blast and supply a bit of isopropyl alcohol for cooling on aluminum. The IPA makes a world of difference when cutting aluminum.
There’s the rough spec sheet of what I’m working with at the moment. As i dial tooling and feeds/speeds in I’ll make them available ala material Monday… maybe I’ll call it tool Tuesday
Neat to see folks are interested!
I am also planning on noting general info on the topic here in the form of “Quick posts”
Basically just a tag to signify a thought i want to get out of my head and onto “paper”.
They might not fit into the general flow of the project but it should be useful info, even out of context.
As always, feel free to ask any questions (and correct me if you think I’m wrong )
Quick post:
A very common pitfall of benchtop machines is the lack of clamping force on the molds. There’s been a lot of focus in the diy community lately around improving injection pressure but i don’t think that’s the first bottleneck most folks hit.
You can have all the injection pressure in the world and it means nothing if you can’t hold your mold closed while injecting.
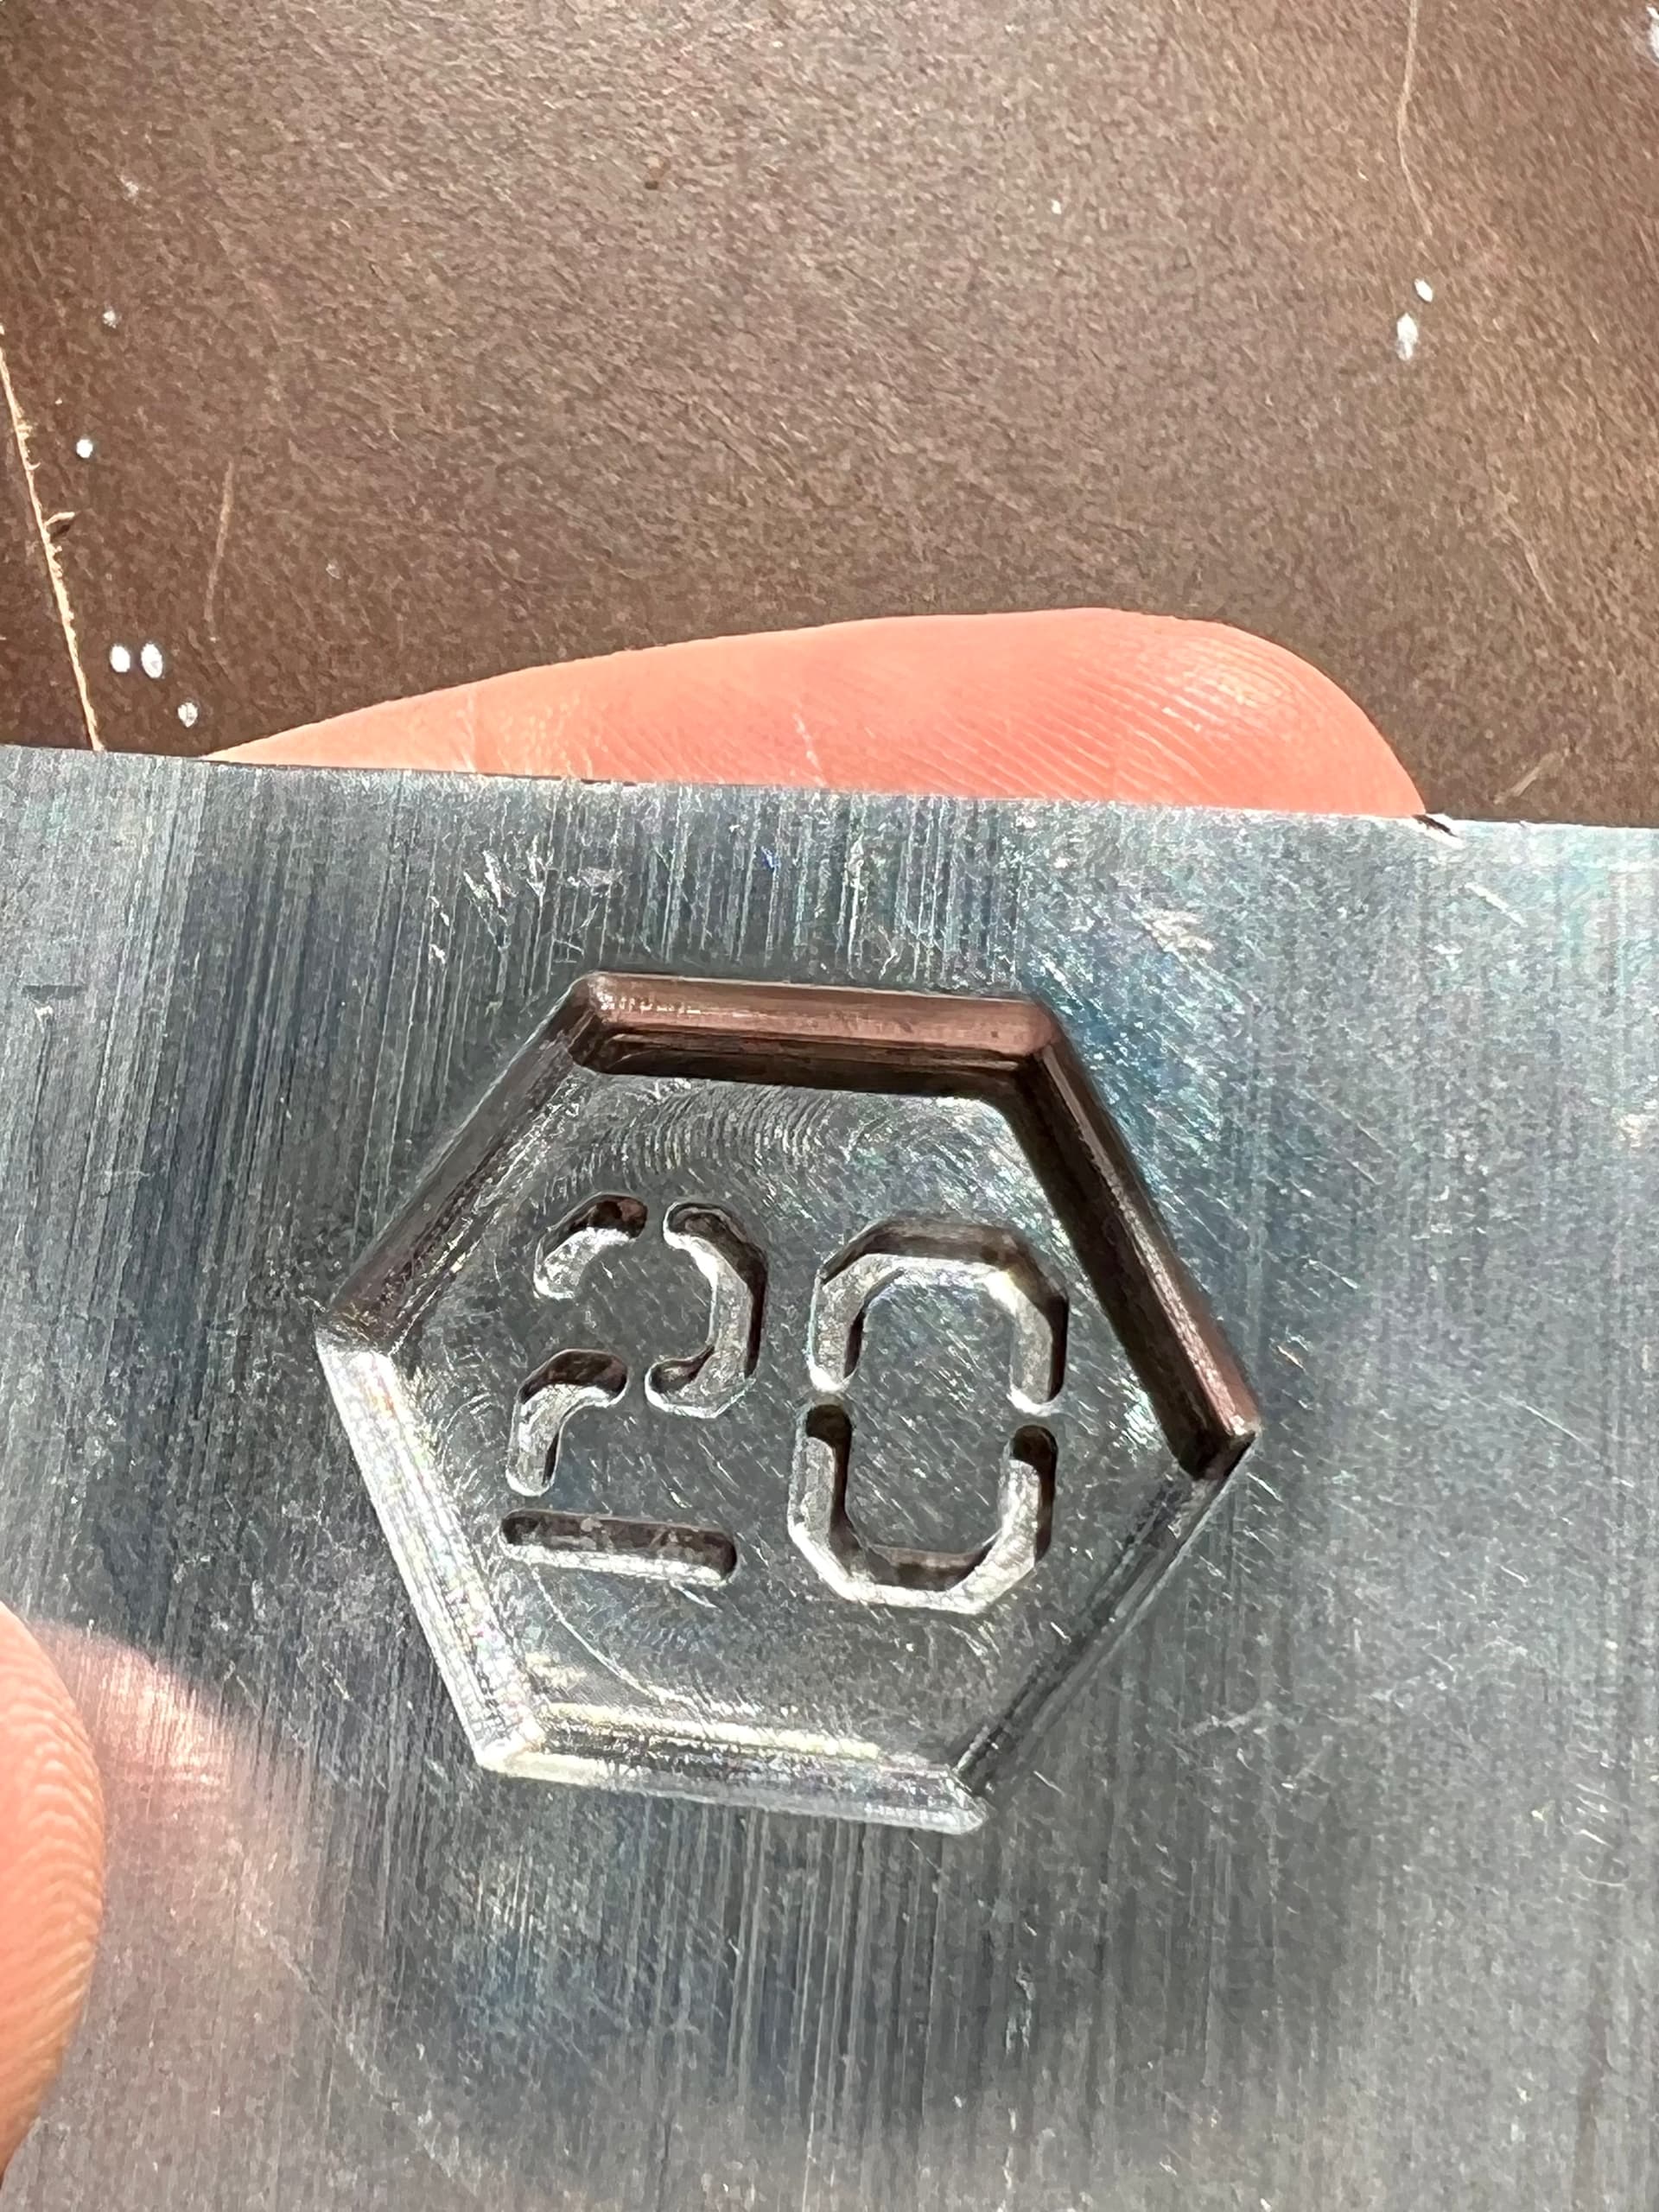
Doing some test cuts and dialing things in a bit.
Total cut time on this was about 8 minutes (Not counting the 2 tool changes)
Radius 22mm, depth 2mm+number depth.
Adaptive clear with a 1/8" single flute coated endmill.
Contour with a .05" reduced shank ball nose. (This was a 4 flute, there’s no way I’m feeding it fast enough)
Pocket the numbers with a 1mm two flute endmill.
I really thought this would take like half an hour but historically I’ve been super conservative with my parameters, i cranked it up to 11 to see how fast i could comfortably go.
Little polishing with a cotton head and flitz aluminum polish cleans it up but it won’t remove any toolmarks.
For what you’re doing, that looks perfect. I bought a Harbor freight blast cabinet, and it leaks media dust when using it. I need to tear it all apart, and try sealing it better.
A little more expensive and doesn’t have multiple guns but I’m more of a “hassle free” kind of guy and this one looks much better built (based on reviews at least)
I’ll be testing surface finishes on the molds as well. I’m interested in what kind of surface detail i can actually replicate on the shot piece.
I have some suspicion that surface finish will be much more forgiving on a benchtop machine. I don’t know if the pressures available will pick up the minor imperfections from things like toolmarks.
I know from experience that it will pick up the general finish, eg a rough finish results in a frosted look on transparent pla and a polished surface results in much more clarity. That said, I don’t recall the part picking up the deeper scratches in an appreciable way.
Maybe a polish without bead blasting is “good enough”
A relatively basic electropolishing setup seemed to work well on aluminum in testing.
I’m hoping the combination of fine bead blasting and electropolishing can get me some very consistent finishes on surfaces that are difficult to get to. For example the inside of the ~1mm stroke width of the numbers on the prior test mold.
Hi Tyler, I’m interested in your molding machine. I’ve been in the trade for 40 years. Started out molding in a small shop, became a moldmaker, then became plastic mold designer. Never did any CNC machining until I bought my very own 1610 router. Lol. I’m loving it. Can you please share your molding machine. Pictures.
It’ll be great to have someone with so much experience following along!
I’ll get pictures when i get home, i can’t believe i didn’t mention the machines in my initial post.
Machines:
First machine:
Started my little journey with a lever operated lns tech 150a. At the time it was about the best value for a manual machine in my budget. I’m not sure if that still holds true though.
Link: Model 150A | LNS Technologies
Current machine:
These days I’m working with a Manning Innovations Proto-ject 150hp and their 15 ton clamp: New Machines
(The owner, Ritchie Manning, is an absolute pleasure to work with. I recommend him and his machines highly if anyone is in the market for this kind of machine/work envelope.)
Next machine:
Not sure yet but it will be fully automatic whatever it is. I’m currently looking at robot digg but I’ll keep an eye on local listings as well.
Robot digg video: RobotDigg.com Injection Molding Machine! Overview By Spyker Workshop - YouTube
(Though if manning comes out with an automatic machine in the next couple years, it’ll be a serious contender for my money)
Let me know if you have any specific questions. No promises I’ll be able to answer them but I’ll certainly try
Fantastic, there is a gigantic market in small molds and low production. I was thinking about getting into it but I am getting old. Lol, still thinking about it though to finance my pool cue addiction. Lol,
And my admittedly unnecessarily diverse tool library. I went the route of “buy a bunch of misc cutters on clearance” when i was learning. It was useful to get experience with so many different types of tools but i found the CAM took far longer than i wanted. Settling on a core tool library has paid dividends in terms of saved time.
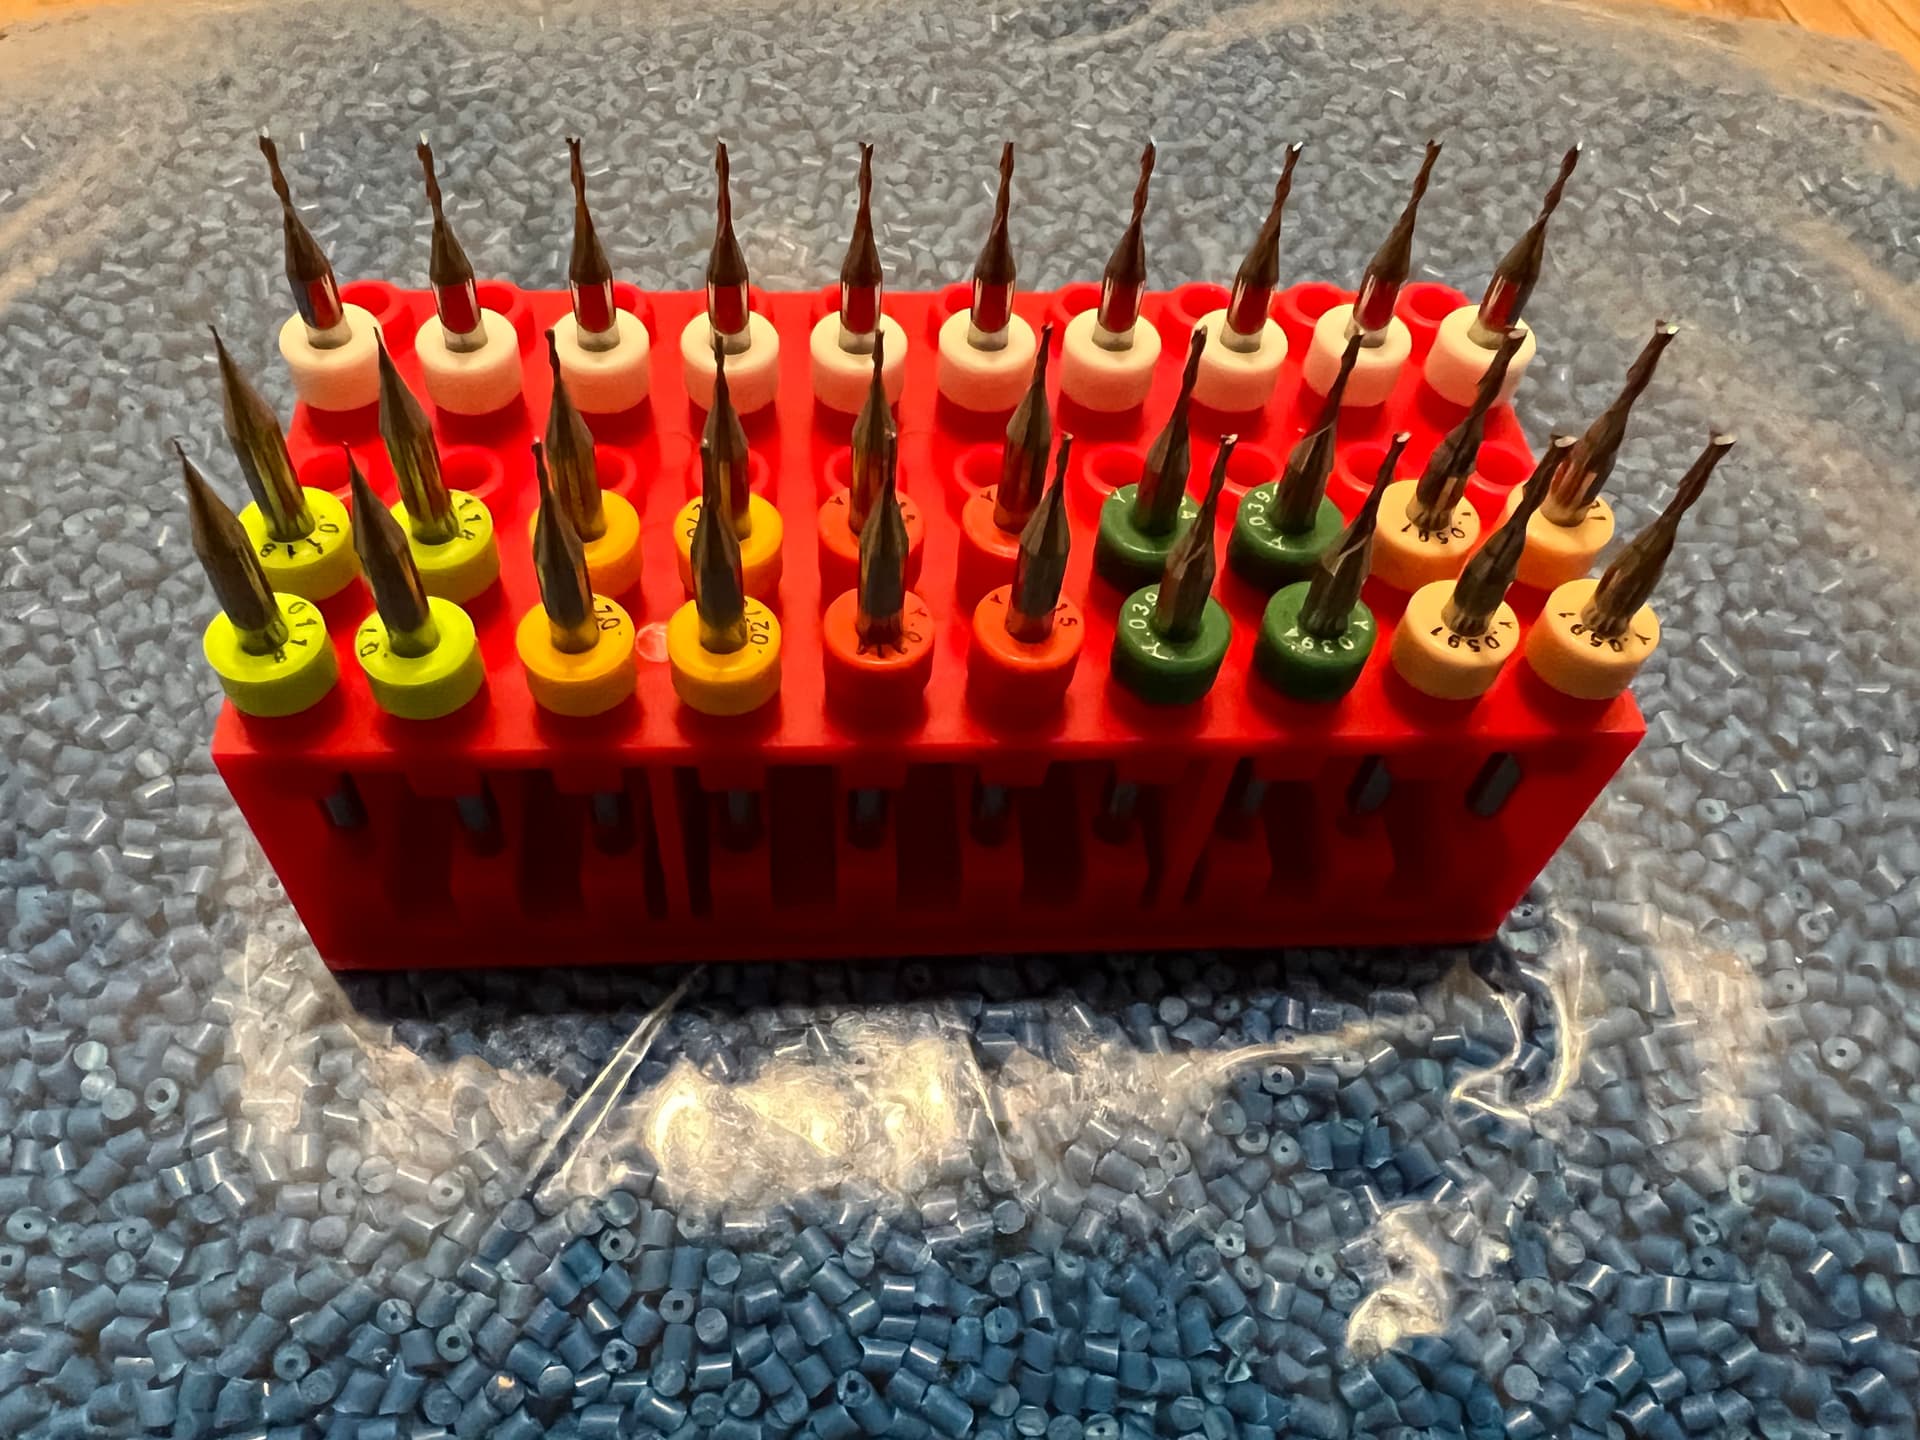
And here are the small tools I’ve settled on, all two flute. The white tools in the back are 1mm diameter. The front ranges from 0.3 to 1.5mm diameter:
Has it really been 8 months… jeez I need to focus up!
So, a lot has happened:
I made my first real injection mold (spoiler, it’s mediocre and full of mistakes lessons learned)
I’ve been working with a friend to get the CAD work done. Oh man did that cause some headache/confusion (another spoiler: 1/8" != 3mm )
None of the params on a benchtop injection molder are too extreme. This results in some pretty forgiving process controls. If you have the necessary pressure and clamping, it tends to “just work”
I was worried about the time it might take to dial in temps, hold times, pressure, etc… But it was super quick once the molds were cut.
Ok, now for a TLDR of lessons before the long story:
Make sure you have a good strategy for recutting/touching up a mold. You will have to put it back on the CNC for some reason or another. (Locating pins for orientation and a precision bore as a datum worked great for me)
if possible, design the product with a certain set of tools in mind. Compromises are likely worth considering. Do the sprues need to be 3mm because it’s a nice round number? Probably not… using 1/8" wastes a fraction of a cent of plastic and a 1/8" ball is already in the tool library
Assume all surface texture is going to be picked up by the injected part. (Seems obvious but i was surprised by just how faithful the replication can be)
Much of what I’ve said here falls into the category of “Yeah, duh. Everyone knows this.”
But I’d assert these are lessons engrained so early in ones career that they become second nature. Unfortunately second nature tends to stay hidden in the various YouTube videos and posts by experienced mold makers looking to share more interesting insights
Still, there’s value in putting the words to paper for everyone to read, even if it means I play the part of the fool every now and again
More content coming soon. This post has taught me that mobile is not conducive to long form composition. Seems I learn something new every day
Are you still working on making molds? I am starting to do research into tooling for my Nomad 3 to make molds for students to make a mold of, and start making molds themselves. I agree and like what you’ve done here. I would document what we do to build on our learning in the classroom and help others in education and the hobby.