I have been doing a lot of water line cutting of 2/2.5D objects in brass. I have but the .500" stock on top of another piece with carpet tape and then held it in the flip jig. This works great most of the time as long as I use an end mill. If I use a ball to penetrate the bottom of the stock on the final cuts it breaks away from the tape and ruins the job. I believe due to deflection from the ball.
I would like to do more work outside of the flip jig. I have tried the blue wax but really do not understand how people are saying it is so strong. I can usually break the stock free with some force by hand. The bigger issue I have, since I have successfully used the wax, is that the stock is not level since it is resting in a bed of wax. I have heated and gotten it to a nice pool, then clamped it in an arbor press with blocks of aluminum stock. It still leaves a slightly unlevel condition. On the final cutout part, the edges are not square due to this being unlevel.
What have you found to be the best for holding .500" work?
Haven’t done work that large, but I found the best way to hold small pieces was to put a series of holes through them which matched up w/ holes in an MDF fixture into which I’d installed brass threaded inserts — then I fastened the stock in place w/ either nylon or aluminum screws — in some instances I even milled away the nylon screw head as part of the work.
Thanks for the reply.
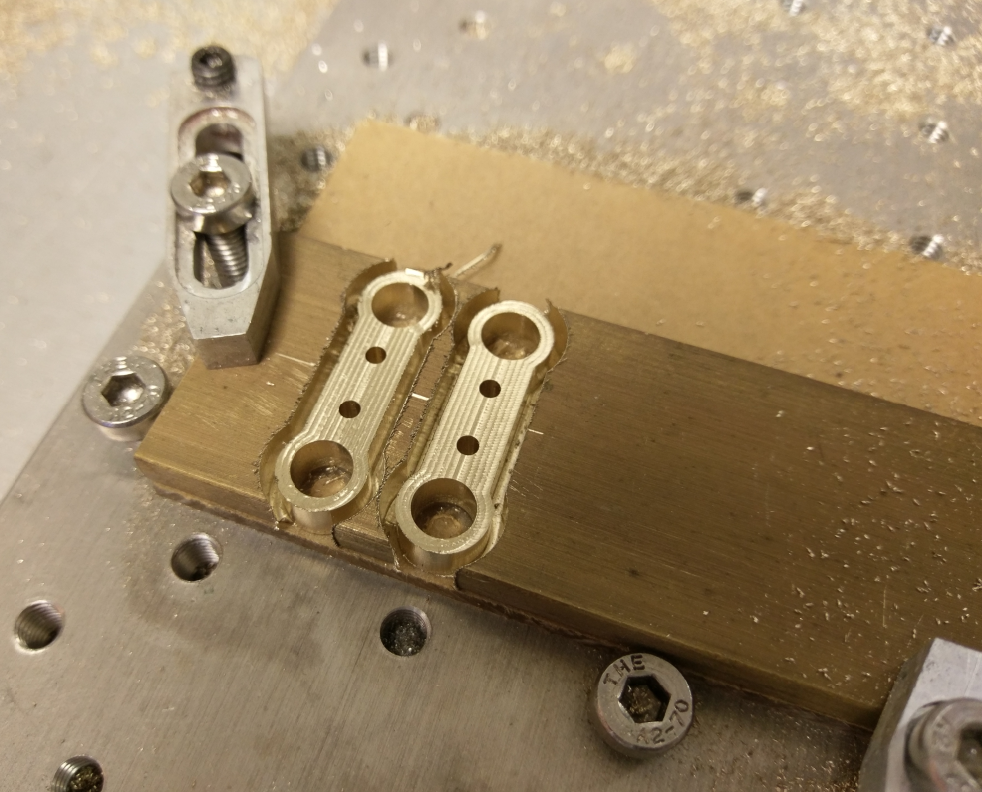
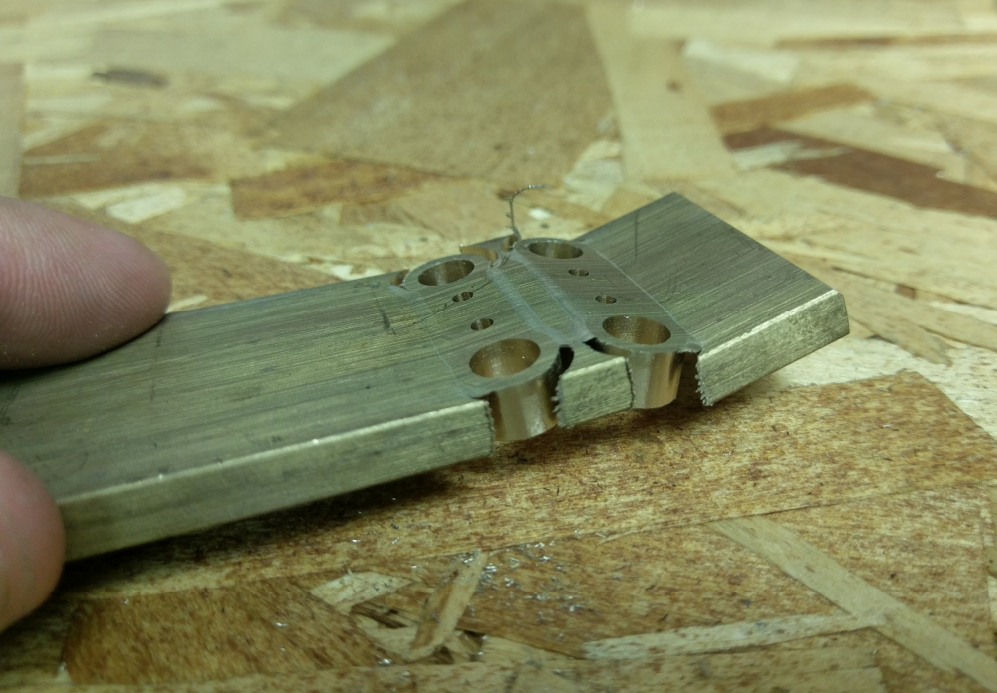
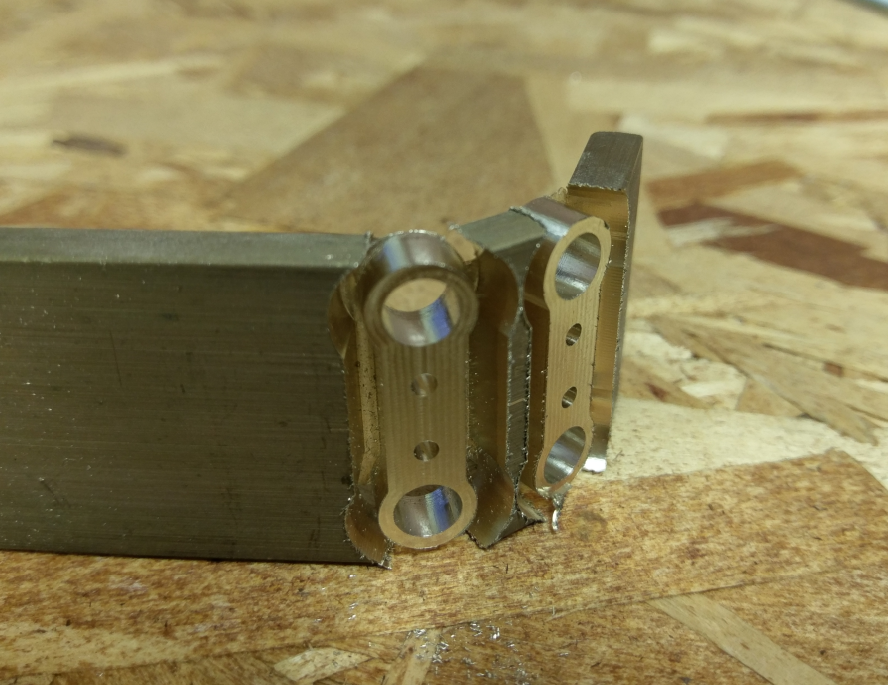
The fixture does I great job holding the stock. The issue is once it makes the final cut through the work, the part gets knocked around by the mill on the final pass.
Don’t mill all the through your material. A thin skin at the botton will hold it in place and this thin material can be easily removed (sanding, hand plane,et.
Wood: Leave 0.015 to 0.025" at the bottom
Metal: Leave 0.005 to 0.015: at the bottom
@rayjneal
.5" thick stock is difficult with the wax- its a lot of material to heat up.
What Richard said is what I do- and I will add:
To get true square stock you will need to surface both sides of the brass.
First the top - then flip it over and surface the stock again- Then leave a skin to keep the part from flying away - no need for wax.
Leaving a thin skin is tricky, go shallow and sneak up on it.
Once you get it dialed in you will get a foil that is easy to trim.
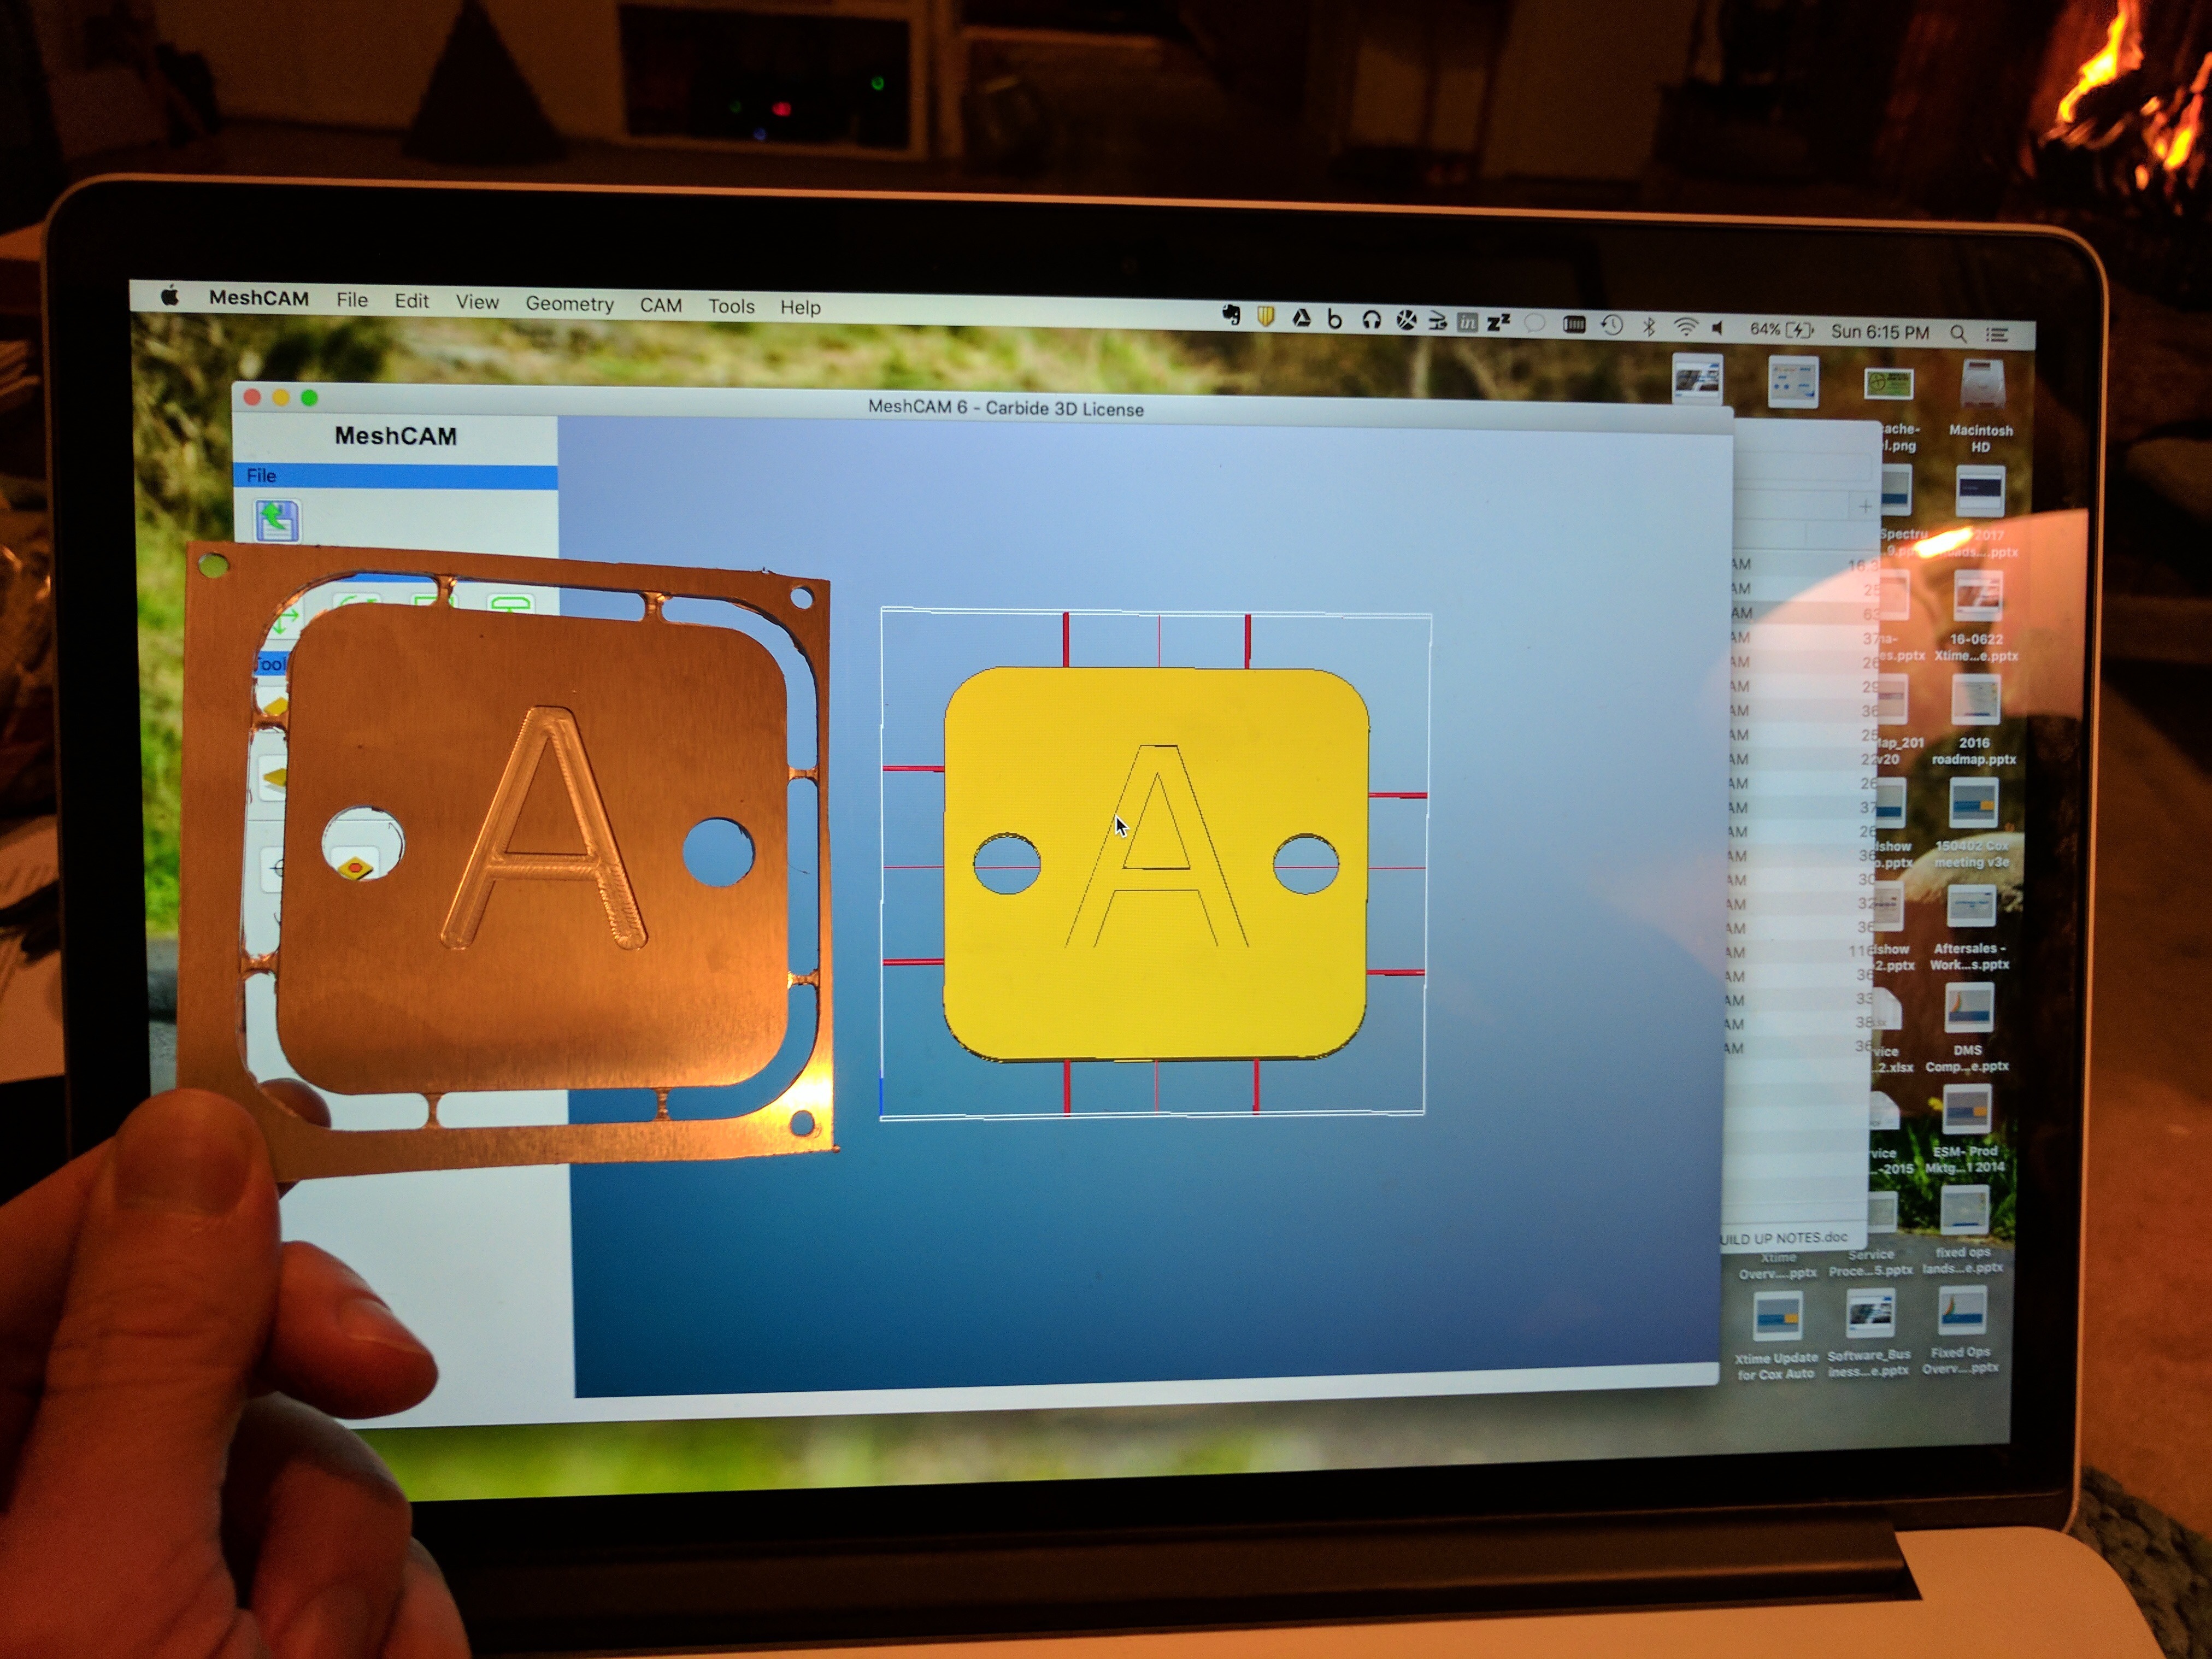
For the #fidg8widg8 I used the threaded table and clamps to hold the .25" brass - with a sacrificial piece of acrylic below the brass (just in case) even though I did not intend to go all the way through the brass.
I did not surface both sides of the brass because only one side would be visible when assembled.
You can see in some parts it went through because I only surfaced the top of the brass.
Towards the edges of the Brass stock the material is curved and rolls upwards.
I’ve been using cam clamps around the edge with a threaded table (hitech systems), and put a piece of 1/8" hardboard underneath it as a sacrificial layer for when I cut through. If you use meshcam to put a few tabs in place, things work pretty well. It’ll be nice and level, it’s easy to take off, etc. I’ve gotten deflection of a square mill to pop material off when using wax as well. The lighter the cuts, the less distortion there is on the bottom, so less force trying to pop it off.
@RichCournoyer
I am cutting stabilized wood from a large block into knife scale form. There is a variation of ten or twenty thousandths of an inch. I have to pick a number, so I figure I am well to go with the larger.
I’ve used this procedure for a half a dozen random parts in 6061-T6, ranging from 1.5mm - 12mm thickness parts.
I drill holes through the stock around the perimeter on a drill press, on the assumption that this is waste stock anyway.
Place the stock on the bed and drop screws into the wasteboard below. Start-drill the holes in the wasteboard with a hand-drill to prevent the screw threads augering board material up underneath the stock, which would cause it to not sit flat.
You can drop screws in the field of the finished part for additional support, if your design includes internal holes. Use Meshcam to generate a hole-drill program, run that first to drill precisely in the field, put in your screws, then “fill” those holes in meshcam, and it will avoid those holes for the full piece-part program.
Mesh cam also has a handy “supports” feature that allows you to put “legs” between the finished part and the waste stock, which keeps the finished part provisionally attached to the waste stock while the rest of the part is fully machined, including pencil finish. While it appears this is only for flip-jig use, it’s very handy for 2D and allows finished cuts all the way down, with only a little spot cleanup when the legs are removed.
I’ve toyed with using carpet tape underneath all this for piece of mind, but so far have not needed it.