What bit would you recommend for creating keyholes in the back of a wall hanging?
I have been using these for a couple of years and love them. Other than waiting a month of Sundays for them to arrive, I have no complaints.
I see that they are now a whopping $8 eBay and $9 Amazon (Prime).

4 Likes
Thanks Rich! Something like:
https://www.amazon.com/Yakamoz-T-Slot-Cutter-Woodworking-Cutters/dp/B075D8KVWR
NOT the blue one…the blue one don’t hold…I"m KIDDING…Yes, just like that… PS I use the 1/2" one 90% so measure your screws…and you might just need one size…but on the other hand…remember the rule… (most tools win).
3 Likes
LOL! Thanks Rich! I’m still working on the most tools things… seems like a never ending quest.
It seems that way because it is! More projects = more tools.
1 Like
I have used this:
1 Like
Just be careful to pick a bit that has the large cutter but also has the small diameter with a cutter. I have a t track cutter that is only the large cutter and no small diameter cutter so you have to cut in two operations and for a hanger hole that wont work. You have to Plunge then move forward to cut smaller diameter then reverse out.
2 Likes
Good point!
I remember having difficulty creating that toolpath in carbide create. I ended up manually editing the gcode.
One other problem i had was with the plunge. I really had to go in slow or my Z skipped (this was before i got an HDZ)
1 Like
Thanks guys! I wasn’t even thinking about that. I see the bits that I’m looking at have that smaller cutter.
This may be useful.

1 Like
To enhance to what others have contributed. I strongly suggest creating yourself a jig to achieve consistency if you need to create multiple keyhole cuts for production .
Also great if you need to make two keyhole cuts on one piece.
Here is a link to a YouTube video to show your what I am referencing.
Cheers 
Sasquatch
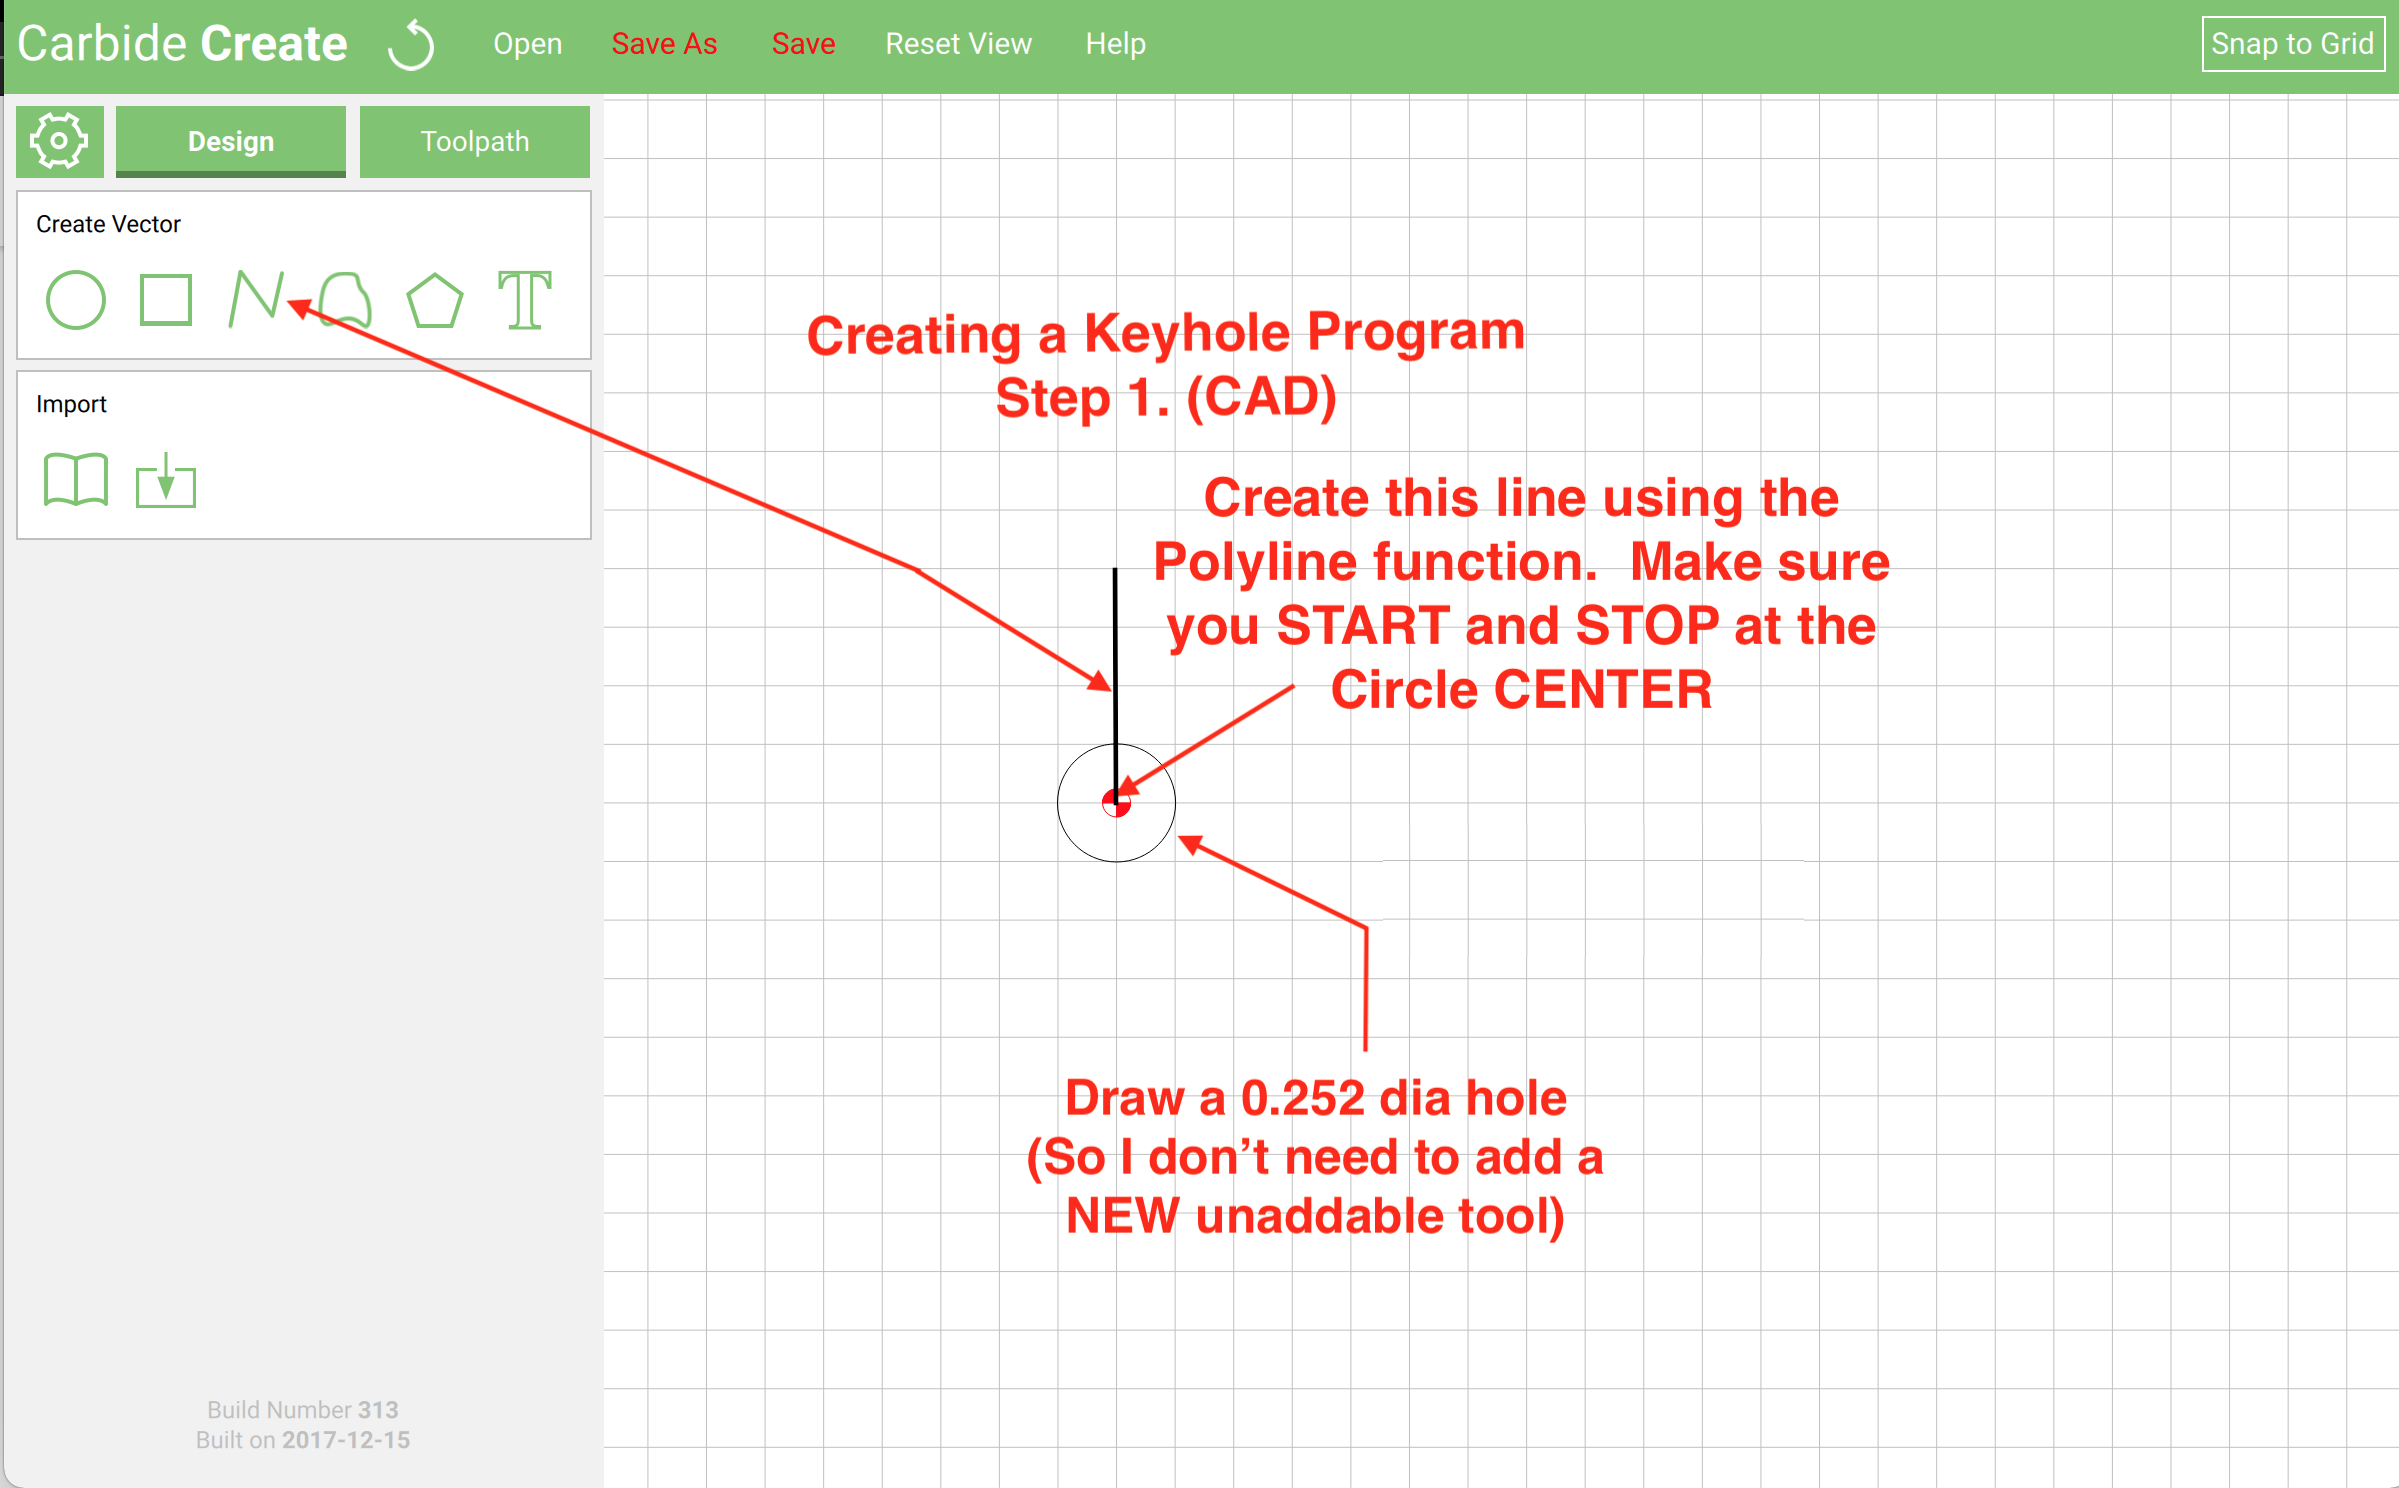
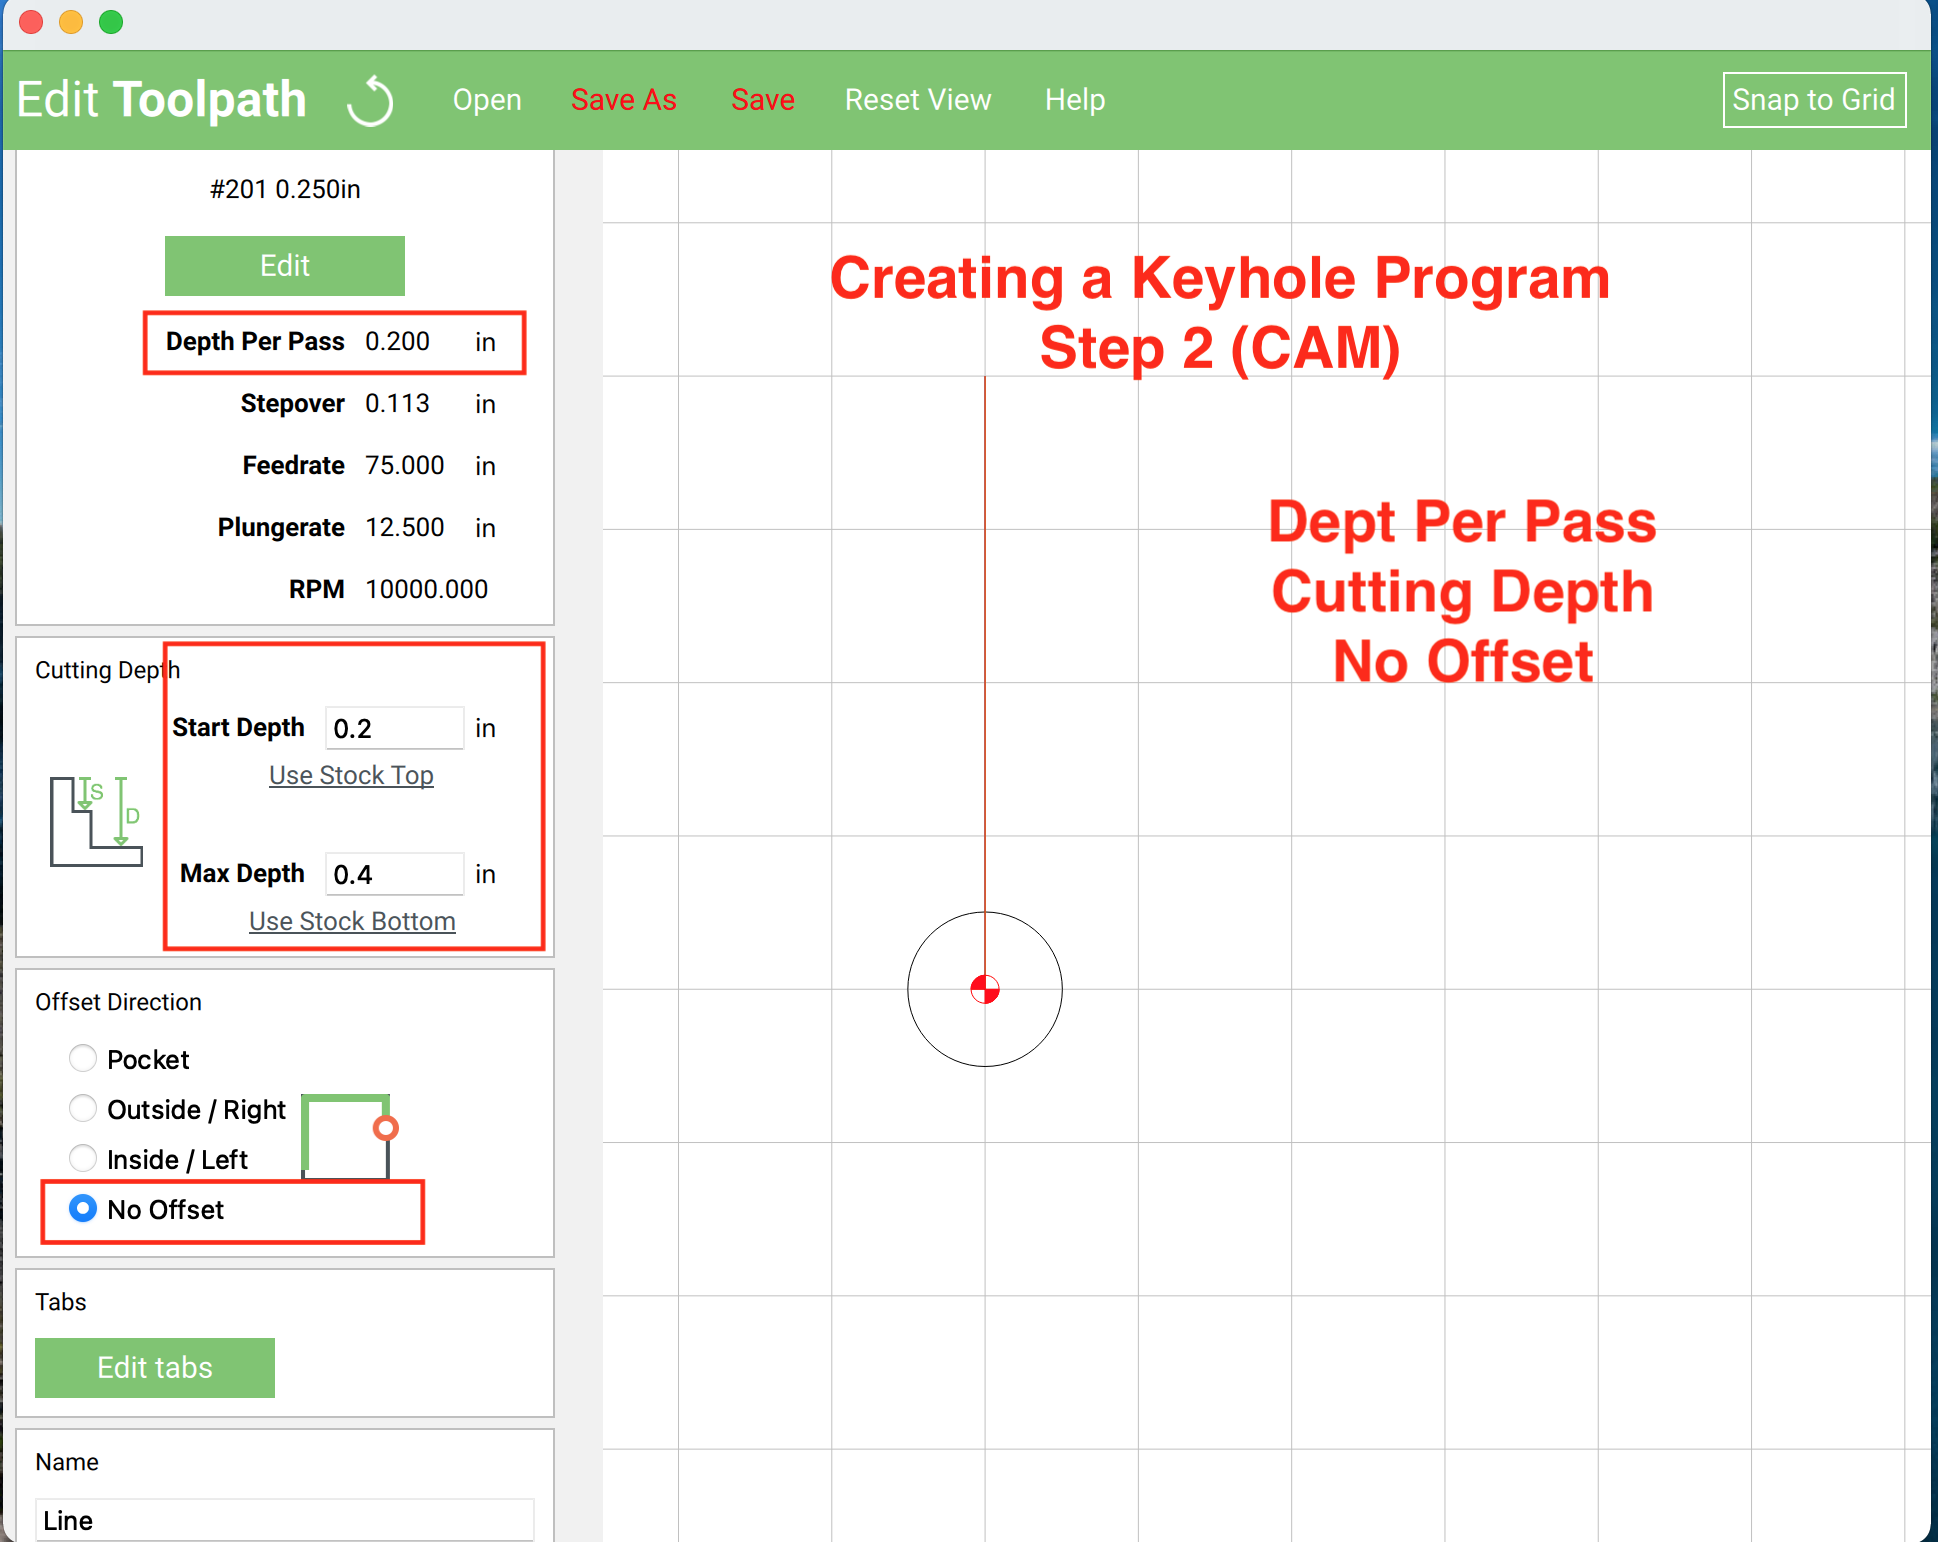
Creating the program is Suppa easy in Carbide Create if you (a) lie to CC, and (b) follow my 2 Step guide.
The cutter plunge (center round hole) feature is straight forward. Pick cutter 201 (But you’ll load the 1/2" or 3/8" cutter into the router (That’s the CC lie). Bore the hole to 0.4 deep, using the Inside Left offset direction. Use the photo to program the line (under the wood) feature. Creating the Polyline from the center and Ending at the center, will make sure the cutter safely lowers and raises from the Center (1/2" or 3/8" hole.
Take a look and ask questions: ( I like using an older ver of CC for training screenshots because all the info is on one screen). Use any version to create the program.
EDIT: Yeah I see the GD Spelling error…it was a typo…trust me. LOL
4 Likes
Errr, you have a CNC, why do you need a jig?
I can process 12 pieces of art without destroying the front in less then half the time it takes to secure and process 2 pieces with a CNC.
Just because a CNC can does not mean it is the most effective way  .
.
Cheers
Sasquatch
2 Likes
These are both great! I’m ordering the bits. Appreciate the advice!
Just realize I never complained about the incorrect use of the word “bit.” It a CUTTER. LOL I must be getting soft in my old age…or forgetful)
1 Like
LOL! Amazon disagrees 
Yakamoz 1/4" Shank T-Slot Cutter Router Bit Steel Handle 3/8" & 1/2" Length Woodworking Cutters For Power Tools
1 Like
Actually, maybe we’re both right since bit and cutter is used in the same title lol
1 Like
This topic was automatically closed 30 days after the last reply. New replies are no longer allowed.