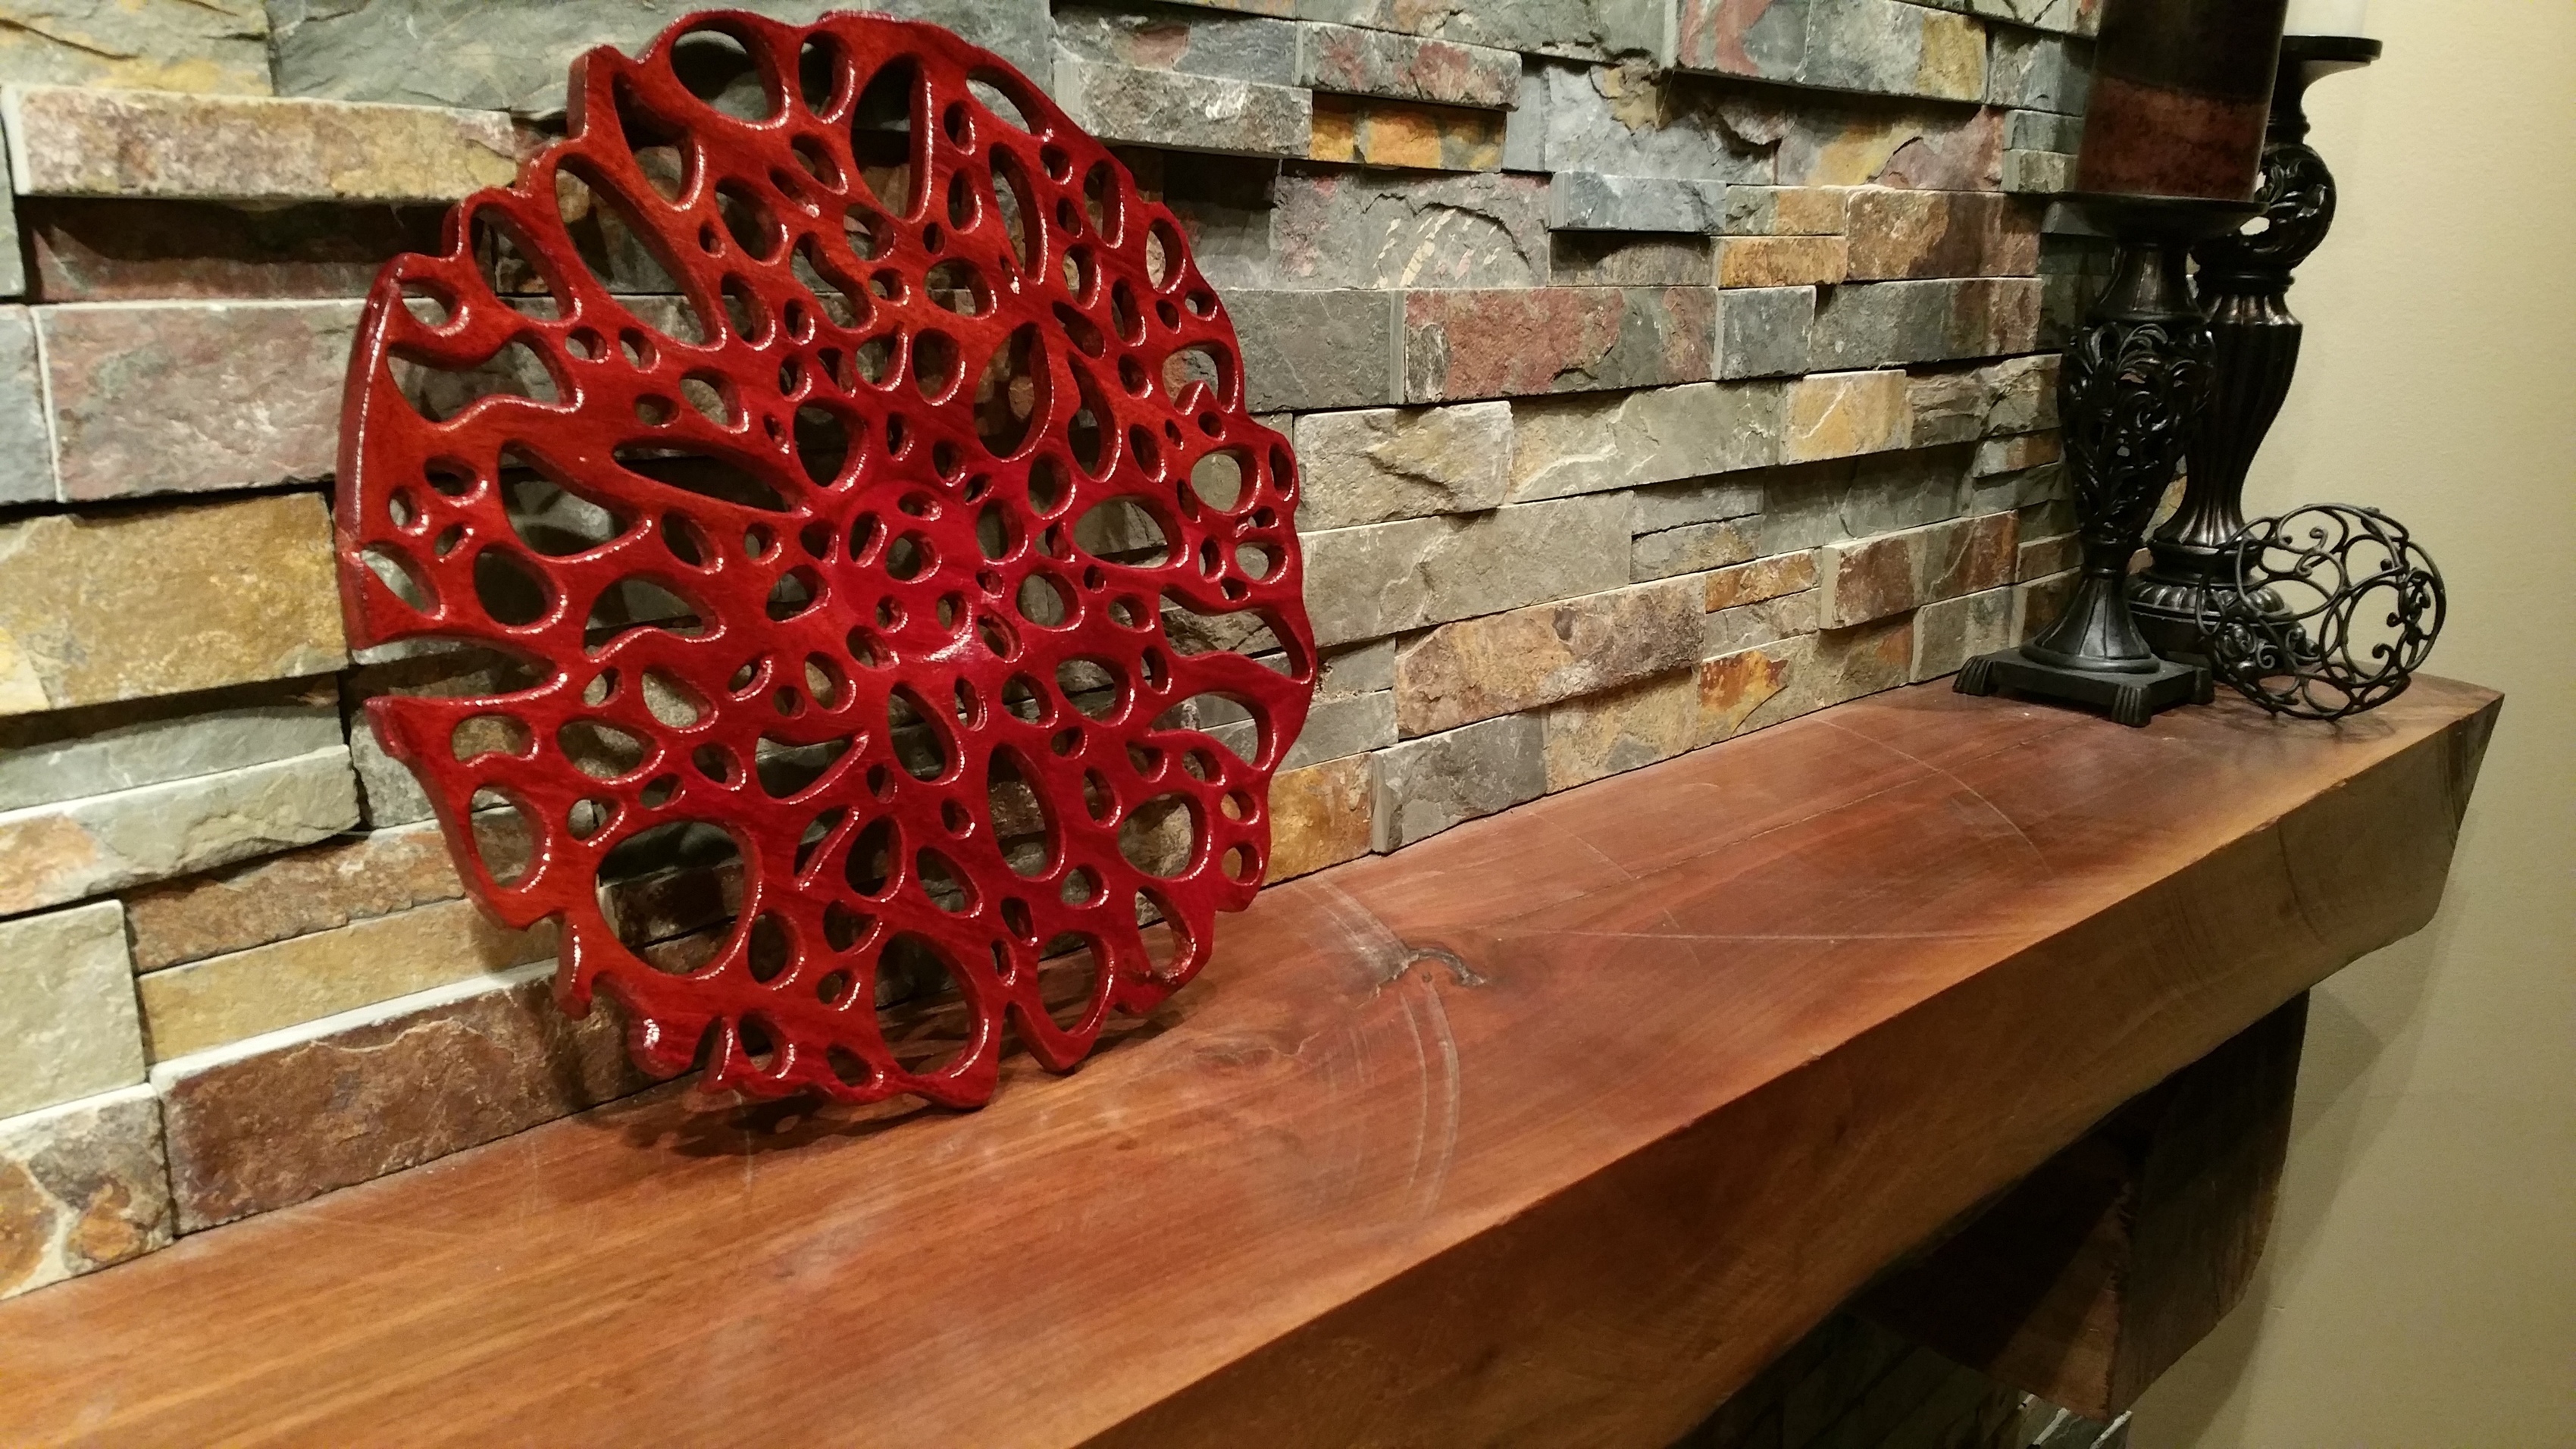
I came across some wood sculptures that were carved to resemble coral, and I thought that it might be fun to cut something similar and organic looking on my Shapeoko. Below is the finished product.I used bloodwood as the stock, which as the name and picture indicate, is bright red.
10 Likes
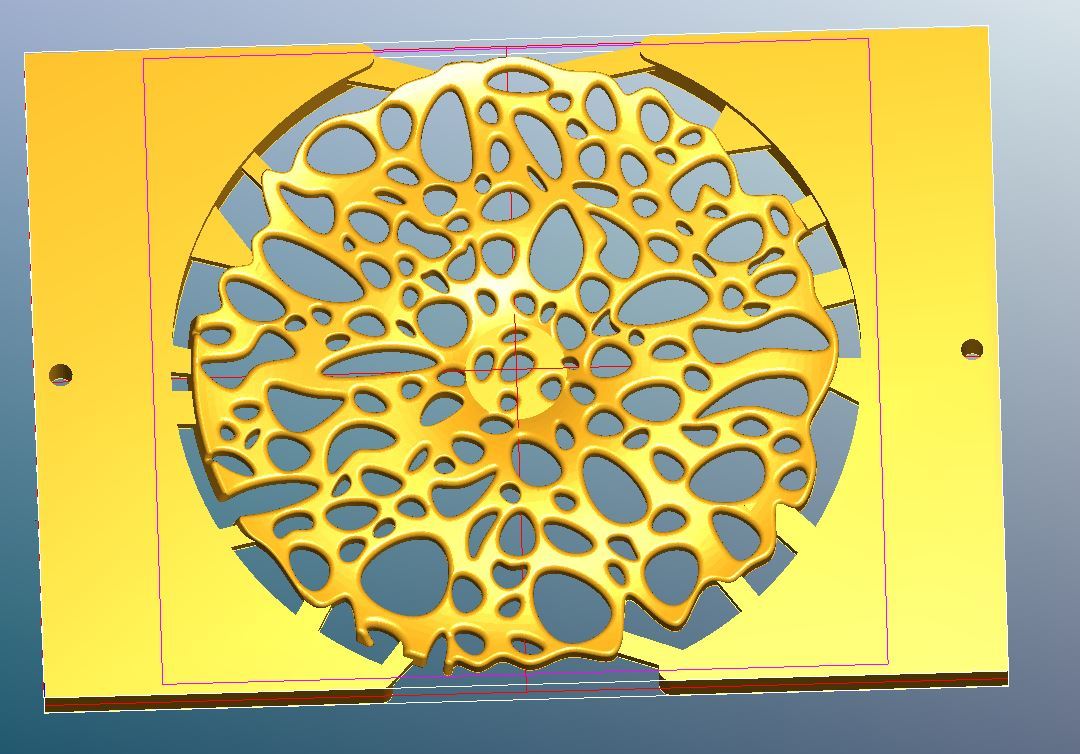
I first started by developing a CAD model, which had the look, shape and size that I wanted. The thickness of the plate is 8 mm and the diameter is approx. 12".

I then manually added supports and “doweling” holes to my CAD model for the two sided machining of the piece. Meshcam was used to generate the tool paths. (1/8" two flute ball end)
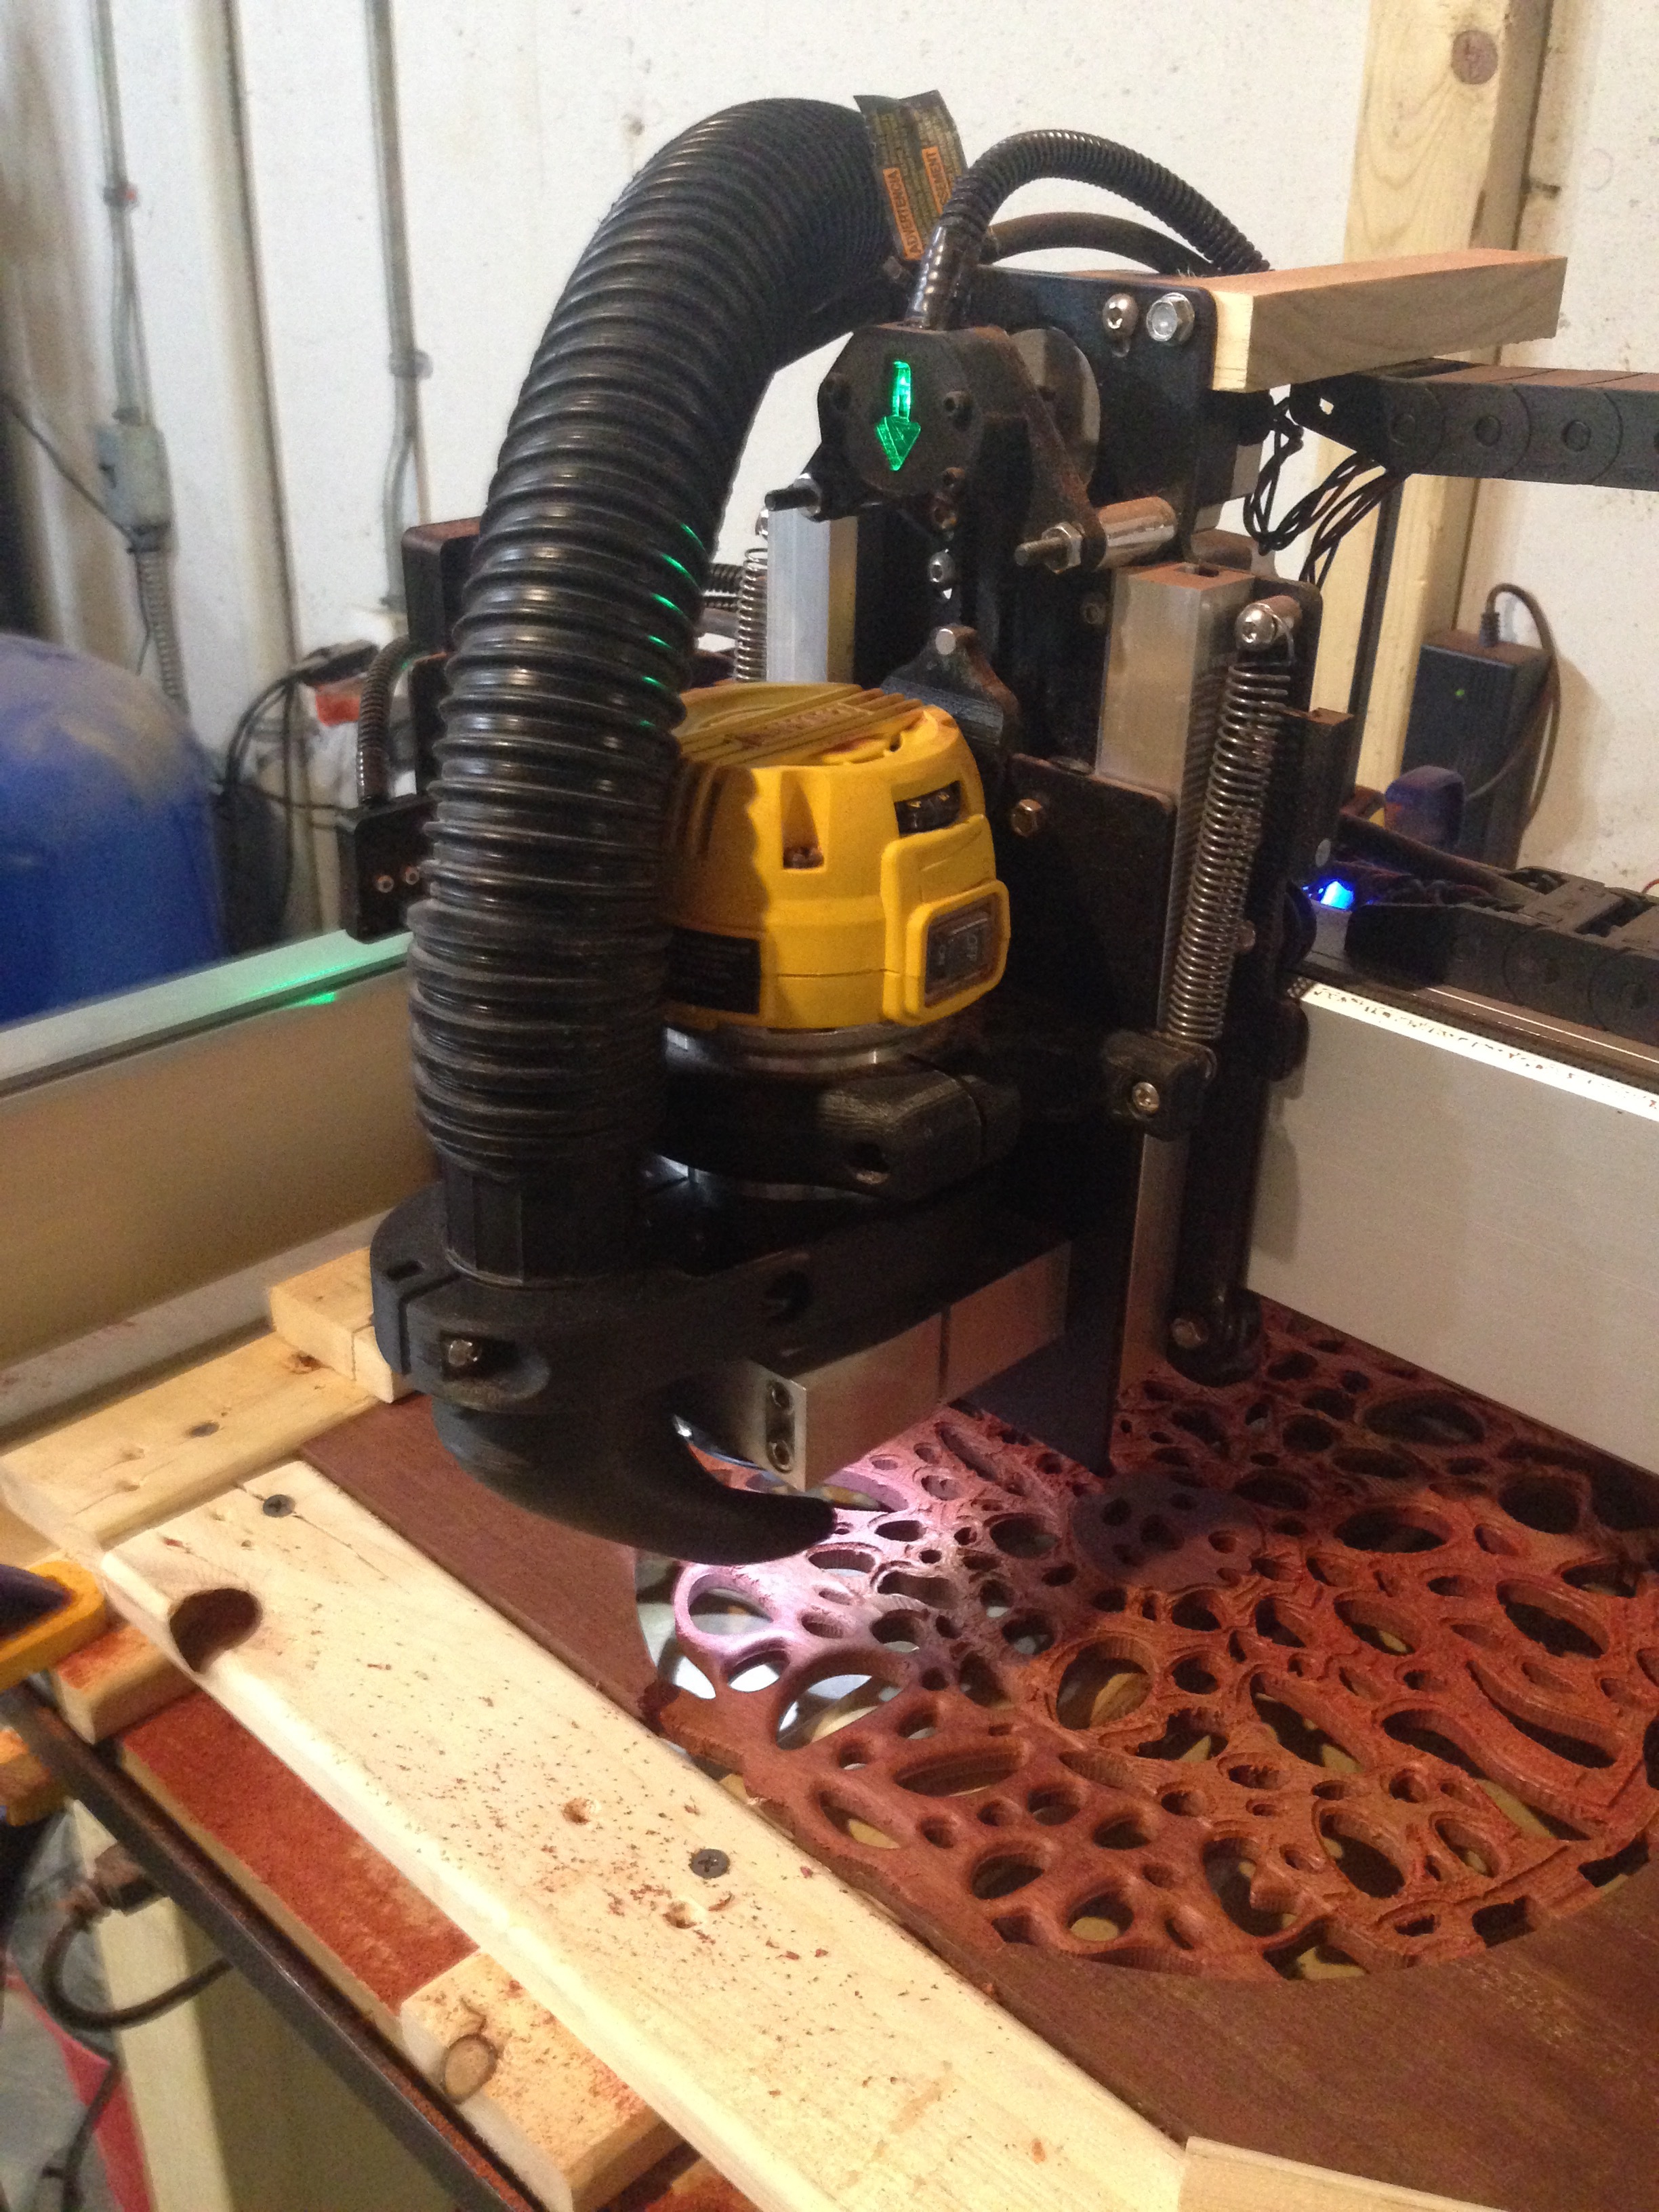
Finally, I began the machining process which took well over 12 hours. A word of caution when cutting bloodwood: the oils in the wood allow the dust particles to become very sticky. The dust residue from this wood was actually sticky enough that it built up on the machine’s aluminum rails and blocked my vwheels from turning. This caused my machine to skip steps, so I had to clean my rails and restart. Make sure you have a vacuum running at all times!
This was definitely one of my favorite projects that I have done on my Shapeoko. I hope you have enjoyed the pictures as much as I enjoyed making it. Now I just need to find a place to display it!
6 Likes
WOW, looks awesome, really nice work!
@burgchevap
I really like your vacuum attachment. I was thinking about something like this, working without the shaggy mop all around. May I ask how you have come to have this wonderful looking attachment?
The object you made is truly inspirational. I real piece of art.
Wow, this is nice work!
I’m with @DJ_Valenski about the vacuum setup, as well as what look like a few other custom mods you’ve performed for a cable drag-chain and maybe EOT sensors?
Would love to seem more shots of those details too 
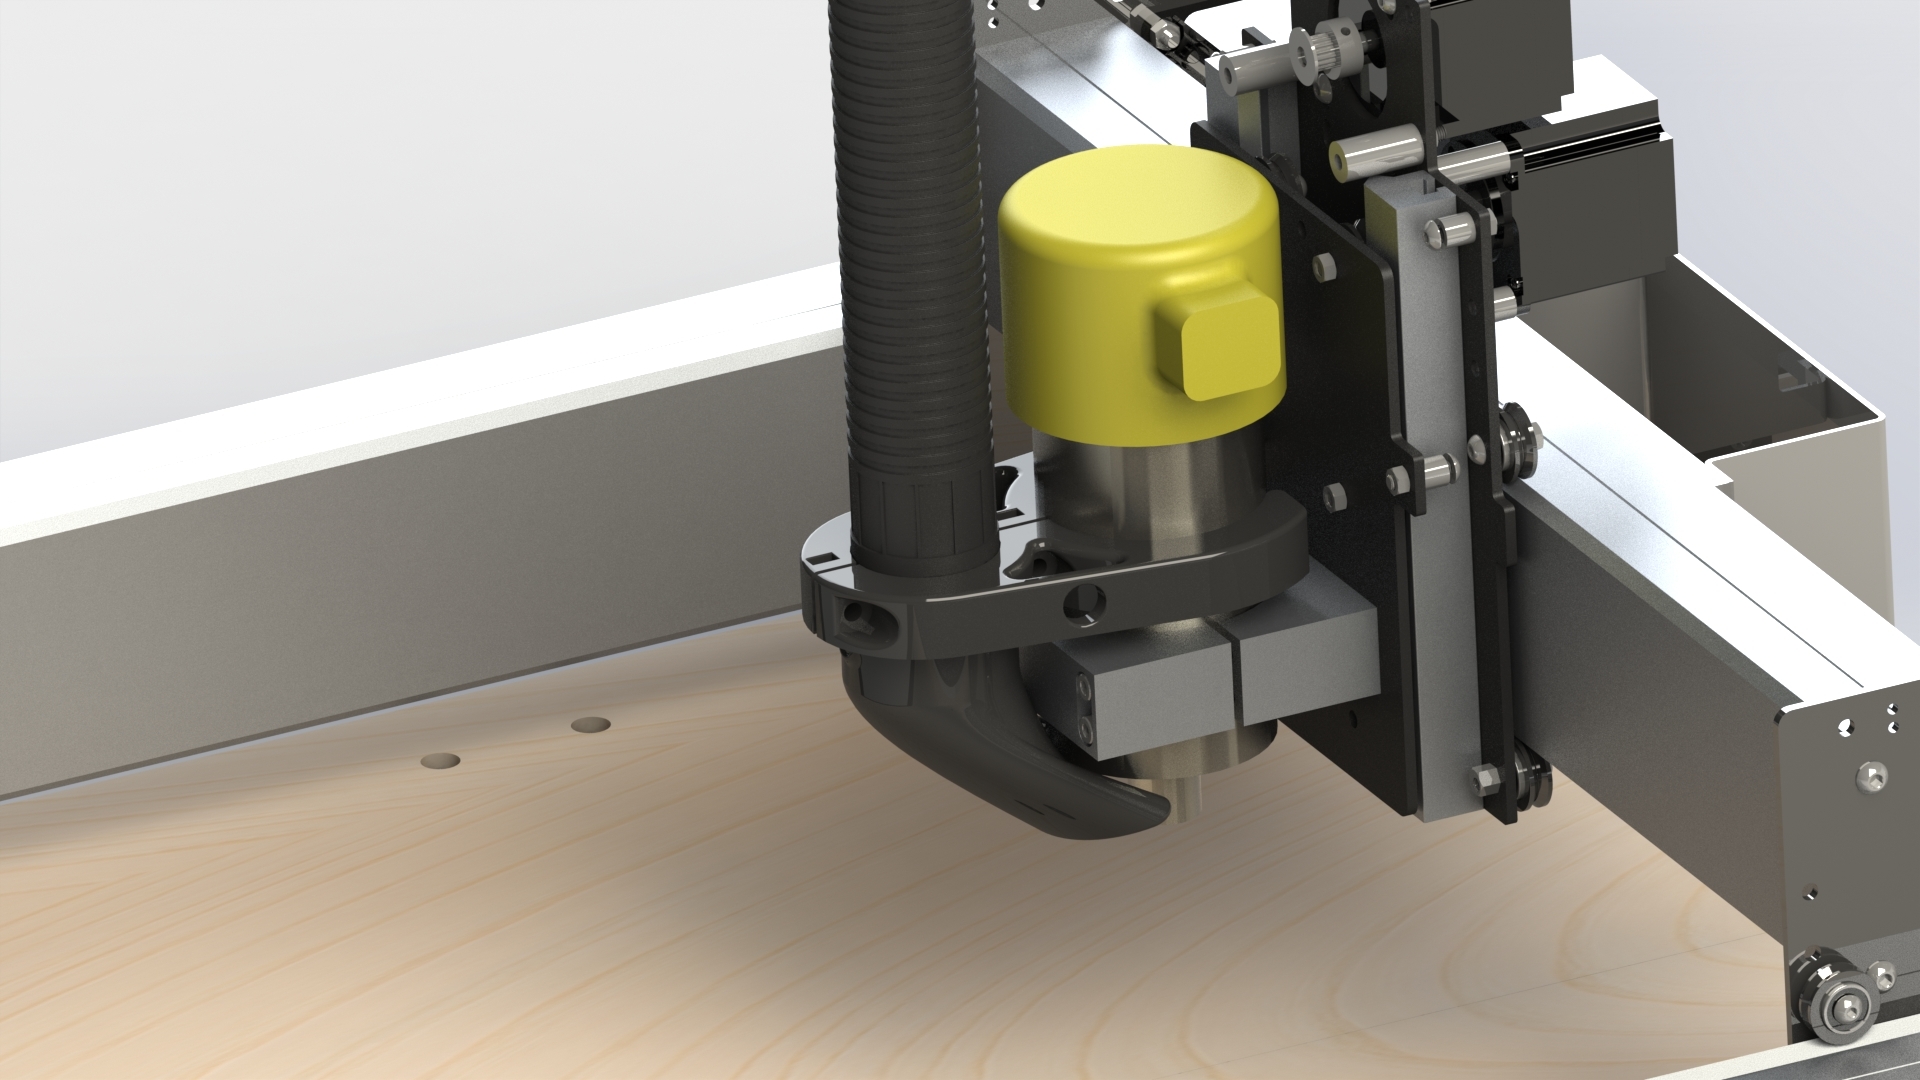
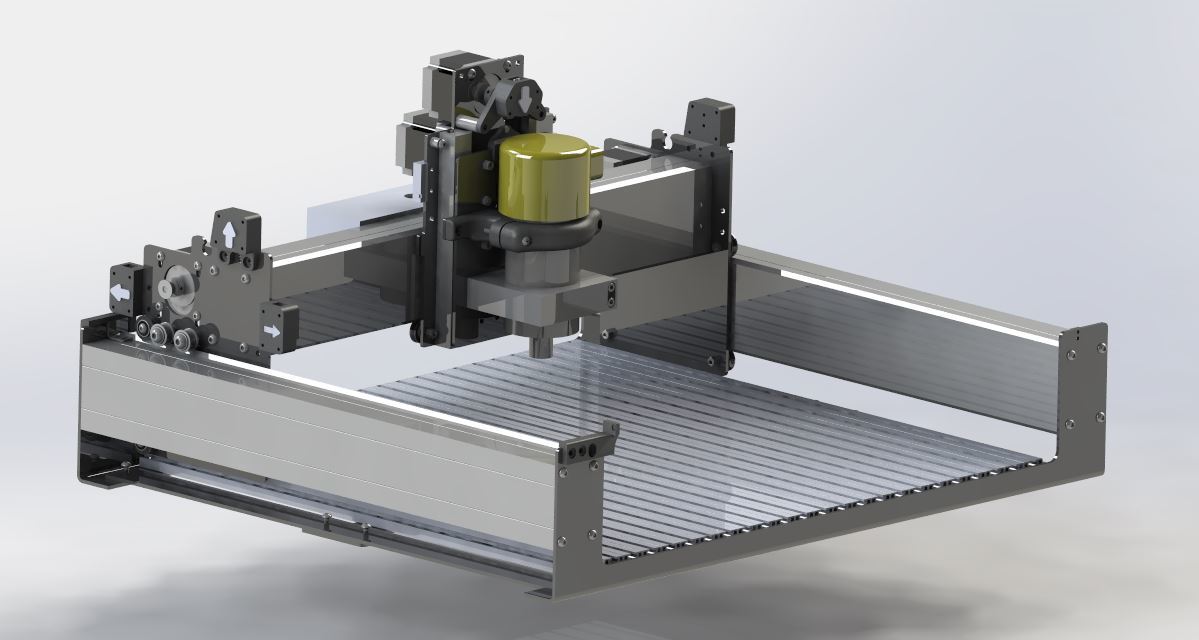
@UnionNine and @DJ_Valenski The vacuum mount was designed and printed by roommate. I also did not like the mop style vacuum mount so we tried to get the nozzle as close to the bit as possible. Here are a few renders that should make the design more clear than my previous picture.
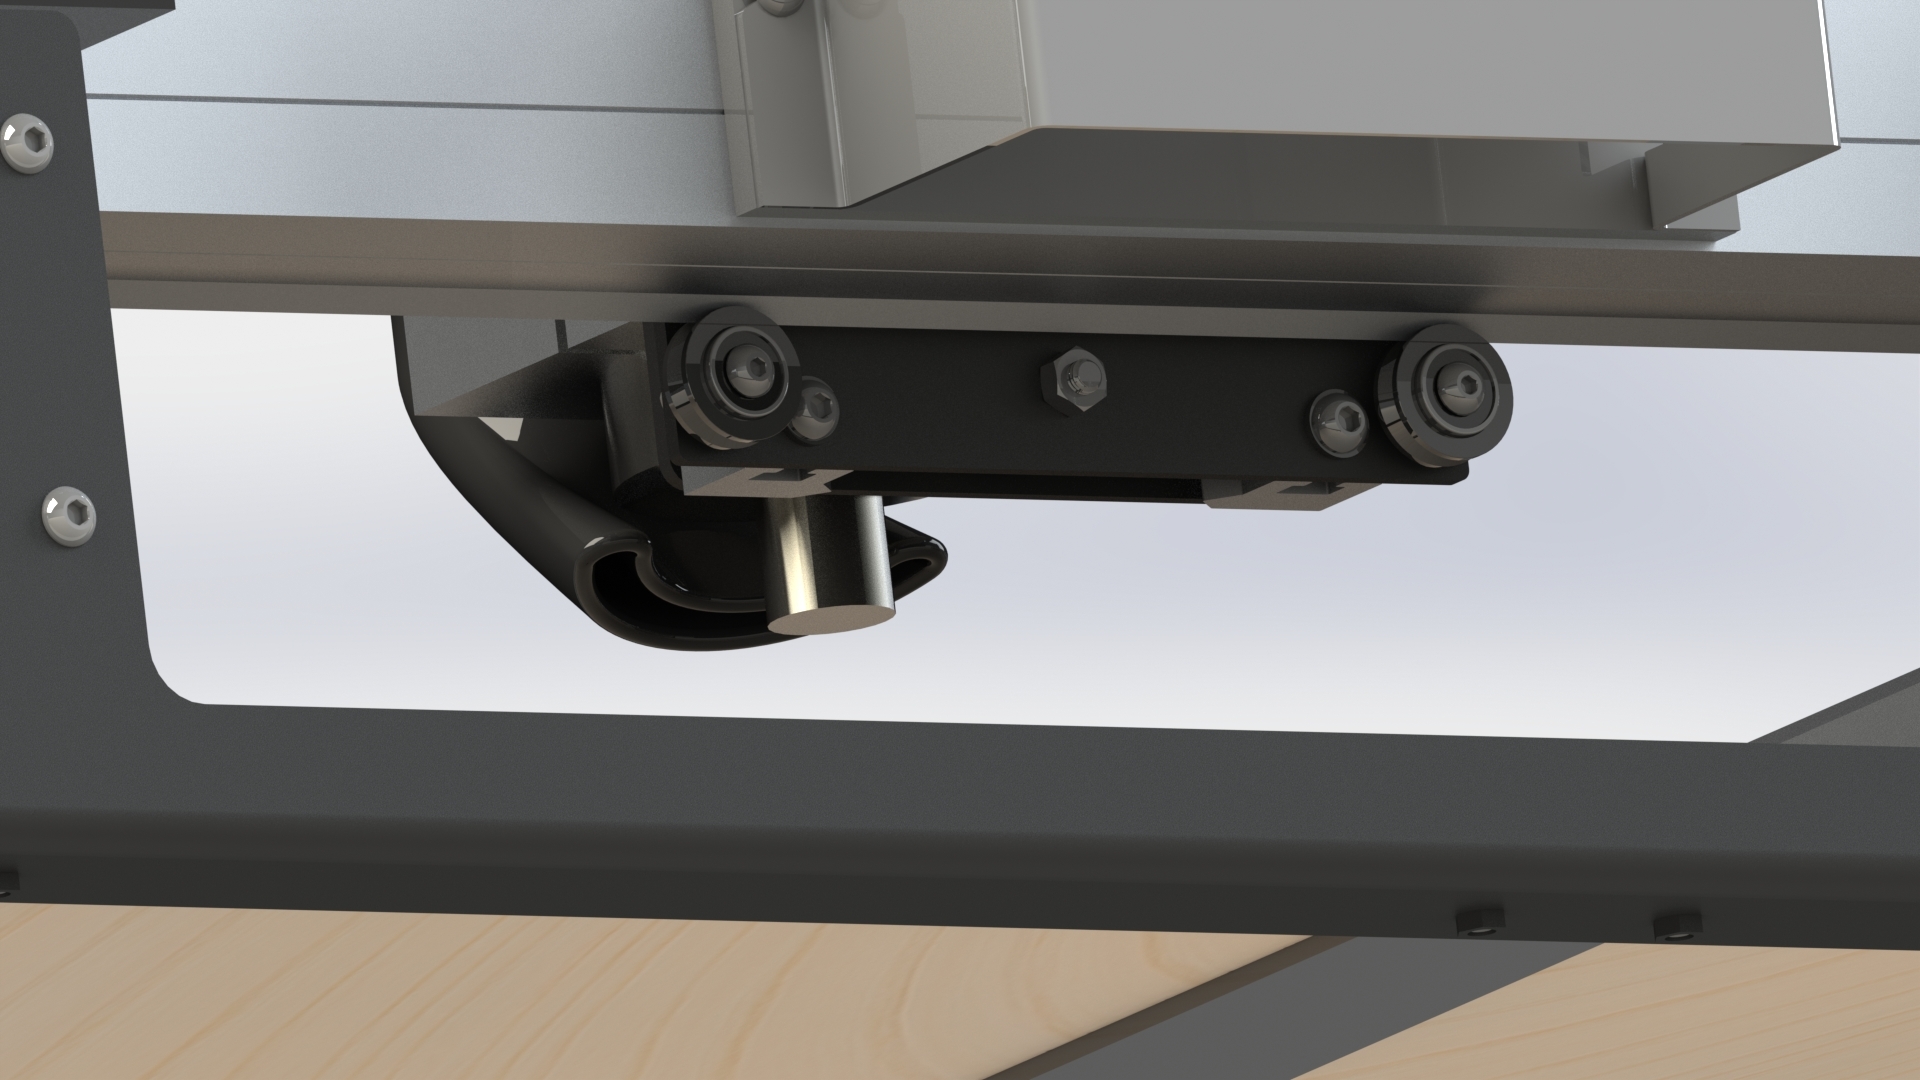
Now for the end stops, I have been using hall effect sensors and magnets. Below is a render showing the sensor positions.and bracket designs. I have used the “arrow” covers to keep dust off them. You will notice that at the ends of the x-axis I had to add flags to hold magnets. The rest of the sensor and magnet brackets use mounting holes already present on the stock machine
Each sensor is mounted to a board which has red and green LED indicators. When the machine trips one of the limit switches, the red LED’s on that axis illuminate. The rest of the time the green LEDs are illuminated…and here’s a short clip of the set up during homing (sorry for the video quality). I will try to get a better video at some point.
I am working on reducing the packaging size of the halleffect set up by building my own boards. Right now it looks a little too chunky for my liking. Also, if enough people are interested in these or other mods, I can send you a link to our 3D printing service site.
4 Likes
@burgchevap
Extremely impressive, I would love to see a full picture or video tour of your setup when you are ready or willing.
So it is possible for me to obtain in some manner the vacuum attachment? Please send the link to the 3D printing service.
There is one other mod I would like to see or make someday. I hate pushing in the Dewalt spindle lock button. It’s an awkward move. I wonder if a simple small locking lever could be designed so that you could rotate the collet by hand until you feel the notch and then lock it in to leave your hand free.
That red color is amazing. Can you talk about how you finished it?
@BennettBenson All I did was a little bit of sanding and then hit it with a couple coats of clear dewaxed shellac. I looked at a couple of woodworking forums, and they indicated that defaxed shellac is one of the few finishes that will stick to this wood due to its natural oils. They also said that over time the red will eventually darken even though it’s been coated.
Great idea on making the push button stick. I always reach around with one hand while wrenching with the other.
1 Like
I agree as well. I am going to try to cad something up to test on my machine.
@burgchevap
Did you ever send us any info on we could possibly obtain that super looking vacuum attachment?
In your opinion, how well do you think it works?
I apologize for not posting a response sooner. We have been working on several design iterations over the past couple weeks (actually we are on number 5), We incorporated your idea for the spindle lock, and it works like a charm. I am not sure I could go back to using my machine without it. It makes changing tools a breeze. The design looks a bit different from what you saw previously, but I am pleased with the performance improvements we achieved It gets the majority of the chips when I am cutting wood. It does not seem to get metal chips quite as well so we are tossing around the idea of doing an optional 180 degree dust skirt. The idea is to help direct the denser chips into the vacuum line while still allowing visibility at the bit.All in all, I’d say we are 90% there on settling the final design We should have some new photos and videos soon Thanks again for the great idea on the spindle lock. You will be the first to know when we have something ready to share.