Build Log: Ampeg AEB/AMB inspired 5 String Bass

I have been a bass player for probably 28 years now (wow that hurts to say that number out loud). The Ampeg AMB or AEB-1 basses have been a major drool factor for me for a long time.

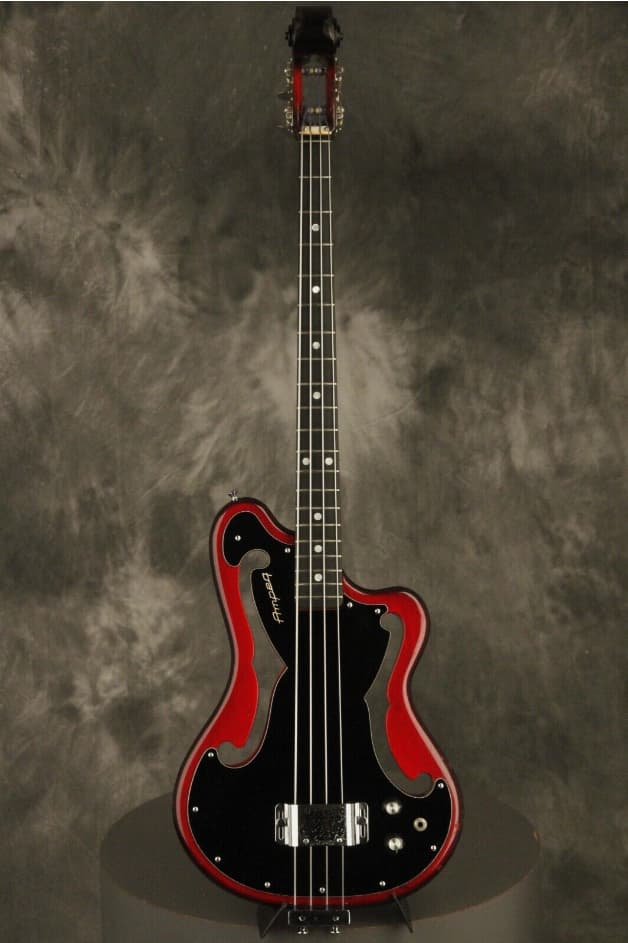
I really prefer playing 5 strings over four, and unfortunately (or maybe fortunately, given how much money they are) the Ampeg bases were only every available with 4 strings.

And now, since I have a Shapeoko, I can build anything right? Well, we’ll see. :slight_smile:

So here is the project, a (some would say) bastardized version of The AMB/AEB-1! For now it will be designated the BAB-5 until I can come up with a better name.

Updated Designation: ASO-5

The Plan:

  • Ash body
  • 34" Scale
  • Aguilar DCM pickup in the EMG 40 size
  • Aguilar OBP-3 Preamp (somehow)
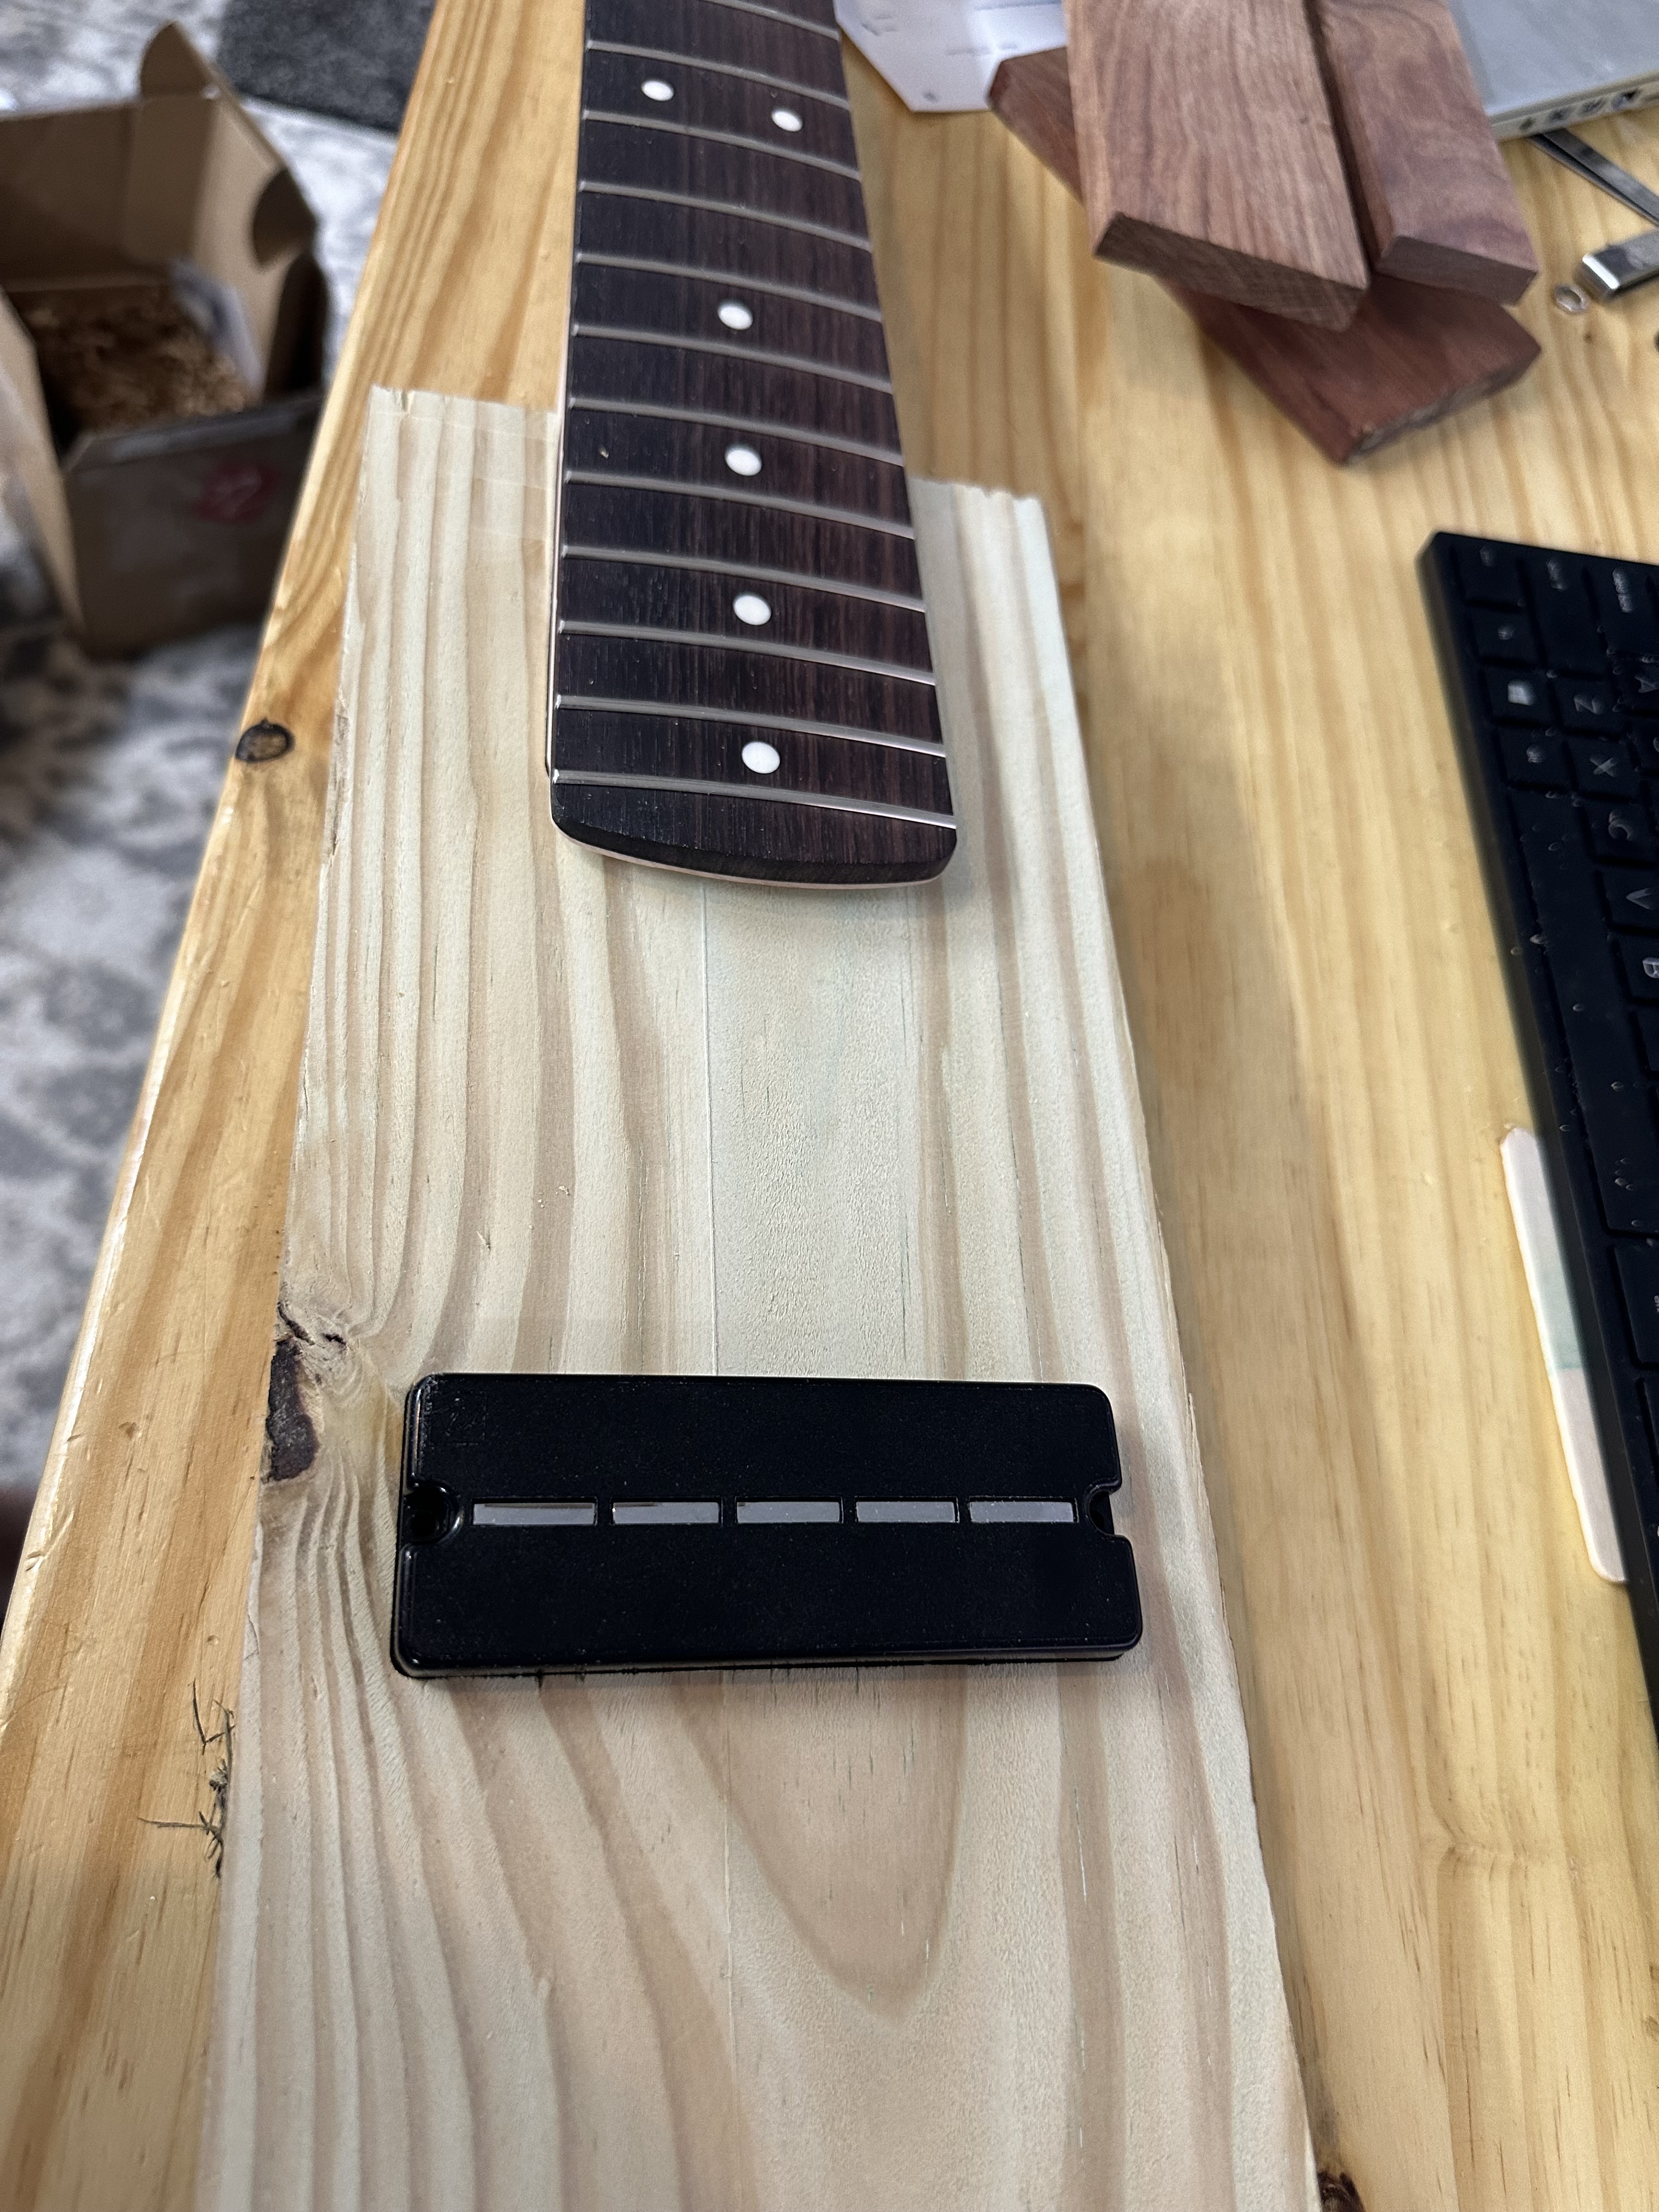
  • Hipshot Vintage 5 Bridge, 18mm spacing
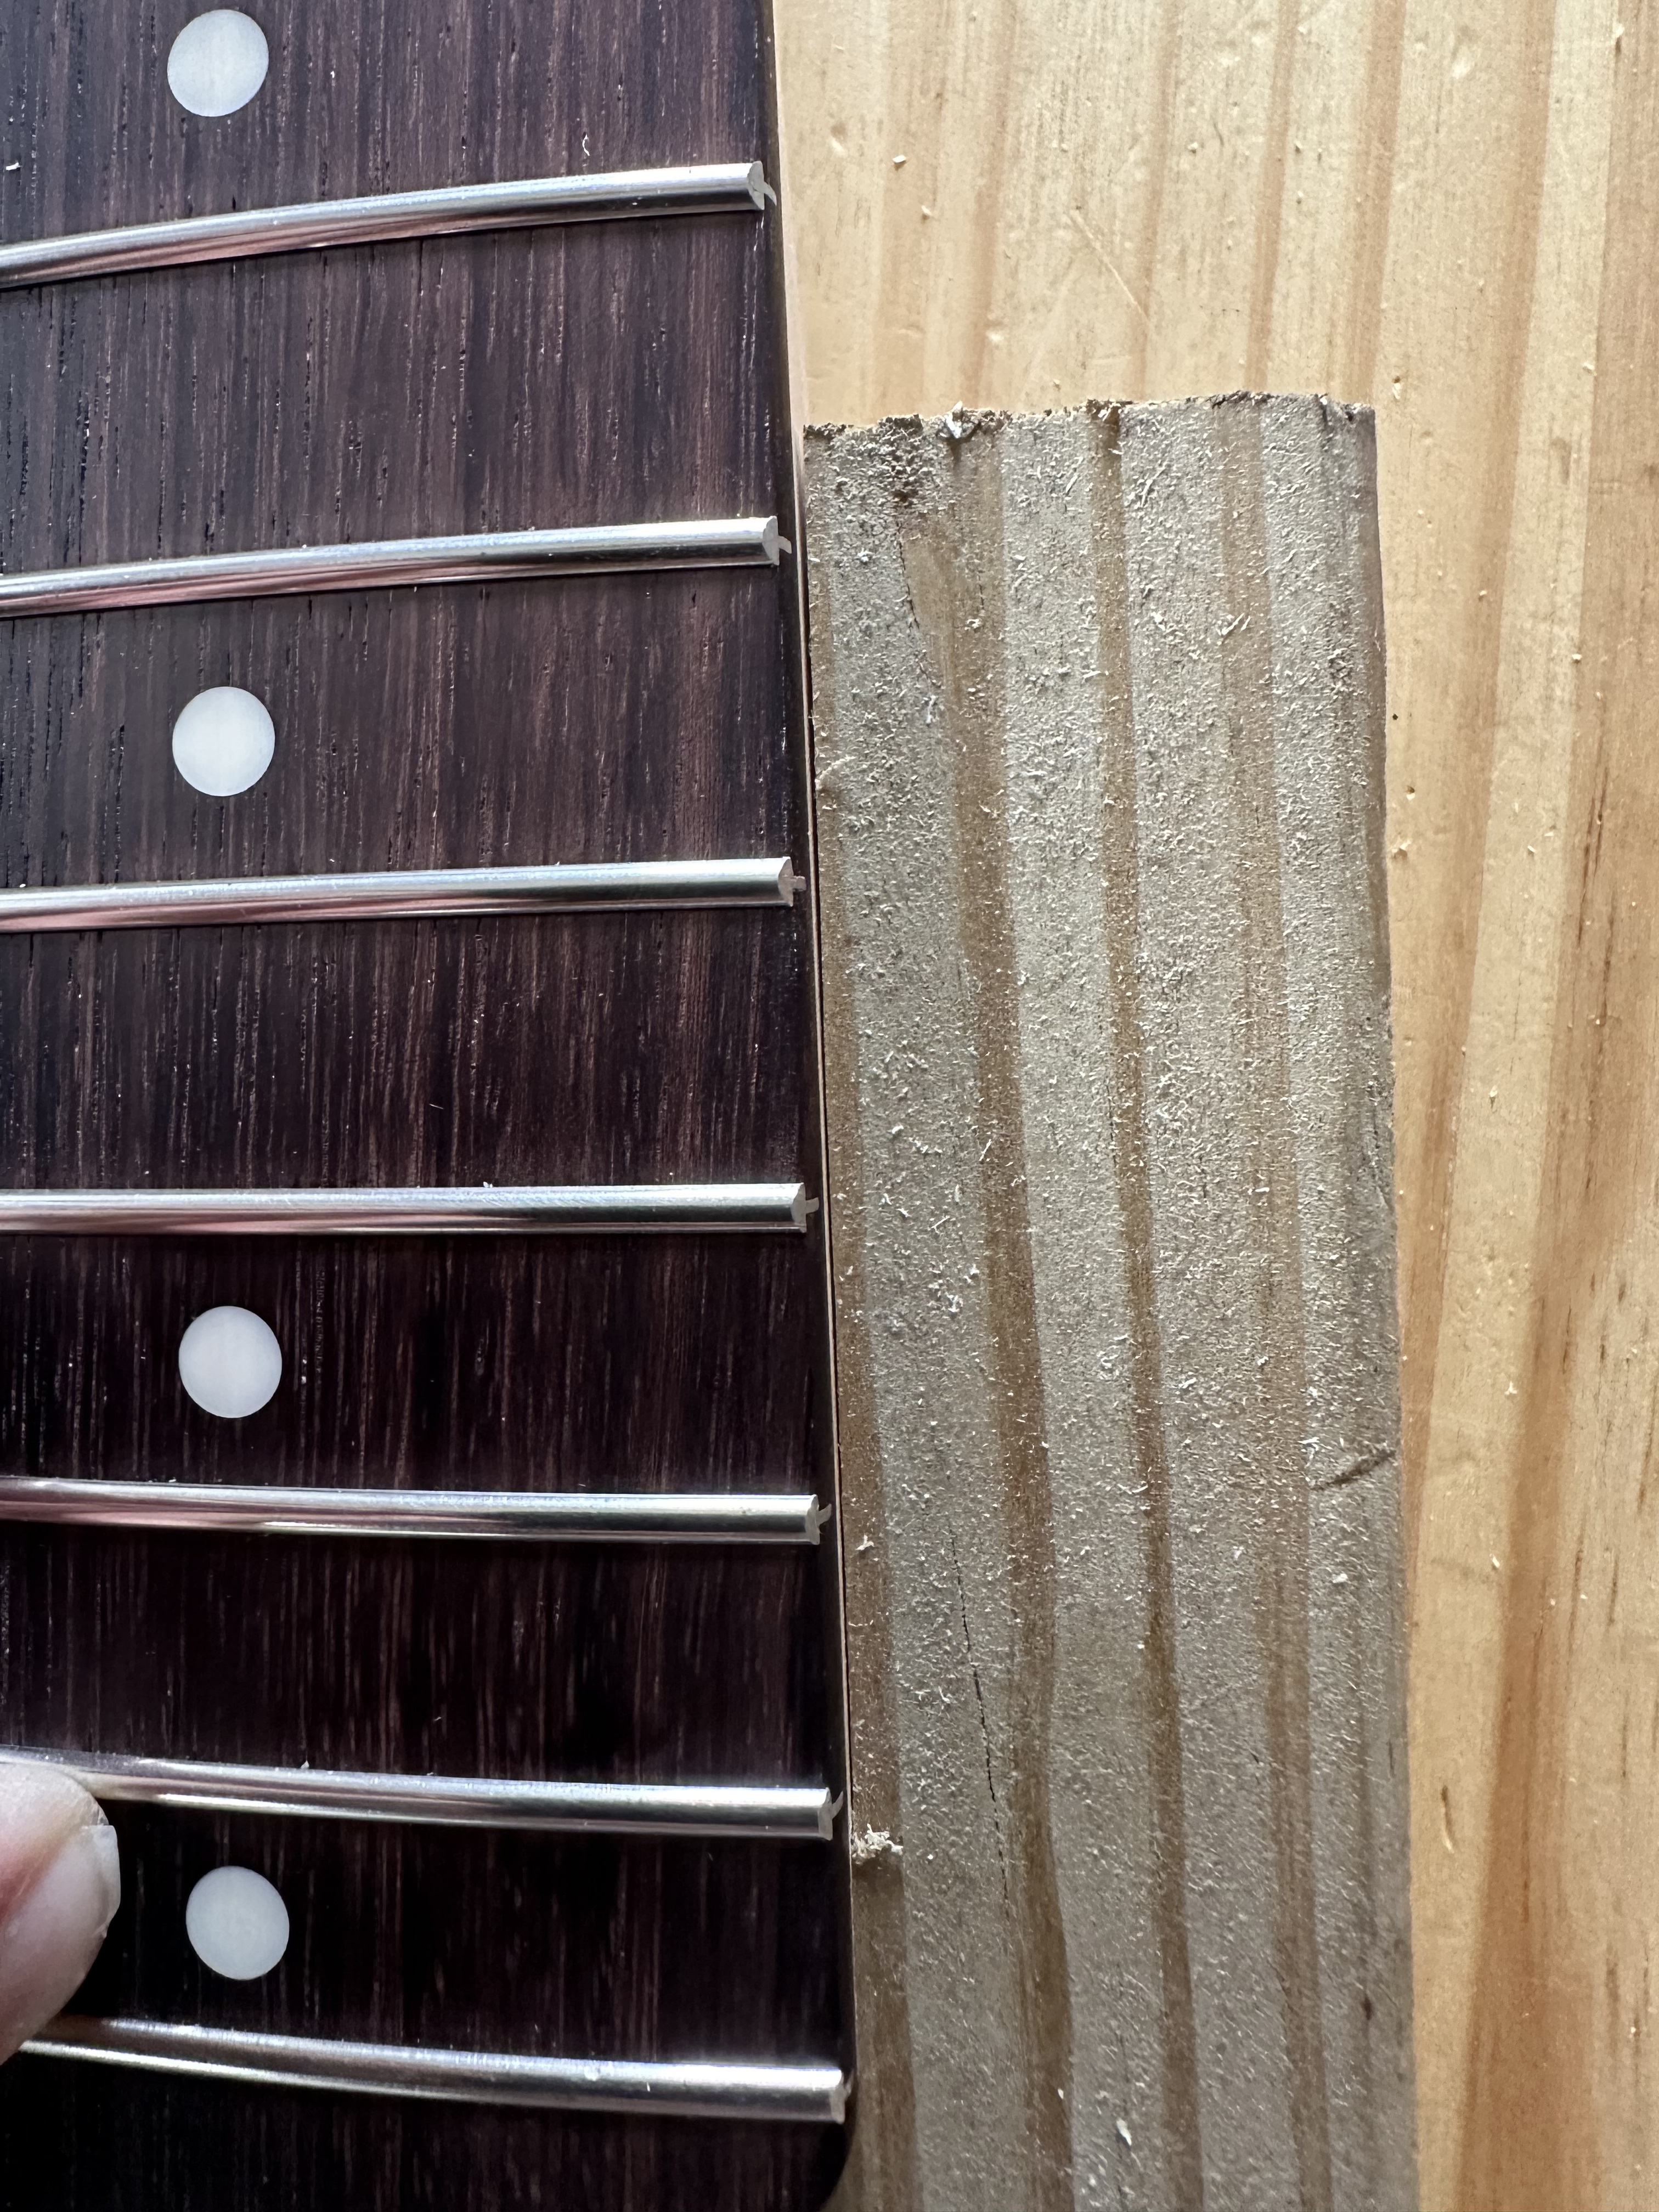
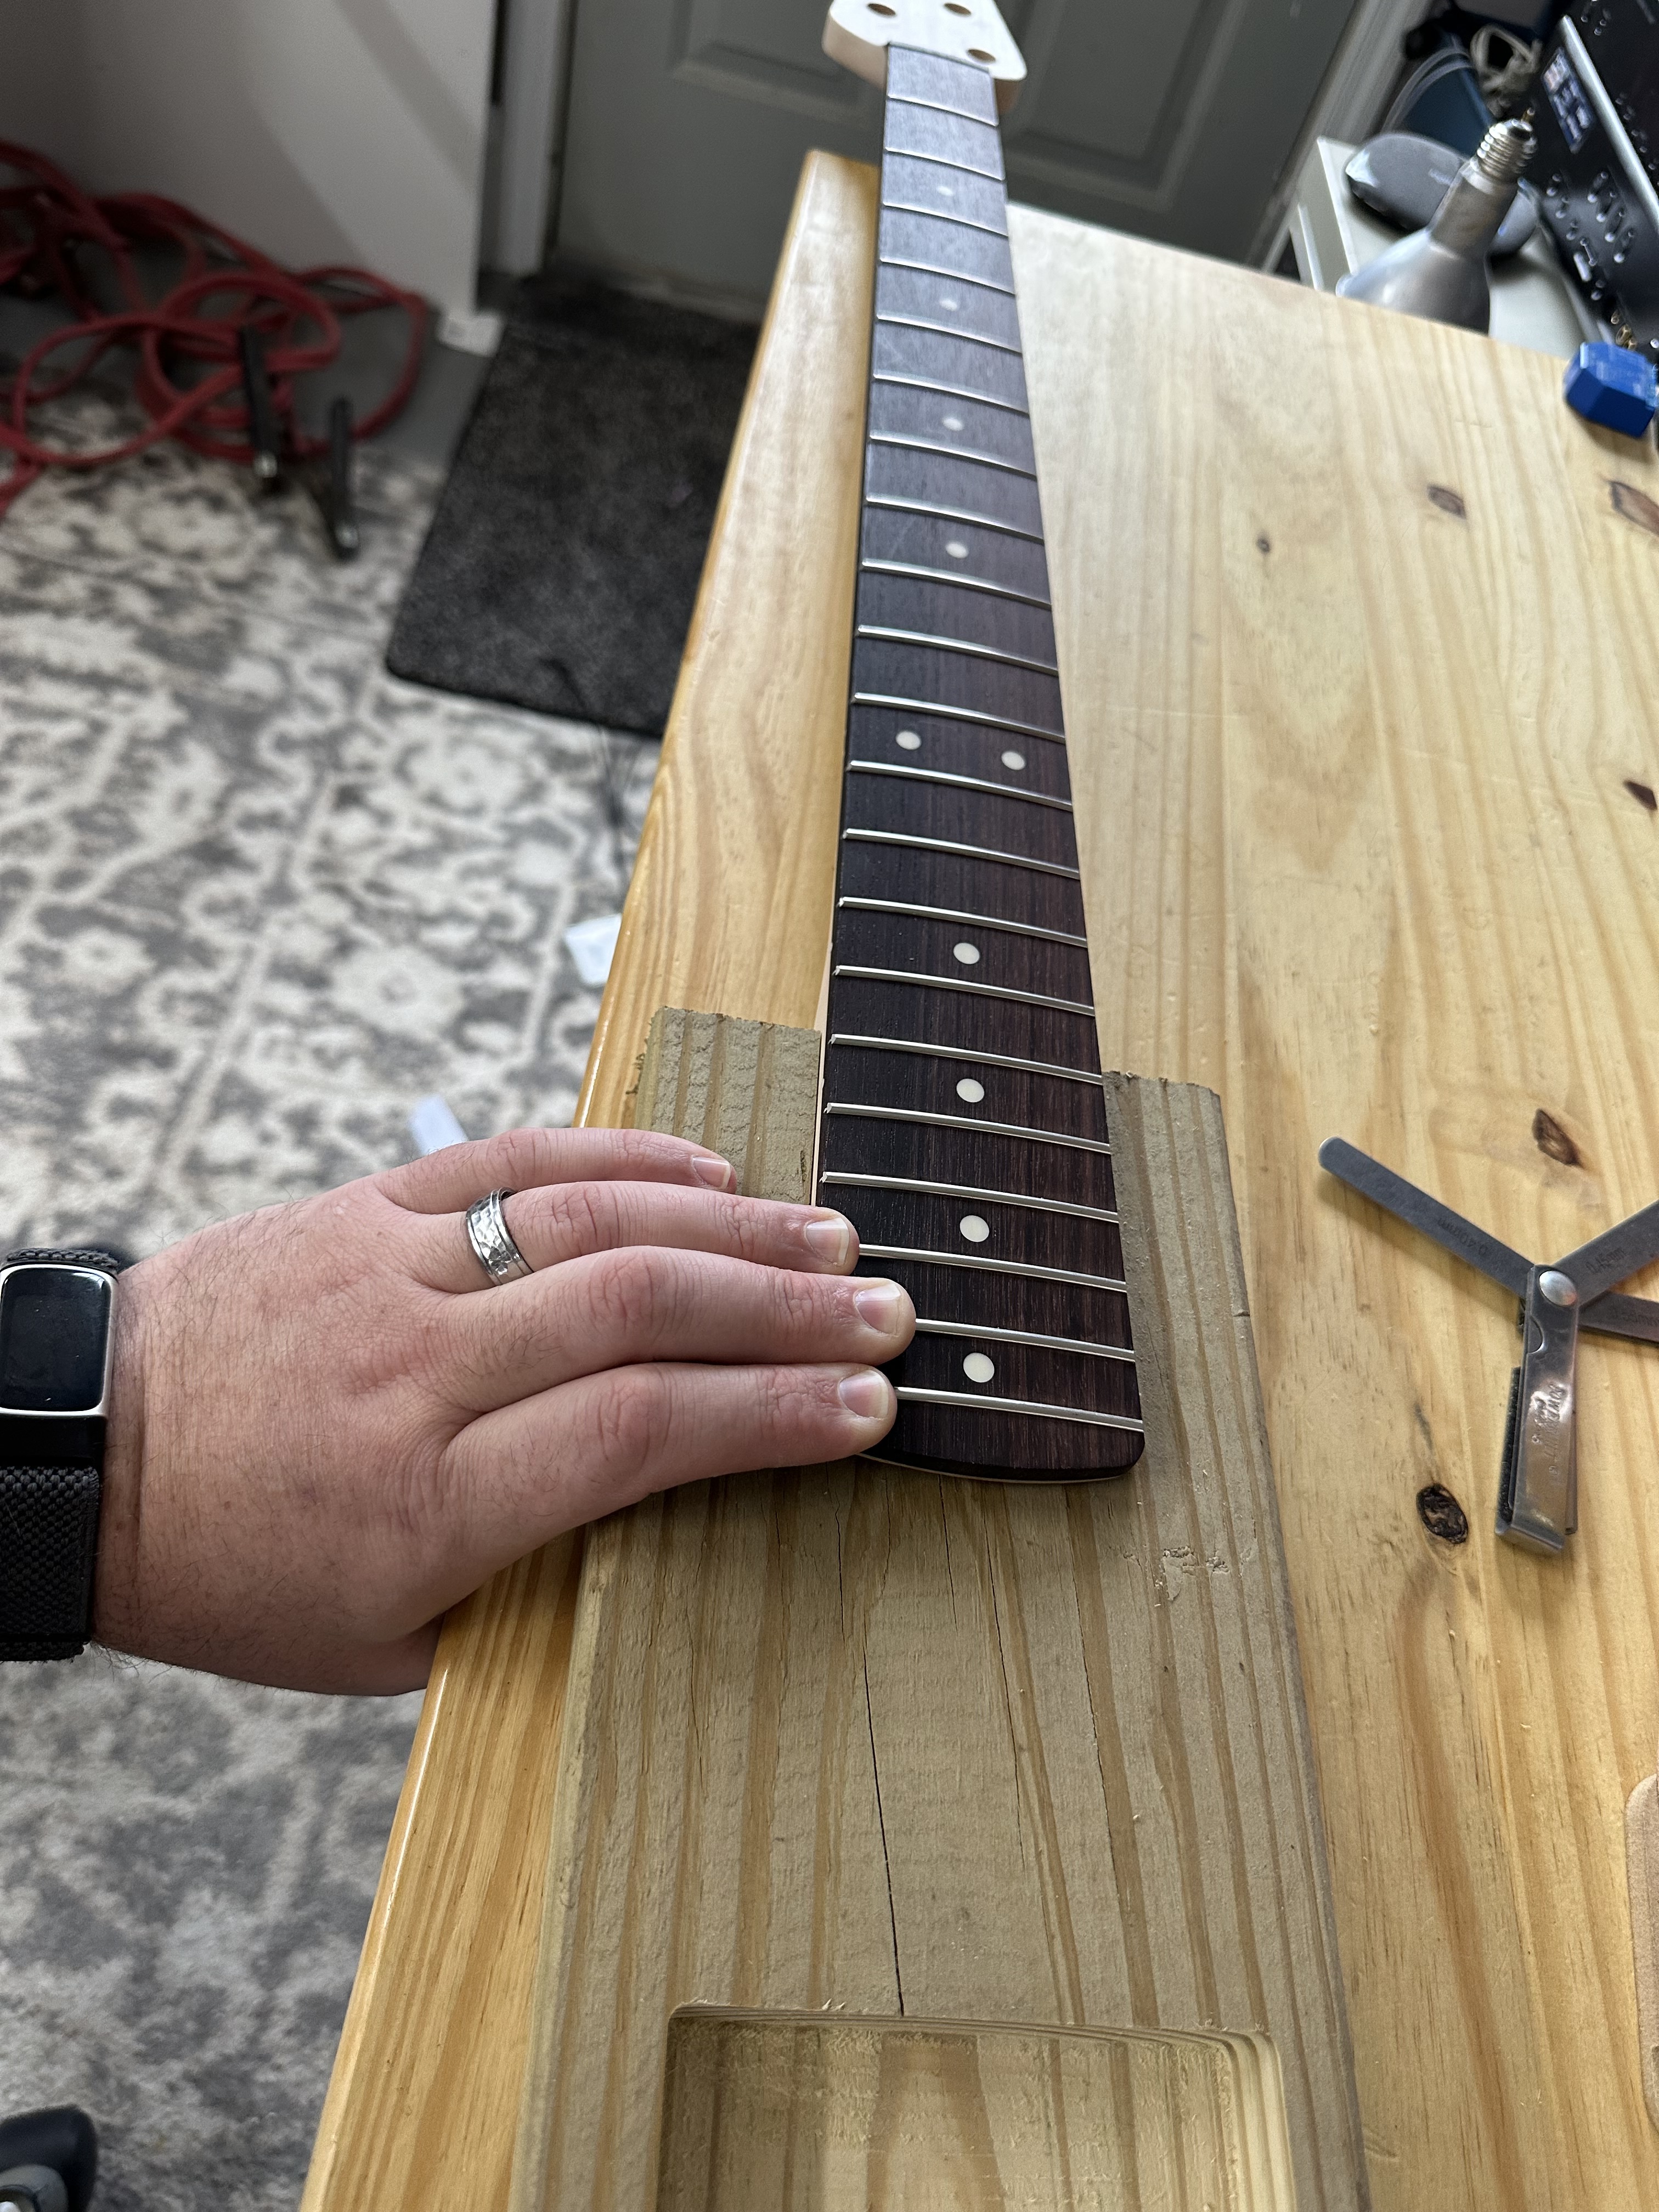
  • AllParts BRO-5 neck. (I wanted to use a Warmoth Deluxe 5 because of the asymmetrical neck profile, and still may, but I have this neck on hand already)
  • Hipshot Ultralight Tuners
  • Dunlop flush-mount strap locks

Things yet to figure out:

  • Finish
  • Pickguard or not.
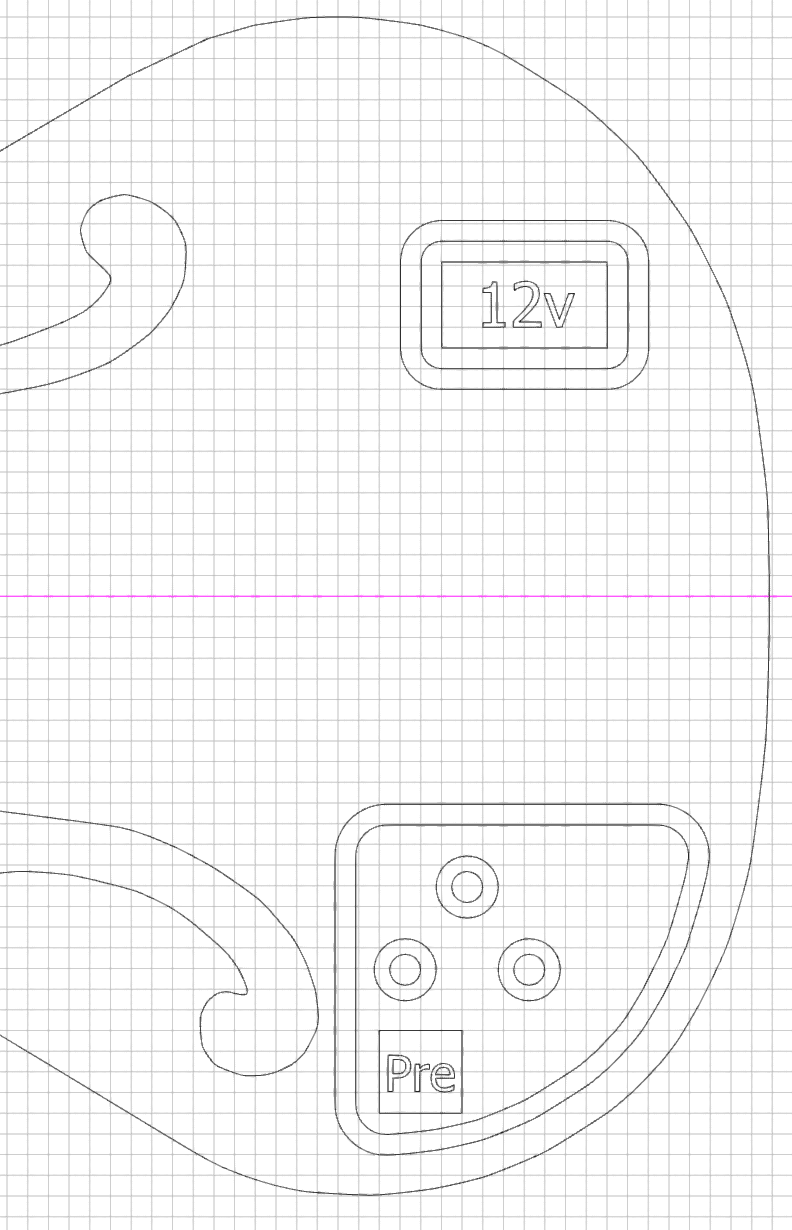
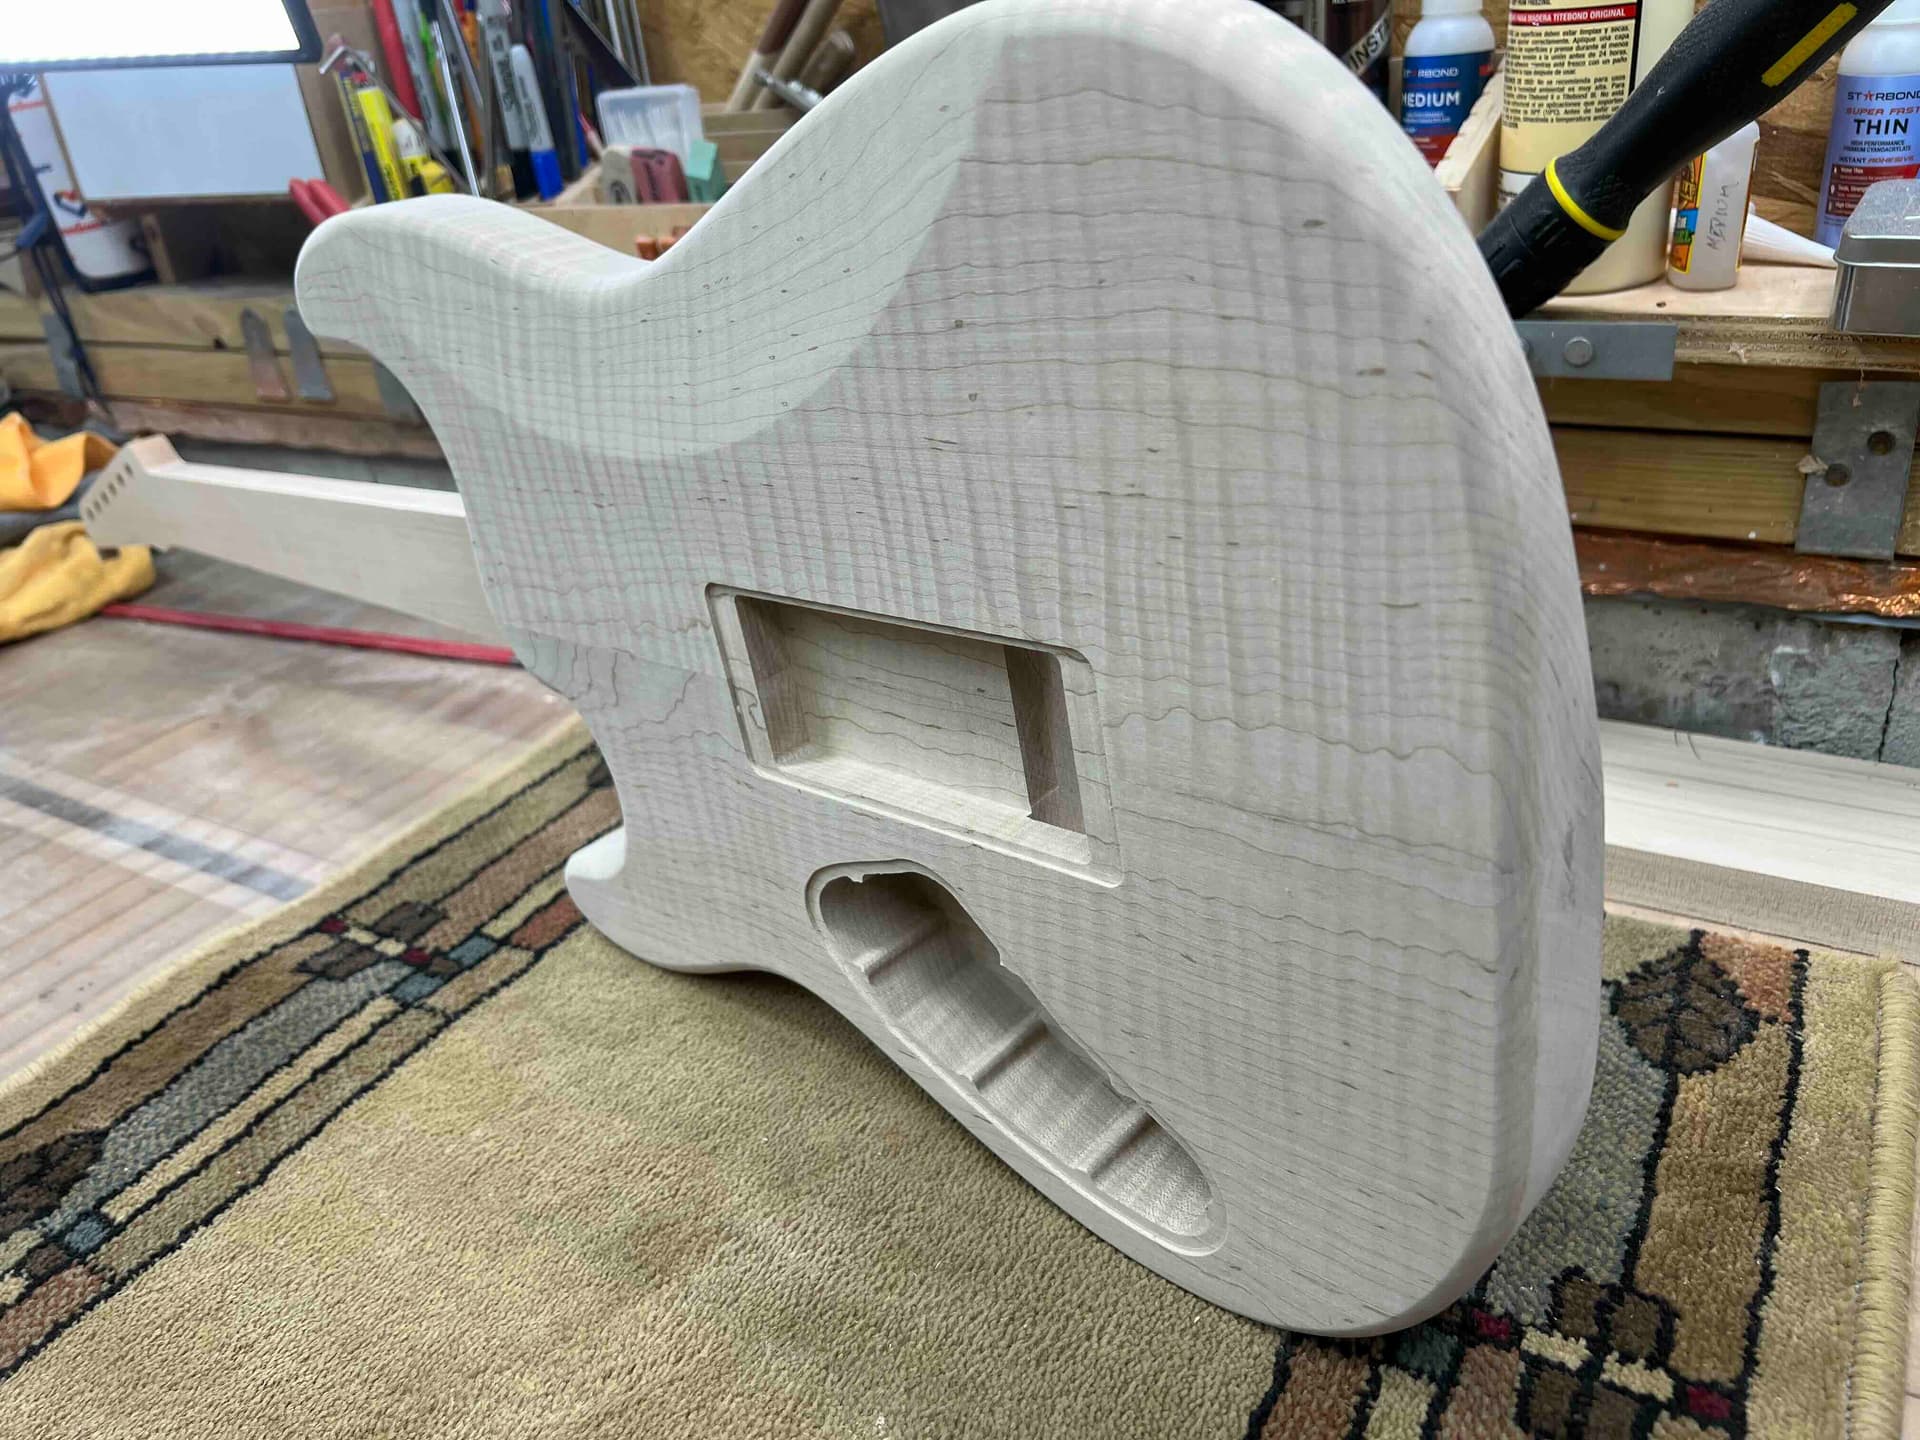
  • Depending on pick guard, then I would need to create my control cavity (or maybe more than one) from the back.

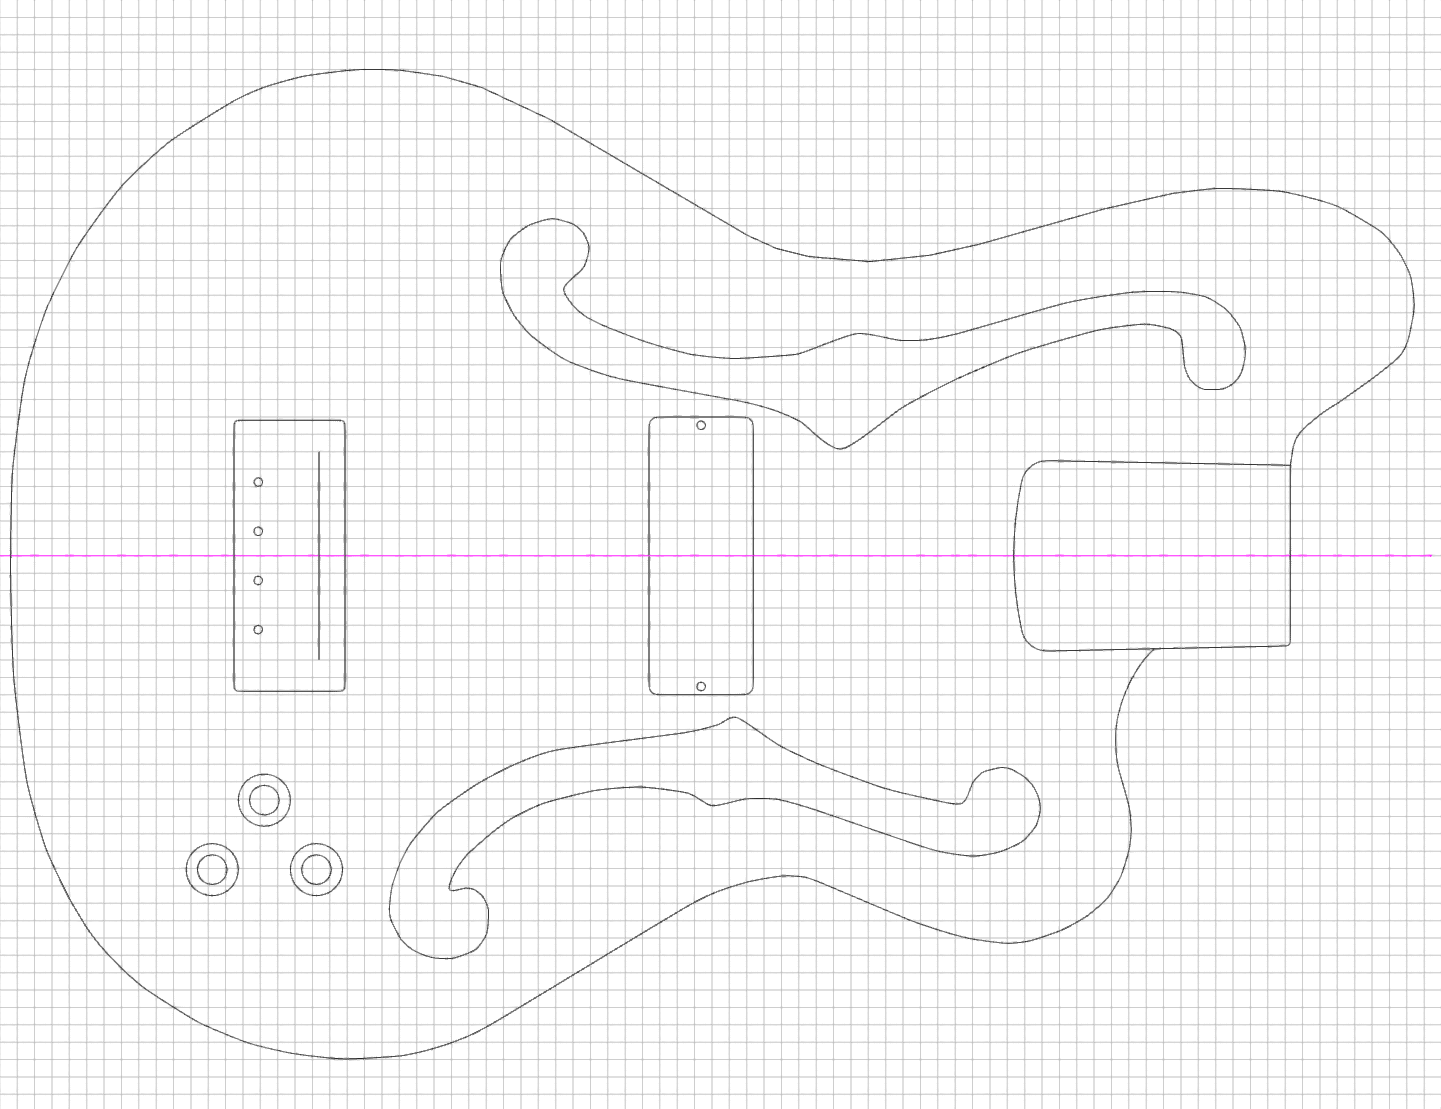
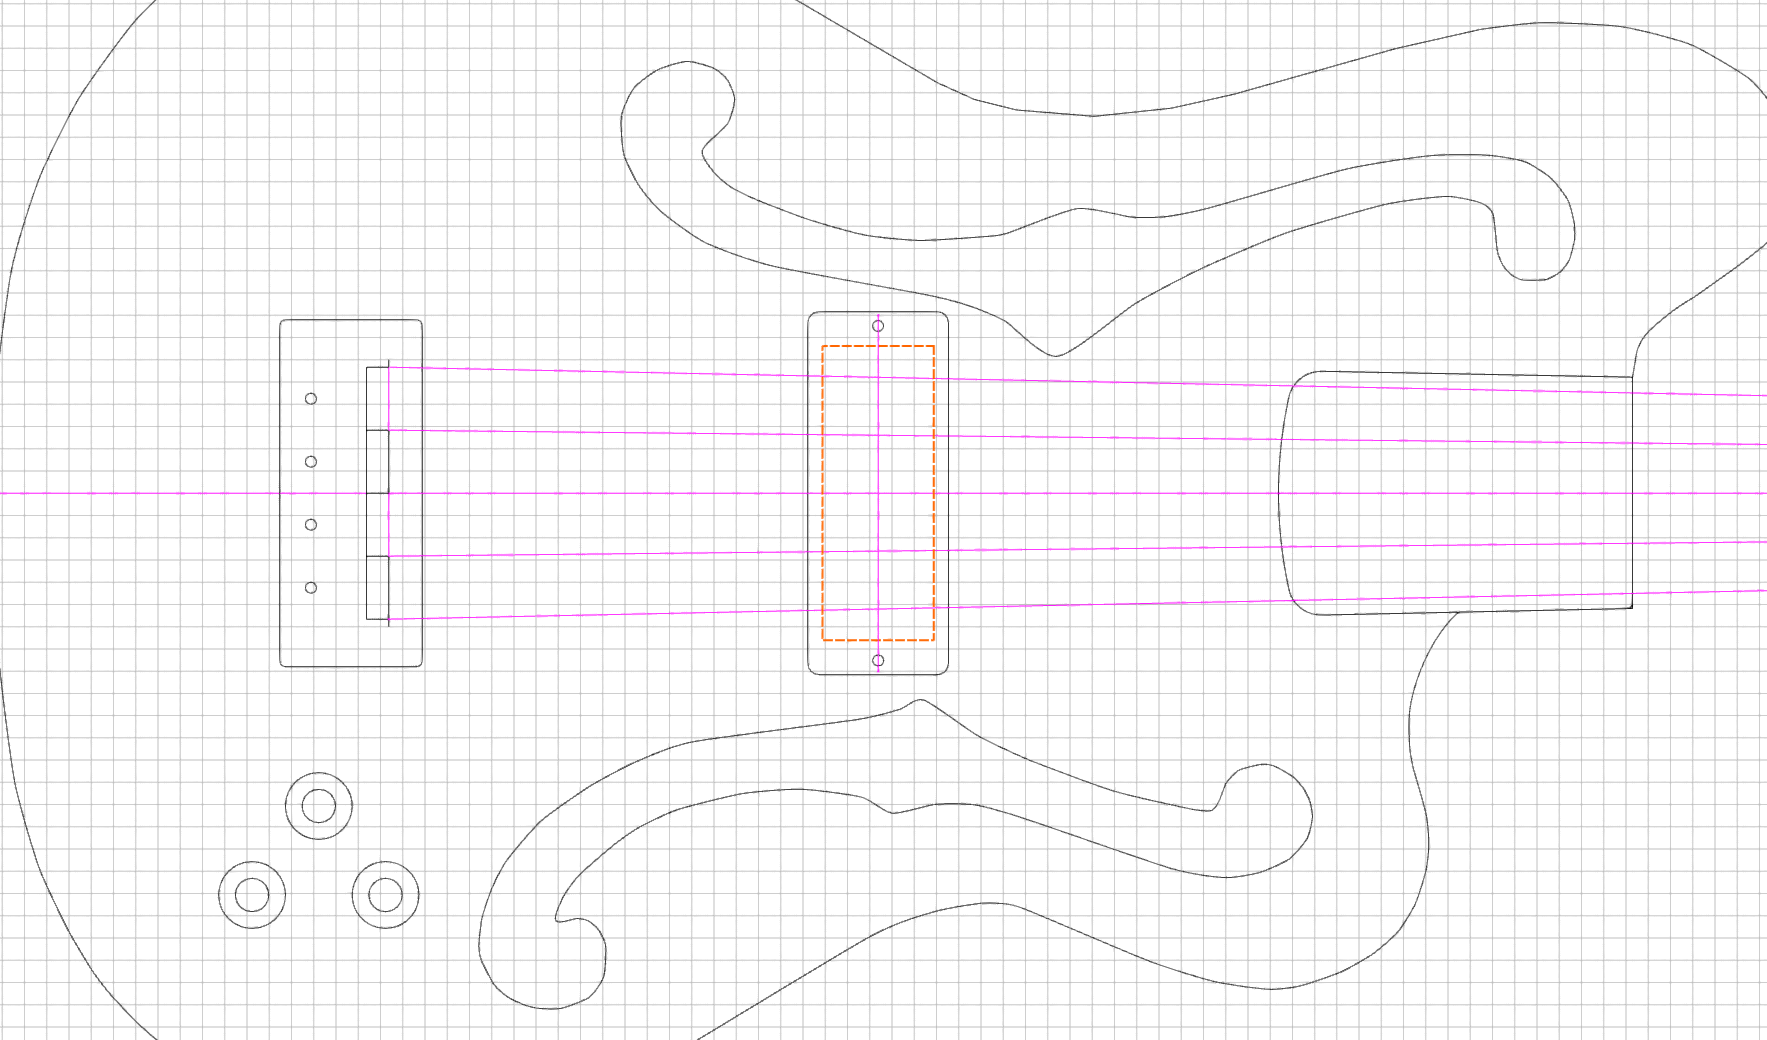
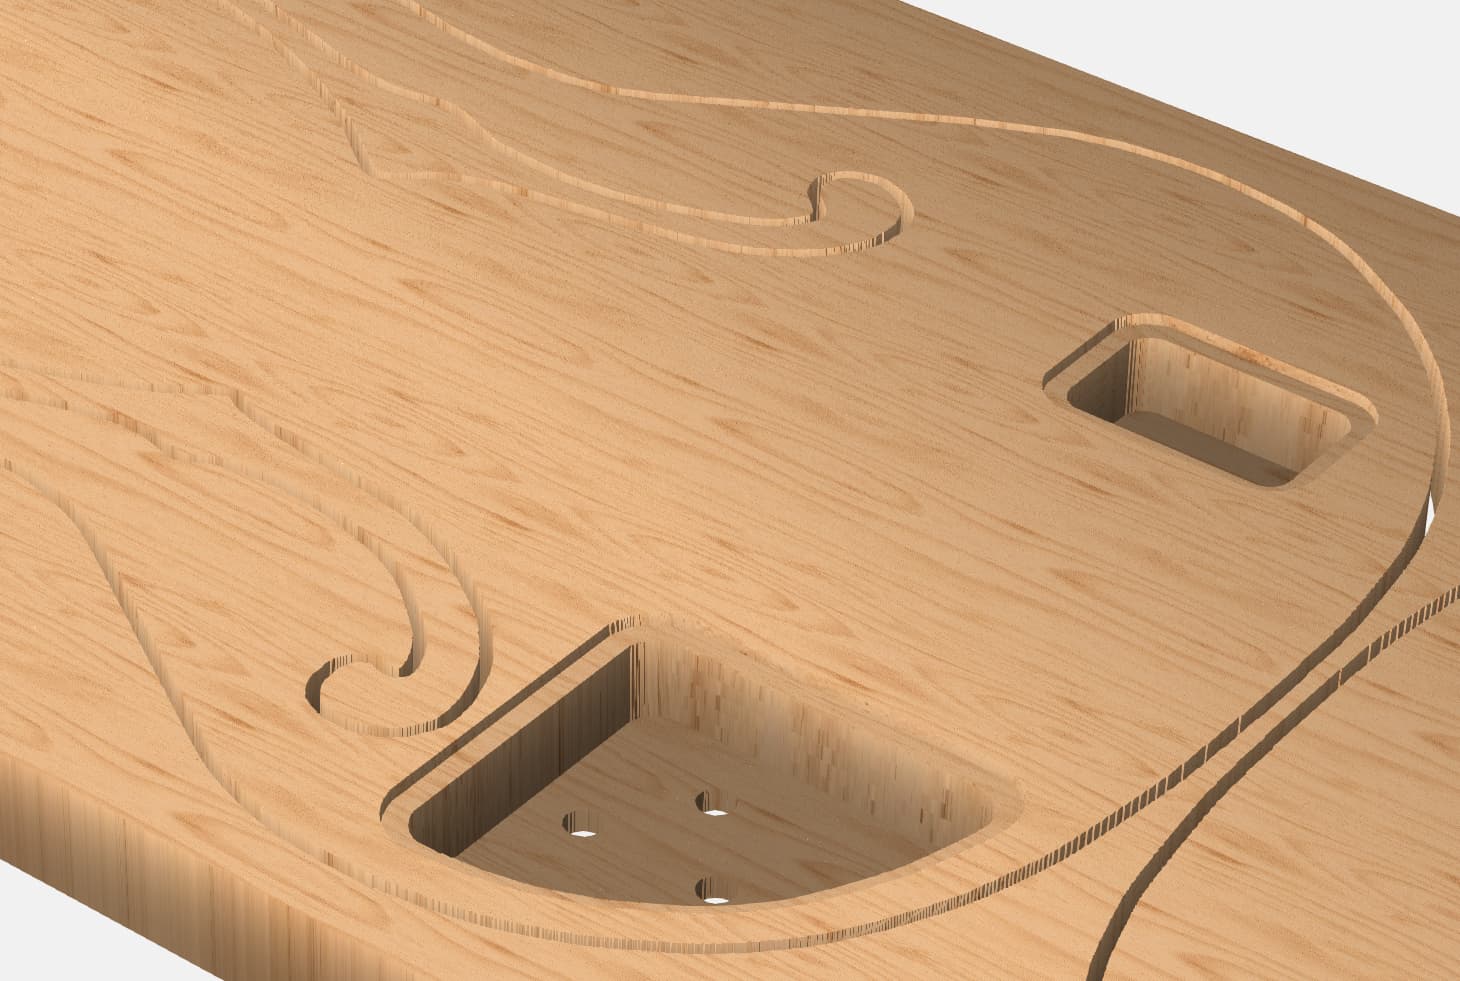
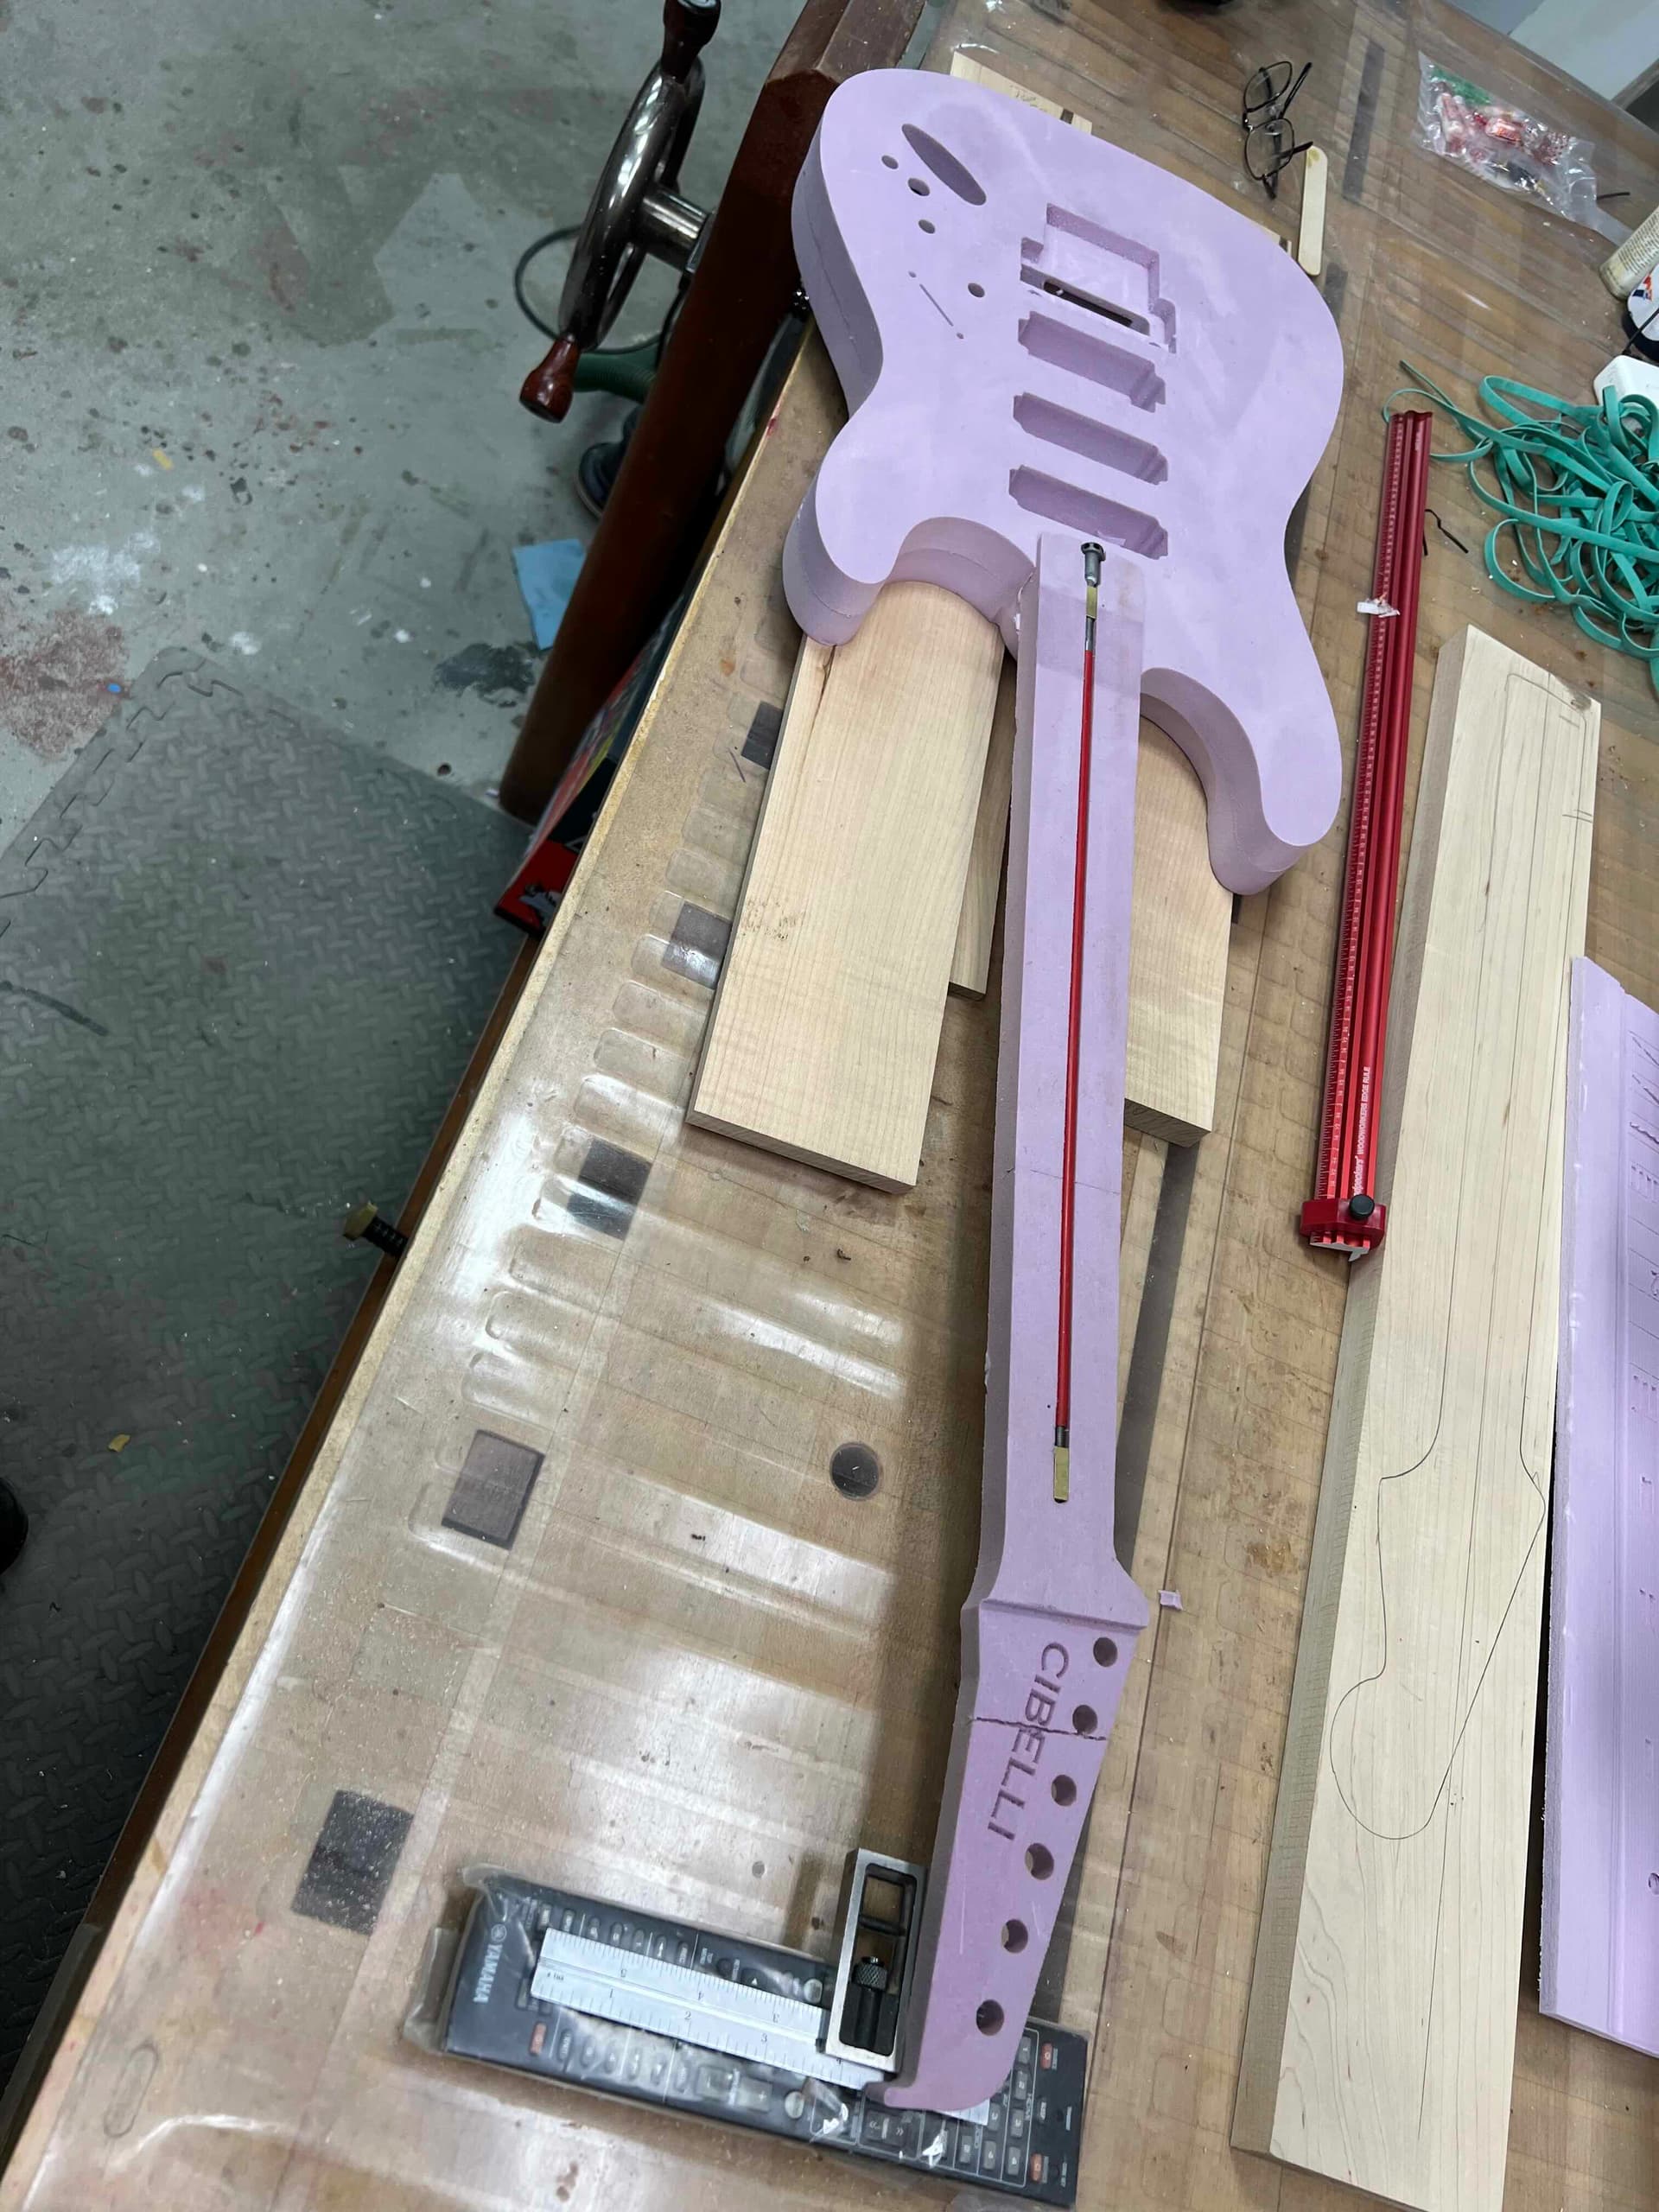
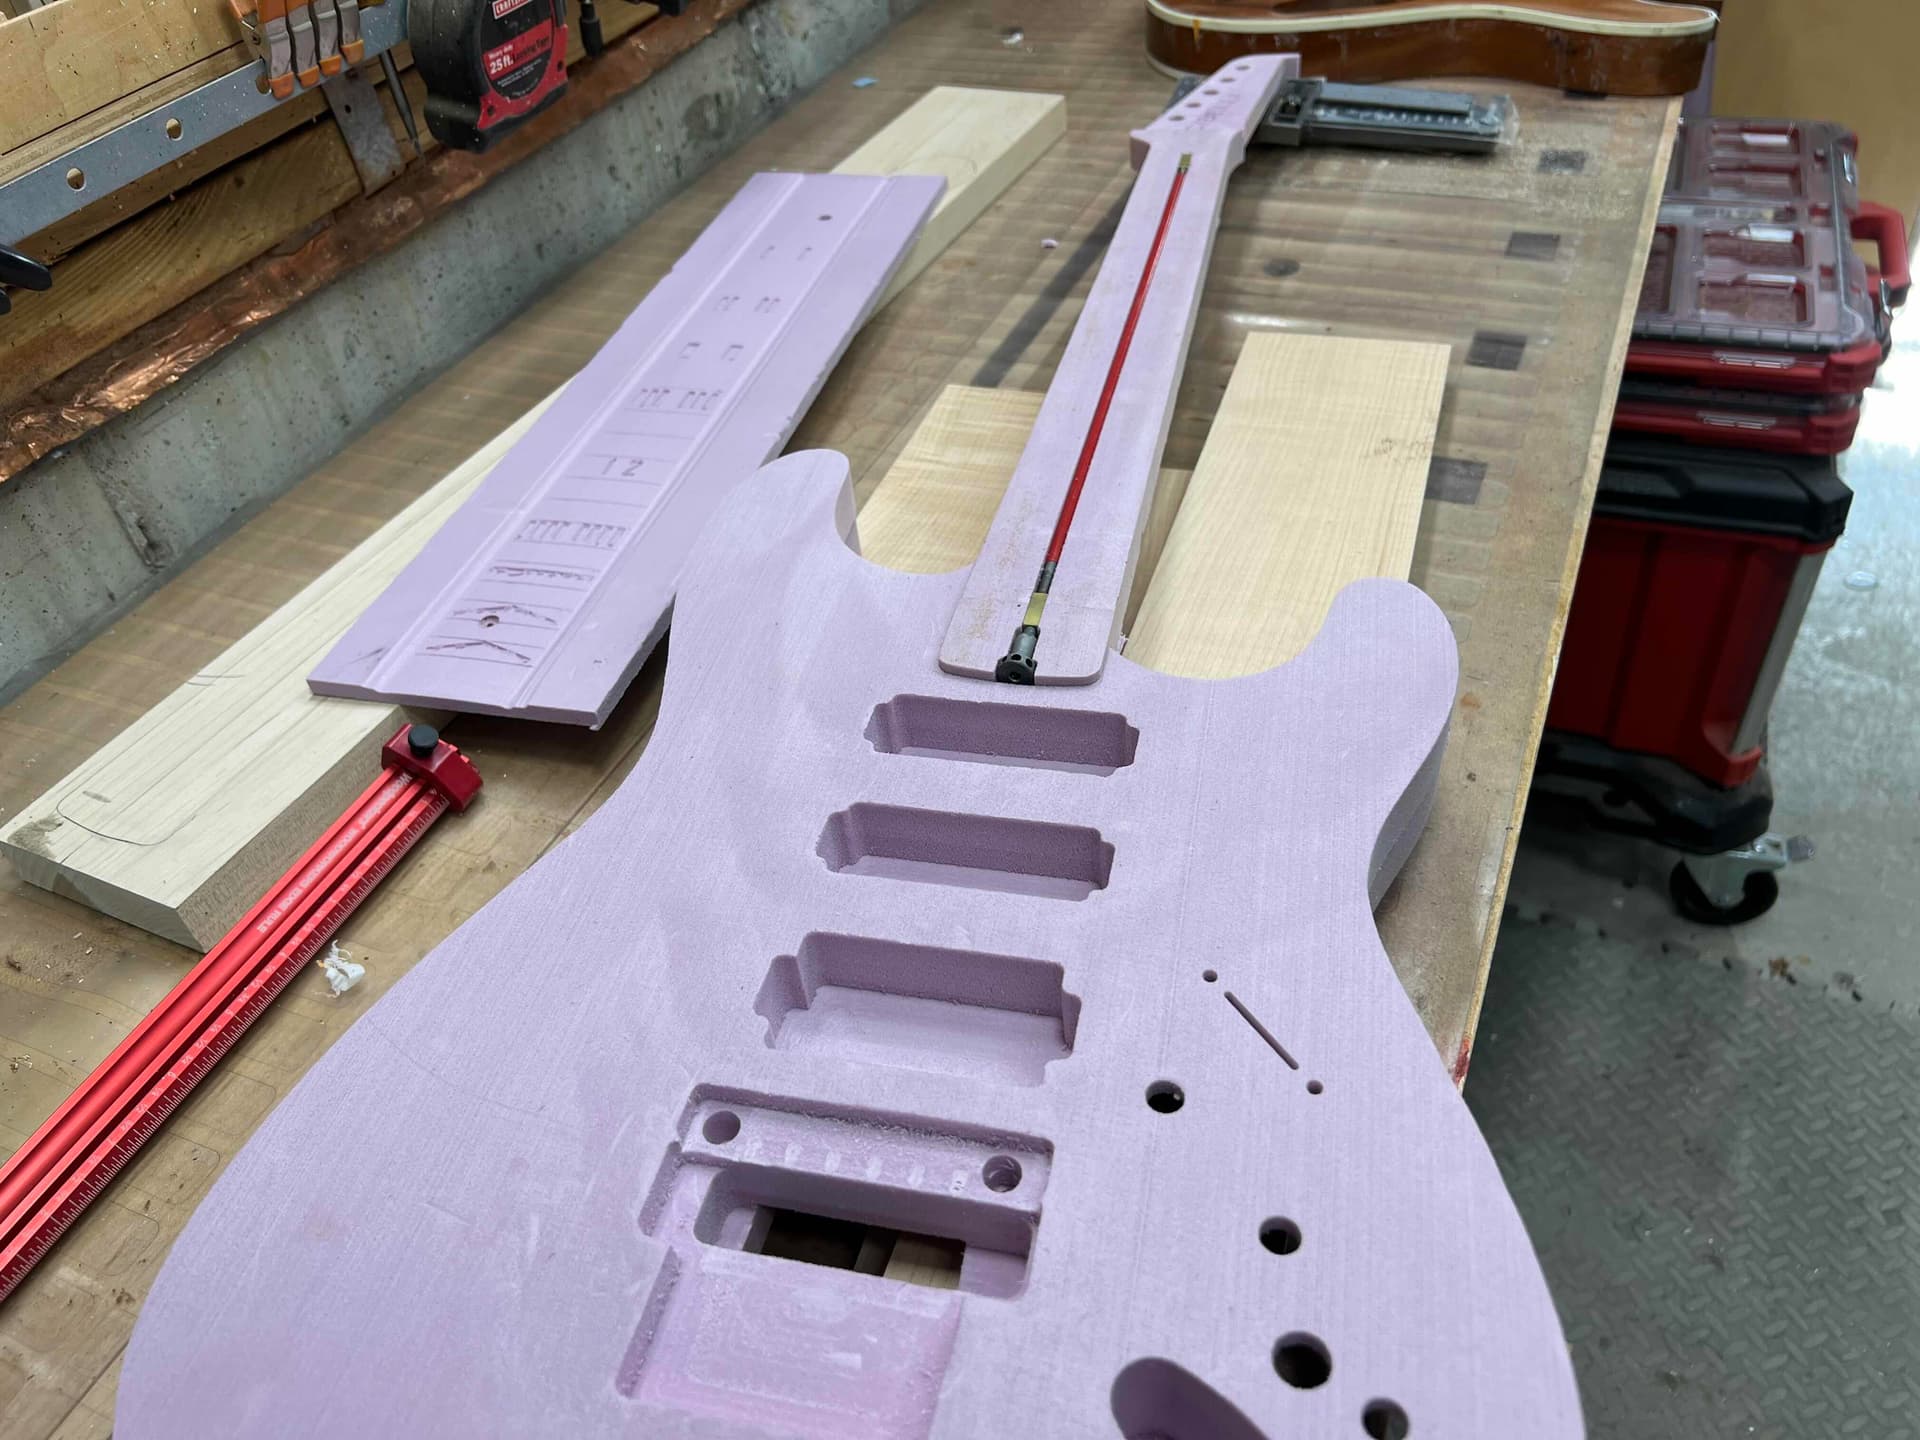
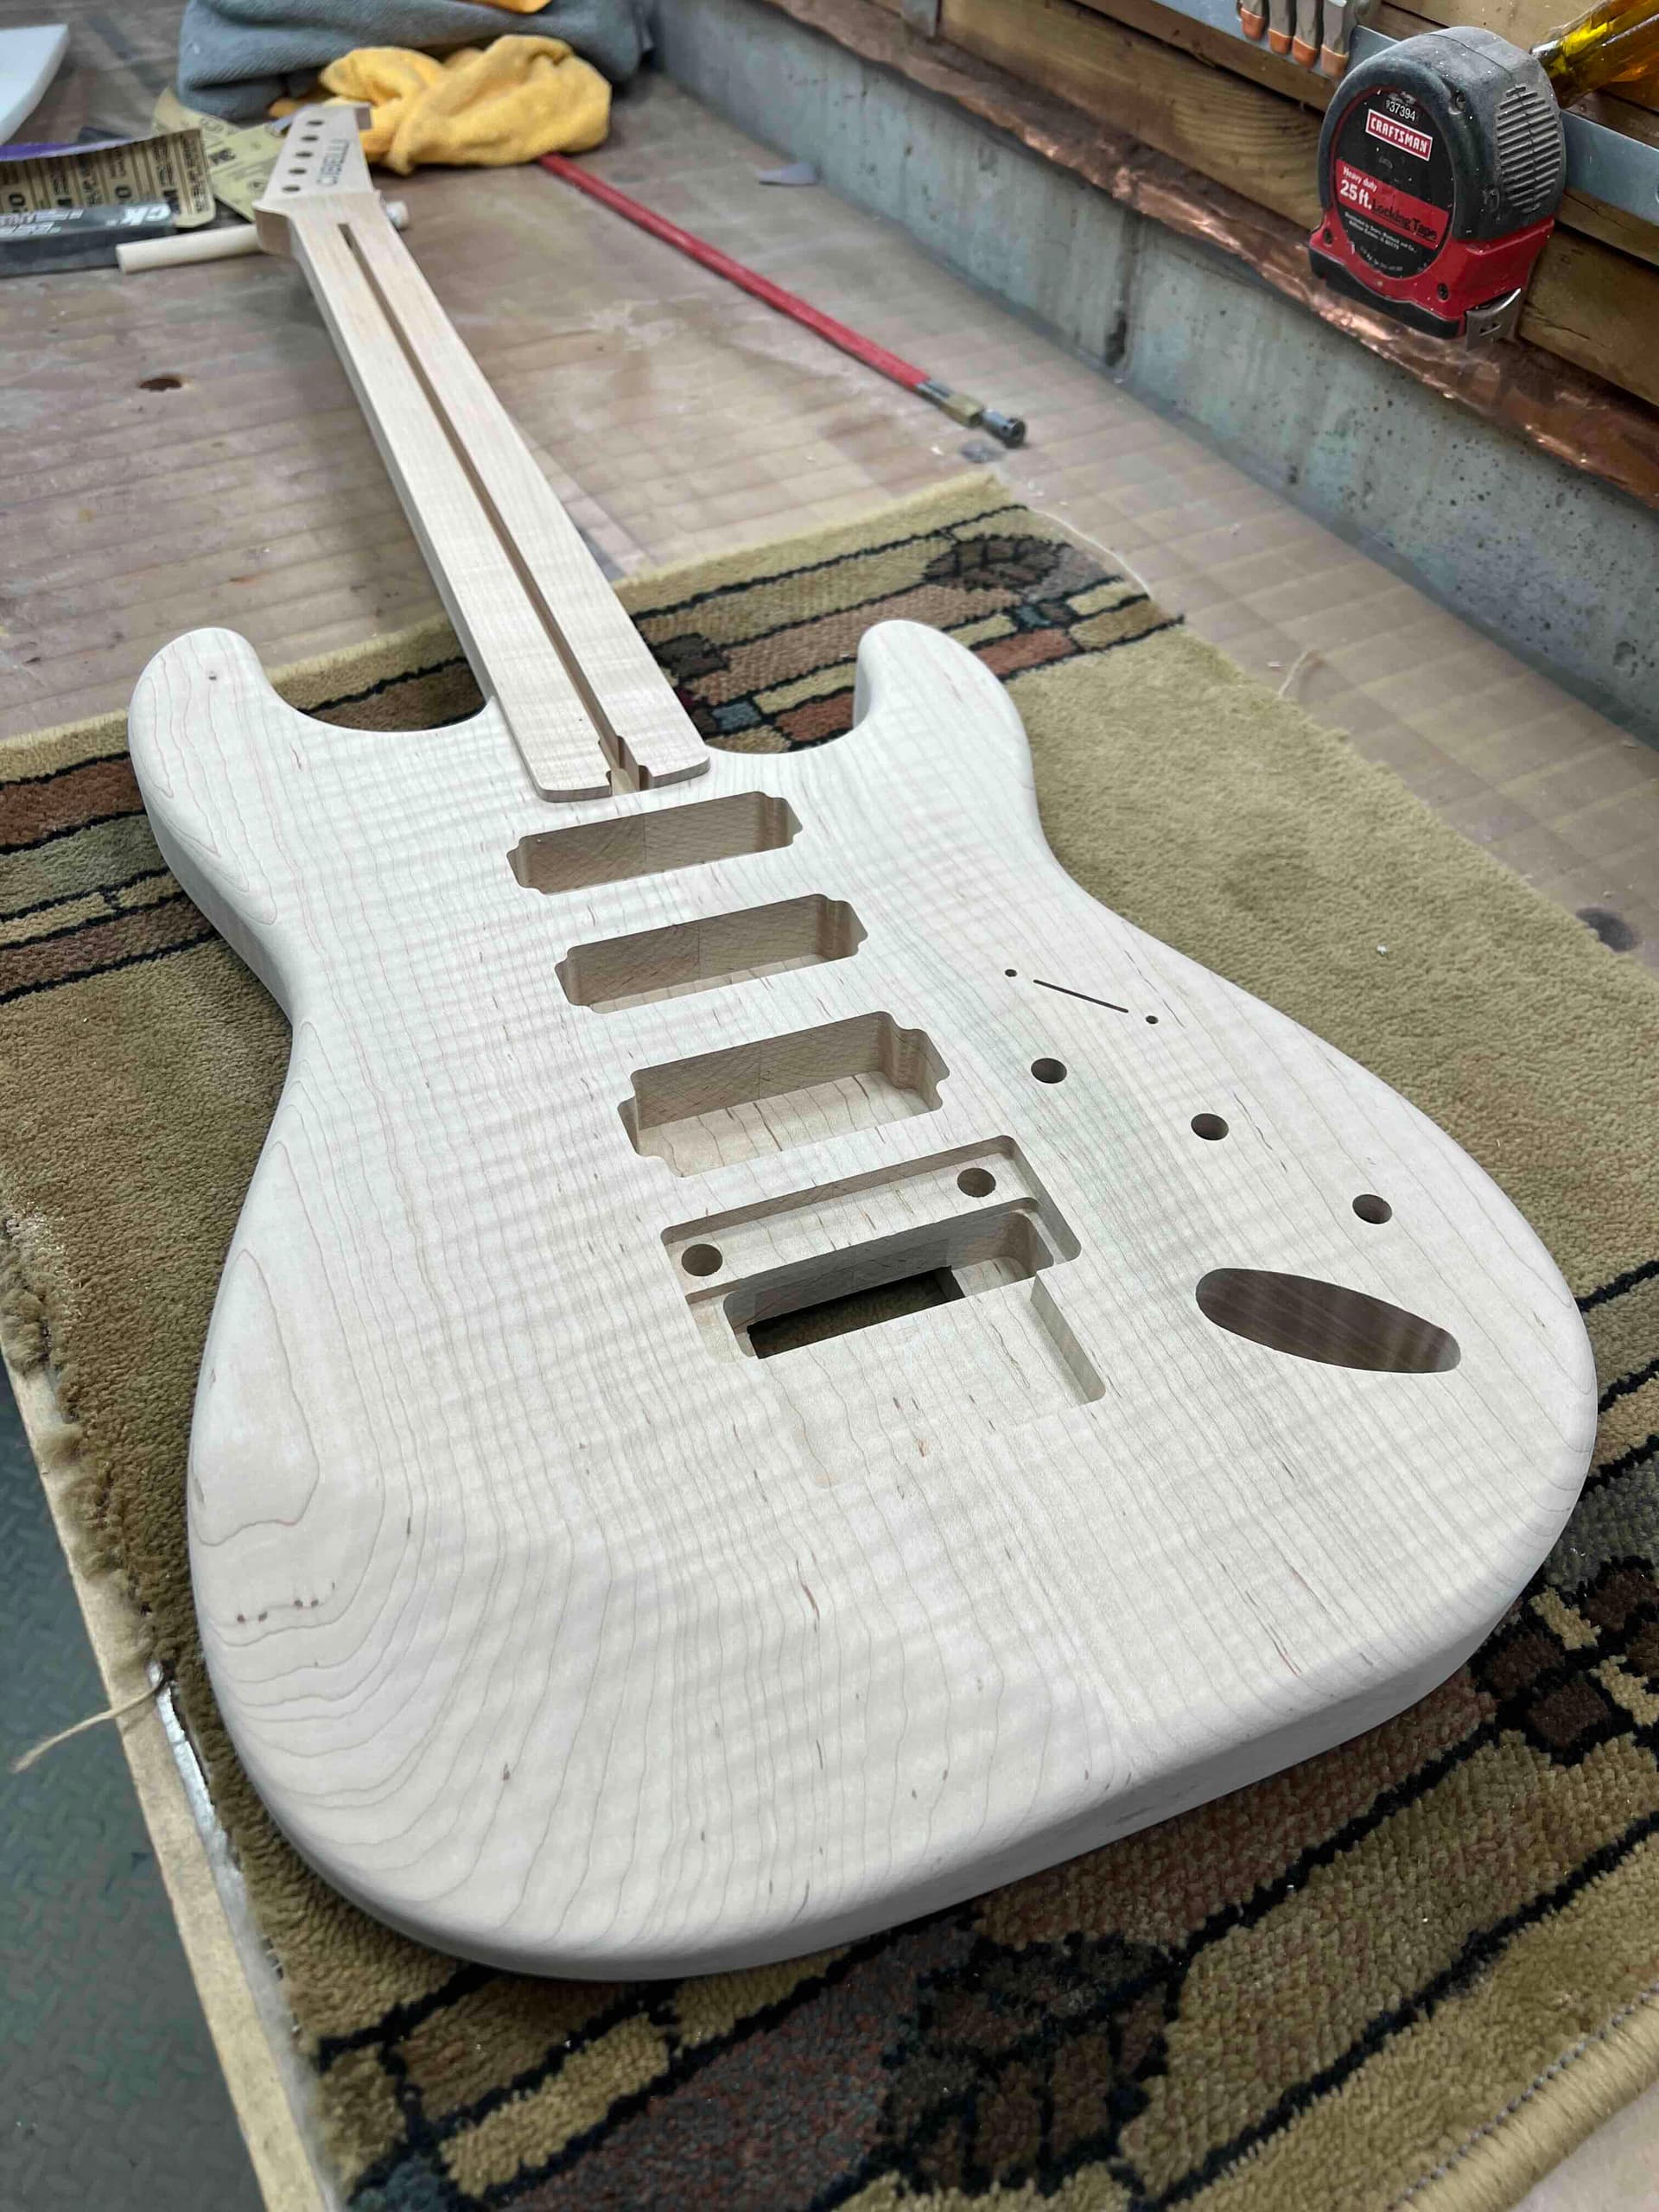
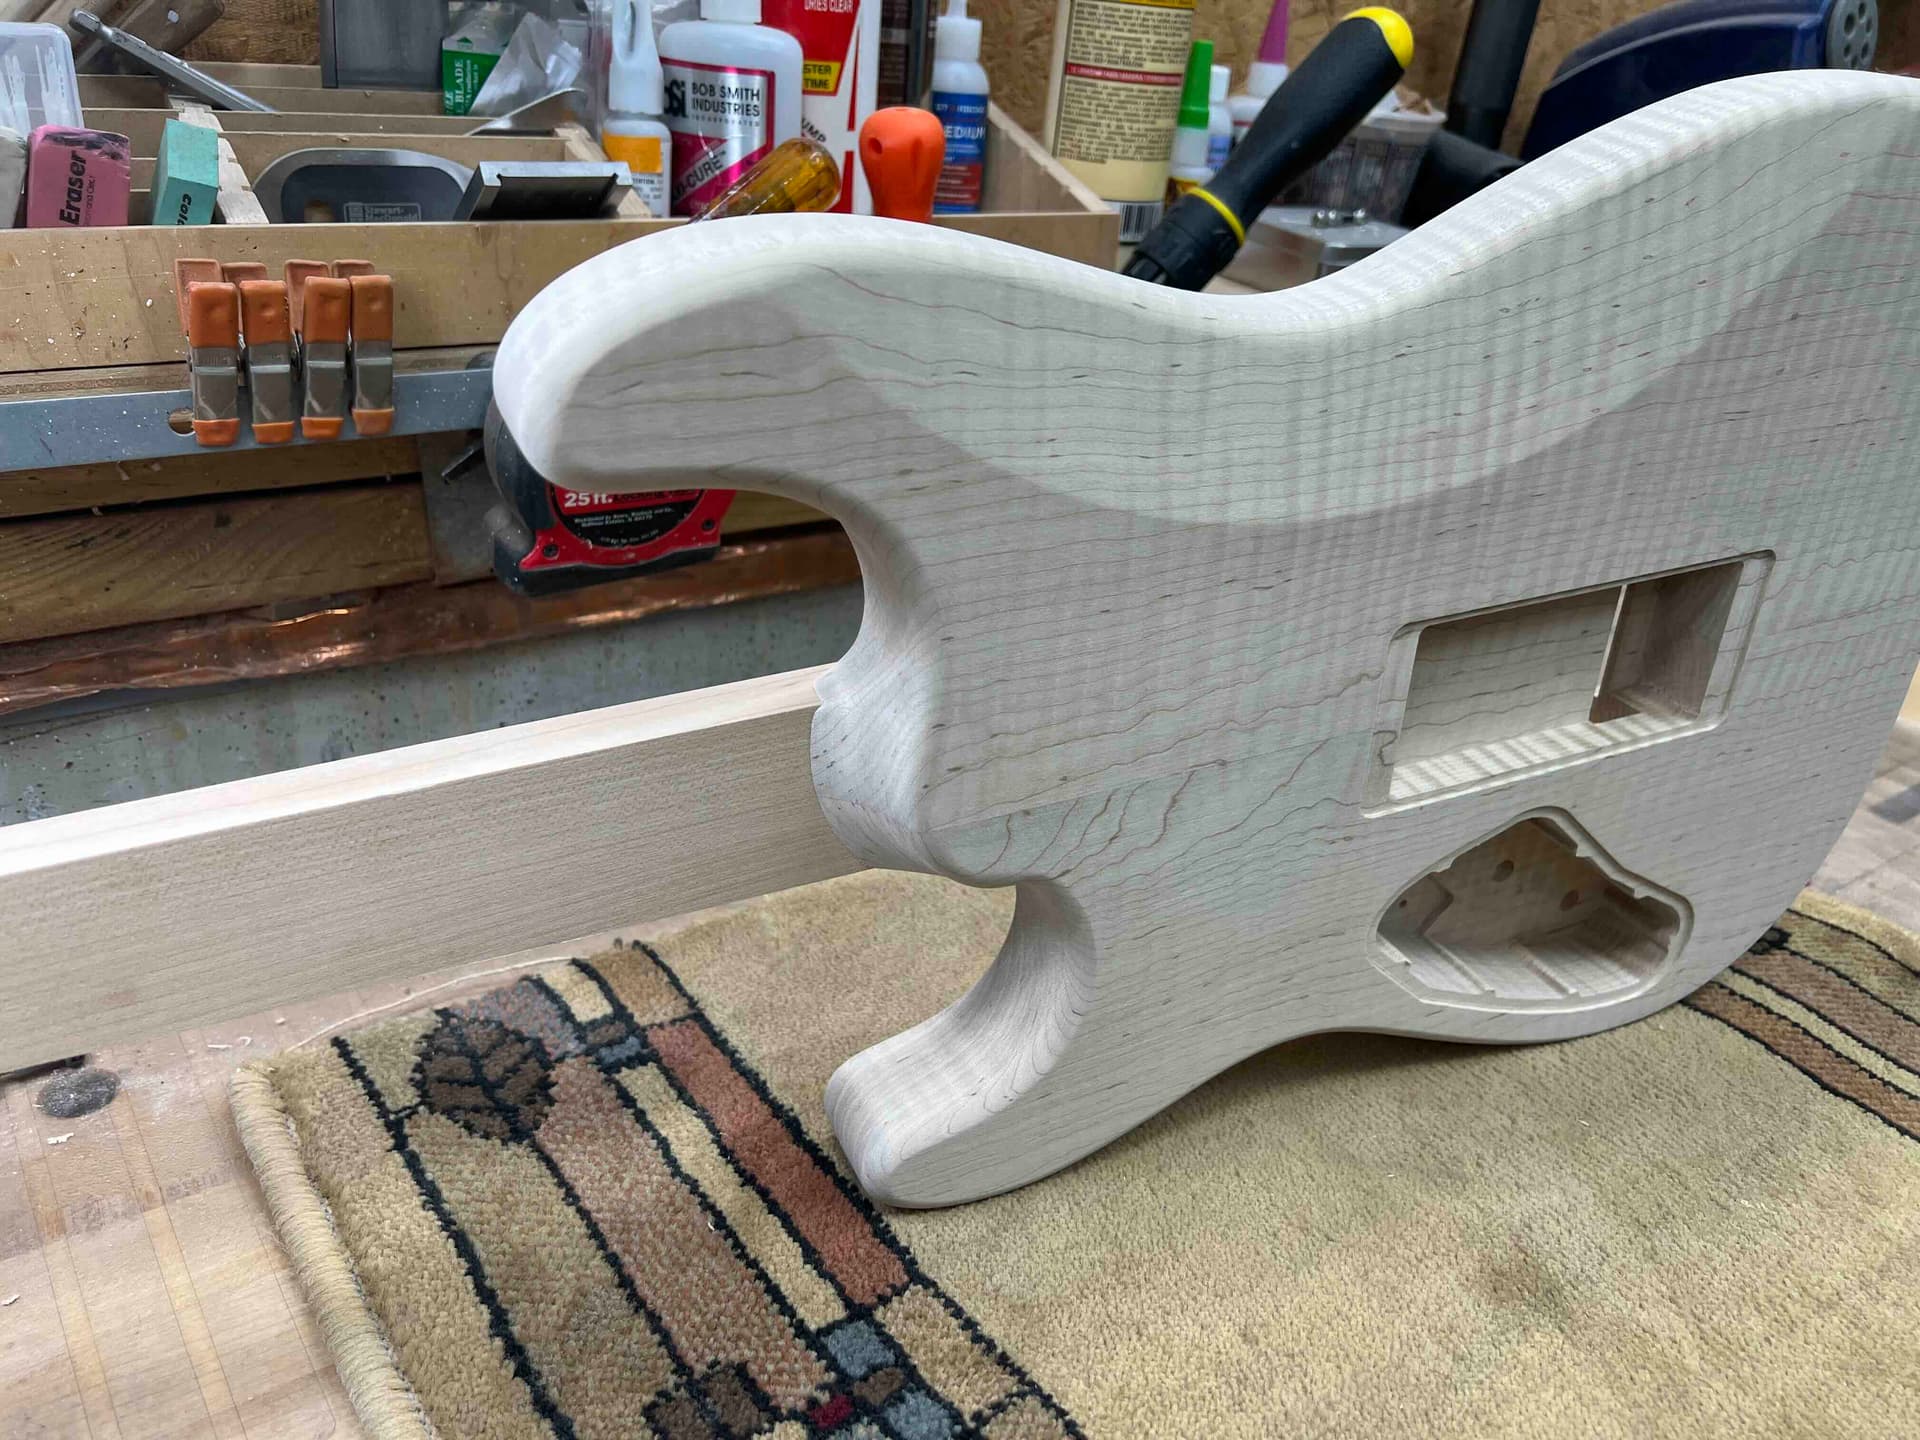
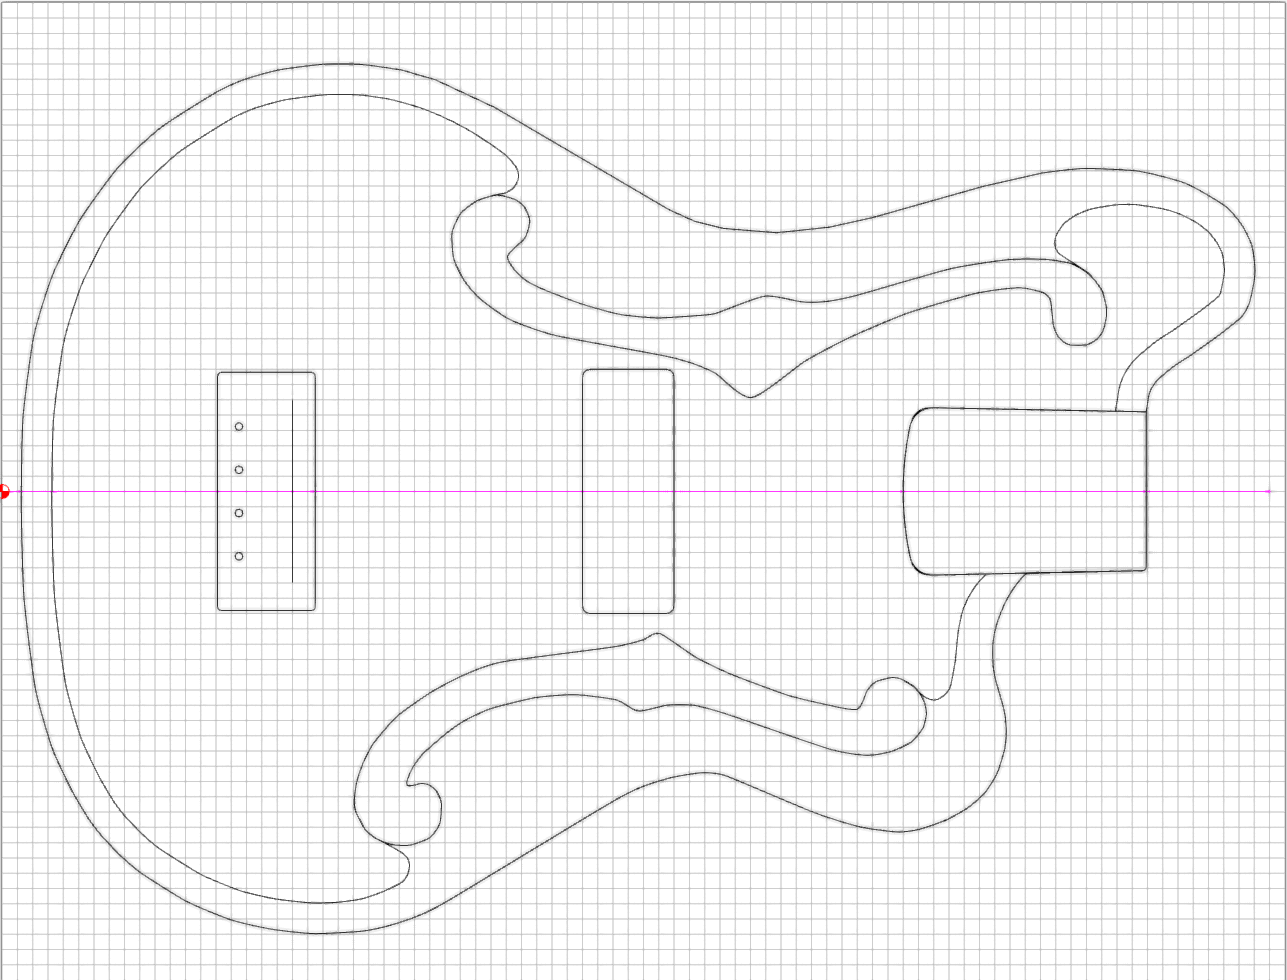
I have spent quite a few hours getting the neck pocket right, or at least what I think is right, and getting the bouts re-aligned to the new neck pocket size. I have also adapted the pick guard design to match this iteration of the body, neck, pickup, and bridge. So here are some shots of the design so far.

Here you can see the placement of the bridge, pickup, f holes, neck and the pick guard. No control cavity so far.

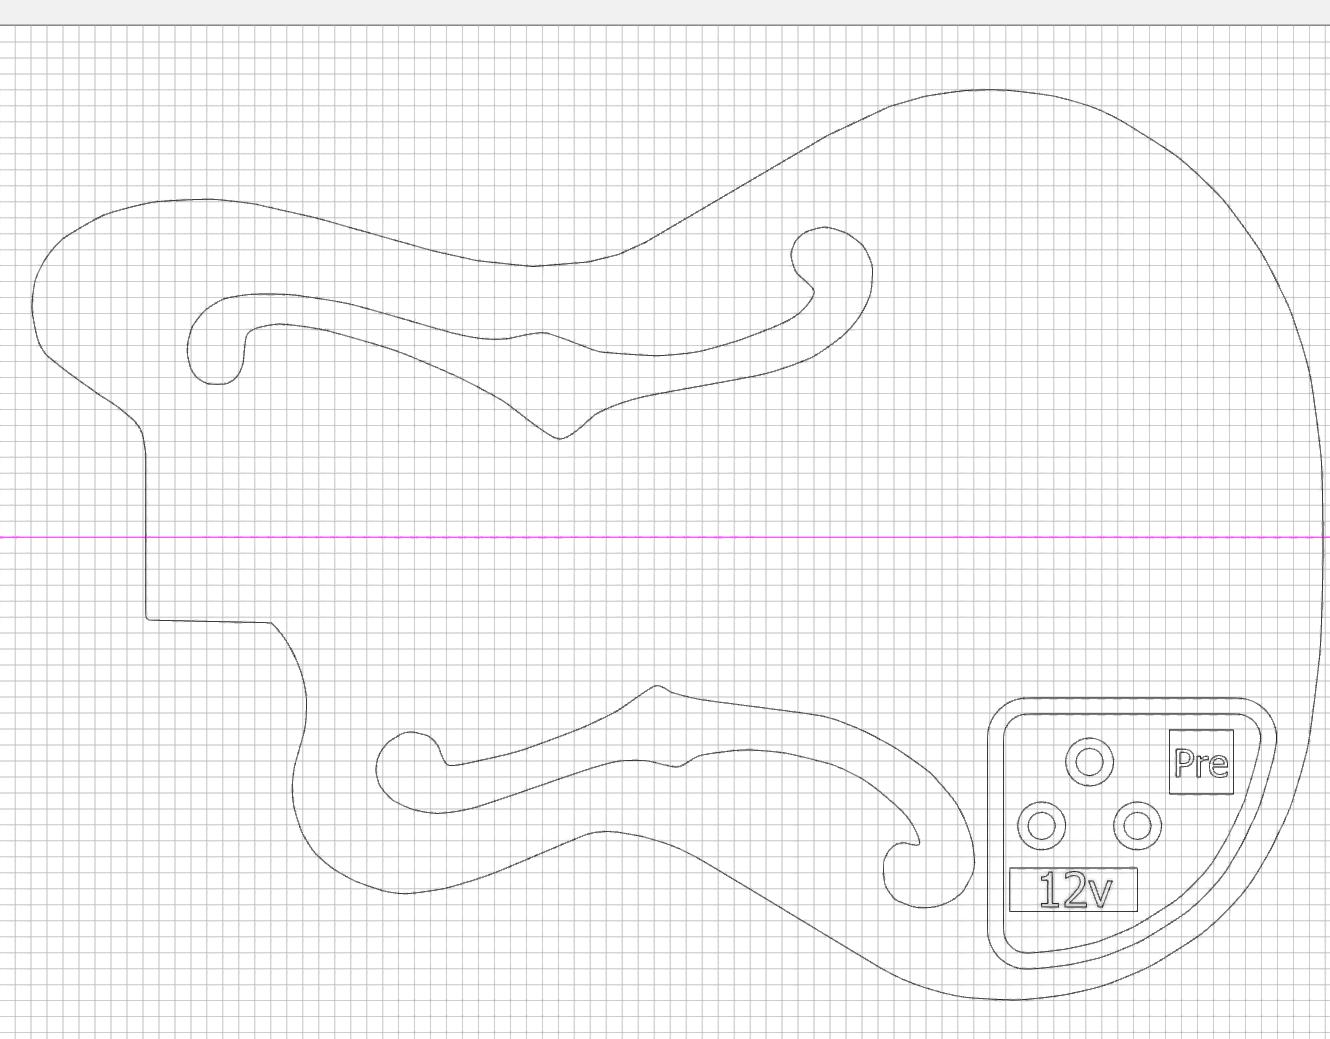
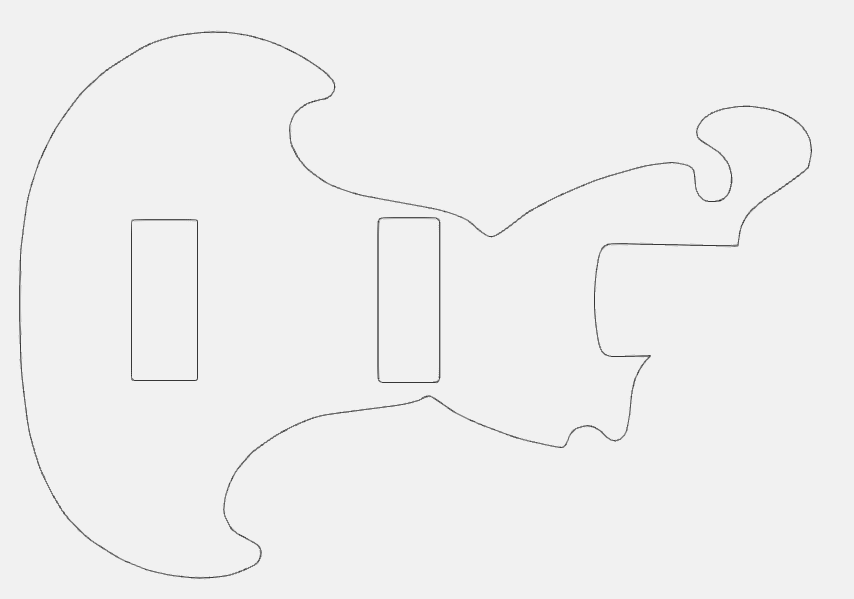
The pickguard by itself

And then the body by itself.

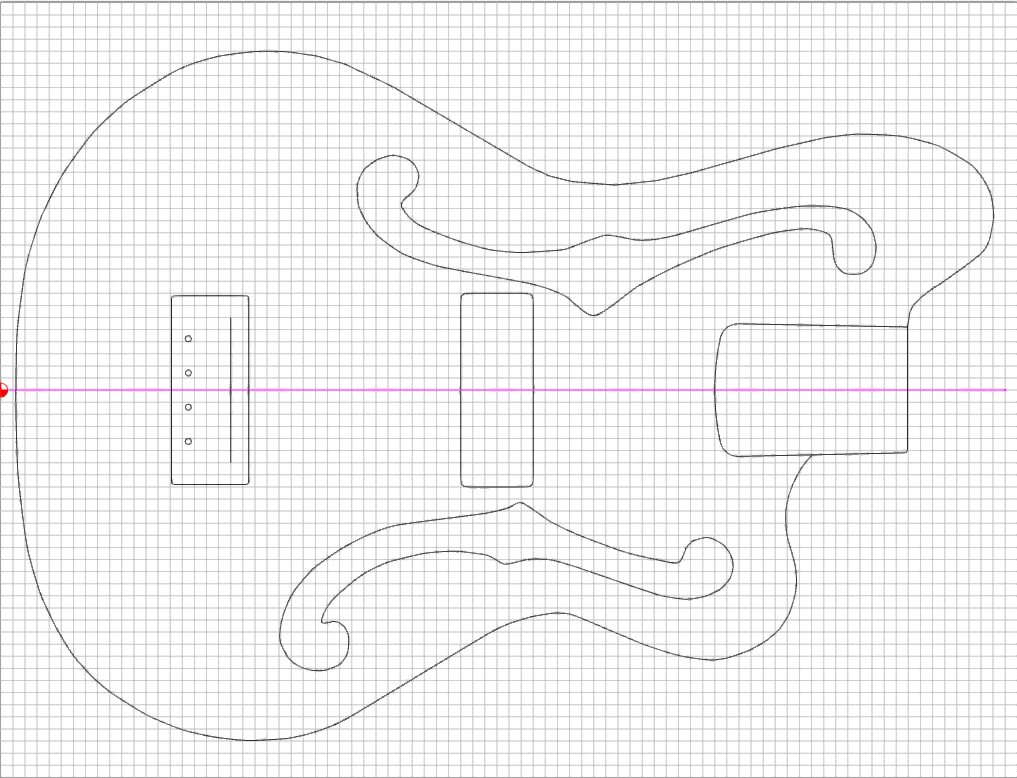
I can really see it in my minds eye without the pickguard, and I think it would look pretty nice. But I am not sure yet.

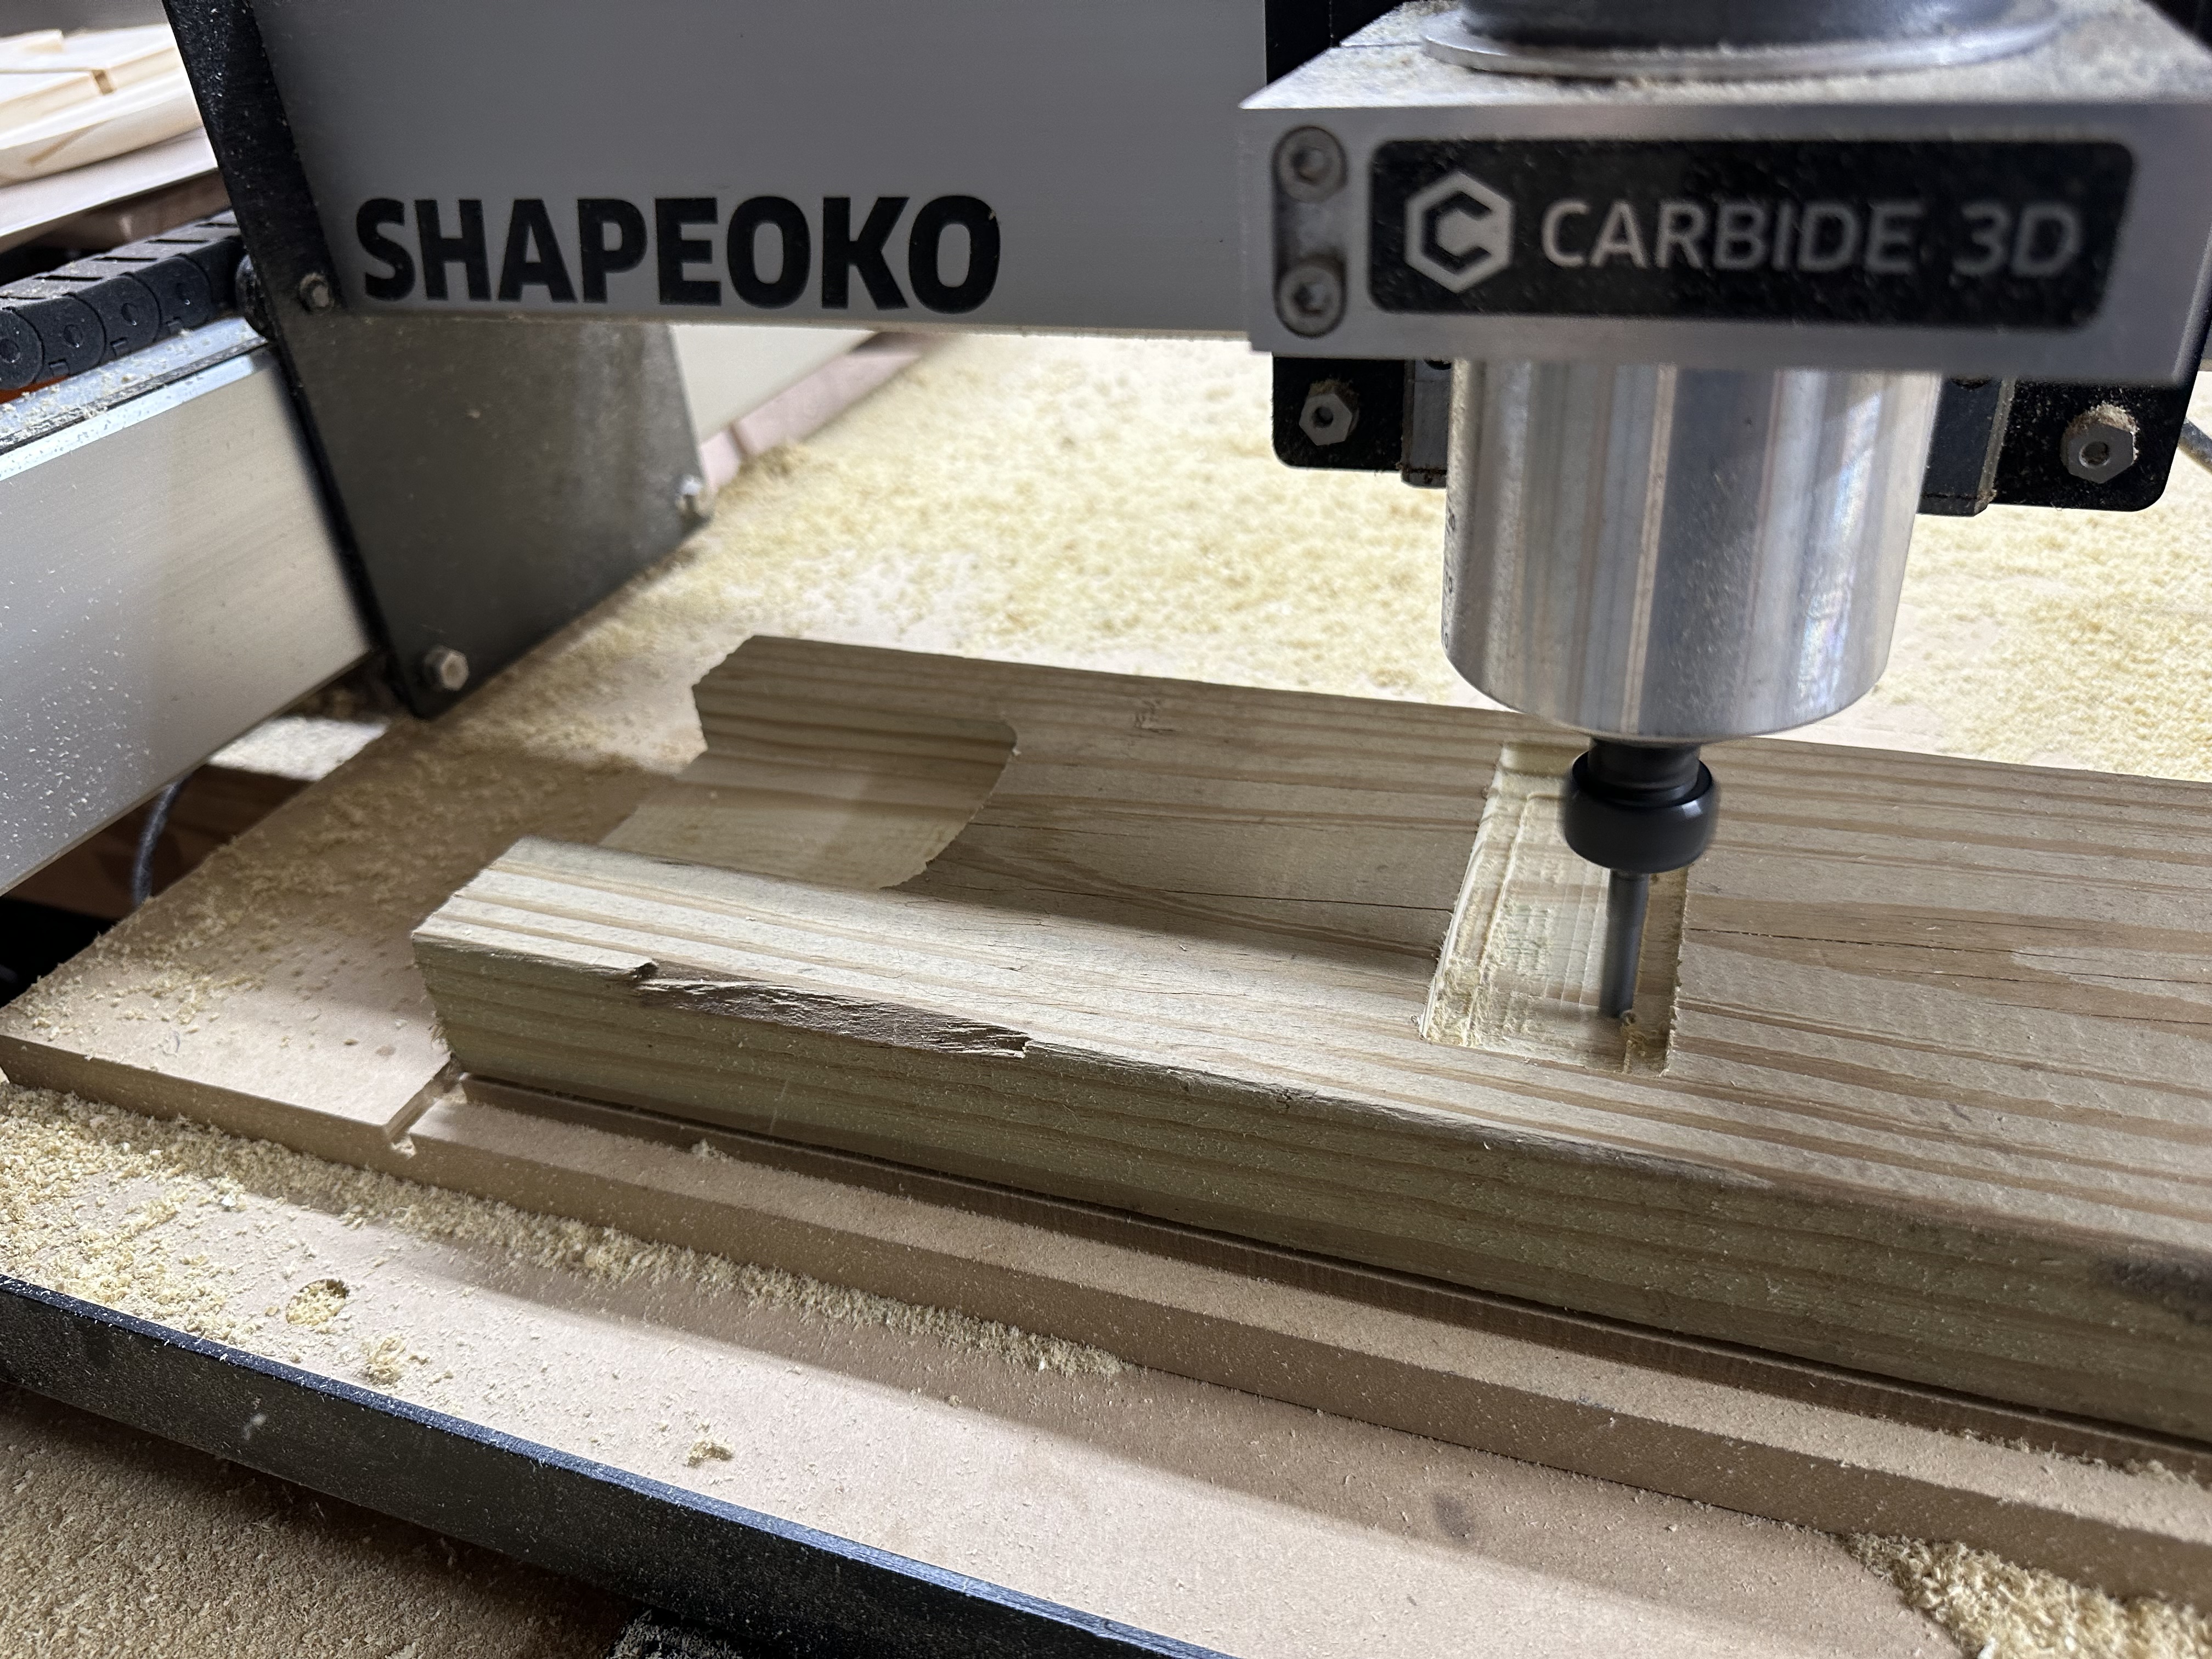
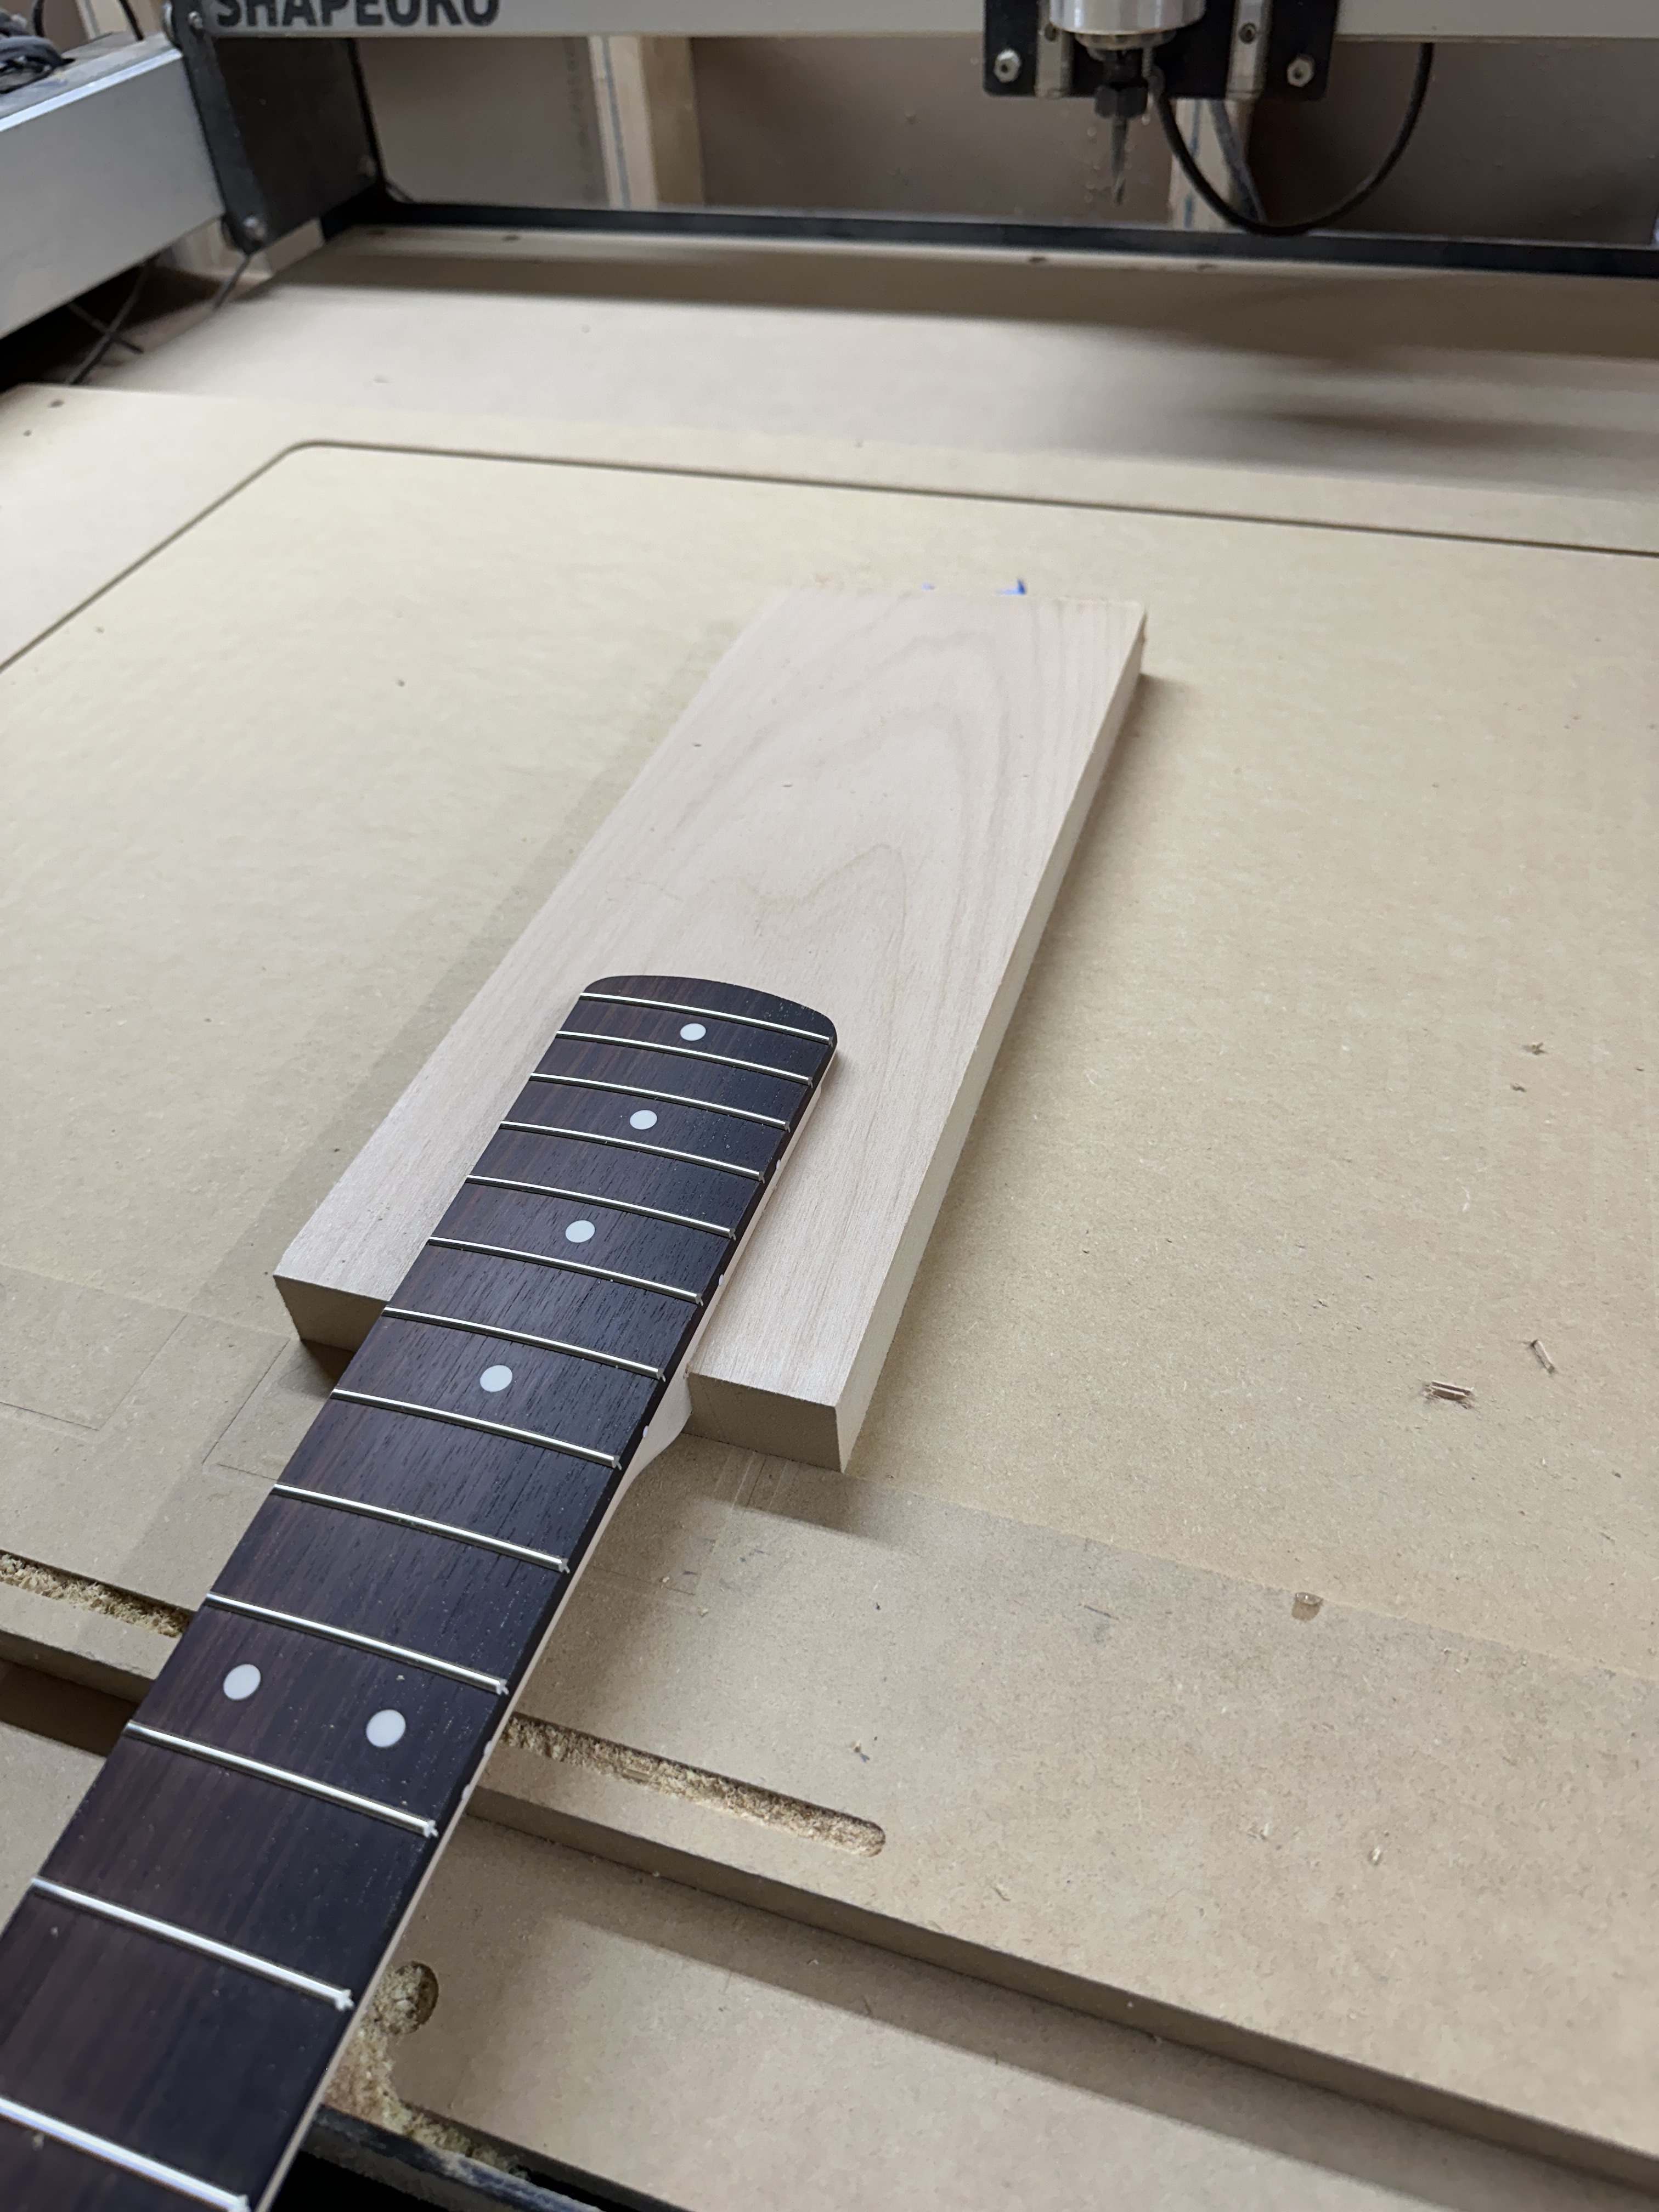
So anyway, that’s the start of this project! In the next week or so I’ll be cutting neck pockets in test material to get that design aspect dialed in. Then after that I will maybe cut out a test body in some cheaper/thinner material for a sanity check on dimensions. By then I’ll hopefully have the front or back cavity thing figured and will get the rest of the design finished. Oh, and also how to flip a work piece. :slight_smile:

Grab a drink, follow along! Should be a learning experience for sure.

13 Likes

More design updates…no cutting yet. :slight_smile:

I think I have decided to go without the pickguard. Or at least build it with that in mind, and then I can always add the pickguard later.

So this is an updated top view with the controls in place. It would be a volume knob, stacked treble/bass with a concentric pot, and a push pull mid for frequency selection.

Here you can see the back view, and the control cavity is just big enough for all. It’s still going to be snug-a-saurus, but I think it should work. Test cuts in scrap will be used to confirm this sizing as well.

Then I will be hopefully drilling a hole from the control cavity to the pickup cavity, as well as from the bridge to the control cavity for ground. That run from the pickup is going to be a long one though, so i might still adjust my plan there.

The next issue I have found is that, after a not-exhaustive search, I can only get that Aguilar DCB pickups in pairs in that package/size. So I might have to adjust there, which would update the route for the pickup obviously.

3 Likes

Really looking forward to seeing how this comes out, please do keep posting.

Comments from the position of a person whose watched way too much Crimson Custom YouTube and not actually built any guitars but…

Regarding the controls and control cavity, is there not an opportunity, given that you have CNC precision now… to produce a more complex shape cavity giving you layout room for the components, and to machine an aluminium insert plate onto which all the key pots and other parts are mounted, such that you can assemble the bulk of the electronics outside the guitar where you have unobstructed access and insert them for final fit and connection to pickups?

Hey Liam!

Good questions. So for the shape of the pocket, there are a couple reasons I’ve chosen that shape and size. So the first thing is - an engineer I am not. Well, I am an IT Infrastructure Engineer, but not a structural one. lol. So the forces of 5 bass strings tuned up are some value that I don’t know. In my mind, if I can keep the area between the neck mount and bridge free of voids, the stronger that will be. Very likely not required (I mean look at an upright bass) but that’s part of what’s in my head.

Another reason is weight. If possible, I’d like to retain as much as I can at the tail end of the instrument to help prevent neck dive. I had originally planned another pocket of the same size to hold the battery and preamp, freeing up the bottom one for just the pots, but ultimately decided to not, for weight. That’s also one of the reason I am doing ultralight tuners, too. To help shave grams from the neck end.

For the electronics, I will definitely be doing a bench assembly. The shafts of the pots will pass through the wood top when not using a pick guard and top route, so you won’t actually gain much by assembling on a plate and then dropping in, because the pot nuts will still be on the top of the body. But I will definitely be soldering it all up ahead of time with appropriate wire lengths. Unless you mean something like an assembly jig of the same dimensions- which if you do, great idea! I’m def gonna do that now lol. Also I will probably machine a thin copper plate/sheet to fit inside to help as a ground plane and shielding. Normally i would cut it with shears or scissors, bur hey why not. :slight_smile:

3 Likes

Aha,

Very interesting thx.

As for the weight balance, it might be very metal to use lead shot to balance or ballast the guitar as one does in race cars… :wink:

1 Like

That’s really an interesting thought. :thinking: Something that I’d definitely consider employing in a future build or if this one ends up too neck heavy anyway.

That said, in the bass community, there are differing opinions in adding mass to bodies and how it affects the natural resonance of the wood. I’m not really sure where I land in that whole topic, honestly. In my experience with past builds (really just assembly of parts) I have found that I don’t care for the sound of a “high mass” bridge like the Leo Quan Badass series. But within a body and in shot form…that could have pretty different properties. Sure you have mass, but if it’s not packed tightly or have like glue or resin holding it in place, kind of like a dead blow, what kind of an effect would that have. Definitely interesting.

It would be a fun experiment to make several different bodies of the same shape and as consistent wood as possible, then address cavities and additional weight in places and actually get some measured data to see the difference. I’m not saying I’m going to do that, but, that sure would be fun. lol.

2 Likes

Some more design updates!

Below you will notice the inner area of the pickup, as well as string positioning. I needed to double check that the pickup I had selected would work with my bridge and nut spacing. As it turns out the sensing area of the pickup was a little bit smaller than I would have preferred. It probably would have been fine, but I didn’t want to lose any volume off of the low B string. So I switched it up and found a single Nordstrand Zen Blade 5, instead. The orange box you see below is the sensing area of that pickup so has plenty of space for this config.

As a happy accident, the nut and bridge spacing also means that the angle of the strings matches the taper of the neck almost exactly. Woo!

After some evaluation of my jack options and thinking things through a bit more, I decided to relocate the battery to its own compartment. Part of it was because this is actually going to be a relatively thin body…and the dept of the battery on its side would be too tall for the compartment depth.

It looks a little weird here, but thats because some of the vectors are for the cover inset. The rendering makes more sense:

Quite a few parts have been ordered, and I hope to be cutting some test pocket for the neck tonight. Just need to find some scrap first. :slight_smile:

4 Likes

Oh, also I am going to change its designation to the ASO-5. There are many, MANY basses out there that are clones or heavily inspired by the Fender Jazz and Precision basses. From the junky imports to high quality ones like Sadowsky, Nordstrand, Xotic, etc. they have become known in the community as Fender Shaped Objects, or FSOs. So I like the idea of this being a non-original, inspired by, Ampeg Shaped Object.

So ASO-5 it is. :smiley:

4 Likes

Test cuts have started! I ended up digging out some old 2x6 from a deck project this summer, and should do the trick. Heck if it works, maybe I’ll just slap a bridge on it and call it good. lol

2 Likes

Ok, the neck pocket is cut and it went pretty much as good as I could have hopped for. Better, probably, since I am making up and measuring out these dimensions, rather than working from templates. So as it sits right now, the neck fits, and has some play. If i shift the neck to one side of the pocket, then I am left with about a .016 gap at the front. The pic will hopefully illustrate it. Additionally, my corner radiuses at the heel seem to be a little shallow, not allowing for contact of the larger radius, but is only off by maybe .025 (i couldn’t get a feeler gauge under the fb hangover).

So I am not sure if I should narrow the taper by .008 on either side, or leave it as is. I am probably going to do a tru-oil or drying oil type of finish on the maple part of the neck, so am uncertain how much of an impact that will make on the thickness.


3 Likes

It is ok to watch videos you may never make. I like the Matchbox car restoration videos. I will likely never restore a car but I think you can still learn skills related to your interests. Like painting or fixing missing parts.

Life is short and uncertain so enjoy it while you can.

3 Likes

Hello all,
Great post… I like seeing what others are building especially when it relates to guitars and bass’. I also like when the thoughts and reasons are included! So thanks!
As an amateur guitar builder I’ve built 8 guitars from scratch so far and all have been mostly by hand (minimal CNC use). I’m in the process now of building a guitar and this one I’m using the CNC a lot more in the process. It’s been a fun learning experience!
I have a few thoughts to share…

With the neck pocket, I’ve found over-sizing the neck or undersizing the pocket slightly (like 0.01") and then finessing with a card scraper or sand paper to be better then exact sizes with the CNC. A loose neck pocket makes for a weak joint and less sustain.

For size, scale, and just overall accuracy I cut my last build out on the pink foam board first. It’s easy and fast to cut and is less wear and tear on the machine and bits.

In your last design with the separate battery compartment, how do you plan on drilling the connection for the wires? Thru the jack hole?

Continue with the updates!

Lou

1 Like

A few photos of my latest build…


4 Likes

So thanks for that Liam. I’m not sure I would have actually landed on his channel or not without you mentioning it, but now I have spent the last several evenings watching his vids instead of working on mine! :smiley:

Jokes aside, though, that’s enjoyable content!

1 Like

Thats a great idea! Its funny, i had thought of using foam board for other projects like RC boats and plane parts, but it hadn’t occurred to me in this one. Have you found it to be stiff enough to give you a high degree of confidence in tight fitting parts?

Regarding the neck pocket, I have a build thread running in the luthier section of a bass forum as well, and from those discussions and recommendations, have actually already snugged up the neck pocket in the design as well!

As for the battery cable, I am planning on drilling from cavity to cavity. The bit i have should reach, but a test body is going to be in order to ensure it works how its working in my mind. If I were doing this in Fusion, I would probably be able to simulate it. Maybe next time. :smiley:

Thats some good looking work you have done there!

I have some waste board leveling to do tonight, and then will hopefully cut the revised pocket for the test.

1 Like

Thanks.

The foam board is pretty stiff but I wouldn’t feel confident using it for critical joints like the neck joint. It does sand well… I used my drum sander to bring a 2" board down to 1.75", the thickness of the guitar body. However, when I brought the neck blank down to 3/4" the sanding caused the foam to warp so on the fret board blank I alternated sanding each side and it stayed straight…
For joint tests I do what you did and use scrap wood.

2 Likes

Well this neck pocket revision is better and worse. Haha. Worse because the gap is .0165, but better because the gap is the same the whole length of the pocket. I suspect my first test pocket wasn’t as good as I thought it was. This time I had gotten a flattening bit and flattened the waste board as well as the stock before the test. So it’s very likely the angles from the previous test skewed my results.

On the plus side the adjustments I made to the pickup pocket were right in the money. So that part is good to go.

I have also received my preamp and got the measurements of my push/pull pots. They are pretty deep, and might not fight in the depth of pocket I have planned. So with that in mind, I might end up shifting the body to either a different species top, or a different wood altogether for the back. Or both. :slight_smile: really goes to show you nothing is set in stone with this project!

Not a very interesting pic for this update but here it is anyway. You might notice that I need to tram the carriage. That’s def up next.

2 Likes

If you’re trying to get a nice tight fit for the neck, it might be worth sneaking up on it.

If you can get the test body on the machine in an orientation where you can test fit the neck without moving the body from its machining position, then you can machine out the pocket deliberately tight and then offset the walls a couple of thou (0.05mm) at a time, re-running the finishing toolpath, until you sneak up on the fit you’re looking for.

Beware that the fit will likely be a little different between the 2x6 bass and a hardwood body though, you might need to cut a little more in the hardwood.

3 Likes

That’s a great idea. It would certainly save time.

Also, your point about differing woods has illustrated itself even further this morning. When I came out to my office/workshop this morning, the 2x6 had moved that it was actually a snug fit. There weren’t any major shifts in temp or humidity, so best I can figure is movement of the wood after it was cut and “relaxed”.


So I think the next piece will need to be in hardwood regardless.

3 Likes

Yahtzee!

I had a piece of darnifiknow (though I think it’s maple) that I just got in a lot of hardwoods and exotic smalls and so I set that piece up so I could test fit the neck.

I had to use a little force but not really mash it, and it squeaked its way in. So with that I think the pocket is all set!

I have a bit more design work to do - bosses for the retainers for the back covers (I think that’s what they are called?) a truss rod access route, etc. but after that I think it will be time for a pink foam test. :slight_smile:

5 Likes