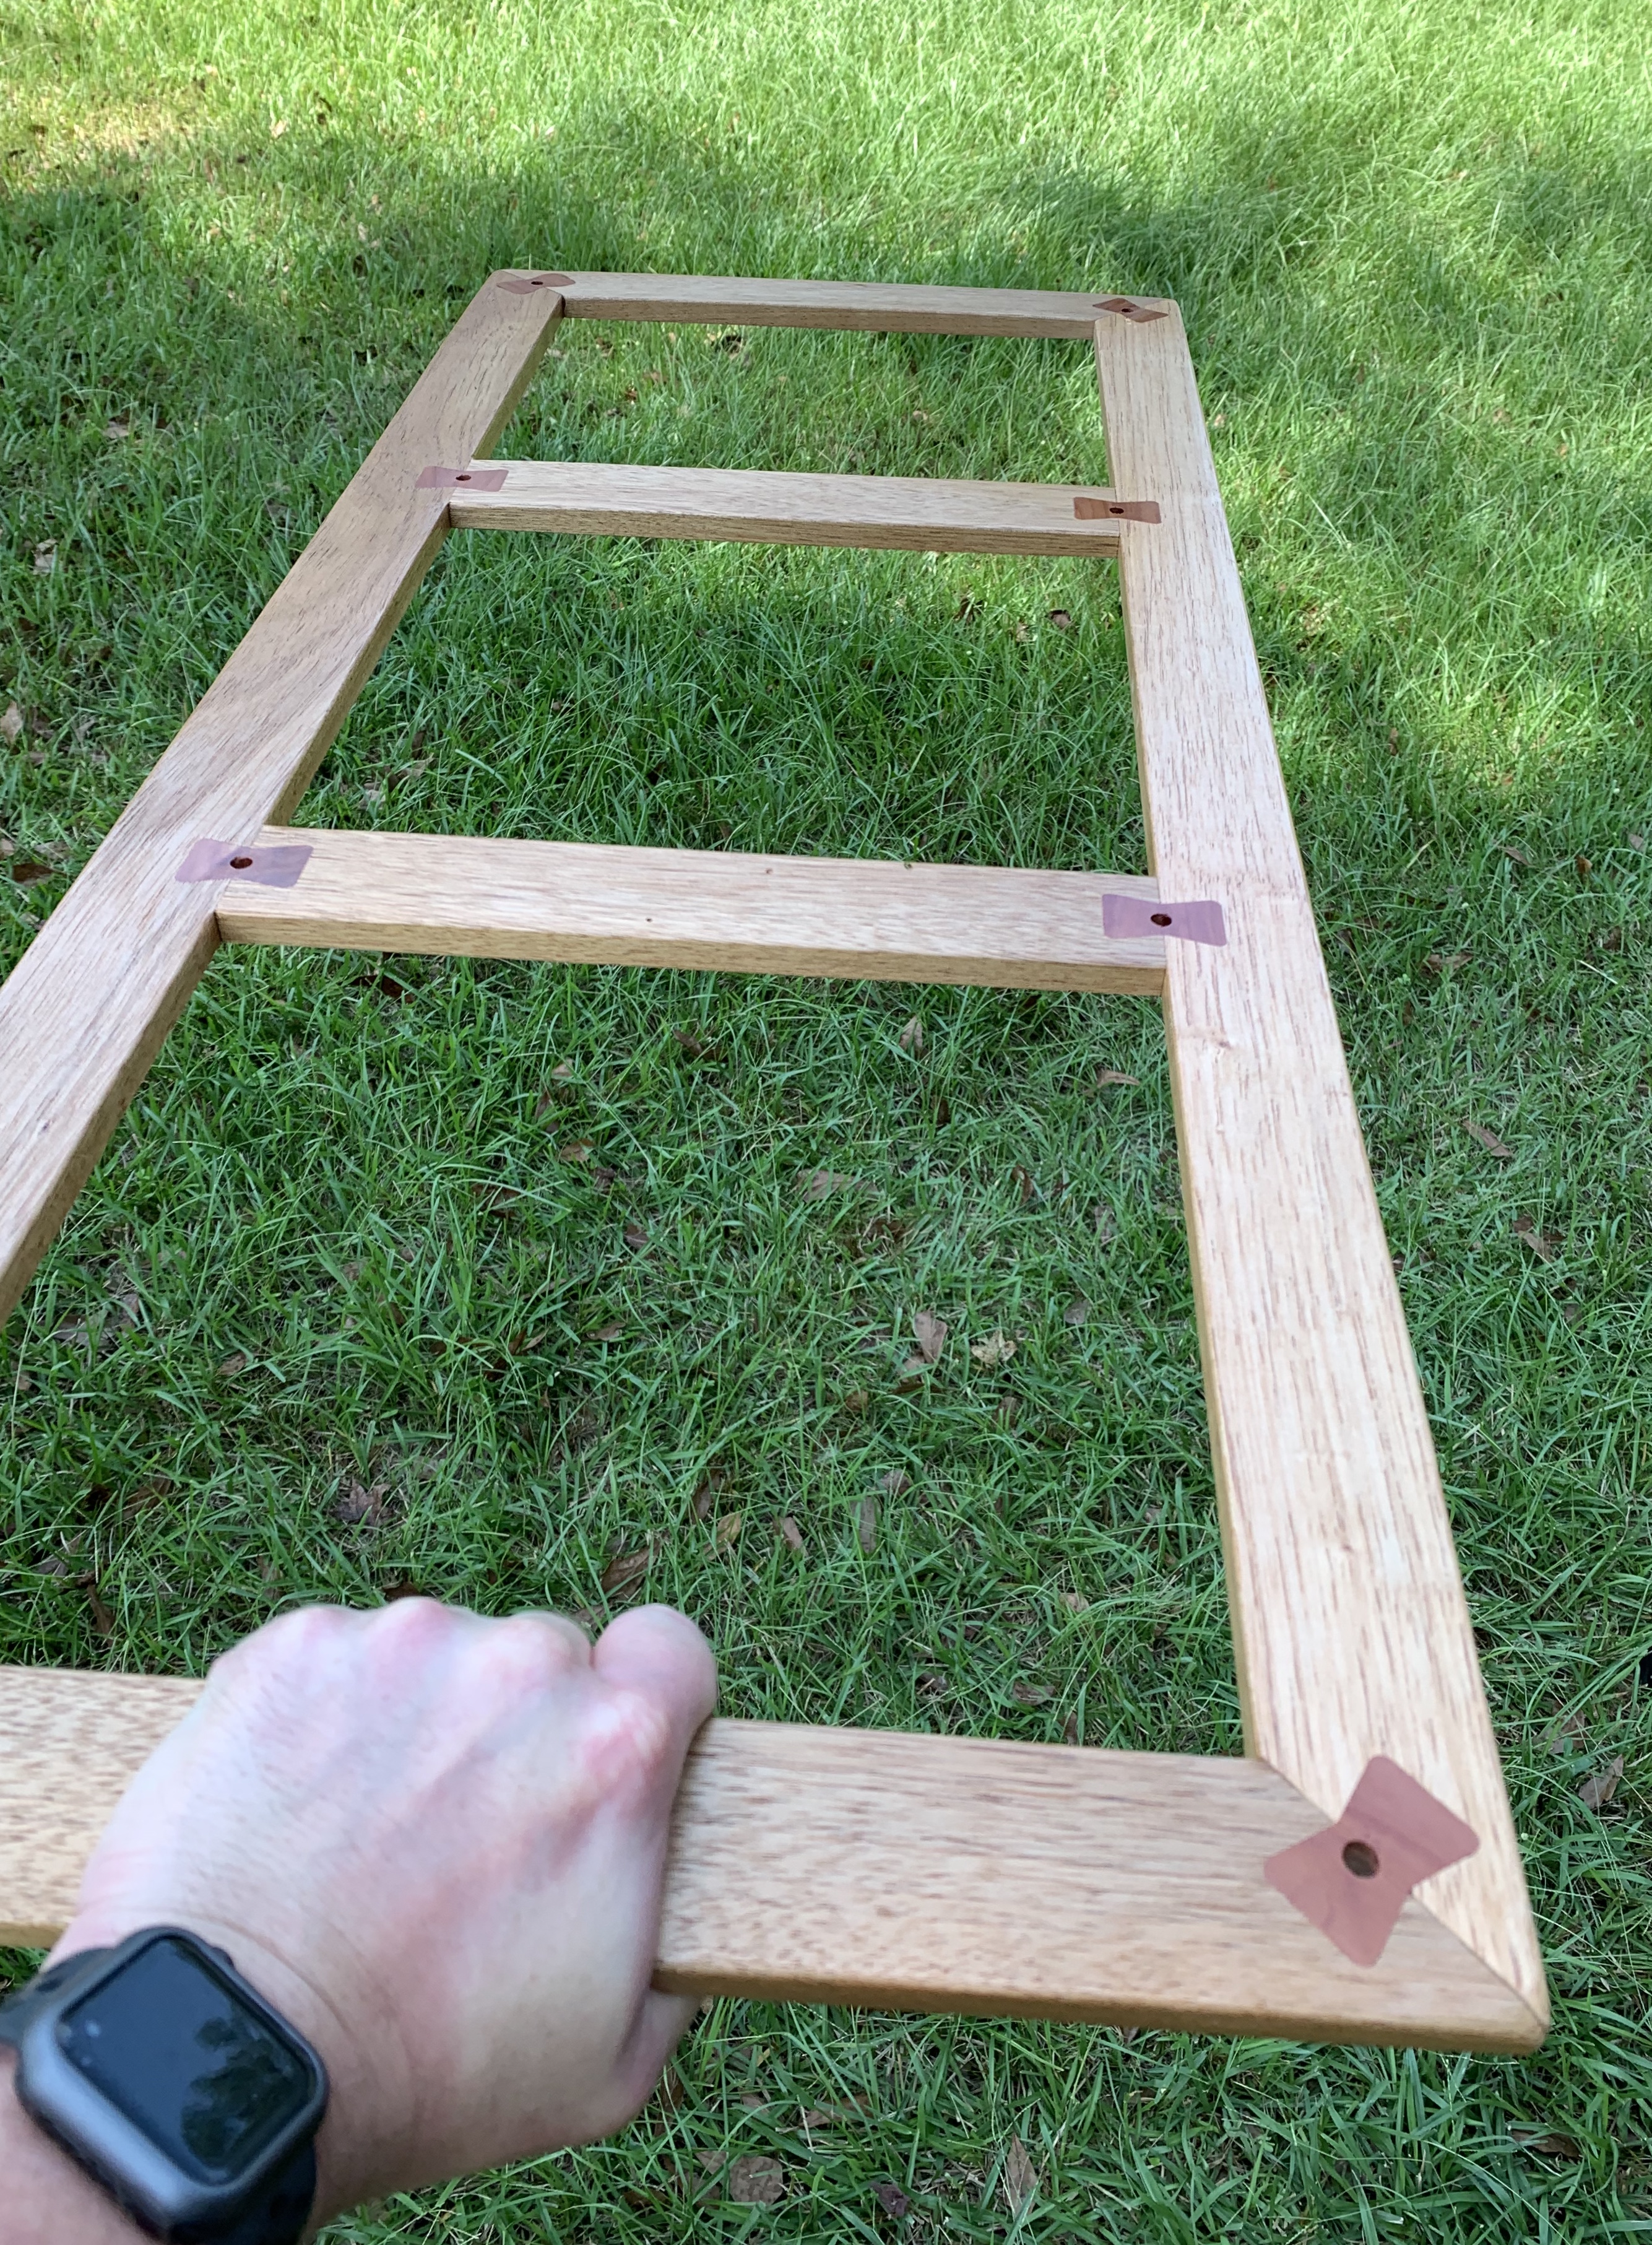
I have been working on a “buddy” project to repair a lid for a cedar chest that got broken. Simply dowels and wood glue are fine for most things, but I felt this needed a little more as there are couple of deep cracks in the lid in other areas. Also this lid is a little over 2 feet wide and 4 feet long. So, I decided that I would build a frame that will mount on the underside of the lid so as not to detract from the appearance I got to work. I like using mitered corners on anything like this as it just looks better in my opinion. However it would be a weak joint for something like this. So, I decided that I would use some “butterfly ties” to strengthen these joints, and add a bit of decretive look to them. While normally cedar would be a bad choice I realize, I couldn’t help myself. Then it hit me. I’ve been doing these by hand for years, but I have a Shapeoko 3, why not make life a bit easier for myself. So I did.
I used Vetric Aspire, though it would be simple in Carbide Create as well to lay out, as a basic flat bottom inlay.
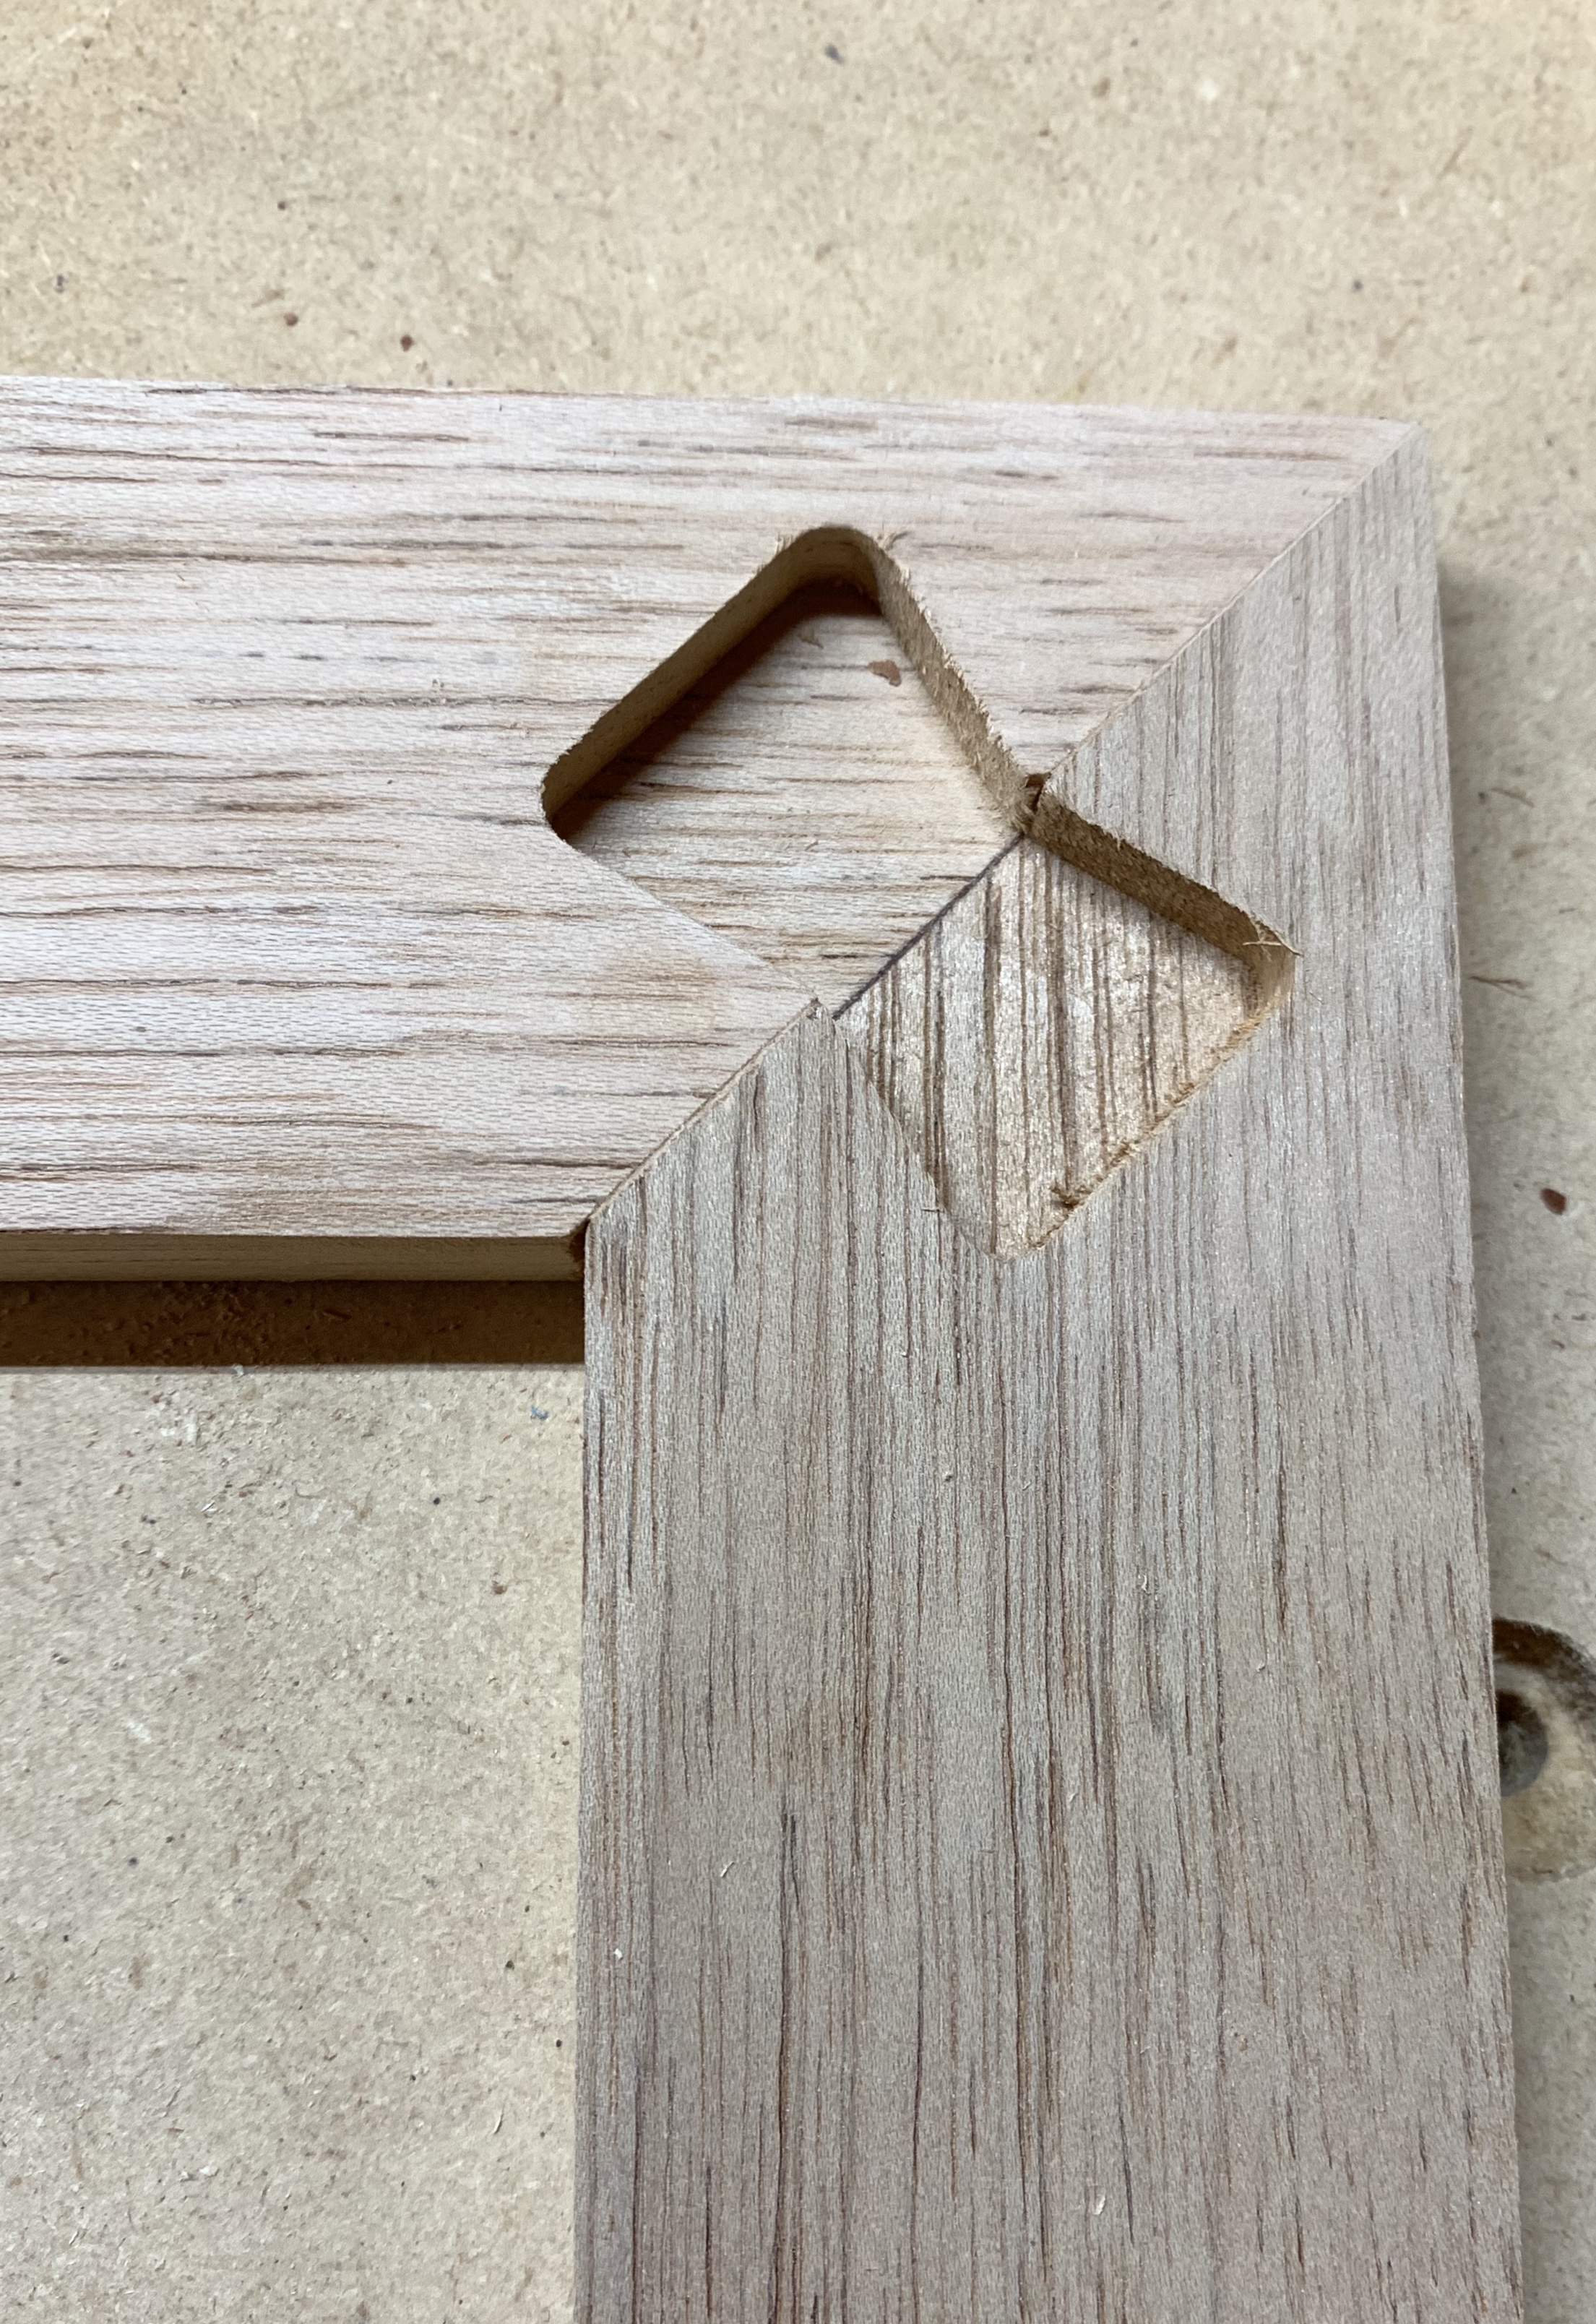
As my "frame is 0.5 inch thick I want my butter fly to fit into the frame at 0.250. Different folks do this different ways, I just prefer that mine fit at least halfway down into the inlay material. After practicing on a couple of scrap boards and finding I needed to add 0.003 clearance to the pockets for the perfect fit,I was ready to go. I first cut my butterfly ties in a cedar
board using a 0.250 down cut end mill.
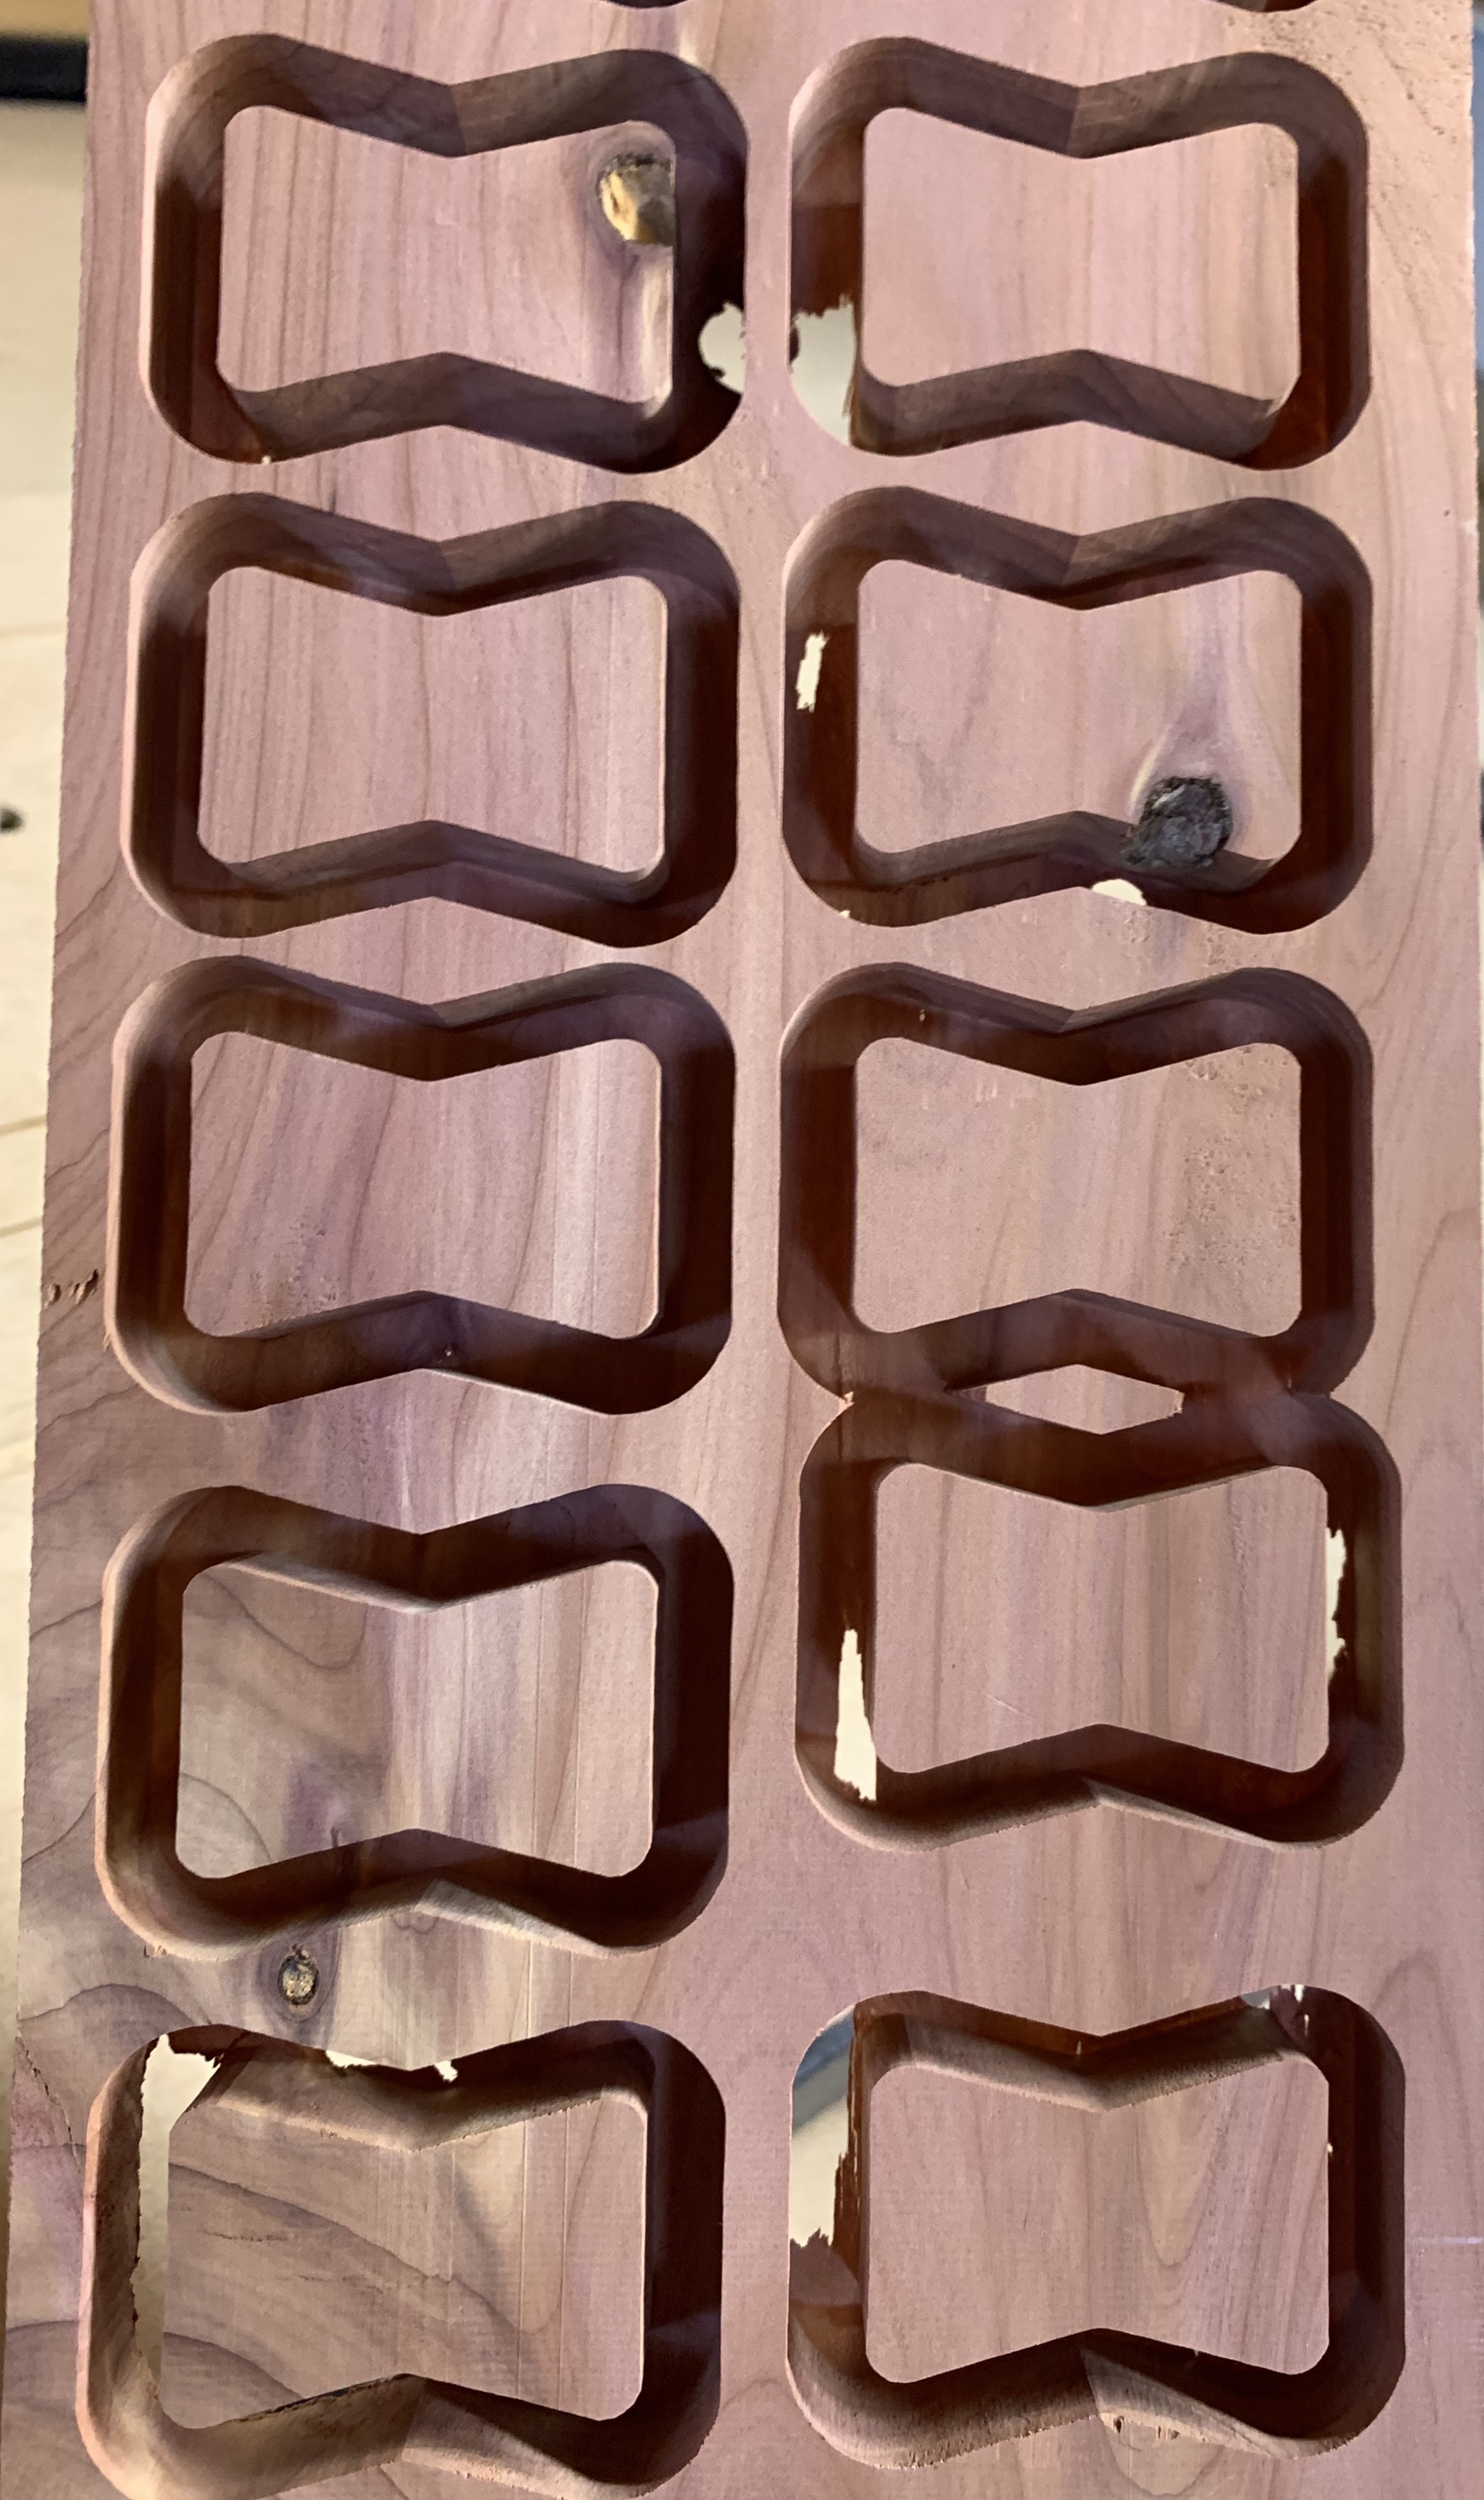
I cut all the pockets in the frame with a 0.125 straight bit. I used a Bosch router bit that I picked up from a big box store.
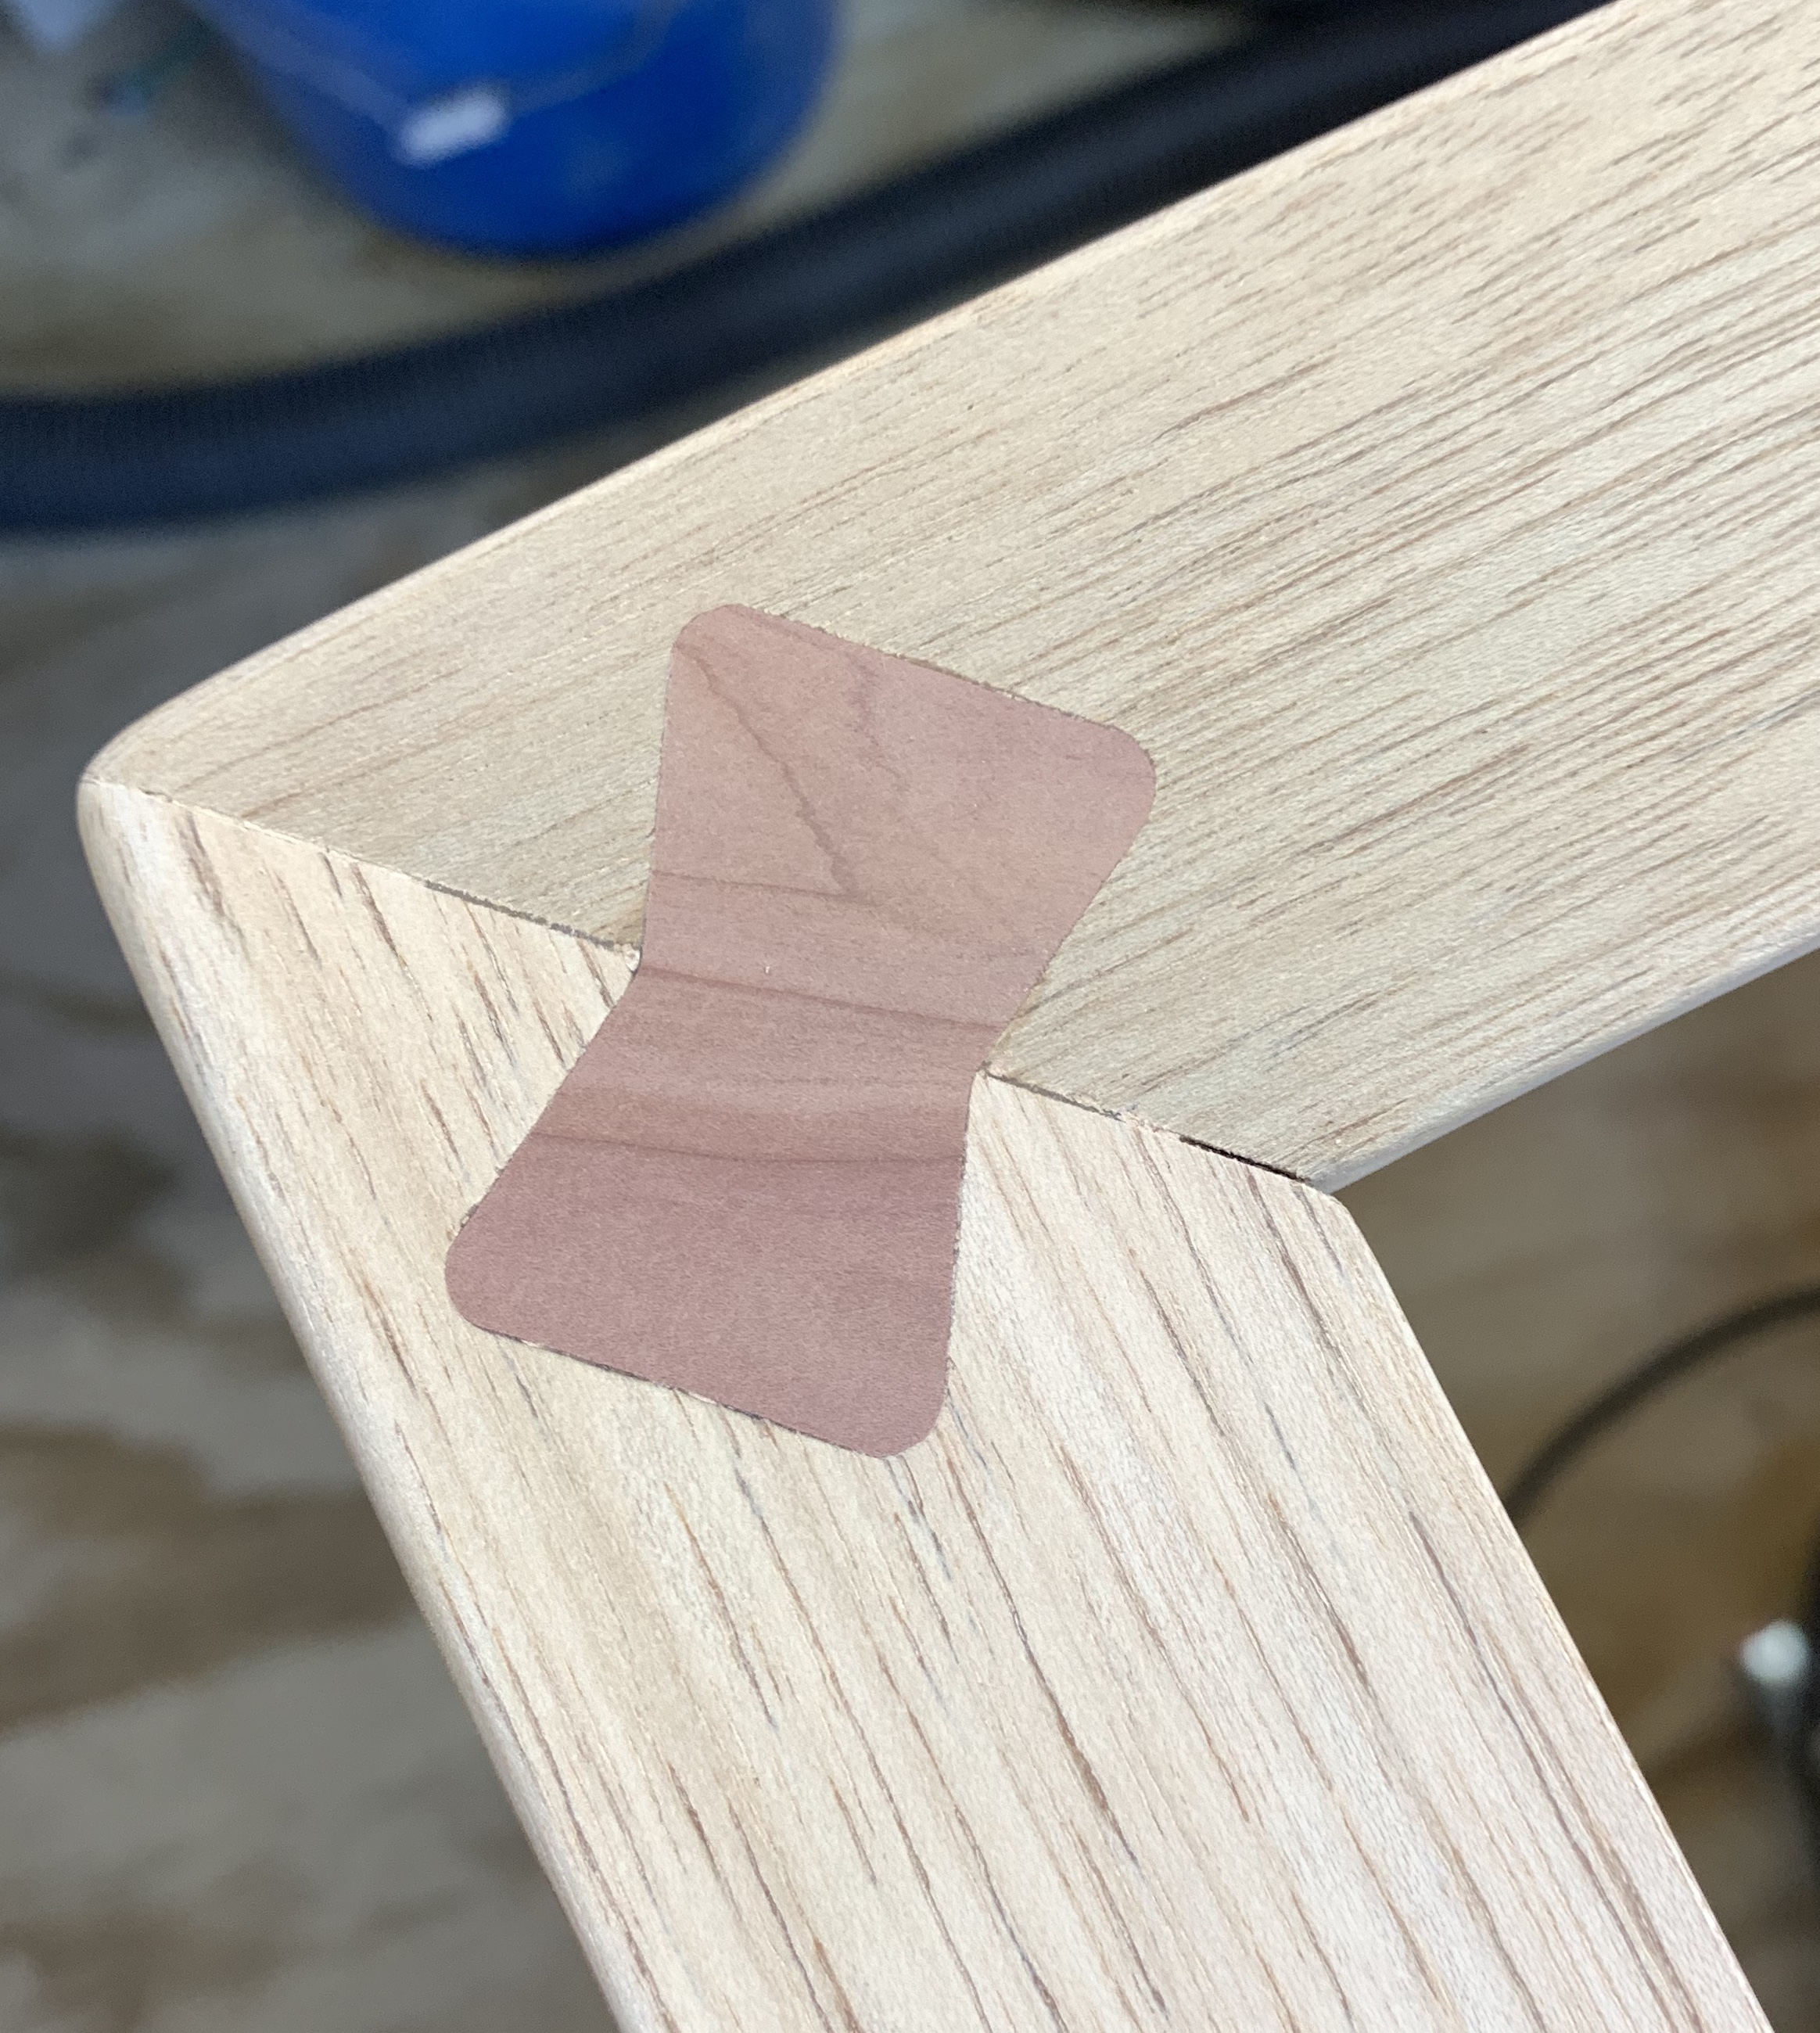
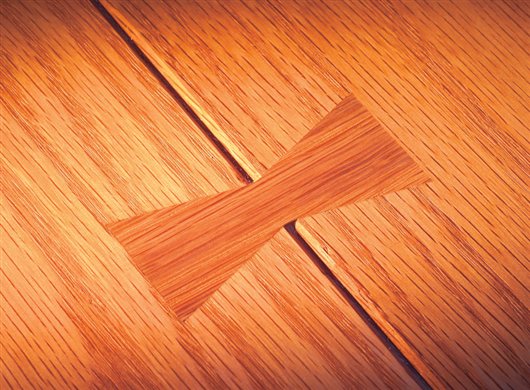
After cutting off the excess cedar of the butterfly ties using a flush cut saw, and some light sanding.
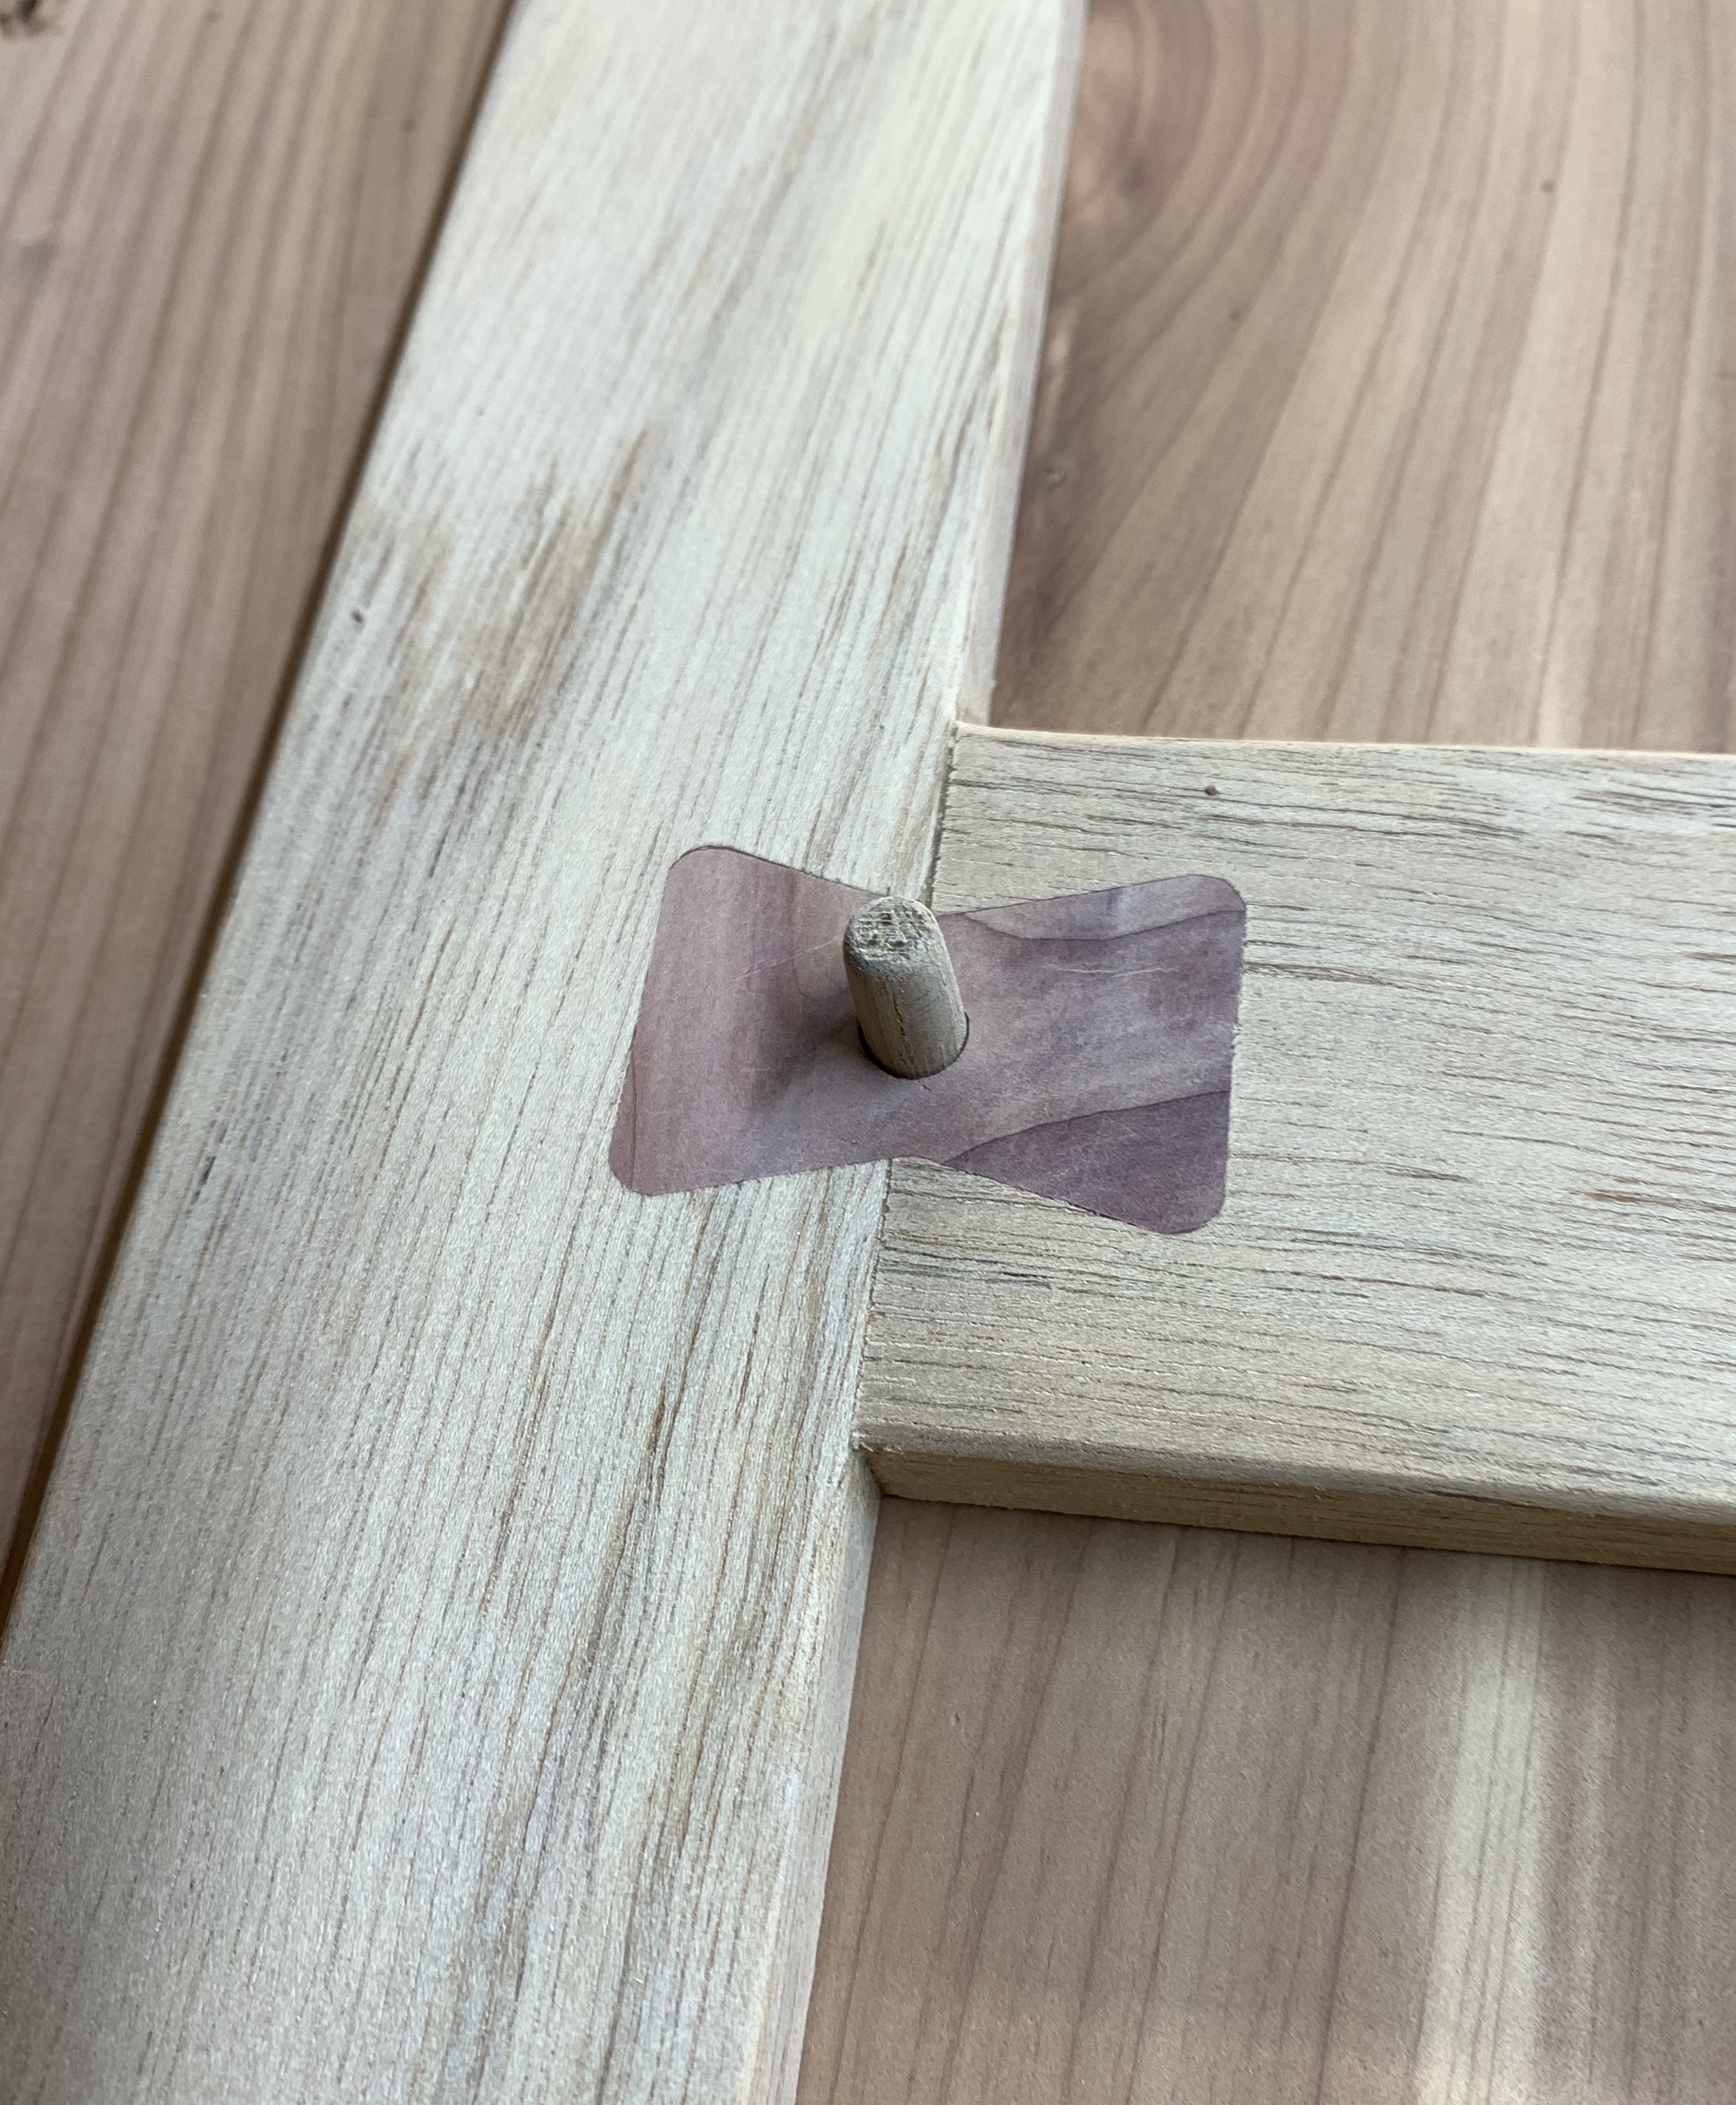
Because I want more than wood glue to hold this in place and help keep this lid from breaking I decided that I would also dowel this to the lid as well. Because I am a goof ball, and because I can I decided that I would dowel through the bowties.
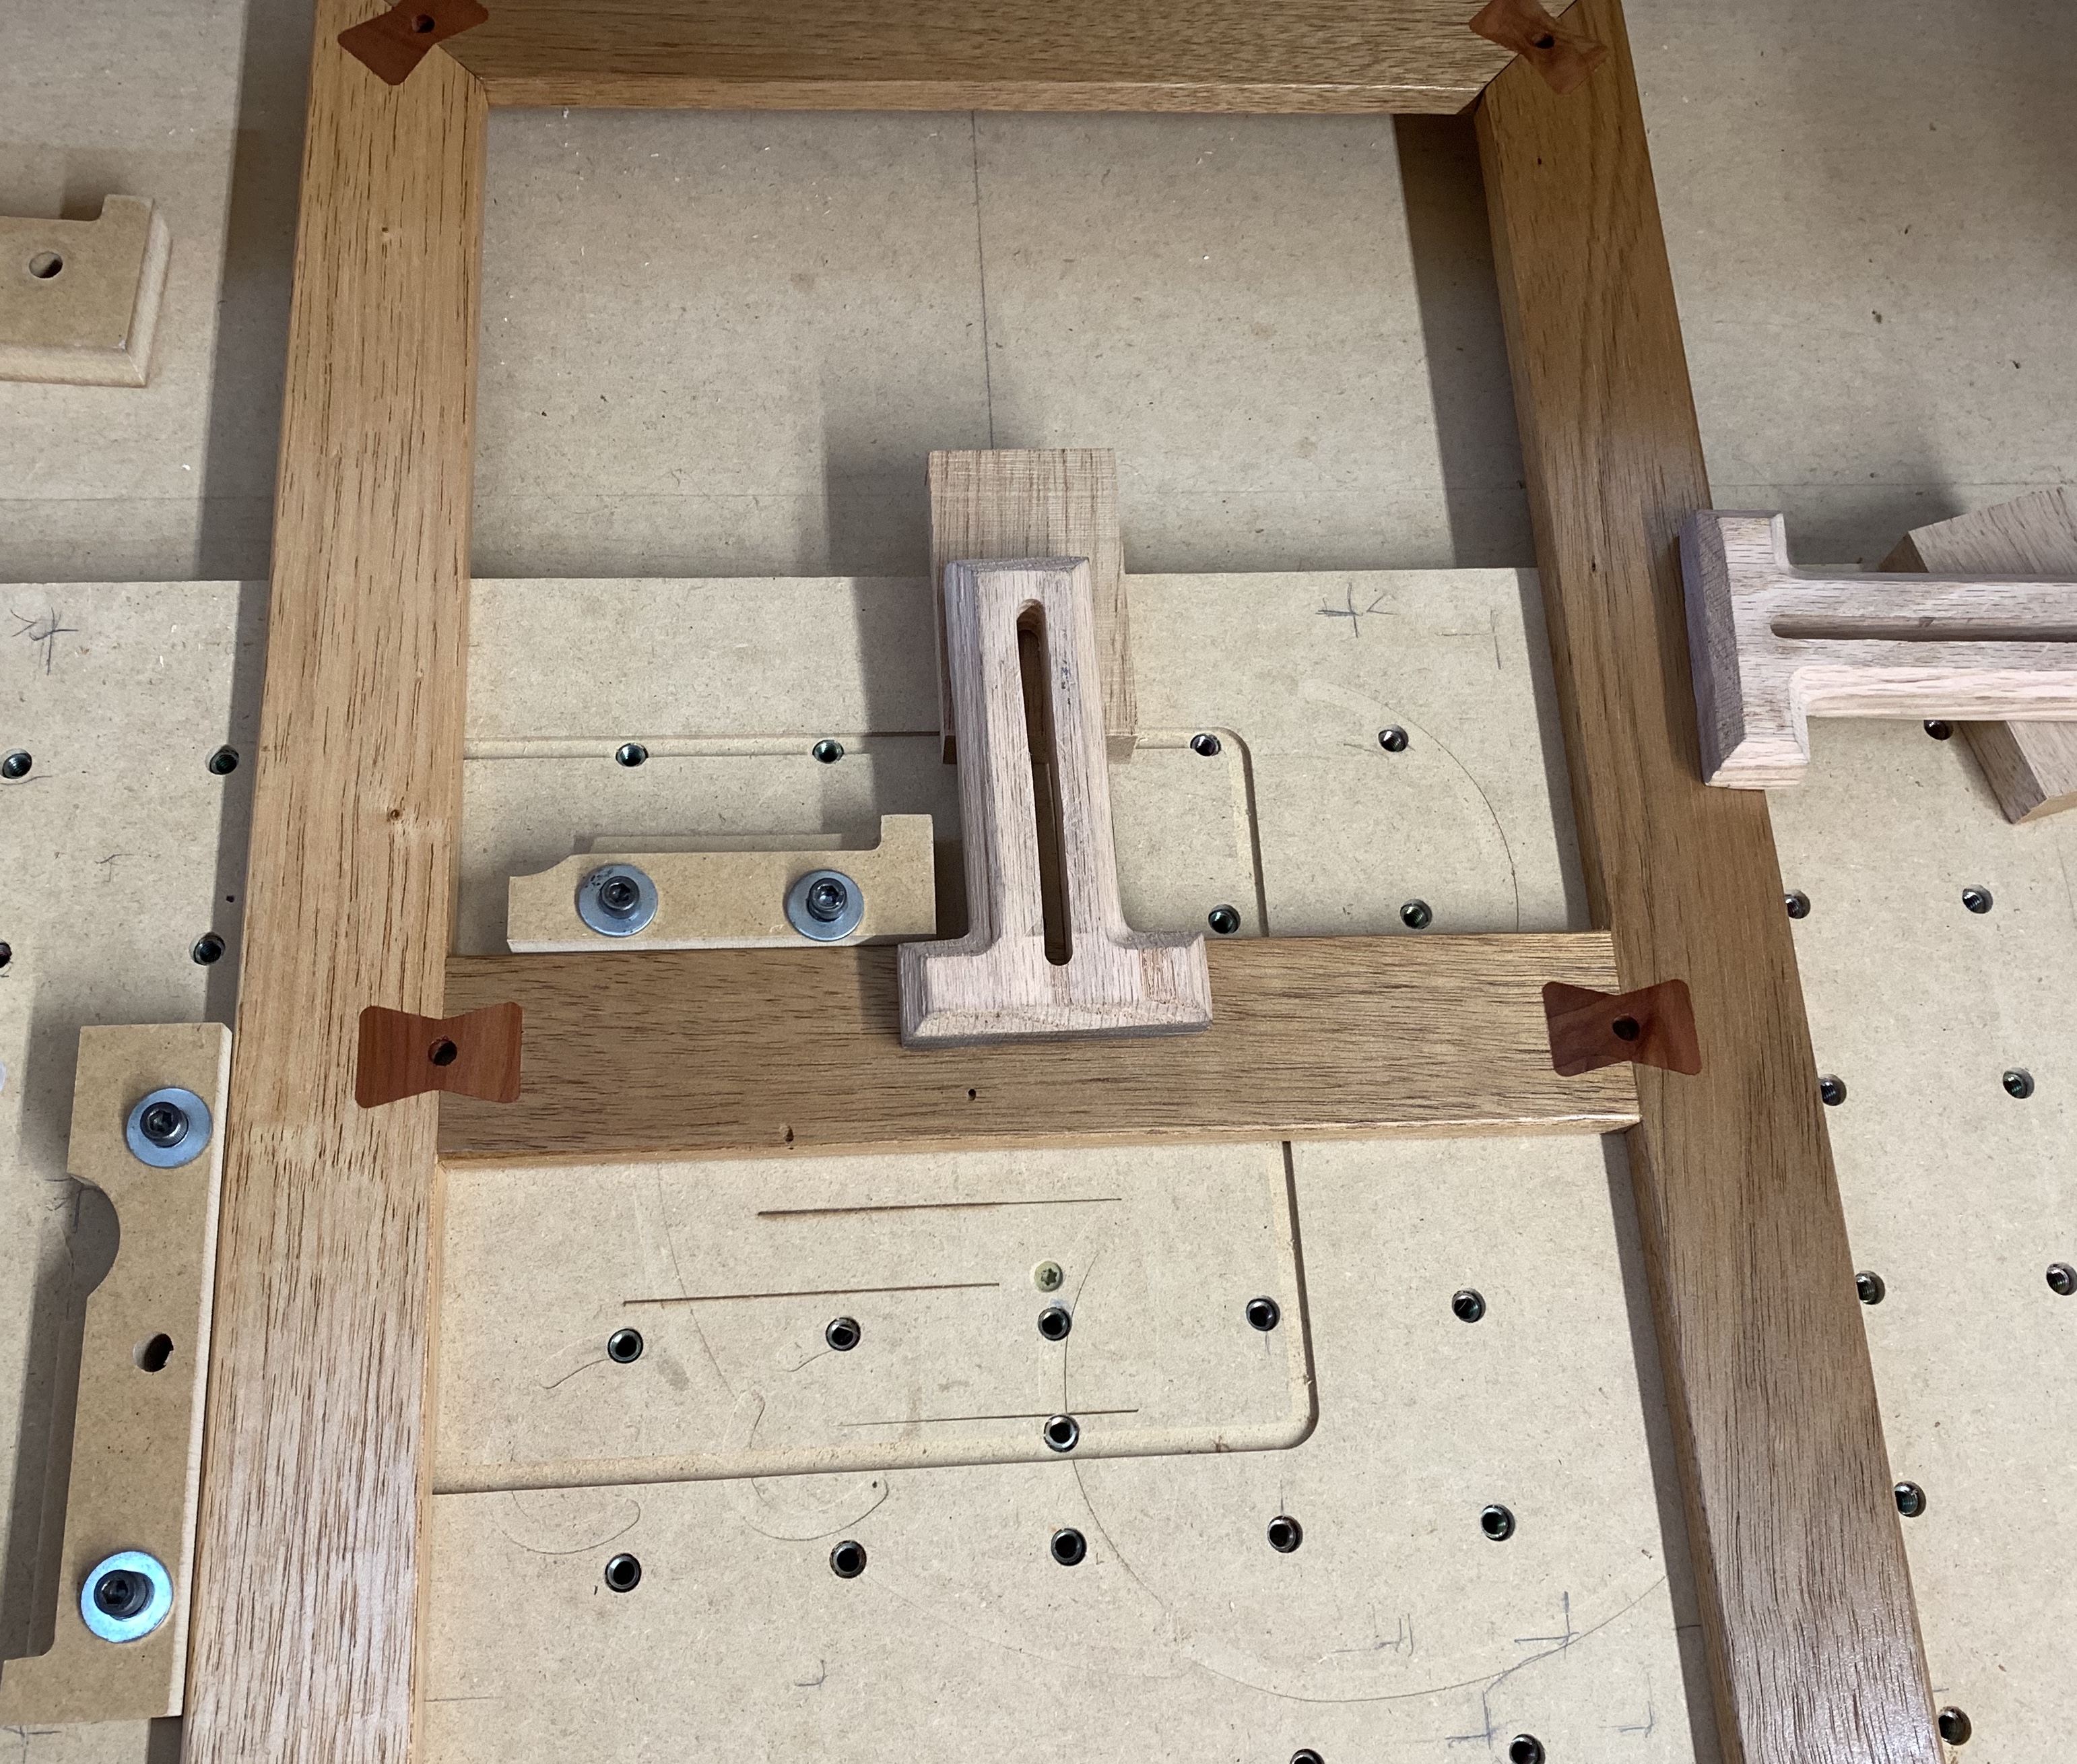
The dry fit.
Still have to glue up and do the finish work.
So, this really long post to simply say, this is the fastest, and easiest butterfly ties I’ve ever done. Oh, and zero chisel work needed. Thats right, didn’t have to use a single chisel.
Nice work, easy enough to cut. Bowties are not seen very often as a joinery choice. How did you old the corners on the Shapeoko so the wood did not interfere with the gantry? Did you cut each 1/2 side individually? I guess the dowels are for purely aesthetic reasons as it is placed directly in the joint. Are the dowels going through to the other side? A dowel on each side, in the middle of the wide part of the bow, would also work well to hold the bowtie in place.
Can you share your Carbon Create file too?
1 Like
Griff
(Well crap, my hypometric precursor device is blown…)
3
Nice work! I’m not familiar with using butterflies in joinery, think I’ll try it. The only thing I’d do different is have the grain running with the long dimension, extra strength.
They way you’ve cut the butterflies is ok for visual accents, but if you’re looking the structural strength, you should cut them such that the grain is running parallel to the long axis of the butterfly:
Straight, tight grain will be stronger than wide, curvy grain. Oak or mahogany are a good choice for this.
Griff / a.f.waltz Thanks, and You guys are both on the money about grain direction, and Waltz as well about wood selection. I probably should have given a better explanation than I did. I am going for the look mostly on this with strength as an added bonus, though that strength is limited, it is all that I need for this. This frame could be thought of as something to help a bit with flex/shock as the lid is opened and closed. I would have rather done more traditional butterfly ties, across the cracks in the top of the lid, like a.f.waltz posted, but the owner didn’t want that. The strength I was mostly after in the butterfly was for surface area for glue or in this case G-Flex 650 two part epoxy. I tried to talk them into an epoxy resin inlay for the butterfly tie fill, but they didn’t like that idea either. lol. I drilled several holes into the bottom of each butterfly and filled with epoxy and allowed to set. Then glued into place with the same G-Flex 650 epoxy. The dowels will add a mechanical bond and sit 0.250 into the cedar lid though the “frame” as well as the frame being glued. Though I will use regular tight bond II for that. I didn’t mean to make it sound like this is how they should be done at all.
Mostly was just amused as all get out, and wondering why I hadn’t thought of using the Shapeoko for this before now and hoped to point it out for other folks who like me hadn’t thought about it.
As to the why of adding a butterfly tie to a 45 corner, well it’s fun, have I mentioned that I’m a bit of a goof ball. lol.
Thanks for the questions. The frame is only 15.250 (15 1/4) wide X 37.8750 (37 7/8) long.
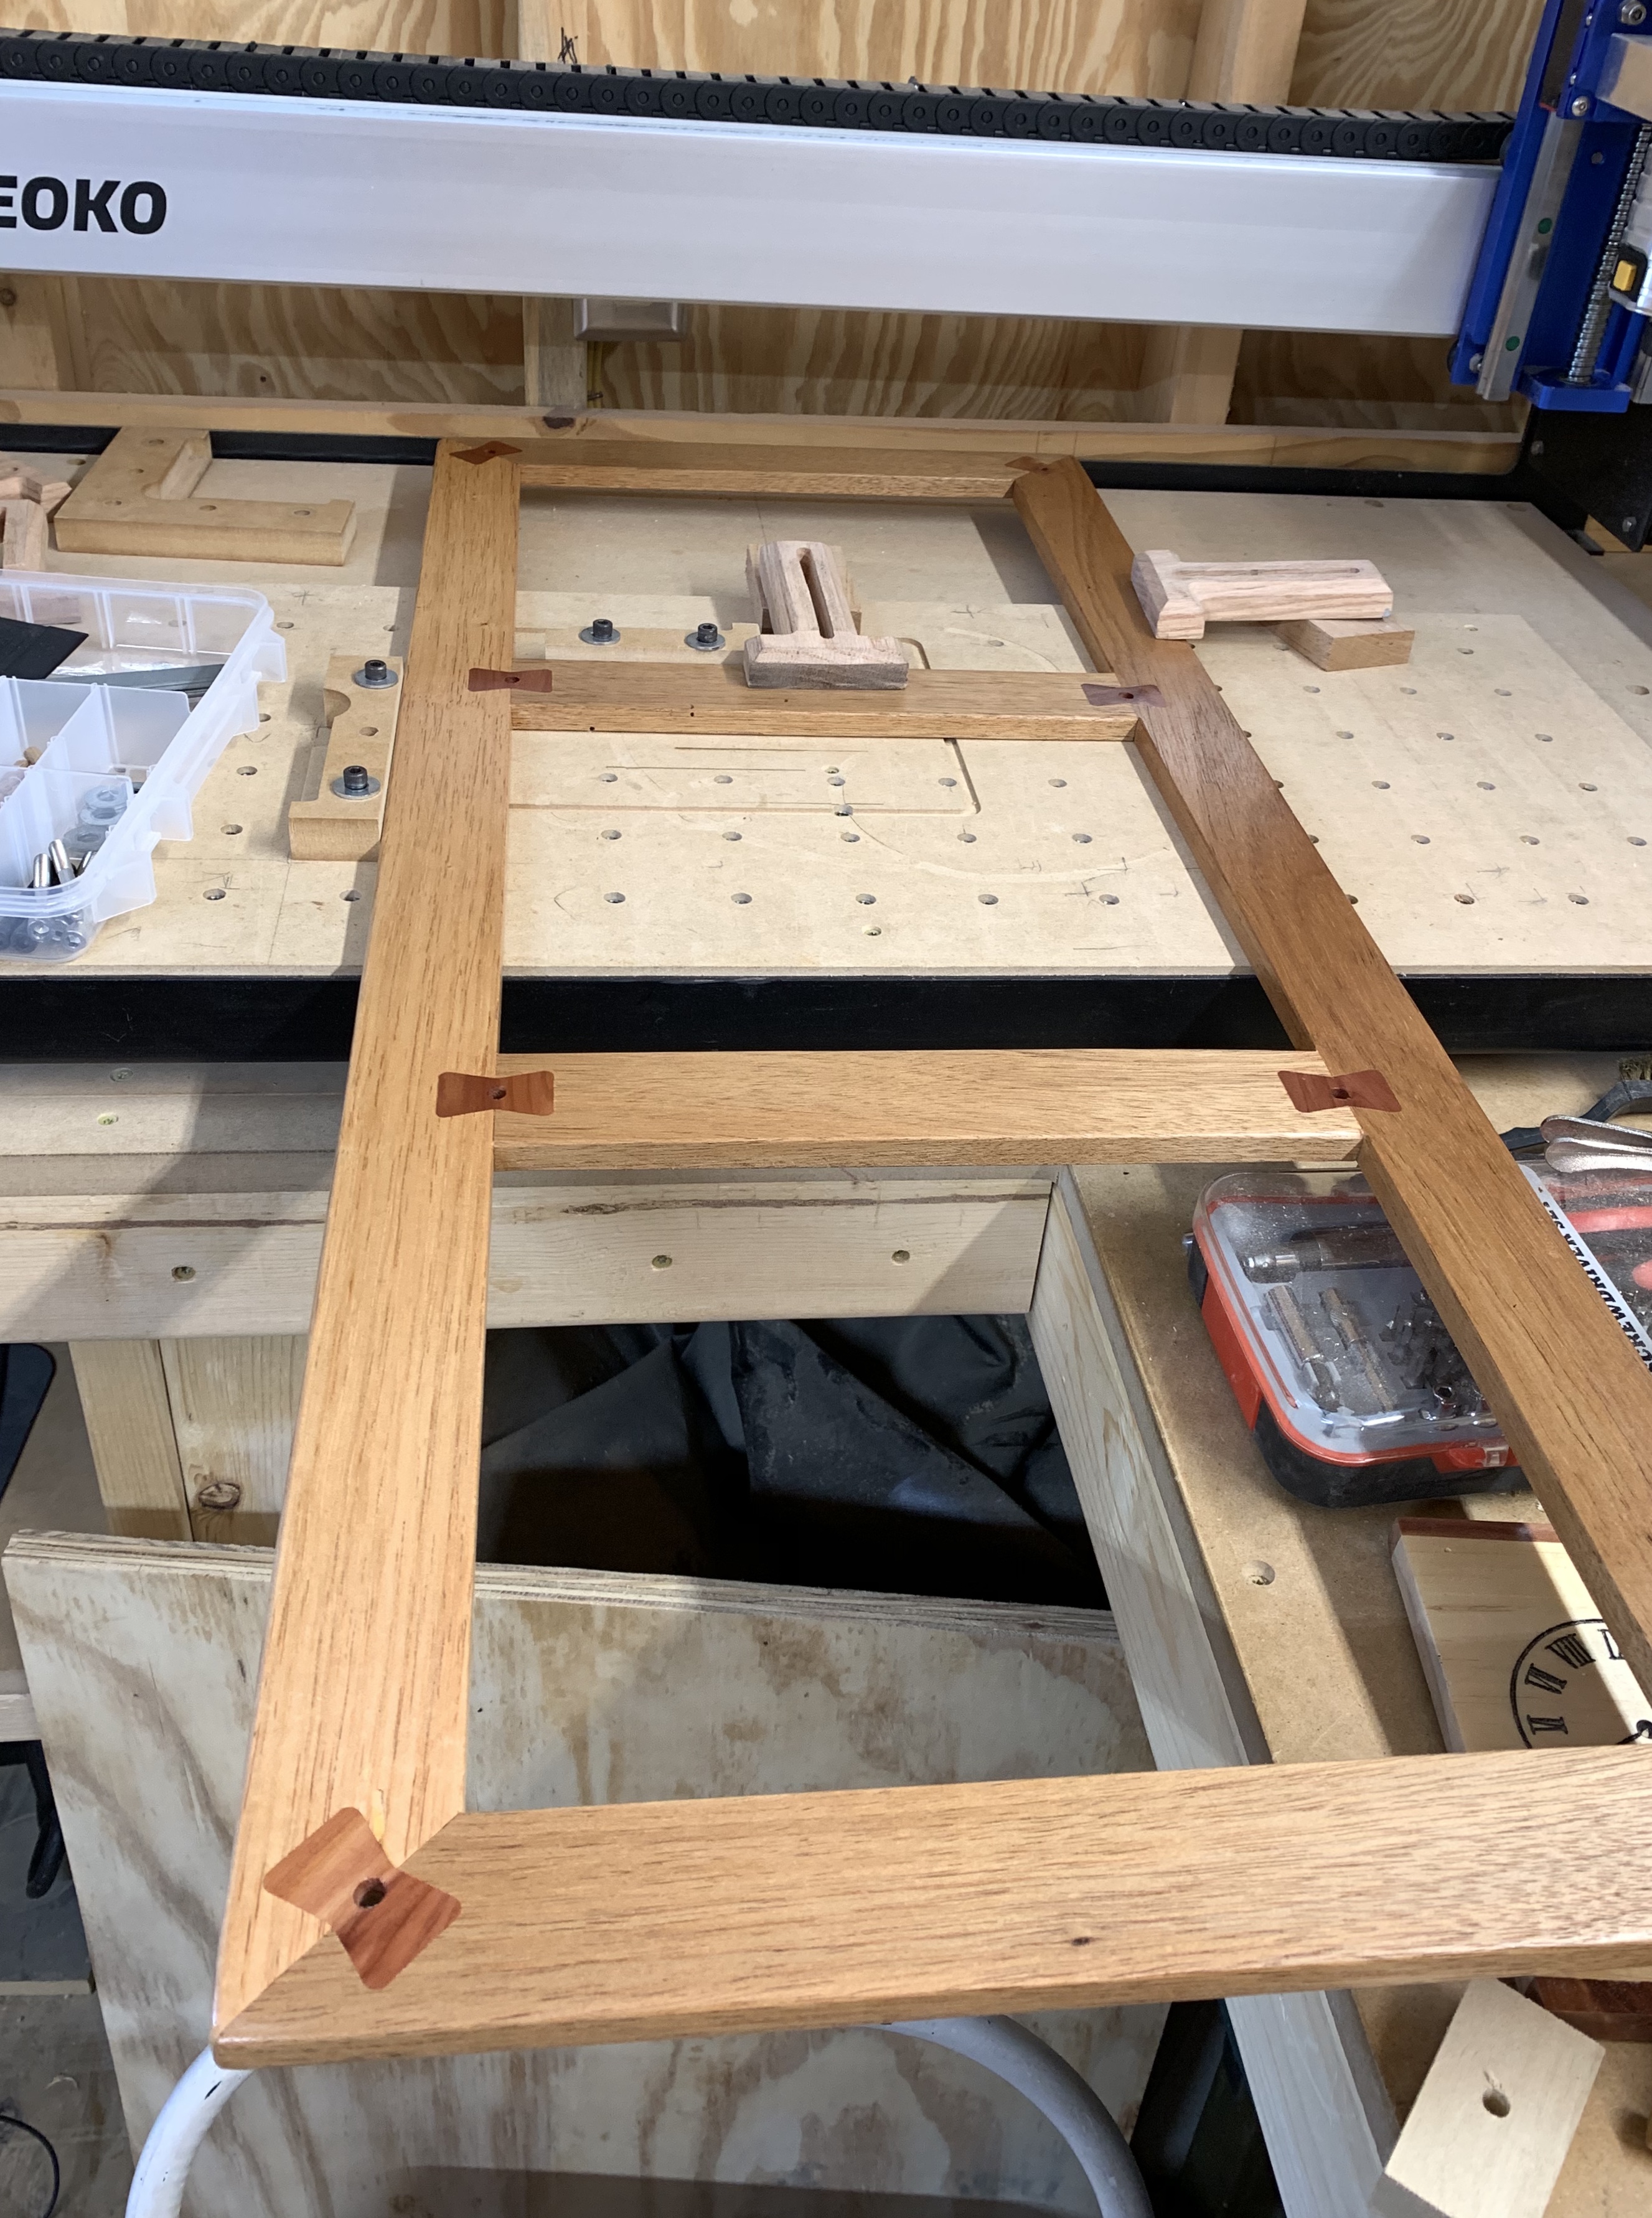
I tried to take a couple of pics while I was out in my shop today.
First for the how.
I let the length hang off the front of the machine.
After cutting the first four, I just flipped it around to get the four on the other side.
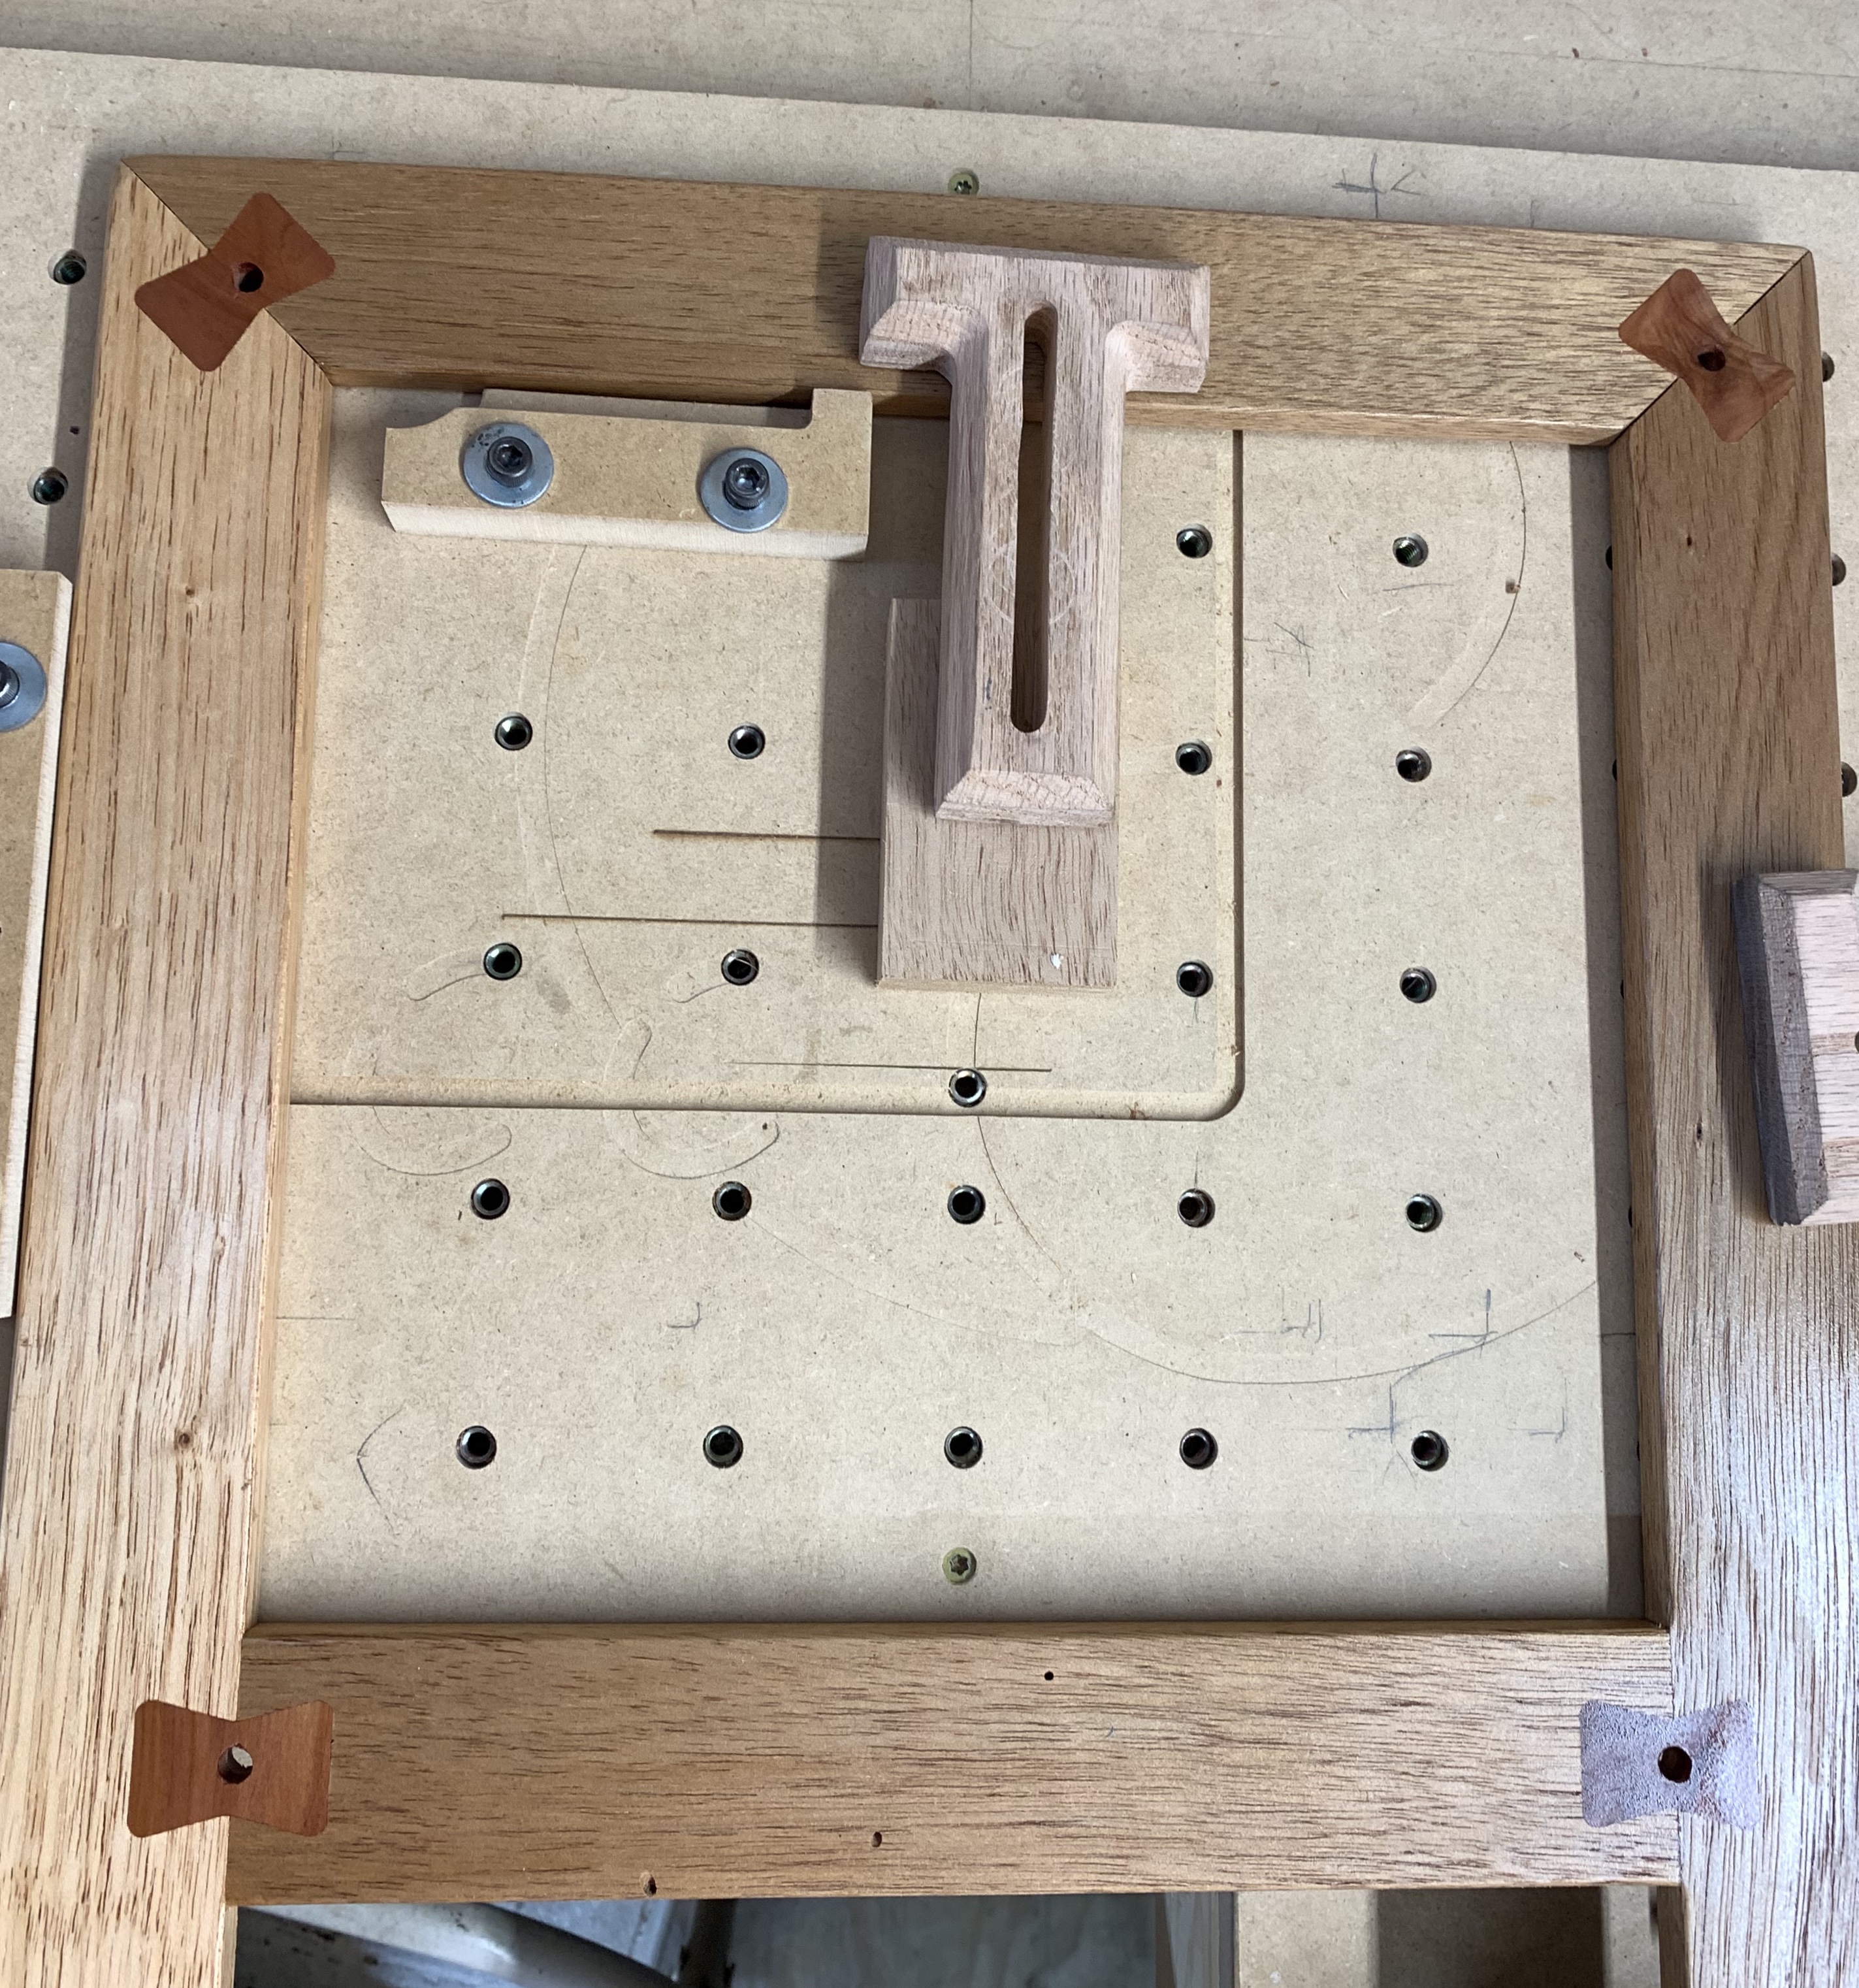
This way I could cut the pockets all in one go. I set up the job to go from center, and set zero center where I wanted them to be. I did only cut one at a time though. So, cut left top, move right top re-zero X, and cut, move down to next set and repeat.
Maybe it’s just me, but friends and family members are the most difficult clients. They don’t necessarily take your advice seriously as a woodworker because they know all the other dumb stuff you’ve done or said in your life.
3 Likes
Griff
(Well crap, my hypometric precursor device is blown…)
8
Yeah, commissions for family/friends can be challenging .
Thanks for the pics of your setup, I’m adding them to my toolbox.
Curious about your use of epoxy. Any troubles with ooze/cleanup after cure? Cure time? Clamping?
a.f.waltz / Griff. You guys have hit the nail on the head. lol. Family project this is. lol.
As for the stupid stuff they have seen and heard from me, oh, that’s a really long list. Ha, ha.
I have been using G-Flex epoxy for sometime for putting handles on knives. Even though I peen the pins inlace and insure they are a good tight fit, the epoxy helps ensure they don’t work loose. It is a marine grade epoxy, so even if the wood is damp/ a little oily, there is no problem. It can also withstand expansion and contraction of the wood, and is shock resistant. It also has a pretty good amount of working time, generally 30 minutes or so, and takes about 4 hours to set.
I took my time doing prep, lots of tapping off, and around the pockets. I used the flat of a razor to scrap off most of the squeeze out. Though to be honest I have worked with this stuff a good bit, so generally I do pretty good about keeping that to a minimum. I generally clamp, then take the clamps off and scrap as much squeeze out (because there’s always the little bit more) with the razor as I can, and pull up the tape.
Clamp for at least 4 hours, though I generally let it set up over night.
While the butterfly ties are a good tight fit into the pocket, the clamps just help insure they don’t back out as the epoxy sets, and not a lot of force is needed.
Then it’s just a matter of the normal finish work. Cut off excess material of the butterfly tie, and some sanding. Hope this makes sense, and helps.
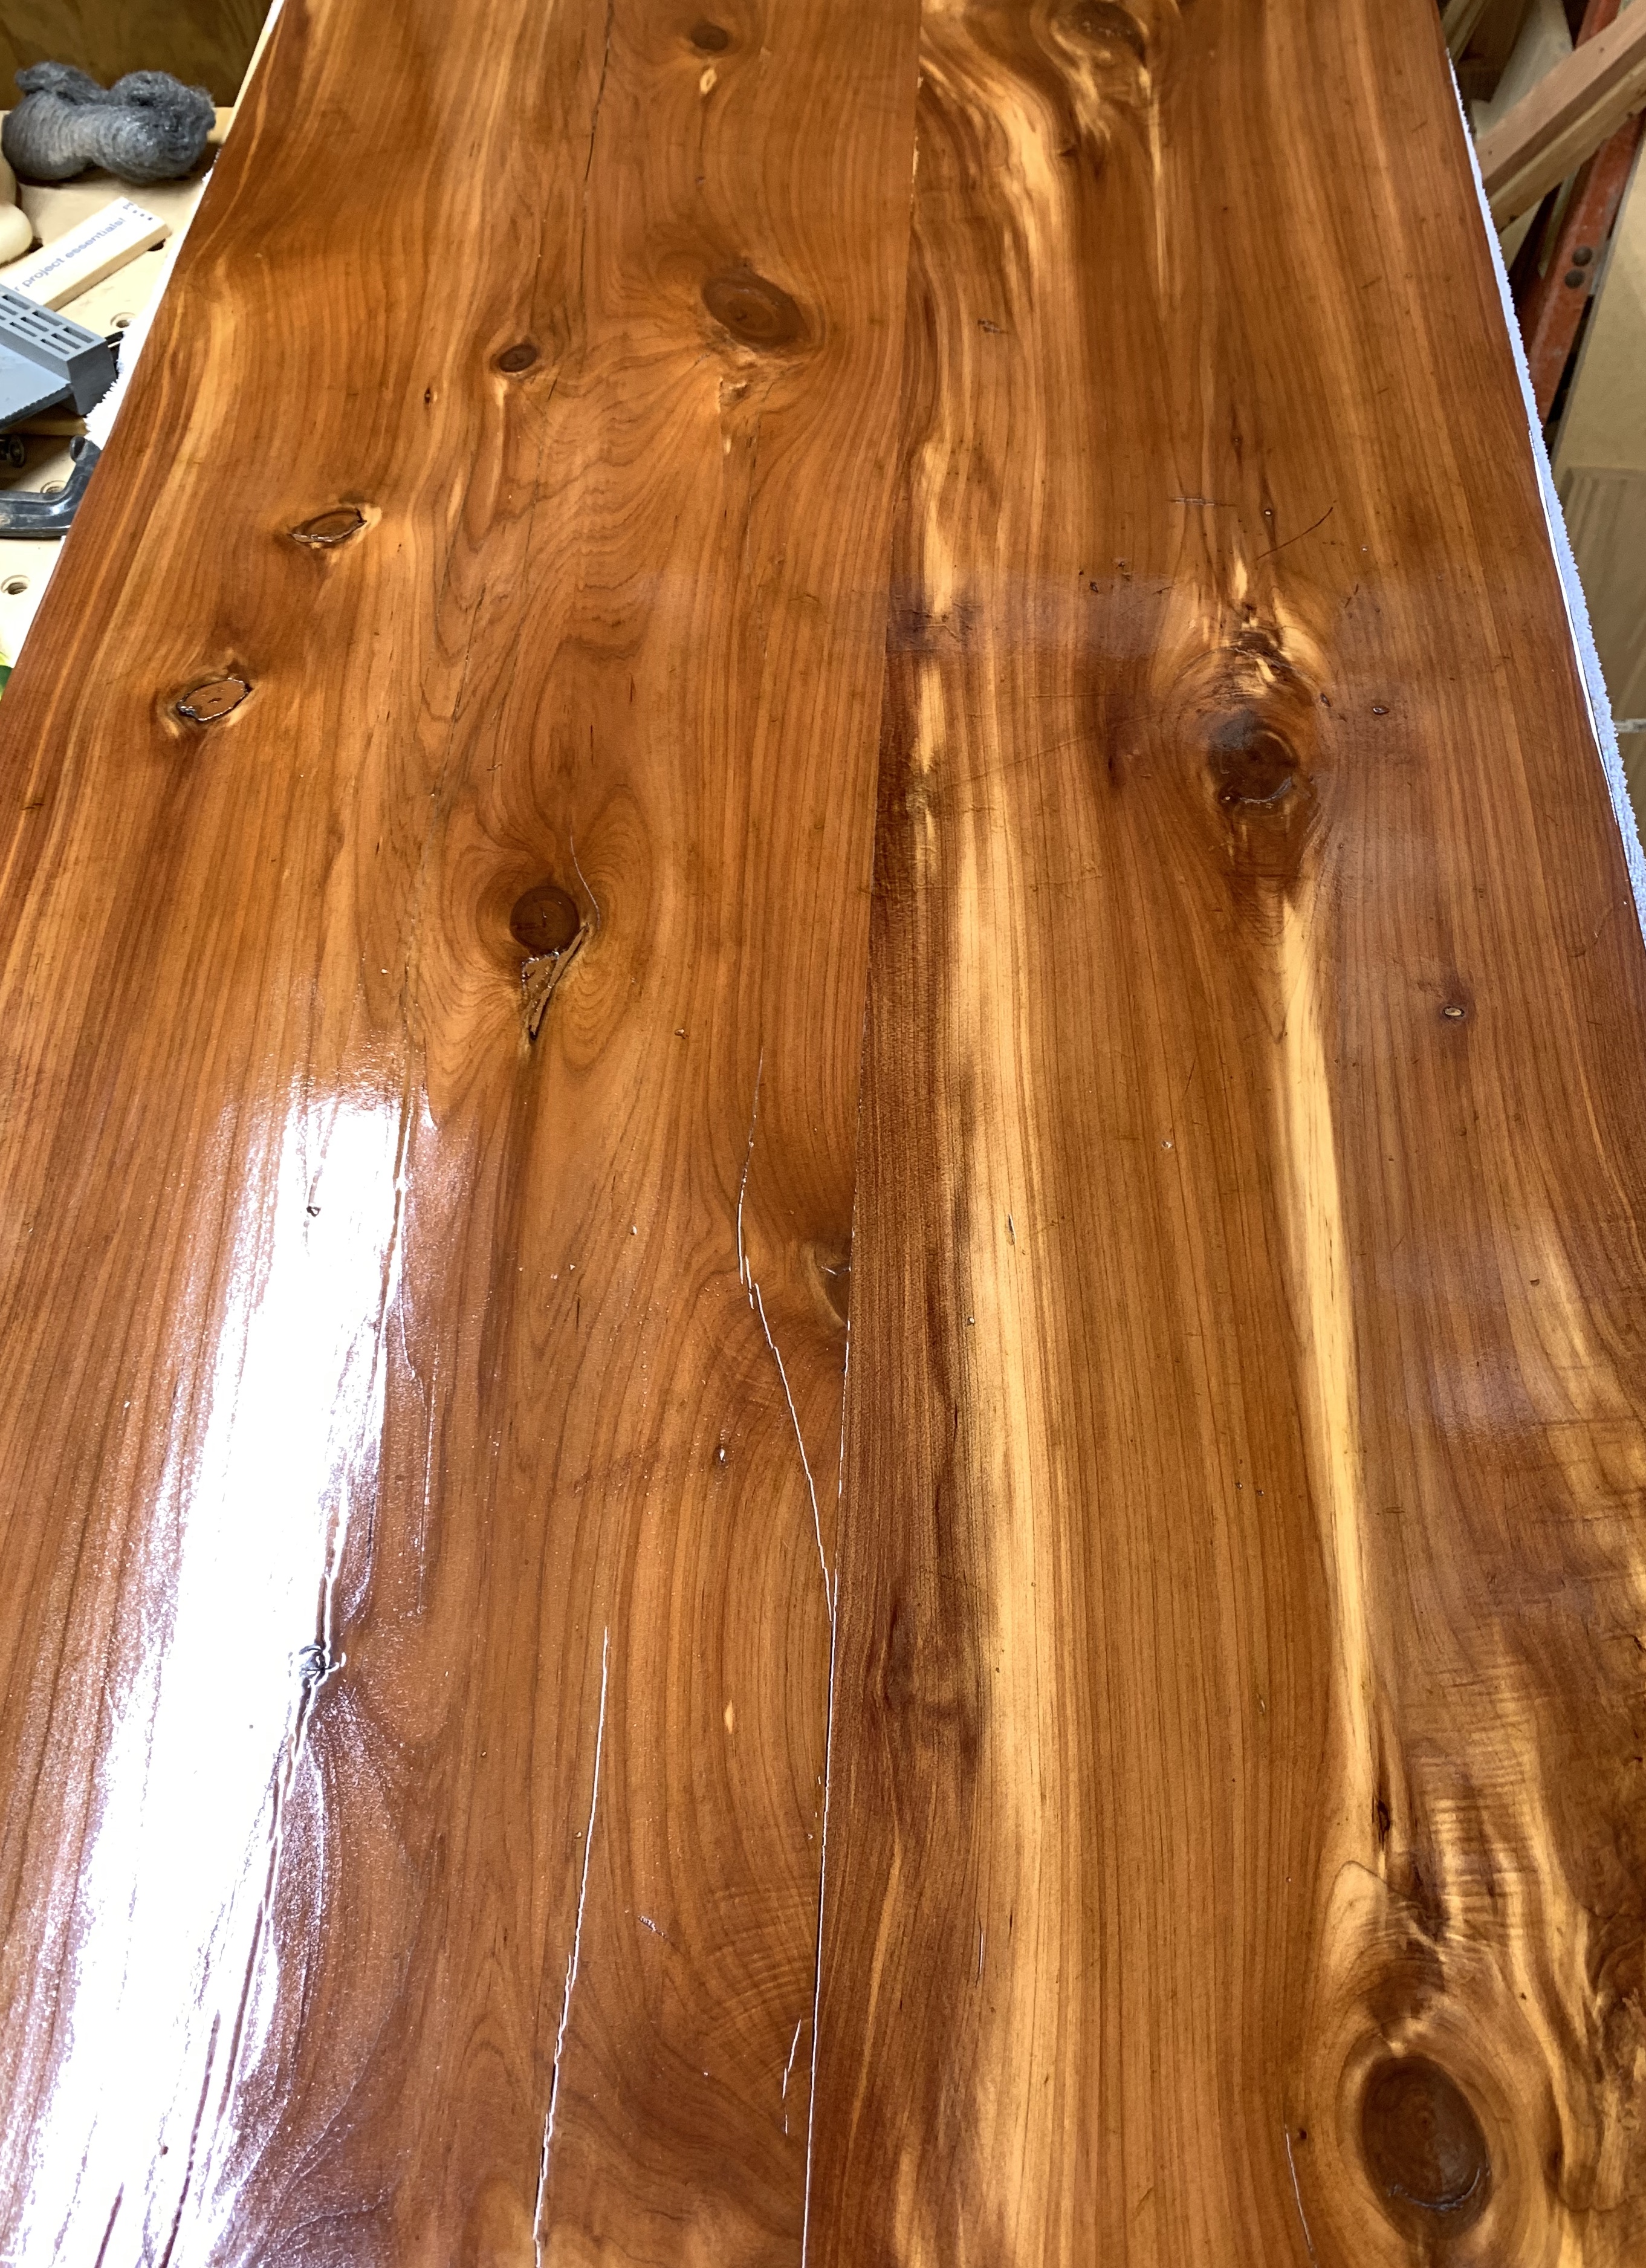
This lid thing is finally done, and gone back to it’s home. lol.
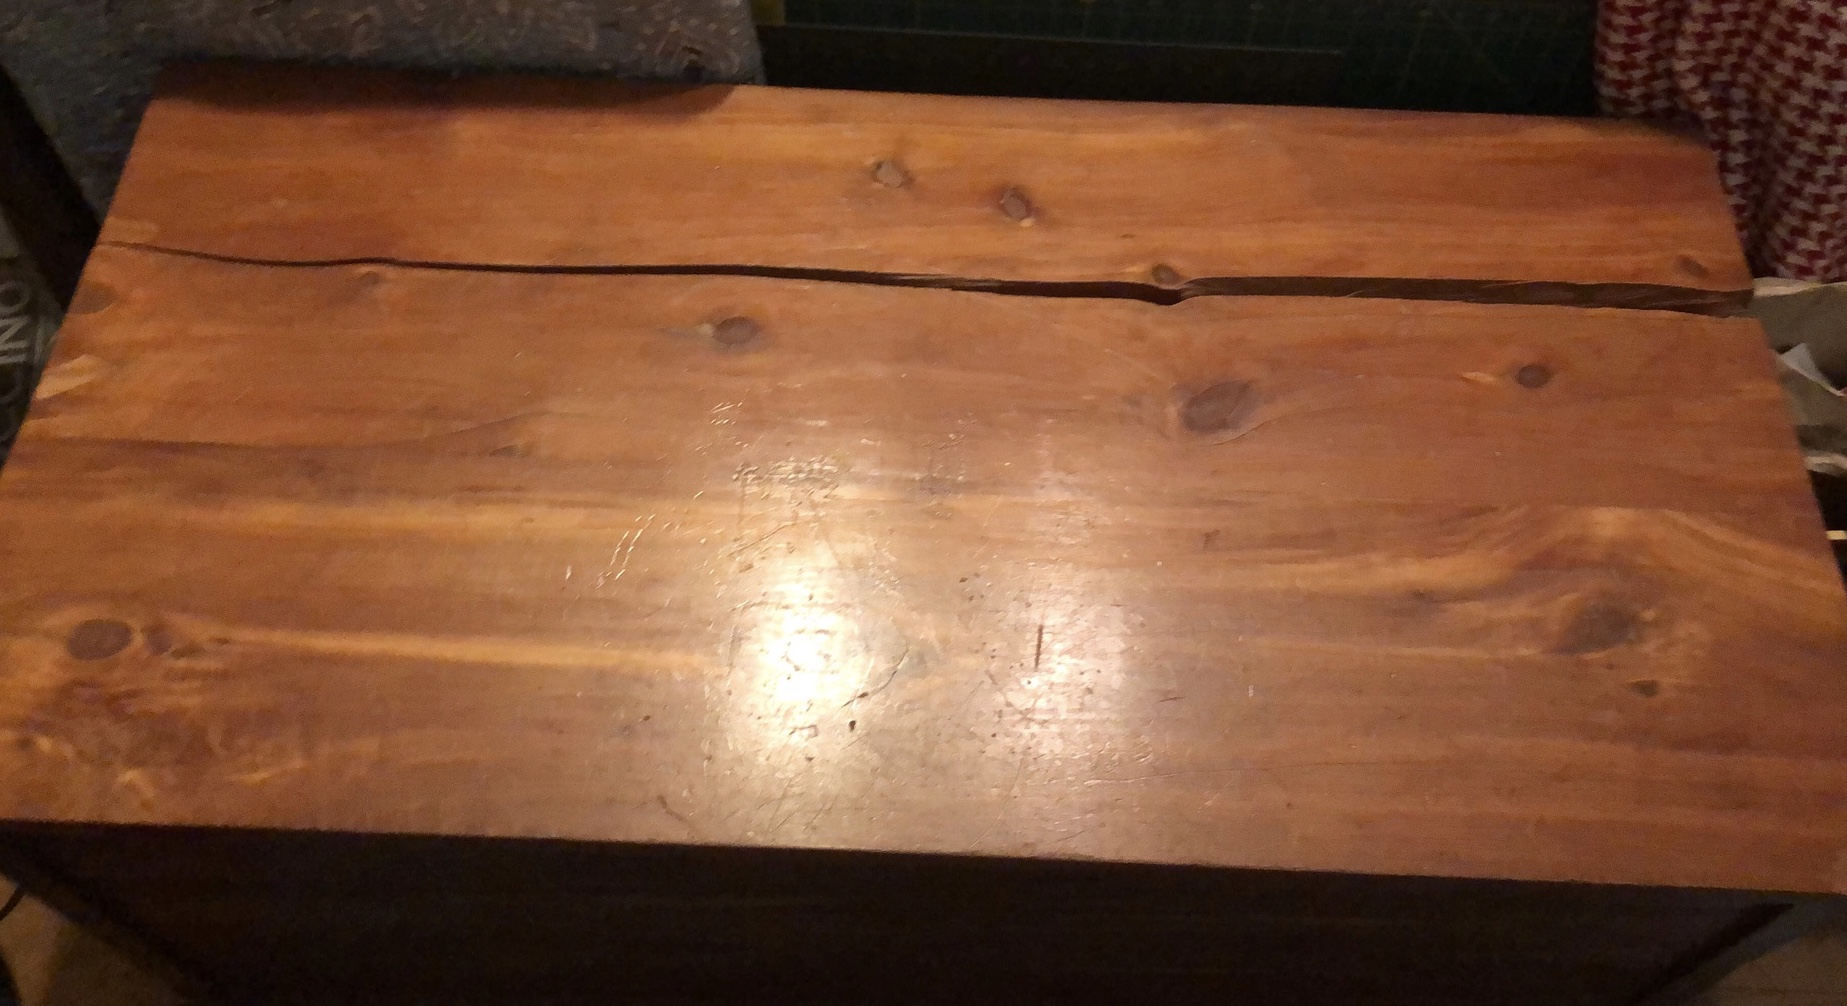
This is the original photo I was sent to see about fixing this thing. It was worse in person.
This photo didn’t really show the rest of the cracks in the lid, or how bad they were. Just that the lid was now in two parts.
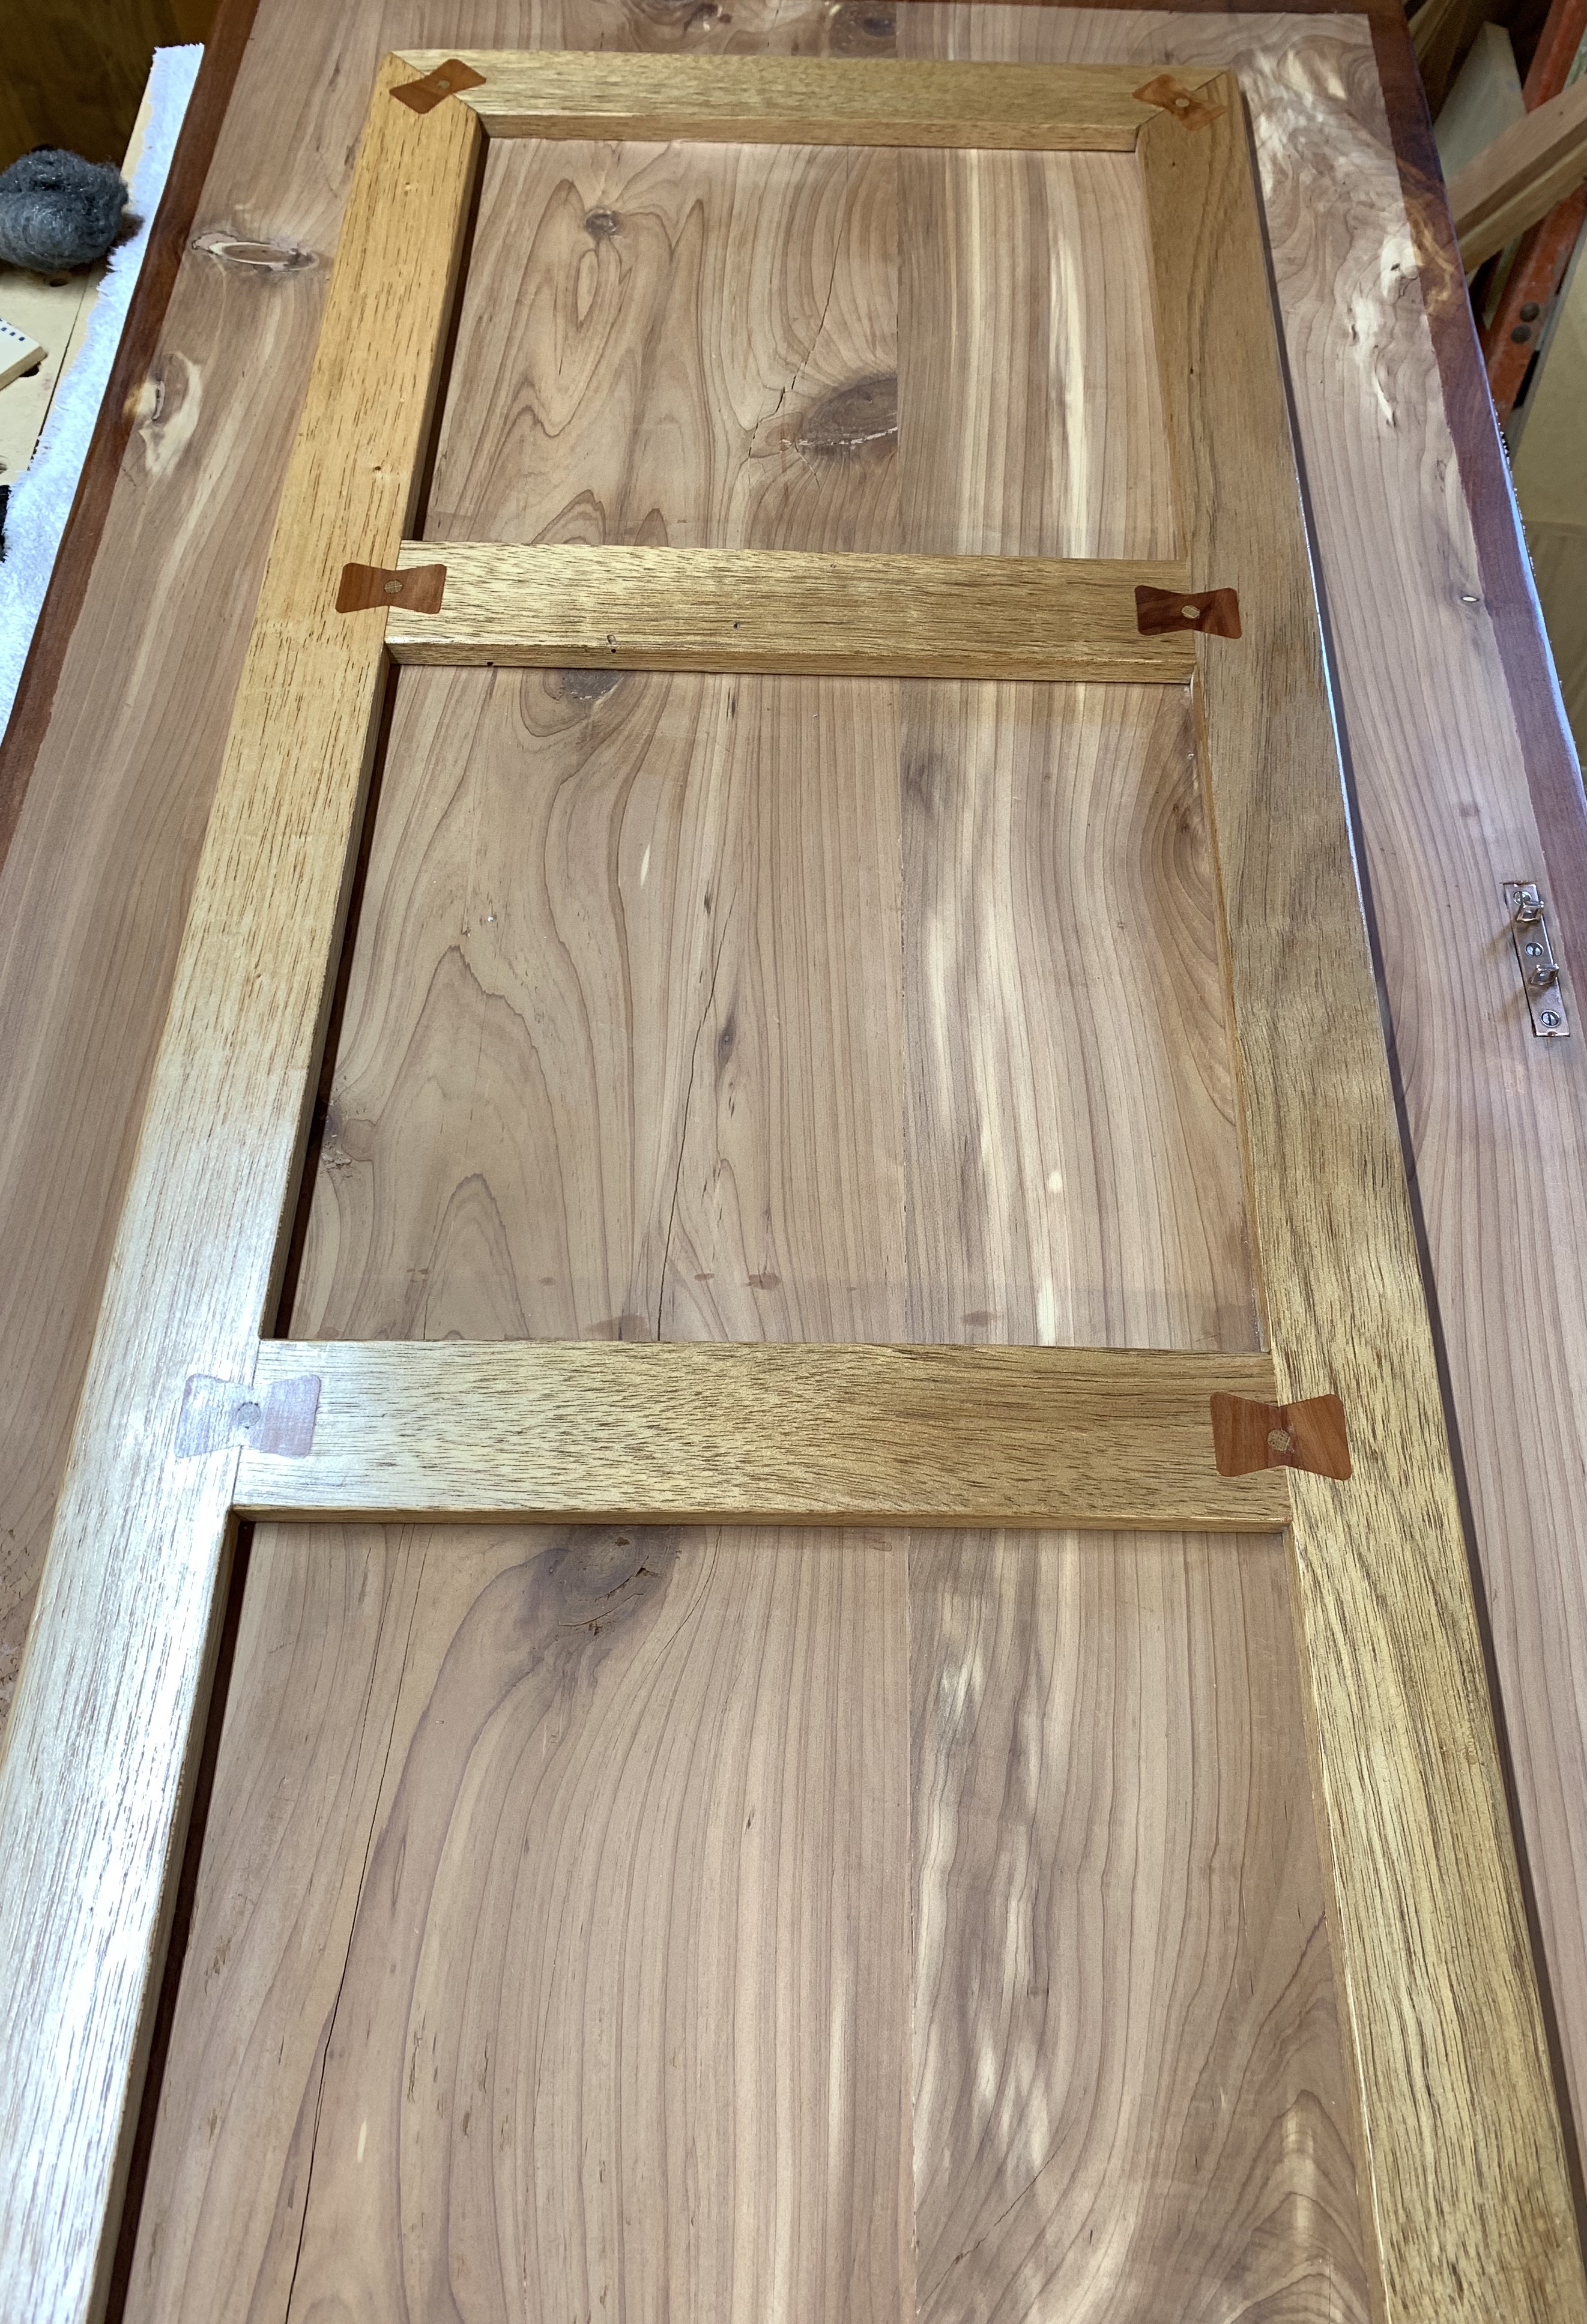
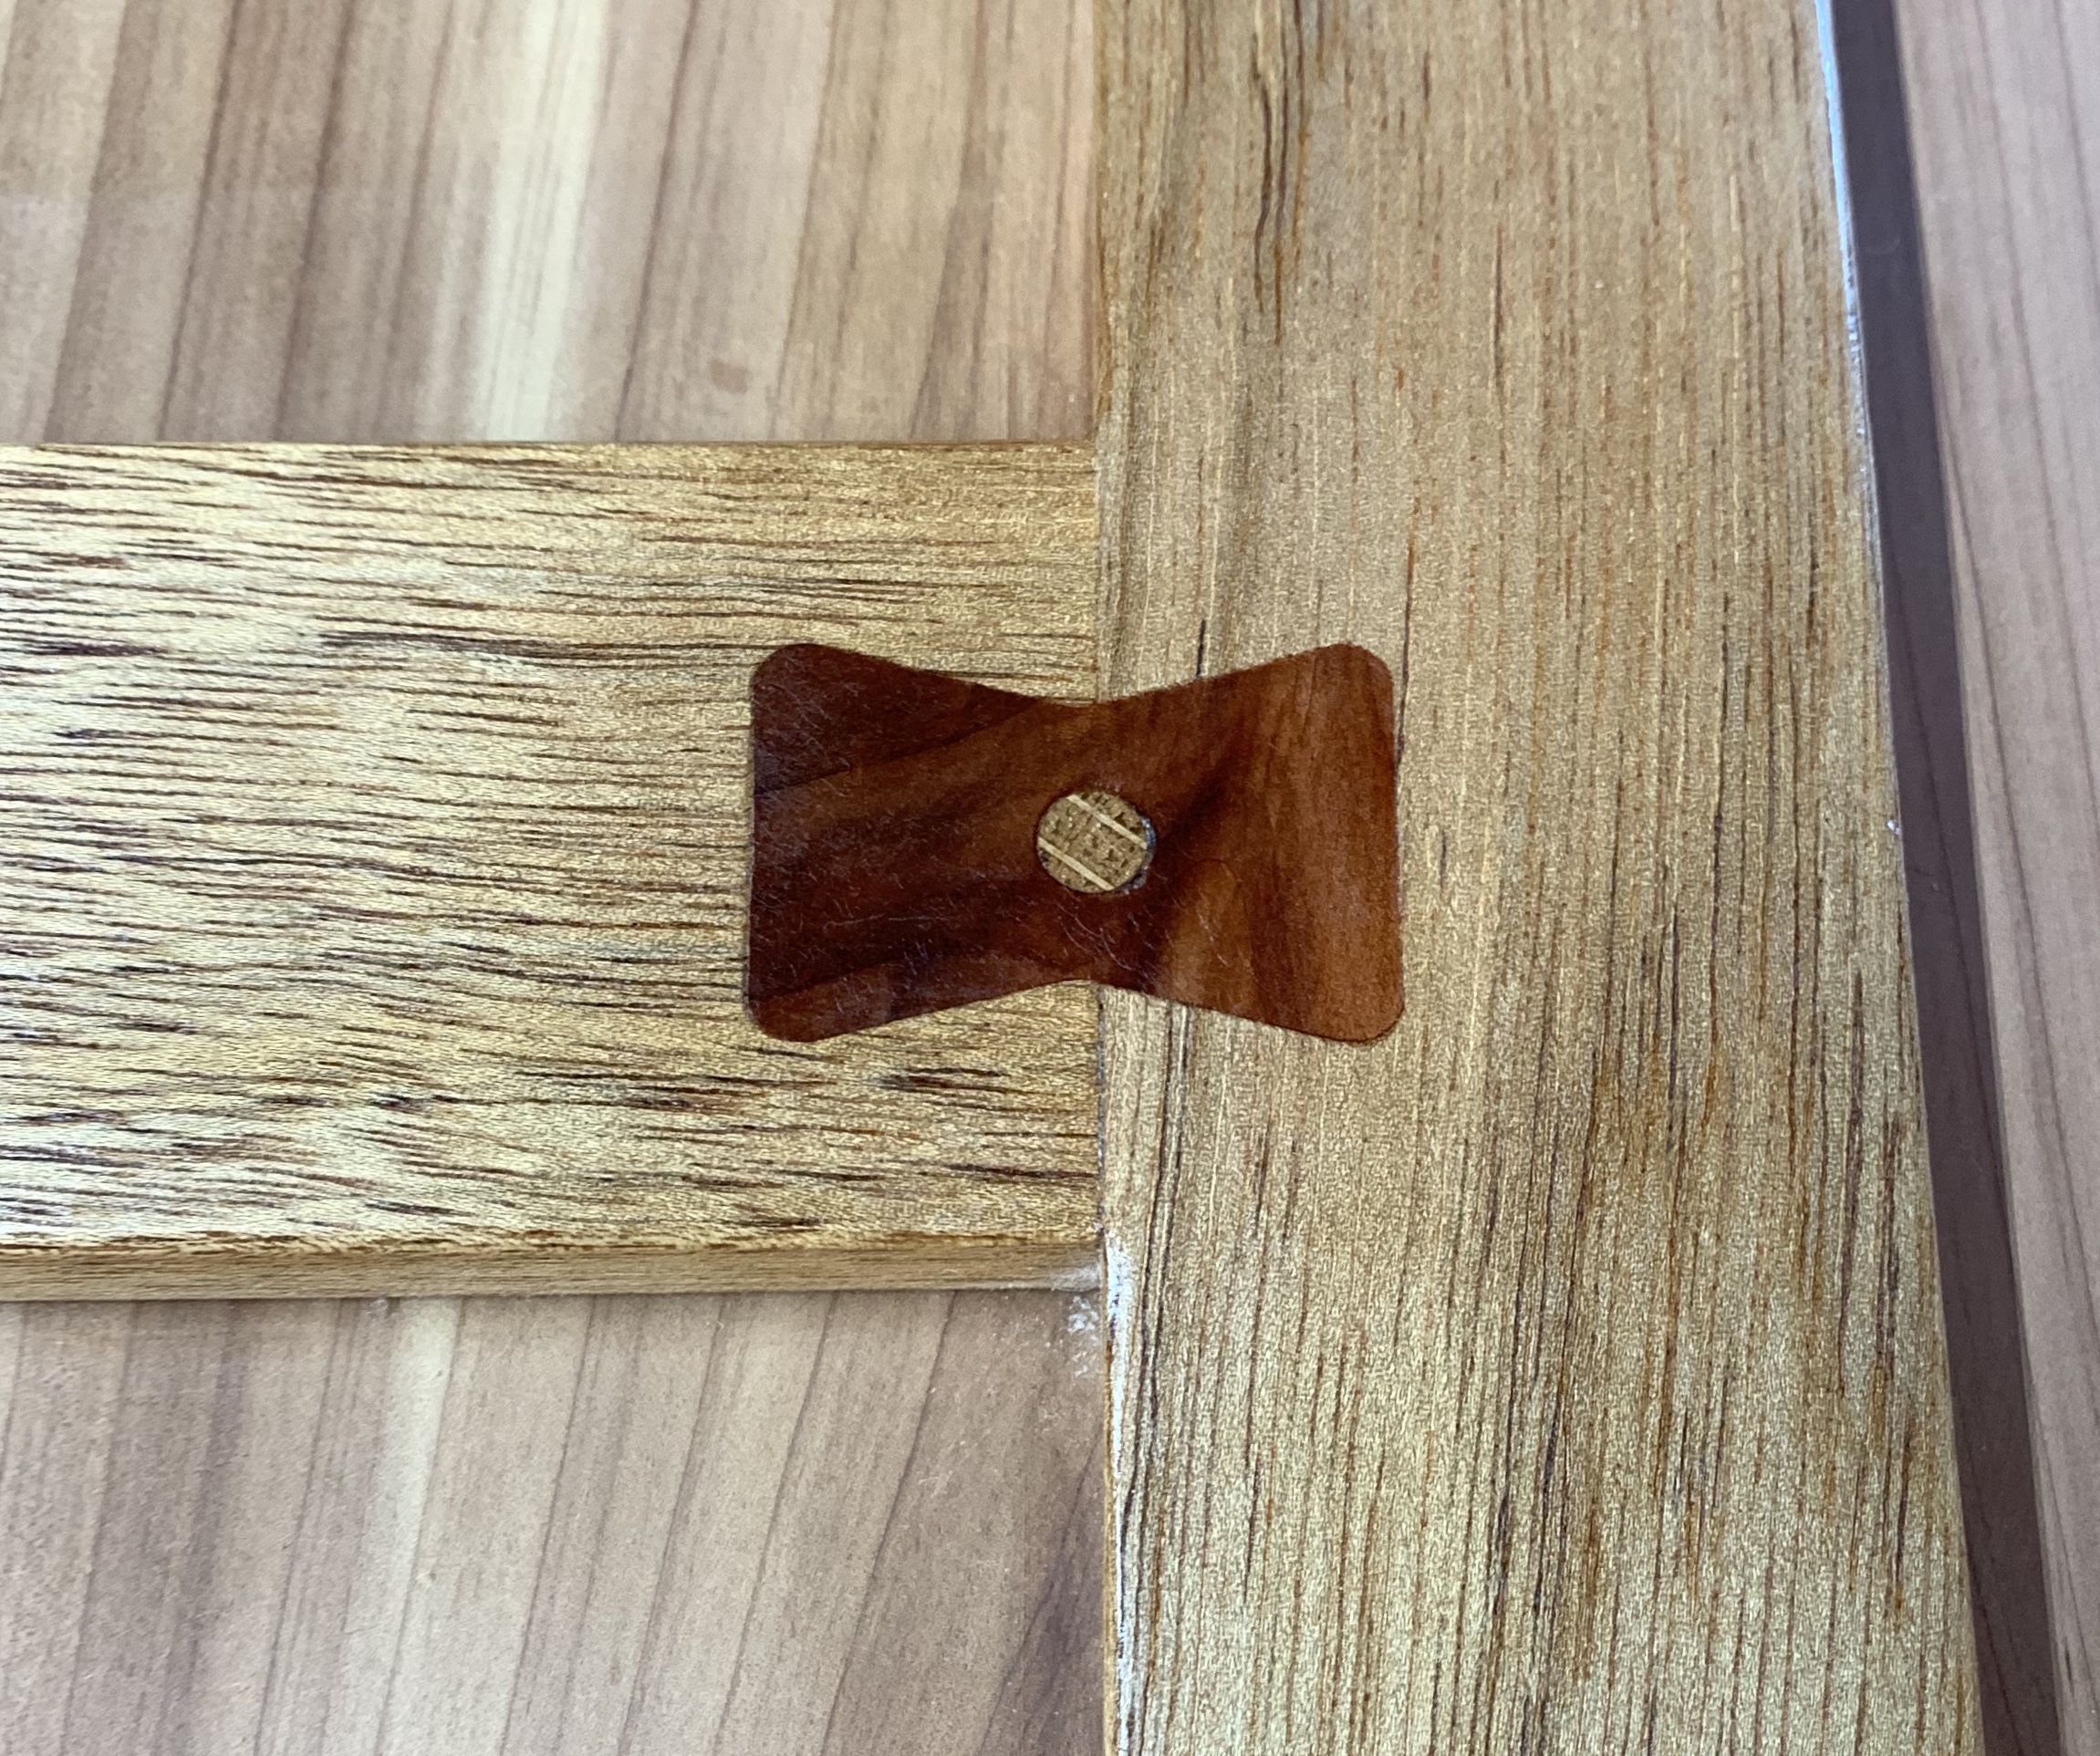
The “frame”, and close up up butterfly tie with dowel. Again the dowels are 0.250 into the cedar lid through the butterfly tie and frame. I also did a coat of lacquer on the frame.

 .
.