Not a large or complex piece, but it started on the Nomad, and also included hand work and the lathe, so why not?
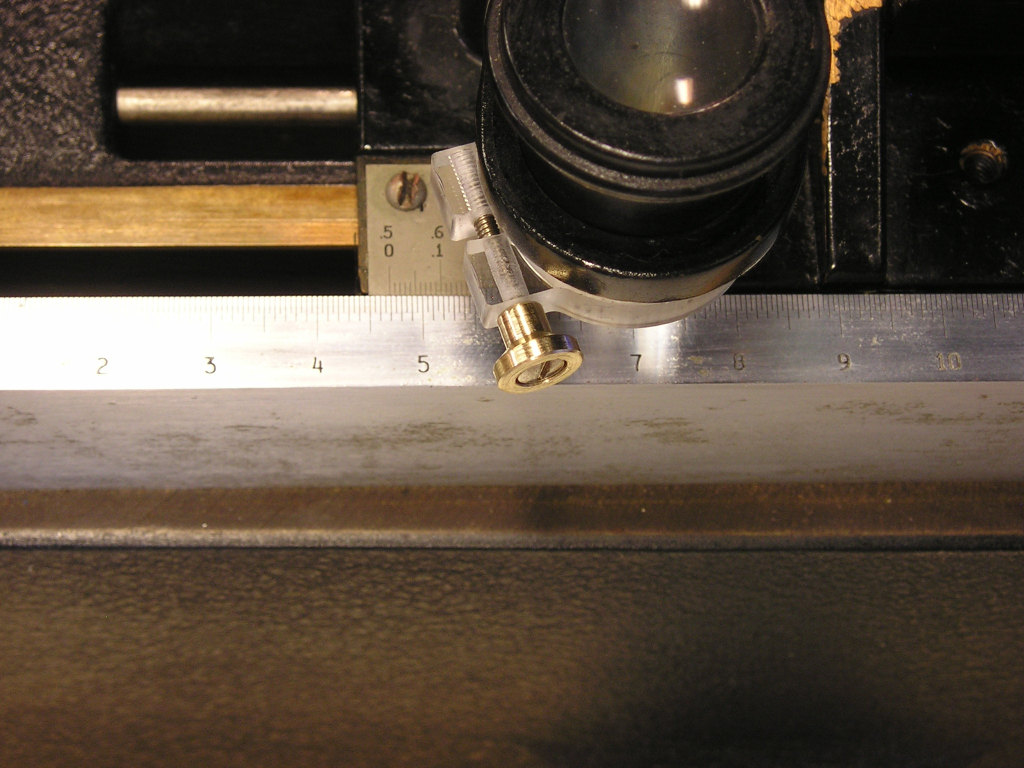
I needed an eyepiece clamp for my traveling microscope. The vernier scale is by 0.01mm and is 25mm long-- it covers 0.5mm-- and the magnifier for the vernier scale is a friction-wing fit in the holdr(standard Gaertner design–the holder tube has slots cut in it to make tabs). With a focal depth of about 1mm, it is tough to keep in focus when it is swung during use, and it tends to walk during transport in the case.
So I made a clamp.
Material is 5.0mm acrylic.
The tools used were 3.15mm and 2.35mm two flute endmills, both TiCN (titanium carbonitride) coated. Not the highest temp coating, but acrylic chips clear well from this coating. Both tools by Kyocera. Both running at 10KRPM in the Nomad with feed rate of 1200mm/min.
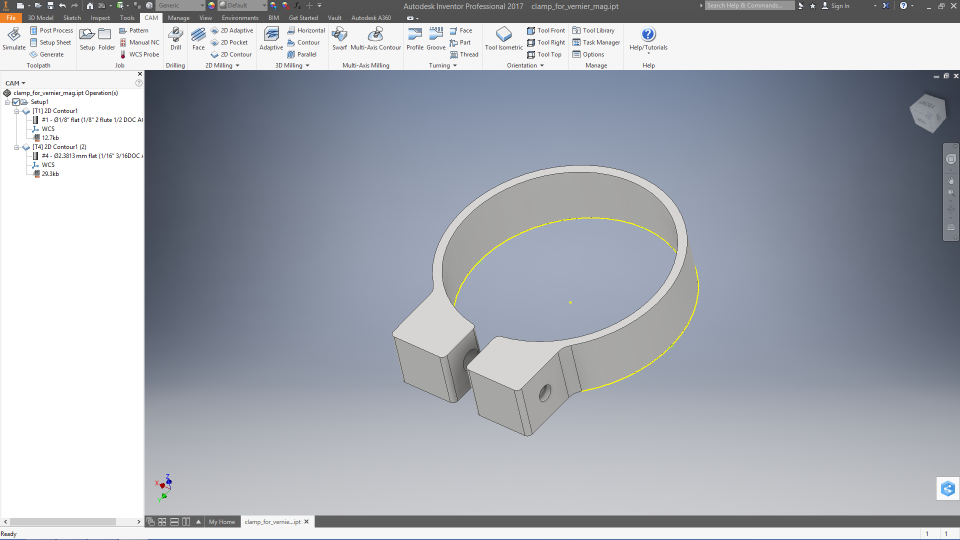
The design was done in Inventor. It is my preferred tool since I also use it at work.
I ran 1.0mm depth of cut for the larger tool, and left 0.1mm for finish cut and stopped with a 1.0mm skin oat the bottom for support. I ran the smaller tool for the finish and final clearing of the bottom. Tabs were left for support when the bottom was cleared. The work was clamped down to a High Tech Systems bed of holes baseplate with a file card underneath for safety clearance and vibration control. The clamps were hunks of aluminum from the scrap pile. The origin was set at the bottom. This allowed my to not worry about hitting the bedplate due to machine tolerance. The 0.15mm cardstock did get touched, but the tool didn’t go through.
Diameter of the center is 22mm, ans the holding screw is a 2.5mm. Here is the part and the cut simulation:
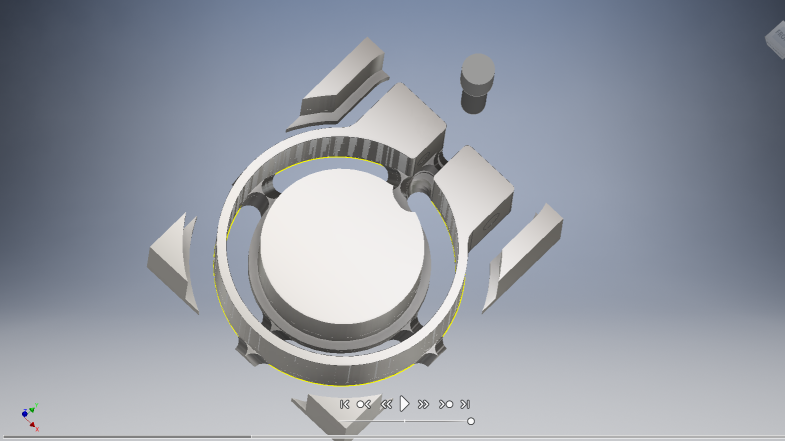
The material was a larger sheet than the defined stock, but I didn’t worry about it in the model. Plowing through this way it makes no difference, since the toolpath used (contour 2D) does surface entries only.
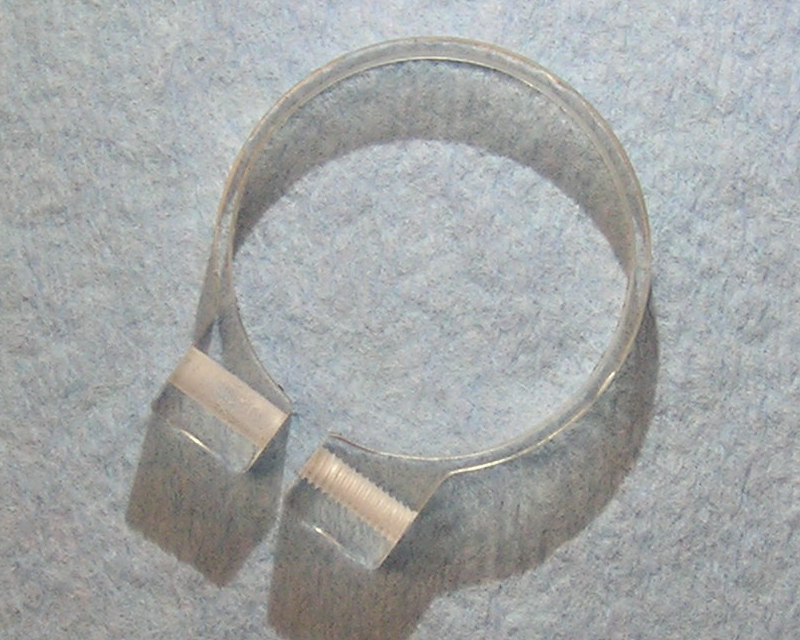
The final part (second iteration, since I didn’t have quite enough clearance for the screw in the first one) is
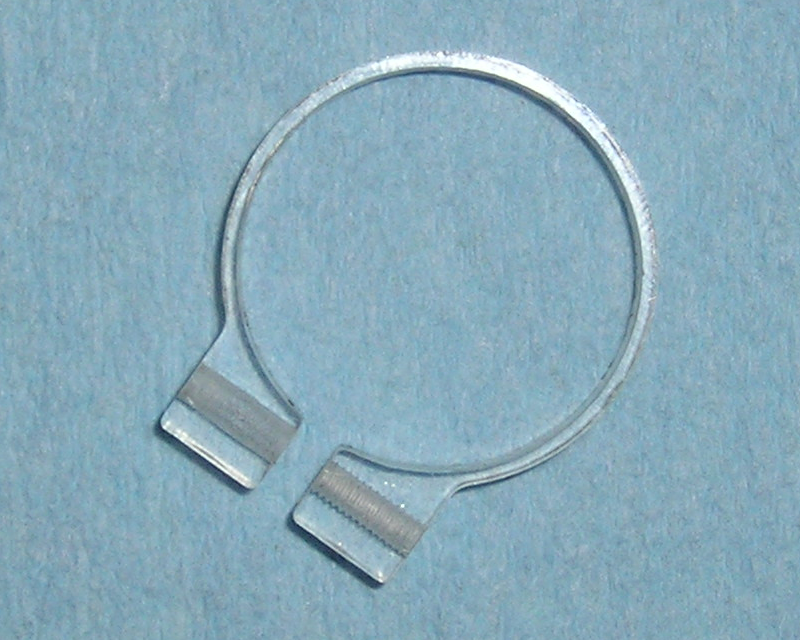
and artistic-like:
The drilling for the screw was done on my small (precision) drill press. It is pre-WWII, supposedly. It does the job well, though. I tapped by hand using a gun tap. In acrylic, especially in smaller sizes, if at all possible, tapped holes should be through holes and done with a gun tap. No jams and no breakage. The center piece was left in for support while drilling and tapping, then broken out and the edges cleaned with a three-corner scraper to take the sharp off and pretty up where the tabs were.
Machining time to this point is about 10 minutes, design time a couple hours, and hand work time about 1/2 hour.
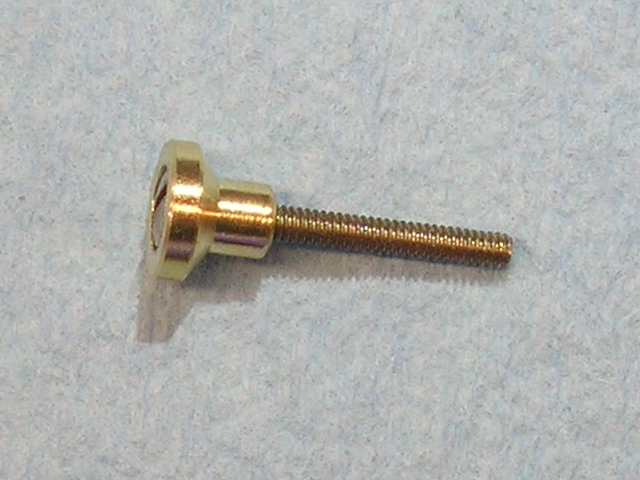
Then I went to the lathe. I had a brass screw the appropriate size, so I turned a bronze head for it, counterbored for the screw head, tapped the bore, and loctited them together.
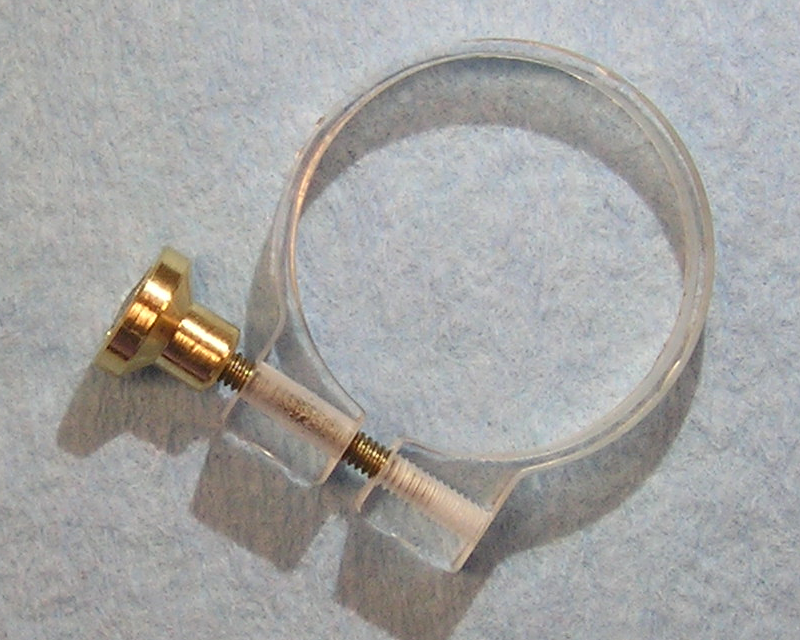
The assembled device:
and installed