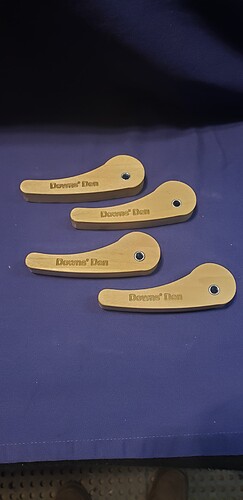
Finally got around to making these much needed clamps
Nice but you need to make the mirror image of those. The reason is on the right side of a project when you tighten those the torque of tightening further tightens them. If you have the same clamp on the left side as you are tightening them the torque is trying to loosen the clamp. Same is true for the top vs bottom of the project. So you need both mirror images to work properly and work against yourself.
I have similar ones but I mostly user the bigger brother. I get more clamping range from the larger ones and with a larger radius I can get more clamping torque as well.
One thing to be careful of with cam clamps is the length of the bolts you use to secure to a spoil board. As you surface a spoil board the bolts you use in tee nuts can bottom out on the Shapeoko base. This will cause your spoil board to lift up and if left for extended periods of time can cause permanent warping. Besides even if you dont leave the spoil board warped the single use makes your project uneven and hard to get consistent doc. Be sure to measure your bolt length to make sure it does not bottom out and recheck length after a surfacing.
Excellent point, thank you. After visualizing, and testing, makes sense that mirroring apposite forces from left, right, top and bottom is required due to the eccentrical rotation of the clamp. Also, appreciate noting that any deflection or warping of the waste board can effect the doc of the final project. Will try larger radius clamps to add to my tool box. Cheers !
