Can you control where the initial toolpath starts in Carbide Create?

I’m a newbie and I’m trying to cut a horseshoe shape out - but the toolpath starts in a weird place and plunges slightly inside the ending toolpath leaving a “dimple” in my design. How do I fix both issues? Thanks.

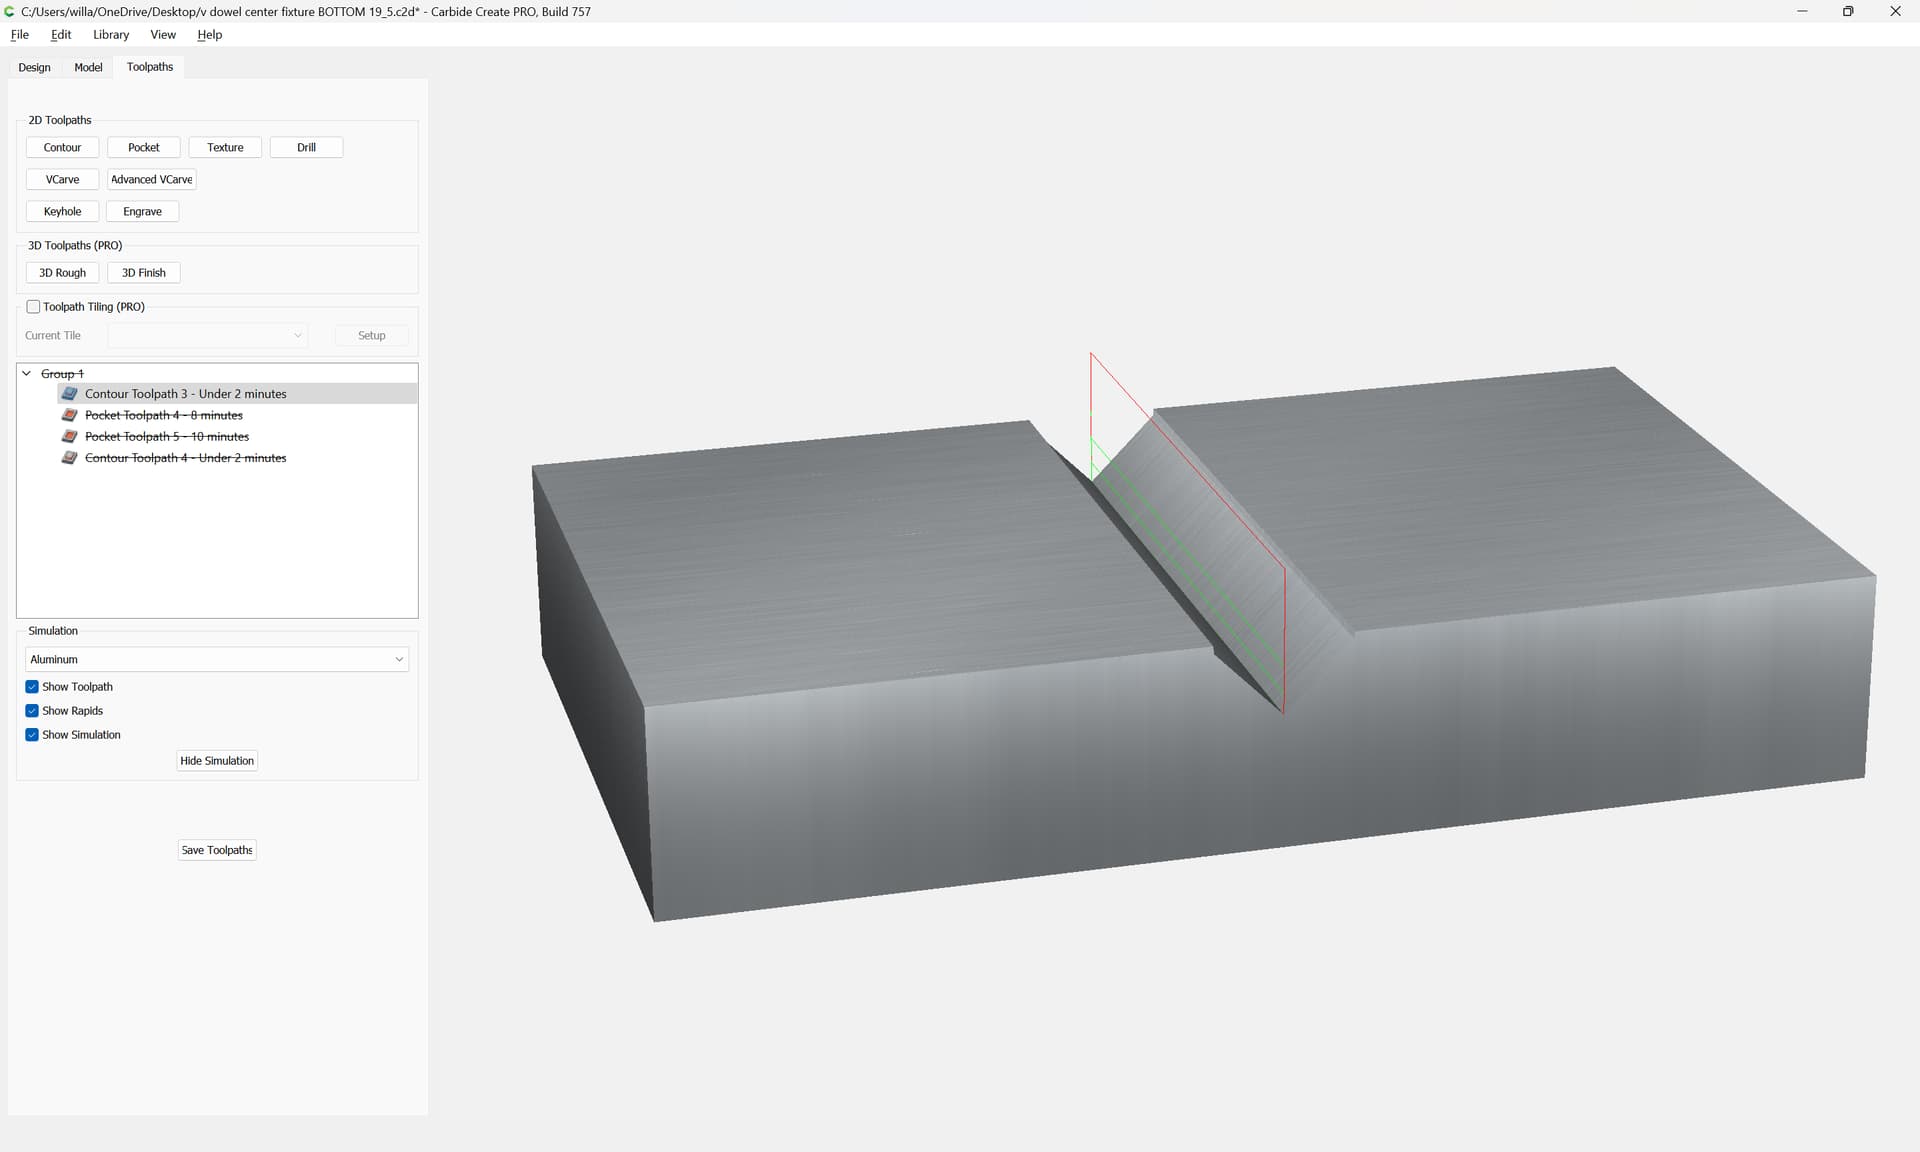
You can see where the operation will start by noting where the red rapid moves down to meet the first cut:

Where possible avoid slotting and add geometry and cut as a pocket

and/or

and consider leaving a roughing clearance and taking a finishing pass.

Carbide Create has vastly improved from version 3 to v7. In v3 the tool paths would skip all around wasting a lot of time moving around. The v7 still seems random at times but they have optimized the router movements much more than in earlier versions. However you cannot control where a tool path will begin but as @WillAdams suggested you can kind of see where it will start. In the end it does not matter where it starts only how it ends with the cuts you want.

Now if you think your clamps can be in the way you can always do two things.

  1. Pause and reposition your clamps during the pause.
  2. Use painters tape and super glue to not need clamps to secure your material.

There are other methods like double sided tape but that can get messy. If you have not used the painters tape and super glue method I highly recommend you try it. I use a large L bracket to initially position my work. I leave it in place unless the tool path might cut into it. In that case after placing the painters tape and super glue I remove the L bracket so I dont cut it up with a contour cut around the outside of my material. The L bracket helps keep my material square to the router and if I need clamps it gives me two sides that are solid I can use my cam clamps against. Here is an example of using my L bracket and painters tape and super glue.

If your projects get large then you do not have to put painters tape 100% under the project but it helps to not have to use tabs and your work is secure.

Here is another example of using painters tape and super glue on an odd shaped piece.

This is what the odd shaped piece turned into. The bottom of the clock was square and was able to put it up against the L bracket.

3 Likes

I’m pretty sure the green end is the start. Your toolpath will “plunge” (engage at plunge feedrate) at the beginning of the cut, and rapid away (retract) at the end of each cut.

For pocket, and contour on a closed vector, you have no control over the start point.
However, on an open vector it’s always going to start on one end of the vector.

For this horseshoe shape, offset the vector by the radius of the cutter. Cut the vector at one of the corners, then drag the ends so they the cross each other.

Now do a contour cut with no offset, and it will start at one end & follow the vector.

image

I like to climb cut, so if the vector is symmetrical you can mirror it.

image

image

1 Like

This topic was automatically closed after 30 days. New replies are no longer allowed.