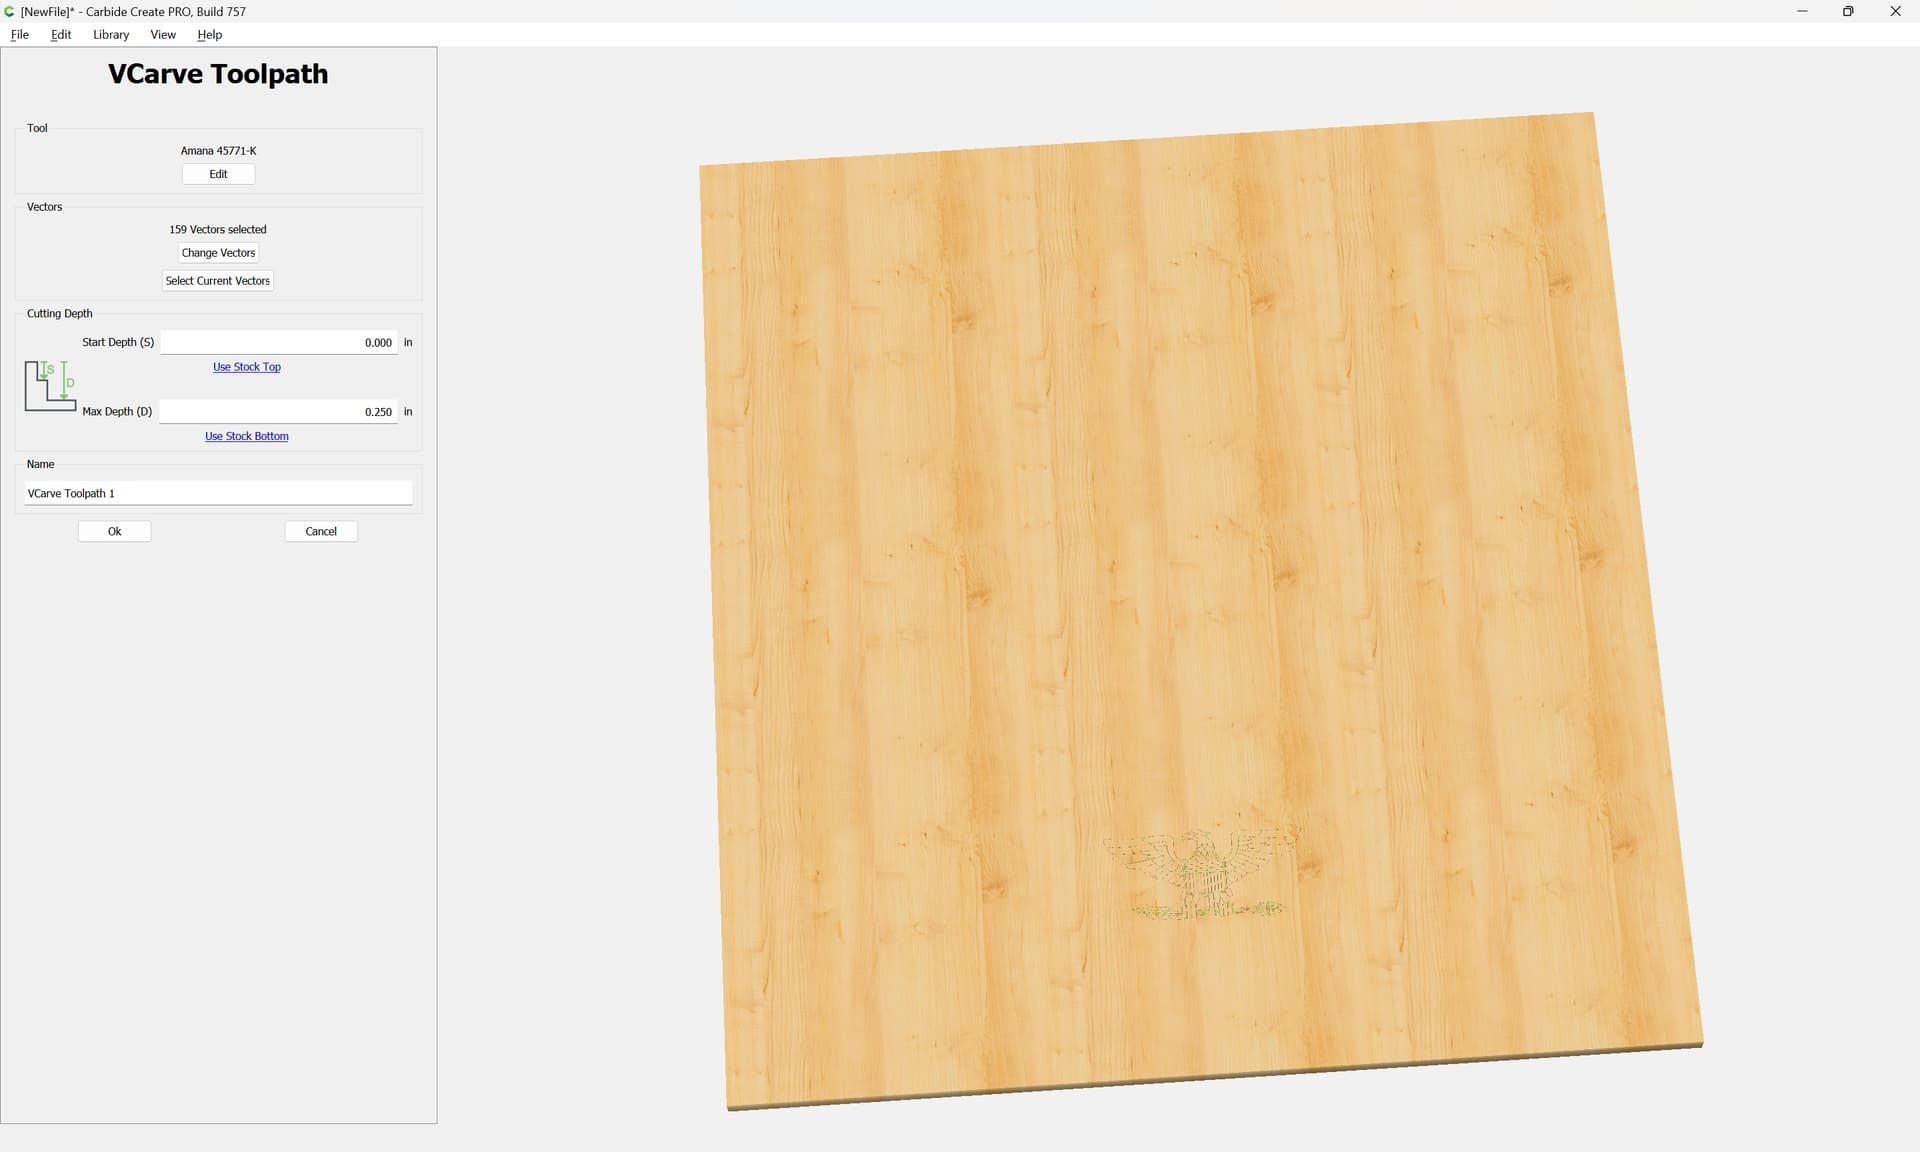
Newbee here, I’m having issues when trying to create a tool-path for the eagle on the attached file. Are there just too many nodes? When I create a tool-path with either a 60 or 90 degree V bit the image is very shallow and compared to the rest of the tool-paths it just doesn’t look right.
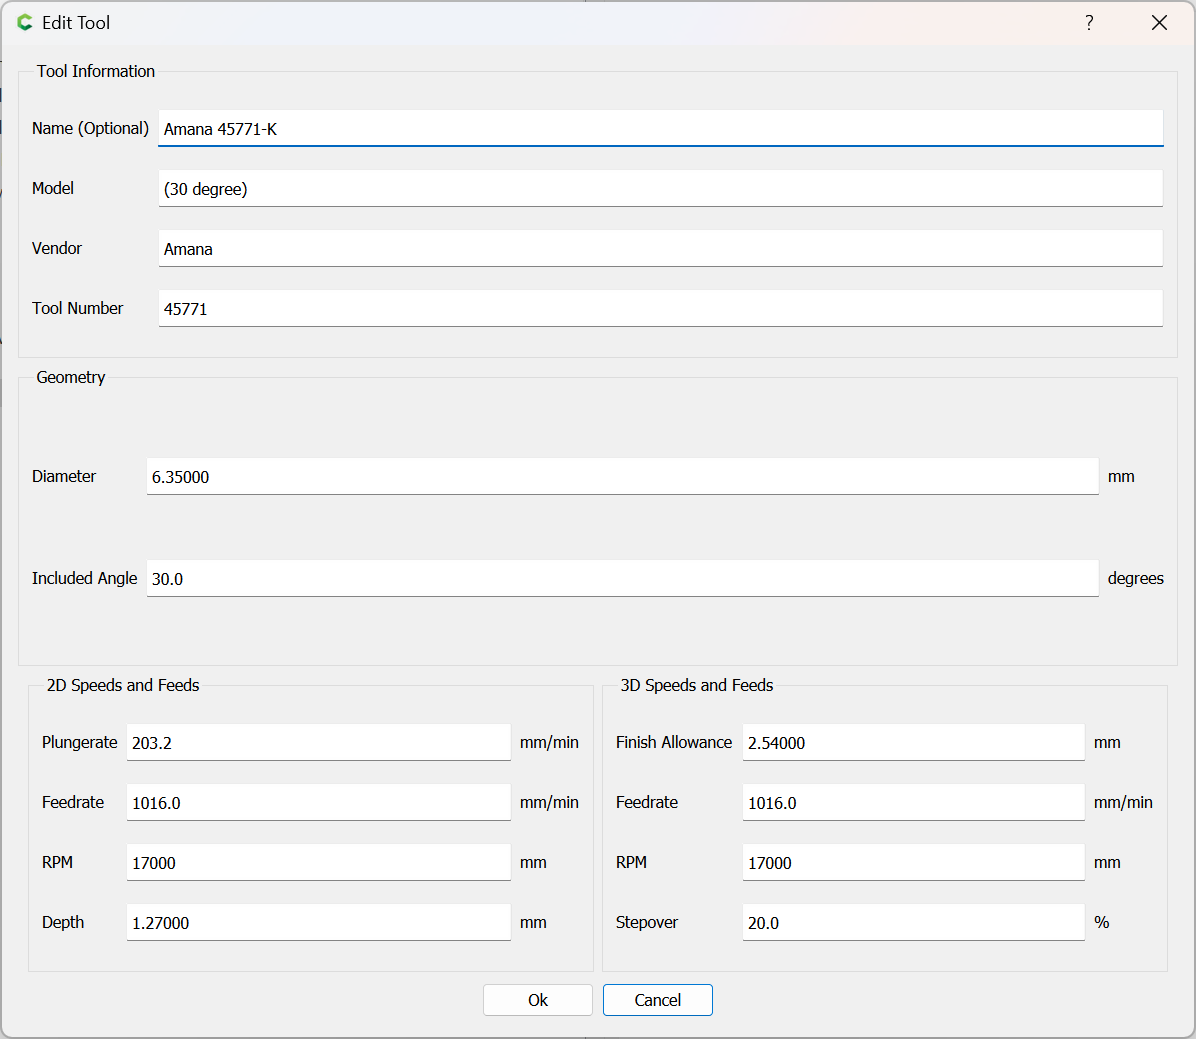
The eagle does look small compared to everything else in the picture. If the design has to be exactly as is, try a 20º engraving bit and see how the simulation looks. If you can redesign the logo, try making the eagle larger and the stars smaller. Maybe put the eagle in the center of the area it’s already in and reposition the stars around it.
As @Ed.E suggested try a smaller angle vee bit. I use a 15 degree vee bit for fine lines. It also depends on how big the material is. If this is 36 x 36" then a 60 degree might work. However if this is 8x10" then a 60/90 will barely scratch the surface.
Caution: a simple vcarve goes down the middle of the lines until the bit touches both sides. On a simple vcarve you should use bottom of material or your vcarve will come out weird if you limit depth. On the other hand you could do an advanced vcarve and the vee bit goes around the perimeter of the lines but if the lines are small a 60/90 will barely scratch the surface. If doing a simple vcarve and the material is thin you can cut right through because the bit goes as deep as required to touch both sides. So the solution for the eagle depends on how physically big it is. So get a 15/20 degree bit to do it specifically if it is very small in relation to the project size.
I’ve been reading a lot about v carves and wondering if I’m understanding things correct. Always use stock bottom and the machine will determine the depth vs. me setting it and risk a lot of bad from possibly happening.
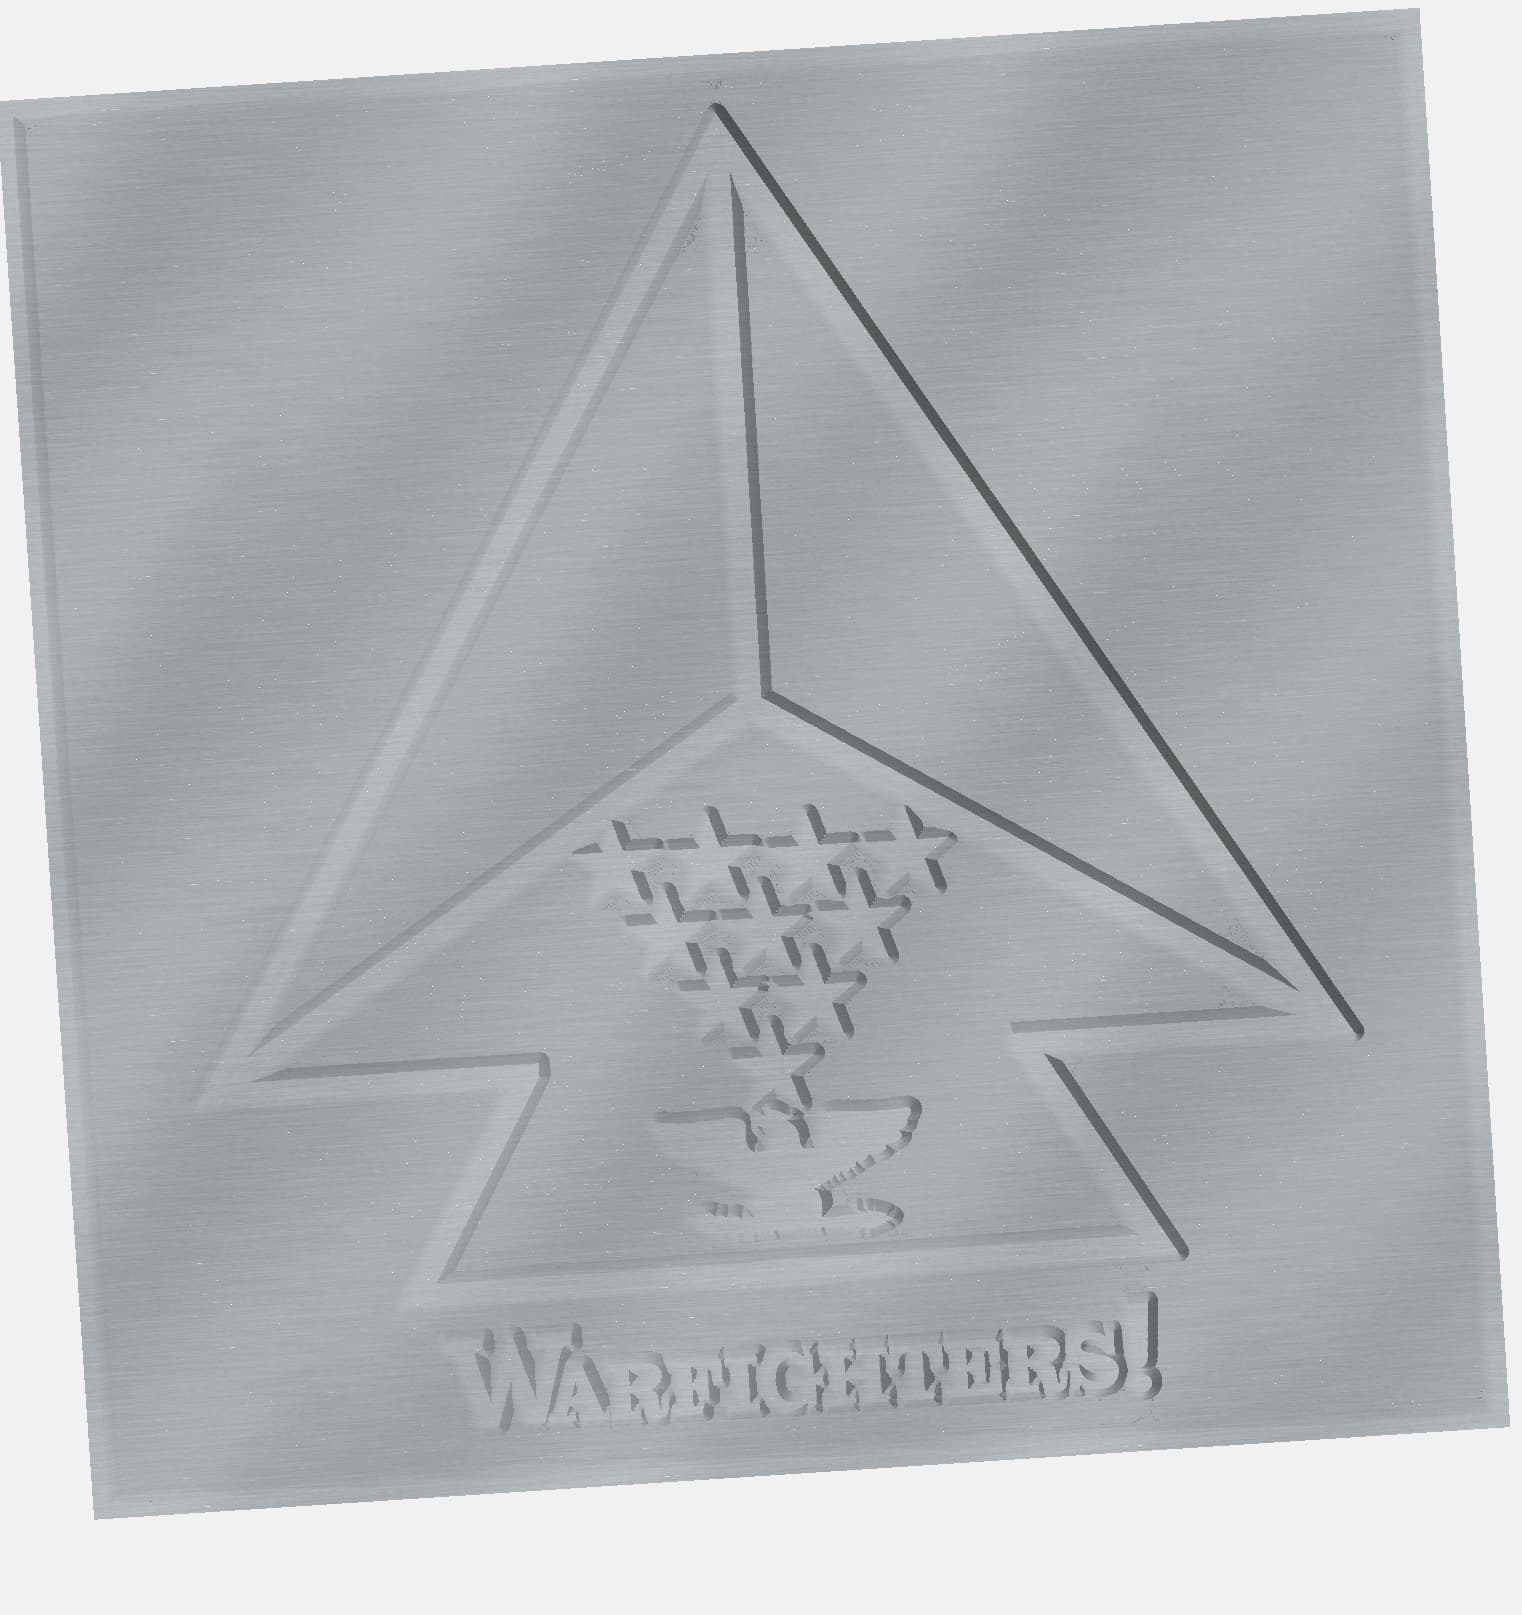
Hi James, You didn’t indicate how larger you needed the final piece. With a 12" square stock adding a boarder just inside the square to allow the logo to be raised. Selected the outline of the eagle and everything else for advanced V-Carving 0.160" deep, using a 1/4" endmill for clearing and a 60 degree V.
You have it. The simple vcarve goes down the middle and if you limit depth then the vee bit goes down the middle to the depth you specified. It may or may not be deep enough to touch both sides of lines. So like a text letter may look like a femer bone instead of the letter you wanted. The femer bone has the two knobs at the top for your knee and two at the bottom for your ankle. That might be good for Halloween but for other times looks weird.
Thank you, this stuff is a little more complicated than I originally thought it would be. So many questions,
I’m new to all this and I’m just working to figure out how to get it created on a 12x12 piece of 3/4 plywood. Eventually, I’m hoping to add it to a flag and use it as gifts.
LWSIV, thank you for your input, I was able to create the below design, plan on doing it on a 12x12x3/4 piece of plywood. As you can see I have areas in the corners around the starts, letters, and eagle that appear as if they’re not cleaned out. I’m using a 20 degree V Bit, plunge rate of 80, feed rate of 90, RPM 18000, and a depth of .160 as you recommended. Can you provide any insight of why it’s doing this
As I’m fooling around, I just changed windmills to a 1/8 and see a lot of the areas have cleaned up. I’m taking it that the design is too small and it’s not allowing the bit to get in those areas and clean everything out?
I thought that’s why you use an Advanced V Carve so when you change to the V bit, it will go back into those area and clean things up??
Will Adams,
Does this mean those areas will not be cleaned out like the rest? If so, how do I fix this? I even went down to a 1/8 inch end mill, obviously the time increased but still leaves those areas. Would spreading the letters out just a hair fix this?