I’m a newbie, so if this sounds stupid I apologize. For my project it makes more sense to start my 0 at the bottom of the stock. However to assign a start measurement for a toolpath it wont allow a negative number. My toolpath path needs to both start and stop above my stock “0”
I’m obviously doing something wrong and any help would be appreciated.
Is mounting your stock upside down an option? As for making the toolpath stop above 0", I think you would need to model your stock oversized by the dimension you’d like to stop at. So if your stock is 1" thick and you need to stop at 0.5" above the stock, model it as 1.5" and set your cut depths to reduce job time.
I have never done either of these, just thought I’d chime in!
Even if you have Z-axis origin at bottom of stock, toolpath dimensions are still positive — think of it in terms of declaring the dimension of the pocket/feature.
If I use positive # it wont allow Max depth to be smaller than the start depth. I’m doing multiple levels on my stock each level a step up from the last like stairs. Fist step 1/2" second 1" and so on. These measurements are from the bottom of my stock.
Please post the file and let us know what you are having difficulty doing.
The start and max depth are both measured from the top of the stock as defined in Job Setup.
Regardless of whether you use top of stock or bottom of stock for your zero. Starting & ending above the stock is just a matter of the retract distance.
If you want to allow for possible additional stock then make your stock a bit thicker in Job Setup, but remember to add that amount to your max depth for each level.
1 Like
Thanks Tod1d,
So to be clear the zero point we set is only for X and Y. Z is always based on the stock height.
No the zero point is where the zero reference is for X, Y and Z
The “Start Depth” and “Max Depth” in a tool path is measured from the top of the stock. If you set your Z at top of stock, this will be Z0. If you set your Z at bottom of stock, this will output Z as the top of stock.
So in your example, if the part is 2" thick, and you want to cut down to 1/2" from the bottom, you set your max depth to 1.5". For your 1" step, max depth is 1", and for you 1 1/2" step, max depth is 0.5"
1 Like
Ok sorry for taking a bit for this to sink in. My stock is tapered and I’m trying to avoid wasting so much time on the toolpath cutting air before reaching the material. So my start height has been changed for each toolpath. That should work I think.
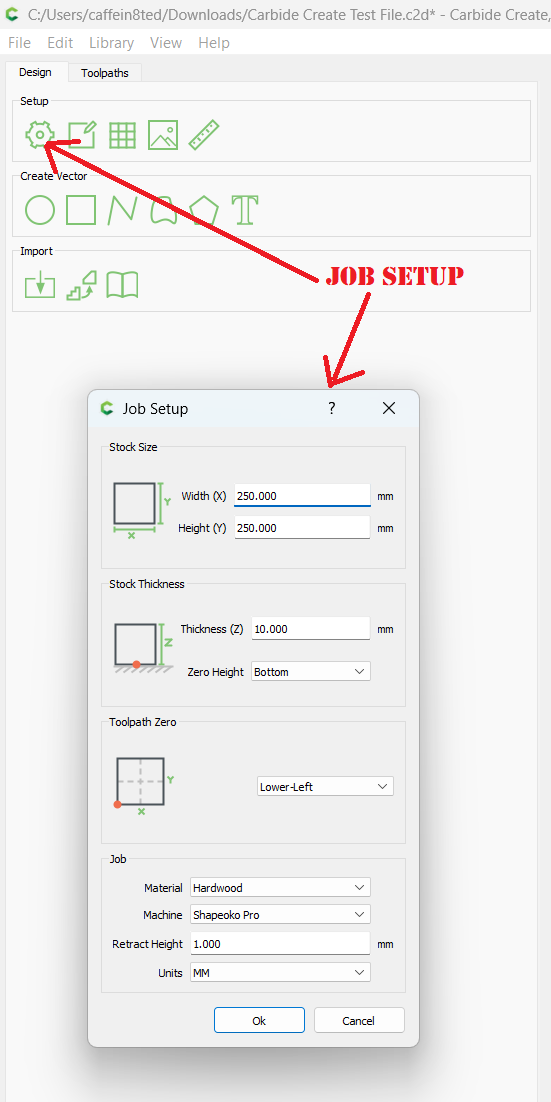
First, set up the job:

Set up a pocket from 0 (top of stock) to 0.5" (midway through the 1" stock):

Next, cut a pocket starting at the bottom of the mid-way pocket, and cutting another 0.25" deeper:


Then, cut from the bottom of that all the way through:


Attached.
cc_positive_not_negative.c2d (424 KB)
1 Like
Thanks so much. I got it. Great help
1 Like
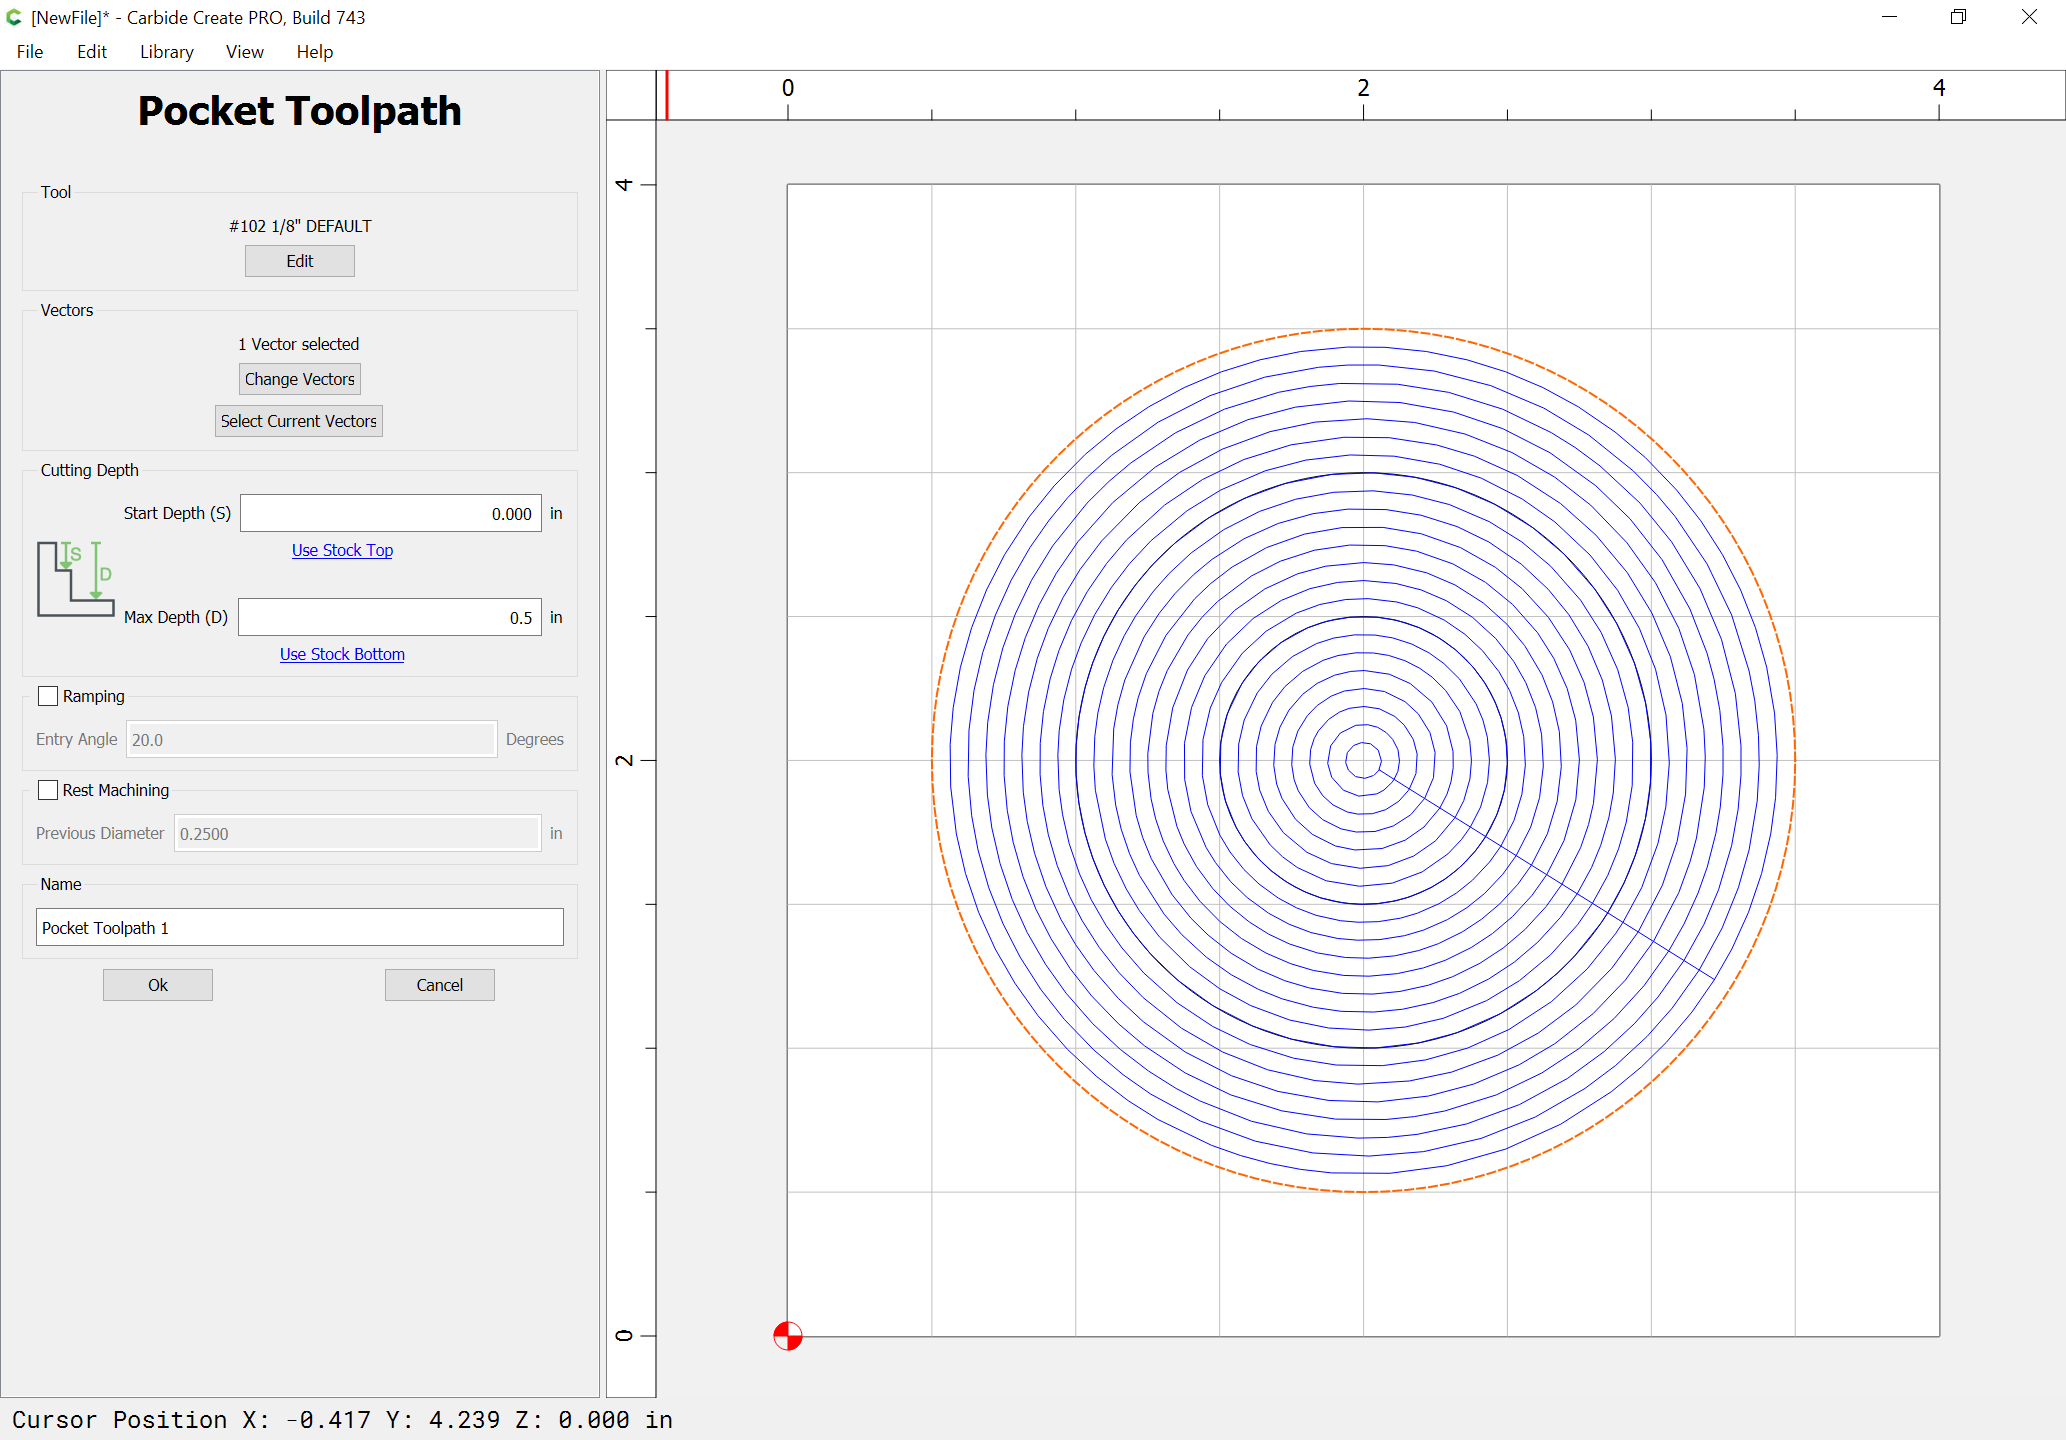
Something to watch out for is when selecting the Start Depth / Max Depth the image to the left shows that it’s in reference to the top of your stock regardless of where Z(zero) is set

Also note the options circled “Use Stock Top” and “Use Stock Bottom” which will enter the value for you if you click it (ie. if clicked for Start Depth (S) the value will be zero and if clicked for Max Depth (D) this value will be the bottom which should match the stock thickness you entered when setting up the project settings under “Job Setup”).
To test things out I tried setting the value for Max Depth (D) to something greater then the stock thickness. I’m my example I setup the stock thickness to 10mm and in the following toolpath I entered 15mm for Max Depth which is 5mm below Z(zero) which is setup for the bottom of the stock / CNC bed.

Taking a look in NCViewer you’ll notice the pocket is too deep and will cut the pocket 5mm into the CNC bed/table. Probably best practice if you want a toolpath to go to the bottom of your stock use the “Use Stock Bottom” button and if it’s not the value you expected then you probably didn’t enter your stock thickness (Thickness Z) properly in the “Job Setup”.

4 Likes
This topic was automatically closed after 30 days. New replies are no longer allowed.