I’m struggling with how to program both the “rough 3d” and the “3d finish” features. Does one work off of the other? The “rough” option leaves plenty of material, the “finish” feature removes way too much. What am I missing in programming this feature?
You need to use a 3D roughing pass first — that will clear the bulk of the material — after you can use one or more 3D finishing passes.
See:
The finish pass is taking off more material than the roughing pass.
How are you managing the tool change?
It should only remove the material left behind by the “Stock to leave” setting.
Maybe it’ll be more helpful if I pointed out the options that i don’t know how to adjust…, in “model” Height, angle, in “roughing” stock to leave, in “finish” the only option is angle.
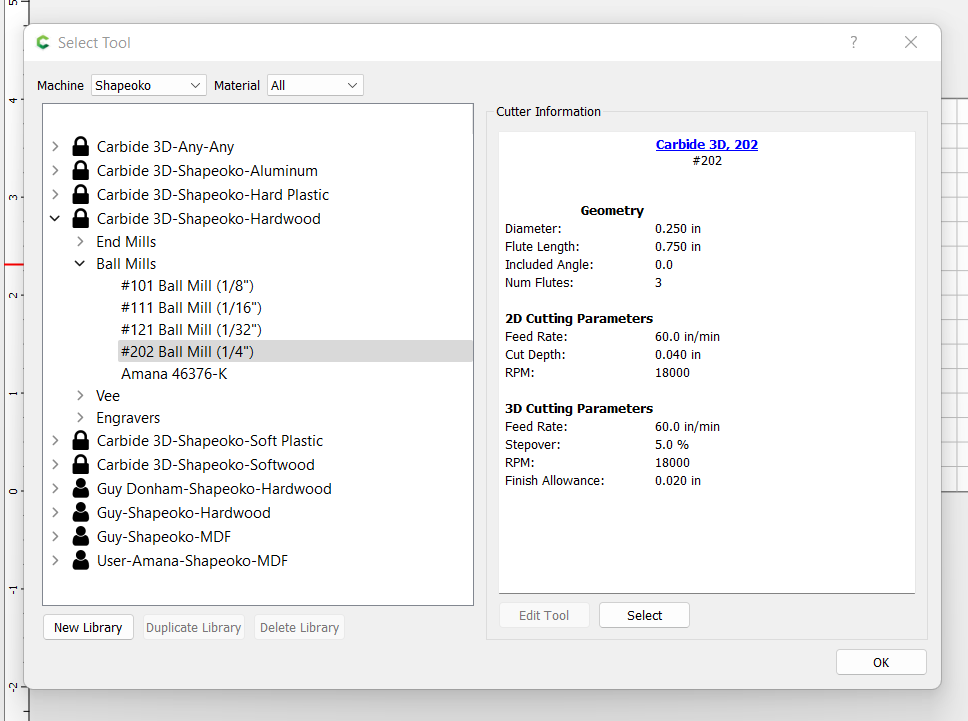
The tools have a depth to leave for 3d carving for roughing. So check that depth in the edit tool in toolpath. The finish will go to depth prescribed in toolpath.
If the are c3d tools that is set but can be edited. If using a custom tool you will need to edit the .csv file found in data directory and add what you want.
To edit .csv file open the custom library in a spreadsheet and after editing save in .csv file format. Quit cc and restart cc to see changes.
Are you referring to finish allowance?
Yes the finish allowance. So lets say you do a pocket that is .5". The roughing path tool has a preset amount to leave. The finishing path tool will go the .5".
Here is a tool from my custom library. This is a keyhole bit so I did not have a 3d parameters set up.
| number | vendor | model | URL | name | type | diameter | cornerradius | flutelength | shaftdiameter | angle | numflutes | stickout | coating | metric | notes | machine | material | plungerate | feedrate | rpm | depth | cutpower | finishallowance | 3dstepover | 3dfeedrate | 3drpm |
|---|---|---|---|---|---|---|---|---|---|---|---|---|---|---|---|---|---|---|---|---|---|---|---|---|---|---|
| 701 | Freud | 70-104 | Keyhole | end | 0.39 | 0 | 0.25 | 0.25 | 0 | 2 | 0 | Shapeoko | Hardwood | 10 | 60 | 16000 | 0.4375 | 0 | 60 | 16000 |
So you open CC and then from Help open the Data Directory. Open the CC folder and then Tools. Find your custom tool and open it in a spreadsheet. When you finish you can save in .csv file format. Close CC and reopen.
For stock tools in the Edit tools menu for tools you can edit the Finish Allowance.
For custom tools you can edit the custom library tool in a spreadsheet to permanently alter the tool and also in the same Edit Tool Menu for a one time change.
Please post the file you are having this difficulty w/ and step-by-step notes on how you are securing your stock and setting zero relative to it and managing all tool changes.
The file is too big to load, but here’s the other information you asked for. I secure the material to the base with clamps on the sides, I zero out the settings from the top, XY zero’d out at the corner and bit centered, Z is set by lowering bit till I can barely pull a piece of paper between bit and material, clearing all presets. The experiment I did, I used an 1/8 endmill for both roughing and finish. For this next experiment I intend to use a 1/4 endmill for roughing and a 1/8 ball point for the finish. My machine automatically stops for tool changes, unless using the 3d feature from a photo is different from using vector files.
Send the file to support@carbide3d.com — if need be, place it on an online file sharing site and send the link.
I sent the file, from Ddclcark2002.
This topic was automatically closed after 30 days. New replies are no longer allowed.

