Procrastination defeated… The Carbide 3D spindle that had been sitting in the Carbide 3D box since March of 2022 finally got installed on my Shapeoko 3 XL. Which triggered several other updates, the following is a summary and my thoughts on each.
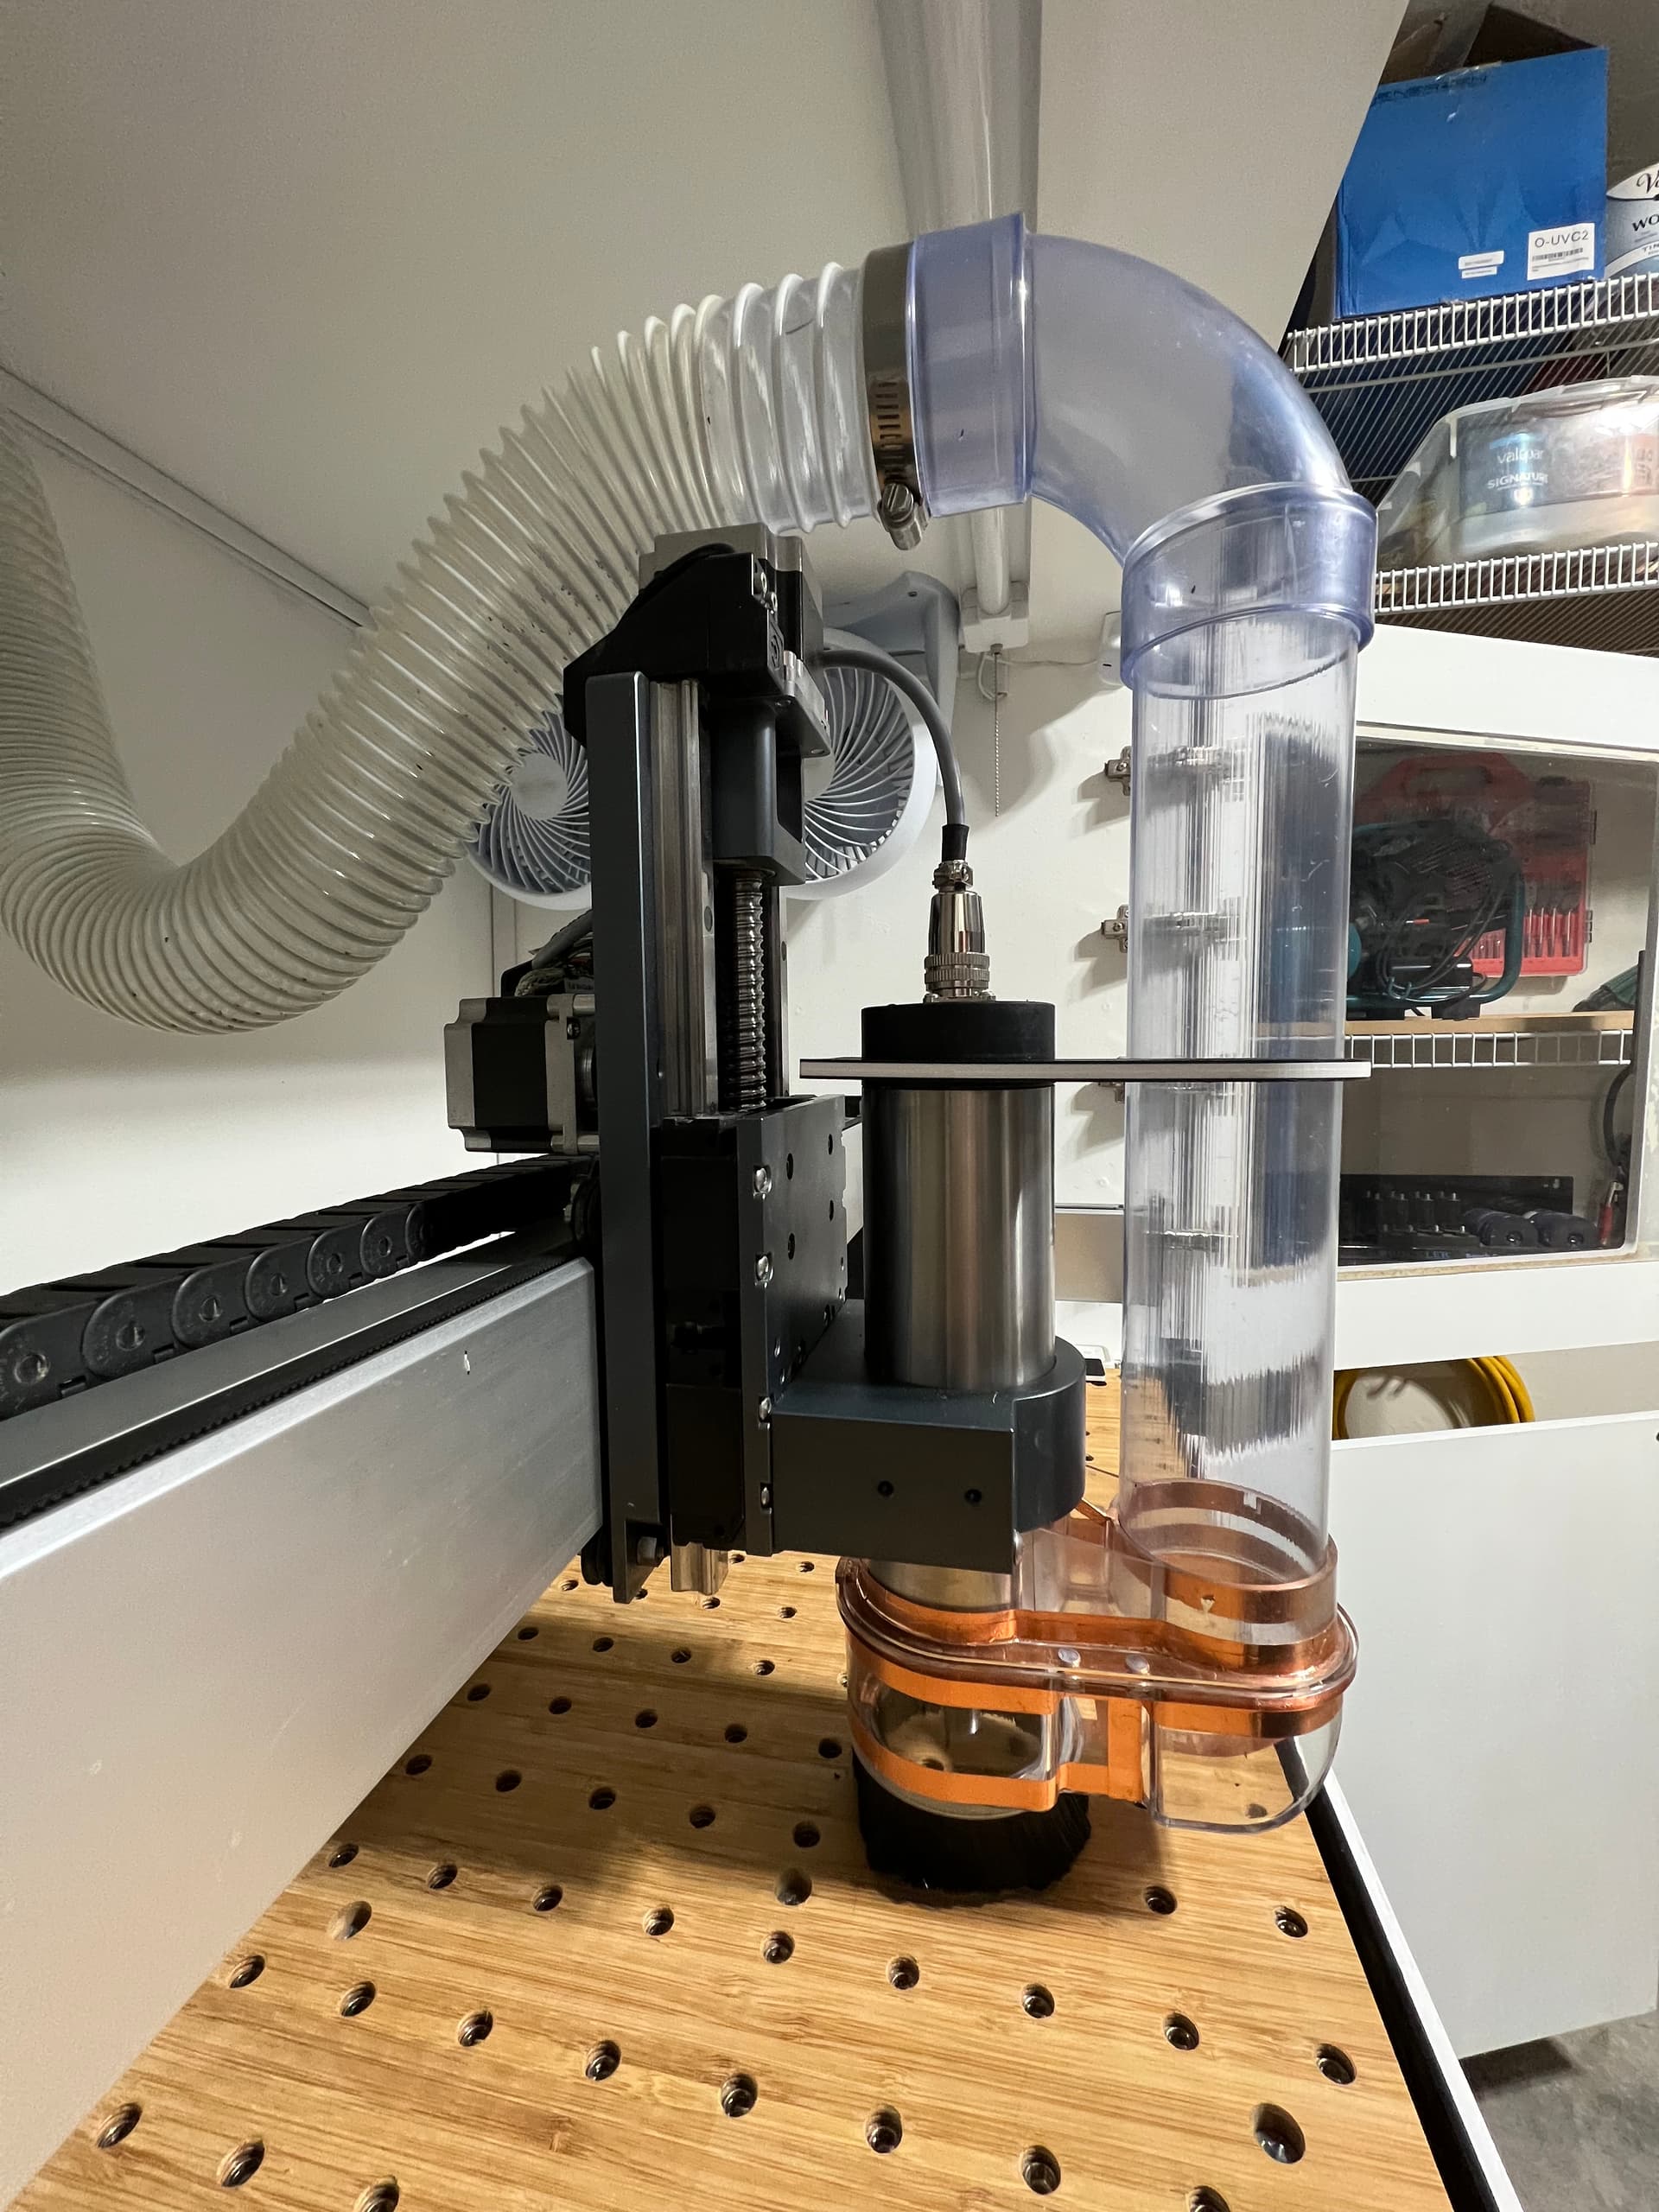
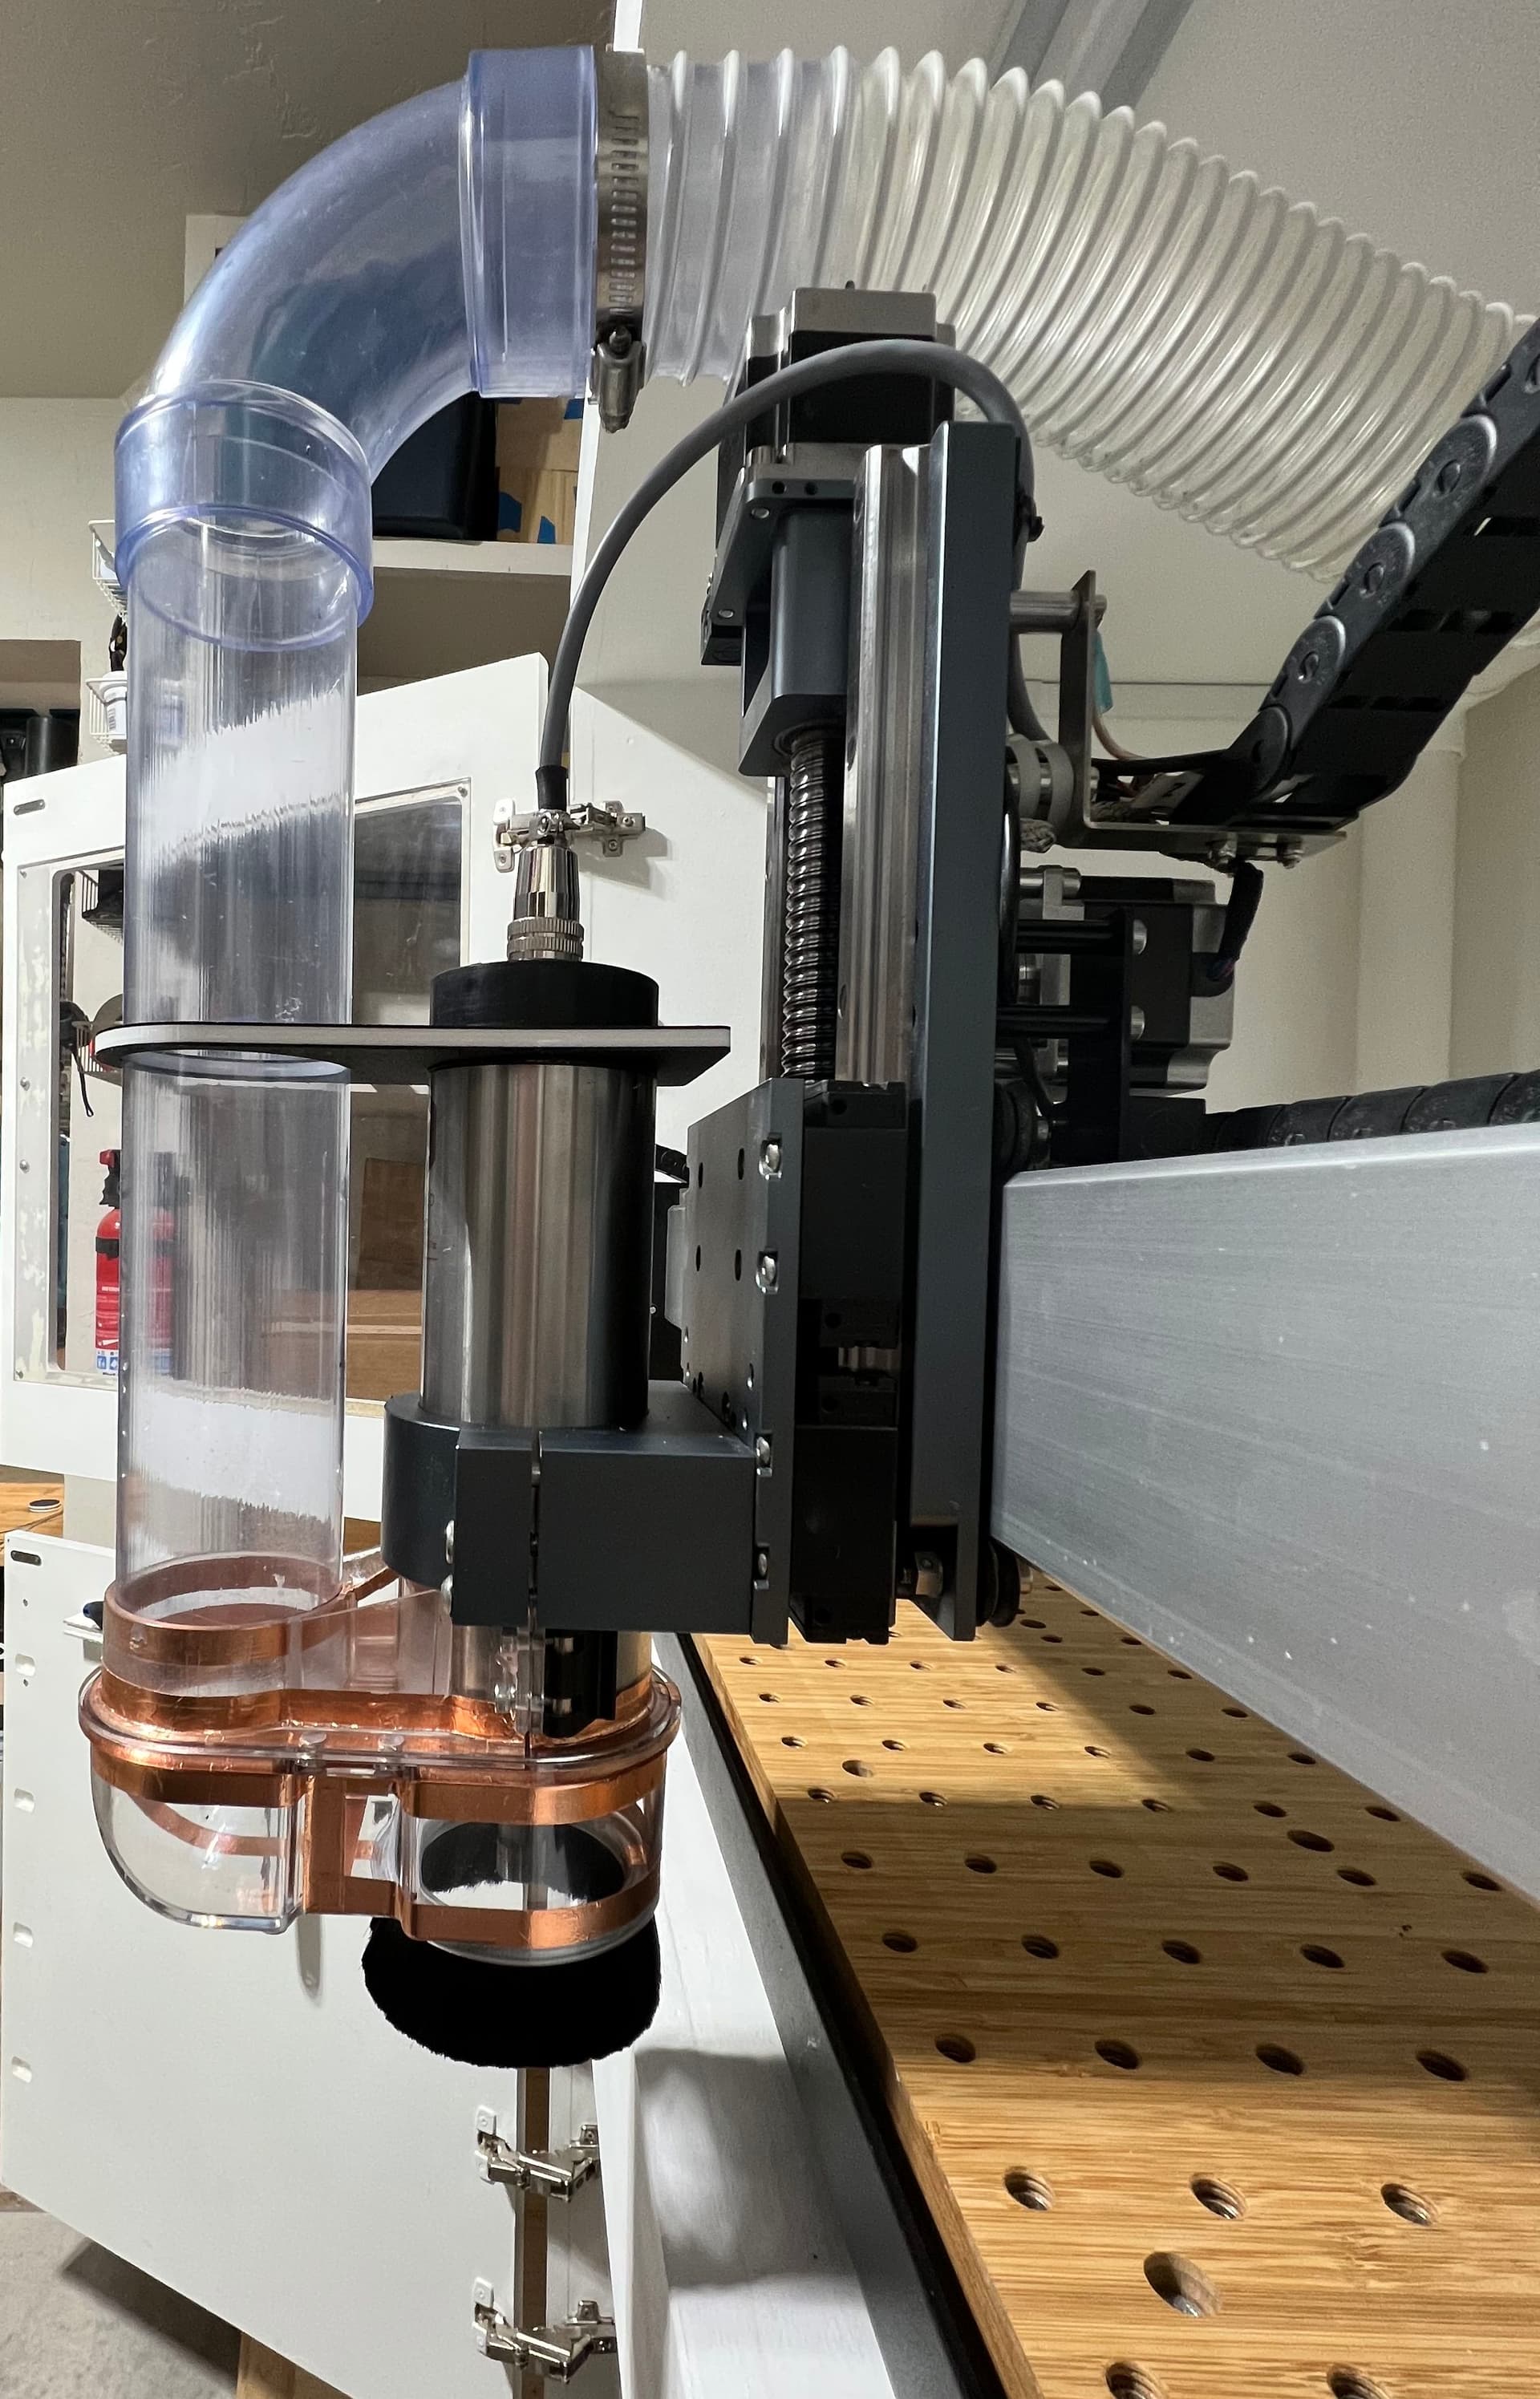
Carbide 3D Spindle: This is a REALLY nice product, that was just as easy to install as Winston made it look. I had to modify my enclosure for cables, but that was my choice. The cables were plenty long and it was easy to deal with. However, regarding the cables/connectors I have a few suggestions for Carbide 3D.
-
The VFD controller (the white box) has three cables connected to it, one to the spindle, one to the Shapeoko control board, and one for AC power. For my setup I would have preferred if all the cables connected to the same side (or back) of the VFD controller.
-
The cable from the VFD controller to the spindle has a fantastic connector on the spindle end. But why was the VFD controller end hard wired? I would have preferred it if the VFD controller had the same connector, so the cable would be a separate (replaceable) part. Carbide 3D could also offer cables with right angled connectors.
Regarding ease of use, Carbide 3D made the VFD Spindle super easy. I am very impressed with this kit, I didn’t have to do anything other than get it connected. Nothing in my workflow has changed, Carbide Motion continues to just handle everything for me. I have no idea what any of the buttons or knob on the front of the VFD controller are for (other than the red button), and honestly that’s fine with me.
It’s worth pointing out to anyone using a BitRunner with the stock router, the VFD spindle replaces both of those. For me this resulted in a cleaner (cable management) setup and one less thing to plug into AC power.
One feature that either I overlooked, or Carbide 3D should draw more attention to is the ER-11 collet. In the past year I would guess roughly half of my “oh shit” moments happened when a bit slipped in the stock router collet. It takes a little more time switching bits in an ER-11 collet, but they just work so much better (in my experience).
Carbide 3D Deep Sweep for Sweepy 2.0 Dust Boot:
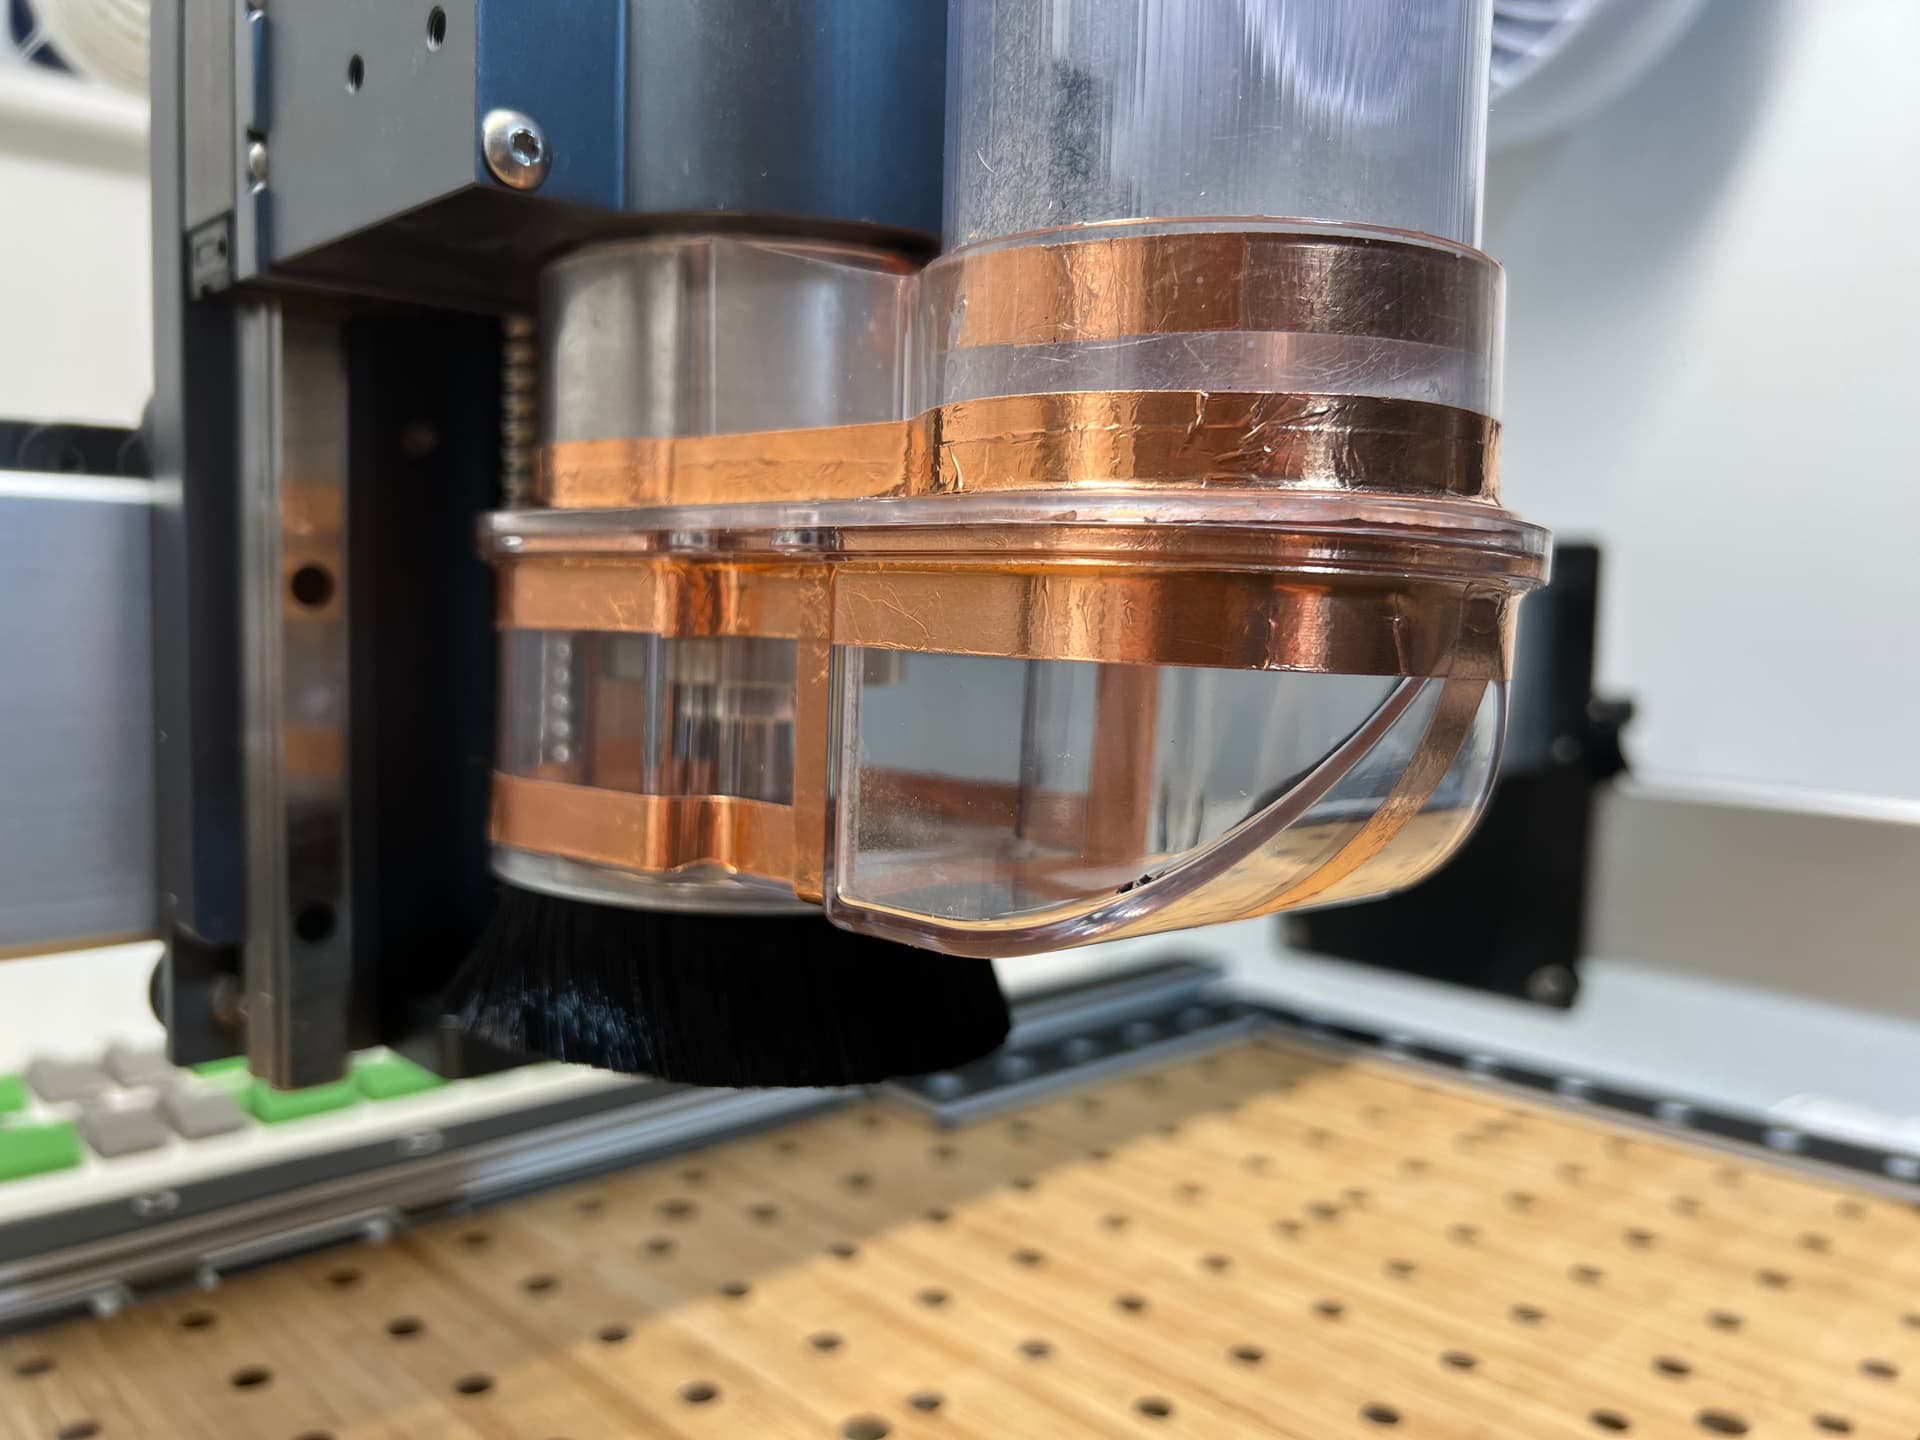
For $20, if you have the Carbide 3D Spindle kit this is very nice solution that not only addresses the mounting limitation with the standard sweepy, it also improves airflow and reduces the chances of clogs (in my experience). In case you are wondering about the additional copper stripes, that is my attempt to ground the plastic back to the spindle to decrease static build-up (and I think it works, but I don’t really know).
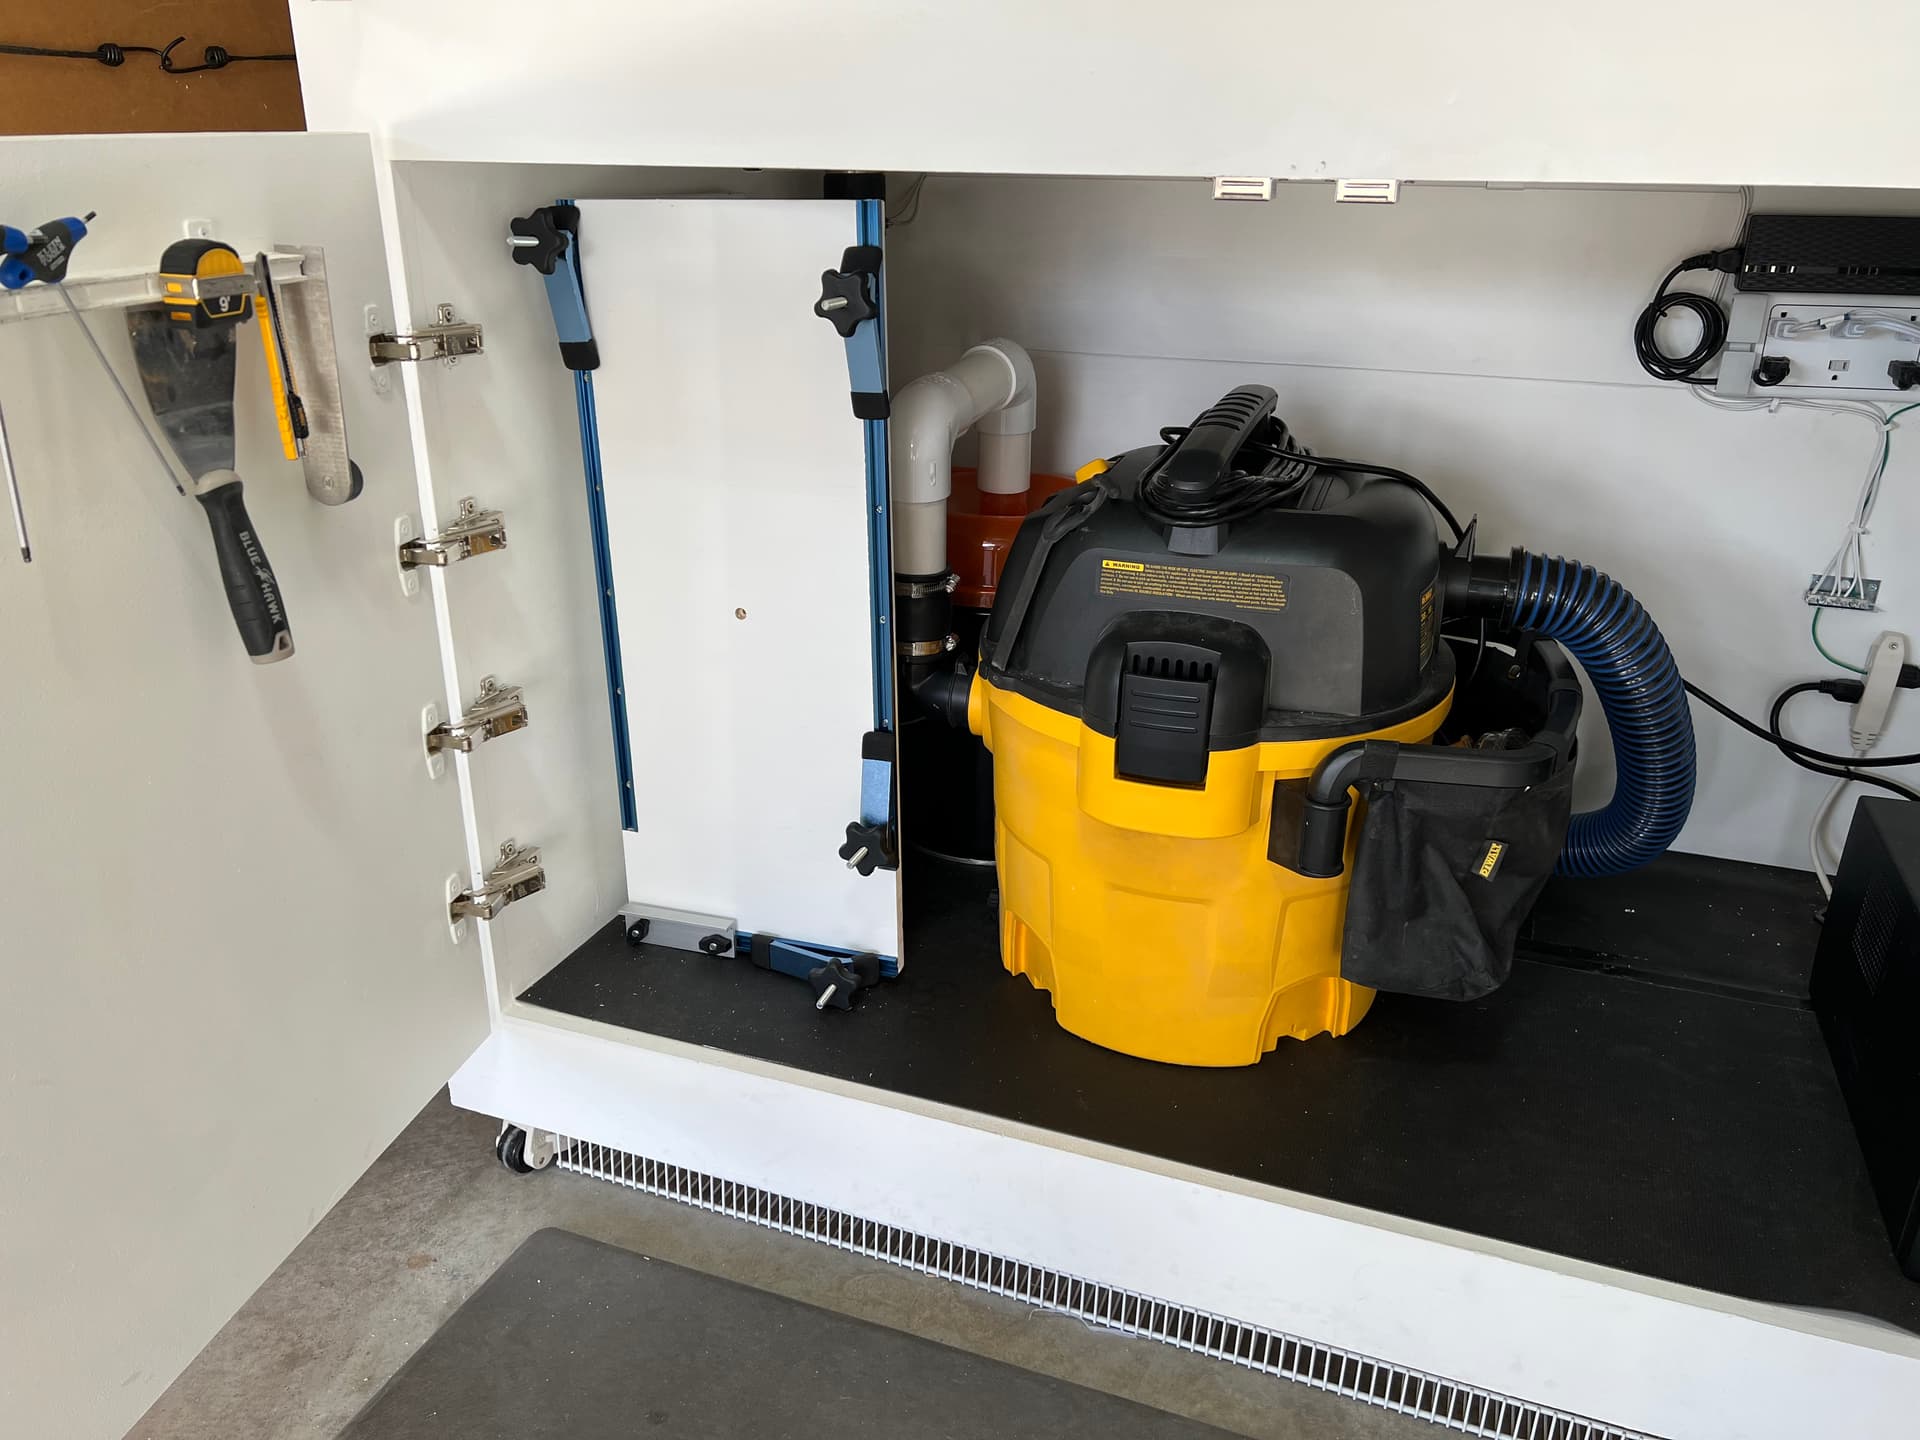
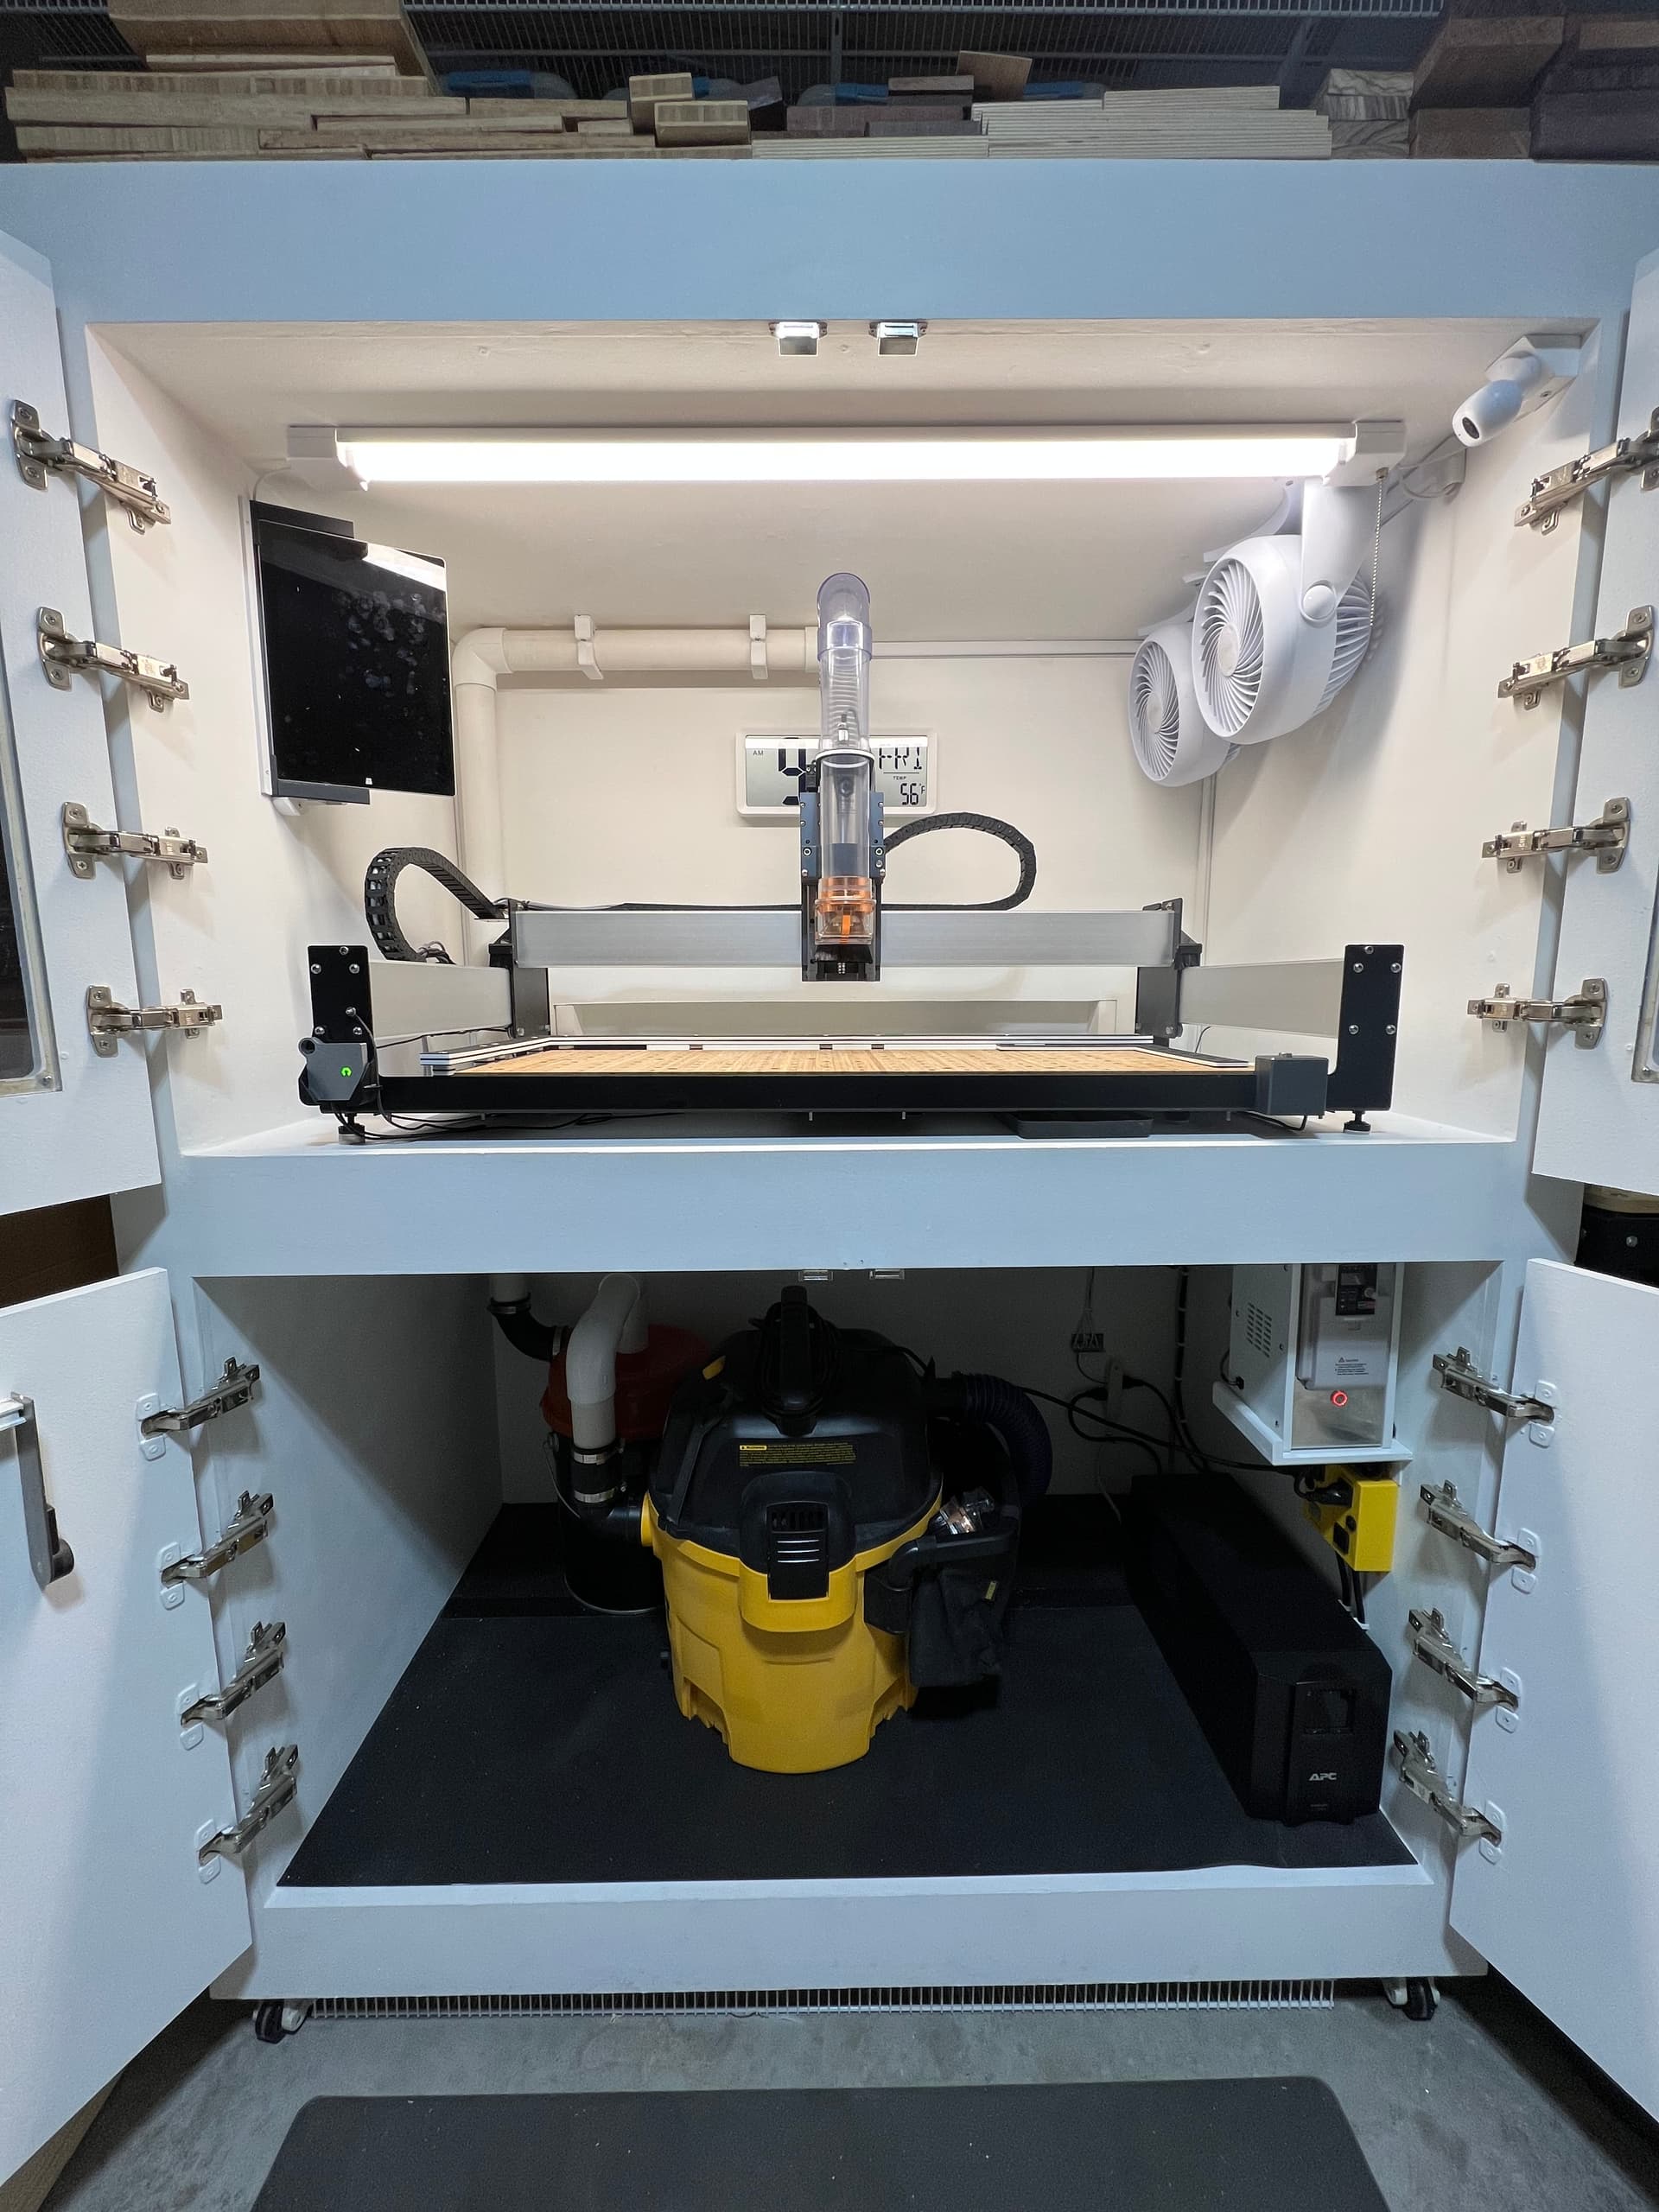
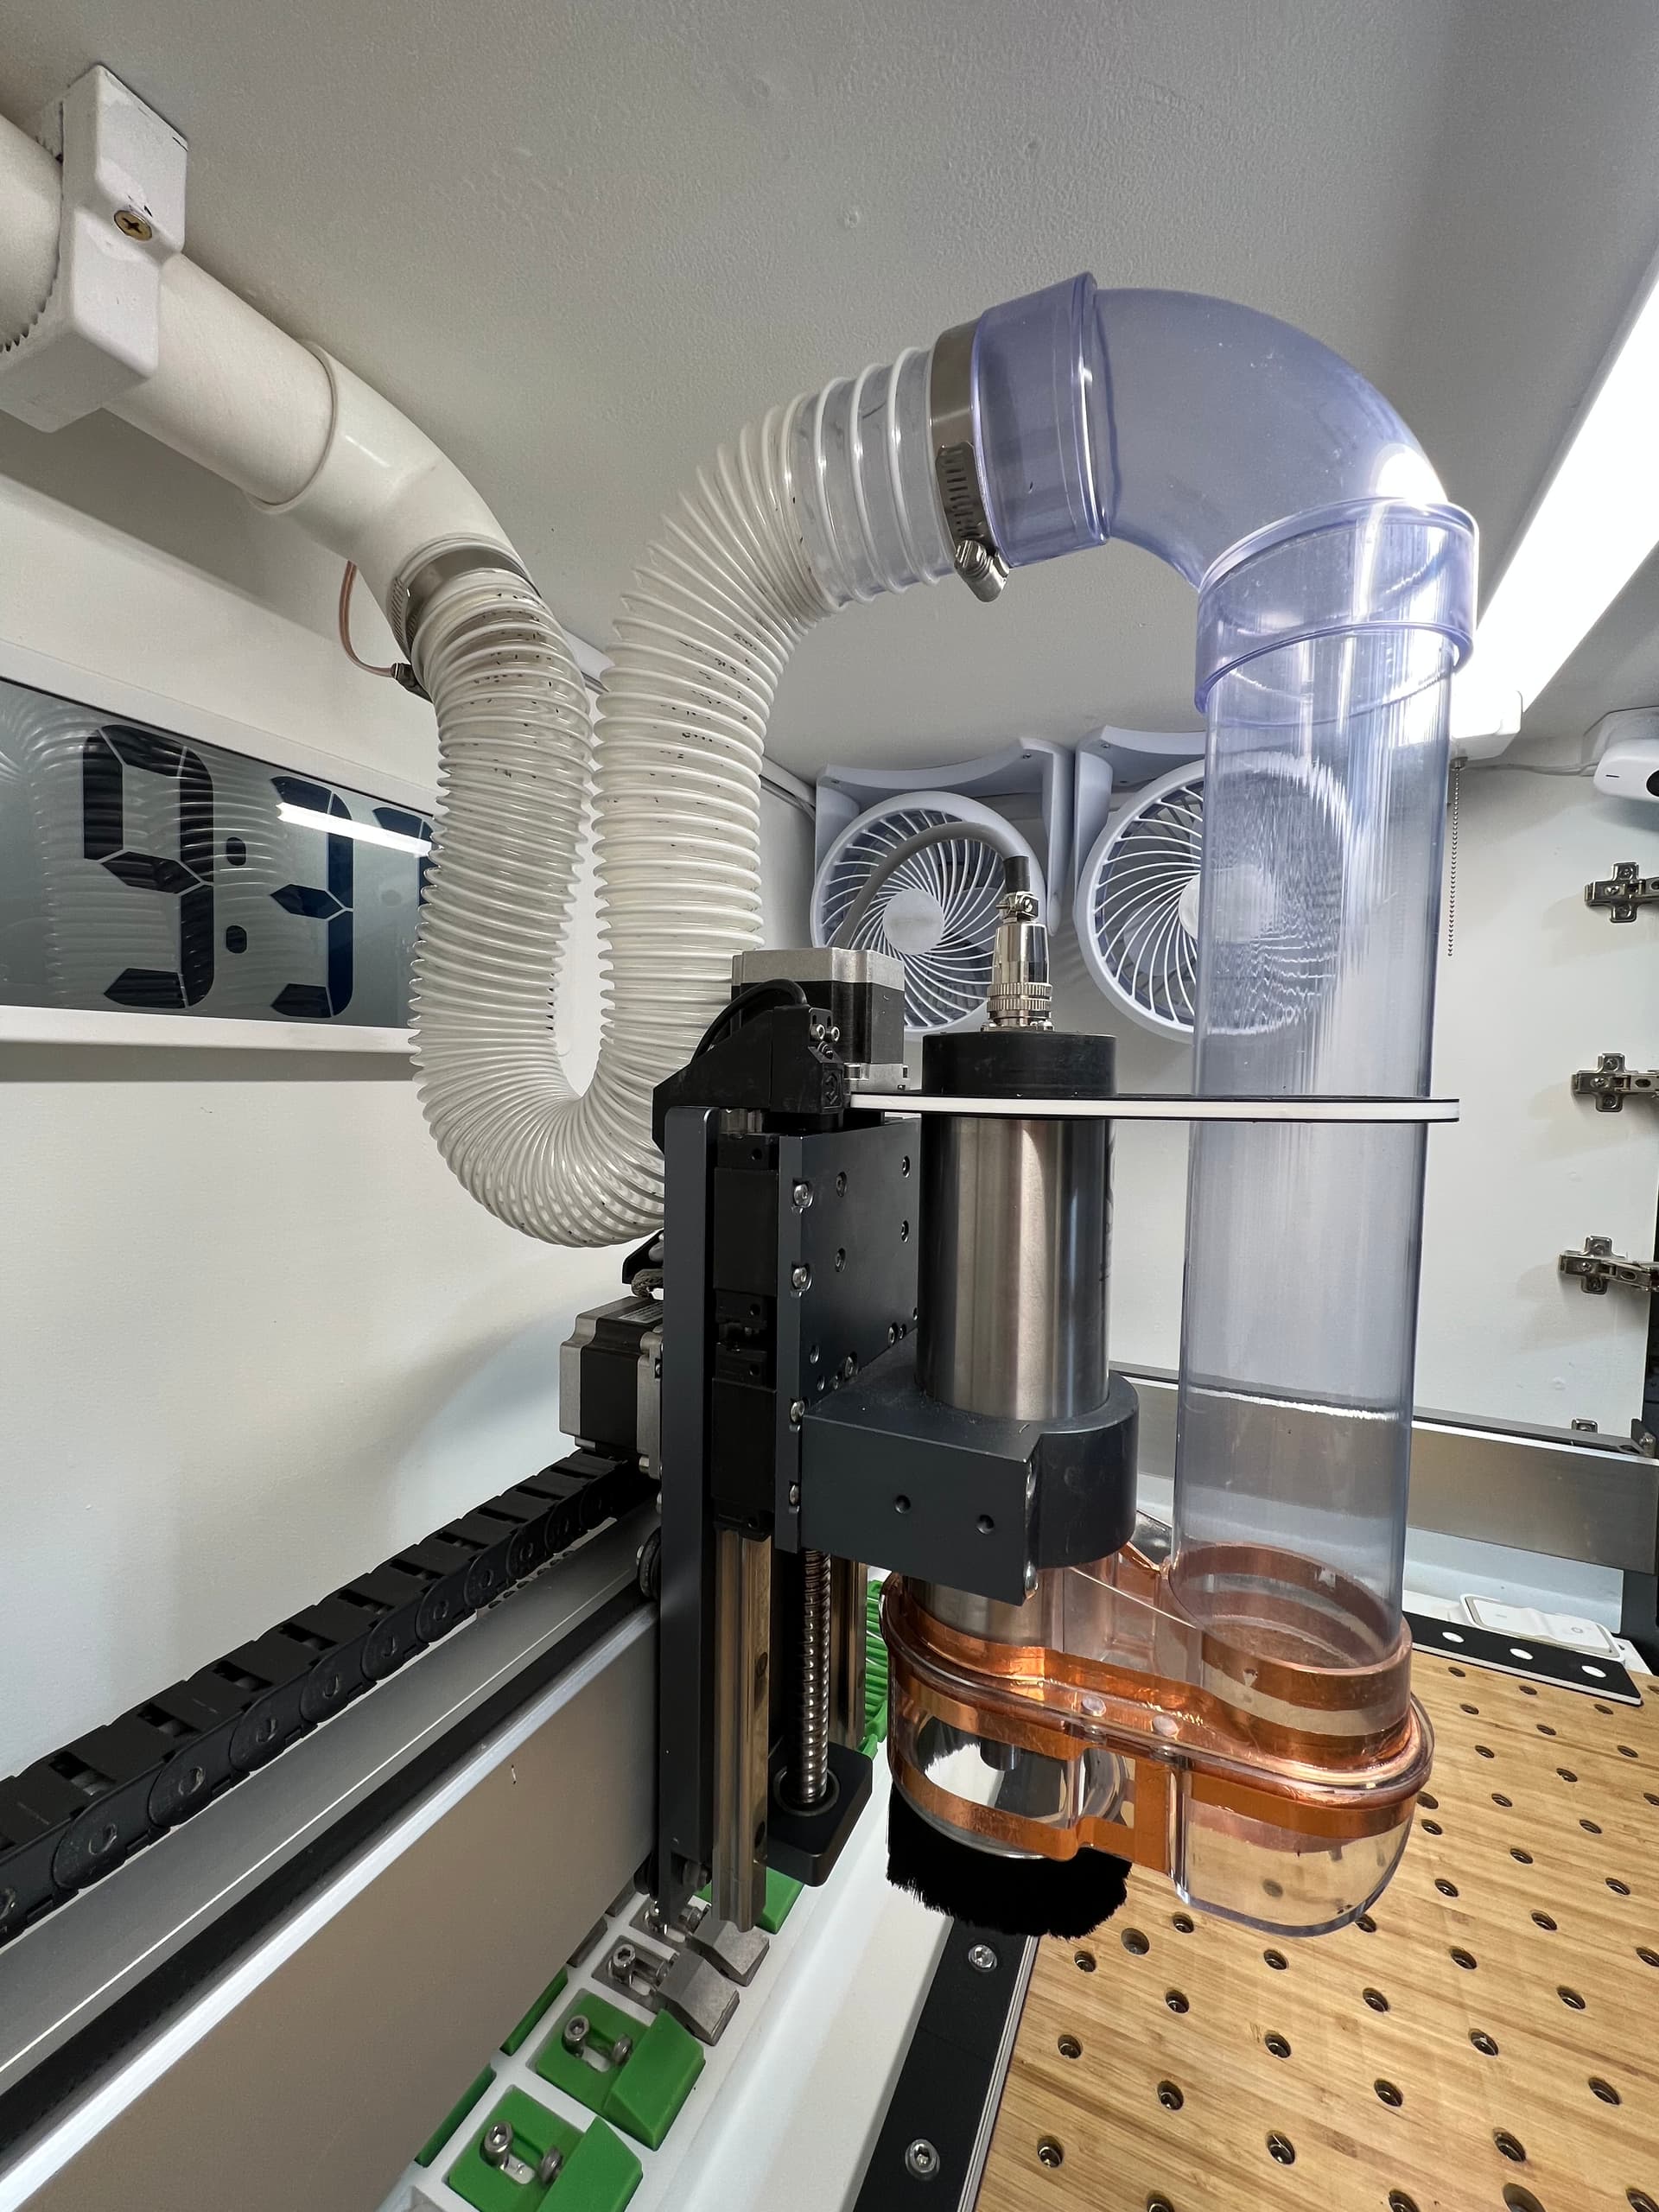
Dust Collection: I modified (improved?) my dust collection, using more straight PVC pipe, and less expandable hose.
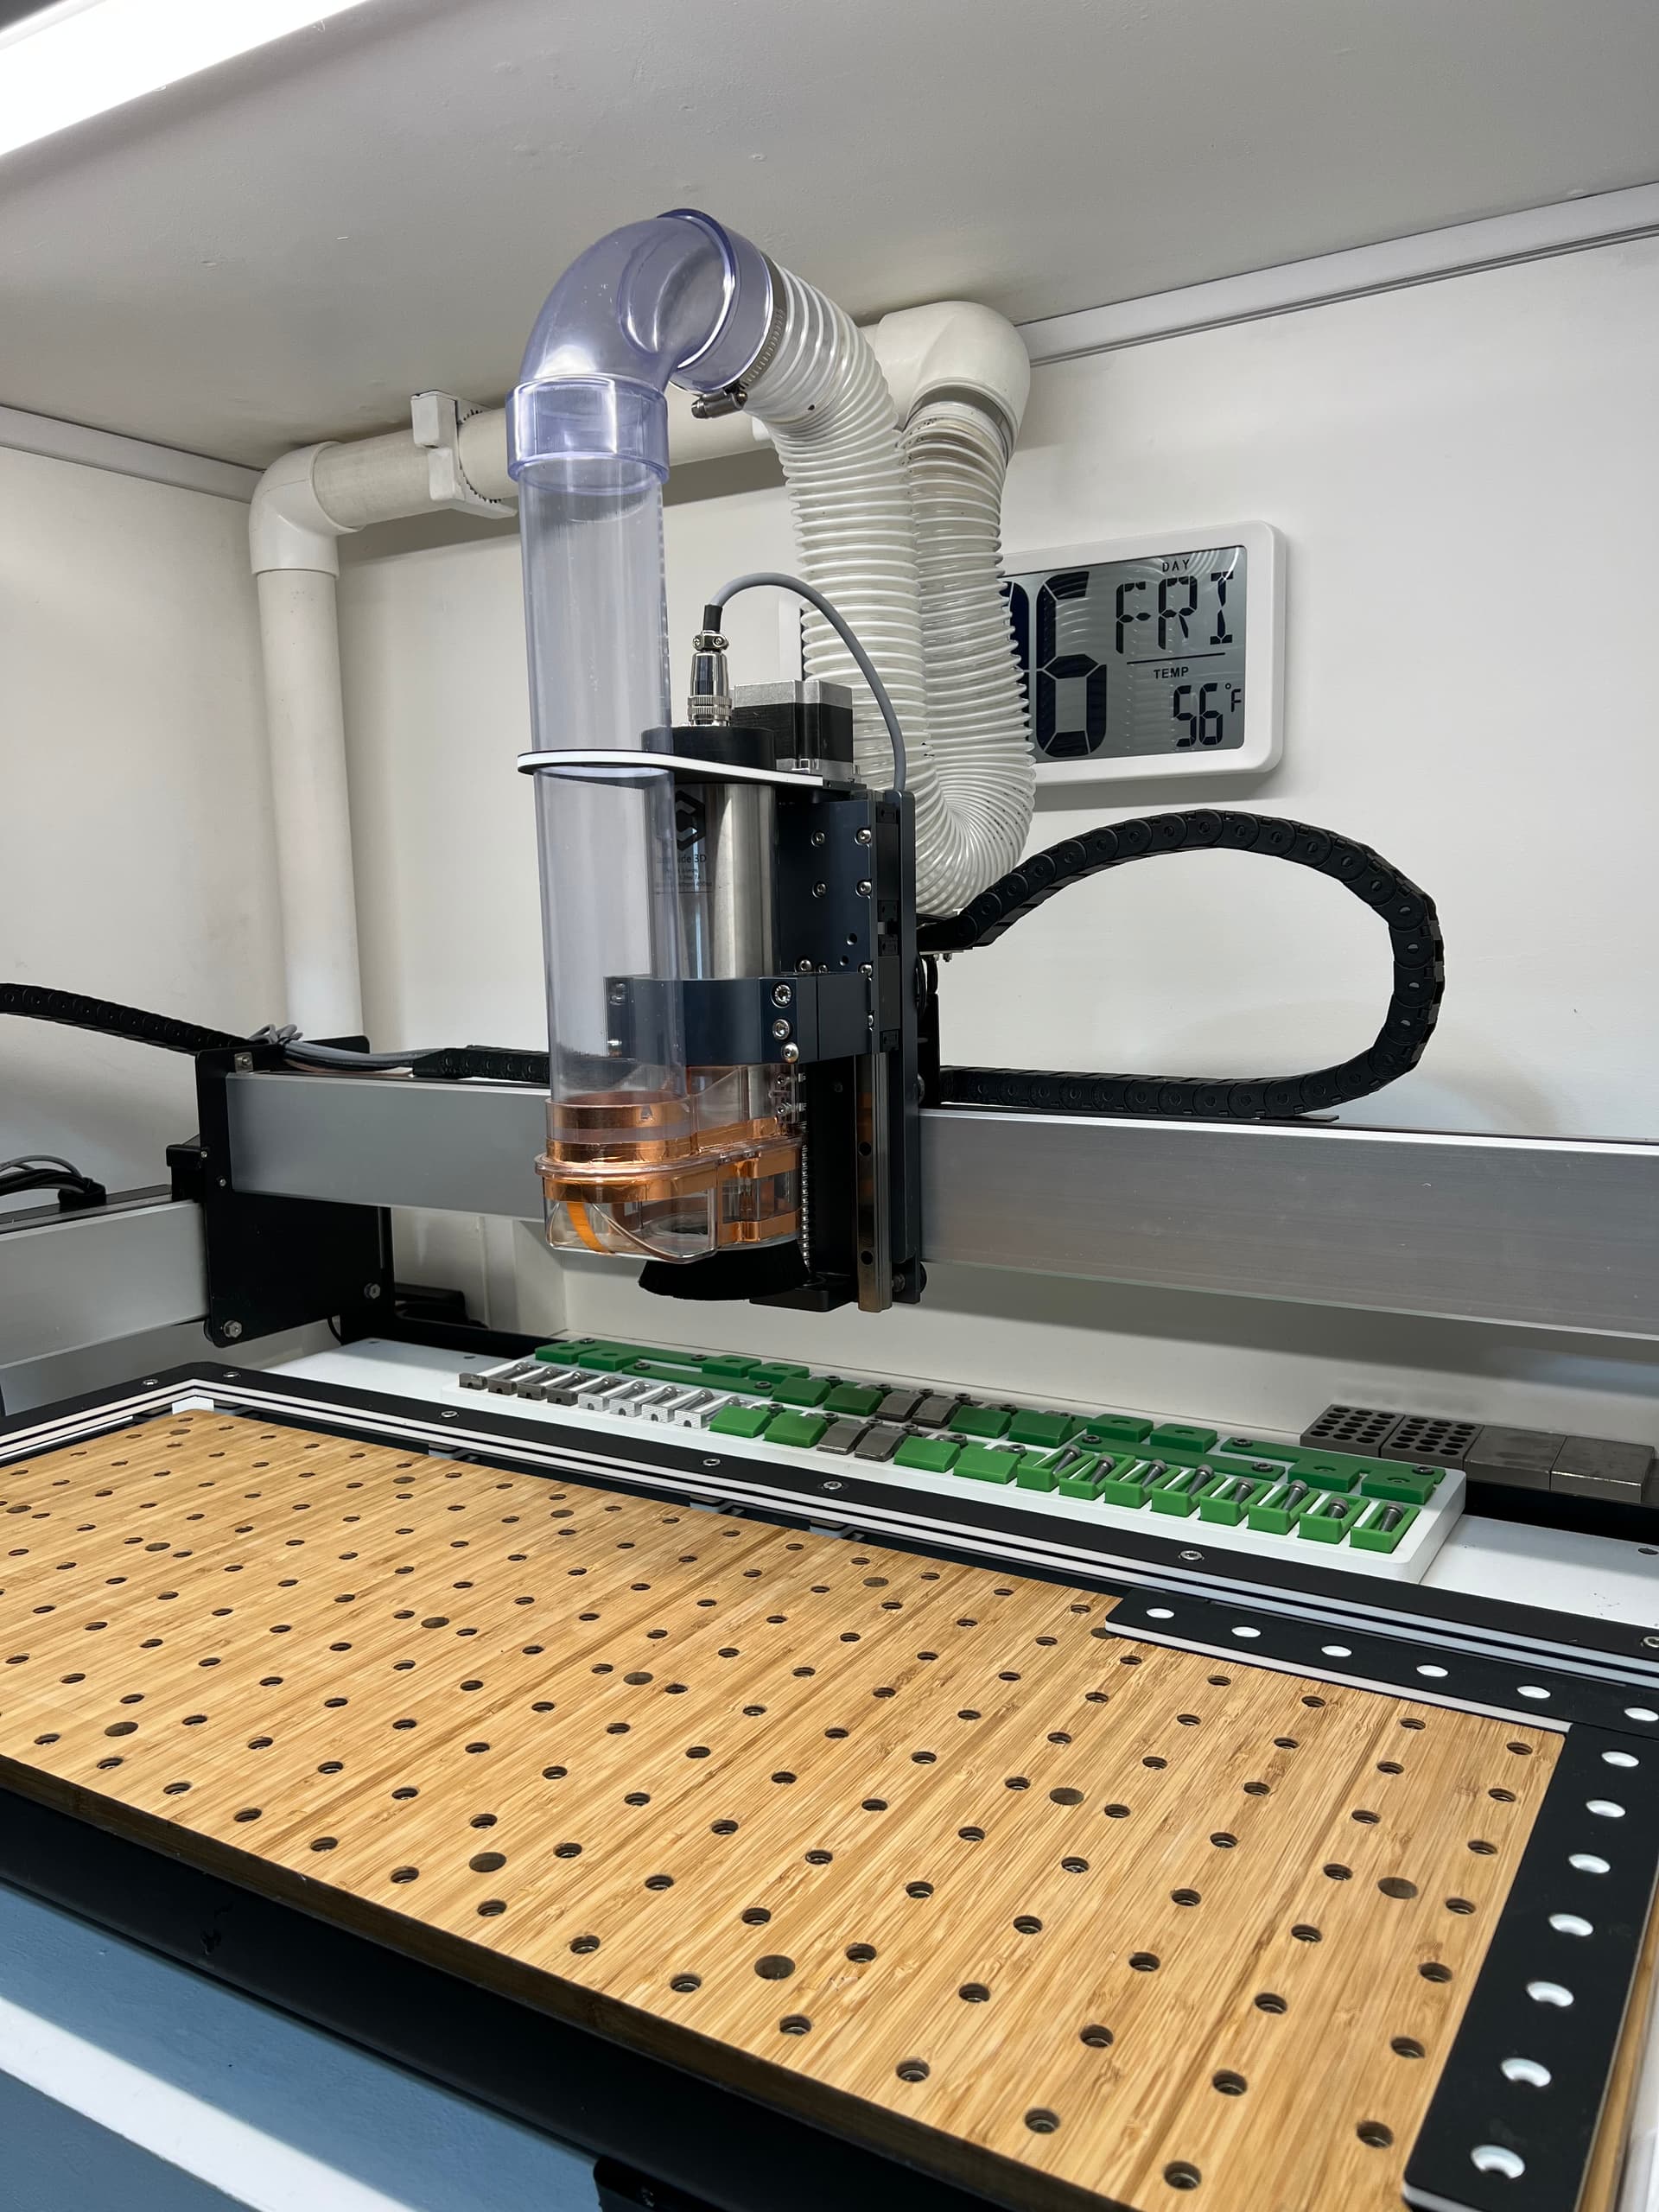
However the taller “snorkel” dust collection setup needed more headroom which caused addition things to be moved inside my enclosure. I also followed this advice to improve the grounding on my dust collection.
The tricky part on the “snorkel” was figuring out the length, because the Z-Axis raises and lowers the snorkel. At the top of the Z-Axis I had to worry about hitting the roof of the enclosure, and at the bottom of the Z-Axis the concern was contacting the Z-Motor. I found the right size so it would work most of the time, but if I am working below the wasteboard I came up about half an inch short.
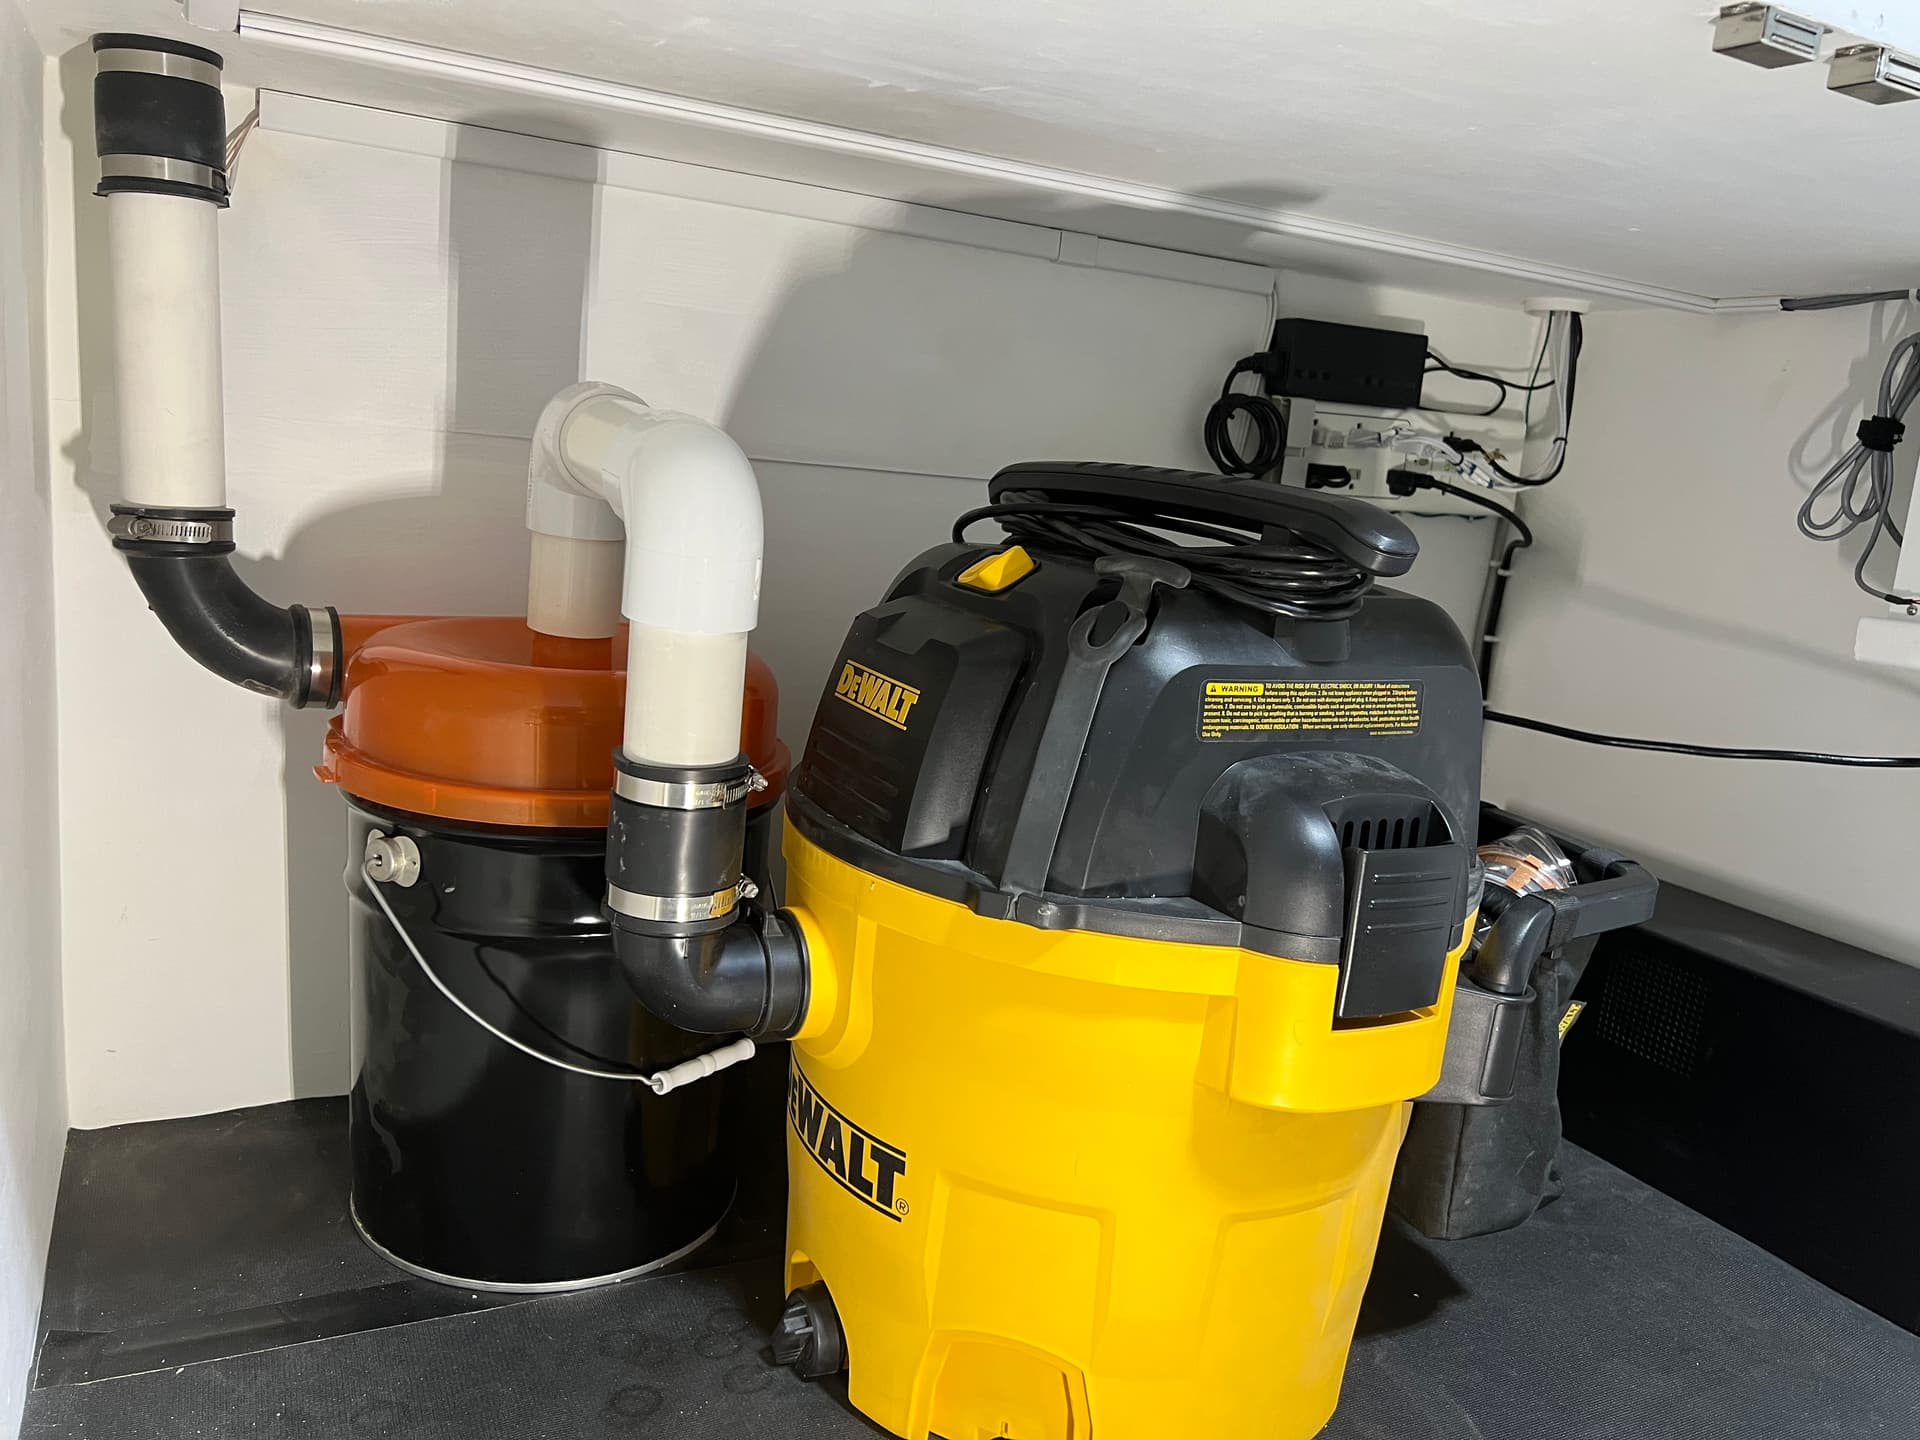
Uninterruptible Power Supply Overload: I had been using this device to automatically turn on my dust collection when the router\spindle turned on. That device worked perfectly; however it required that both the dust collection and the router\spindle operate from the same power source which combined was too much for my UPS. And while dust collection is nice, it’s not something I care about when there is a power problem.
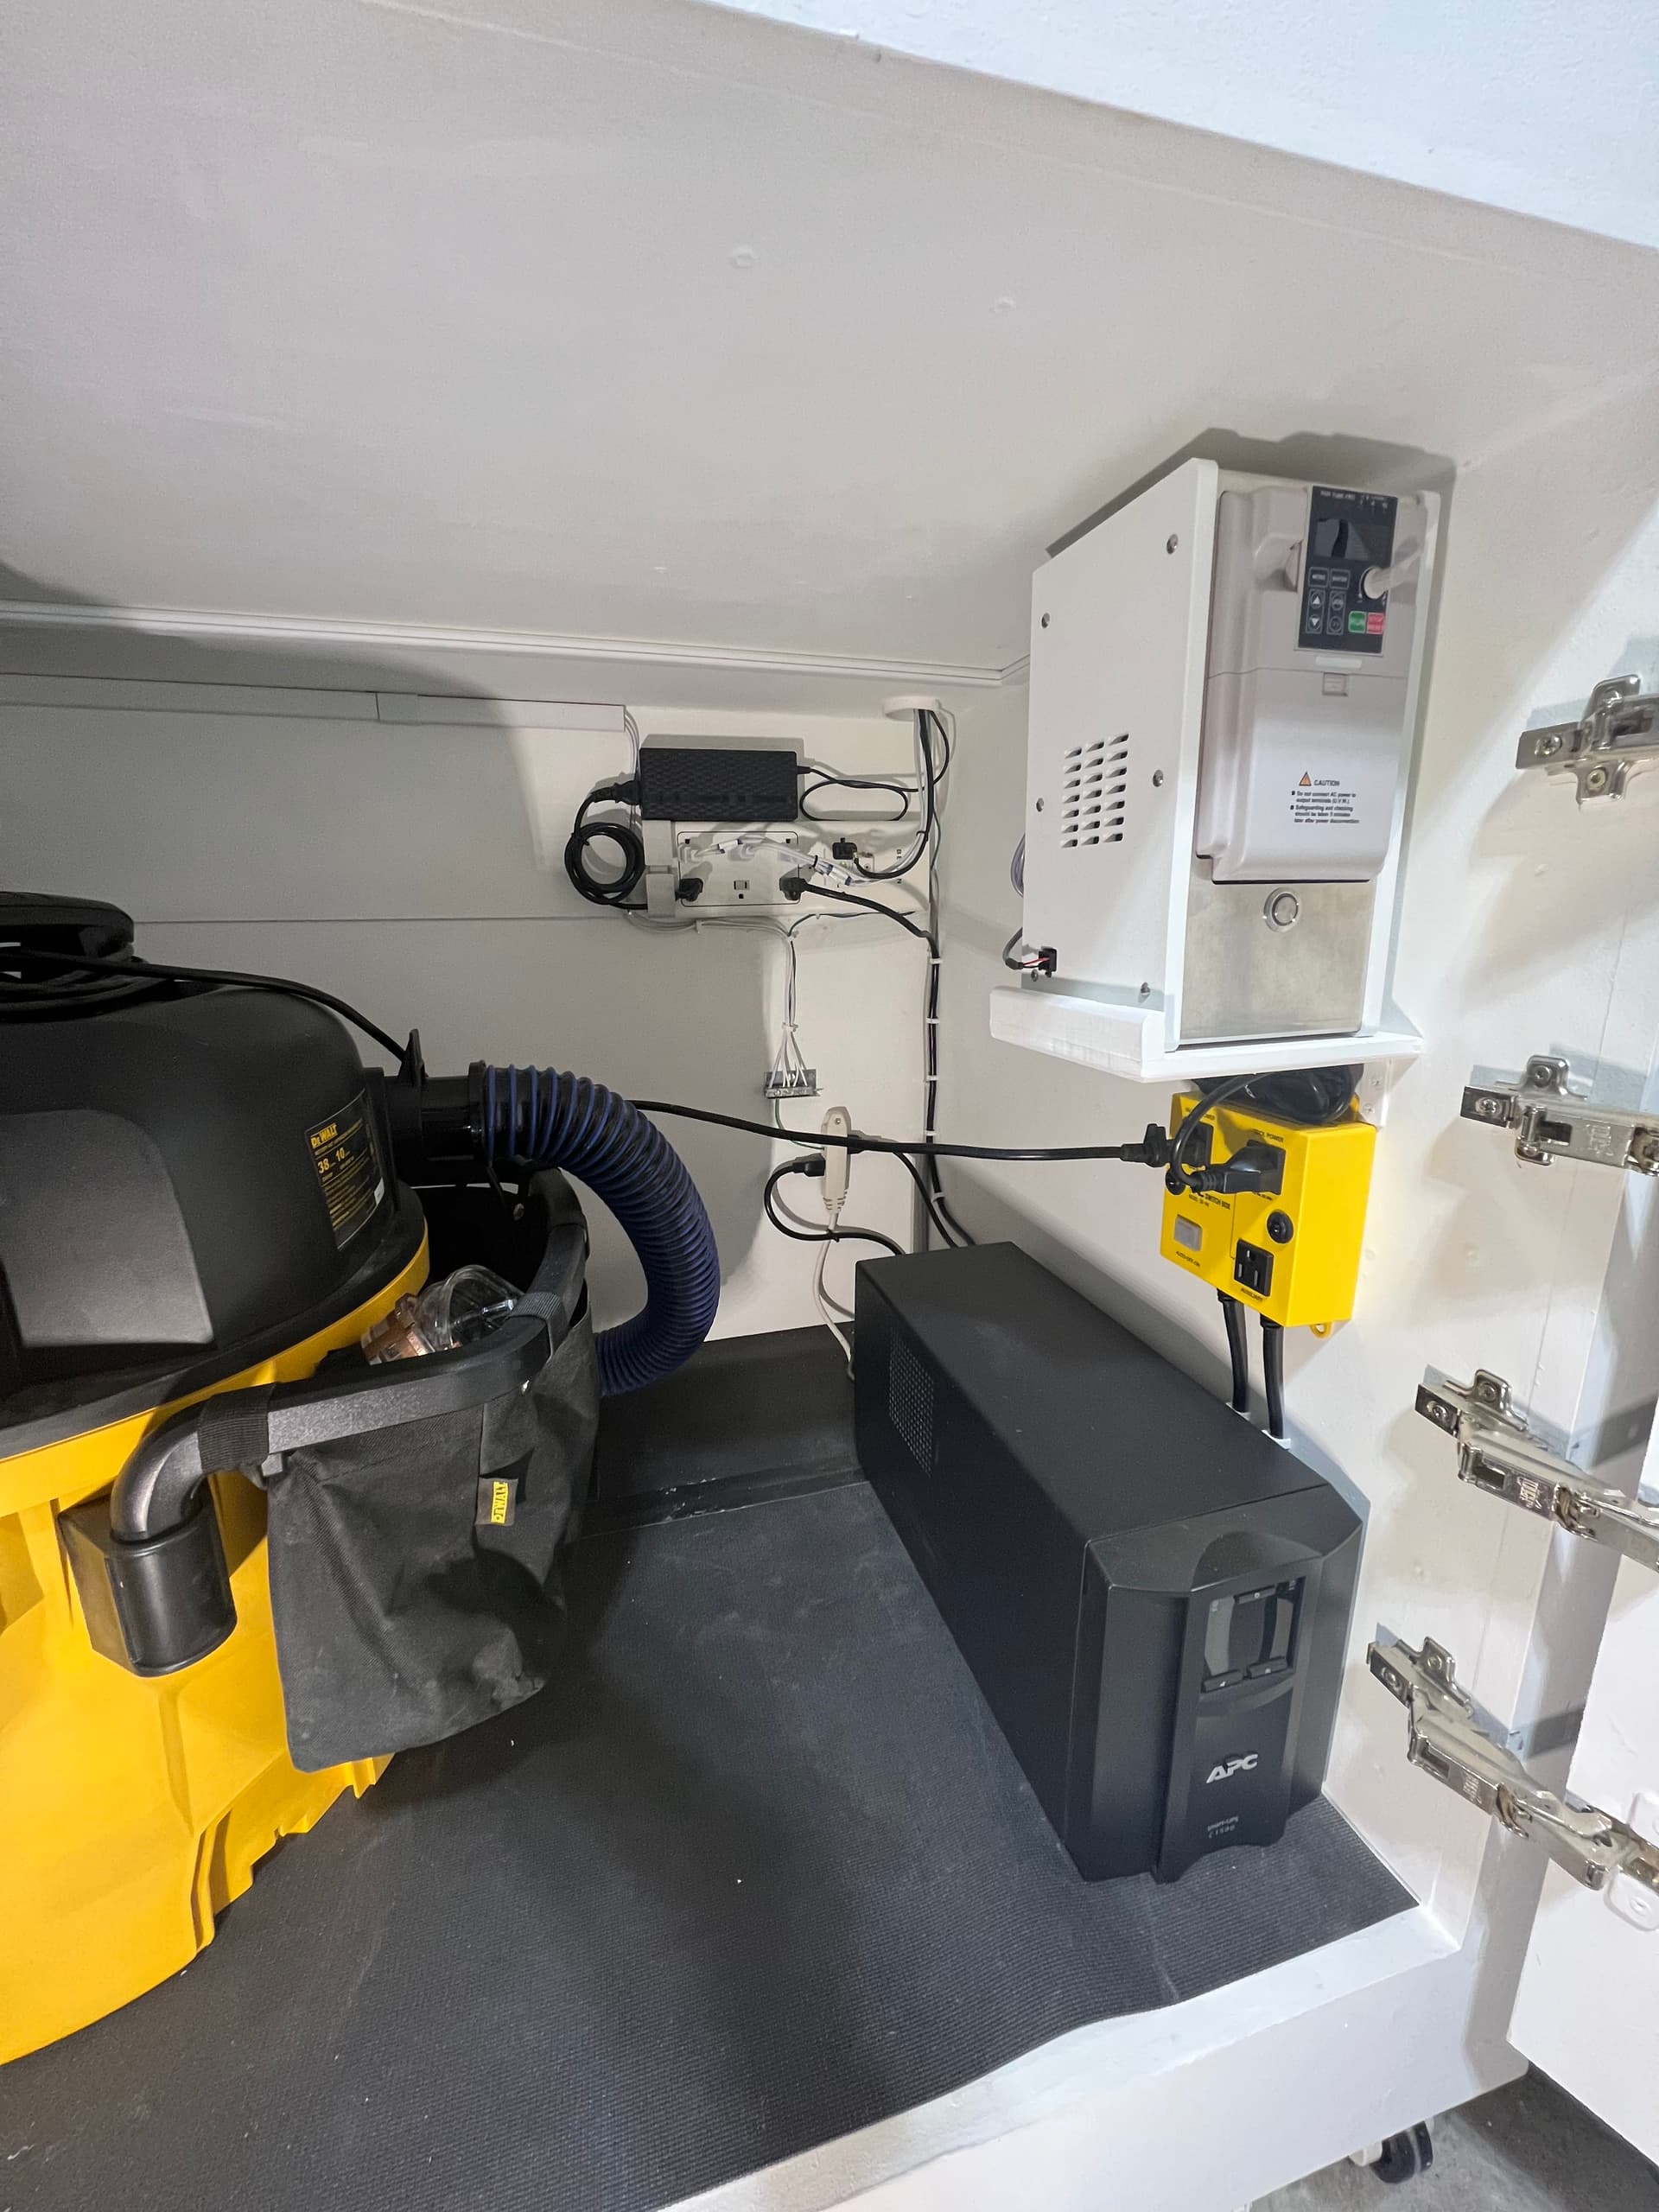
I fixed this by changing to this vacuum switch which allows the dust collection to use a different power source. So now the dust collection is the only device not being backed-up by the UPS.
The remaining updates were mostly not needed, just something I wanted to do.

-
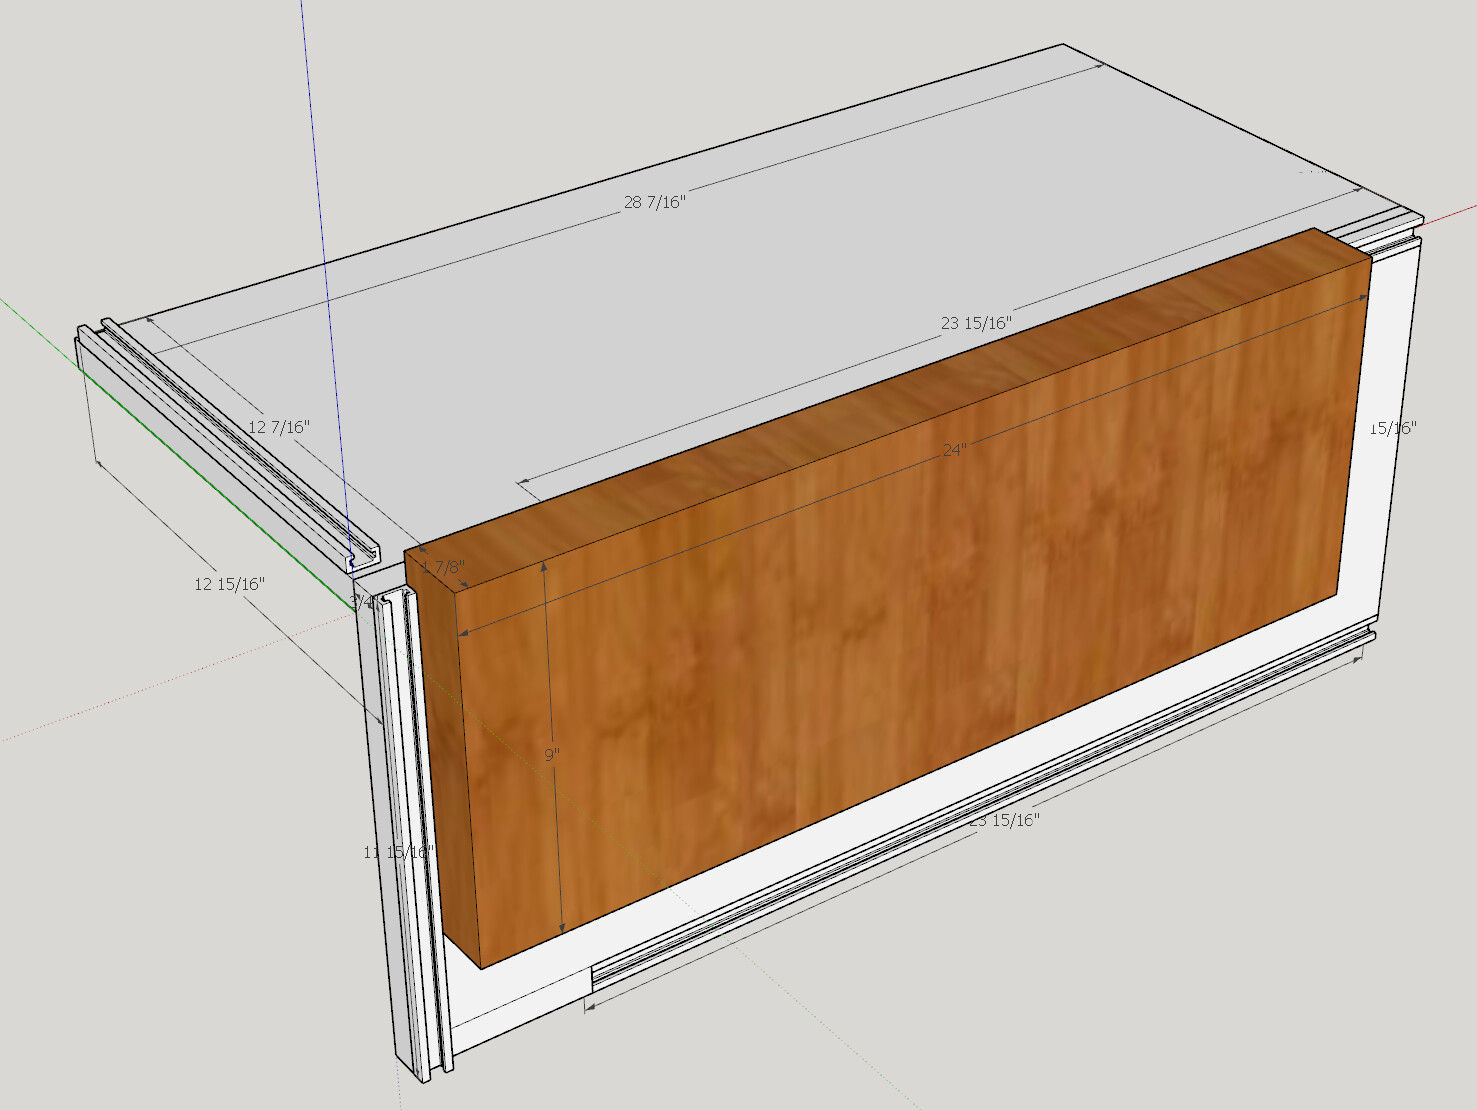
New base-board (the board below the waste-board). Painted white, added threaded-inserts and miter tracks.
-
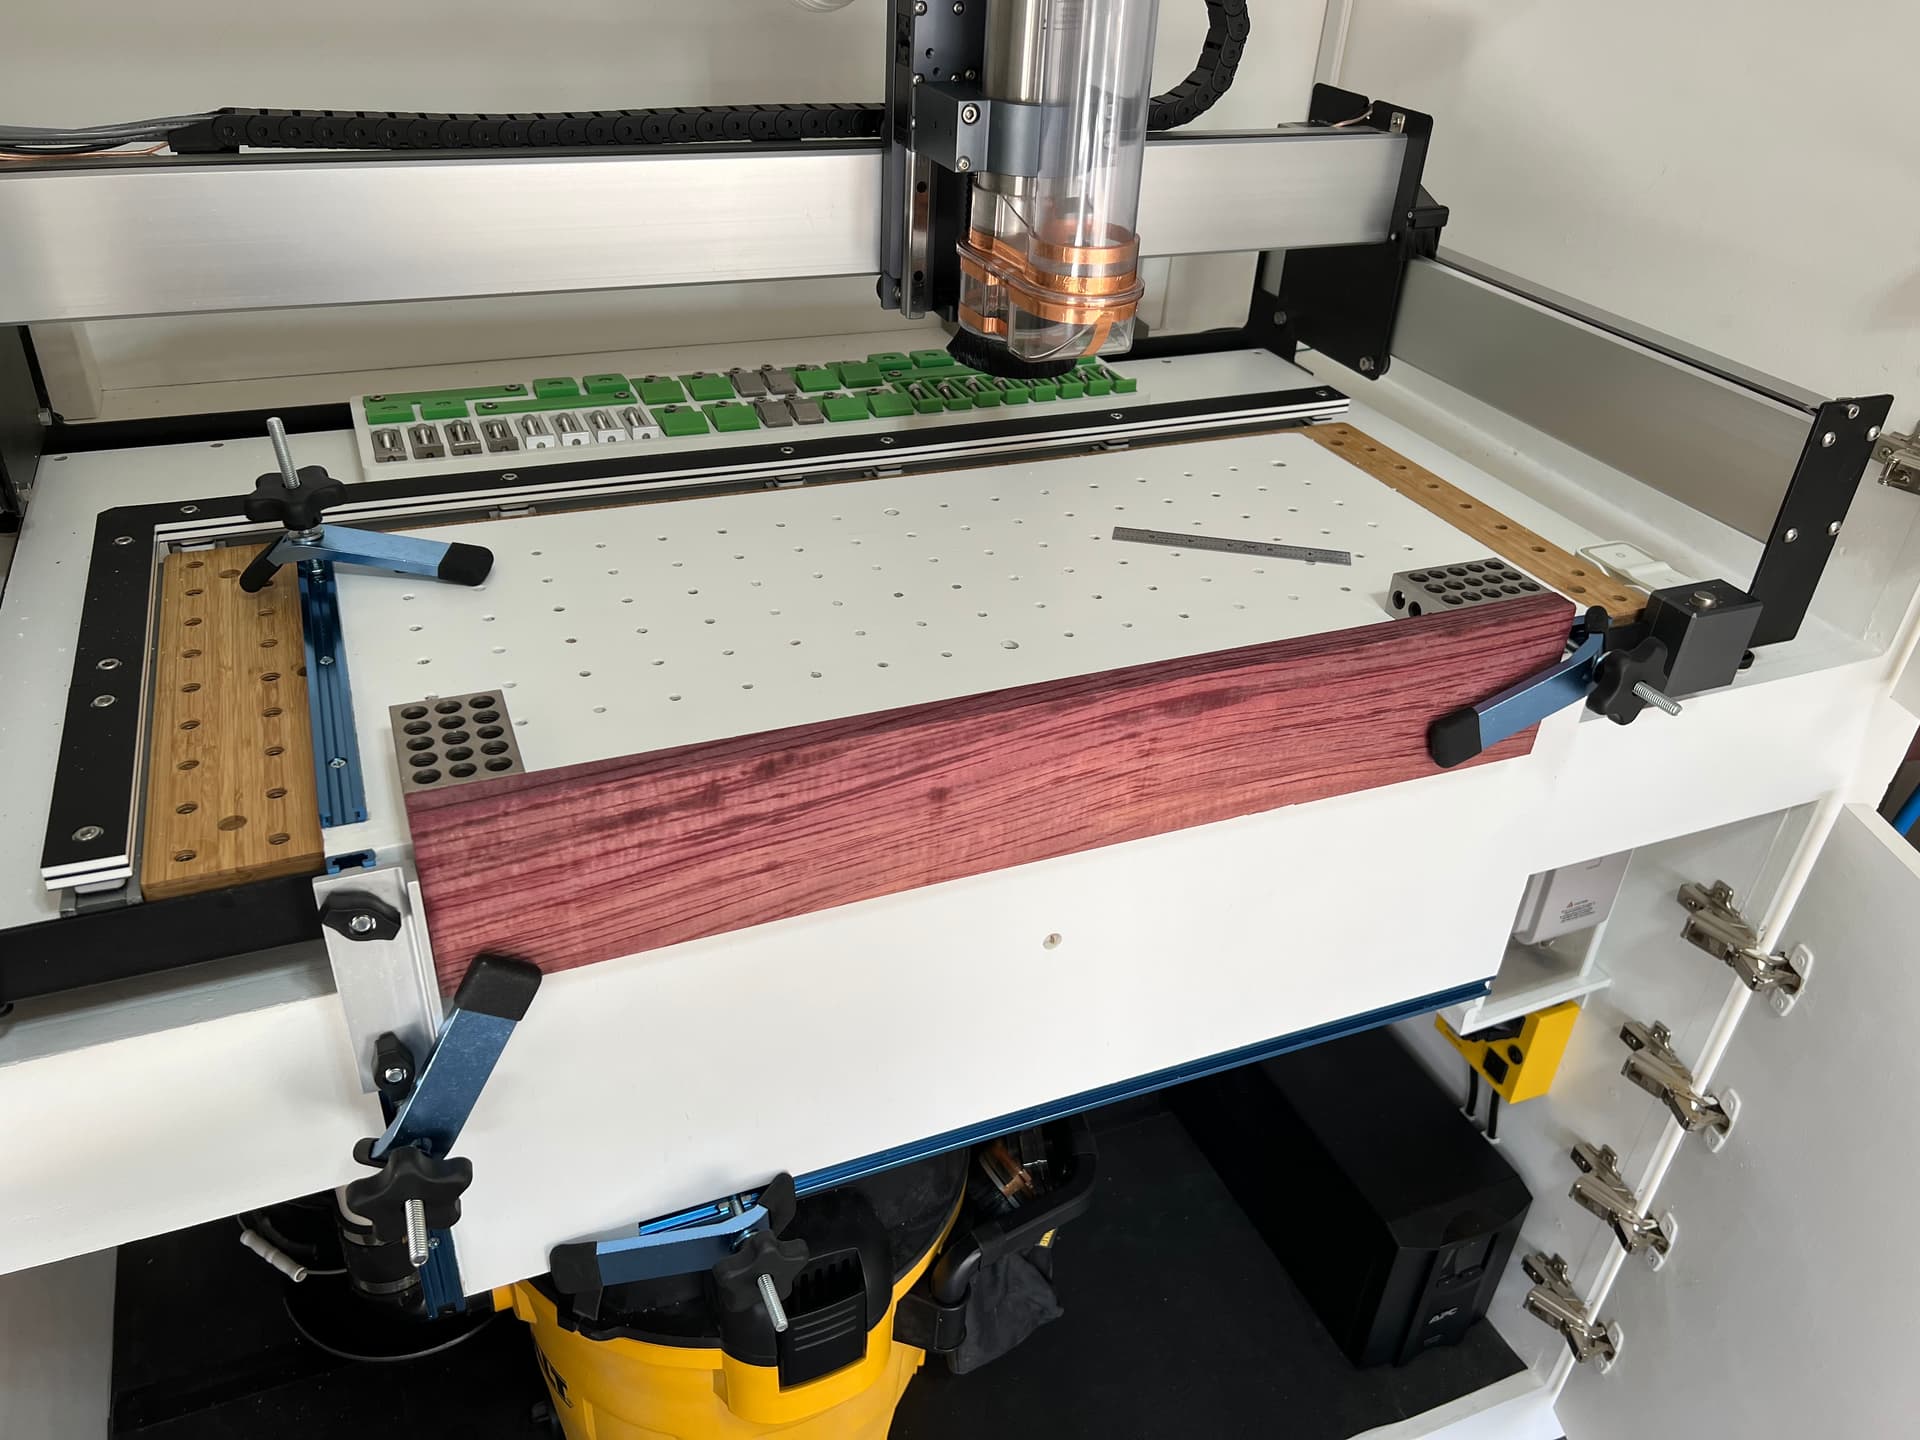
New bamboo waste-board, with 1.5" grid pattern with different threaded inserts that could be installed deeper into the board.
-
The miter tracks along the top and left side of the base-board are outside of the spindle movement range. I made raised stop-block guides that are square to the waste-board.
Up Next: I get to start a project I’ve been looking forward to since watching @45rpm John Clark show how he made a finger joint jig.