Again, I’ll answer my own question after some methodical quantitative testing, using CC 764 and the Advanced VCarve Inlay feature. I cut three test inlays with a 30° bit, and three test inlays with a 60° bit, changing only the “Bottom Gap” value each time. I tested “Bottom Gap” values of .02", .04", and .06" with each bit. Here are the six test inlays before assembly:
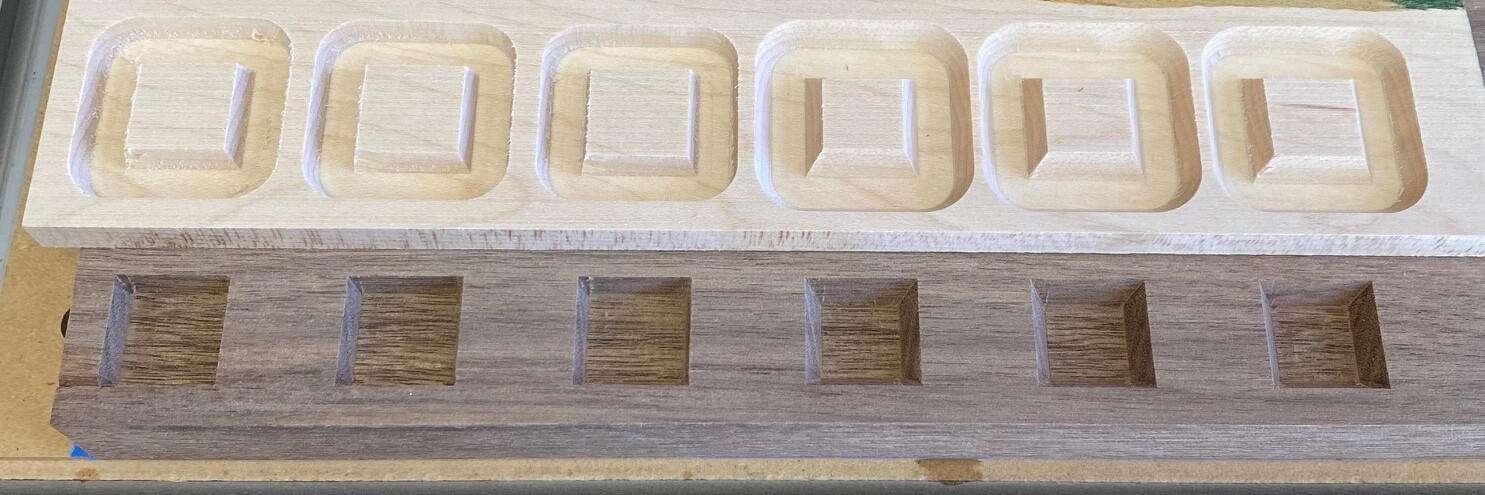
I glued the inlays, then ripped them in half on the table saw to reveal the resulting gaps.
30° Vee Bit Results:

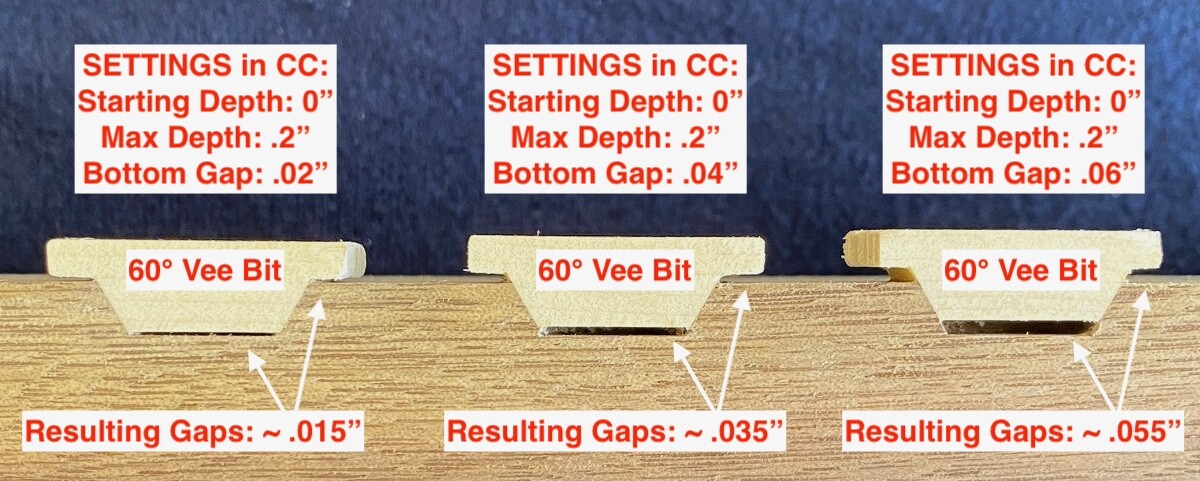
60° Vee Bit Results:
CONCLUSIONS:
-
As you increase the “Bottom Gap” value, the inlay rises, and the resulting bottom and top gaps are the same.
-
With a 30° vee bit, a “Bottom Gap” value of .02" is not enough - The inlay “just” fits, but it doesn’t wedge in for a decidedly tight fit, and results in no actual bottom gap for glue squeeze-out. So…for a 30° vee bit, use a “Bottom Gap” value of .03" or .04".
-
With a 60° vee bit, a “Bottom Gap” value of .02" seems ideal. The inlay wedges in for a tight fit, and leaves an actual .015" bottom gap for glue squeeze-out.