For grins and giggles remake your file. Draw a box the size of your file for reference and apply no tool path. Import into carbide create and set up your tool paths.
Did you make changes to the file after making tool paths? If so delete the the tool paths and remake. But I would recreate the file and try again to be sure.
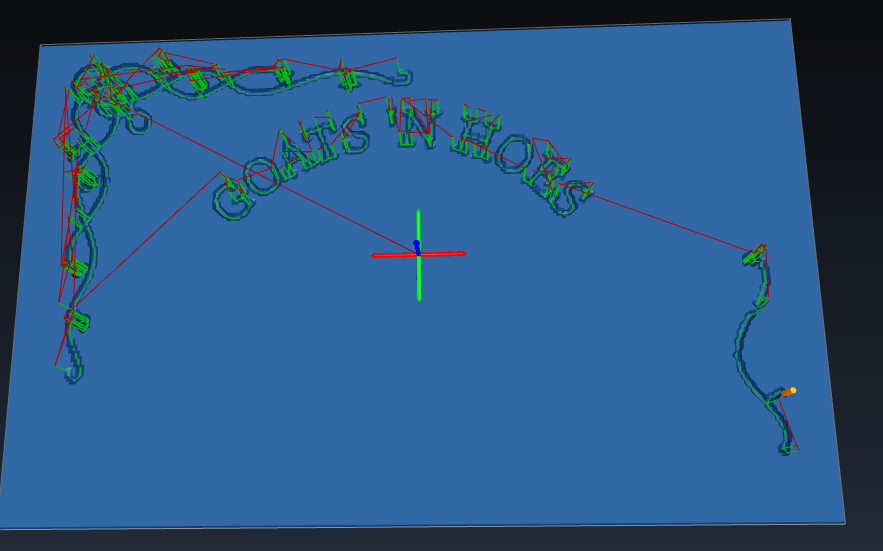
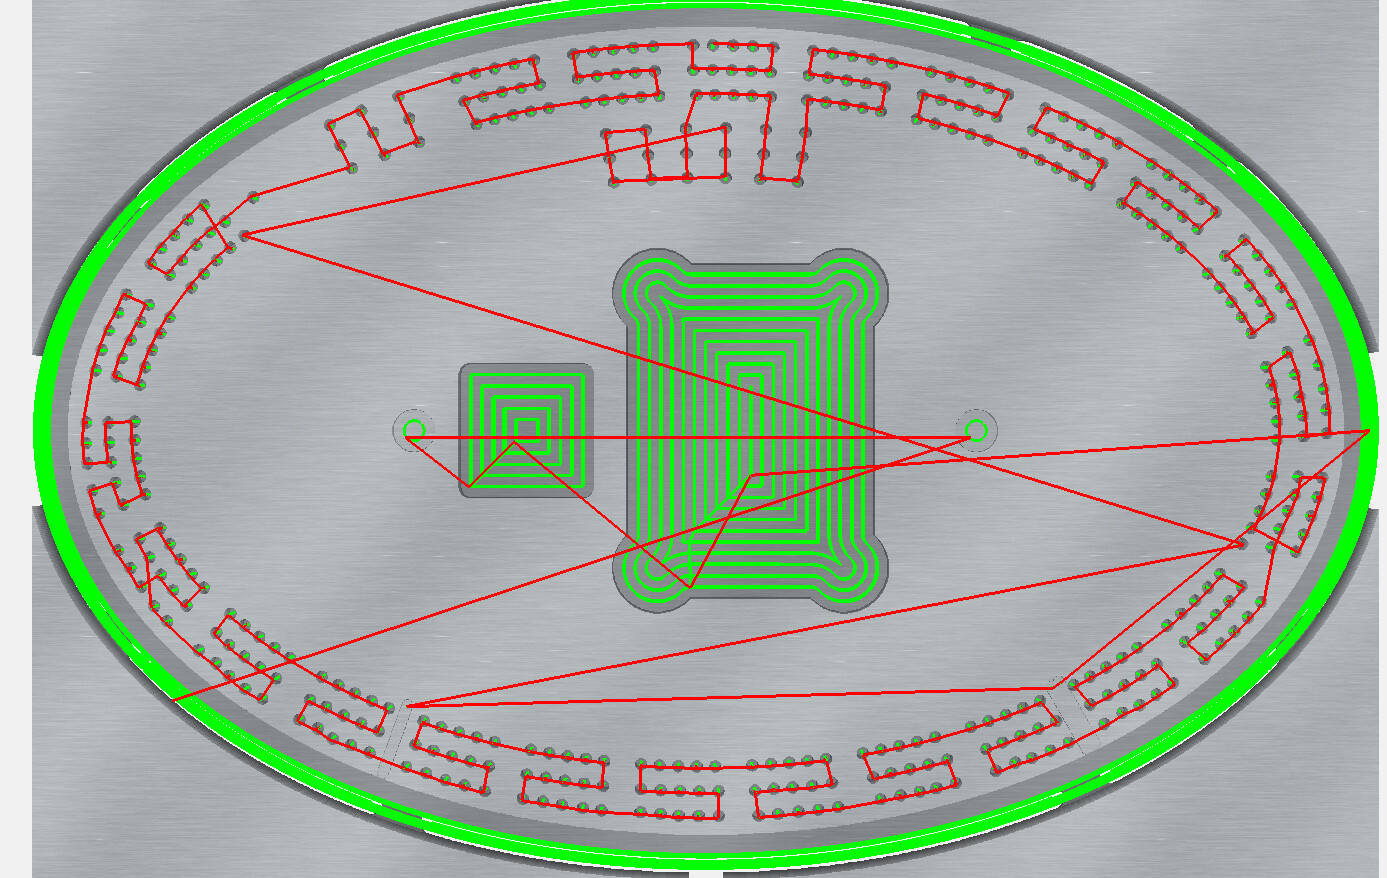
Have you ever let this finish? I ran it through CAMotics and it seems to be doing exactly what it should be doing. Try running it through Camotics and see for yourself. You can watch the process of the entire job and it will eventually move back up. CAMotics is available free at https://camotics.org/.
This is a screen shot of the job at about the same place as your picture.
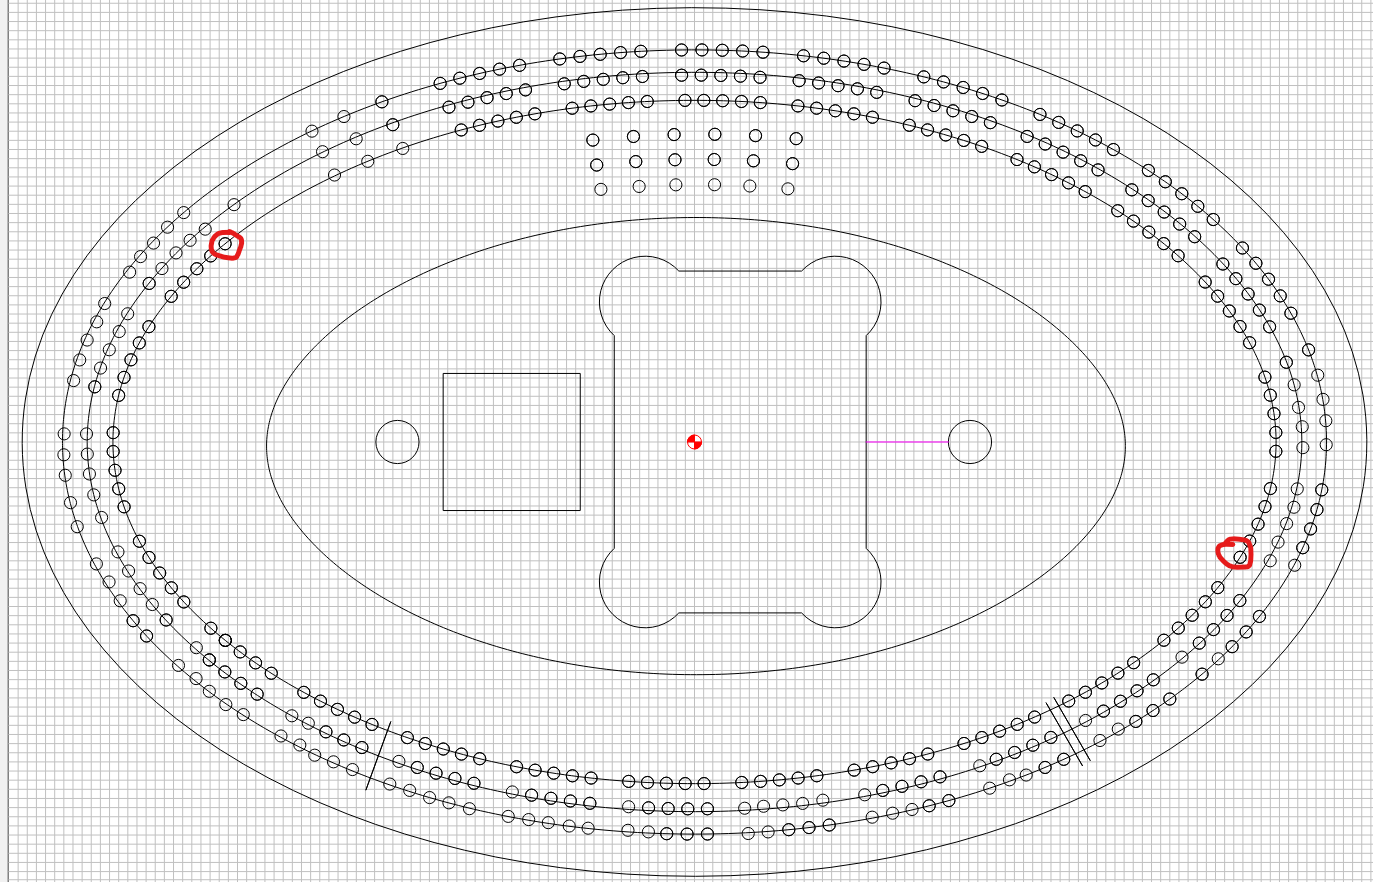
The first time I ran this cribbage board I thought I had missed two holes as I watched it run. The two circled holes were skipped as it went around the board. It finally went back and finished then as the last two cuts on the path.
I was getting pretty annoyed with myself as it was finishing thinking that I had wrecked the board over a miscount. While it was finishing I went back and looked at the rapids in the simulation and it showed that it was still coming to them.
I suggest letting it finish and see what happens. Put the one you have already done back in place and try to center if you can but if you are already considering that board waste then just let it run right through.
Is your stock placed so far back on the machine that when you set the origin at the center it bumped up against the travel limits at the back and lost steps there?
It’s worth noting that the centre position for Rapid Position is not the centre of the machine’s cutting area. It’s offset in the Y axis. So if you are assuming it’s the place where there is the maximum amount of radial movement, unfortunately that’s not correct.
I’d draw two diagonal pencil marks on your stock from corner to corner. Then fix the stock so it’s 20-30mm from the front of the machine (it doesn’t matter where you put the stock on the wasteboard since the zero point is relative not absolute), then zero everything so the centre is where the two pencil marks cross on your (very nice) bit of wood.
rnicolson - I had hoped the same thing but this is the second stock piece. The first one I let go until I was watching it carve air. But I’m definitely going to dl camotics- looks like an extremely useful tool. WillAdams and Gerry- I never noticed it bump when it went all the way back to the Y axis before, but after resetting everything from initial settings all the way to initializing the machine when it started the job this time I noticed a bump. Tonight I will re-position the stock and go from there. Thanks again everyone
Perhaps some wireless doorbell switches to affix in some strategic places such that the buttons get depressed when the axis go to far is a possible future C3D upgrade
Success!! I thought I’d get the maximum travel by centering directly in the middle of the machine. I didn’t take into account the X axis getting in the way and I didn’t notice it bumping on the first cut. Also, this fixed a Z depth travel issue I didn’t even bring up. Thanks everyone!!