Hi I have CM 563 or later and I noticed the probing problem before but never took any pictures.
It’s only on the Probe Left Edge (X) and Probe Front Edge (Y). BitZero V1. Shapeoko 3 XXL.
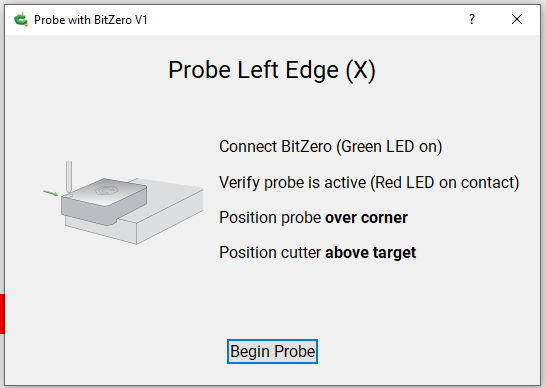
The instructions say to Position the Probe Over Corner and Position Cutter Above Target.
Position Cutter Above Target is going to cause a probe failure.
To make it work you have to position the cutter to the Left of the Bit Zero and below the top of the BitZero. I did about 10mm to the left and 10mm below and it worked correctly.
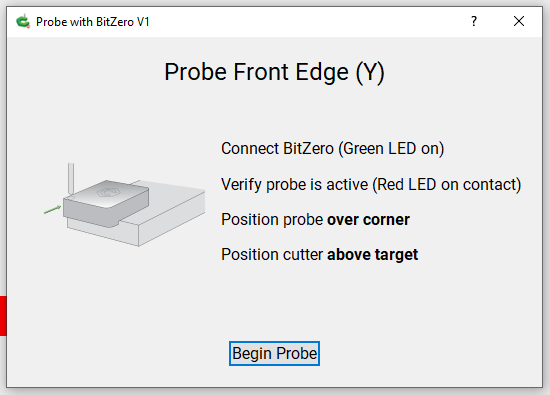
The same problem with the Front Edge Y axis. If you position the Cutter above the target it will fail.
The Cutter needs to be in Front of the Y BitZero Edge and below the top of the BitZero. Again I used about 10mm on both and it worked correctly.
One thing I never understood is why you have to reinitialize the machine after a probe failure.
If it fails I would think no settings would be set and the most likely cause is the ground wire isn’t connected or fell off the tool or you were just a bit too far away from the BitZero.
Why can’t there be a Retry or just have the machine go back to it’s position before probing so you can lower the bit or put the clip on or correct what ever the problem is.
Also noticed that after the XYZ probe it goes back to the place it started. I believe Left Edge X did too but not sure. But Front Edge Y didn’t. It moved back maybe 5 mm or less when I was at least 10mm away from the BitZero.
I could not find my original pdf for the v1 BitZero but I had stored an html copy of the online guide. In the online guide they state to find the left side do the following:
This operation will find the left edge of your material. The setup is as follows:
Position Probe on top of workpiece (do not overhang the lip)
Position the Probe flush with the left edge of the workpiece
Position endmill within 1/2” (12mm) of the edge of the Probe - to the outside of the material.
Position endmill below the Probe’s top surface
Attach clip to endmill
Begin probing cycle
After the probing operation completes, CM will set X=0
Then for the front edge:
This operation will find the front edge of your material. The setup is as follows:
Position Probe on top of workpiece (do not overhang the lip)
Position the Probe flush with the front edge of the workpiece.
Position endmill within 1/2” (12mm) of the edge of the Probe - to the outside of the material.
Position endmill below the Probe’s top surface
Attach clip to endmill
Begin probing cycle
After the probing operation completes, CM will set Y=0
I never use my V1 BitZero to find X or Y just Z or all 3 on the corner. Hopefully they will change the instructions in CM prove instructions.
I have CM 565, the latest, and verified that the instructions tell you to put the bit over the probe. I started an X only probe and the bit started to move to the right to find the edge.
So the instructions should tell you to move the bit to the left of the material and low enough for the bit to hit the side of the BitZero. Good Catch!!!
Be sure to copy your post and send it to support@carbide3d.com so the technical folks get a fix in the works for the next version of CM. C3D has been hot and heavy with updates to both CC and CM.