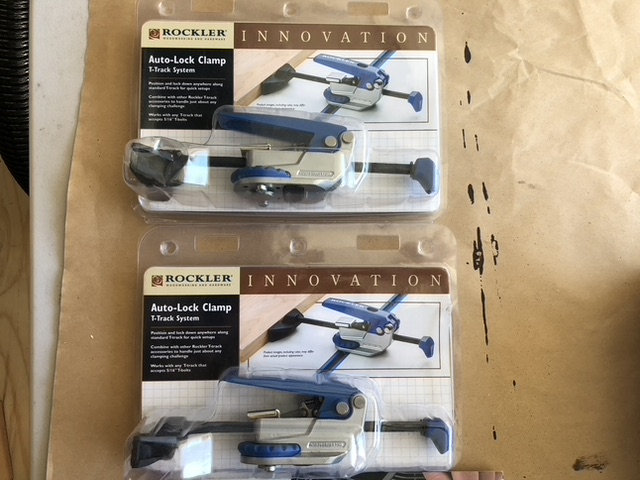
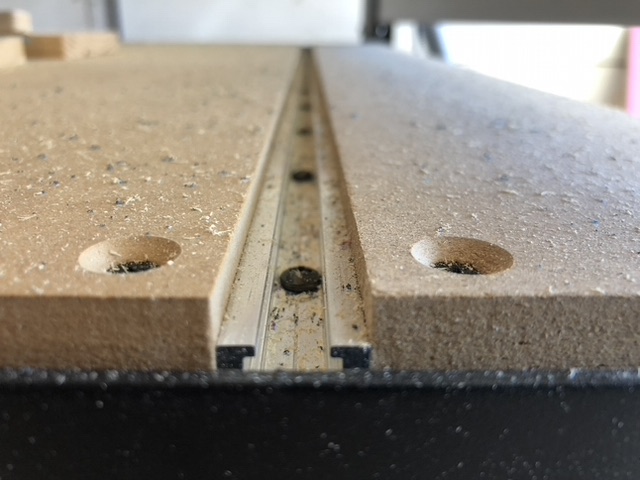
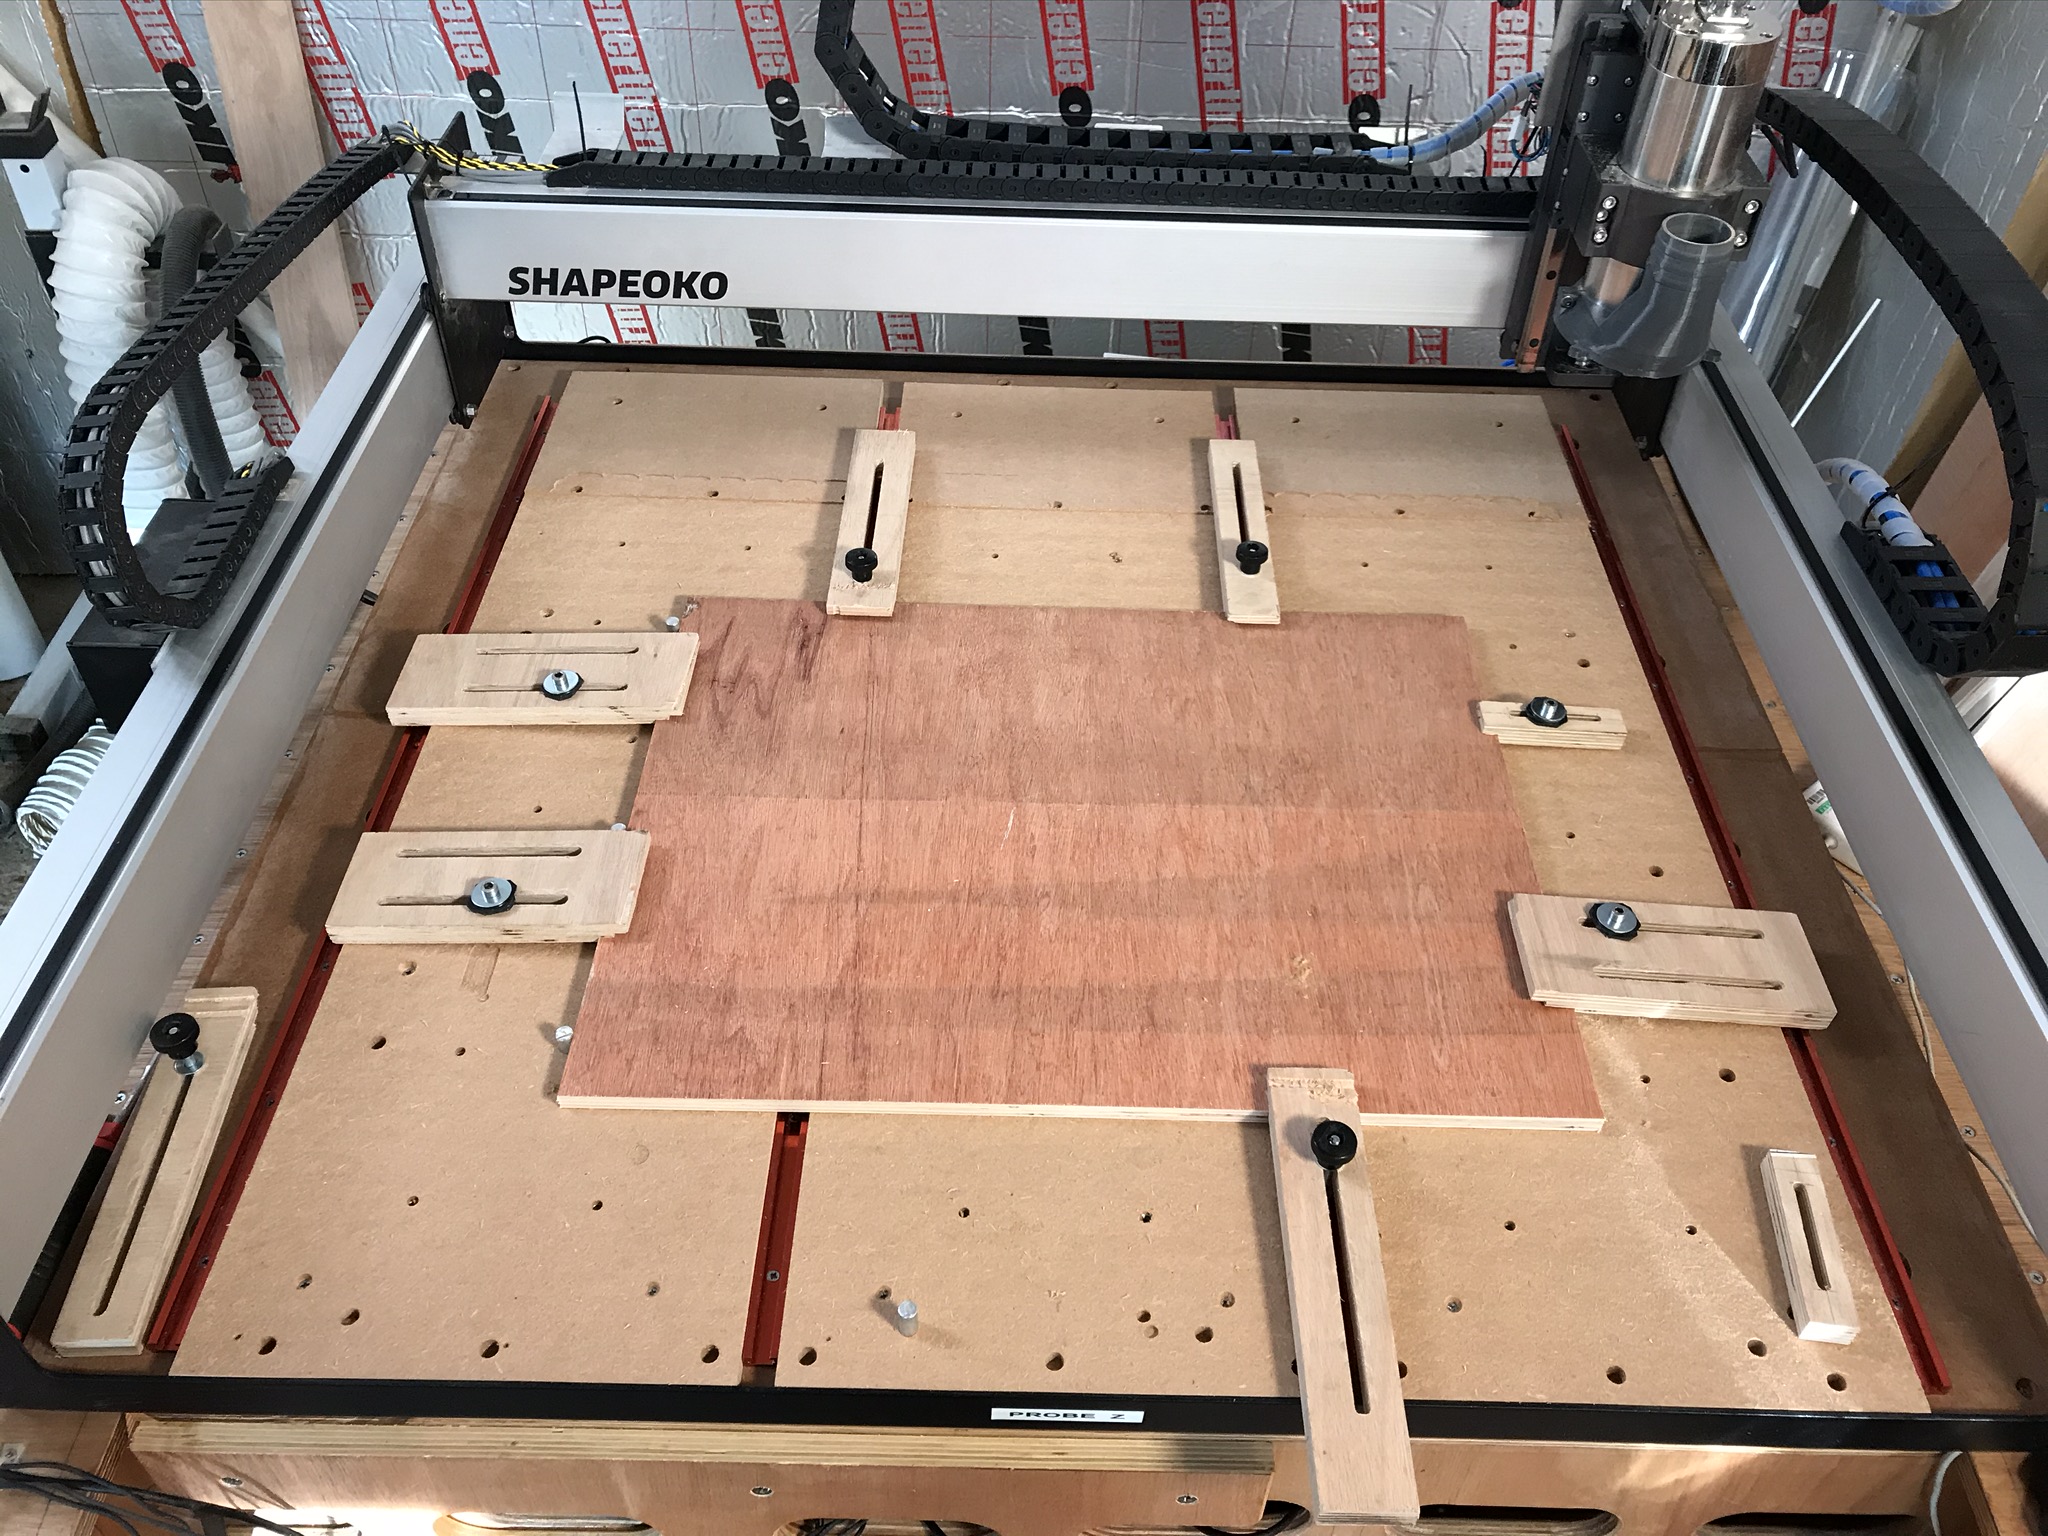
I’m a newbie! Here is a photo of the Carbide3D waste board and t-track kit that I bought and installed. Attached is a photo of the two types of Rockler t-track clamps I bought that other Shapeoko users seem to love, but I don’t know how they can use them with the Carbide3D t-tracks. Also attached is a close up of the mechanism that is supposed to slide into the t-track and then use the blue dial to tighten it down. Neither of these accessories clamp the stock from the top so thickness of the stock isn’t an issue.
My suspicion is that 3rd party clamps / hold downs need flush mounted tracks and that’s not how Carbide t-tracks work. Am I missing something? Do I need to surface the waste board down to the tracks? Seems excessive.
The clamps don’t drop in from the top, they go in from the front of the track. You need room between the spoil board and front of the machine to get them in.
Hi Michael. Thanks for the quick response. I tried sliding them in from the end of the track as I did with my stock Carbide hold down clamps, but because the track is not flush with the waste board, the Rockler clamps won’t slide in. It seems like they either need a flush track or a longer mechanism to hold the clamp in to the track. Do you use Rockler clamps on a Carbide t-track? Thanks.
I have t-tracks on other machines. The t-tracks are a standard size.
Is it that the oblong part at the end of the bolt won’t go in the track? I see that the track sits pretty deep. The corner clamp looks like you can unscrew the blue pieces off. those you could use toilet bolts for the tracks. The clamps from the picture don’t look like the piece that goes in the track is long enough from the photos.
Would they fit if you put a strip of MDF under the track? Raise them up so they are just below the surface. When you level the spoil board to the point that the track will be to high take them out and remove the strips from underneath.
I’m sure someone will come along that has these and can tell you how they are using them.
It looks like you could get a longer bolt for the part to make the t track guide for the rockler pieces longer?
Yeah, most wood working stuff, the t track sits flush or pretty close to flush, for CNC you want your spoilboard to not sit flush, in case of accidents.
I believe the Carbide3d T-Tracks are designed for 1/4-20 hardware, but those rocklers are for 5/16-18 hardware. With the 5/16-18 T-Track design being larger, that hardware might not fit in your t-tracks. I would slice one open and see if it fits before going any further. I can fit a 5/16 bolt into my 1/4 T-Track, but it doesn’t offer much clearance, might bind very easily
The depth issue can be easily solved if it fits, as MrGNY suggested, shim up your T-Tracks, or buy longer hardware, and thread it in to the cams, then cut it off at the necessary height.
I think raising the tracks or surfacing the spoil board may work, but I also think I may be trying to hard. I have a bag of bolts from Carbide and I should probably cut my own 90 degree corner stop and stop trying to be so fancy with the Rockler gear!
Thanks David. Not only am I understanding this better now, but Carbide Community just sent me a pop up window showing me how to respond to multiple users at once! Thanks for your suggestions. I’m going to use the Carbide bolts and make my own corner stop!
Peter,you have made me think I am about to do the T Track and I have some Legacy low profile clamps,I have used them on a track that is level with the spoil board and work brilliantly but when I look at the difference in height of the track to board I may have some real problems.
I found this kit to be very handy with the T track in my spoilboard (and elsewhere) especially the assorted lengths of M6 tee bolt. I’m sure there are similar kits in the US.
I cut clamp bars out of plywood so that when I put a toolpath through them by mistake I don’t mess up the bit.
One day I might be confident enough in my toolpath simulations and machine operating fu to put big aluminium clamps where the the cutter can reach them but that’s not today.