Hi folks! We typically do indoor items, but a friend asked us to do an outdoor sign for them. I created it using 3D modeling in CC. When I work through the toolpaths, they seem way longer to run than I would have expected. Any suggestions for how I could adjust?
Outdoor Sign Texture Exploration V6.c2d (2.2 MB)
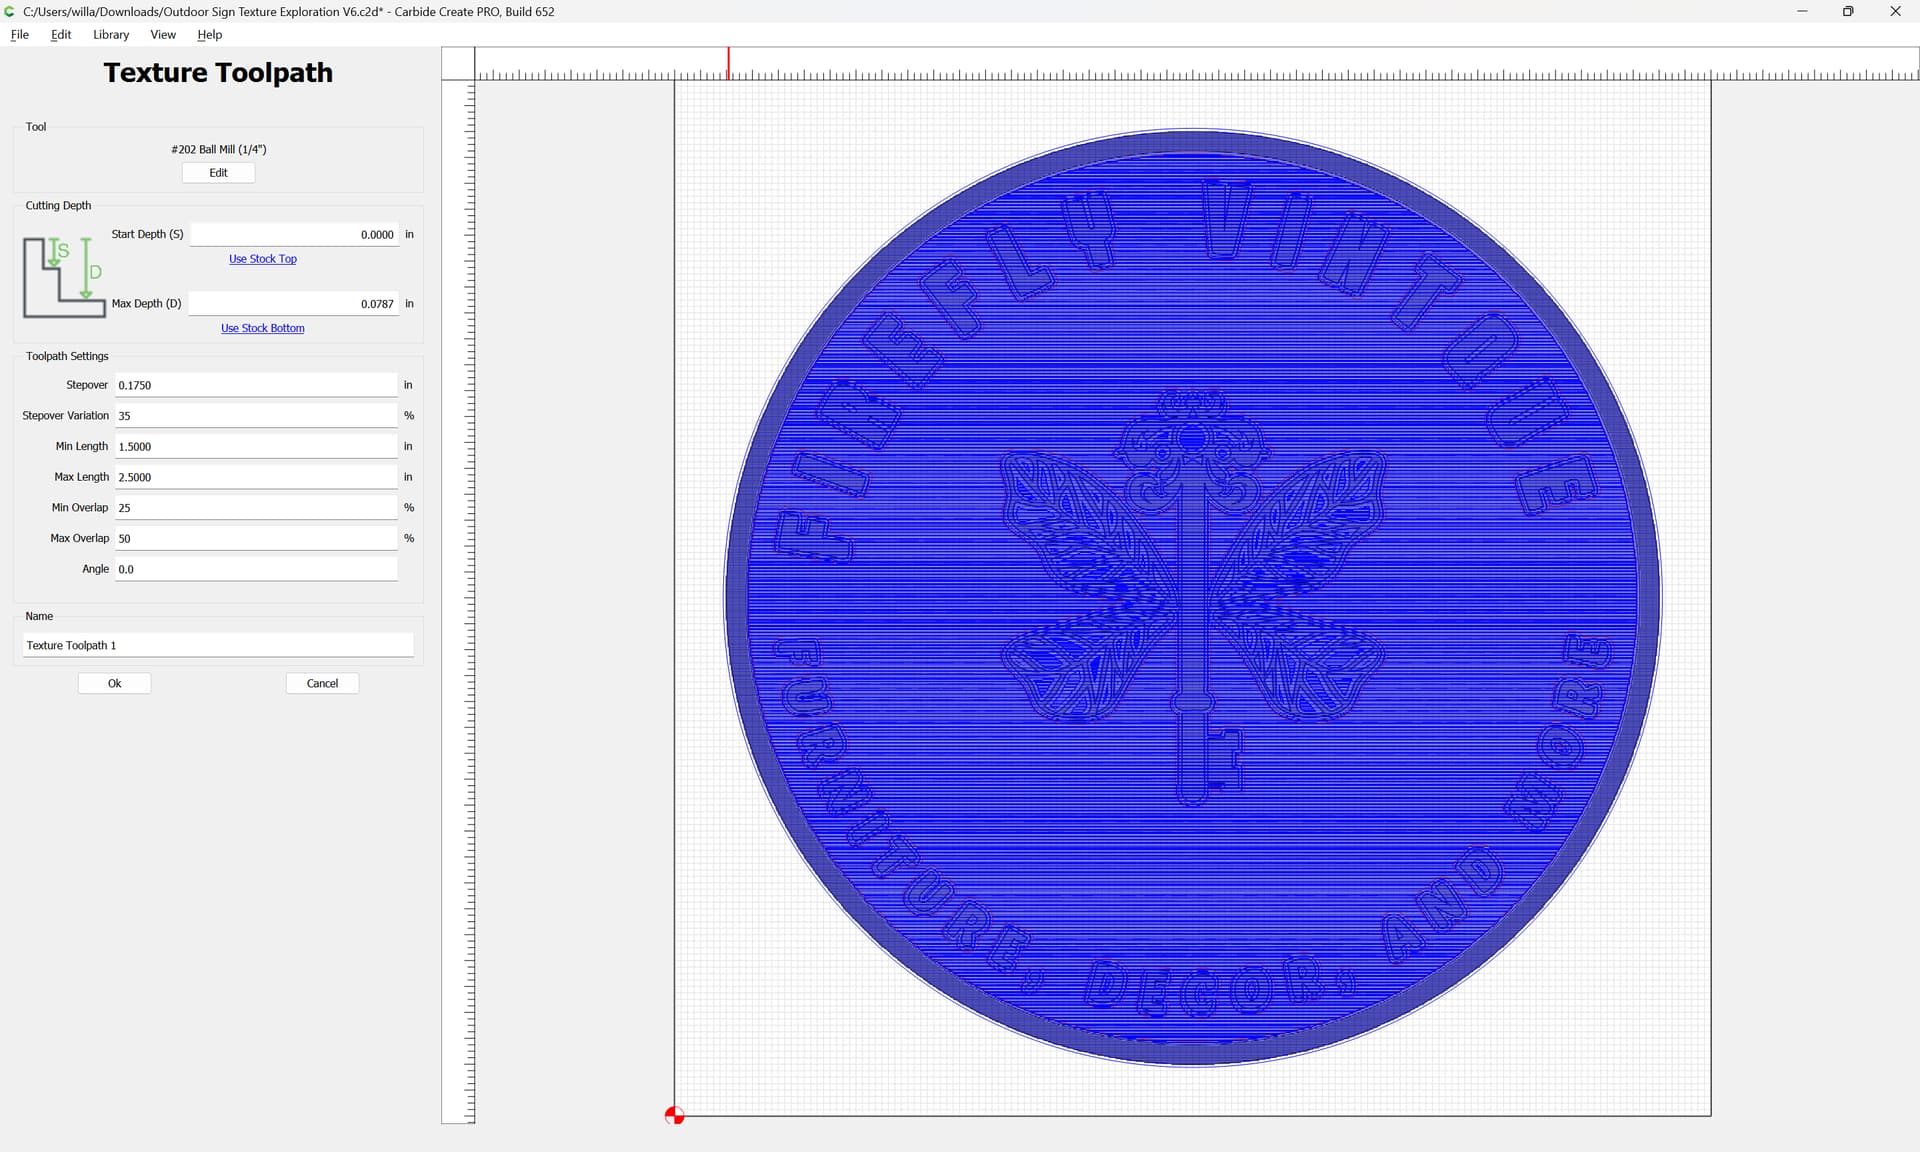
First off, the McFly is intended for facing, not material removal:

What material are you cutting?
Second, if the field has been machined down to 0.5 inches:

You will need to change the Texture toolpath to start at that depth:

Lastly, if you’re cutting the entire surface in 3D, why not make the texture part of the 3D model and cut it all at once?
1 Like
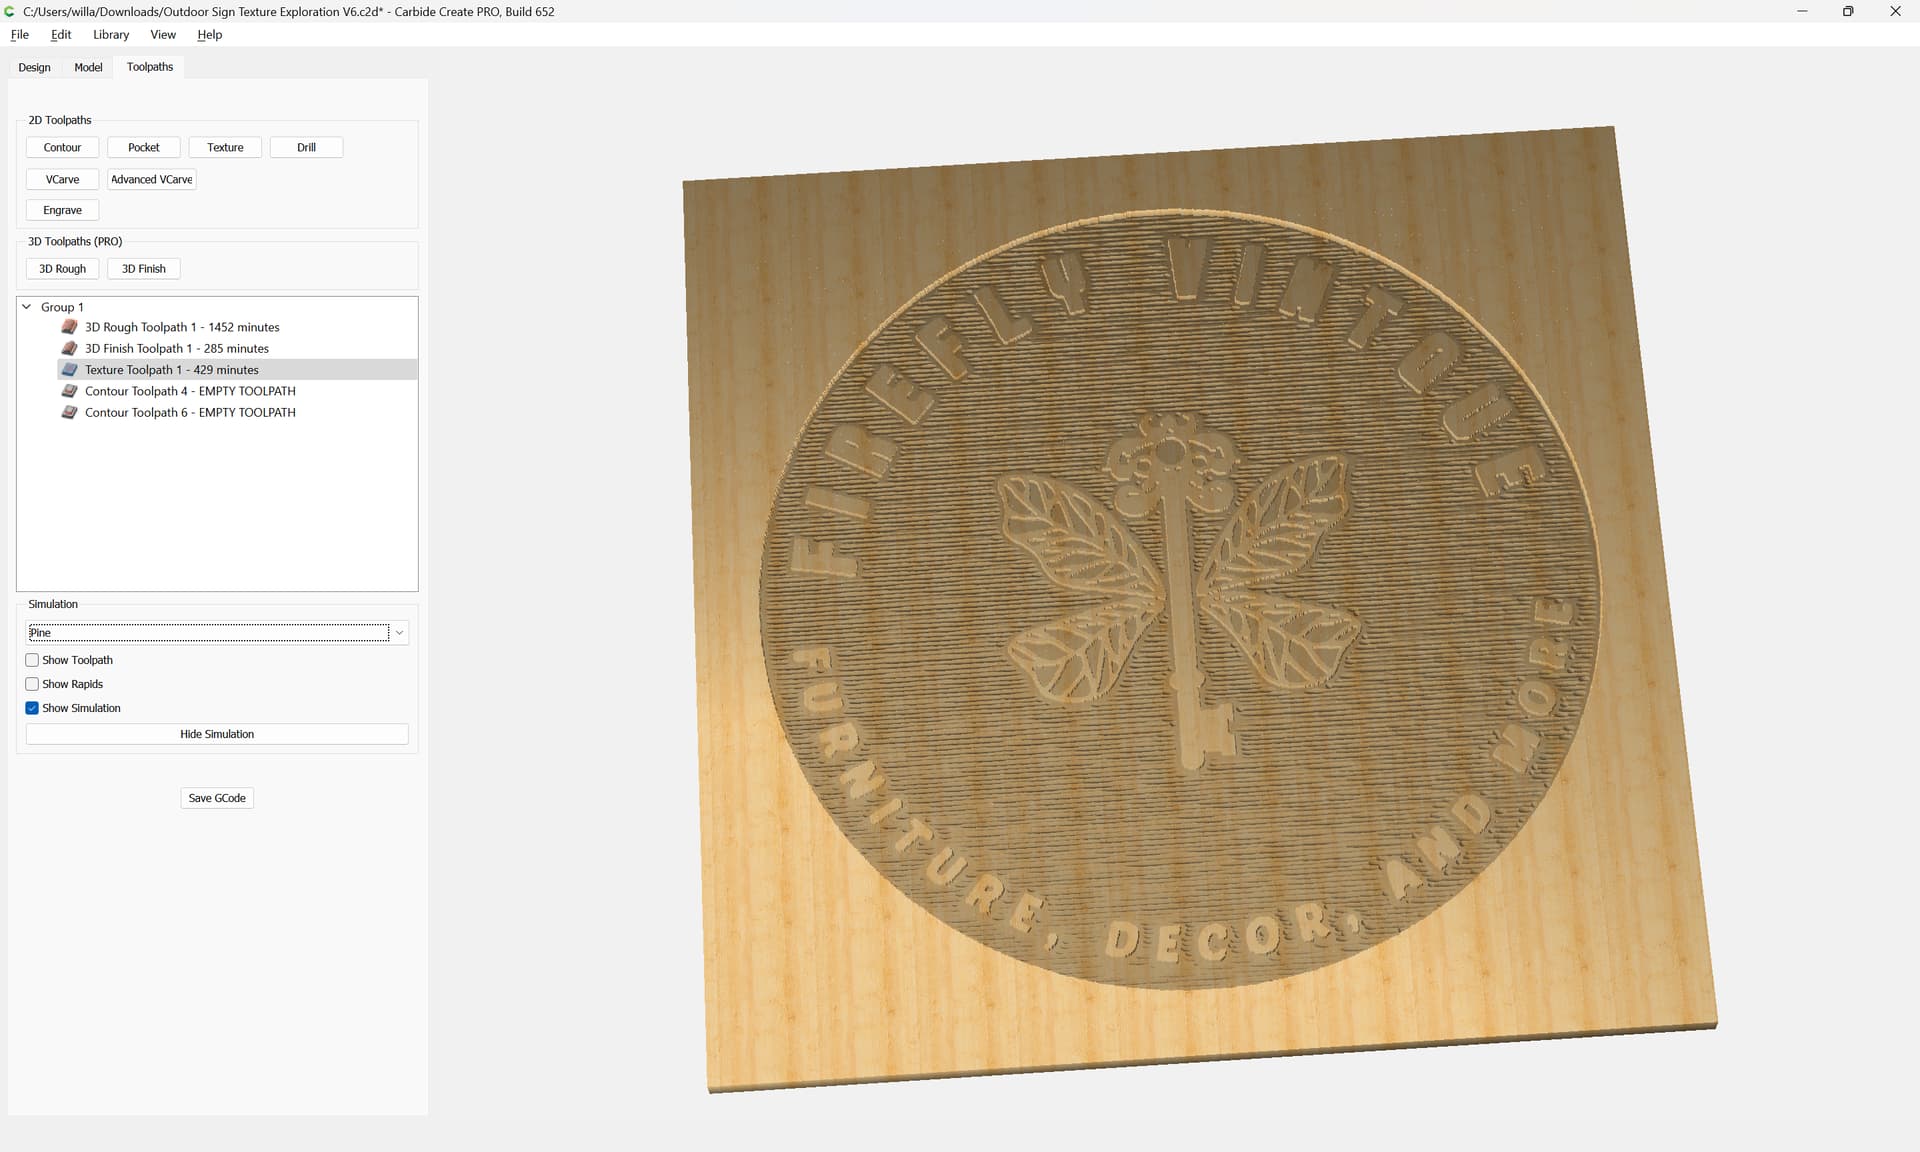
We played around with the Mcly versus a 1/4" ball nose just to see the timing differences. I don’t think the McFly would do well with that kind of workload, either.
Thanks for the tip on the texture; I missed that part. I didn’t include it in the 3D model because I couldn’t find a picture to use that I liked. From the videos I watched, it looks like you have to upload a png or jpeg of the texture. Any recommendations or a similar look? I’d imagine that using it in 3D would make it quicker.
Draw in geometry which describes the regions you want cut away and remove them w/ appropriate settings from the 3D model.
I have the 65 mm spindle.
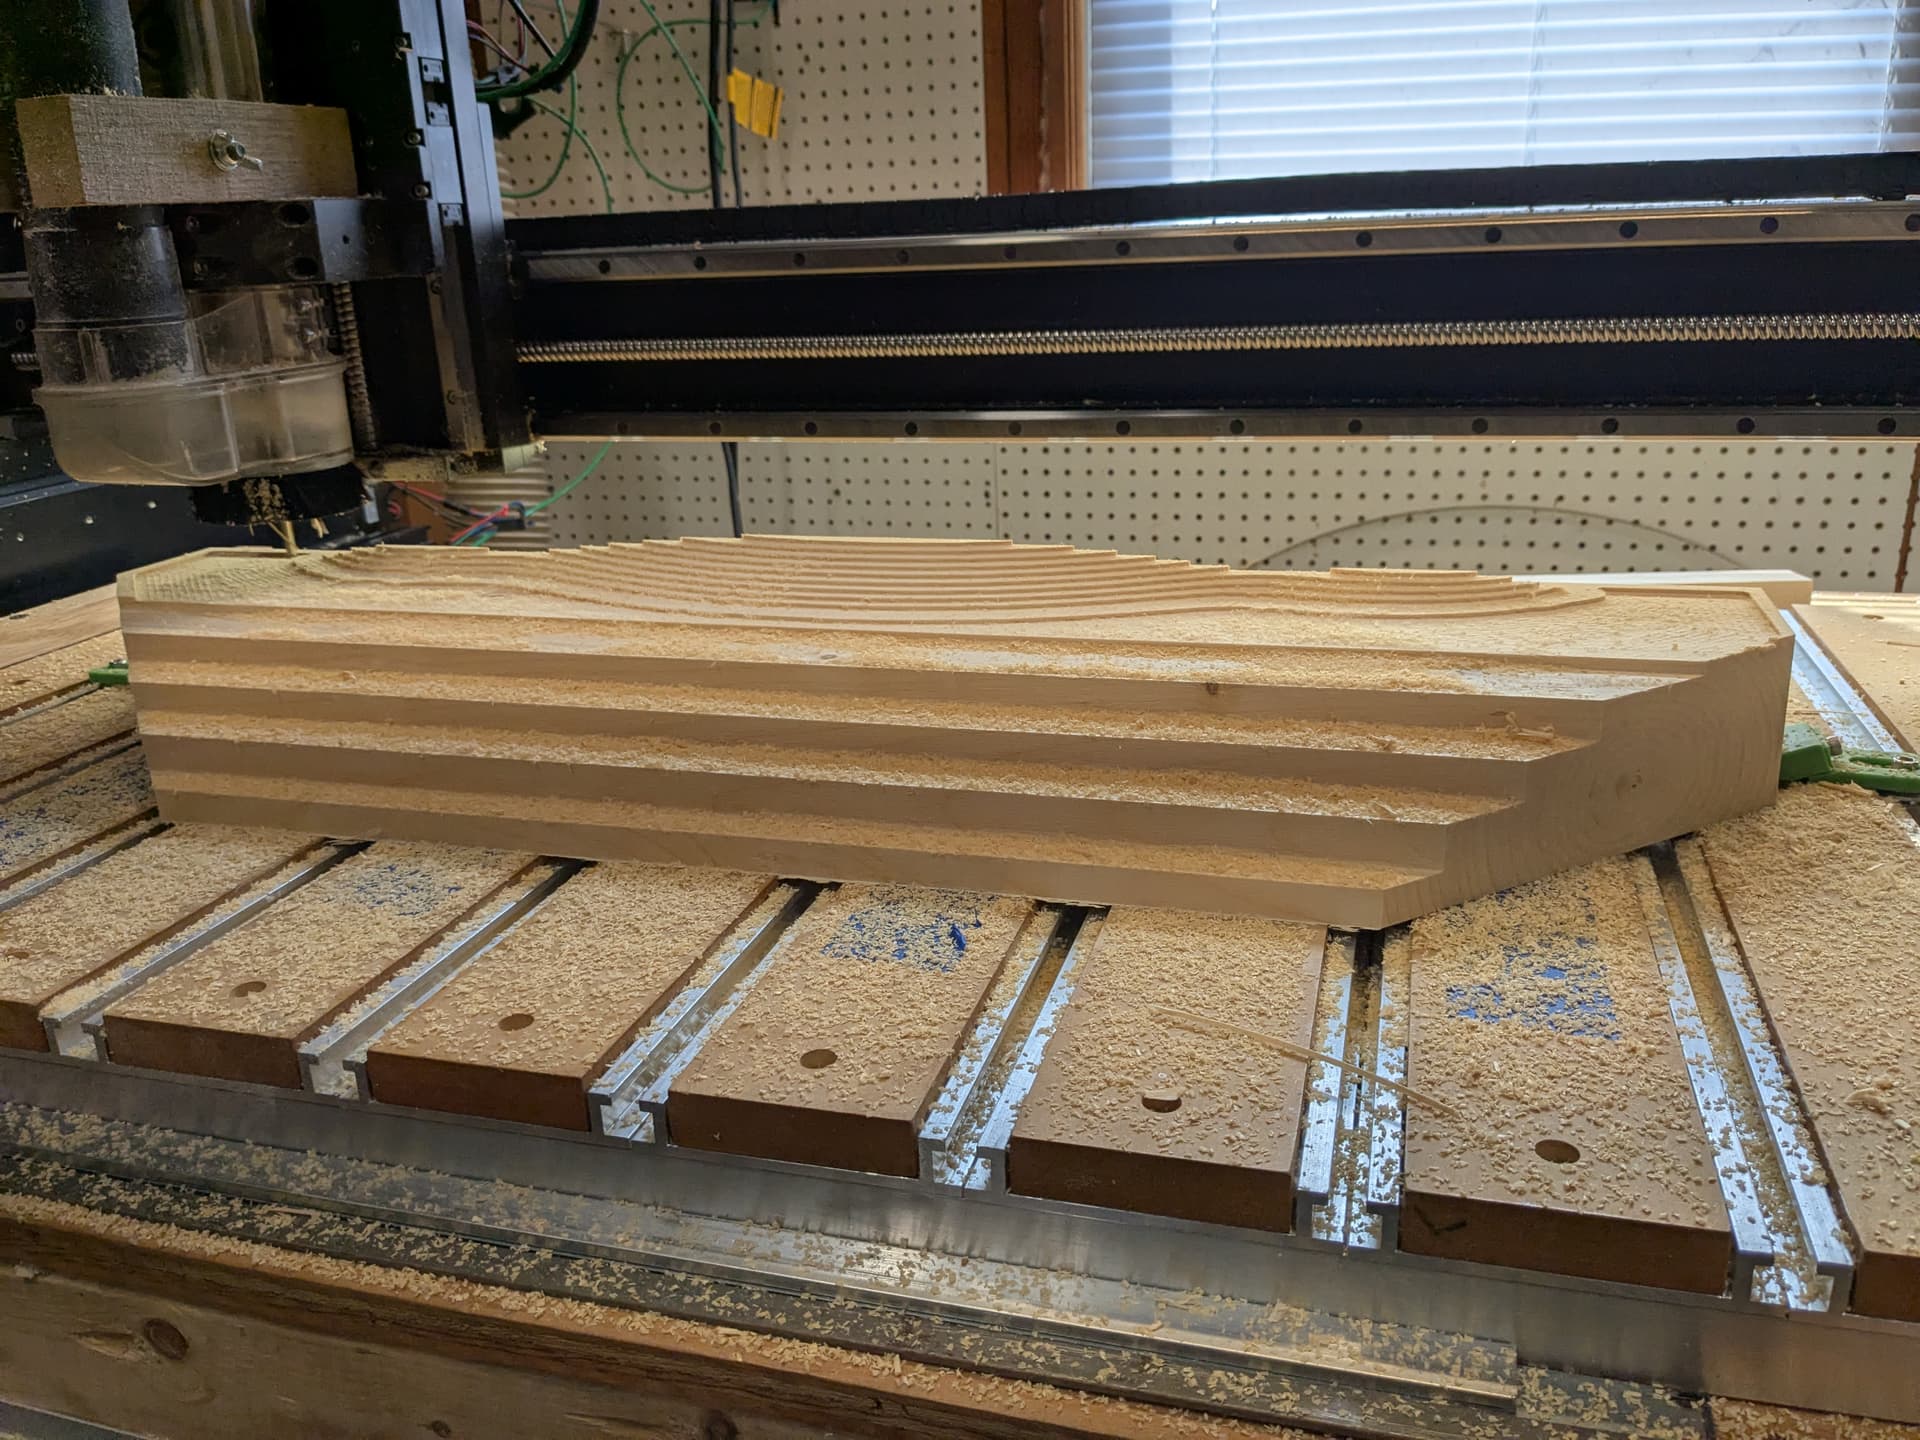
I just cut eastern pine (3.5 " deep) and I needed to remove a lot of material to get to the real model. I used the McFly @ .06 DOC @ 200 ipm for a 6 cu inch/min rate.
For Pine it was faster than I would send a 1/4 bit.
If it was hardwood, this story would change.
The big steps were cut with the McFly first to save time for a 3D Pocket.
That’s helpful! I am thinking of doing this with 4/4 cedar.
I’ve drawn out the spaces where I want the texture to be, but I don’t plan to draw it out line by line in the 3D model, if that’s what you mean.
I was watching this video to learn: https://www.youtube.com/watch?v=jDaaA5JLcKQ&ab_channel=CarbideAnswers
I don’t know how to draw out that geometry on my own without taking hours to complete or using a picture.
If I change the 3D Rough with the McFly to 0.3 DOC at 100 IPM, the cut time is reduced from 700ish minutes to 301 minutes.
You have a choice of design time vs. machine time — either is valid.
Note that for machine time, our feeds and speeds in Carbide Create are very conservative, and you should be able to push them quite a bit, see:
and
My inclination for speeding up roughing would be to get an 8mm endmill w/ an aggressive cutting flute geometry.
Your DOC of 0.3 is 5X more than my 0.06 DOC.
I don’t know if the cutters are that tall.
I tried 0.1 at 150 ipm and the spindle sound was different. When I ran into a knot, it definitely slowed down. I backed down.
Thank you! That’s helpful. Just trying to weigh out how to use the time wisely, I guess. Do you know if there is a texture library of sorts if I want to try to look for a photo option like in the video?
I’ve also never run a program that would take this much time before. Is this something that the machine can handle if I decide to do something like this file?
Typo, my bad lol. It was supposed to say 0.03 instead
We have folks who run the machines 8+ hours a day, day-in, day-out for production — your ability to monitor things is of more concern as a limit, so long as the machine stays clean (run dust collection) and nothing mechanically interferes (make sure that hoses/cords are routed safely and managed so that they will stay out of the way through a full range of motion.
I have an over night run going right now …
10 million+ line file.
The picture above is the rough cut of a laser scan of my wife’s Miata. Making a 50% version.
I am not sure if I will let it go by itself tonight.
I can pause and hope for no computer gremlins or let it rip.
@WillAdams @jtclose that’s good to know! Most of the stuff we run is only about 4-6 hours. I appreciate the feedback from both of you!
Note that we specifically enjoin folks not to allow machines run unattended/unmonitored — the only sensors are for homing, and the machine will neither know, nor care that a tool has broken, workholding has come loose, a part has broken free, or a fire has started.
I’ve tried using the McFly for clearing a large area for an outdoor sign and agree it didn’t provide ideal results, but with some changes to my approach it could have been better.
If I were to try it again, I’d create offsets around all the edges and let the McFly chew out the volume of material and then pocket the offesets and do a finishing pass or two with the more refined/appropriate tools.
That said, the trade off is ‘more area, less depth per pass’ vs conversely what you can do with a 1/4” mill and you’d still have to go back and clean up all the edges and bottom. Not sure the juice is worth the squeeze, as some say.
I use the “Winston” mod on the McFly, which is removing the bottom inserts.
It works much better. Surface finish is ok, not great.
2 Likes
This topic was automatically closed 30 days after the last reply. New replies are no longer allowed.