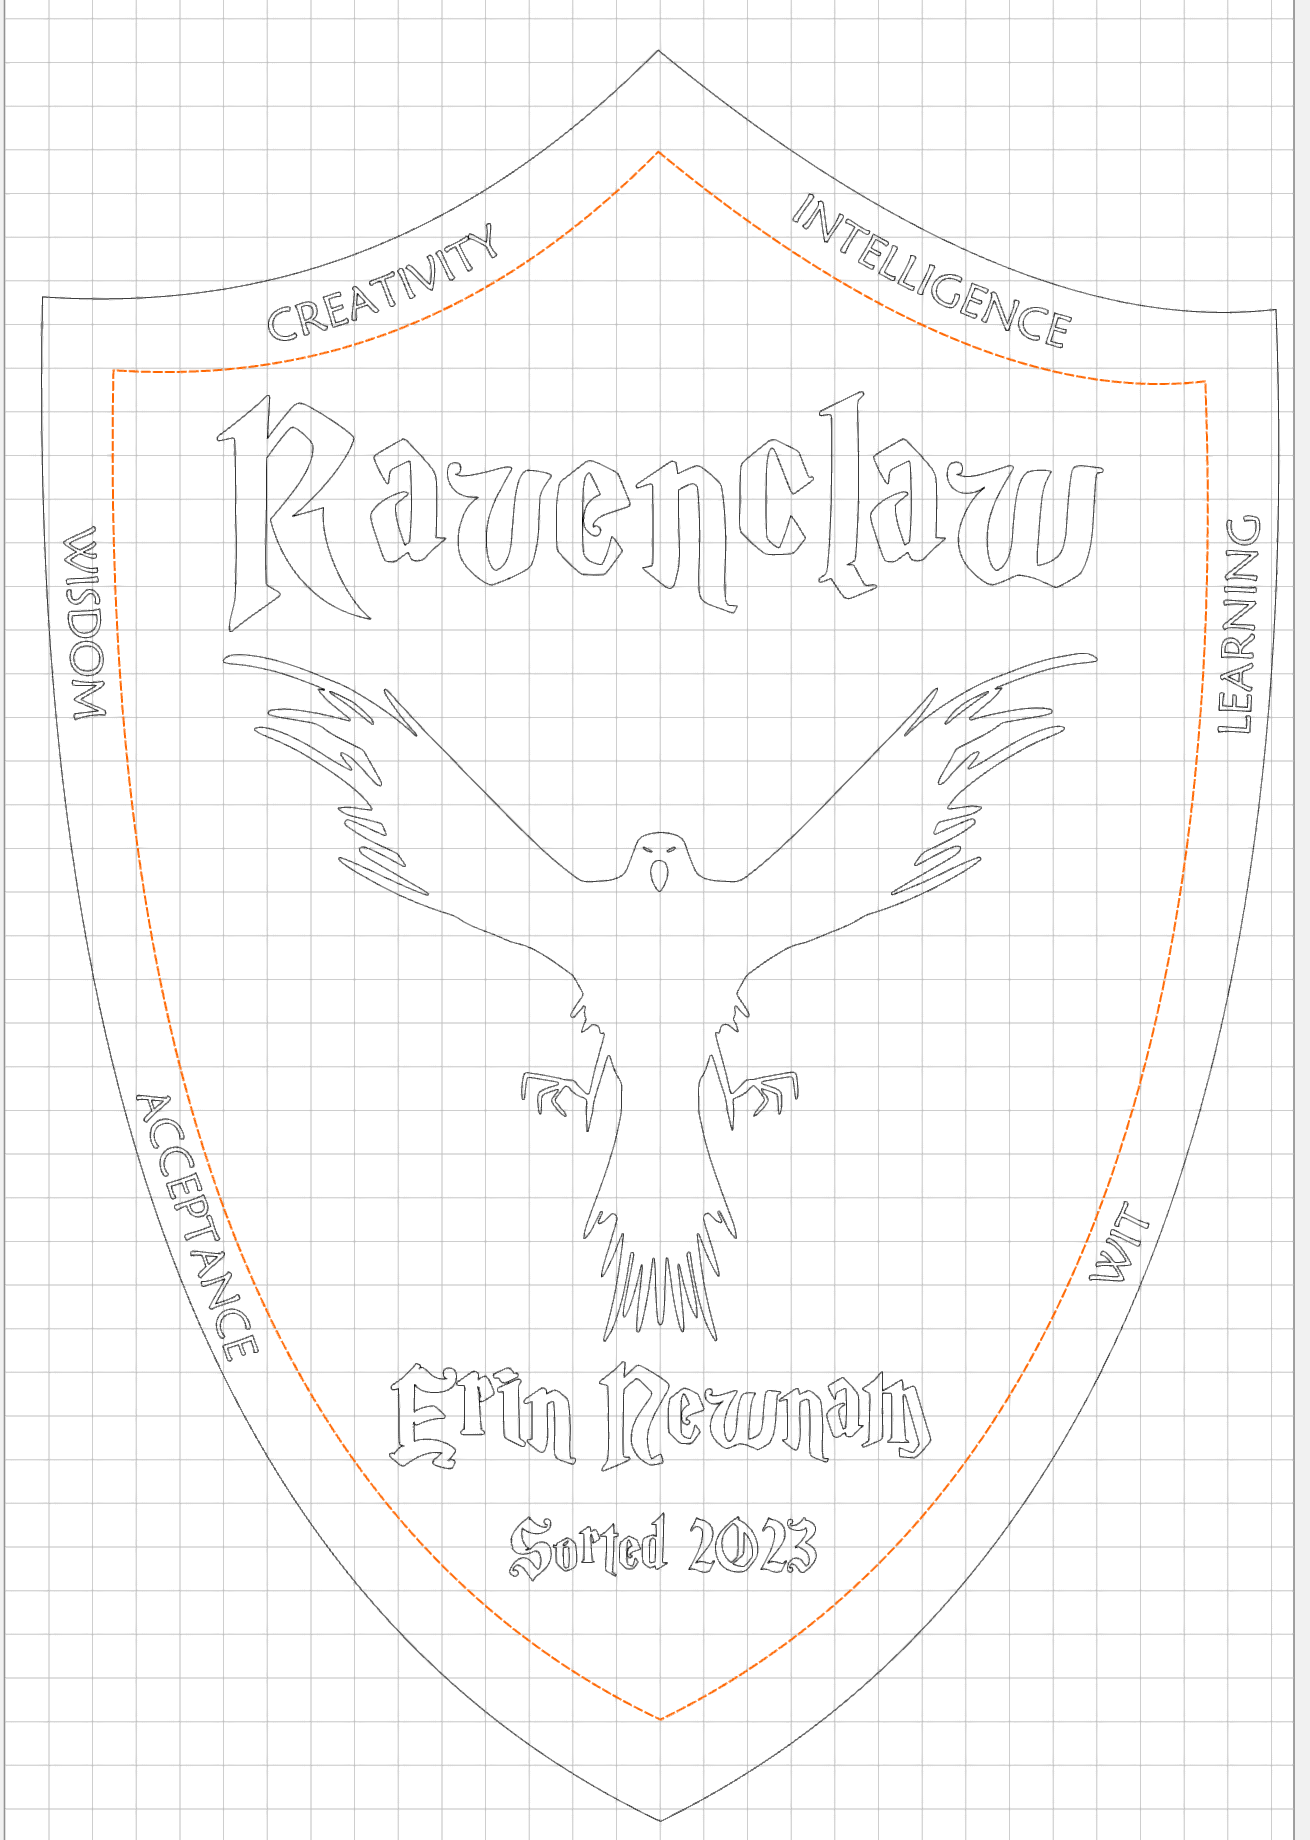
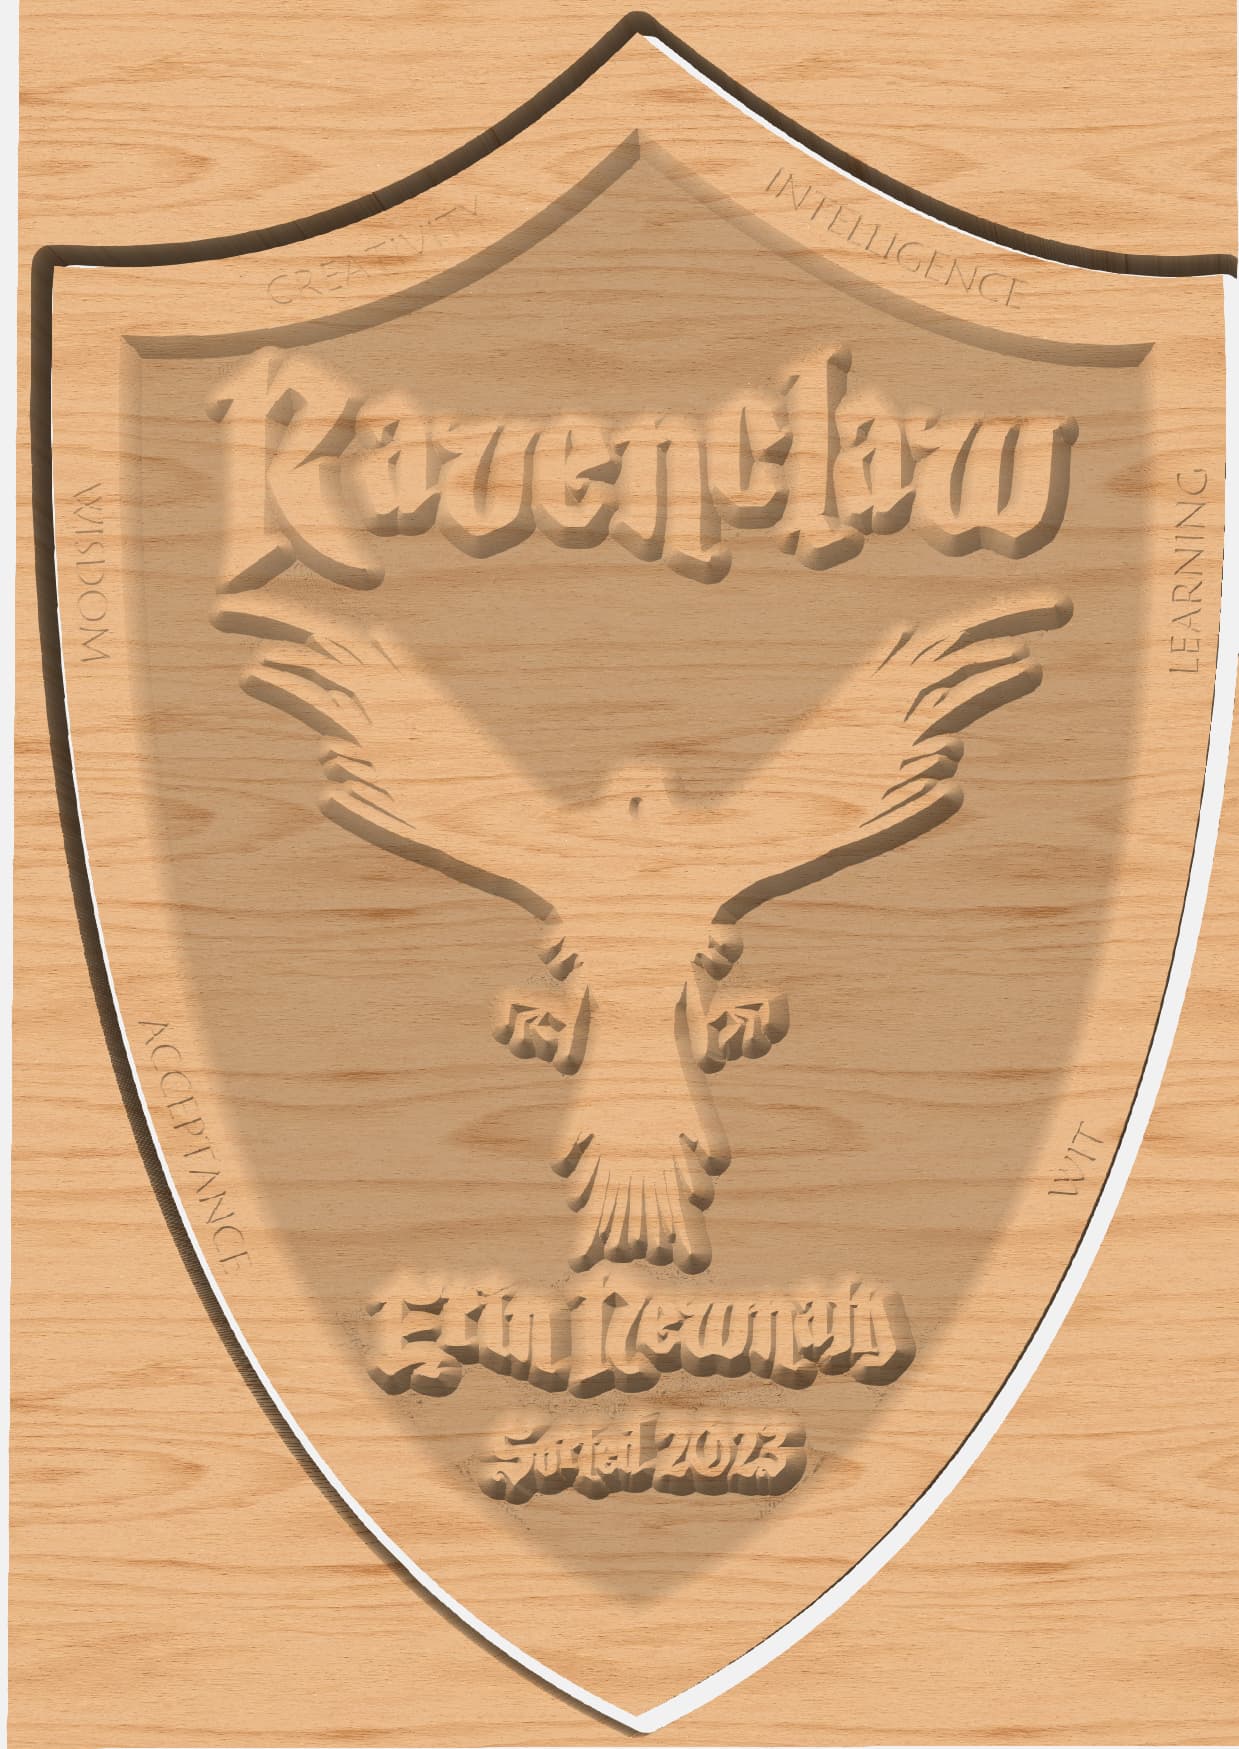
I am in need of assistance. I am working on a Christmas present for my sister in law, who is a nerd like the rest of us, but her nerdery is in the form of Harry Potter. So I am commemorating her “Sorting” to house Ravenclaw (just an online quiz thing) with a plaque/sign thing. I am planning on using cherry for the base material and have gotten the appropriate wording and outline all designed, but I am having some trouble getting satisfactory results with the toolpath.
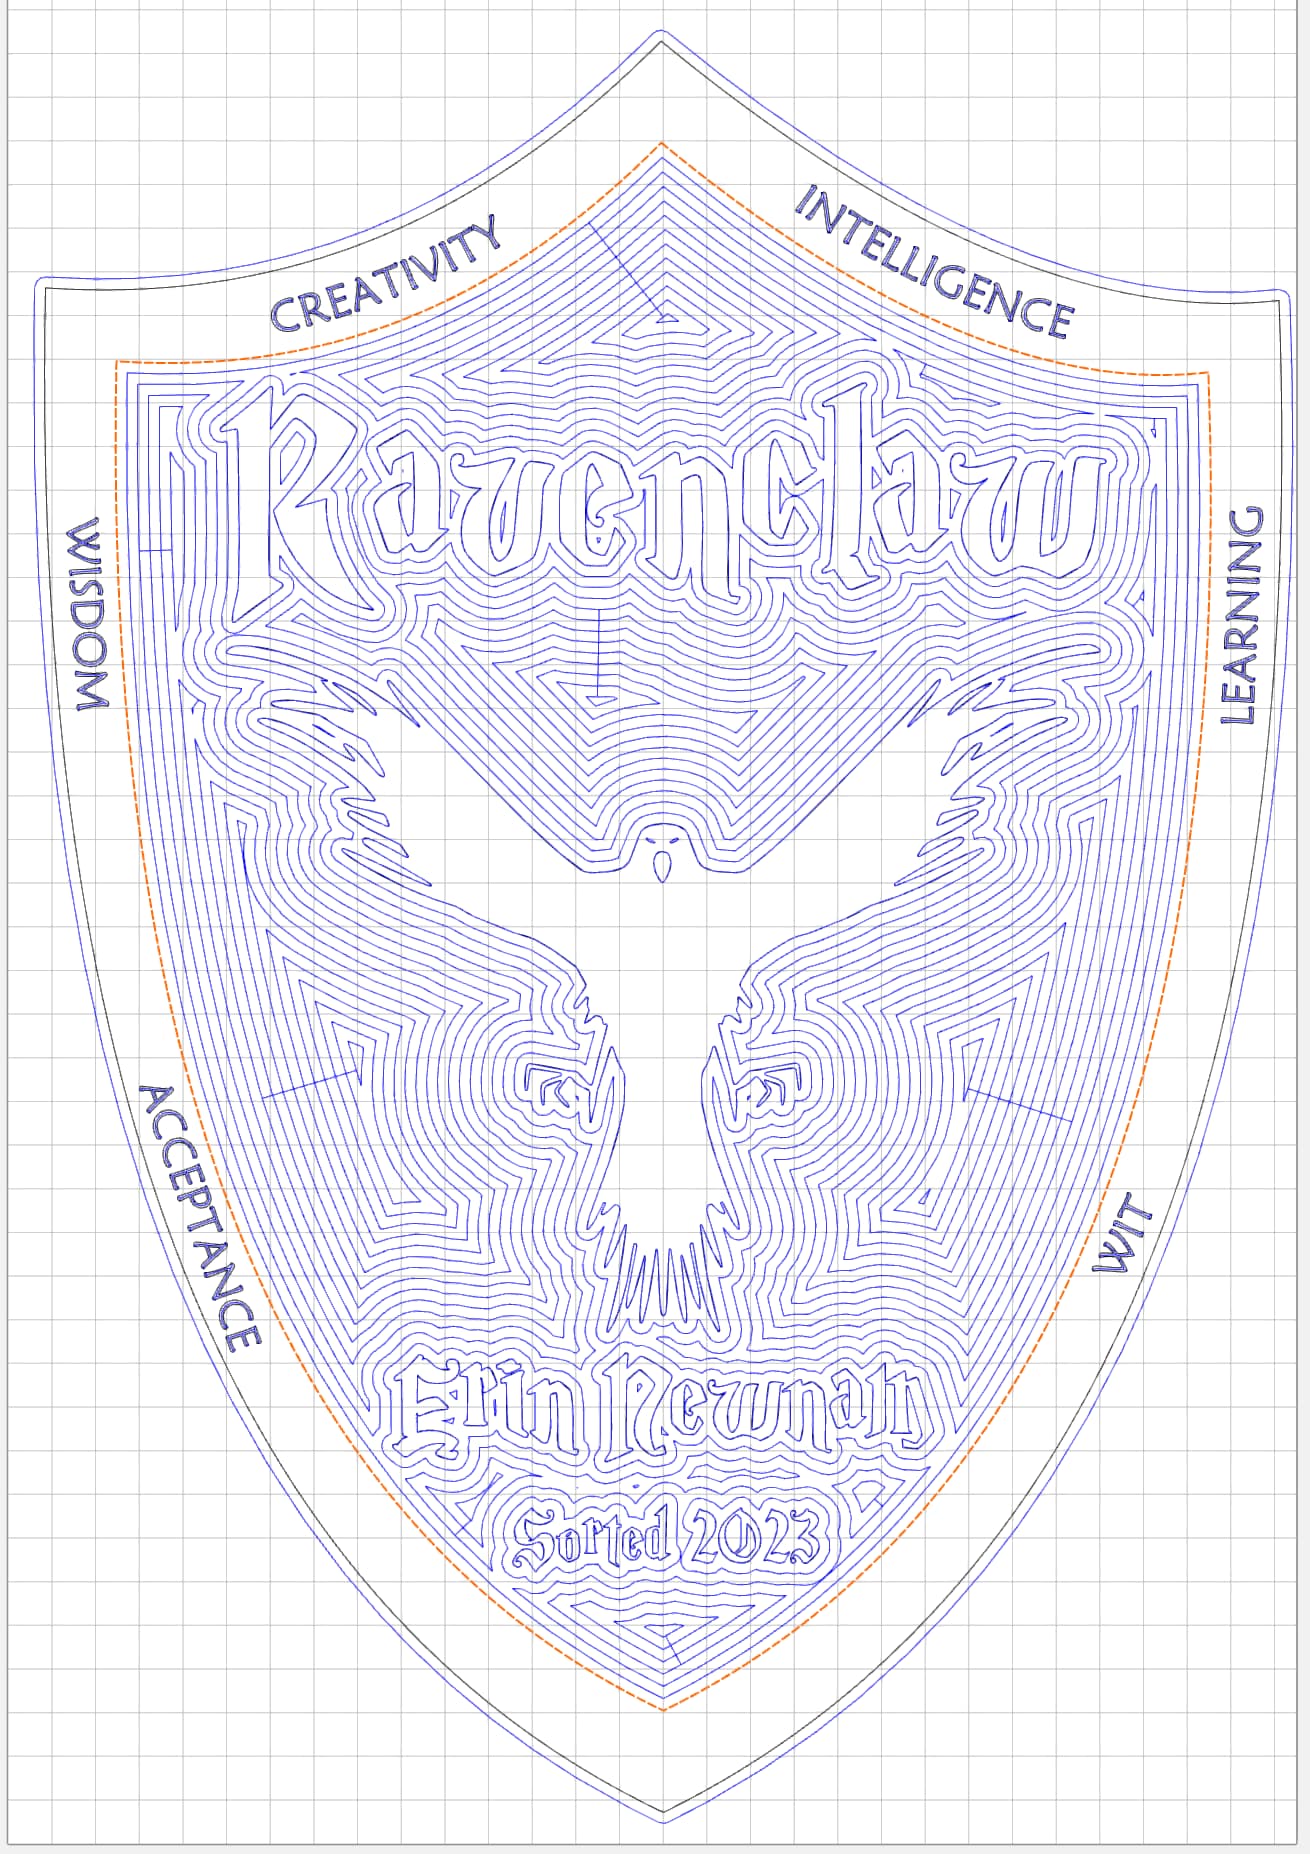
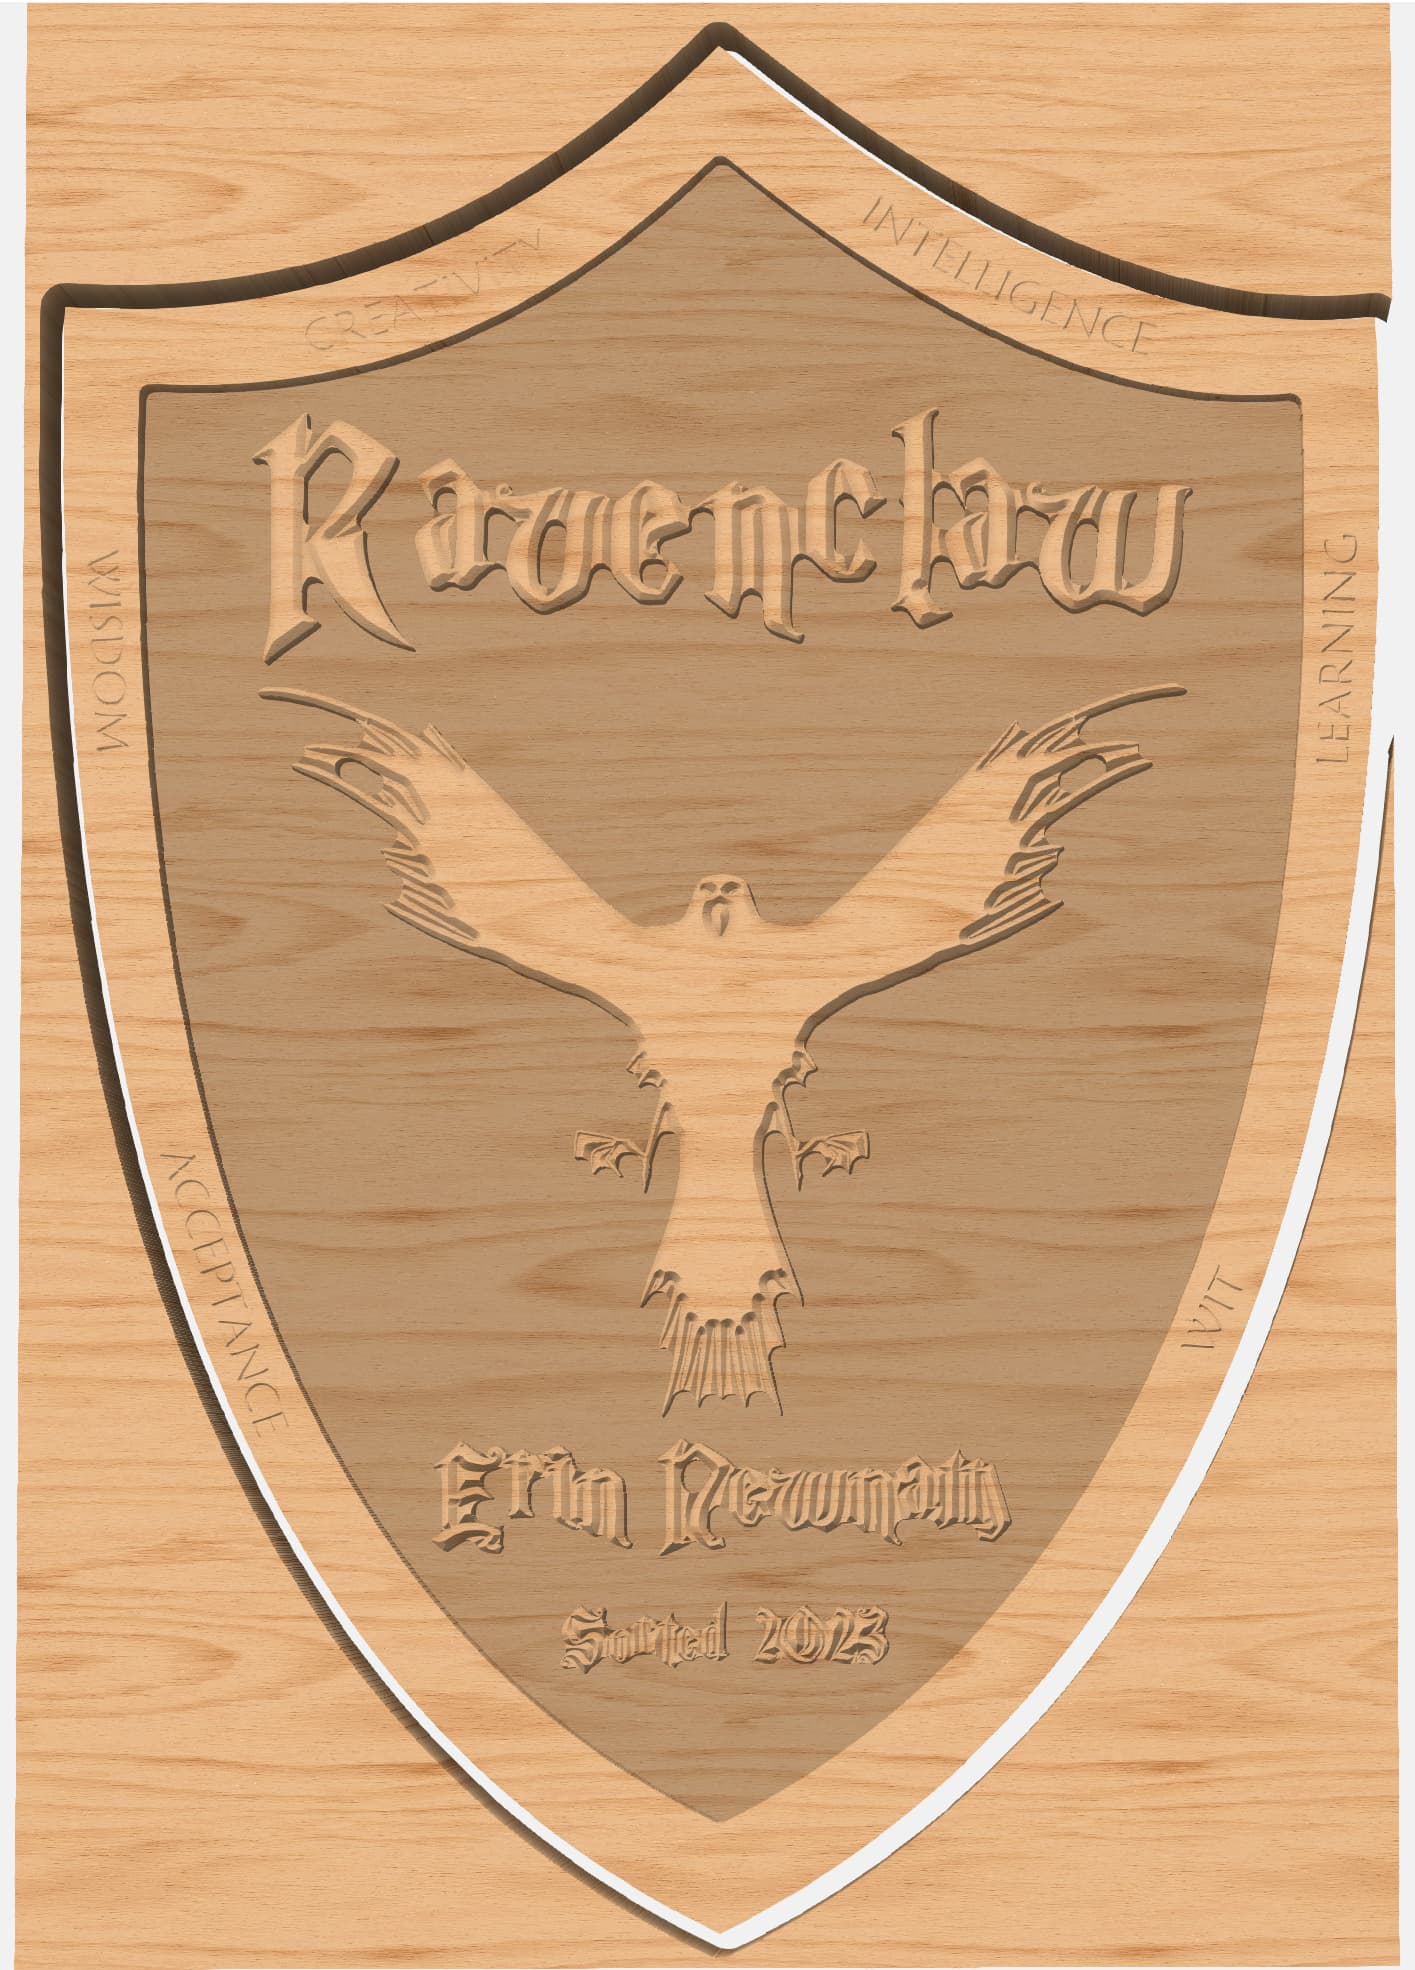
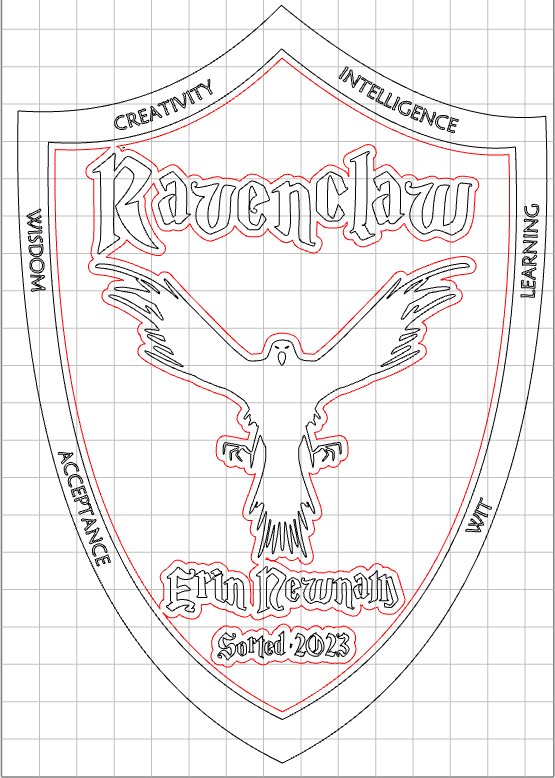
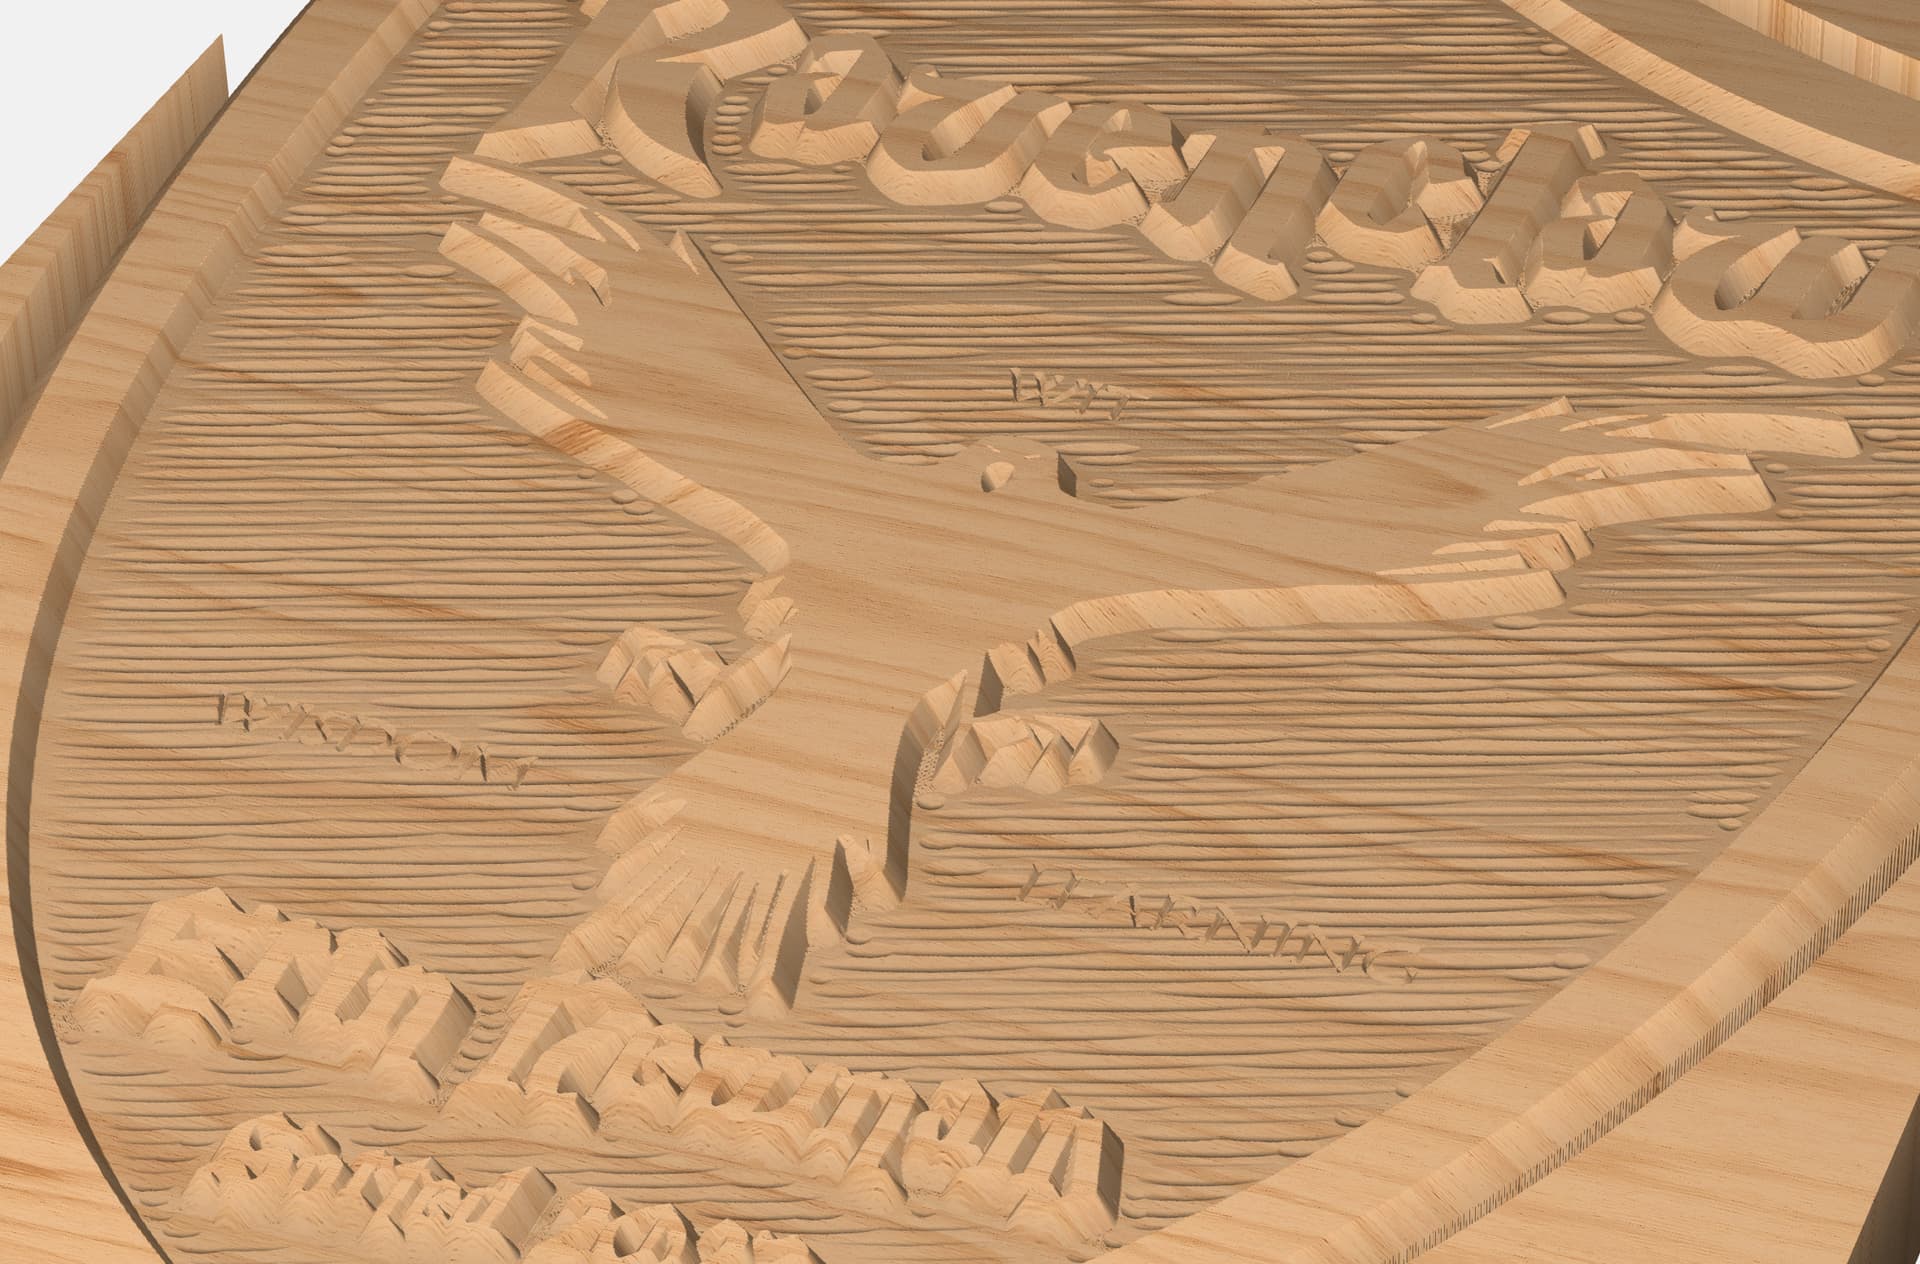
Here is the design concept. I’d like the shield border, Ravenclaw, the raven, the name, and sorting to all be the surface. I’d like to then pocket the areas between that, and then v-carve the traits around the shield border. When I initially tried just pocket, the resolution of the endmill made it obviously bad, so i thought, hey, why not do a shallow v-carve on the vectors to set that detail off, then pocket or texture the lower spot. That certainly got me closer, but still not quite there. Oh, and if I could have an interesting rough texture for the pocket, that would be amazing, but when I tried the texture toolpath it was even worse.
So what am I missing? As you can tell, I’m quite inexperienced, and hoping one of you will have the magic combo for me that will be obvious to me one day.
I played around with the texture toolpath with a 1/8" ball…
You have to offset the boundary as the texture path cuts ON the boundary, not inside of it, and I had to account for the 45° angle from the V-Carve. (I showed the math in the file)
I also changed the Adv V-carve depth to 0.050
Ah yeah, offsetting…Thats something I was definitely missing. I’ll check out your file a bit later this evening (have too many irons in the fire at the moment). I need to understand how to offset better to make that happen as well.
I like the look of your attached sim, though, thats great! I was worried about going too shallow and losing some of the pop, but that looks like it could be nice.
I shall! as soon as my bitsetter gets here! Sadly, its currently scheduled for a Monday delivery.
I am considering pre-painting the bird area black before carving. Then the names inside and shield border blue, as those are the primary colors I can find on the interwebs for Ravenclaw. But I am nervous about doing that and not ruining it.
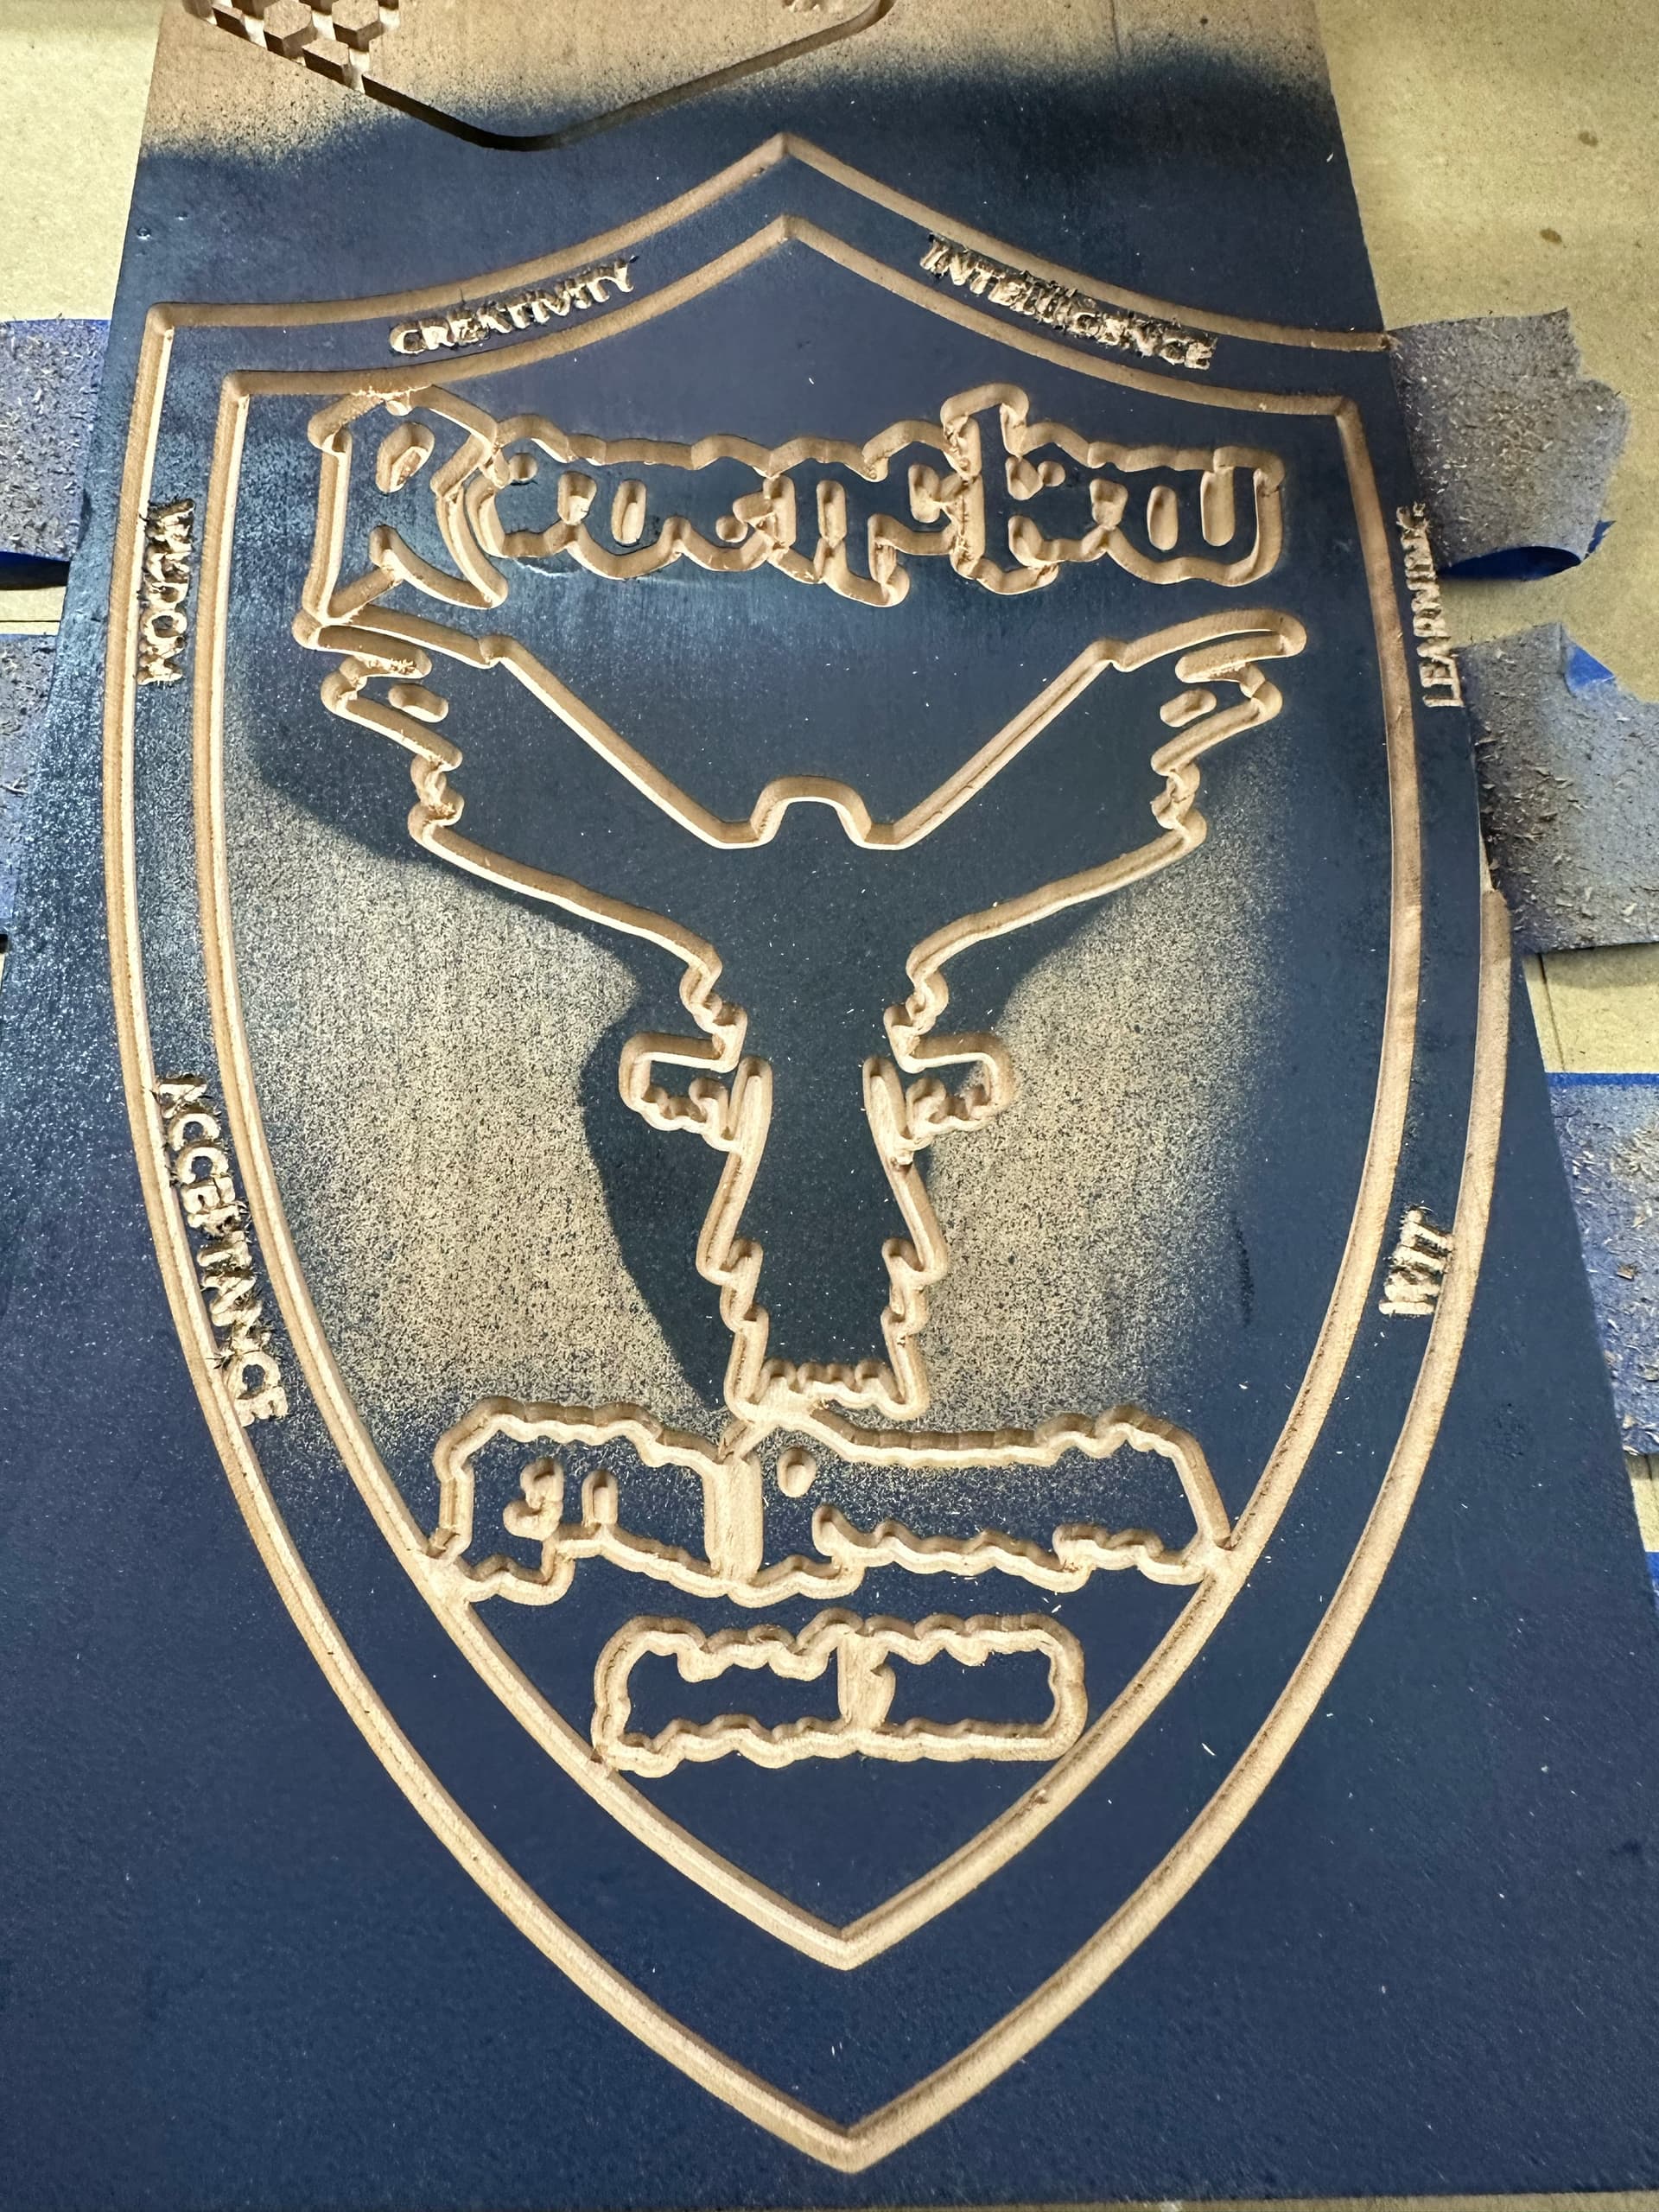
Well I got my bitsetter and am off and running. Turns out…I can’t tell the difference between 7 3/8 and 7 3/16. Lol, doh. I converted my brain to metric for 3d printing, I dunno why I’m sticking with imperial here.
Either way, I suspected this would be a dry run…and it was. I messed with pre-painting and it turned out pretty nice. The black and blue are pretty similar, though.
Looks like I need to investigate single line fonts a bit further…the 6 traits didn’t do so well in v carve. Anybody have any good resources that helped them with small text like this?
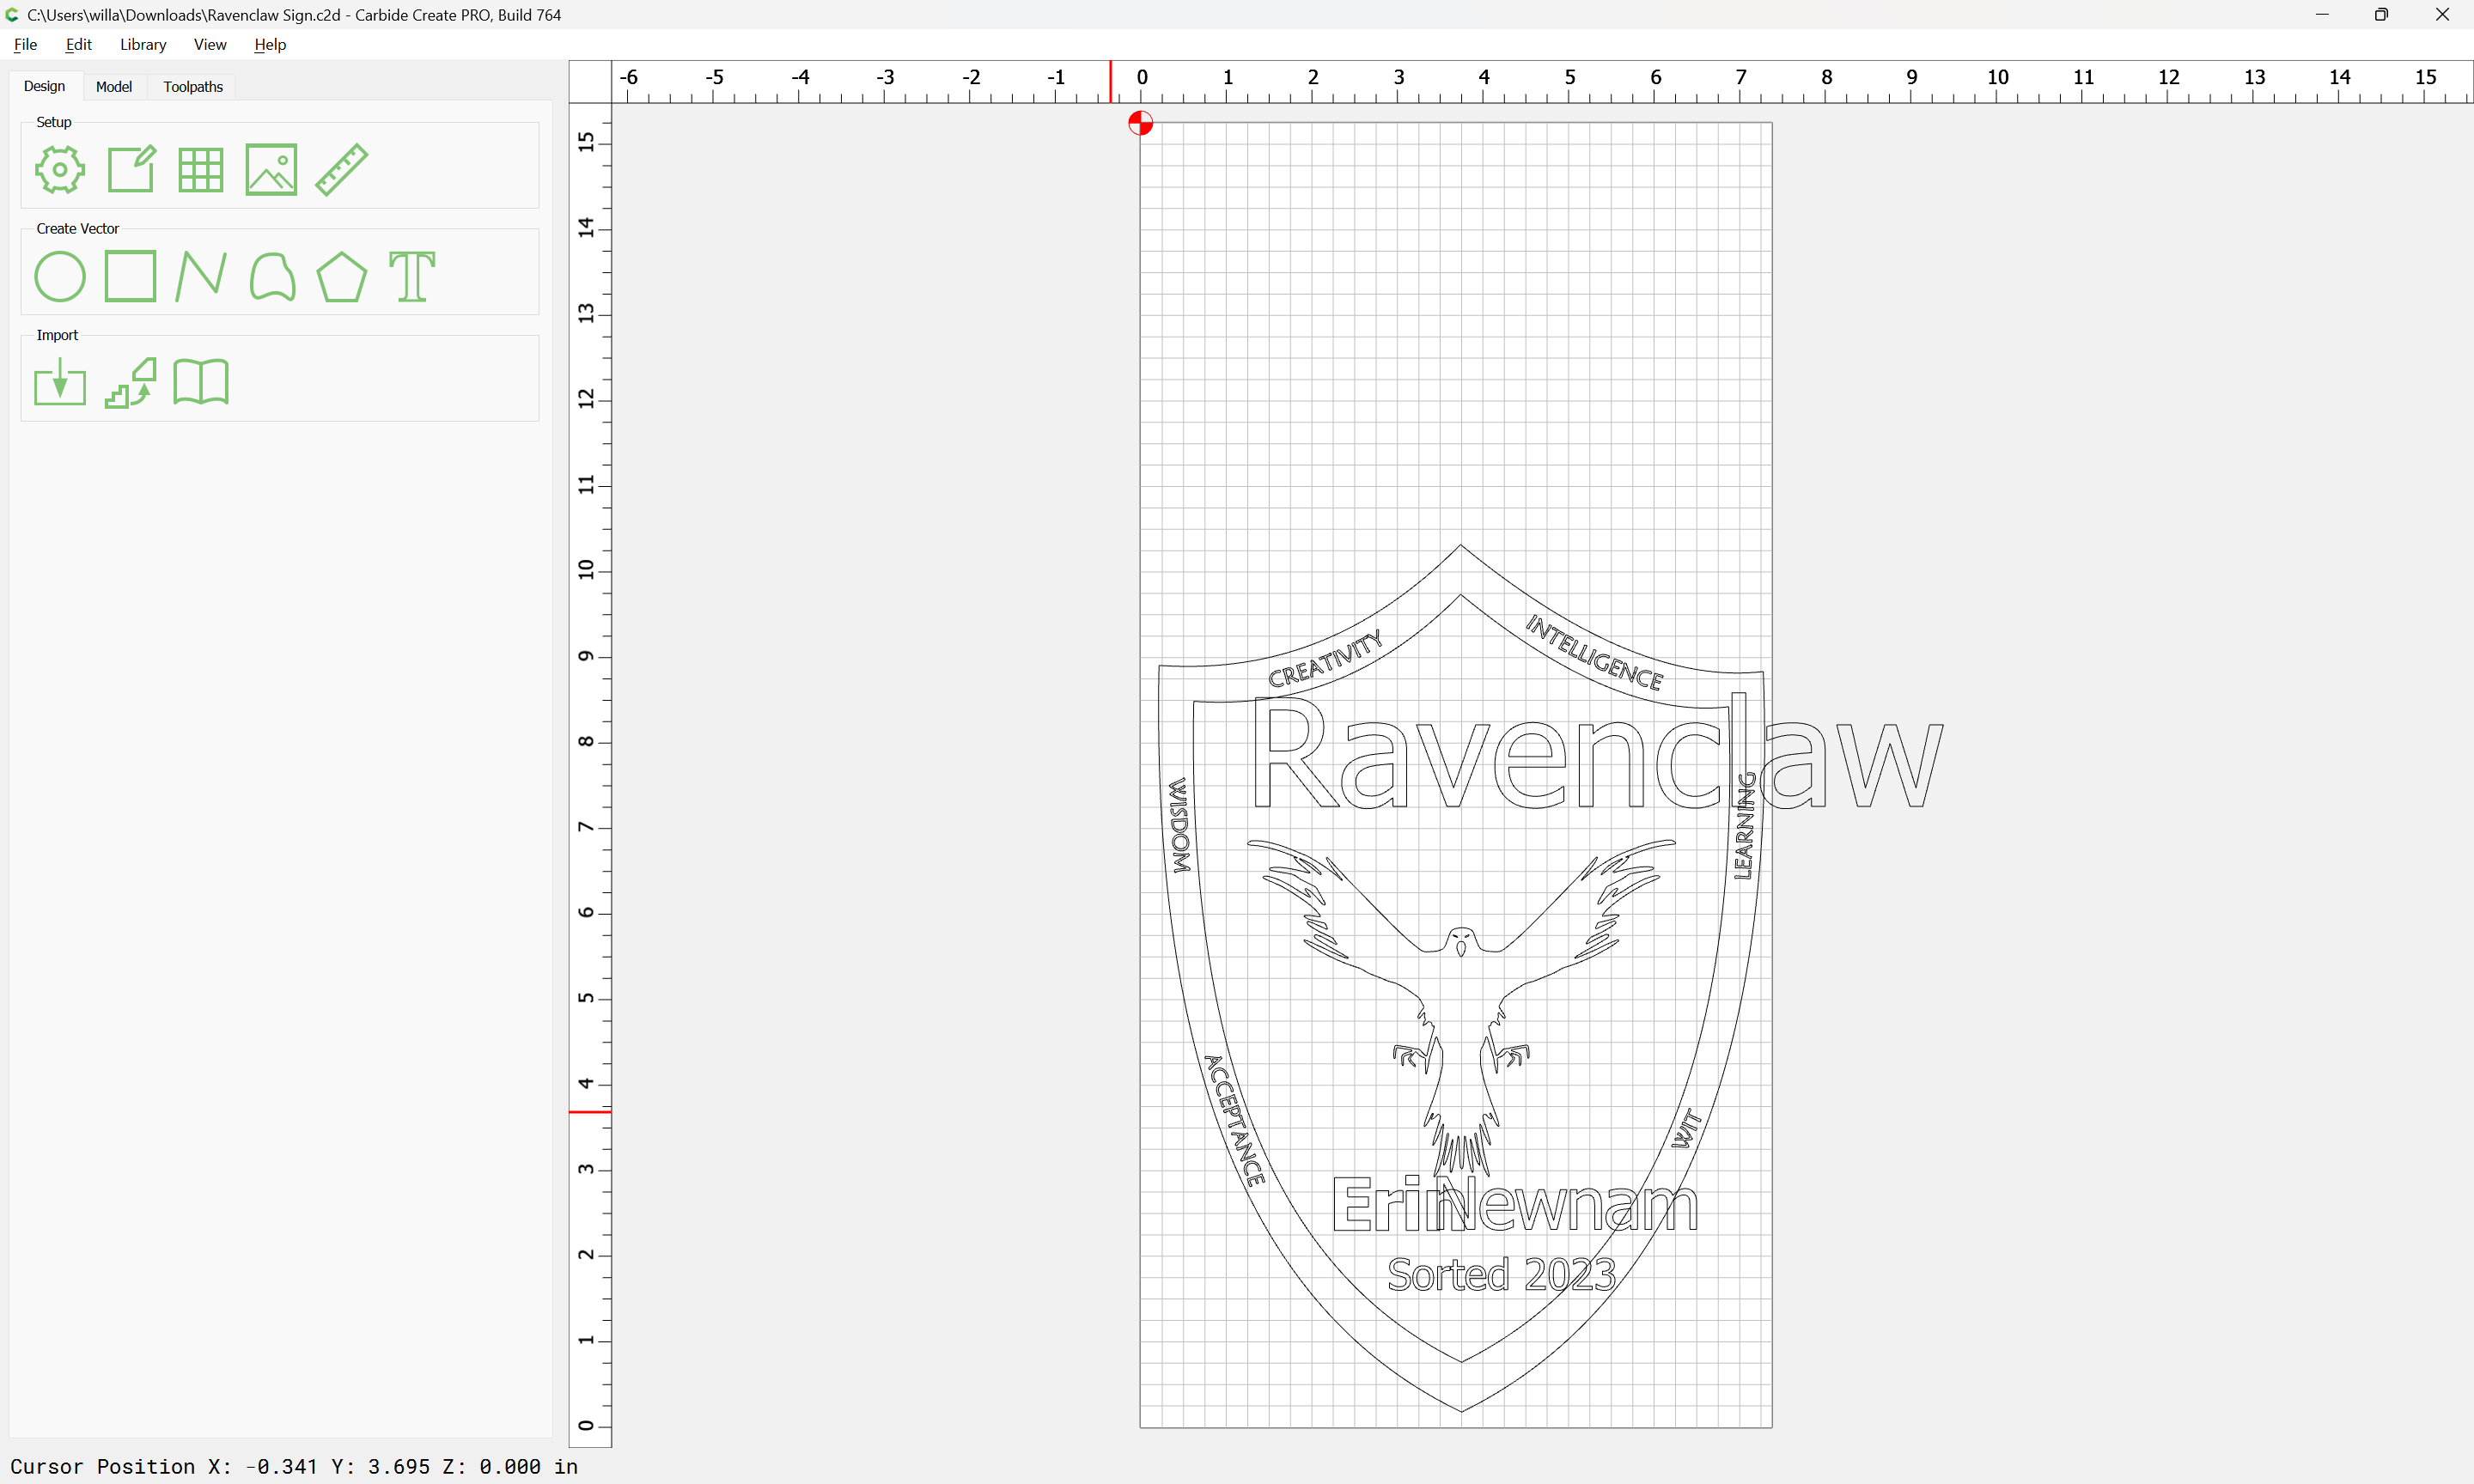
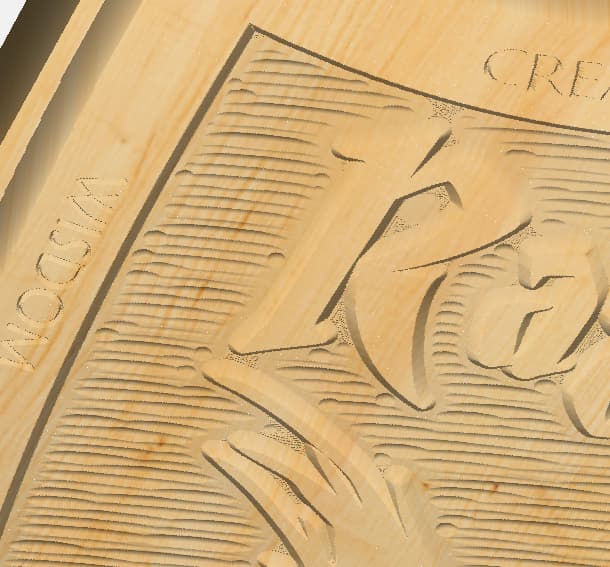
Here is a pic so you can see how I had my setup wrong, and some of the other issues. I stopped it before it got too far in (not even finished the vcarve part before pocketing), but let it go long enough that I could see if most of it was working. I will probably plane this off and try again tomorrow.
For V Carving small fonts, a sharper V bit can help, like a 30 deg bit.
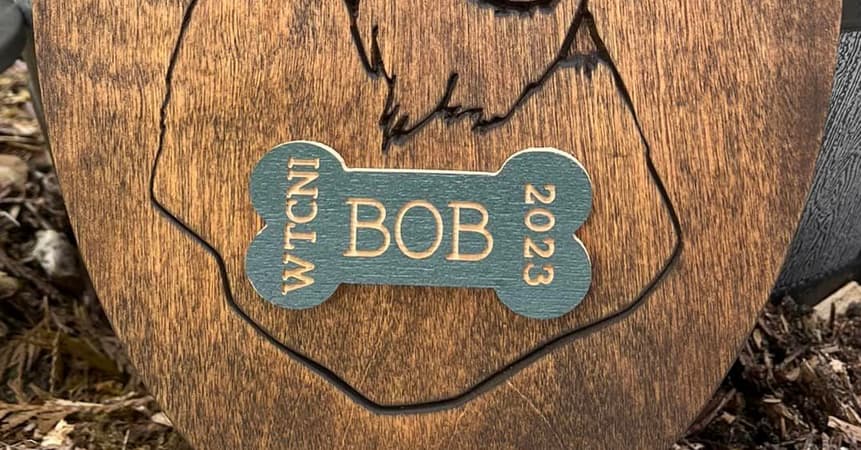
Another option is a font designed for contour cutting, and use a very small bit. For example, this is from a dog-show prize I made, the ‘bone’ is about 1" across the center area:
Thanks, Michael! That is one small bit! I will definitely be looking for those, and a 30 degree in the future. Unfortunately for now, for Christmas, I’m stuck with what I have.
I think I am going to change up how I approach that text, and make it a little more subtle. I think ill shift that text operation to after the texture run, trim down the traits to just 3, and then sink them below the texture a bit.
that the surface of the stock is flat and parallel to machine motion (either the stock has to be of uniform thickness, or it needs to be surfaced on the machine)
that the surface which the stock is mounted to is flat and parallel to machine motion (unless the top is surfaced on the machine)
that the tool length offset stays consistent if the tool is changed
effective V angle of the tool matches the tool definition in the file
Here is an example of 30 degree v carve in cherry using a western font. Tool path from CC on an S3. This was done using a bit from a cheap 10 pack off amazon (nothing special). Your small lettering is a little less in width than the horizontal portion of the “e” and would carve shallower. 30 degree would do it but what Will says applies with respect to flatness etc. You could always scale up the traits if their small size is an issue.
Thanks guys! But maybe you are seeing something that I am missing here.
@WillAdams you mention those points specifically, but I don’t think I had any issues related to flat unexpected tool profiles. Or did I and i just haven’t realized it yet? lol. I have changed the file a bit since the last one, and added a chamfer to the outside profile. My issue for sure was that I had the wrong width of stock in CC. So is there some defect that you see in the image that I am totally missing?
@Bozo thats awesome to see you can get a nice result with cheap amazon ones. How long did they last for you?
if you want to feel like you’re sticking it to the man and getting a deal, then great.
the reality is more complicated.
cheap bits do not last as long as quality bits.
this means you are either paying up front for “expensive” bits or paying on the backend with bits that have a far shorter lifespan.
having bits that dull much faster means you are going to have poor results more often. Due to the shorter lifecycle, you are going to be running a dull bit a greater percentage of the time.
this causes you to have greater cut failures and increases the amount of post processing required on each project.
this is because of math and human behavior.
Run them if you want, but know you are going to go through them faster and you’re creating more work on the back end.
Either way you are paying.
I’m in favor of the up front cost. My time is valuable and so is yours.
You could also kook at Taper Ball Mill bits.
A 1/32in TBM is like a very fine pencil for carving. And can be setup as a V-bit in CC for fairly accurate virtual depiction of the carve. The very low angle of the bit allows for really small text carving.
For me, bits never last long because I drop them and chip the tip off, plunge them into stainless bolts on my homemade clamps, or run feedrates/rpms incompatible with bit/material being cut. I am the neighborhood guy who should not own tools.