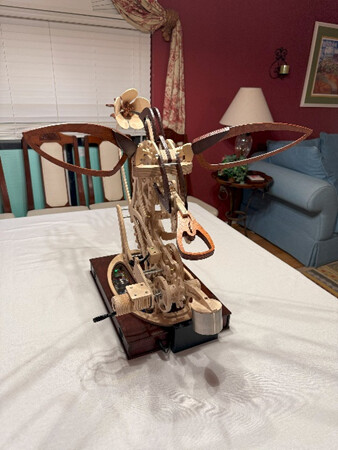
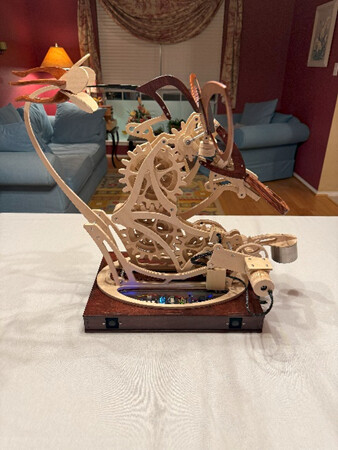
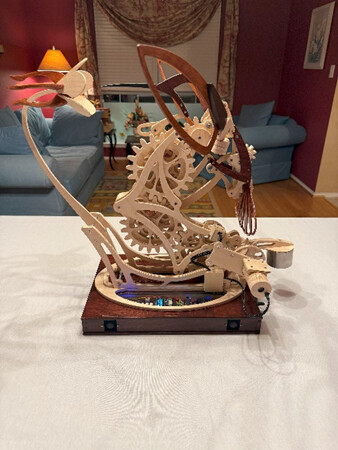
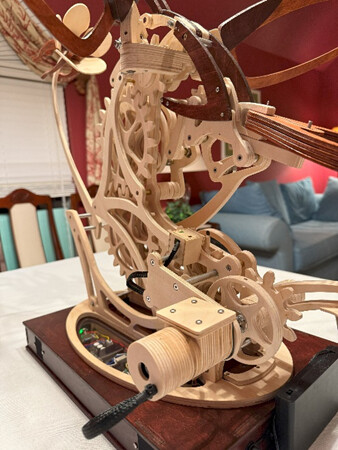
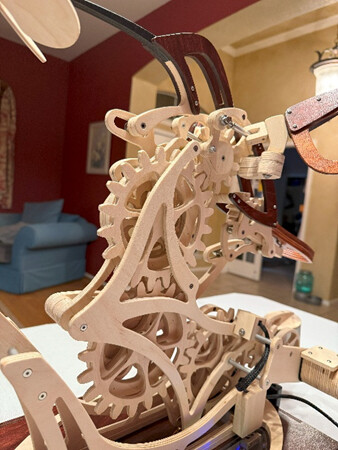
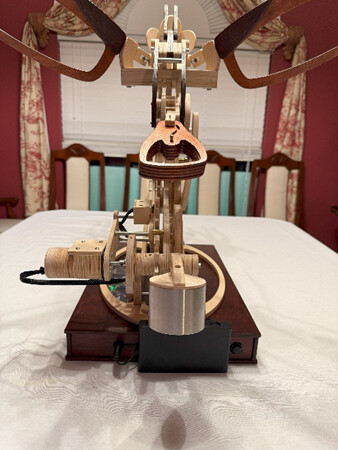
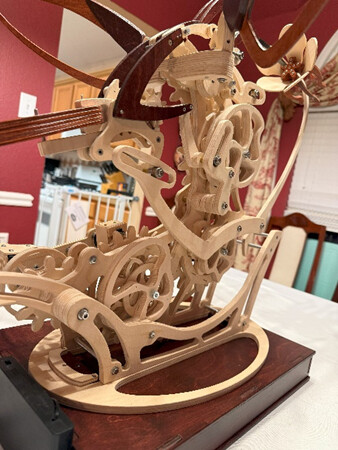
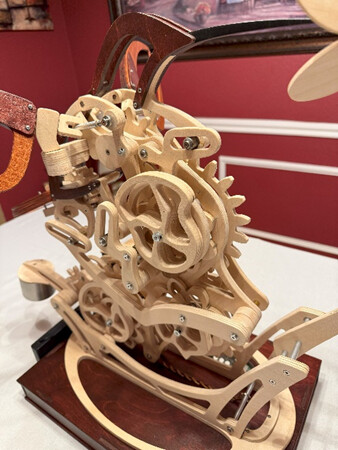
I’m finally happy to present my completed project which I made with my Shapeoko 4 standard CNC. It’s called Colibri, which means hummingbird. I’ve worked on it in my spare time for the past 3.5 years, and I’m now wanting to share it with everyone in this forum. The CAD plans I purchased from this project’s designer are all in DXF format. All toolpaths setup to cut these parts were carefully created so when cut they matched up perfectly to the full-scale part drawings. There are over 140 wooden parts and over 280 metal parts in the wooden assembly itself. Many of those metal parts were hand made from aluminum, brass and stainless-steel tubing and round bar.
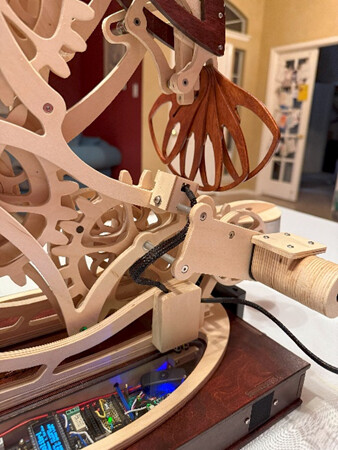
Drilled holes in so many of the parts had to be exact sizes and in exact locations so that the part assemblies would be true and accurately fit together in relation to each other. These exact placements of the holes were drilled with my Shapeoko 4 using PreciseBits.com drills of various sizes up to 1/4" and running at the lowest speed setting of the router. Larger size holes were cut with an endmill.

To see the video of it running enter this youtube.com link
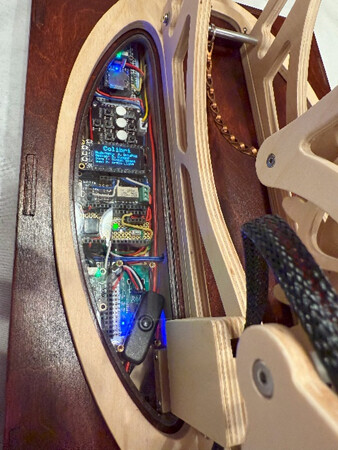
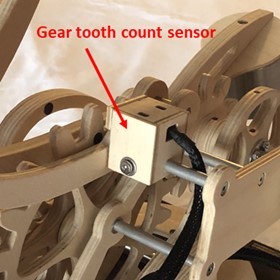
As beautiful as the designer’s Colibri is, I was able to modify this design by adding my own ideas to make this kinetic art sculpture unique. Modifications included the challenge to add motorized control of the motion (the default motion is by turning a hand crank). I added integrated electronics to play a beautiful song when it is running, and I designed a wooden housing for a reflective photo interrupt sensor that is used as a gear tooth counter. This sensor is added to the sculpture frame to count gear teeth to be able to sync the motion to end when the song ends and return the sculpture to the starting position. In addition, all of the electronics are neatly incased in a wooden base I designed and cut with my CNC to mount the Colibri. I also cut a nice plexiglass window to see the electronics while it is in motion.
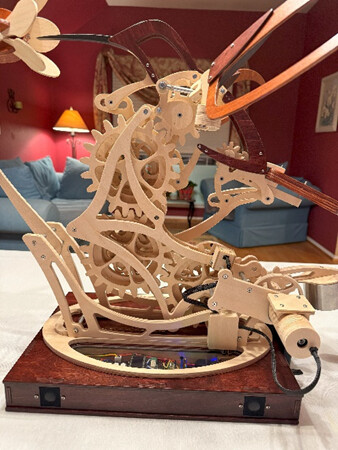
I had many setbacks, a steep learning curve to using a CNC machine, lots of trial-and-error attempts to implement my modifications, but my hard work paid off.
These modifications were all accomplished during the past year. The process to achieve the modifications involved learning how to program microcontrollers and writing the associated software code in Arduino IDE to control all of the electronic functions.
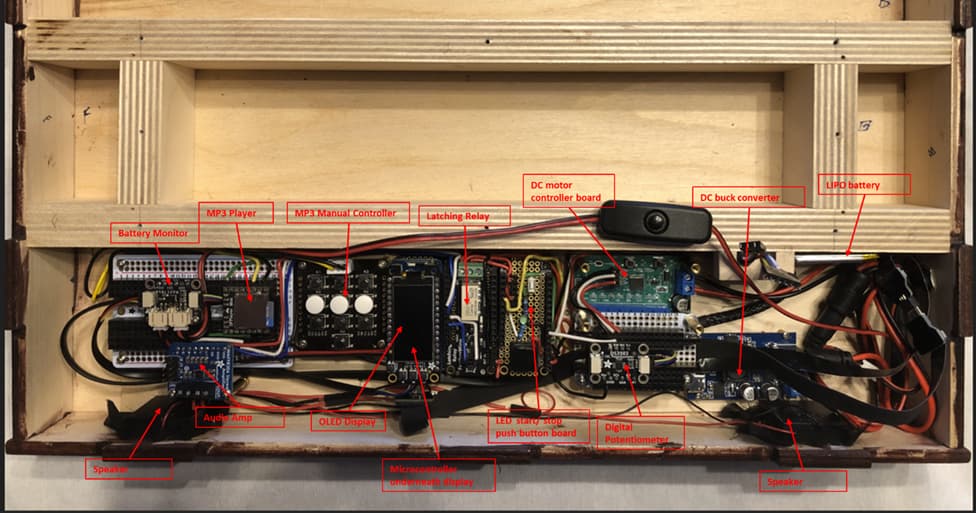
The electronics shown in the photo above includes all of the following:
1 Adafruit Feather nRF5280 Express microcontroller
1 Adafruit FeatherWing OLED display
1 Adafruit Latching Mini Relay FeatherWing
1 push button/LED start/stop board
1 DFPlayer mini-MP3 Player
1 Fermion ADKey MP3 player manual override control board
1 brushless DC PWM gear motor
1 DC PWM controller board
1 Adafruit Digital Potentiometer
1 DC buck converter
1 Adafruit 3.7W Class D Stereo Audio Amplifier
2 mini speakers
1 Adafruit 3.7v LiPoly battery
1 Adafruit LiPoly battery monitor board
1 Adafruit Reflective Photo Interrupt Sensor
The list above is all controlled by over 550 lines of Arduino IDE software code.

![]()