Disclaimer: it’s not a CNC project I just was 3d printing these parts because in this case it was way easier and streamline for me as well a kind of look I wanted to achieve but of course anything could have been cnc`ed.
So let me start… In Germany were havin internet provided over the “cable TV line” and these cables happen to come out in my living room of course because that’s the regular place where your Tv is living at.
Rerouting cables in Germany is not so an easy task because everything is concrete or brick so I had to come up with a solution putting my internet/TV/console/smarthome stuff in a room where we are mostly living in and hide it.
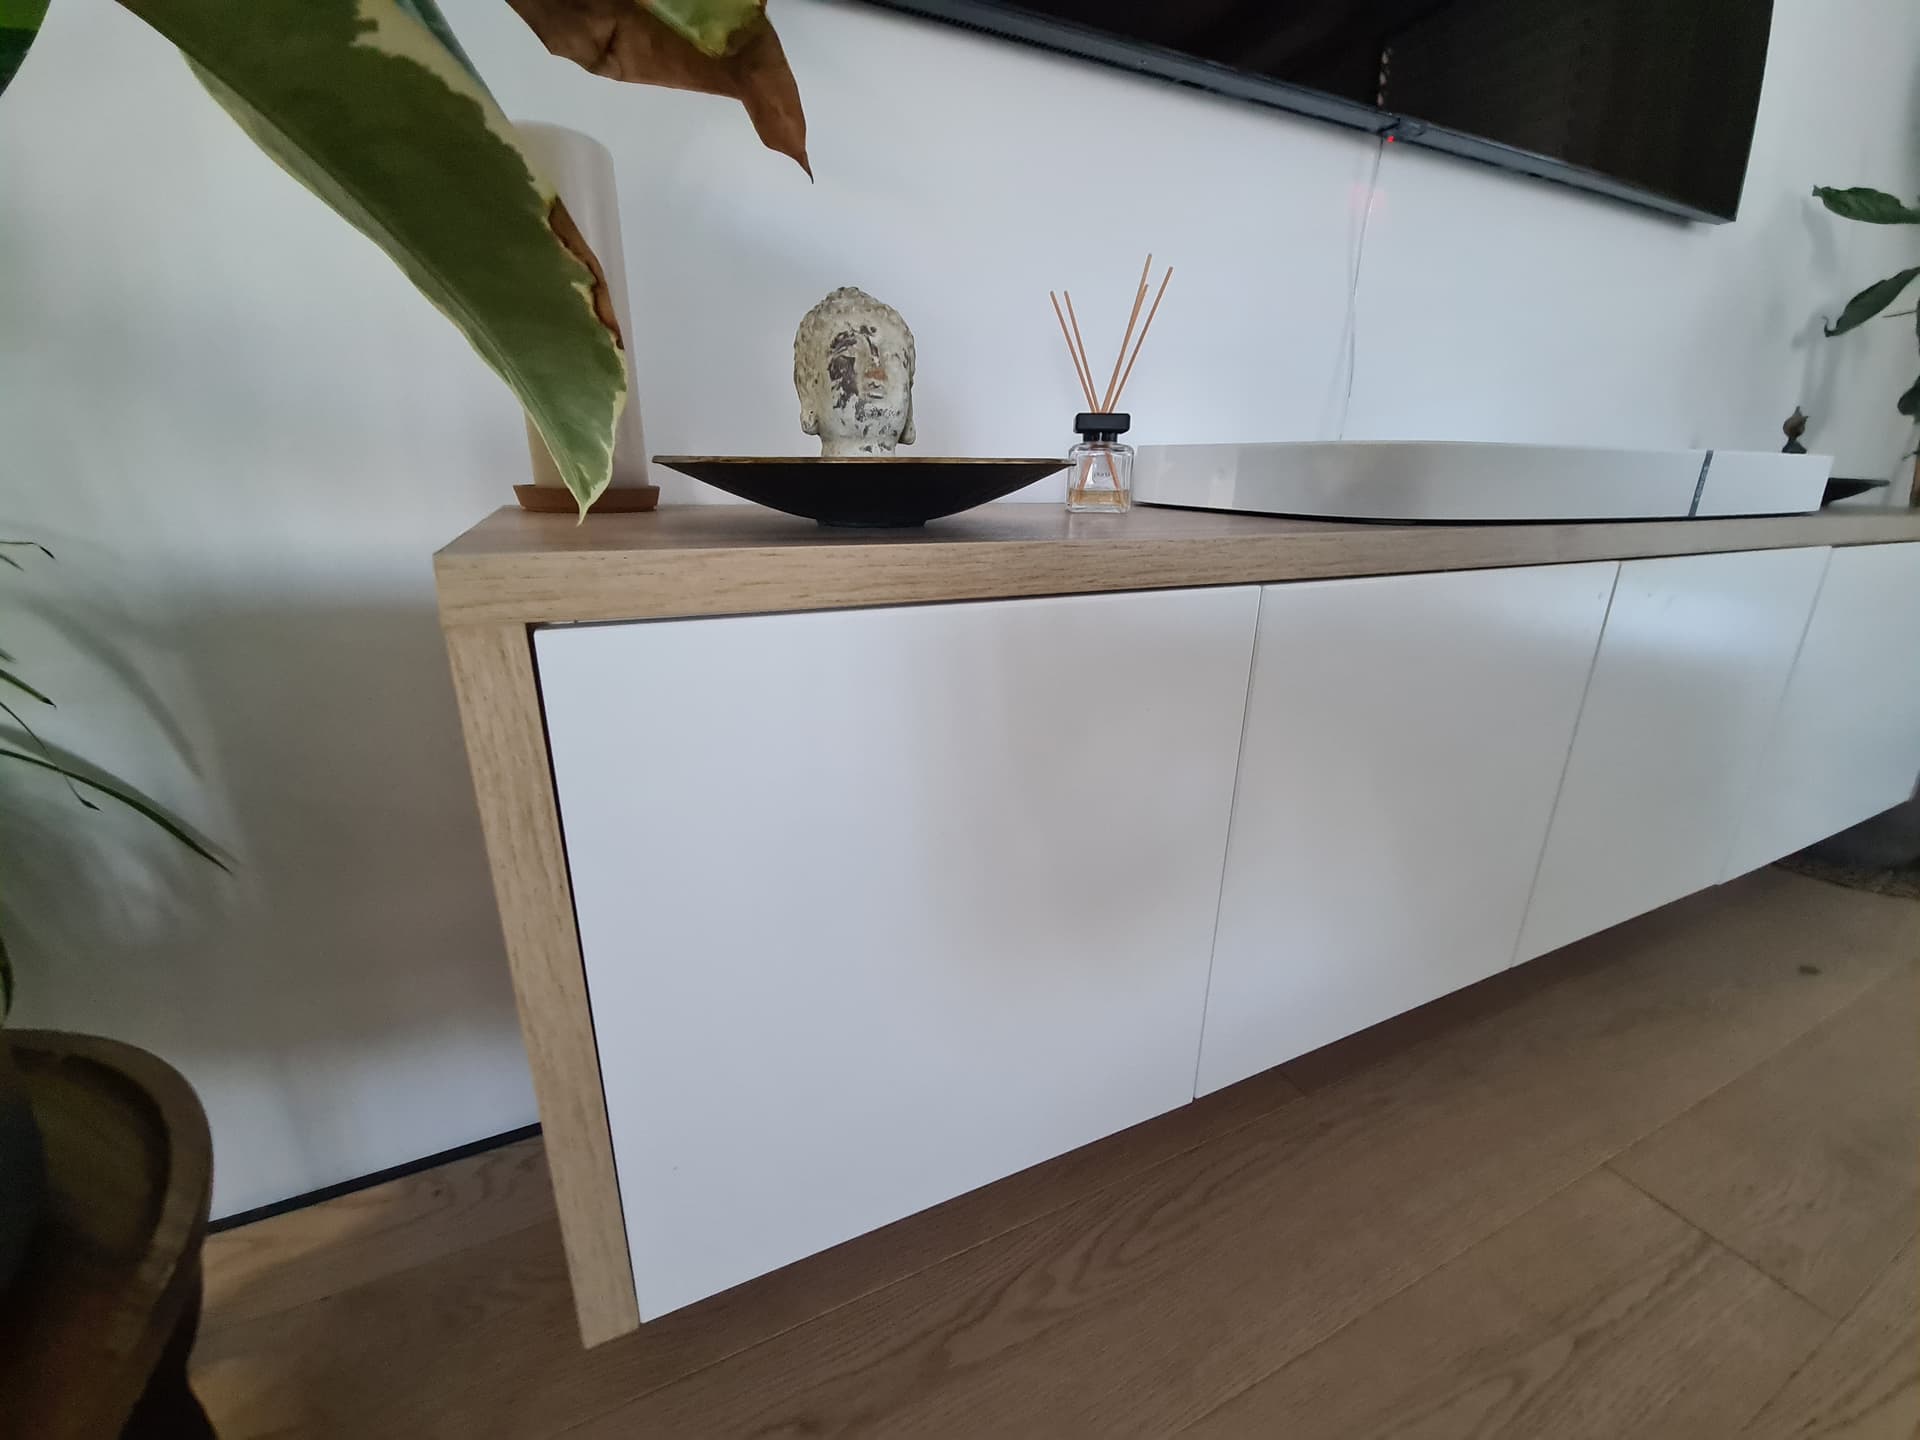
The problem of hiding electronic of any kind ist that this stuff doesn’t like closed spaces and or heat… And of course I’m an Mechatronic engineer and like to over do stuff for the sake of having it done and feeling all warm And fuzzy inside . On top of that comes the requests of my wife no visible stuff or open cabinets or diffusing materials like waved rattan or slatted wood what so ever clean and streamline it should be like the rest of our furniture white and oak.
That’s what I’m dealing with as a base line.
I put up this cabinet as an version 1 as we moved in and didn’t took much time designing or building that as well as had several changes within my smart home system. And now I want to upgrade to V2 because the old one is too loud too messy and I got happy and get my hands on a Ps5 and I have the fear it’s going to overheat in there.
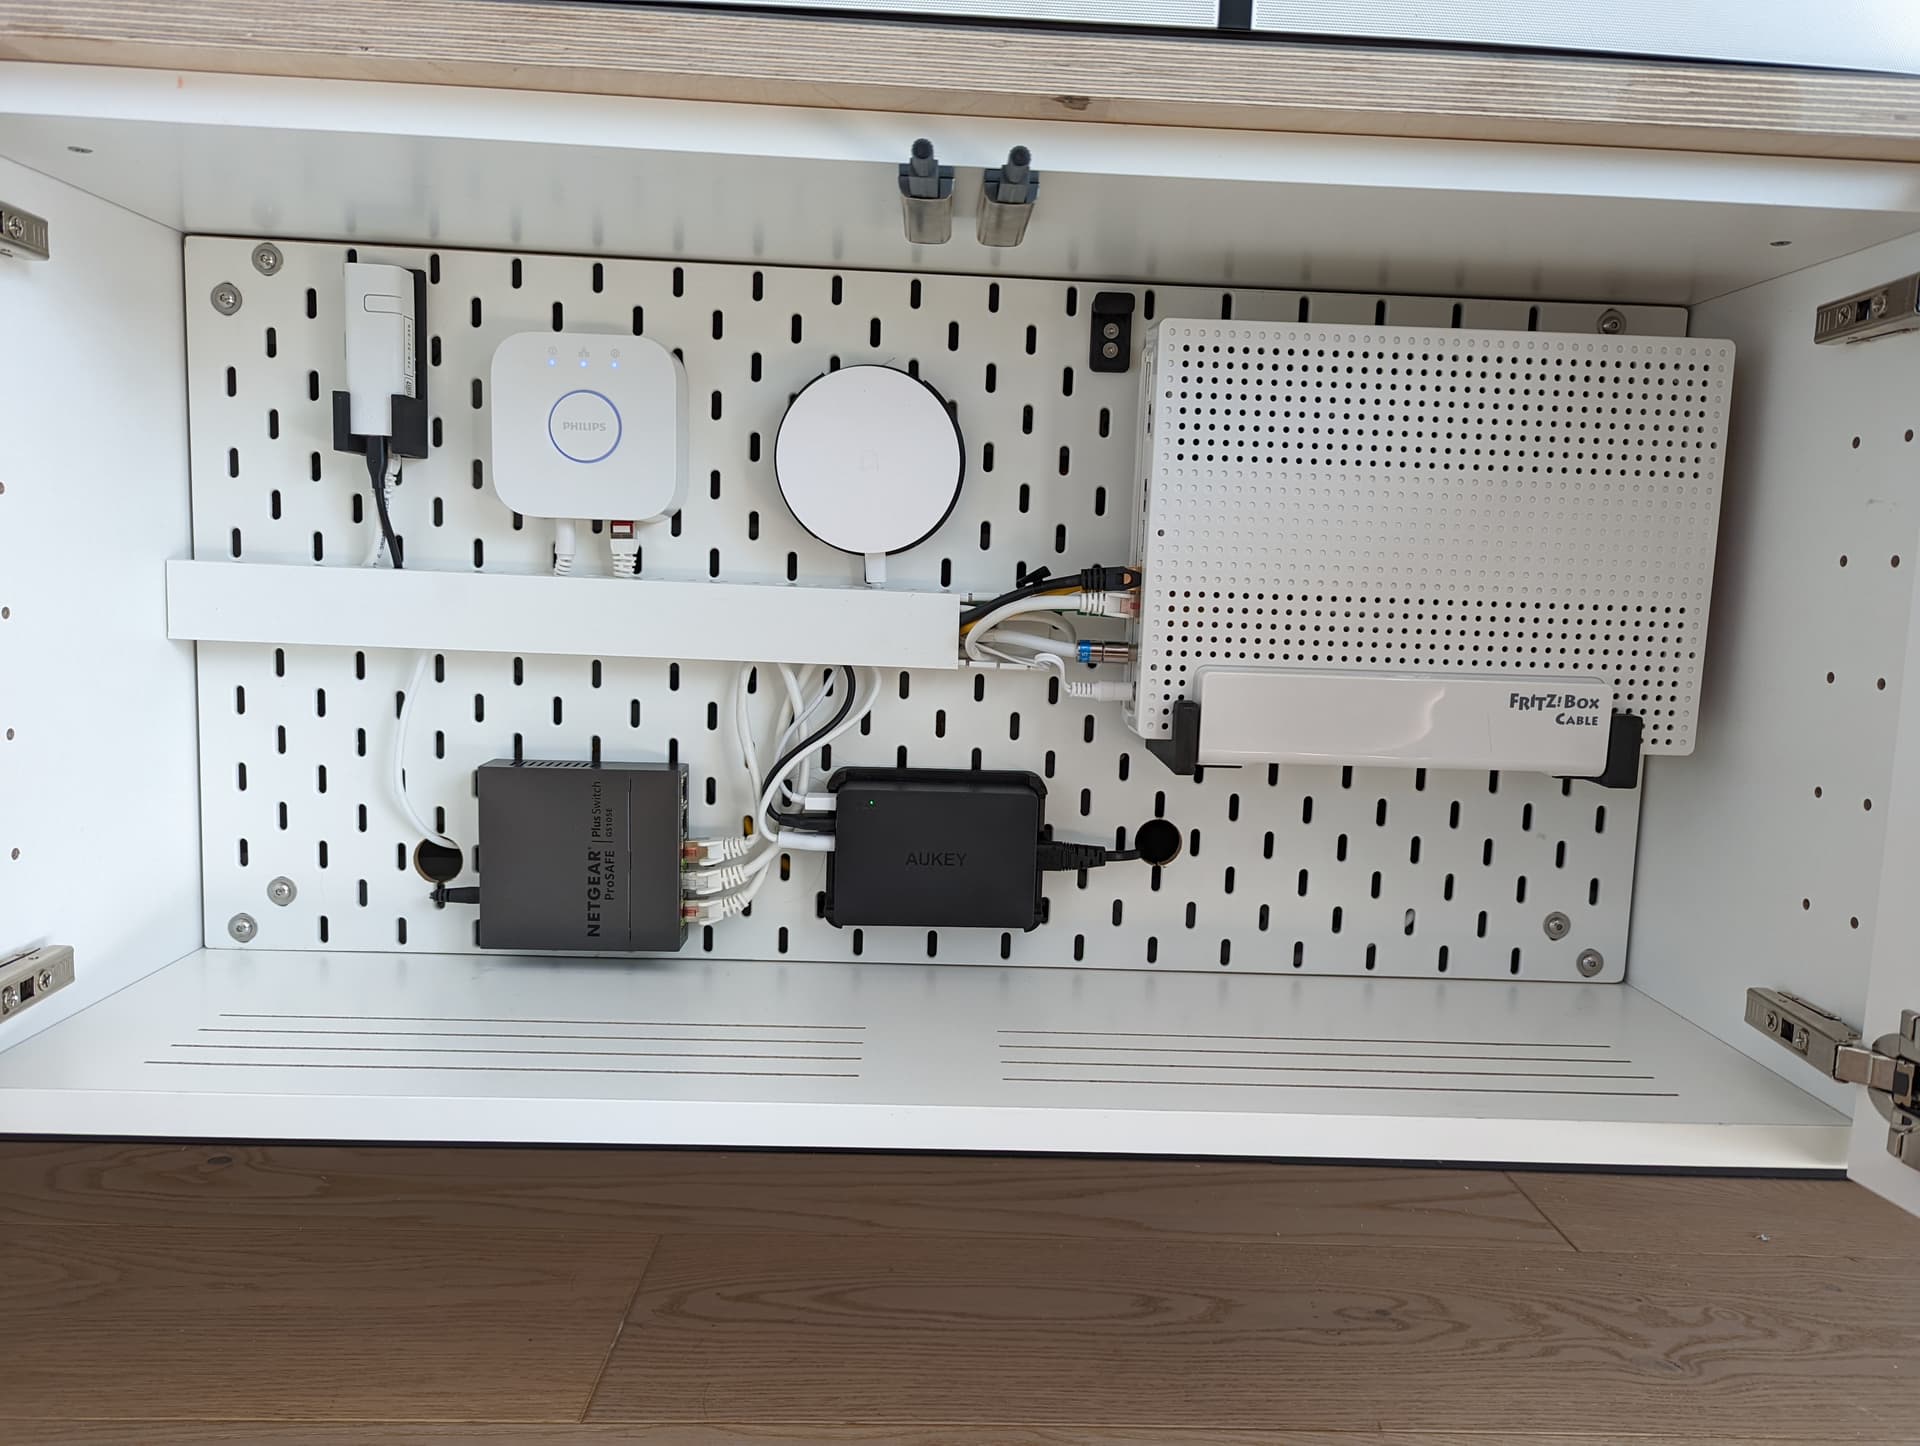
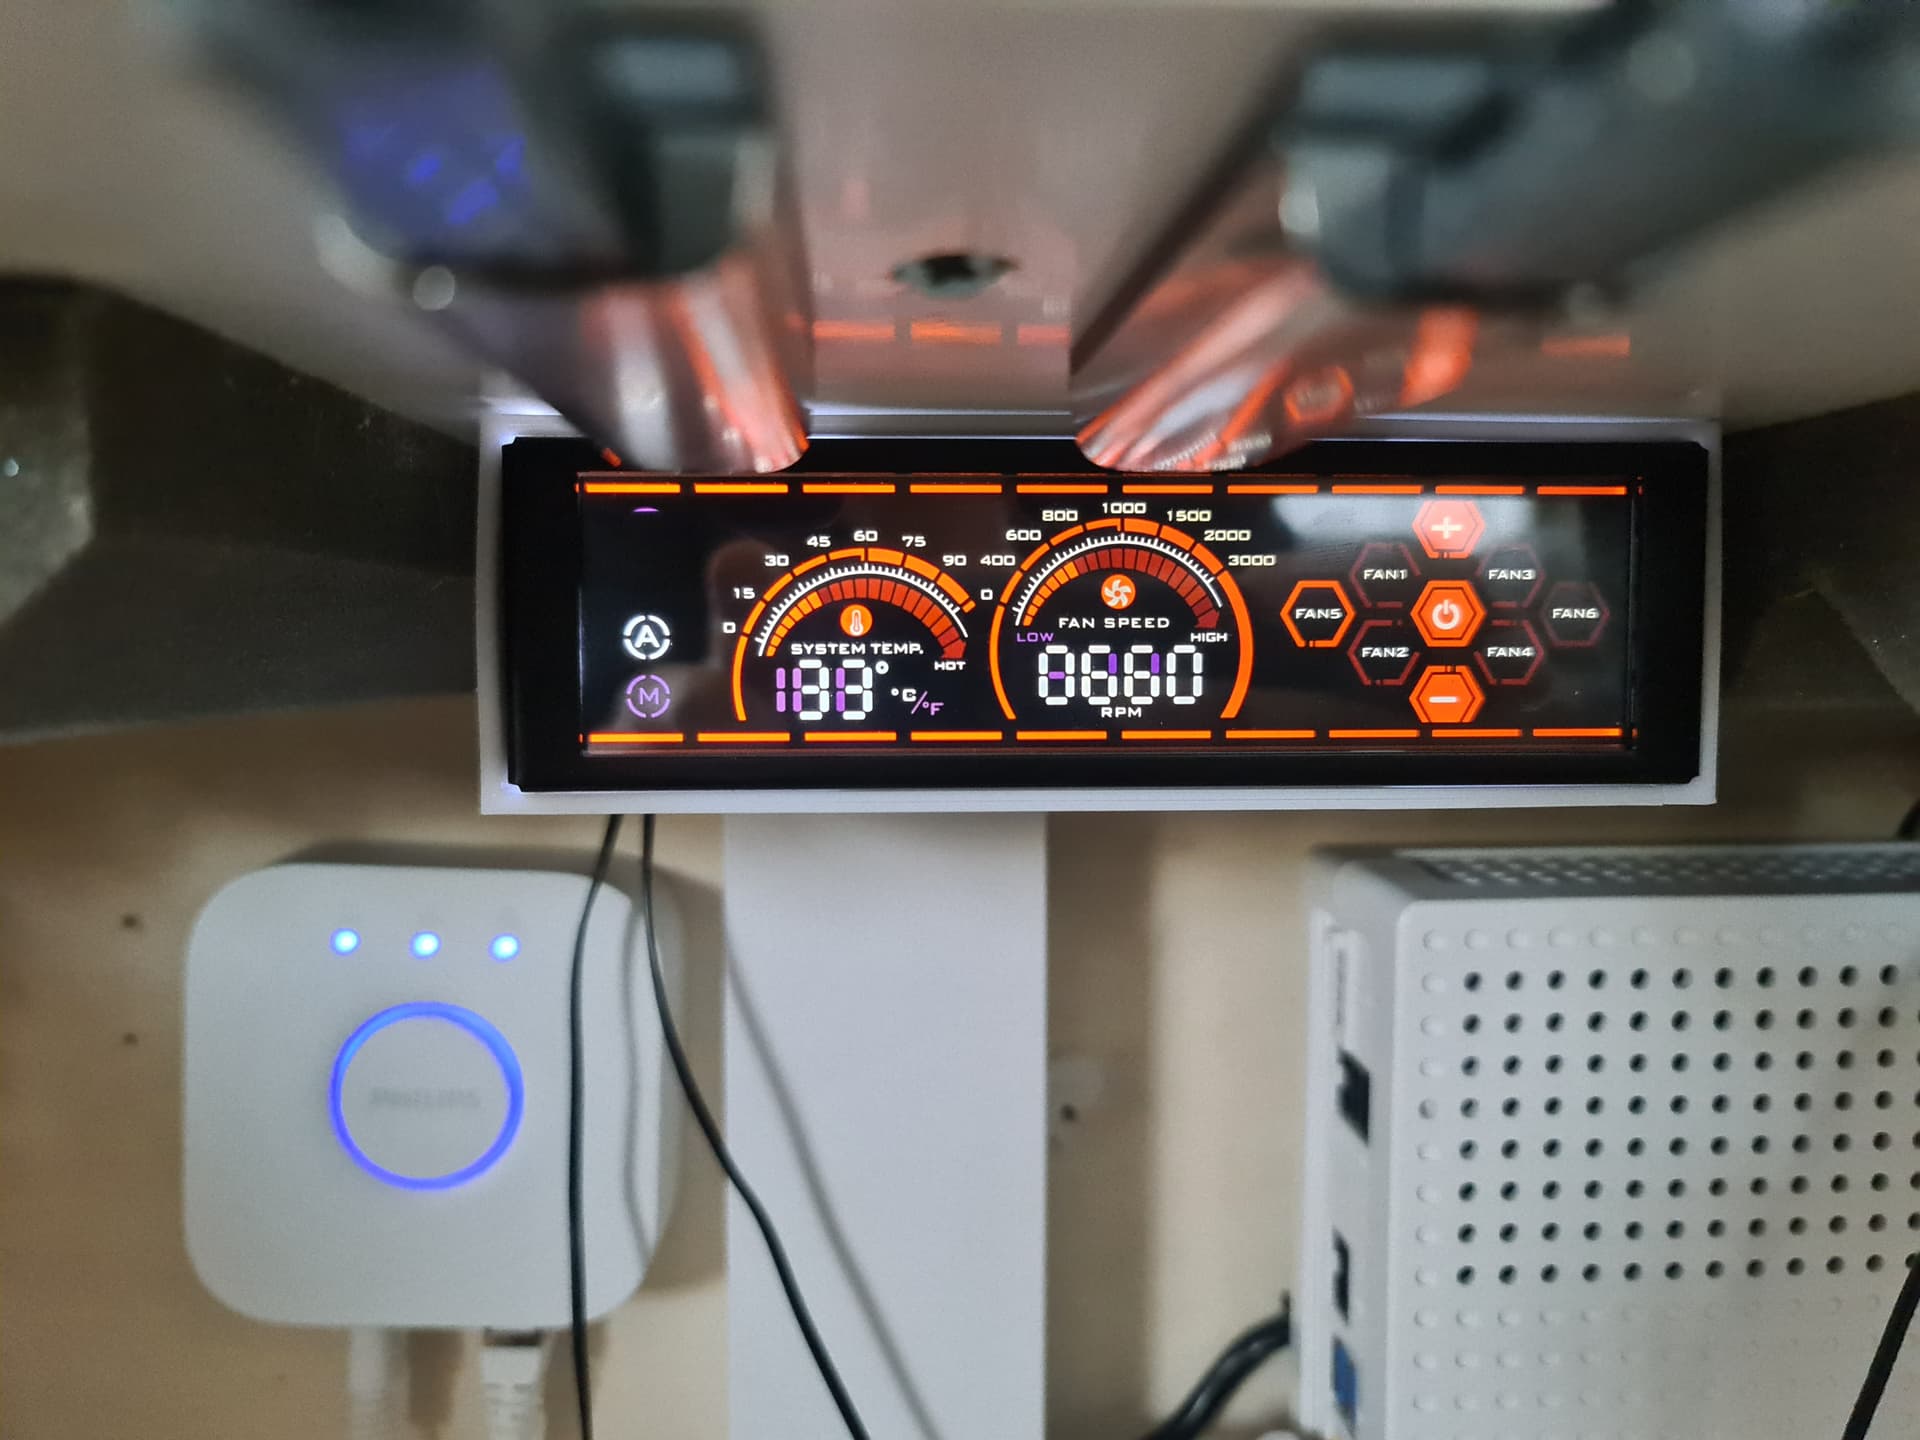
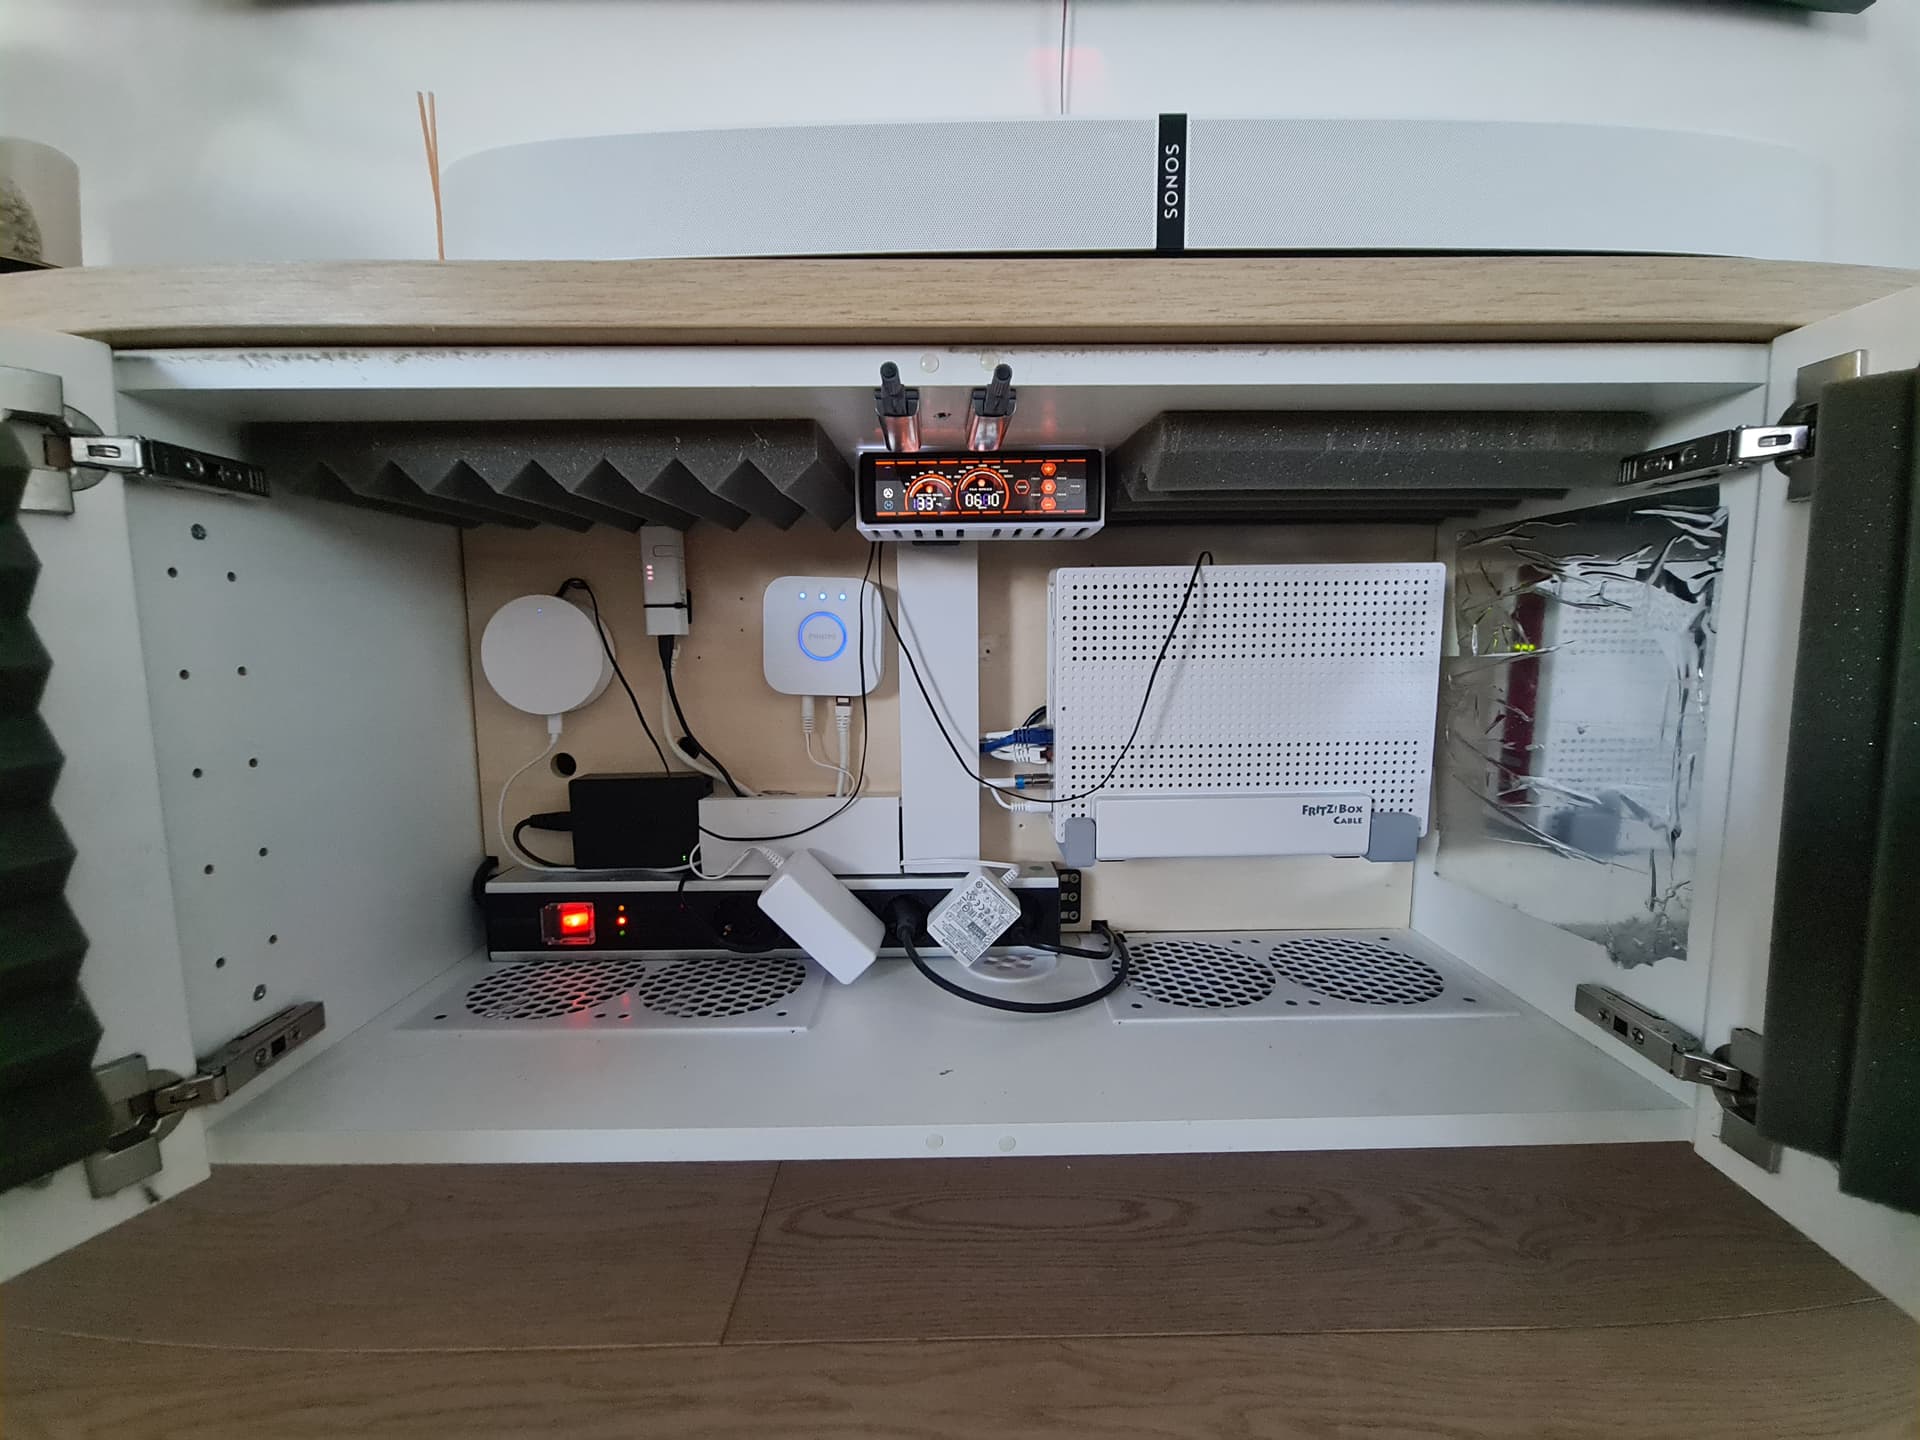
How is v1 looking what’s it from. So v1 are method cabinets from Ikea, floating mounted on the wall with 3d printed inserts and 120mm fans to provide a fresh breeze. Everything controlled by a pc fan speed controller and temp sensors for the devices buttond up with an oak counter top as shell.
So now that I wrote a half side in a gallery blog that’s the pics o v1:
Noise…got around 35db of noise on the outside of the cabinet in running condition so when the TV is turned on and all network running.
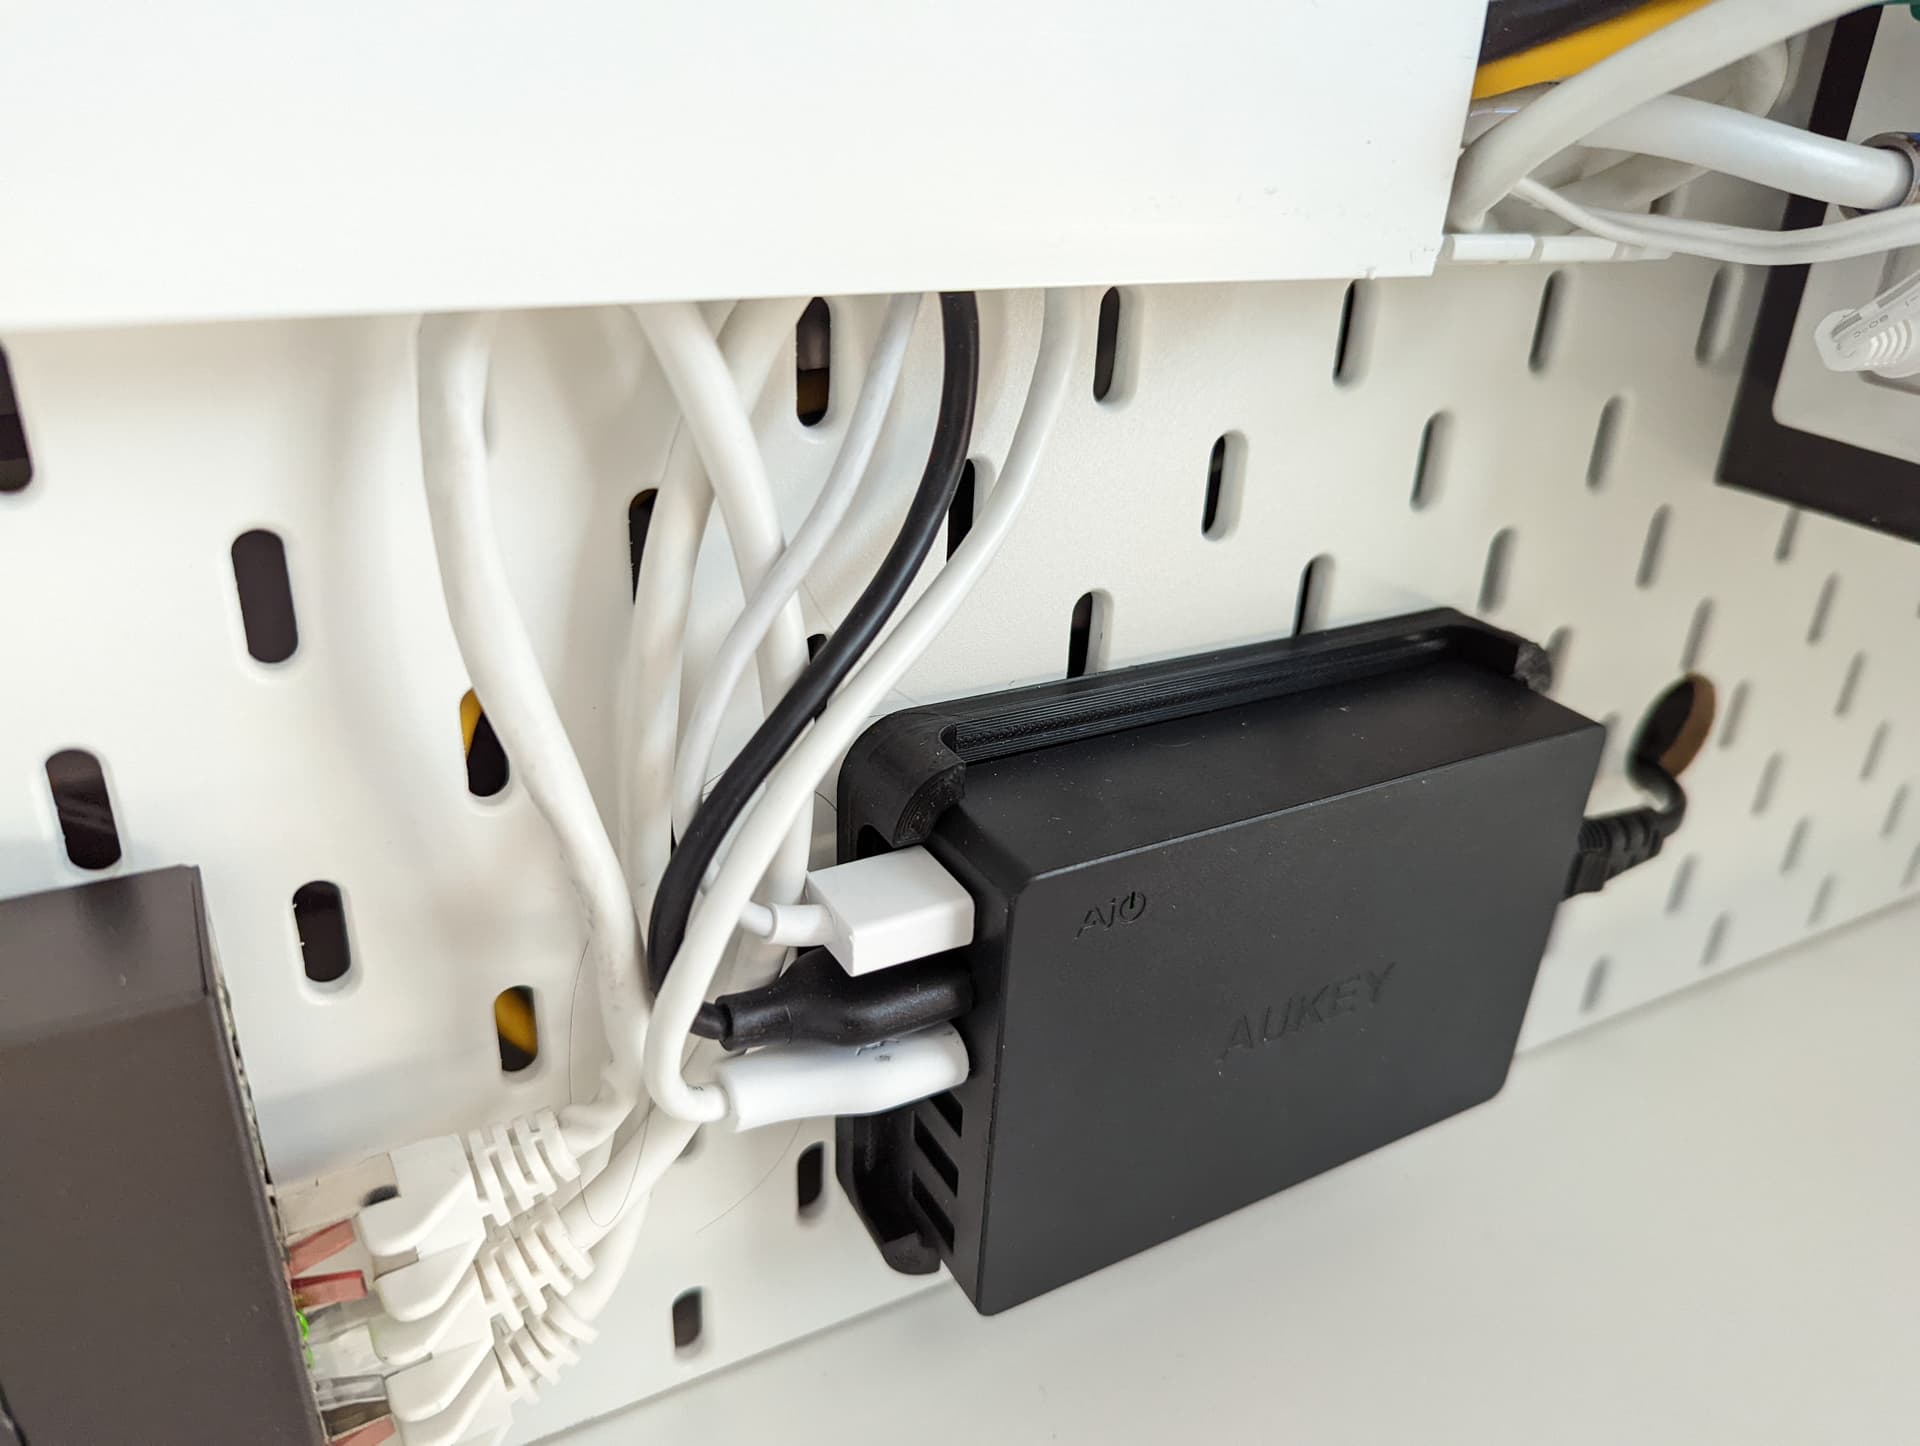
the cable management is a mess
the joinery on the top plate is bugging me… because its just a but joint
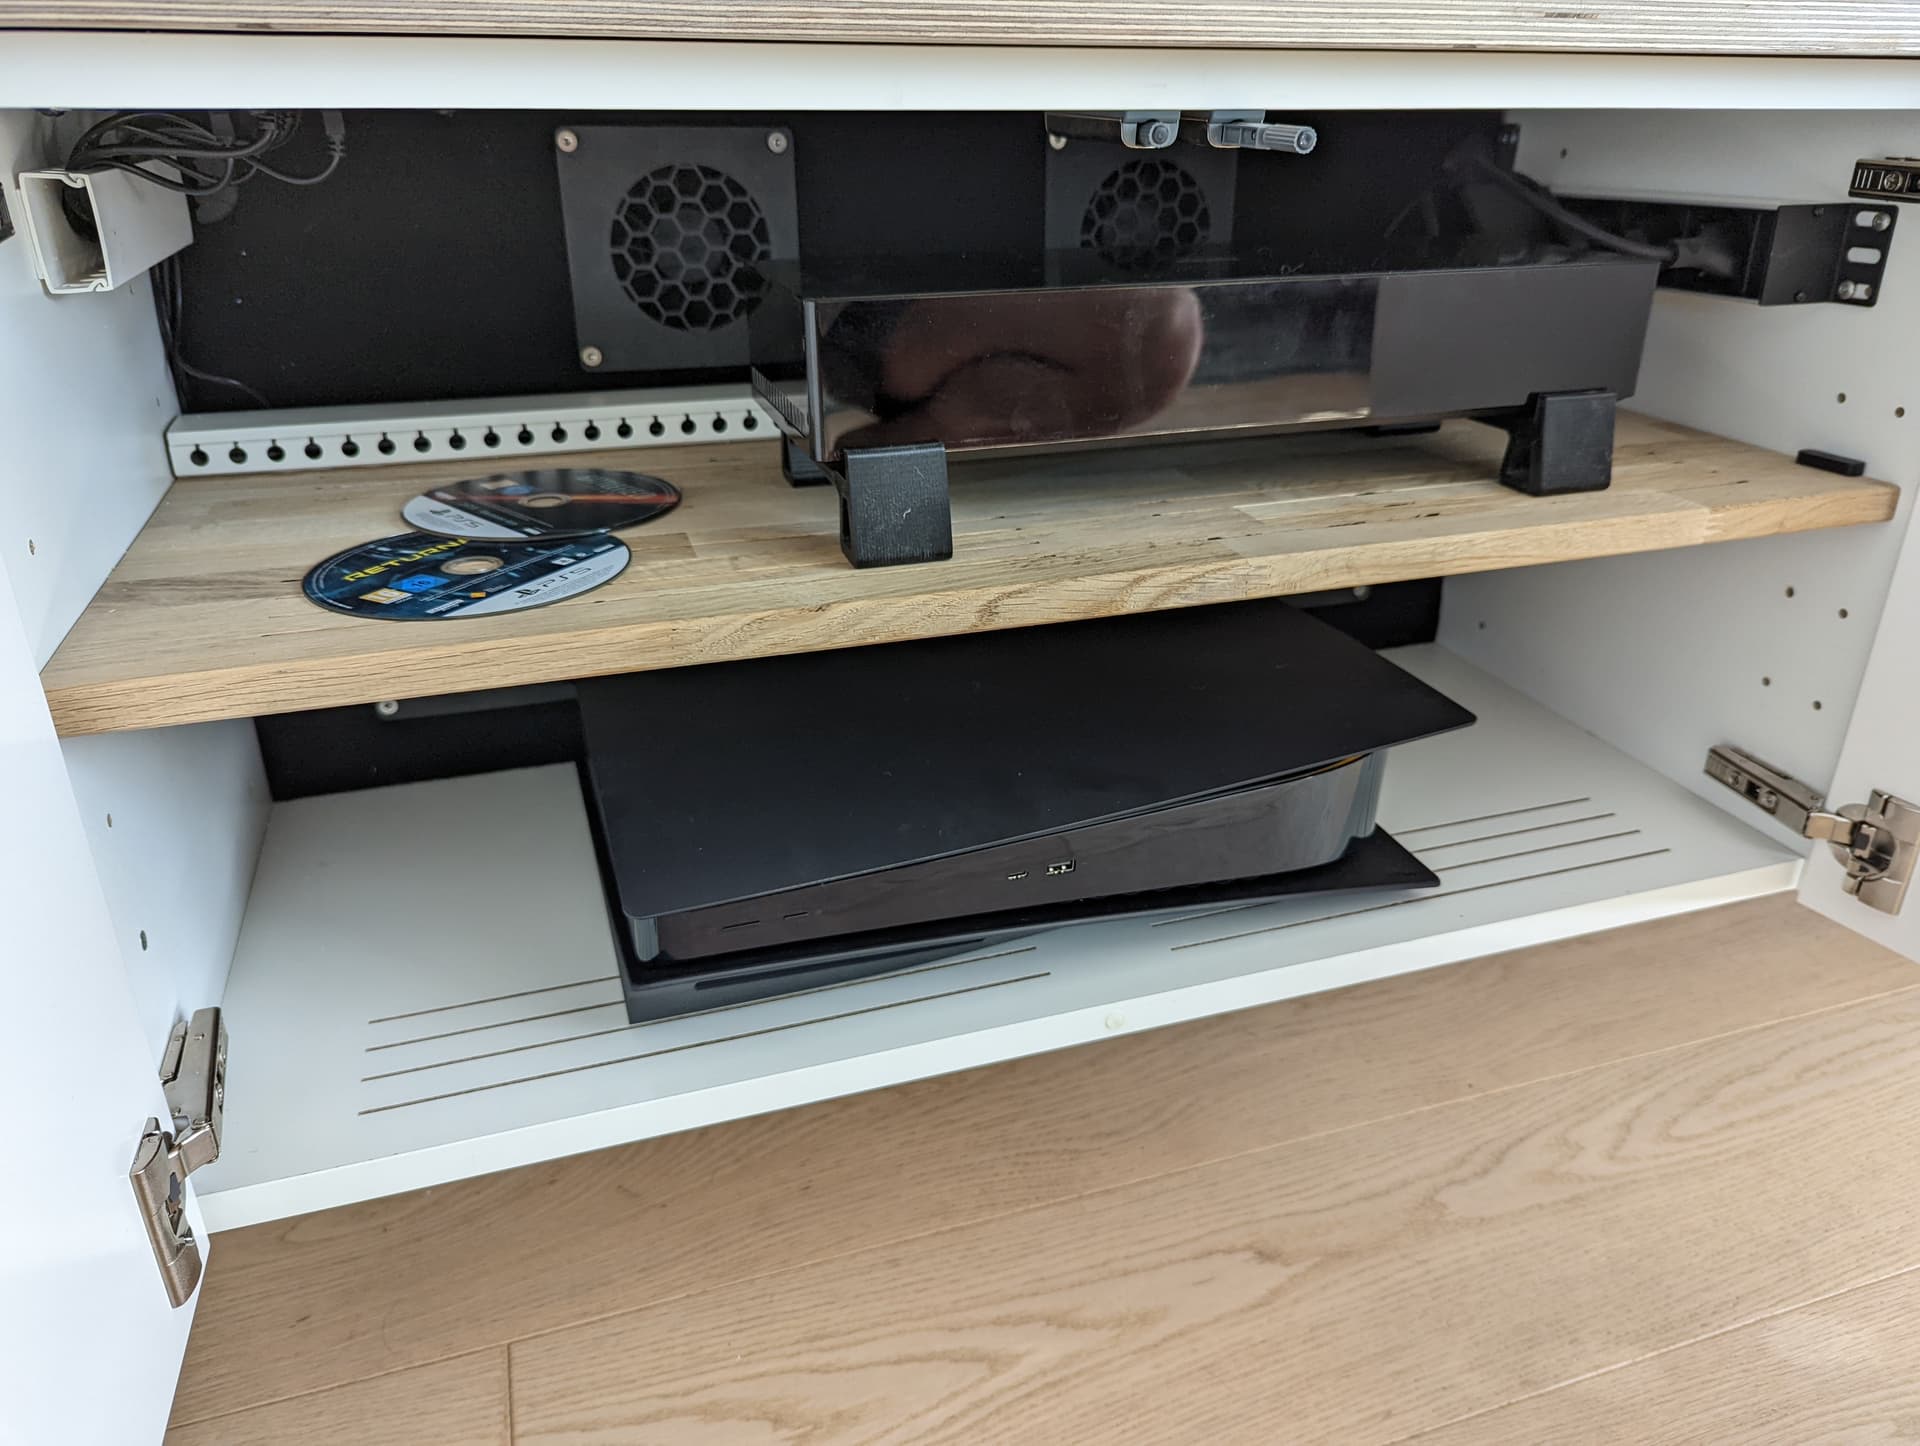
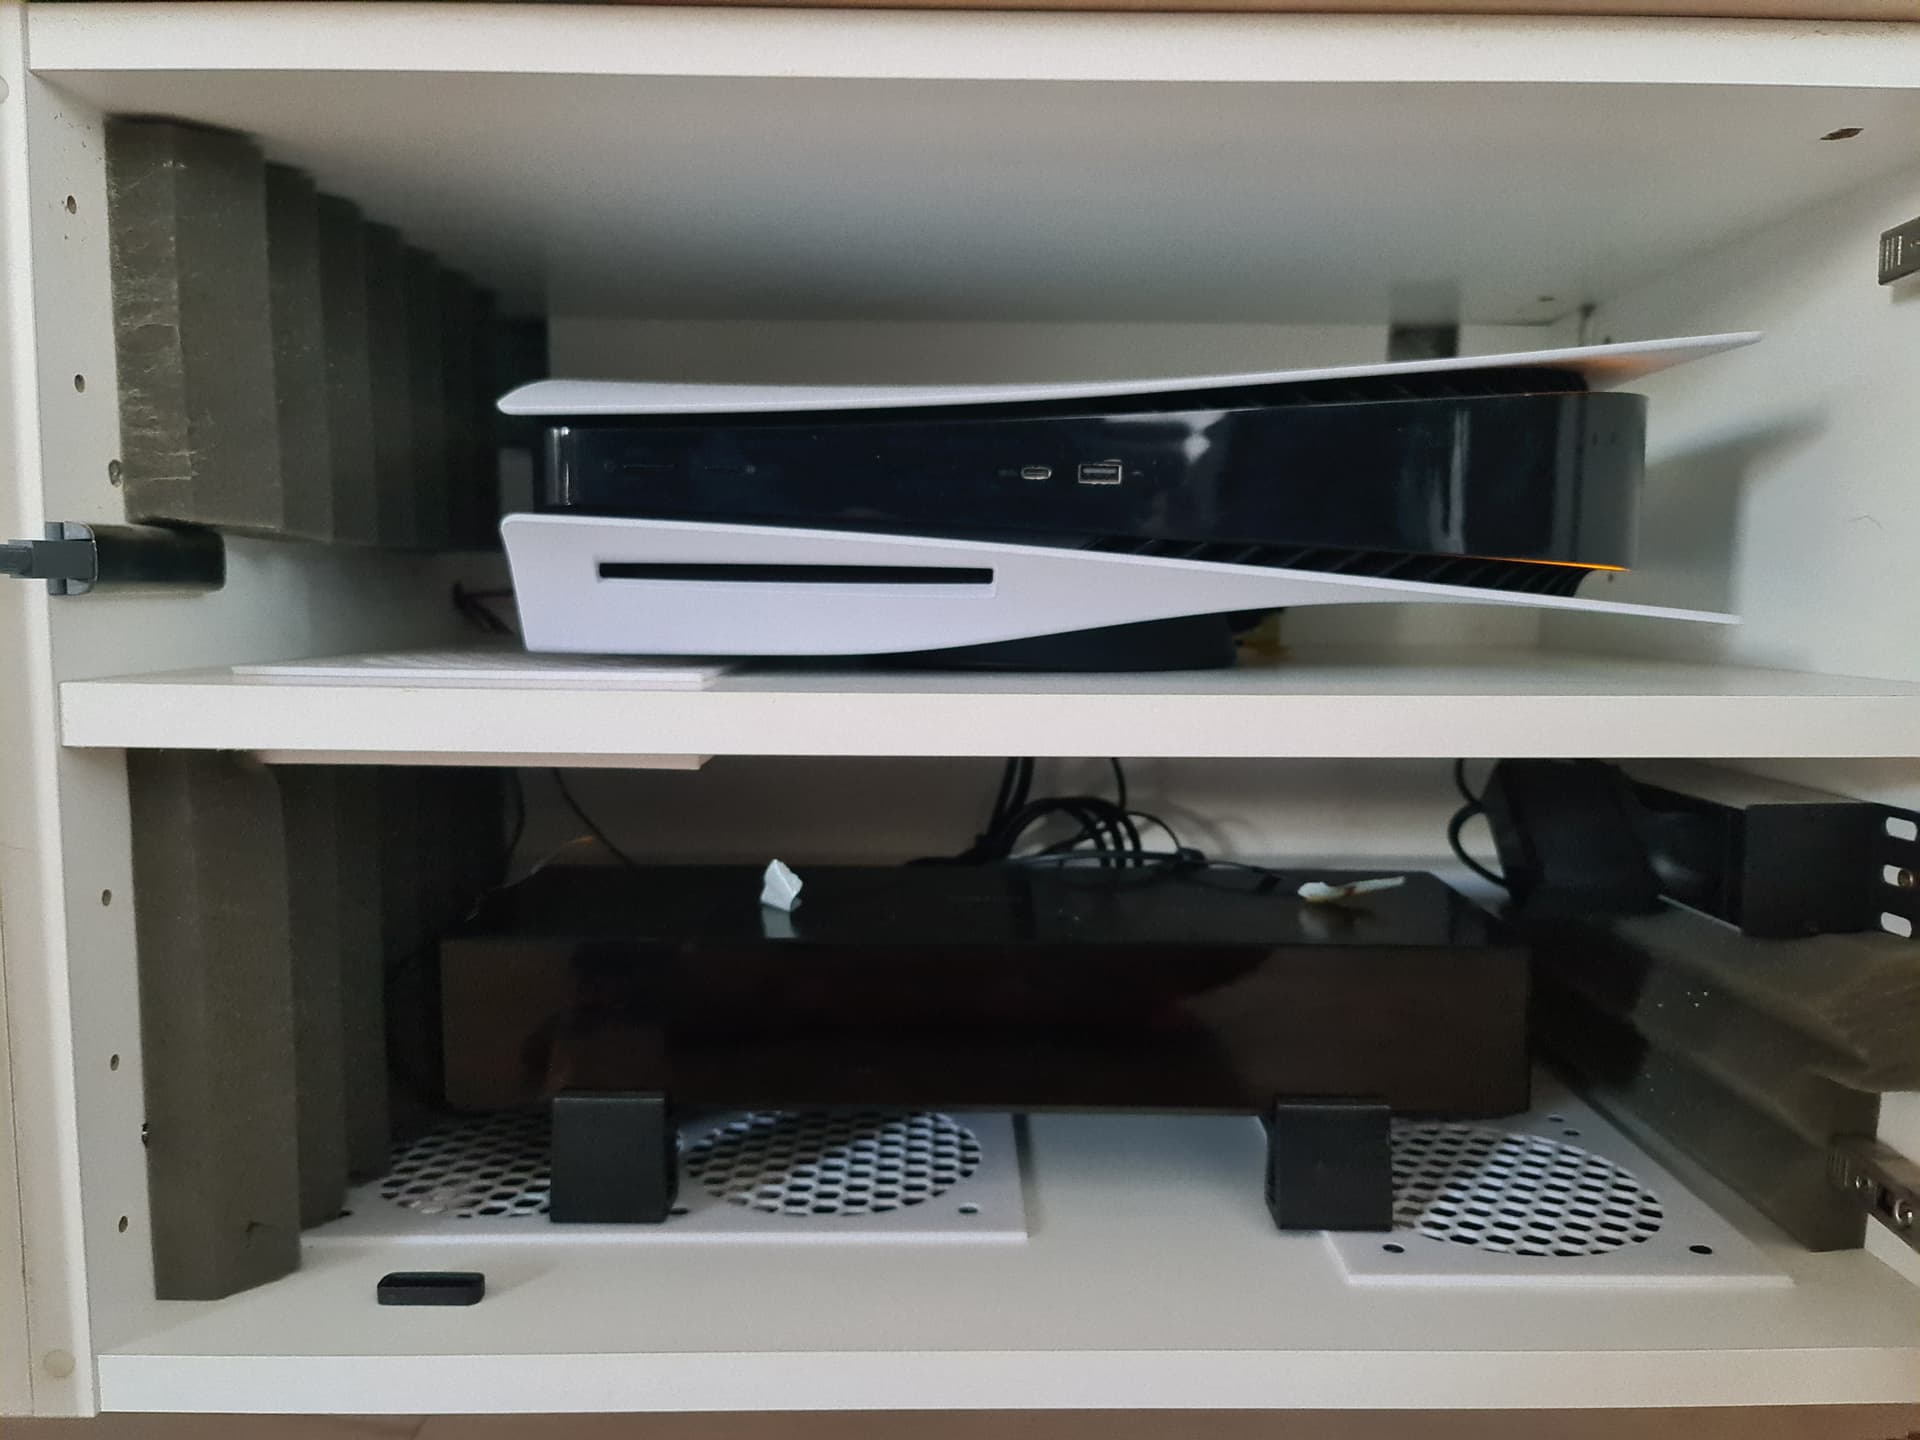
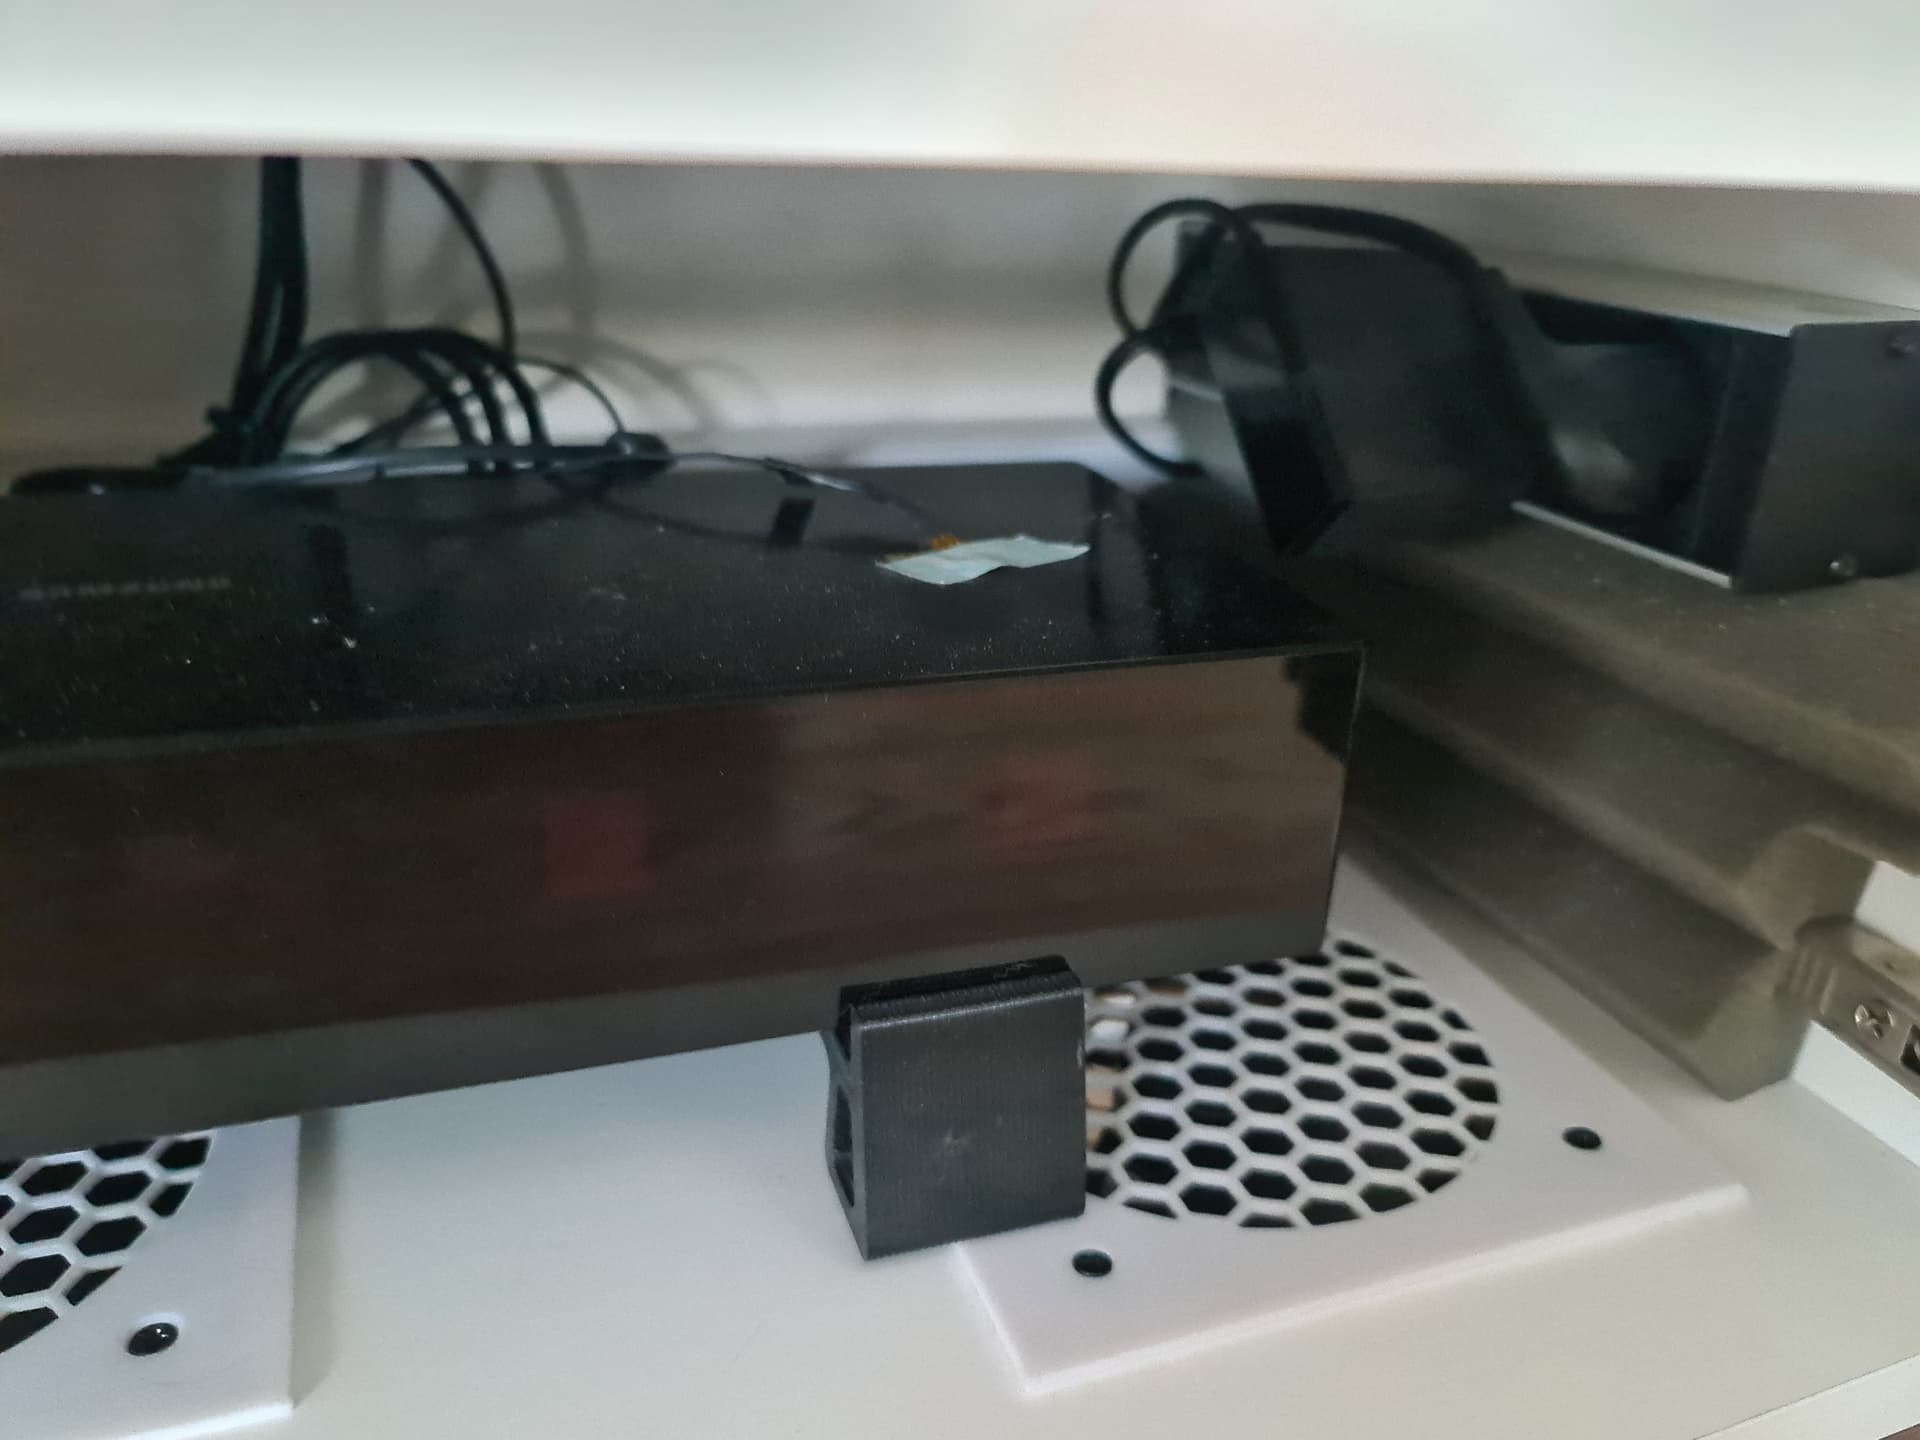
i got a ps5 and have to put it inside the small cabinet and the exhaust is on the back and there is mostly no circulating air.
fans a pushing fresh air in, no dedicated outlet of any kind, general position of the fans on the bottom and not on the back where most generated heat is pushed.
too many fans… a bit over over powered, the box around 0,122m³ and one fan on full blast is rated with 48 cfm so 192 cfm on full blast fans running quite low lets say 80 cfm that is then: 80 Cubic foot per minute [cfm] = 135,92 Kubikmeter per hour [m³/h] and yeah even with back pressure from missing outlets and so on you get my point.
these are my main headache points and all i want to change in V2. stay with me its getting more and more bonkers
things that didnt changed, im still using the Method cabinets because my wife really liked the look of it, so i designed my stuff around it.
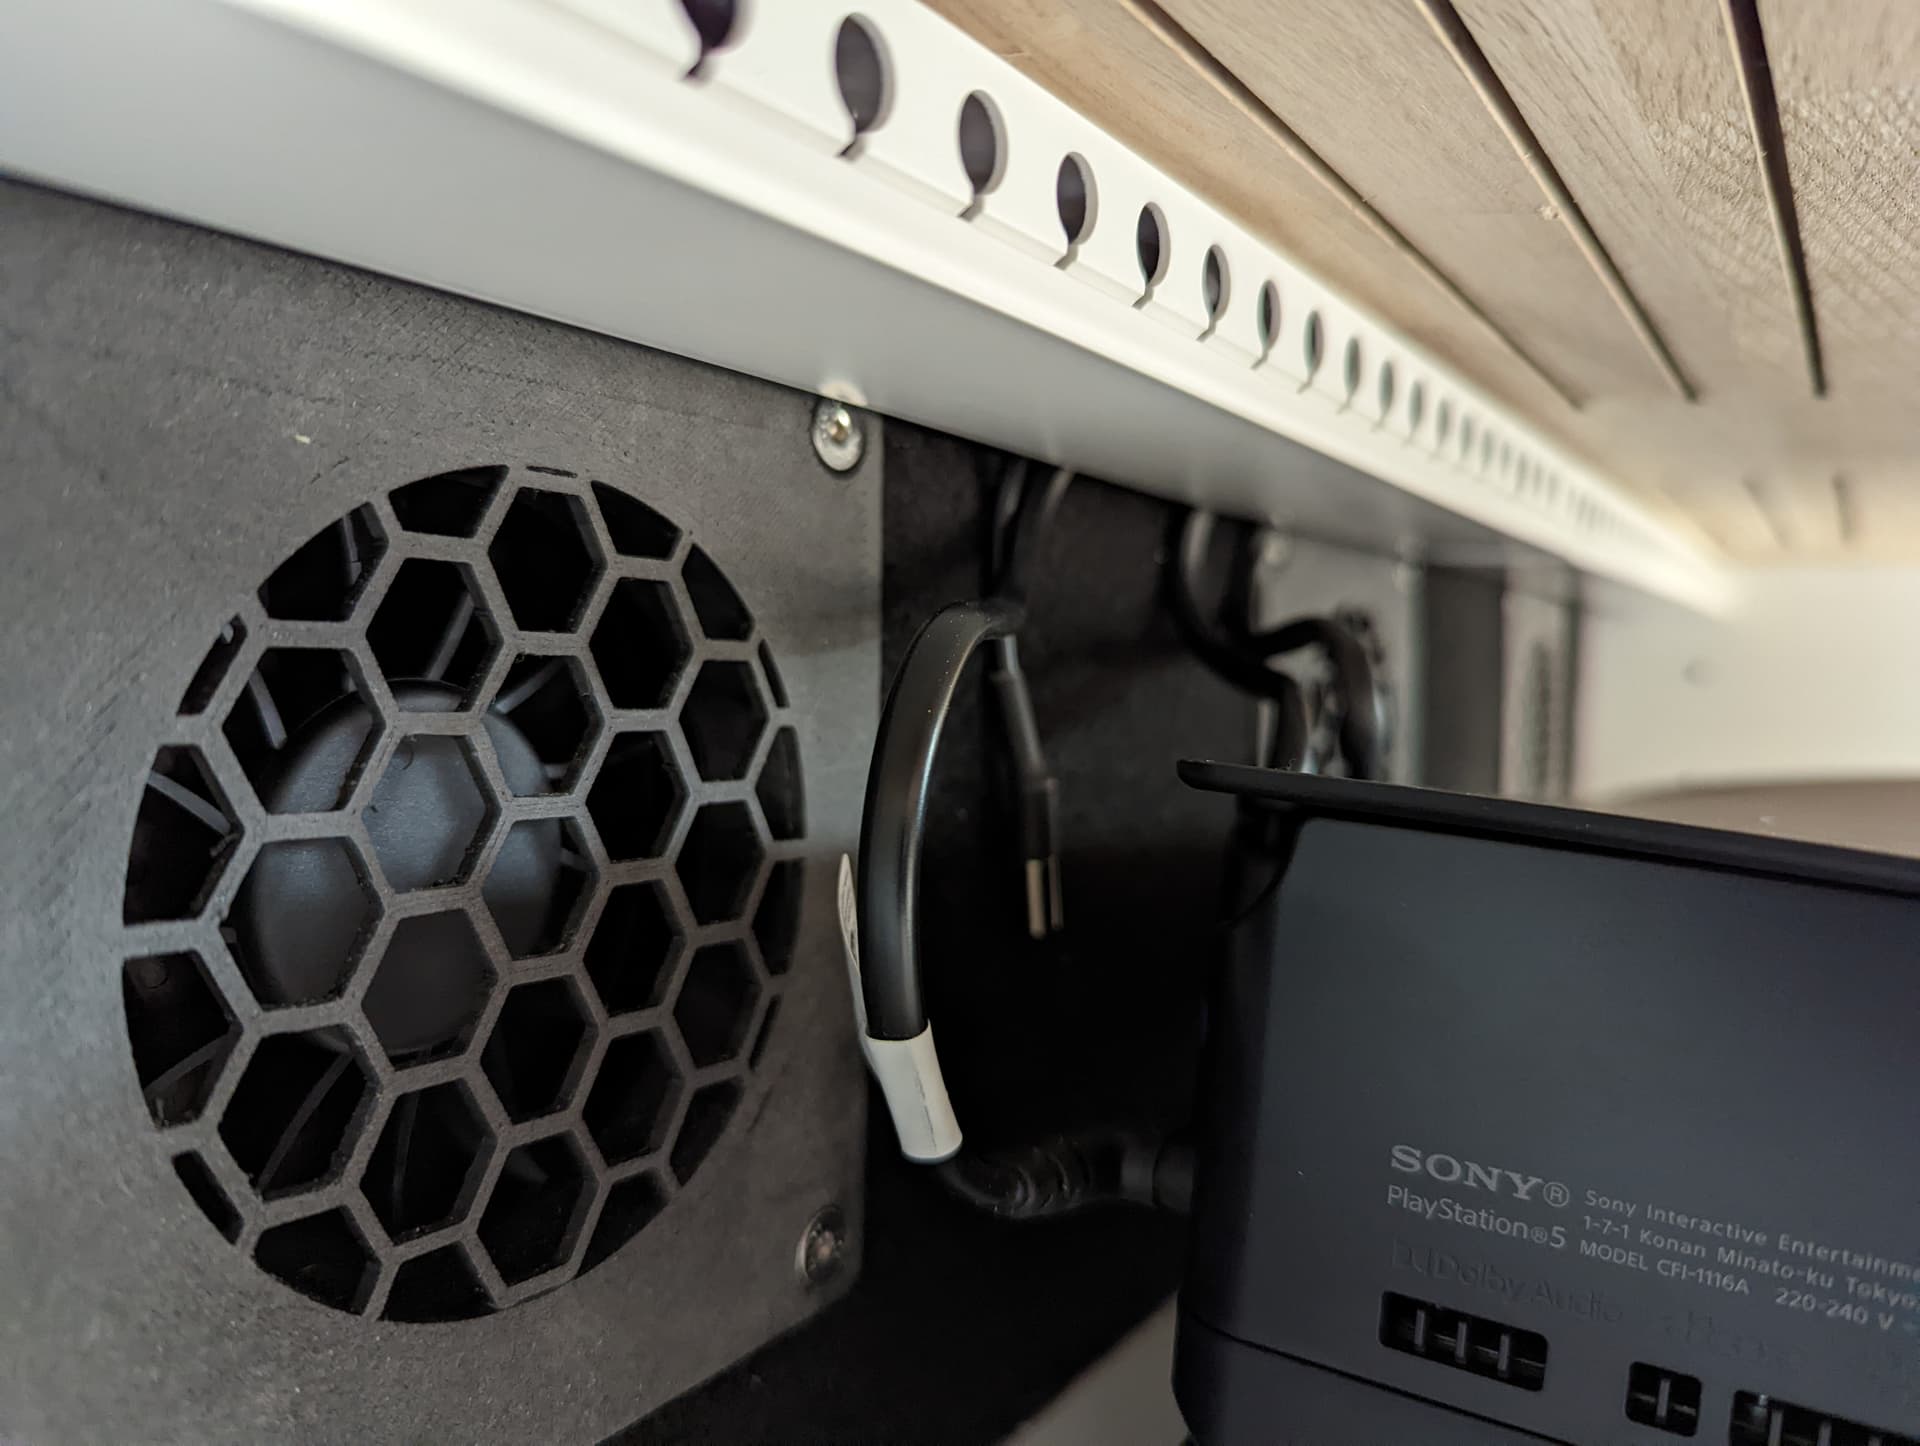
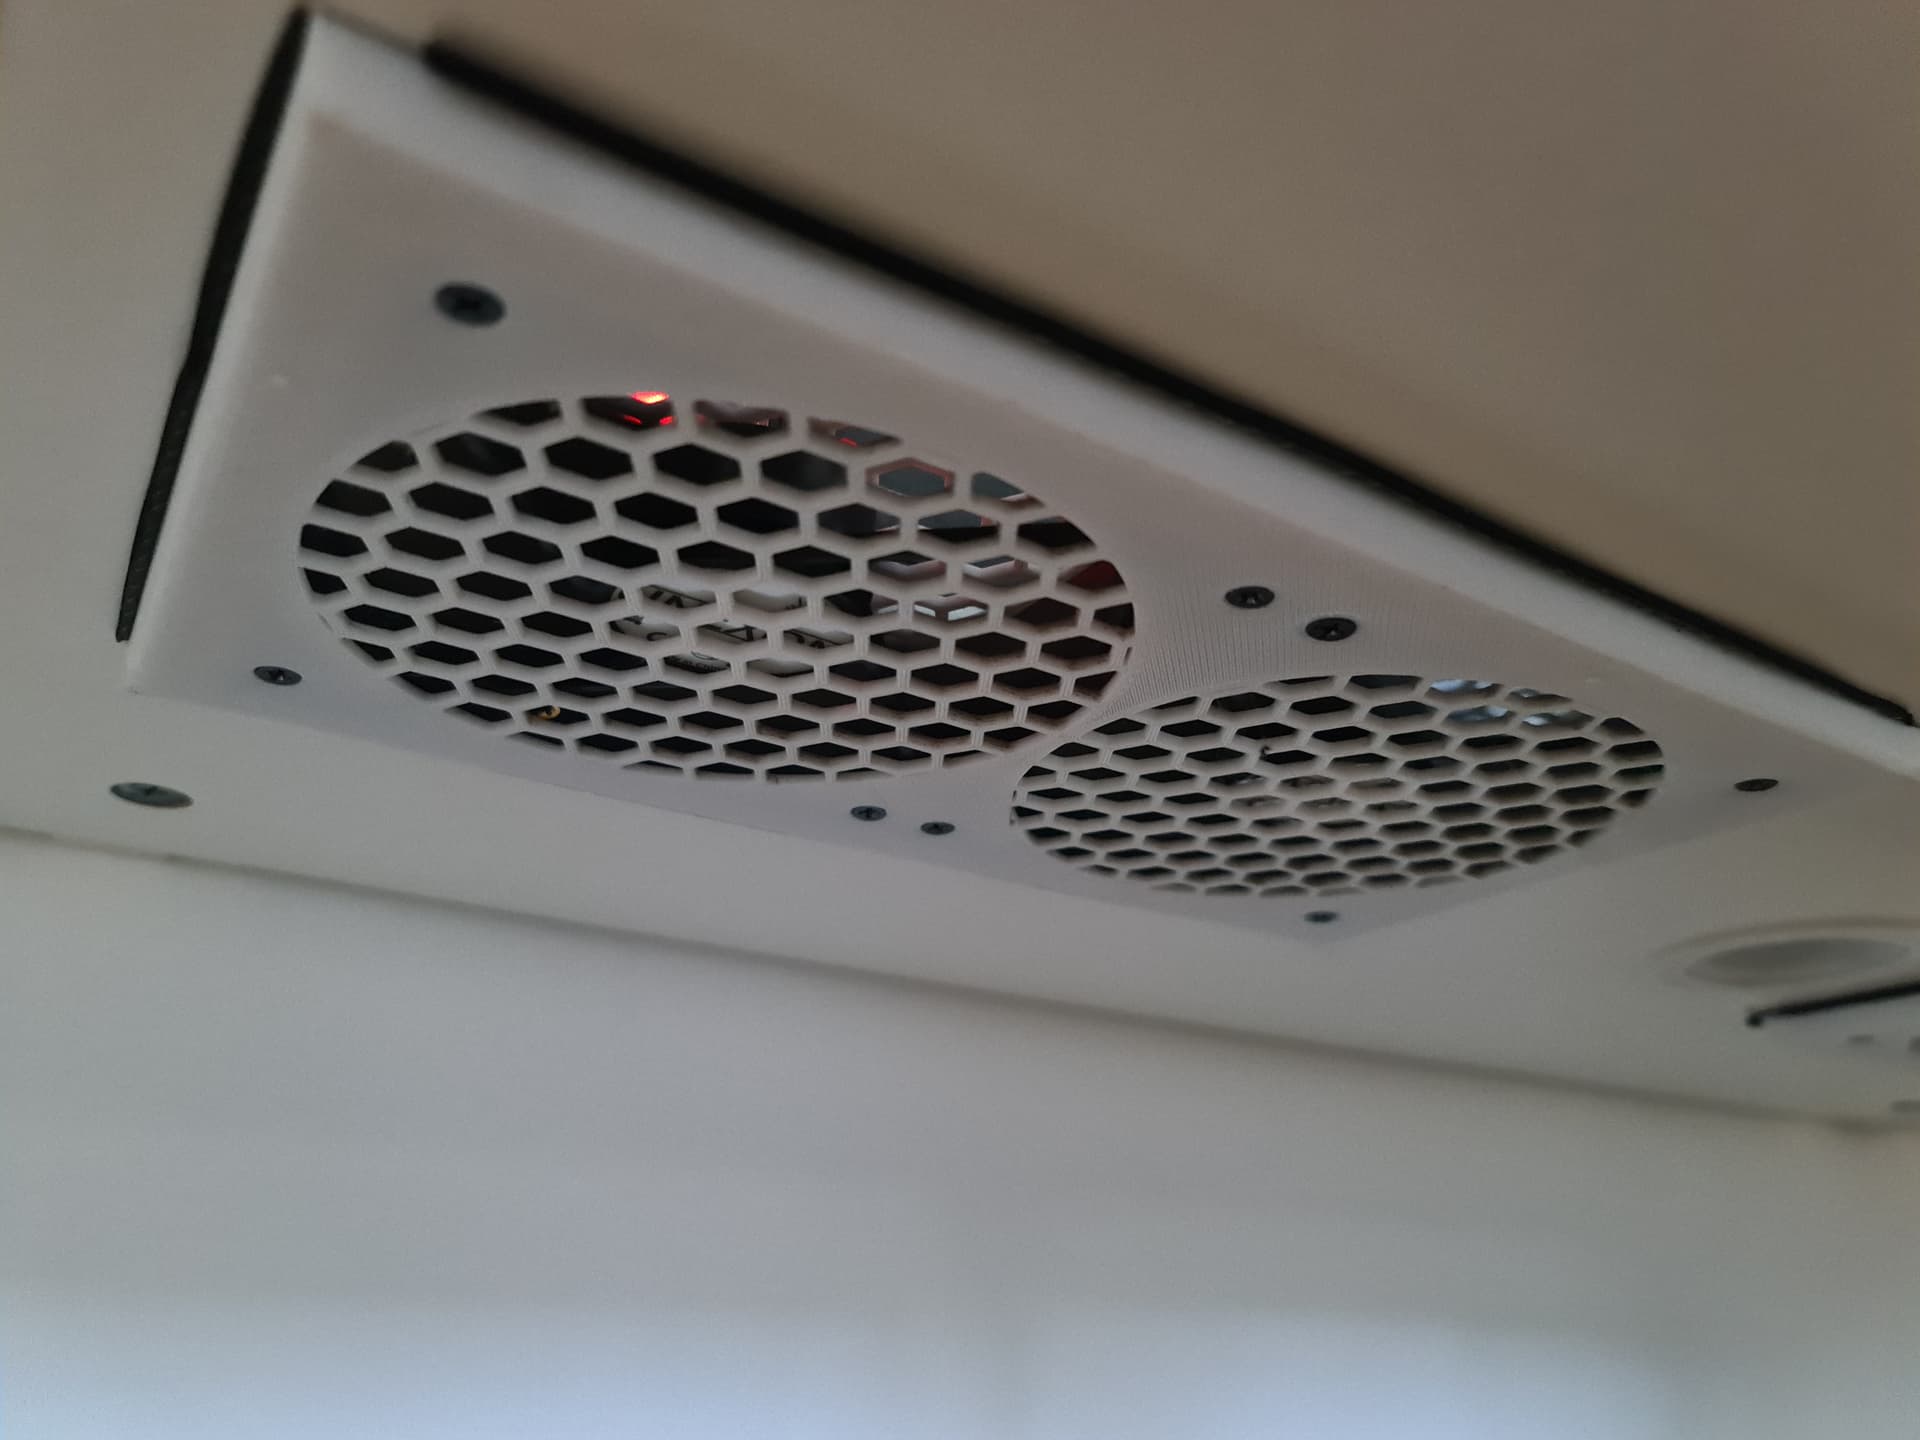
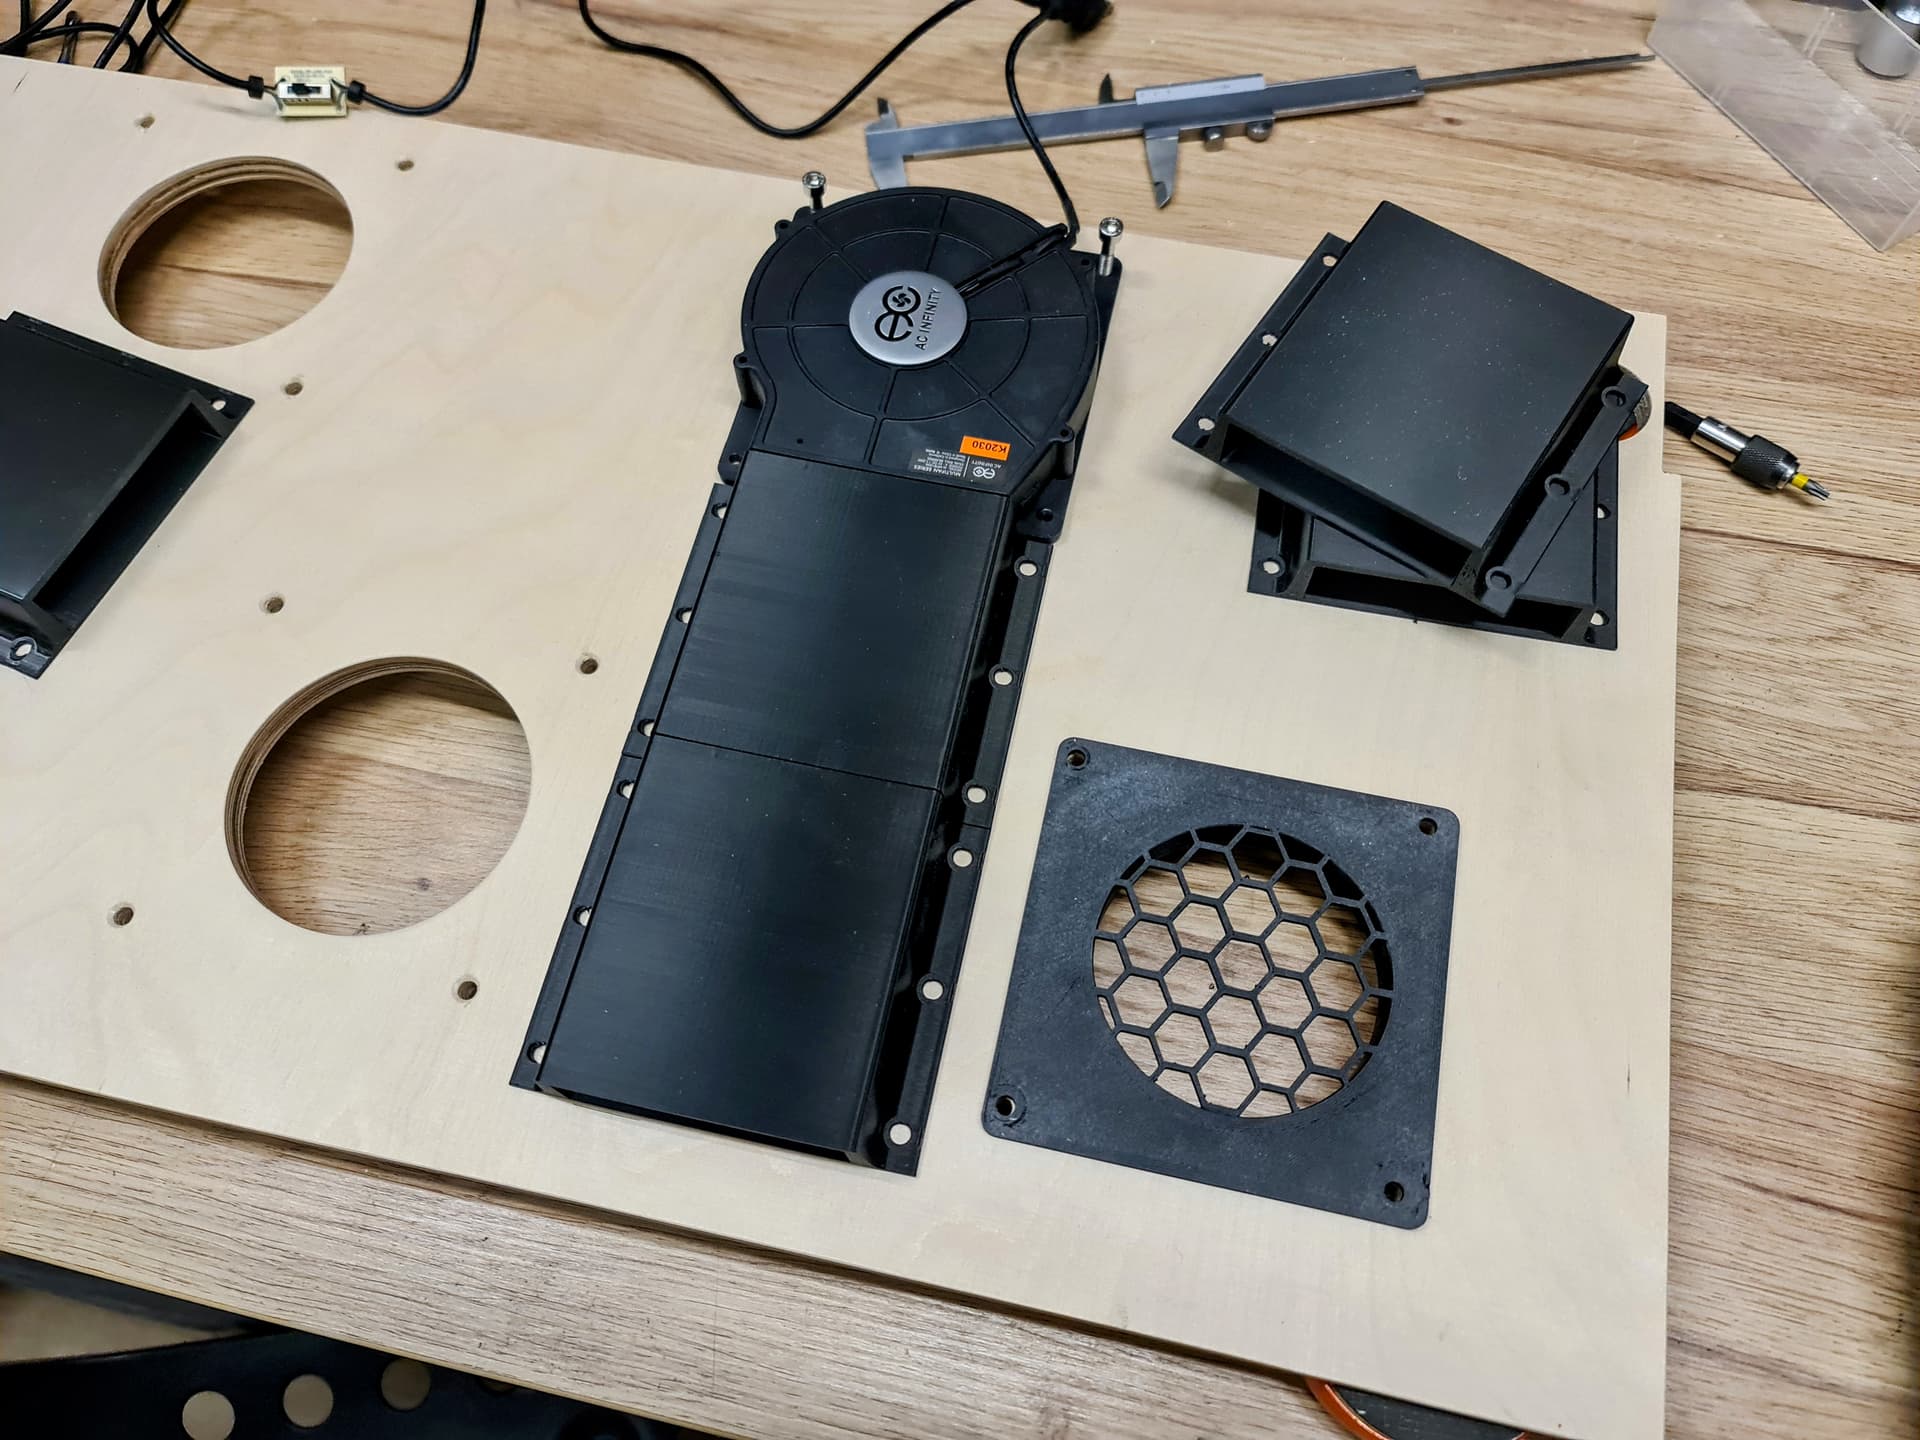
Blower fans on the back side, double isolated and damped for silence sucking air out from the highest point and on the back of the devices
way less fans ((7) in total 2 running permanent 1 per cabinet for ambient control and the rest for the ps5 so i can play with doors closed) rated with around 35 cfm full blast each. dedicated temperature control with a bought solution from ac infinity. I wouldnt describe this as an update of any kind its more of a declutter and they have these nice silent 5V blower fans with 120mm that i didnt found cheaper or more silent and i wanted to extrude air from the back so i dont block them with devices standing on top.
dedicated air inlet
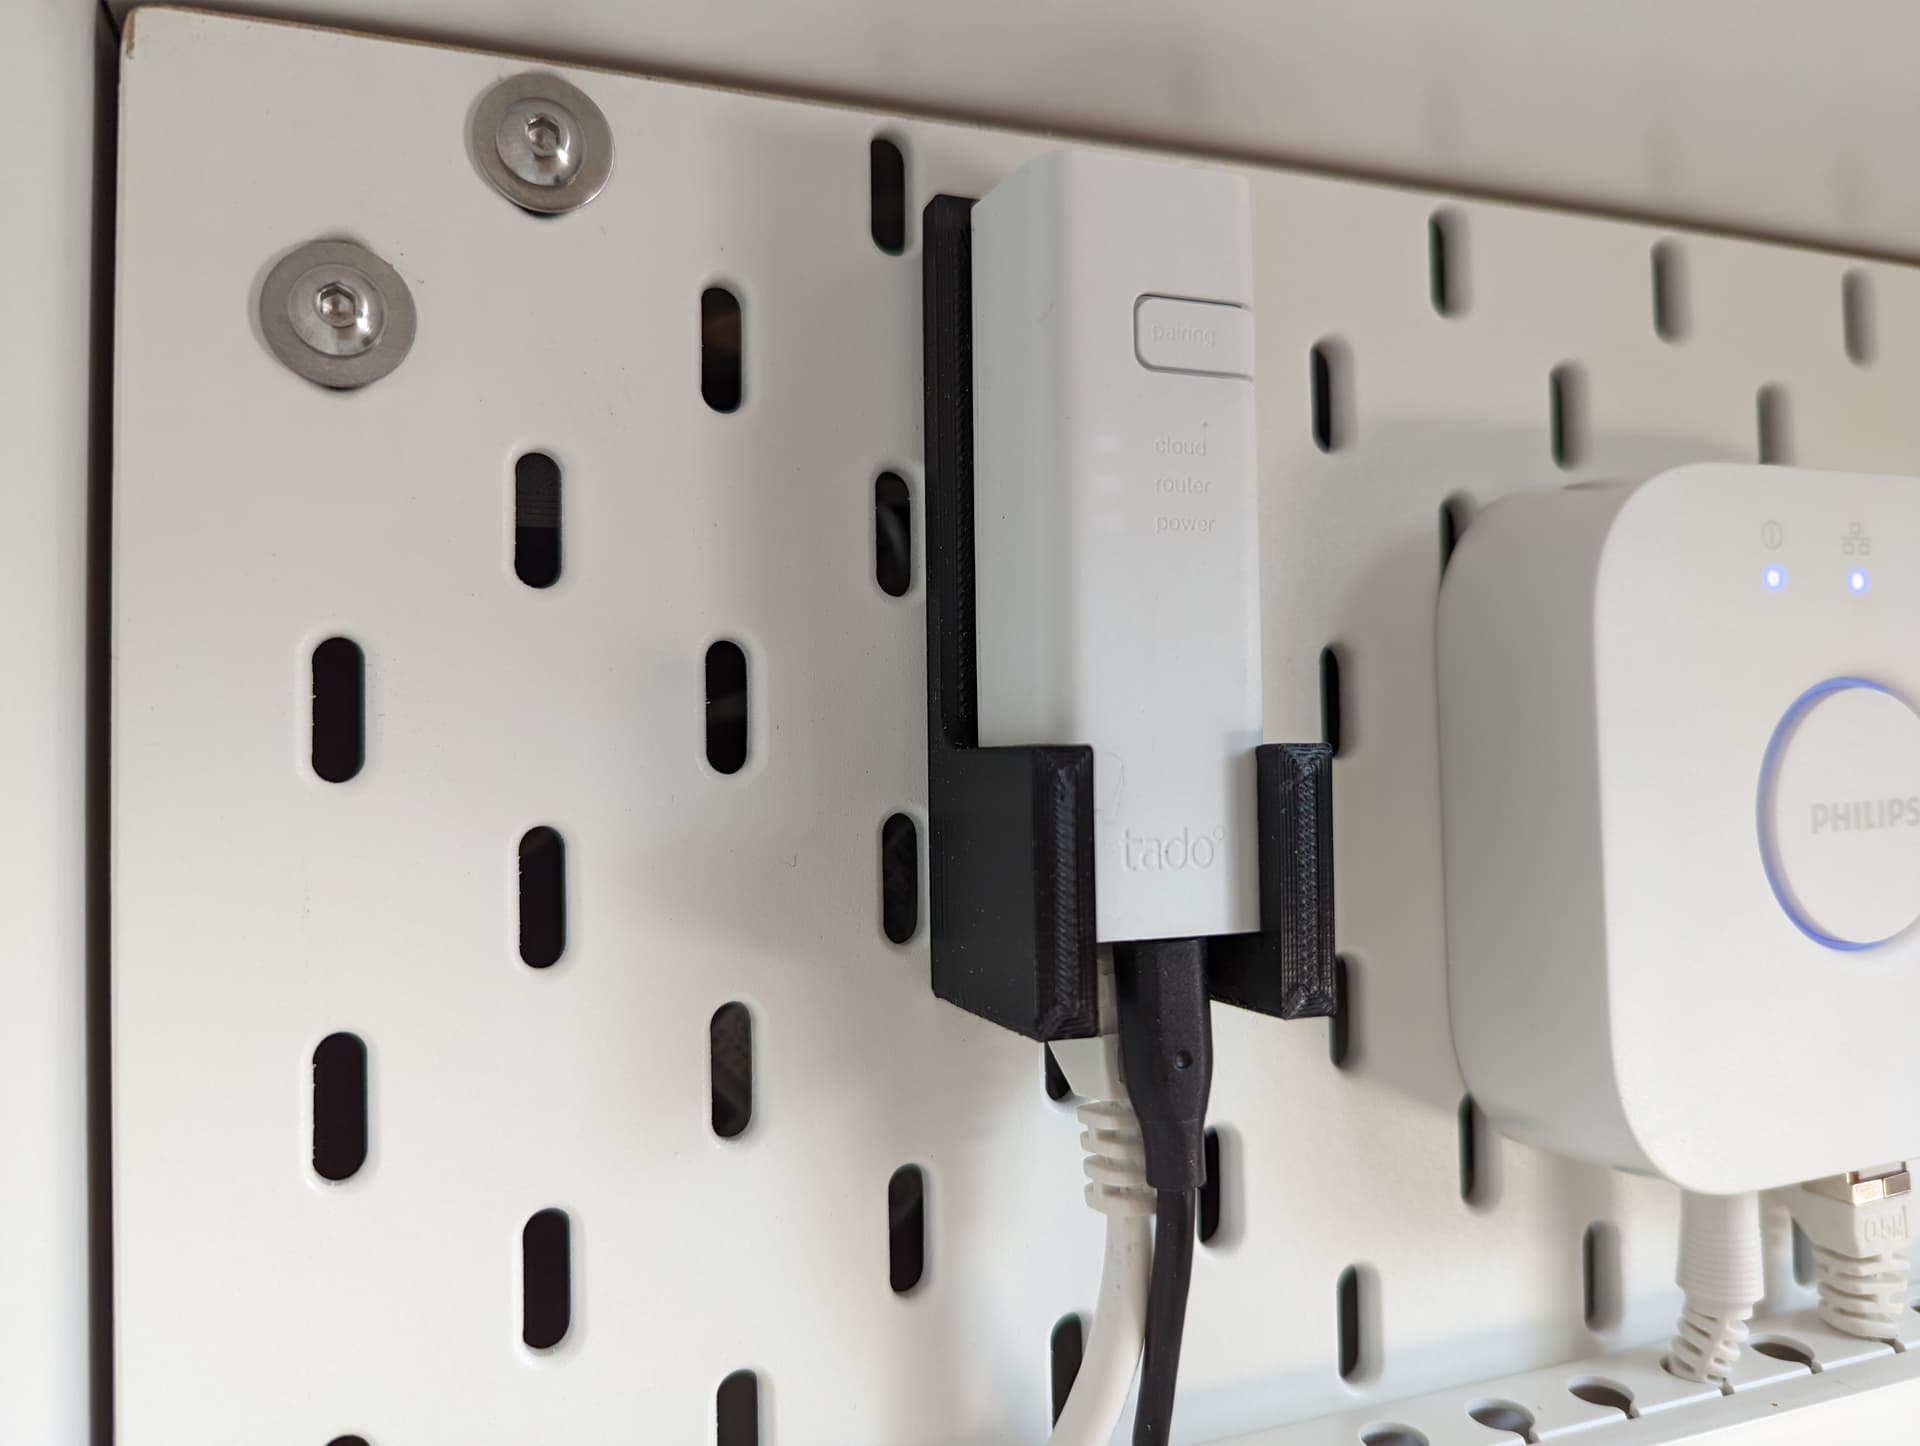
better cable management easier to restructure the smart home with an ikea pegboard as divider wall and magnet holders for easy cable access
one larger cabinet to fit in the PS5 better because that boi is memeish large…
One observation is that the acoustic foam is probably pointless in this scenario since the cabinet will act as a resonator with all those vibrating things inside it. The foam is also a thermal insulator.
Thank you very much. That really means quite much too me.
was never far away always listening and reading in the shadows, Liking stuff:sweat_smile:. But my CNC is working flawlessly and I don’t make such amazing or exiting projects as all of you do. So creeping up from time to time
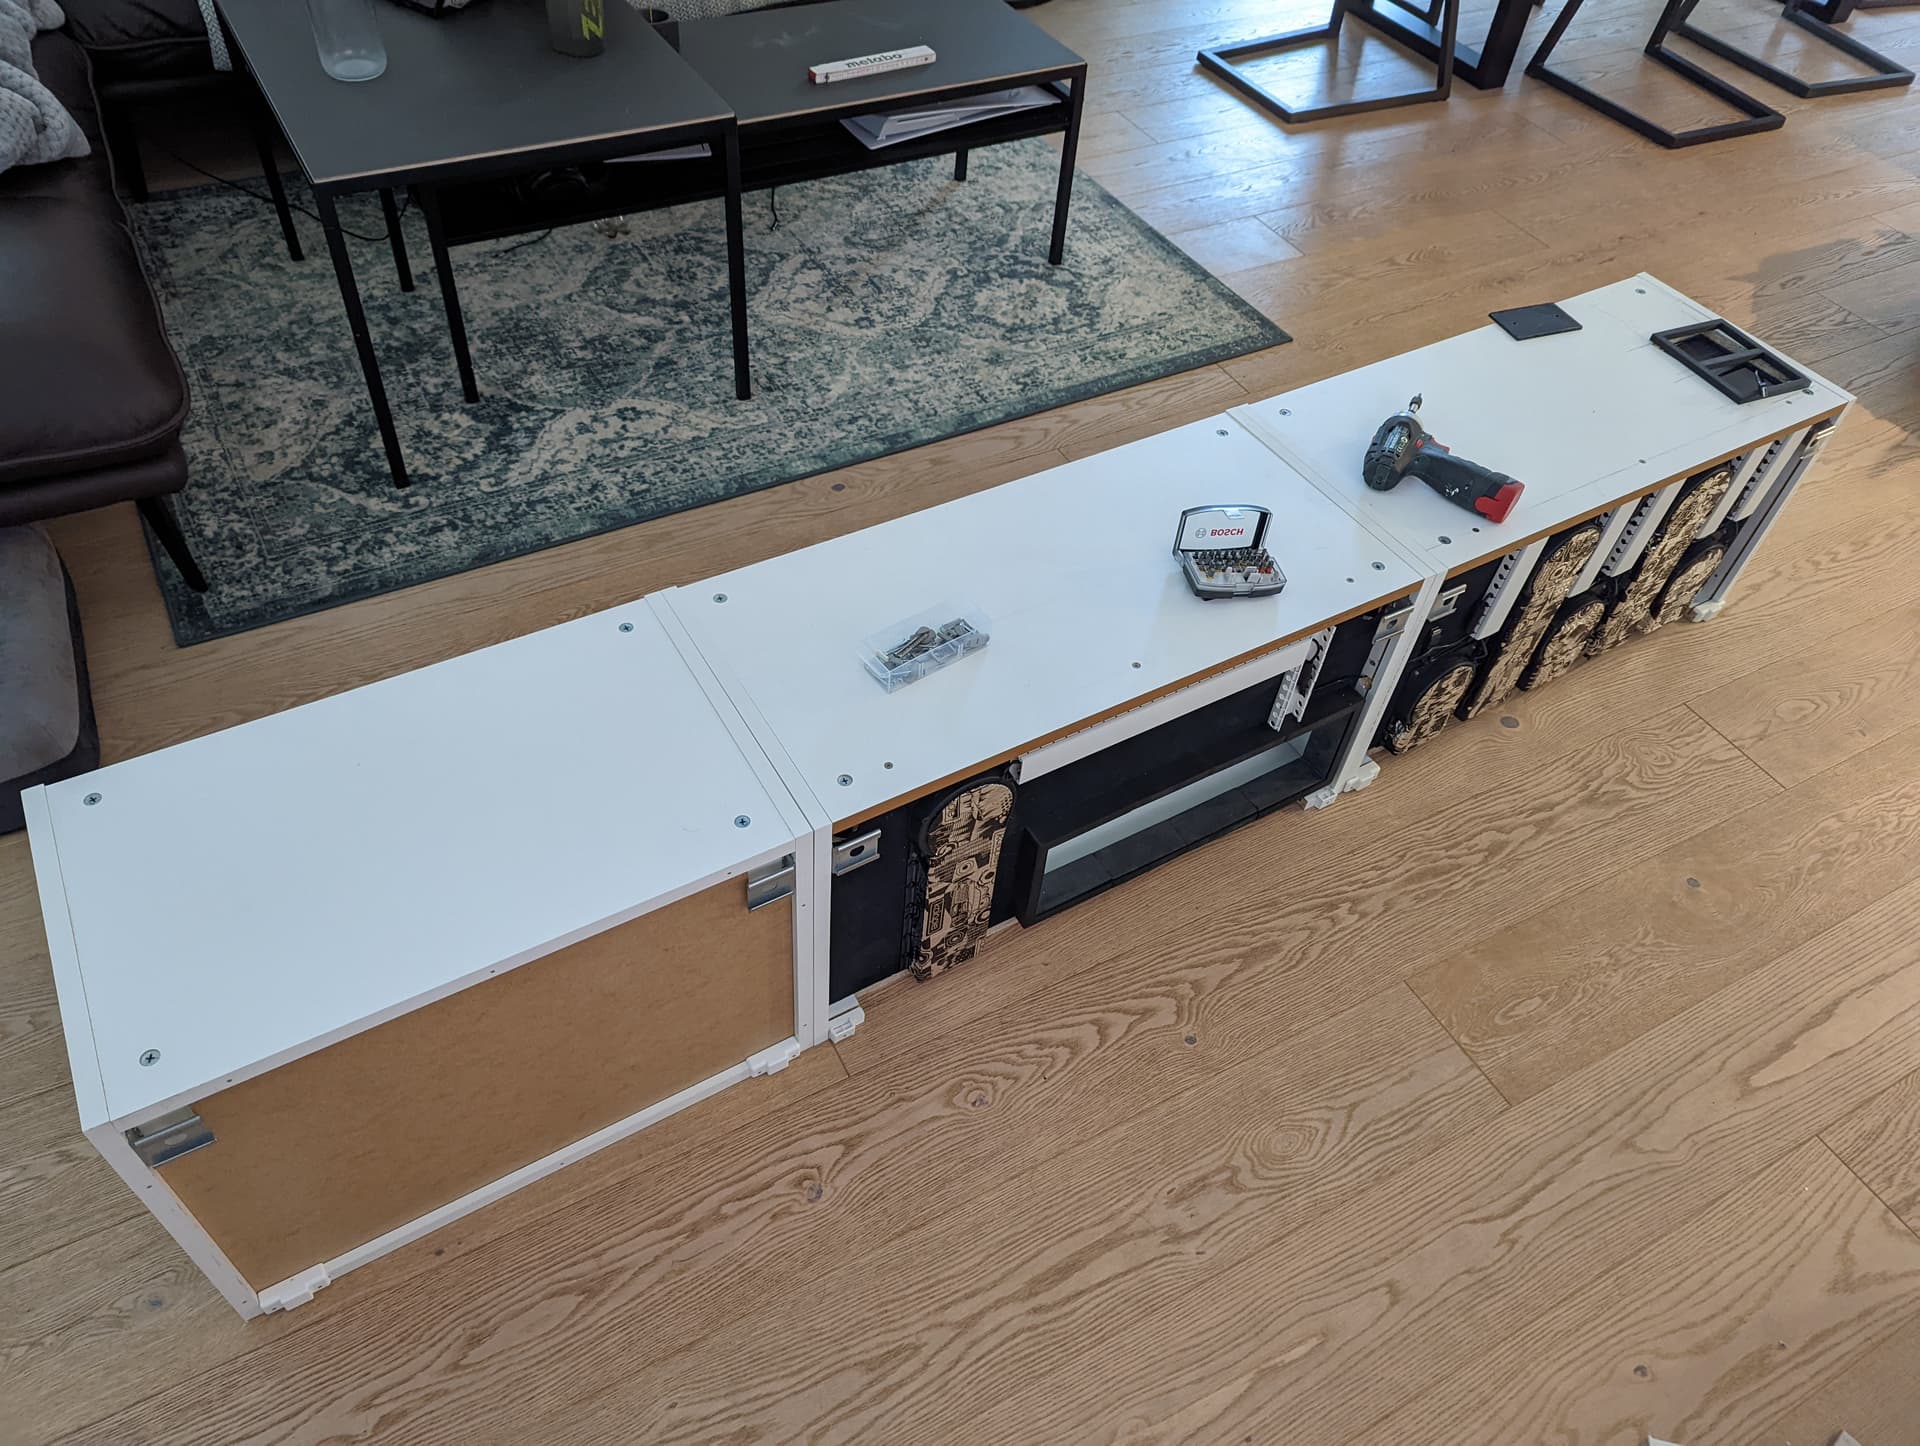
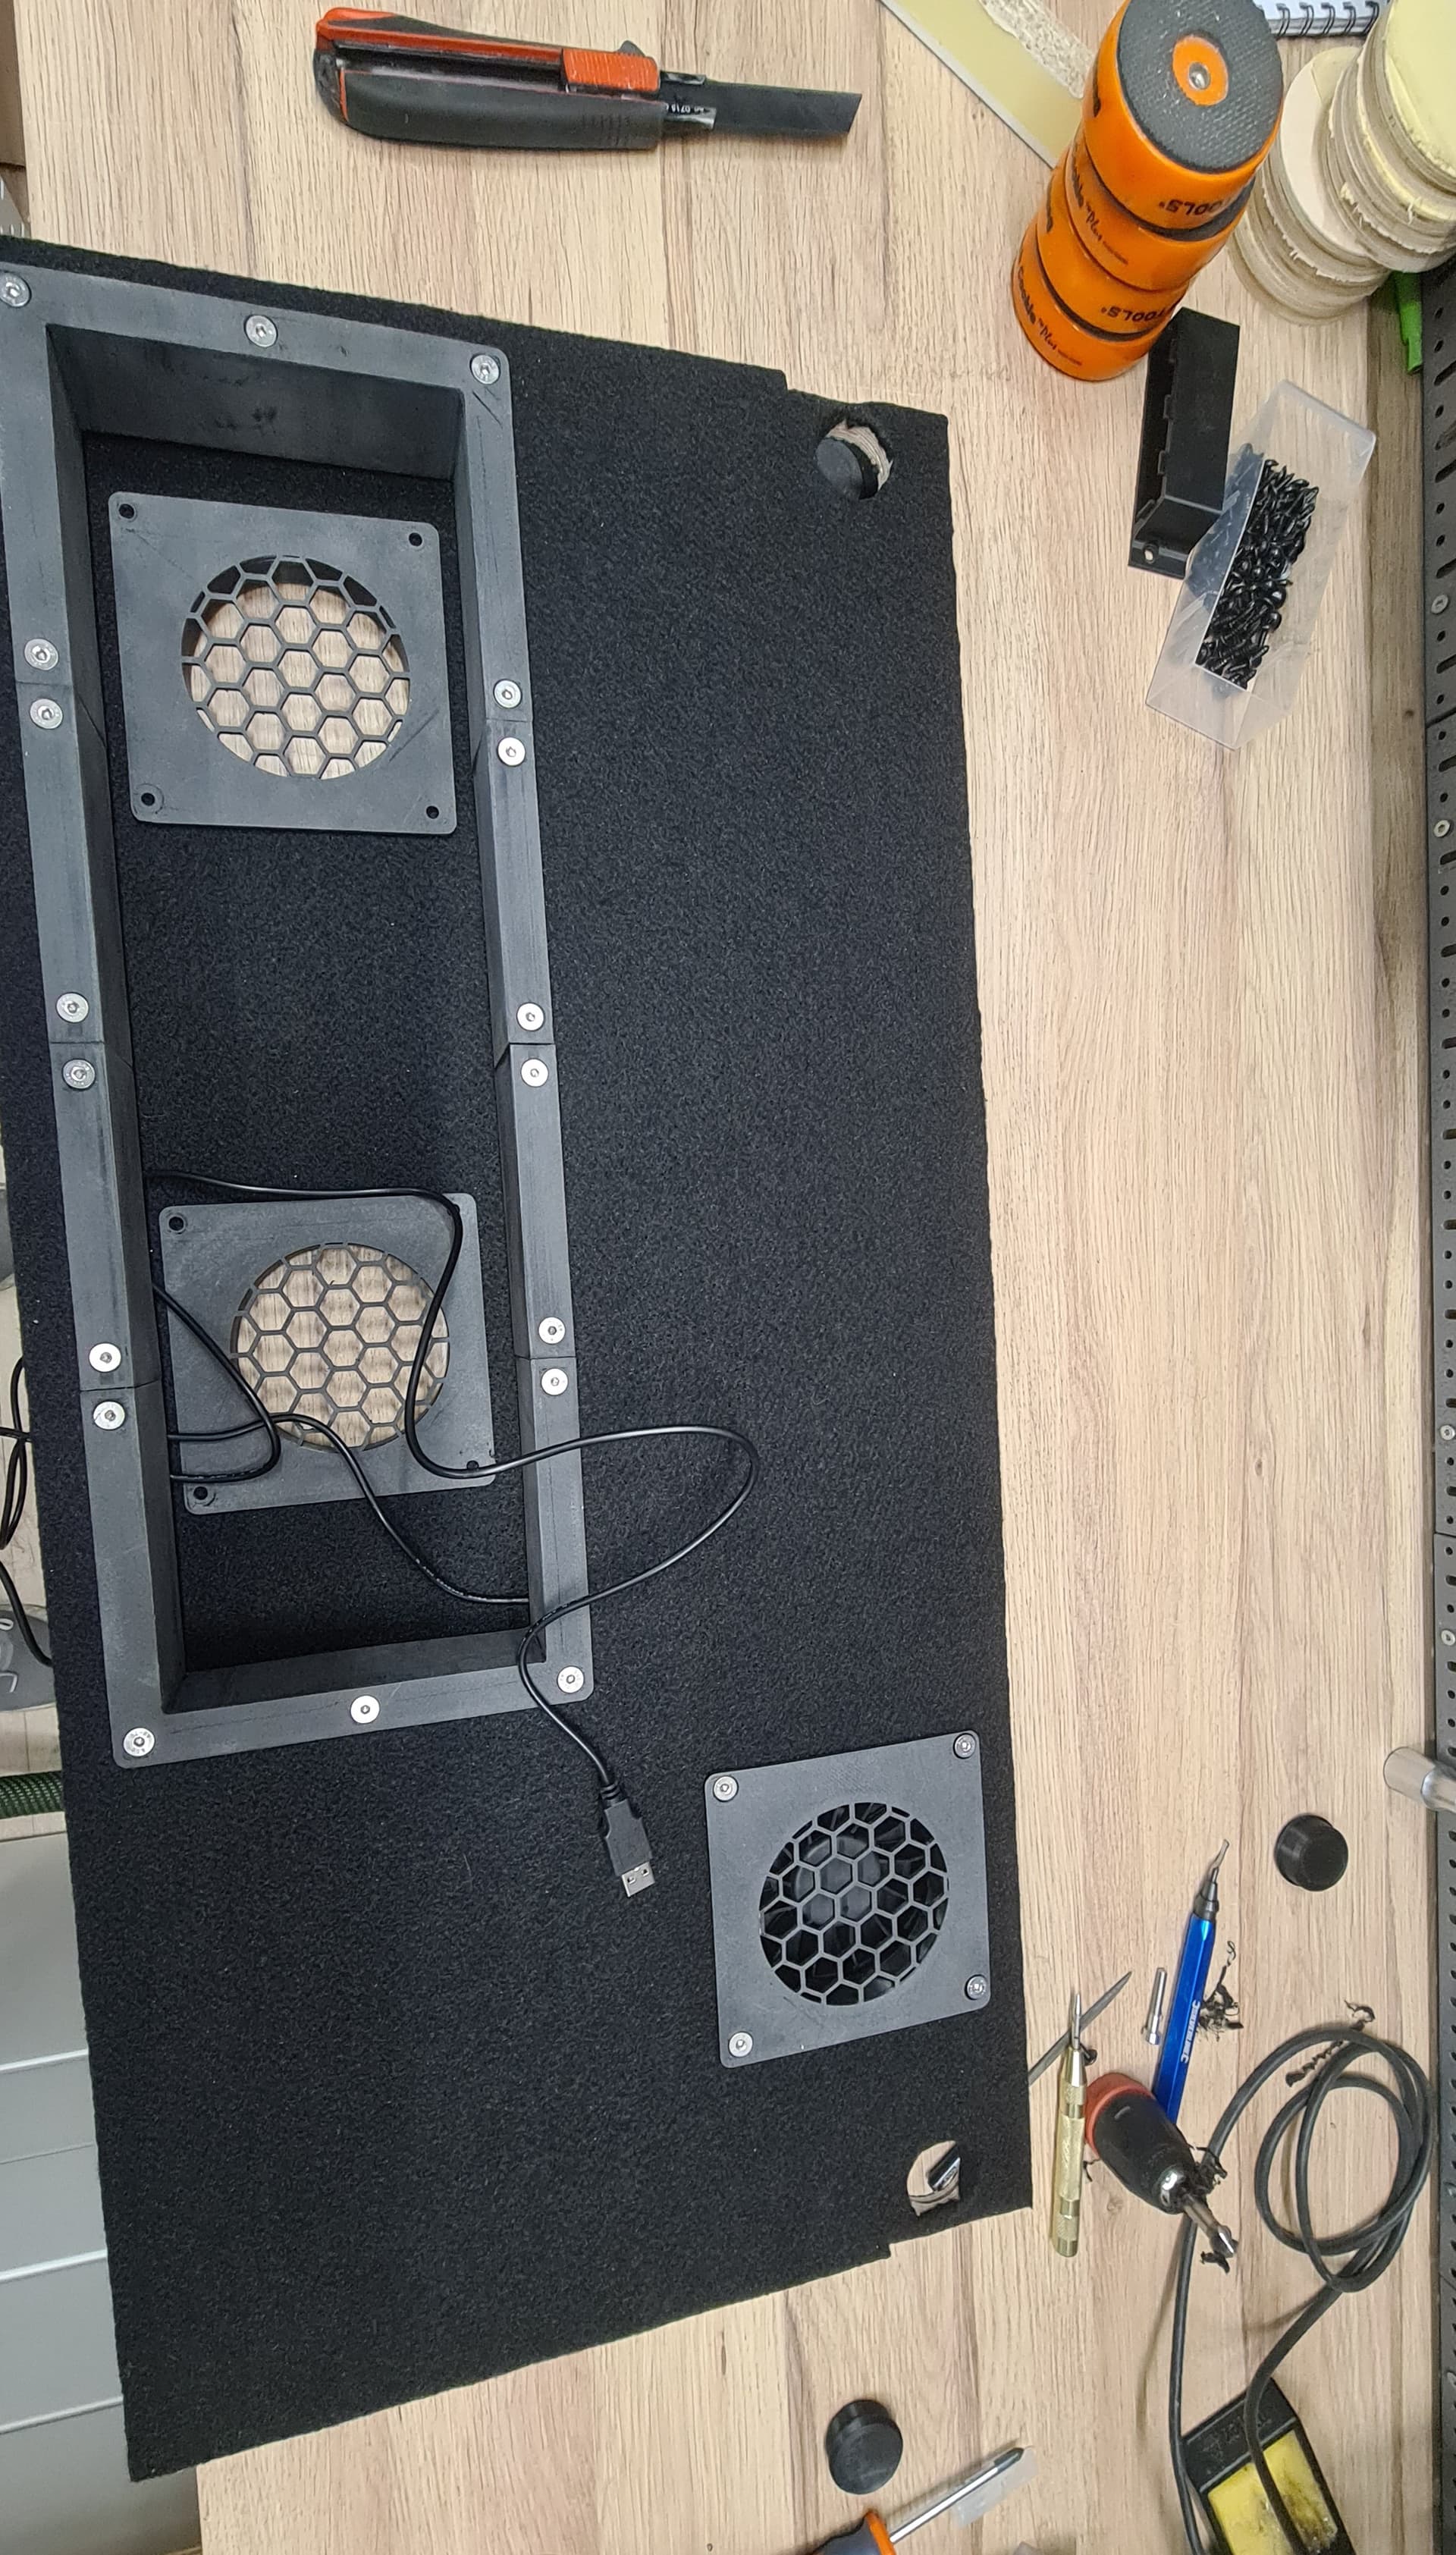
Builded the two 80cm wide cabinets and cut the air inlets with my plunge cut saw as well as cut the new plywood back walls to size and partially assembled them. Then I quickly test fitted the fan grills and duct.
(I made some 3d printed drill guides and spacer so building and fit worked like a charm and to my personal suprise I had no tear out…)
Things ahead:
Mount the pegboard magnet holders
Cut and mount the pegboard
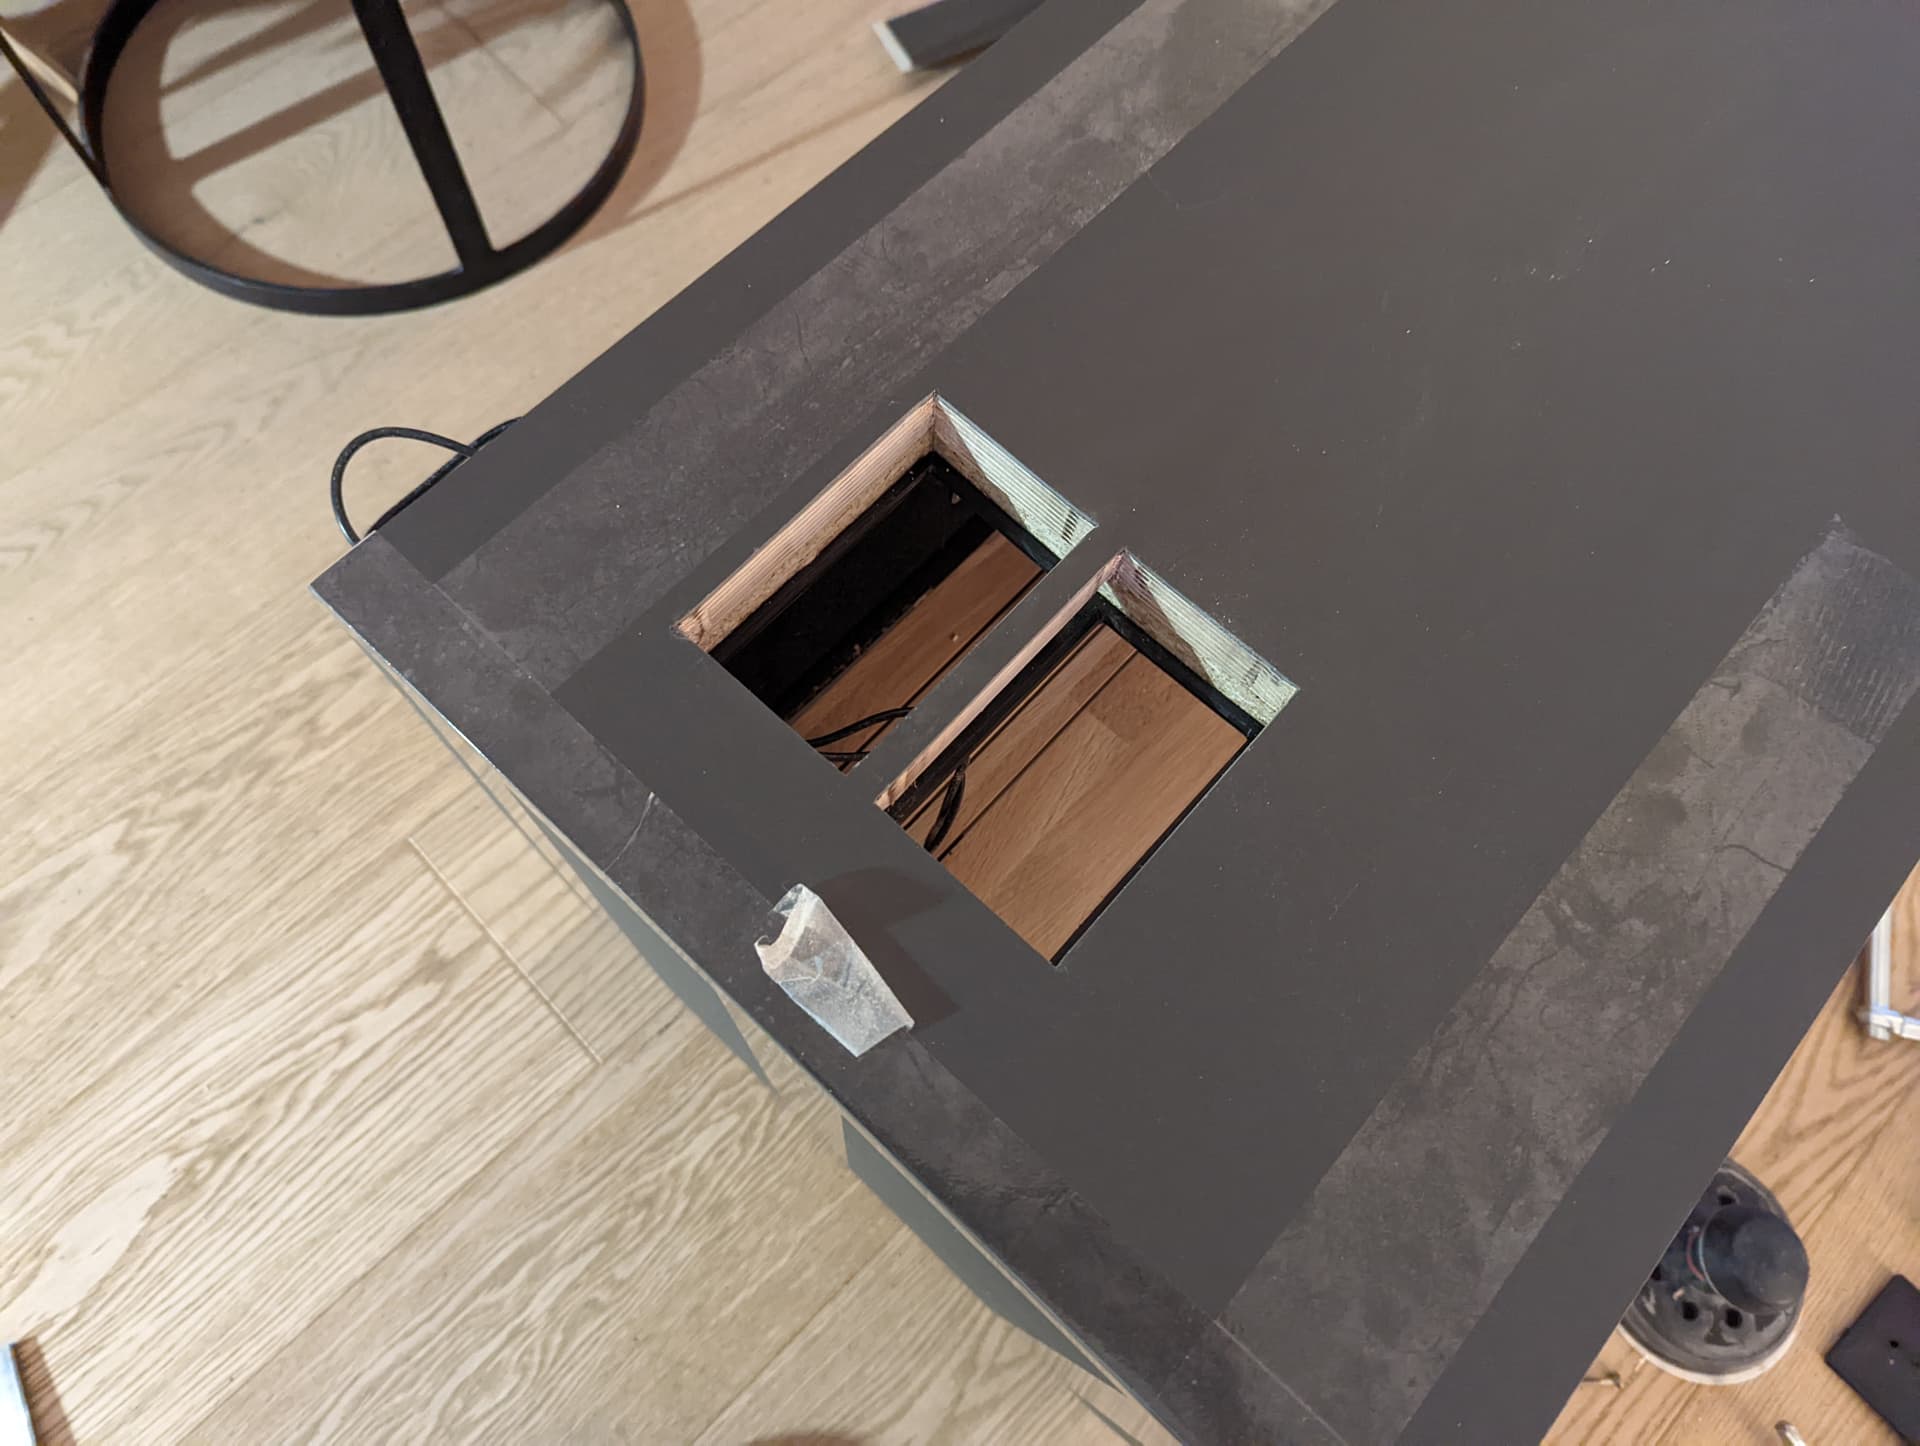
Find a perfect spot for the cable pass through of the fans
Pre mount the AC infinity display
Dampening the back side of the plywood and then assemble fans and ducts
Pre wiring and wire management with cable channels
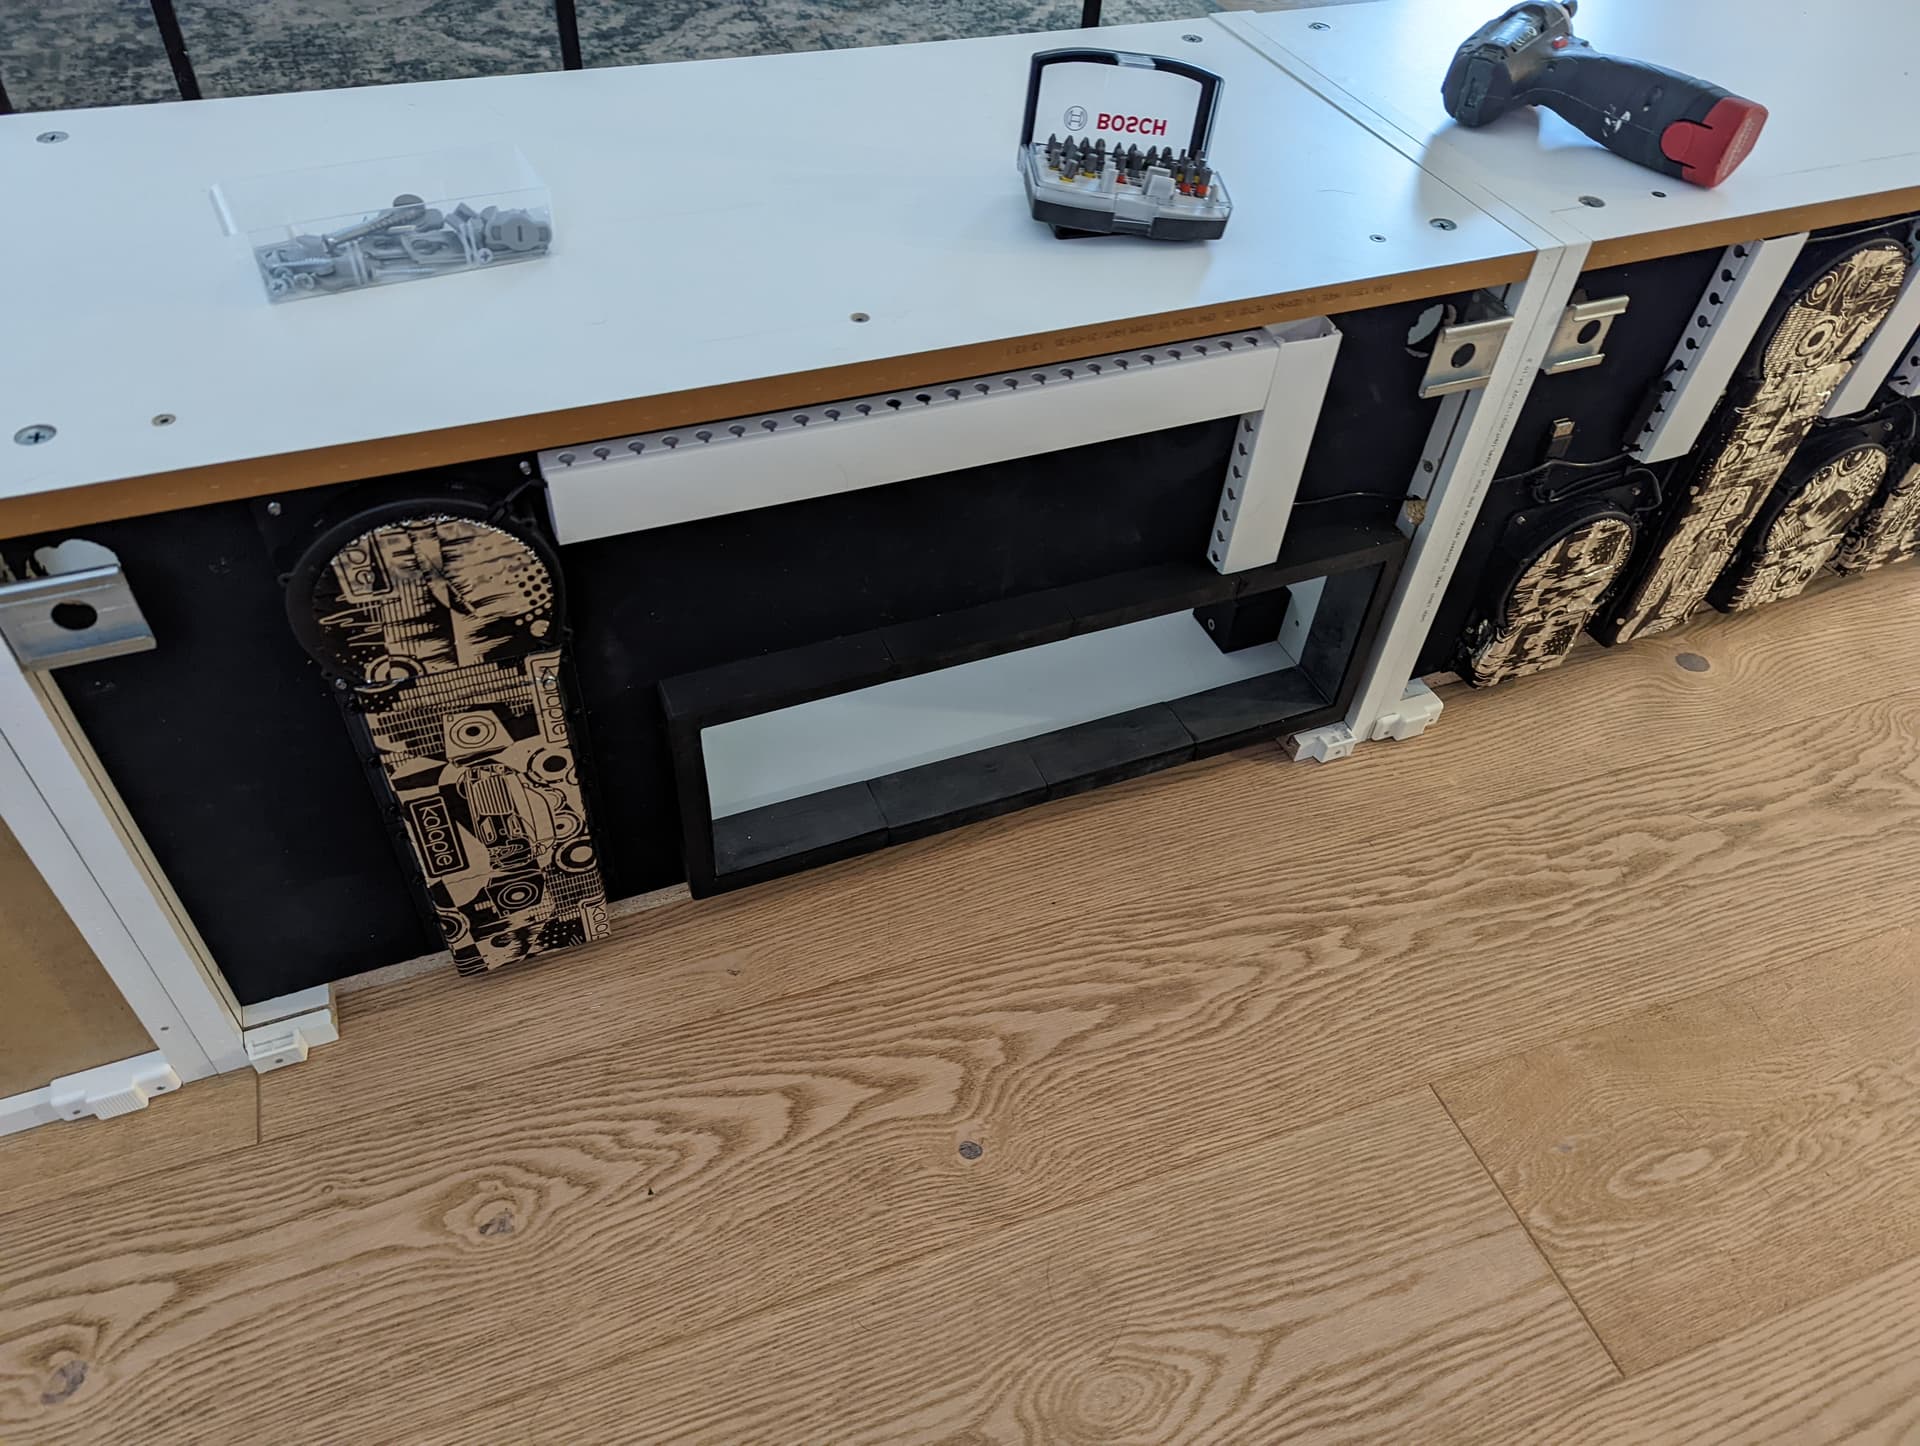
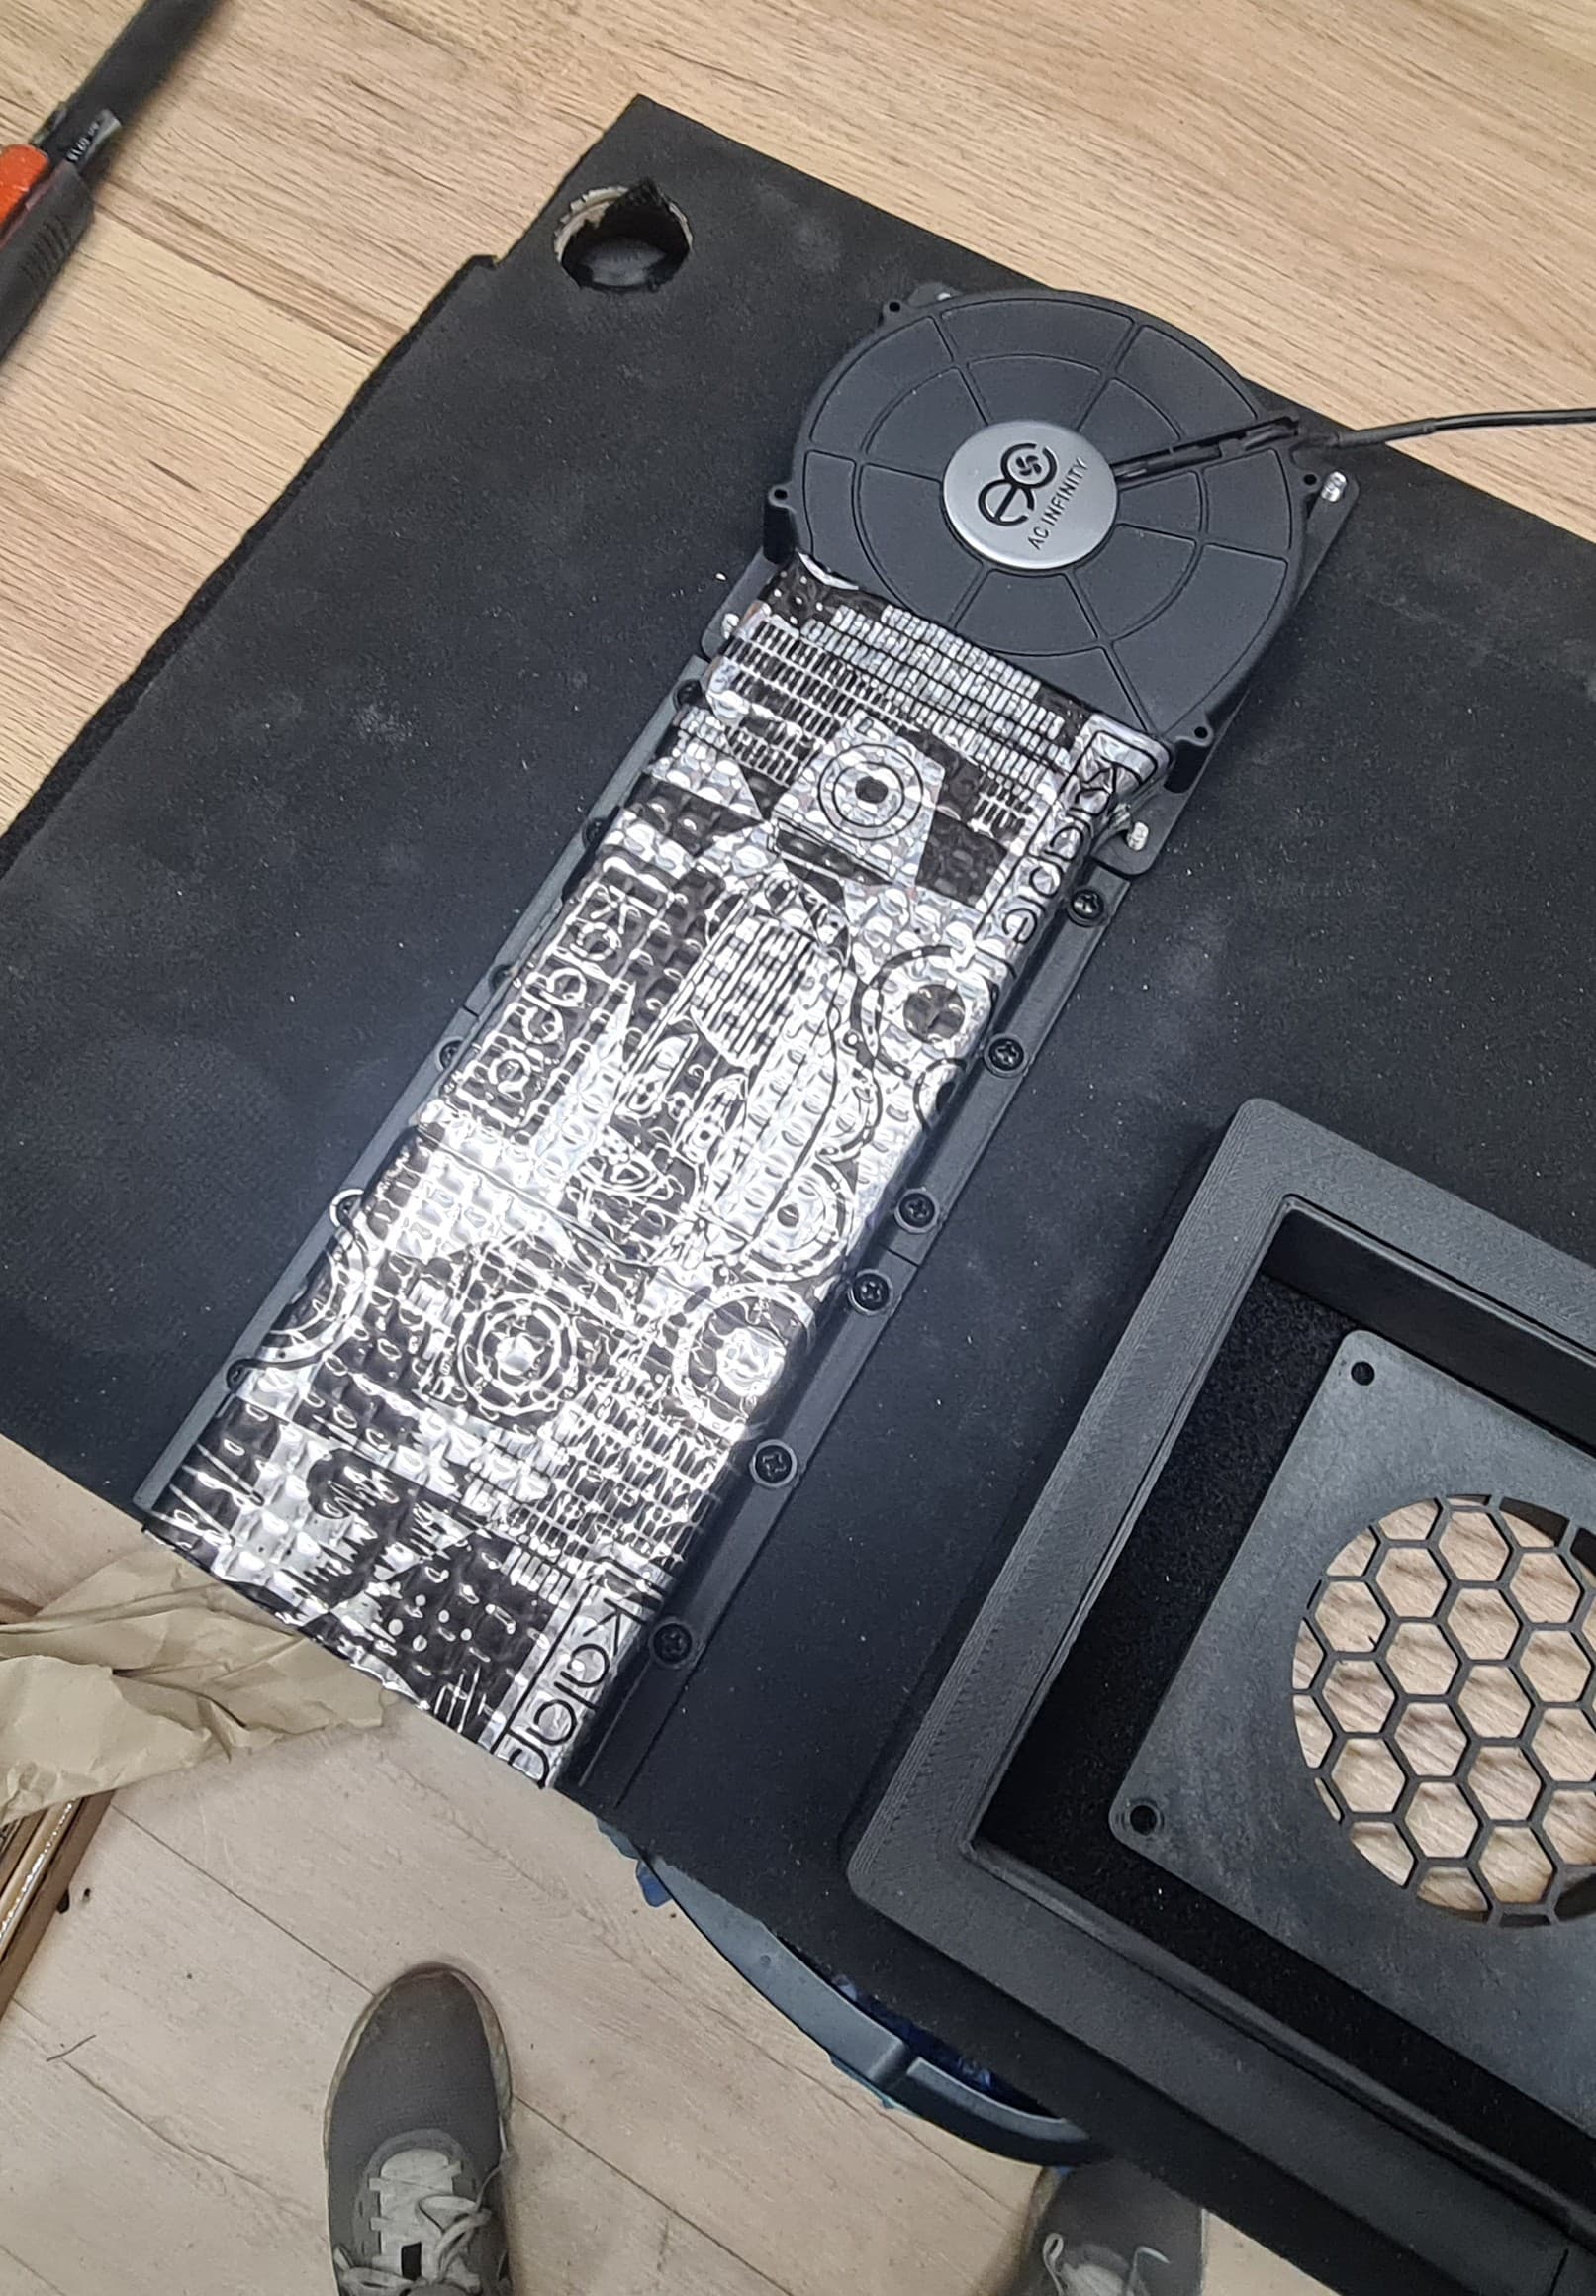
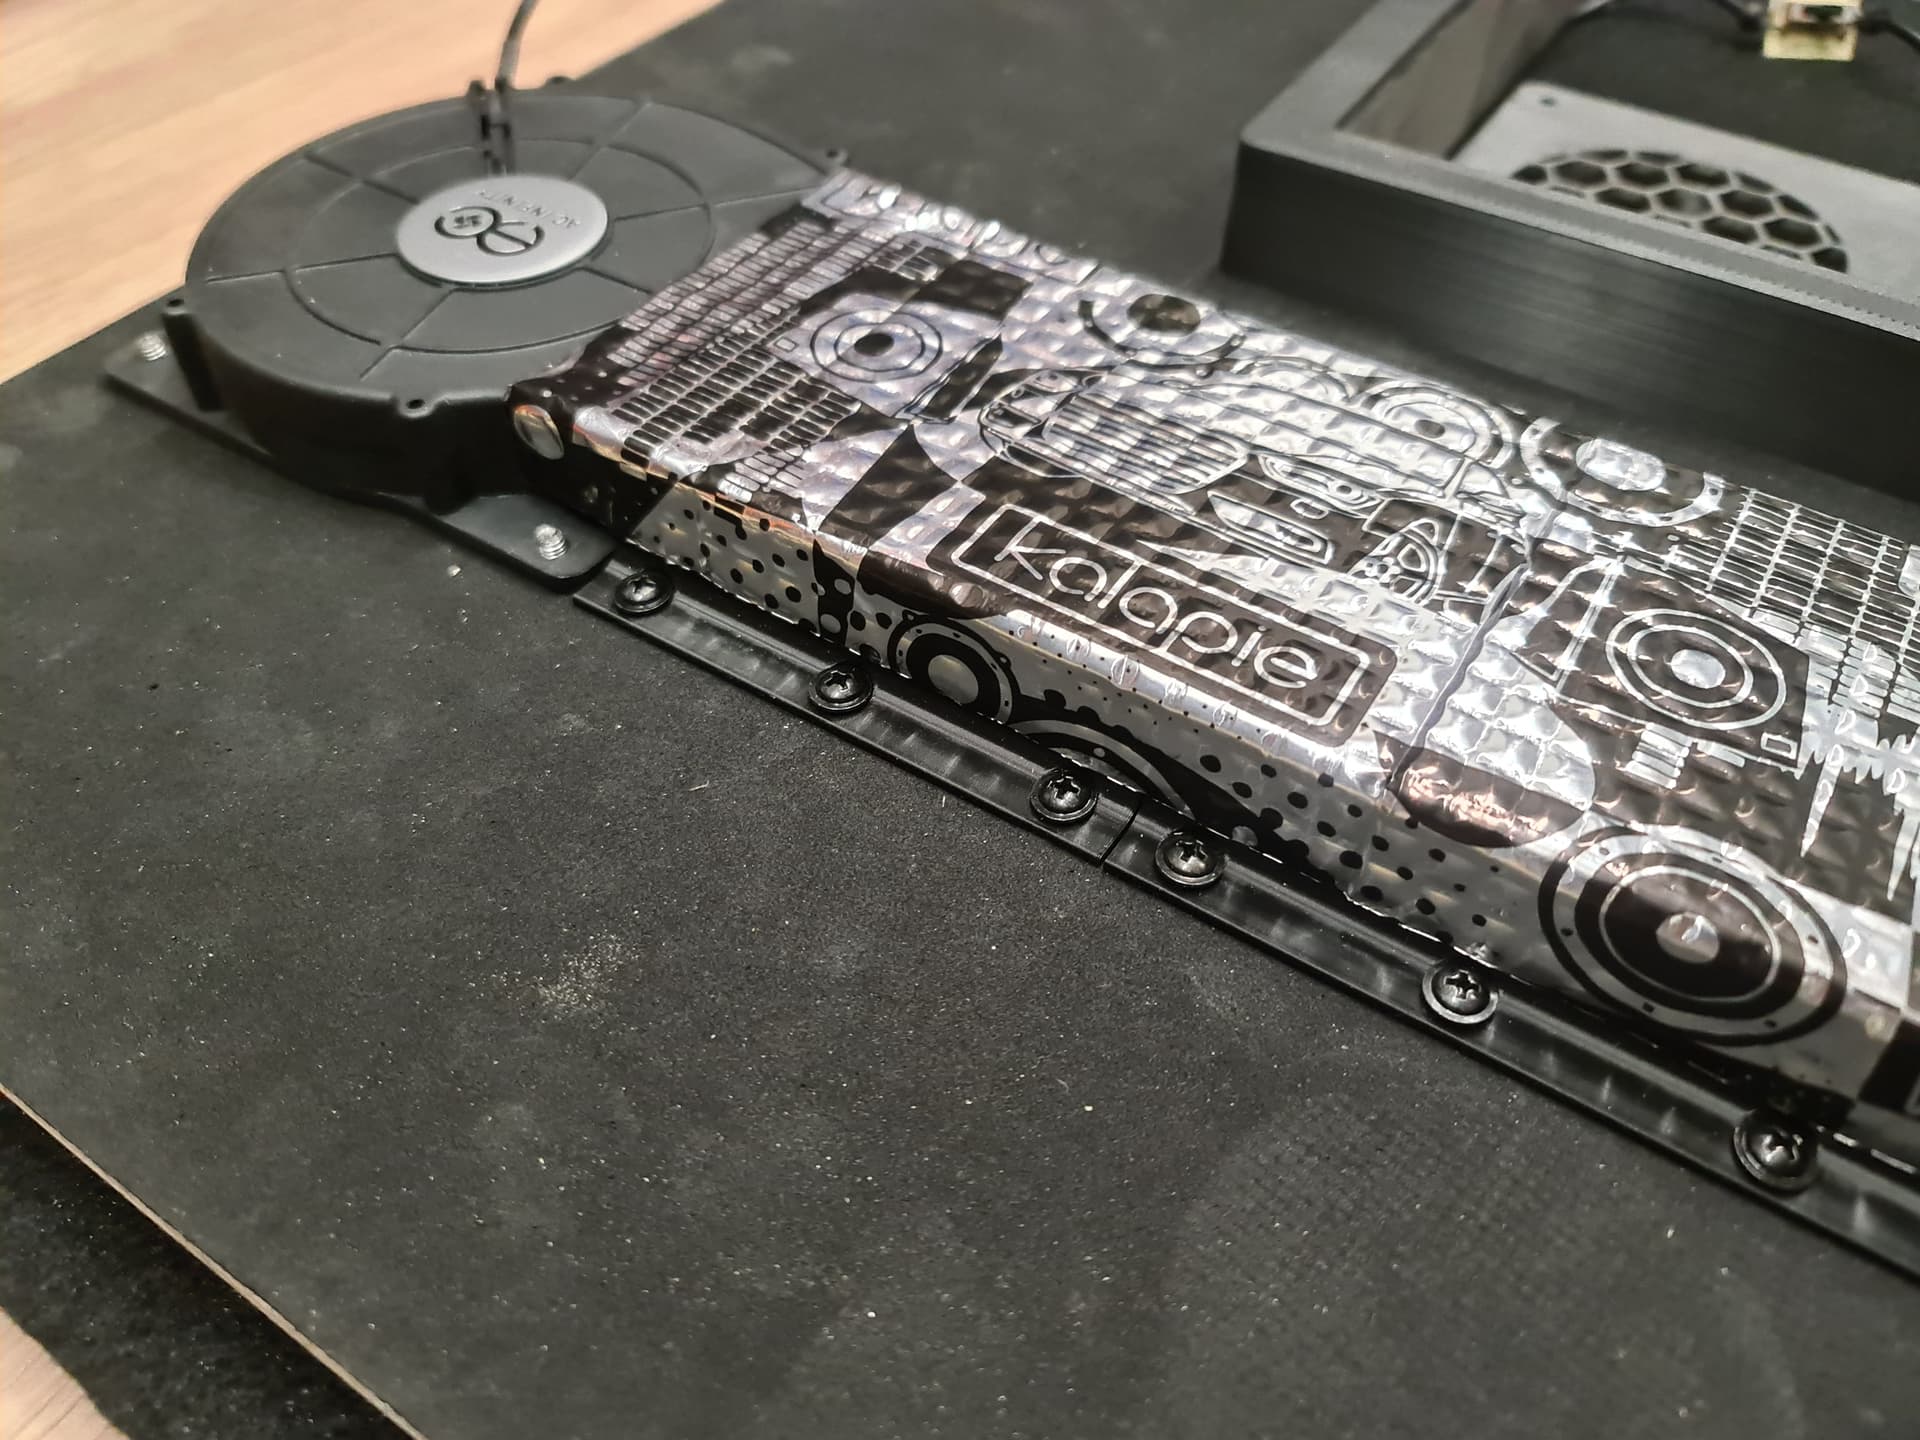
So after cutting out the back panels for the fans I put some 2mm foam as vibration isolator on the back and some 3mm foam on the front cut everything to size and mounted it. First panel (behind the smart home stuff is done and assembled. Second panel waiting for the fans to install and the ducts. I covered the ducts and later on the fan itself in some Alubutyl sound deadening to further minimize any vibration build up traveling through a large plastic “amplifier”
Next steps. Assemble panel 2 then assemble the whole thing and as a last step making the wooden outer she’ll. And of course wires…
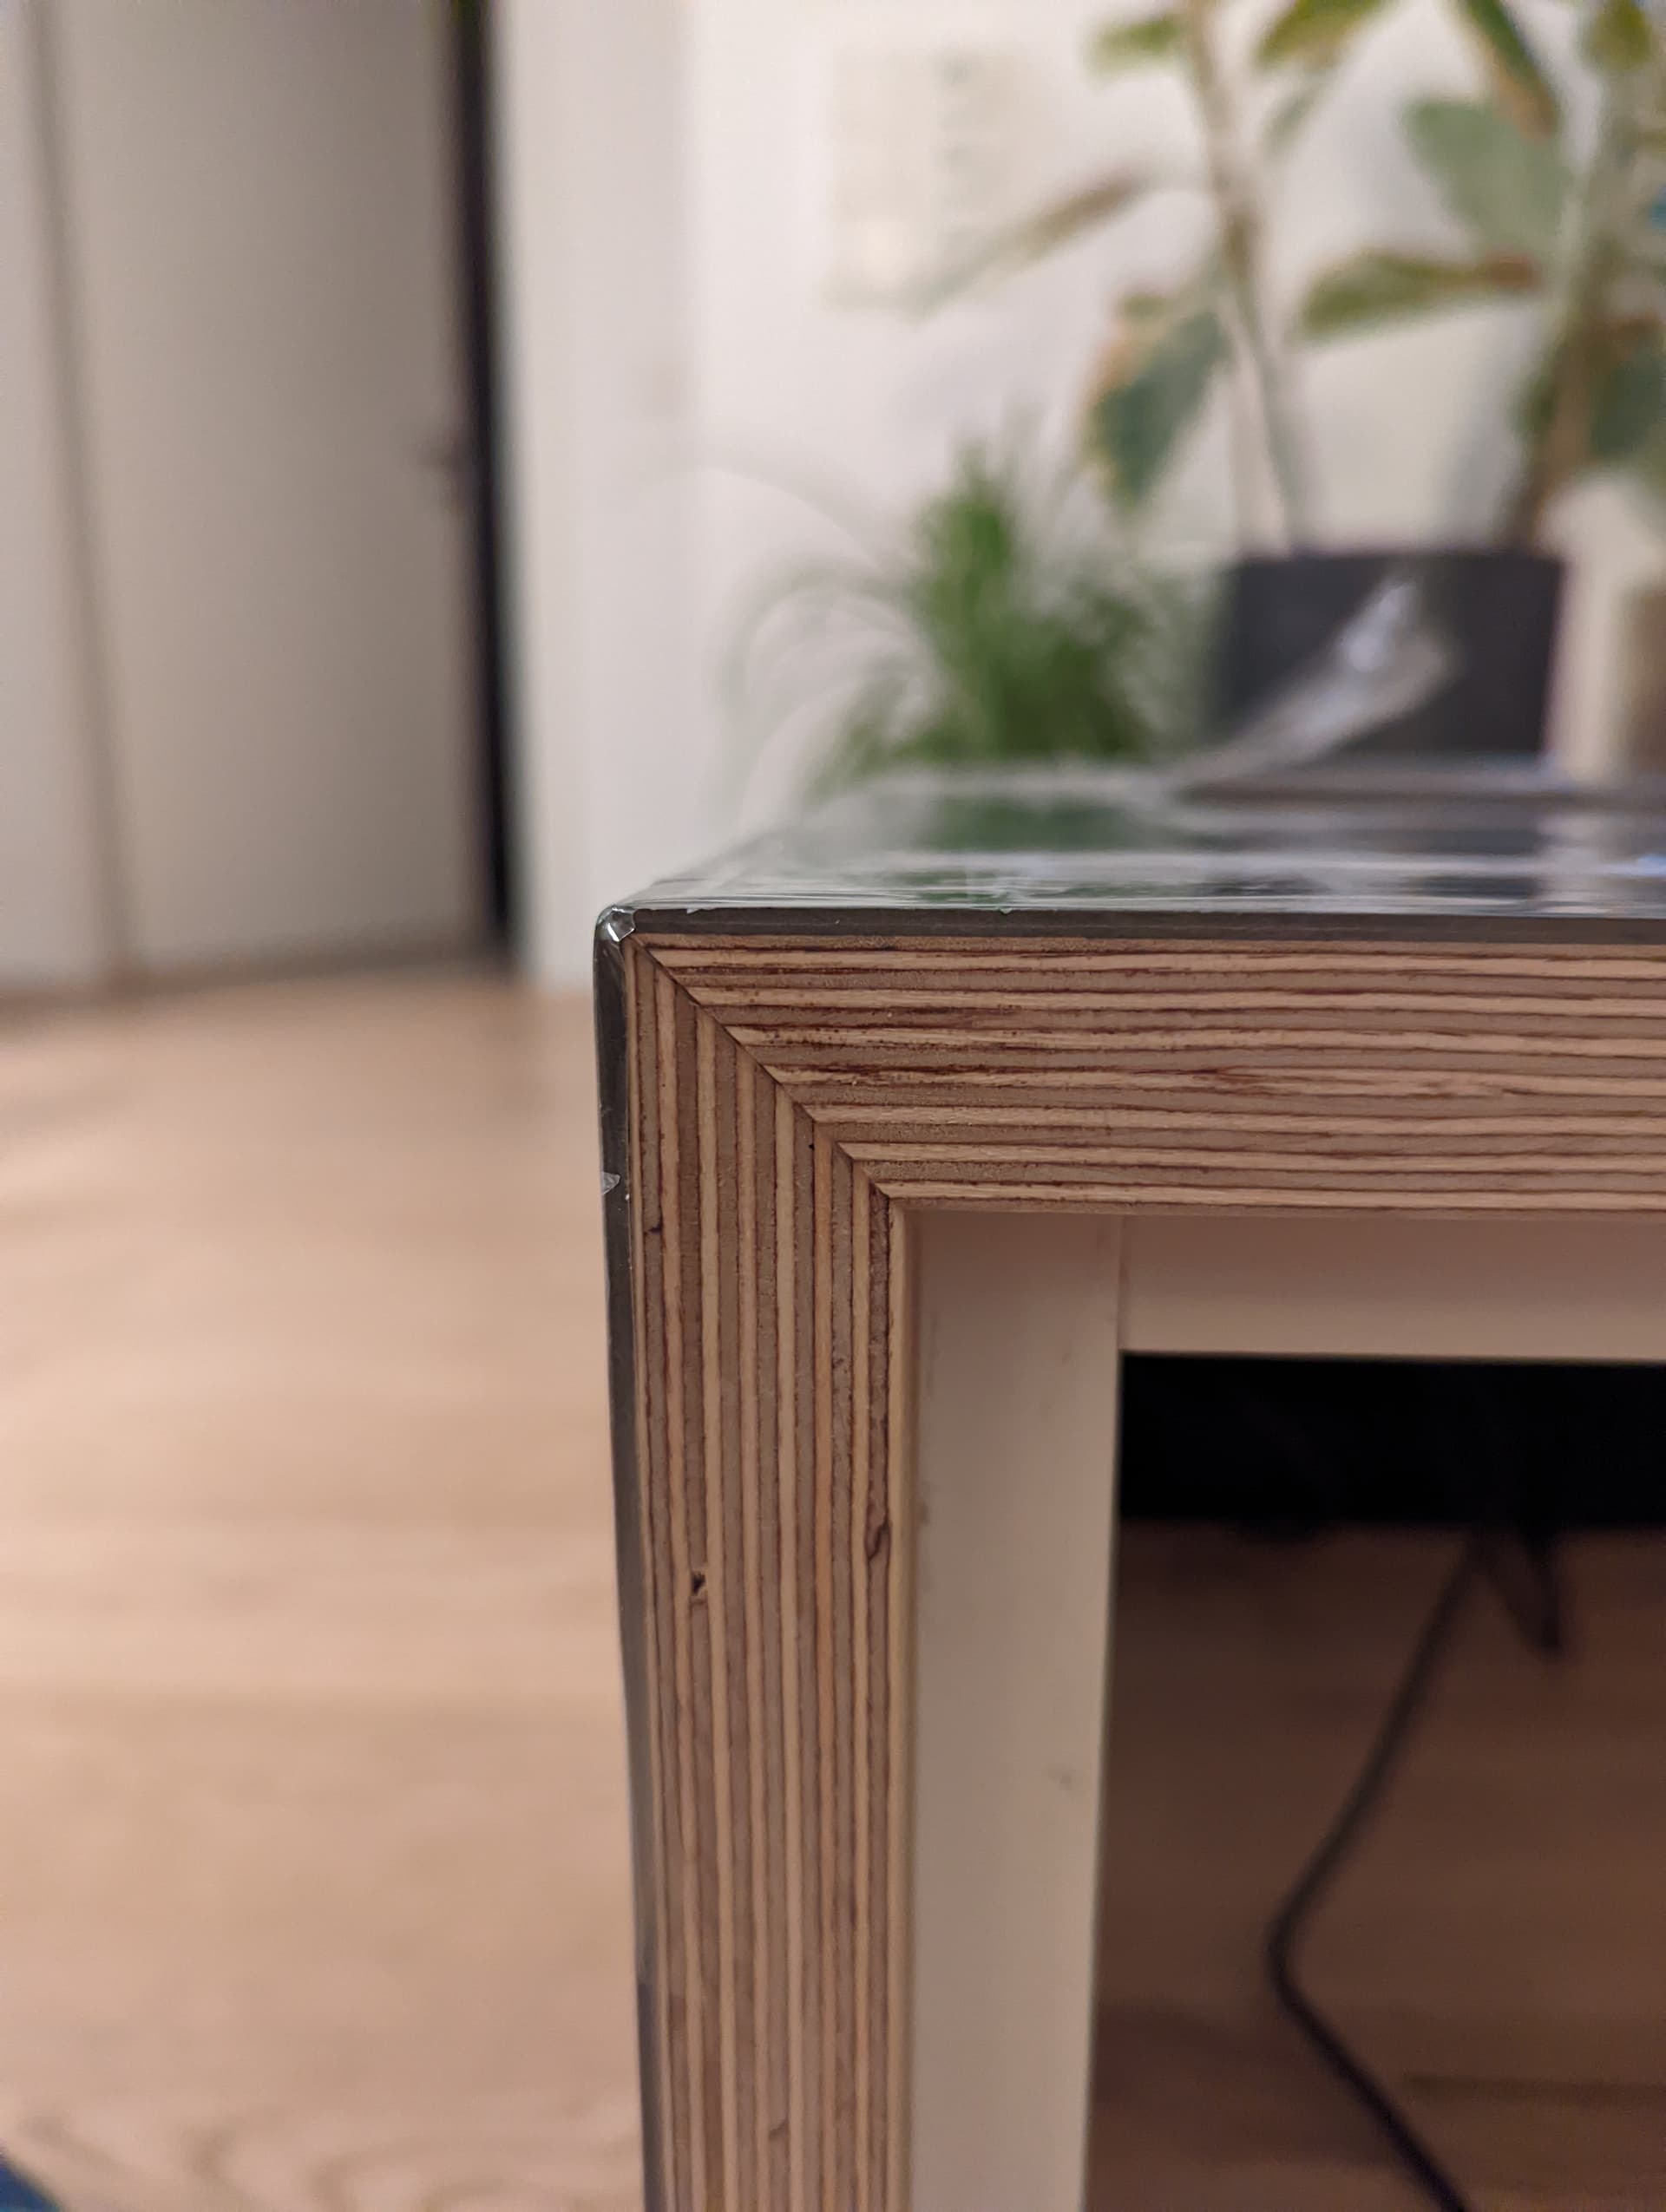
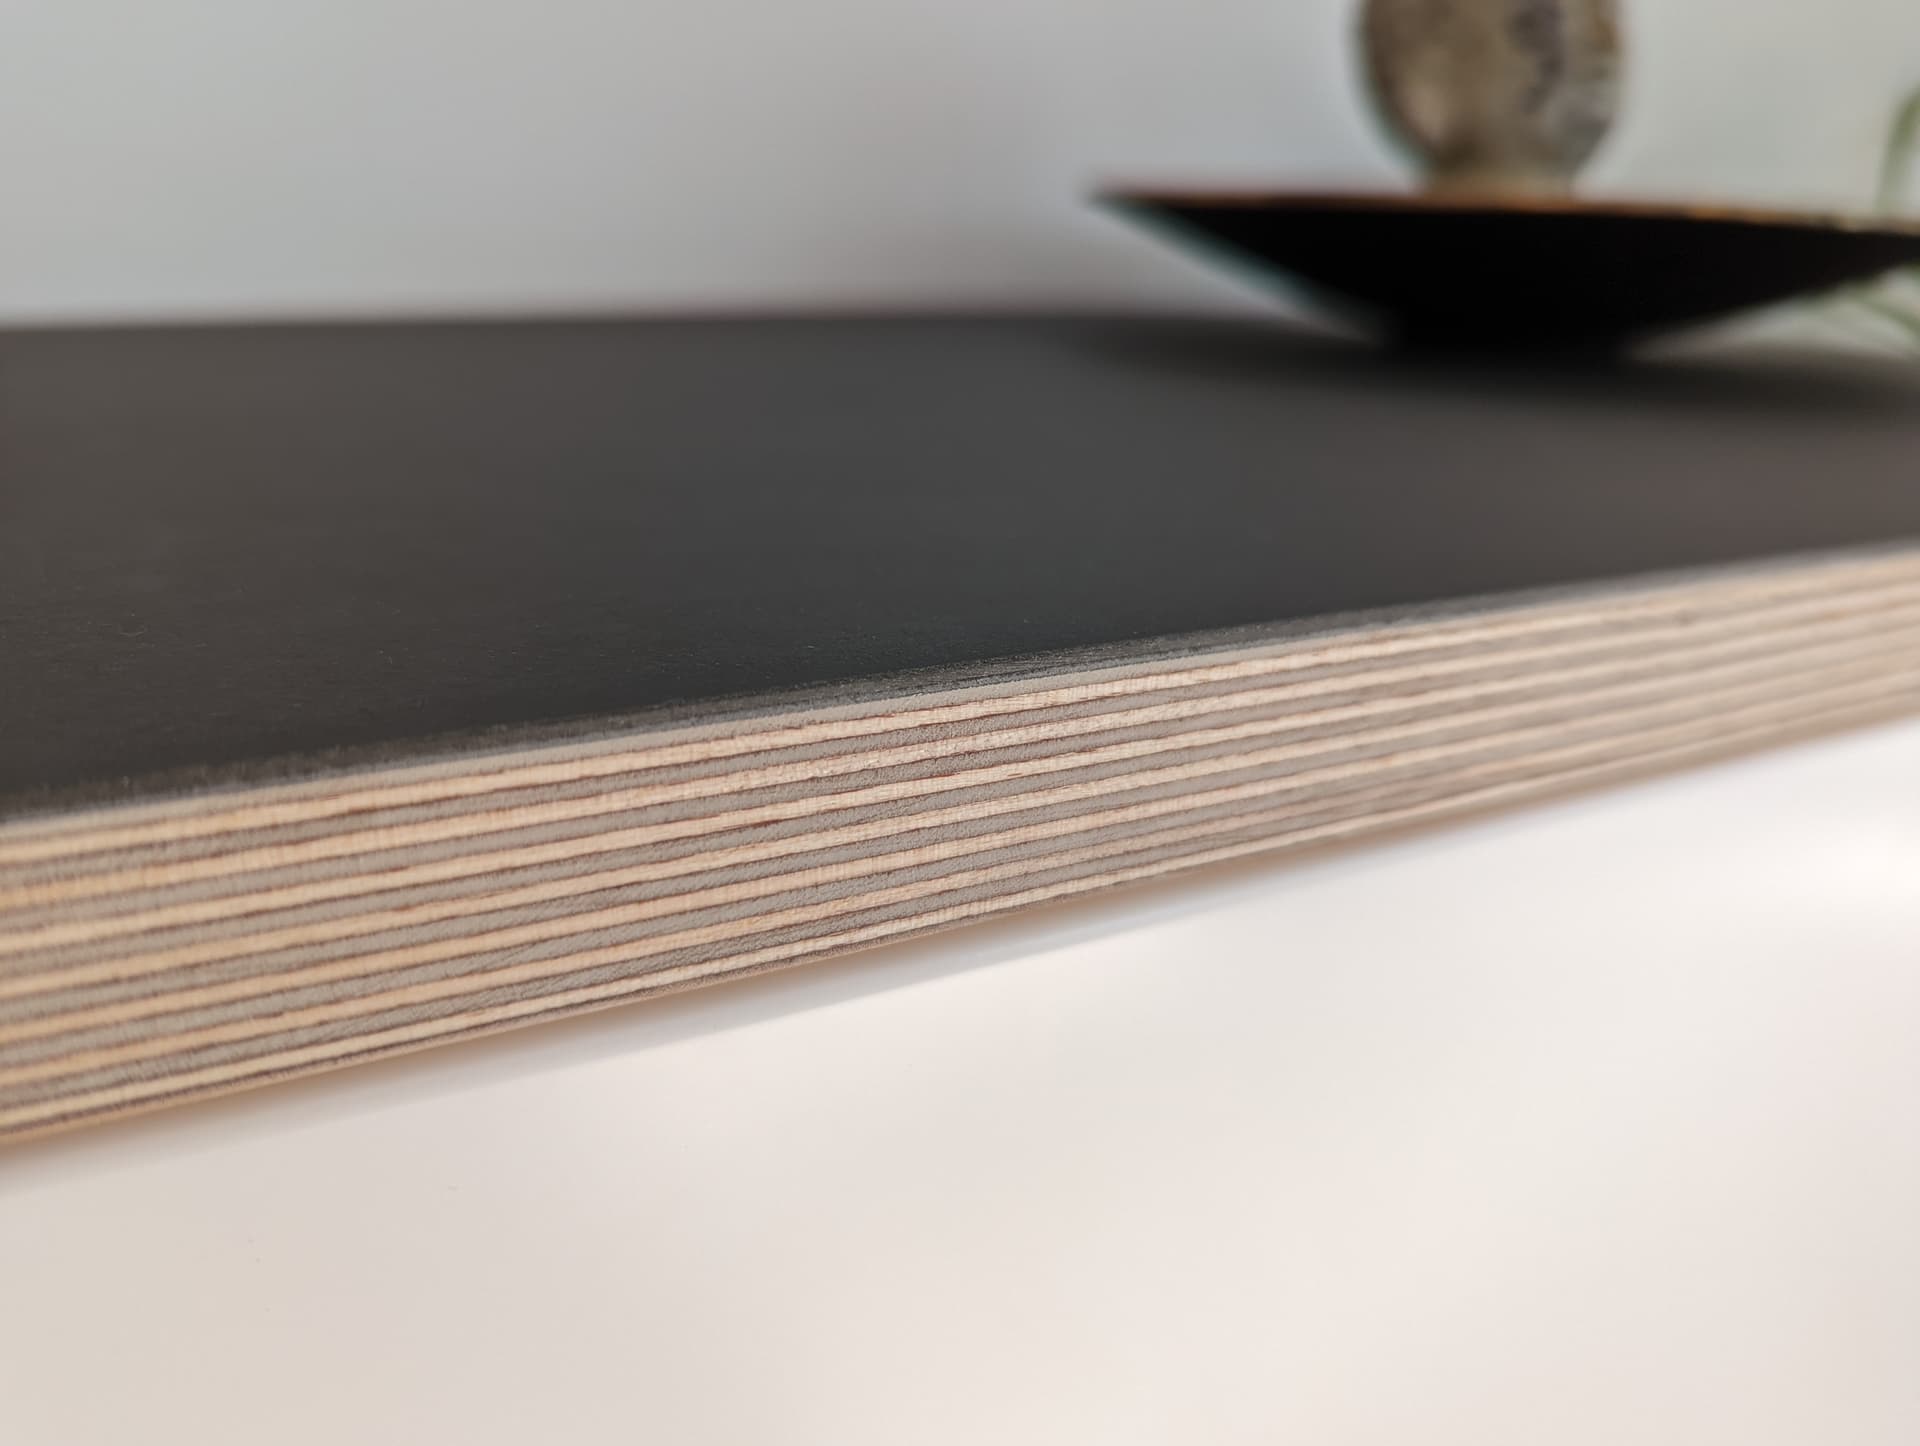
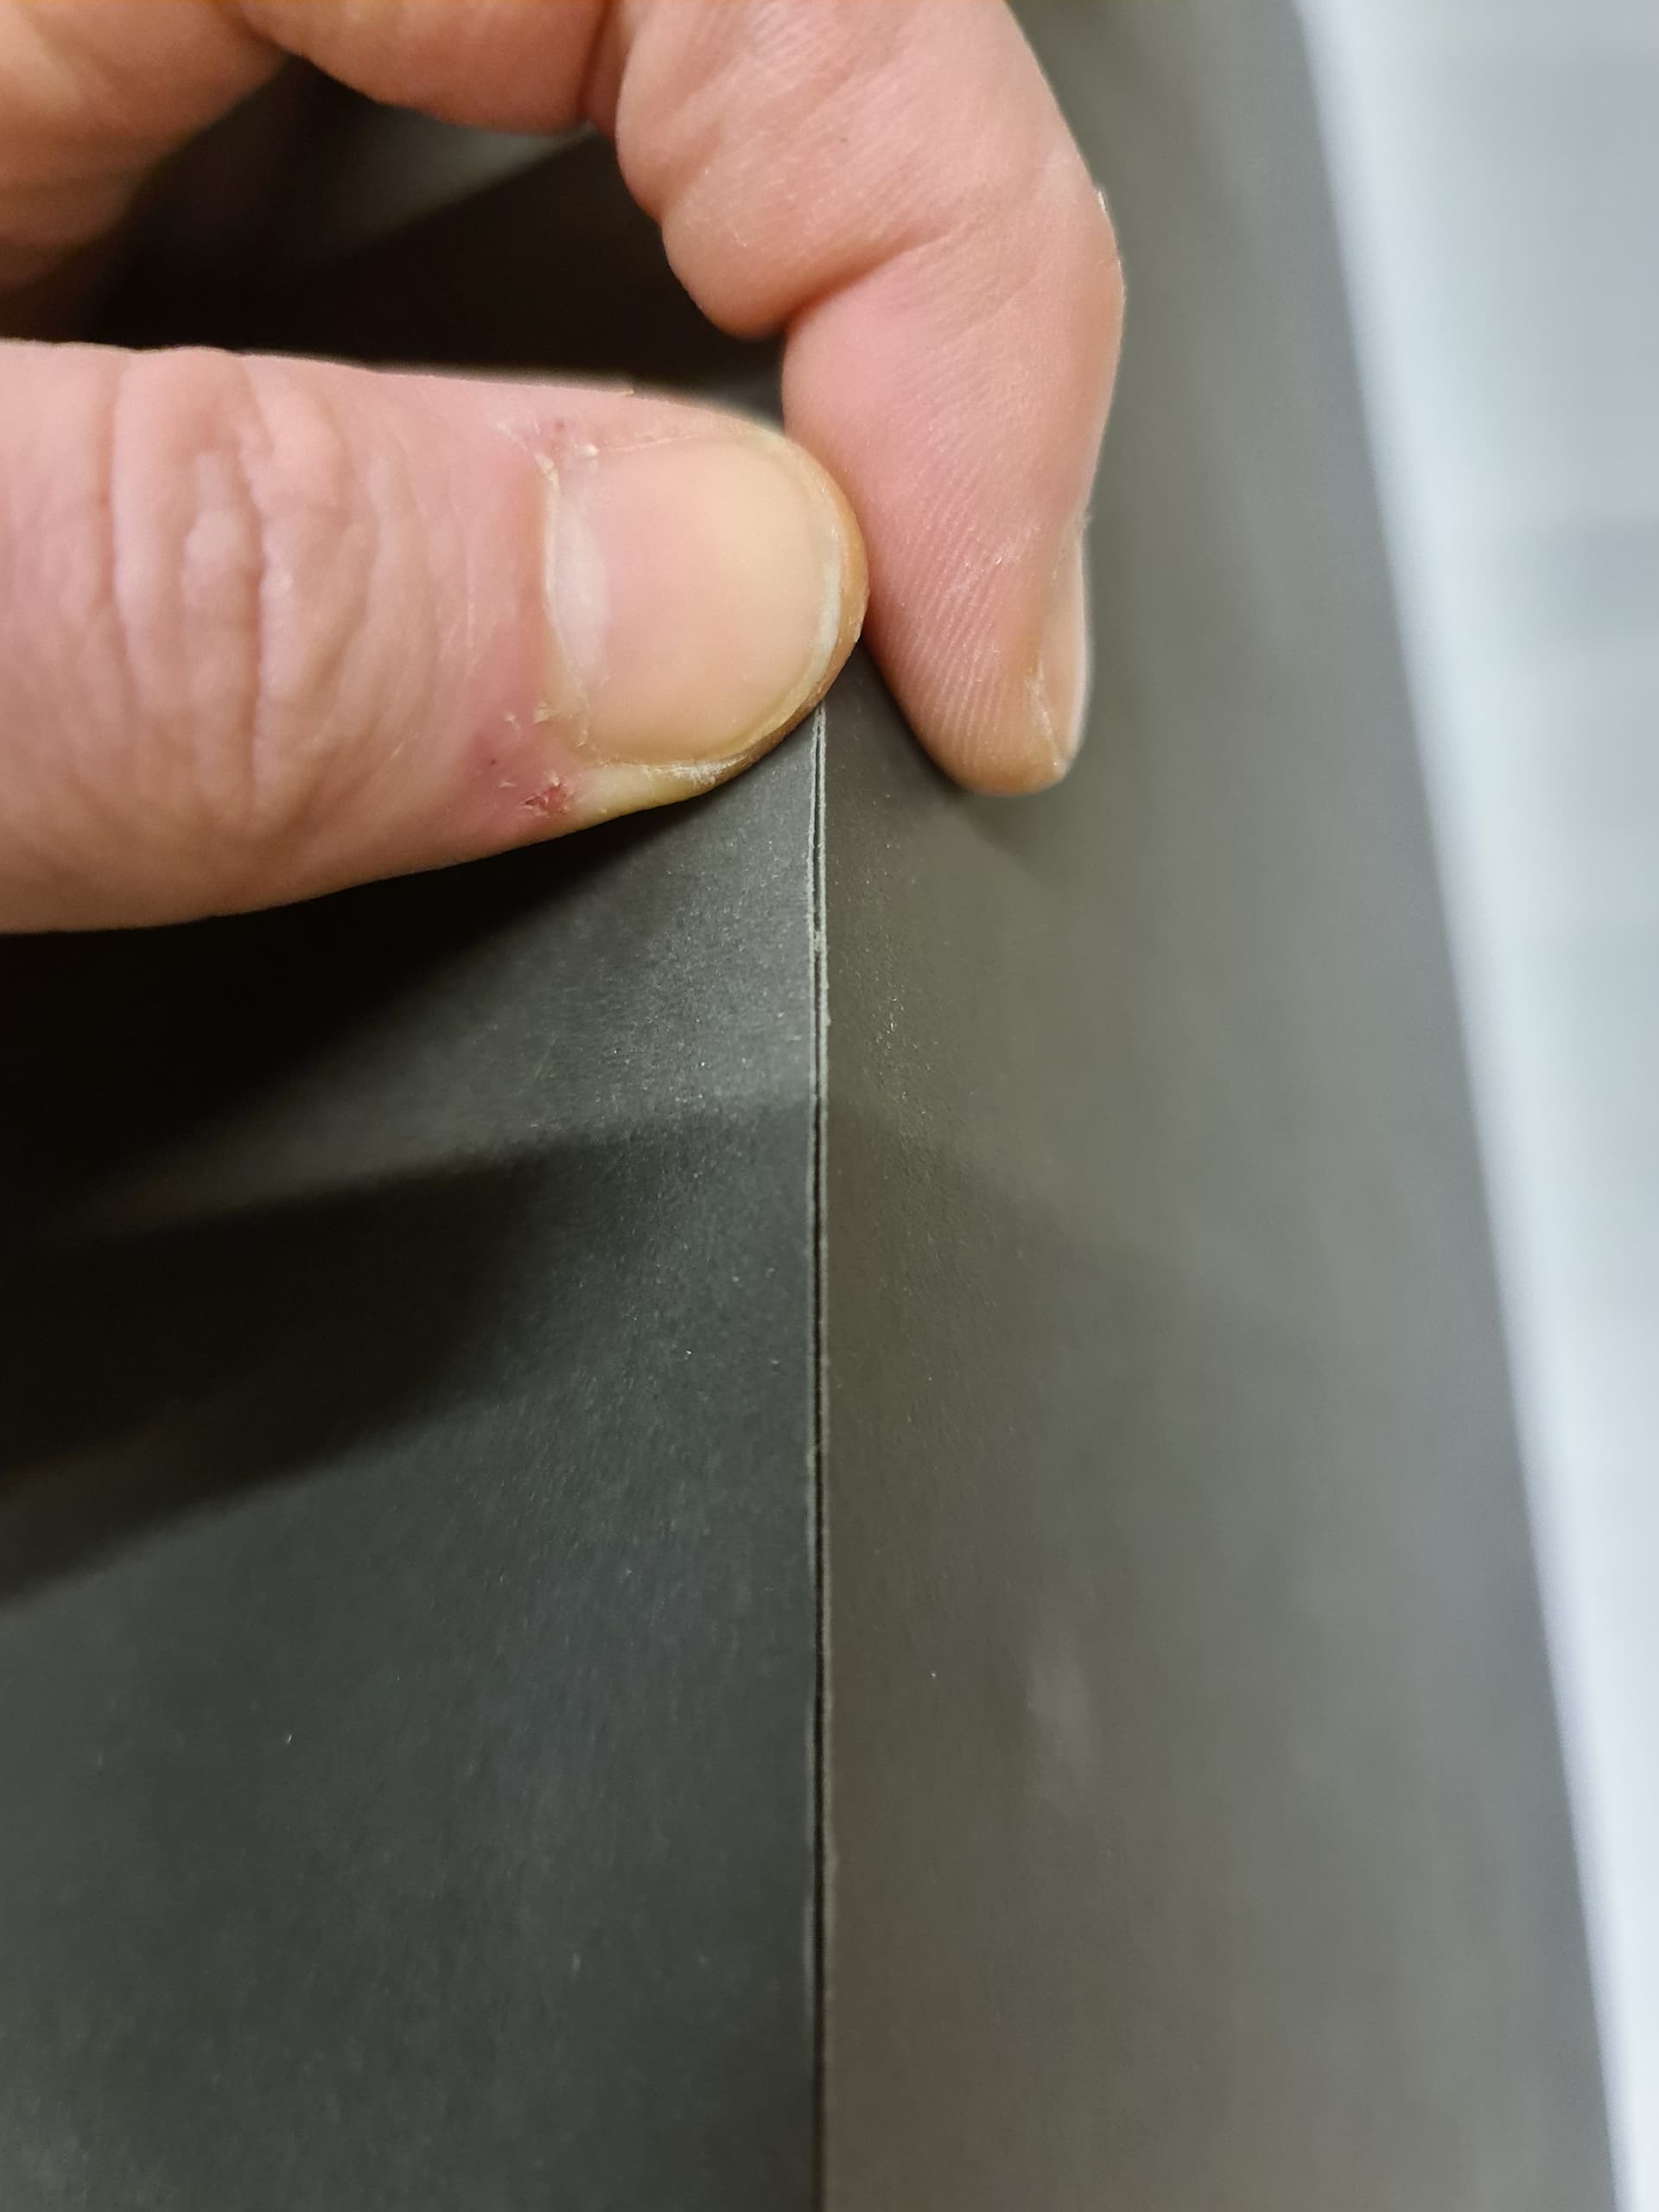
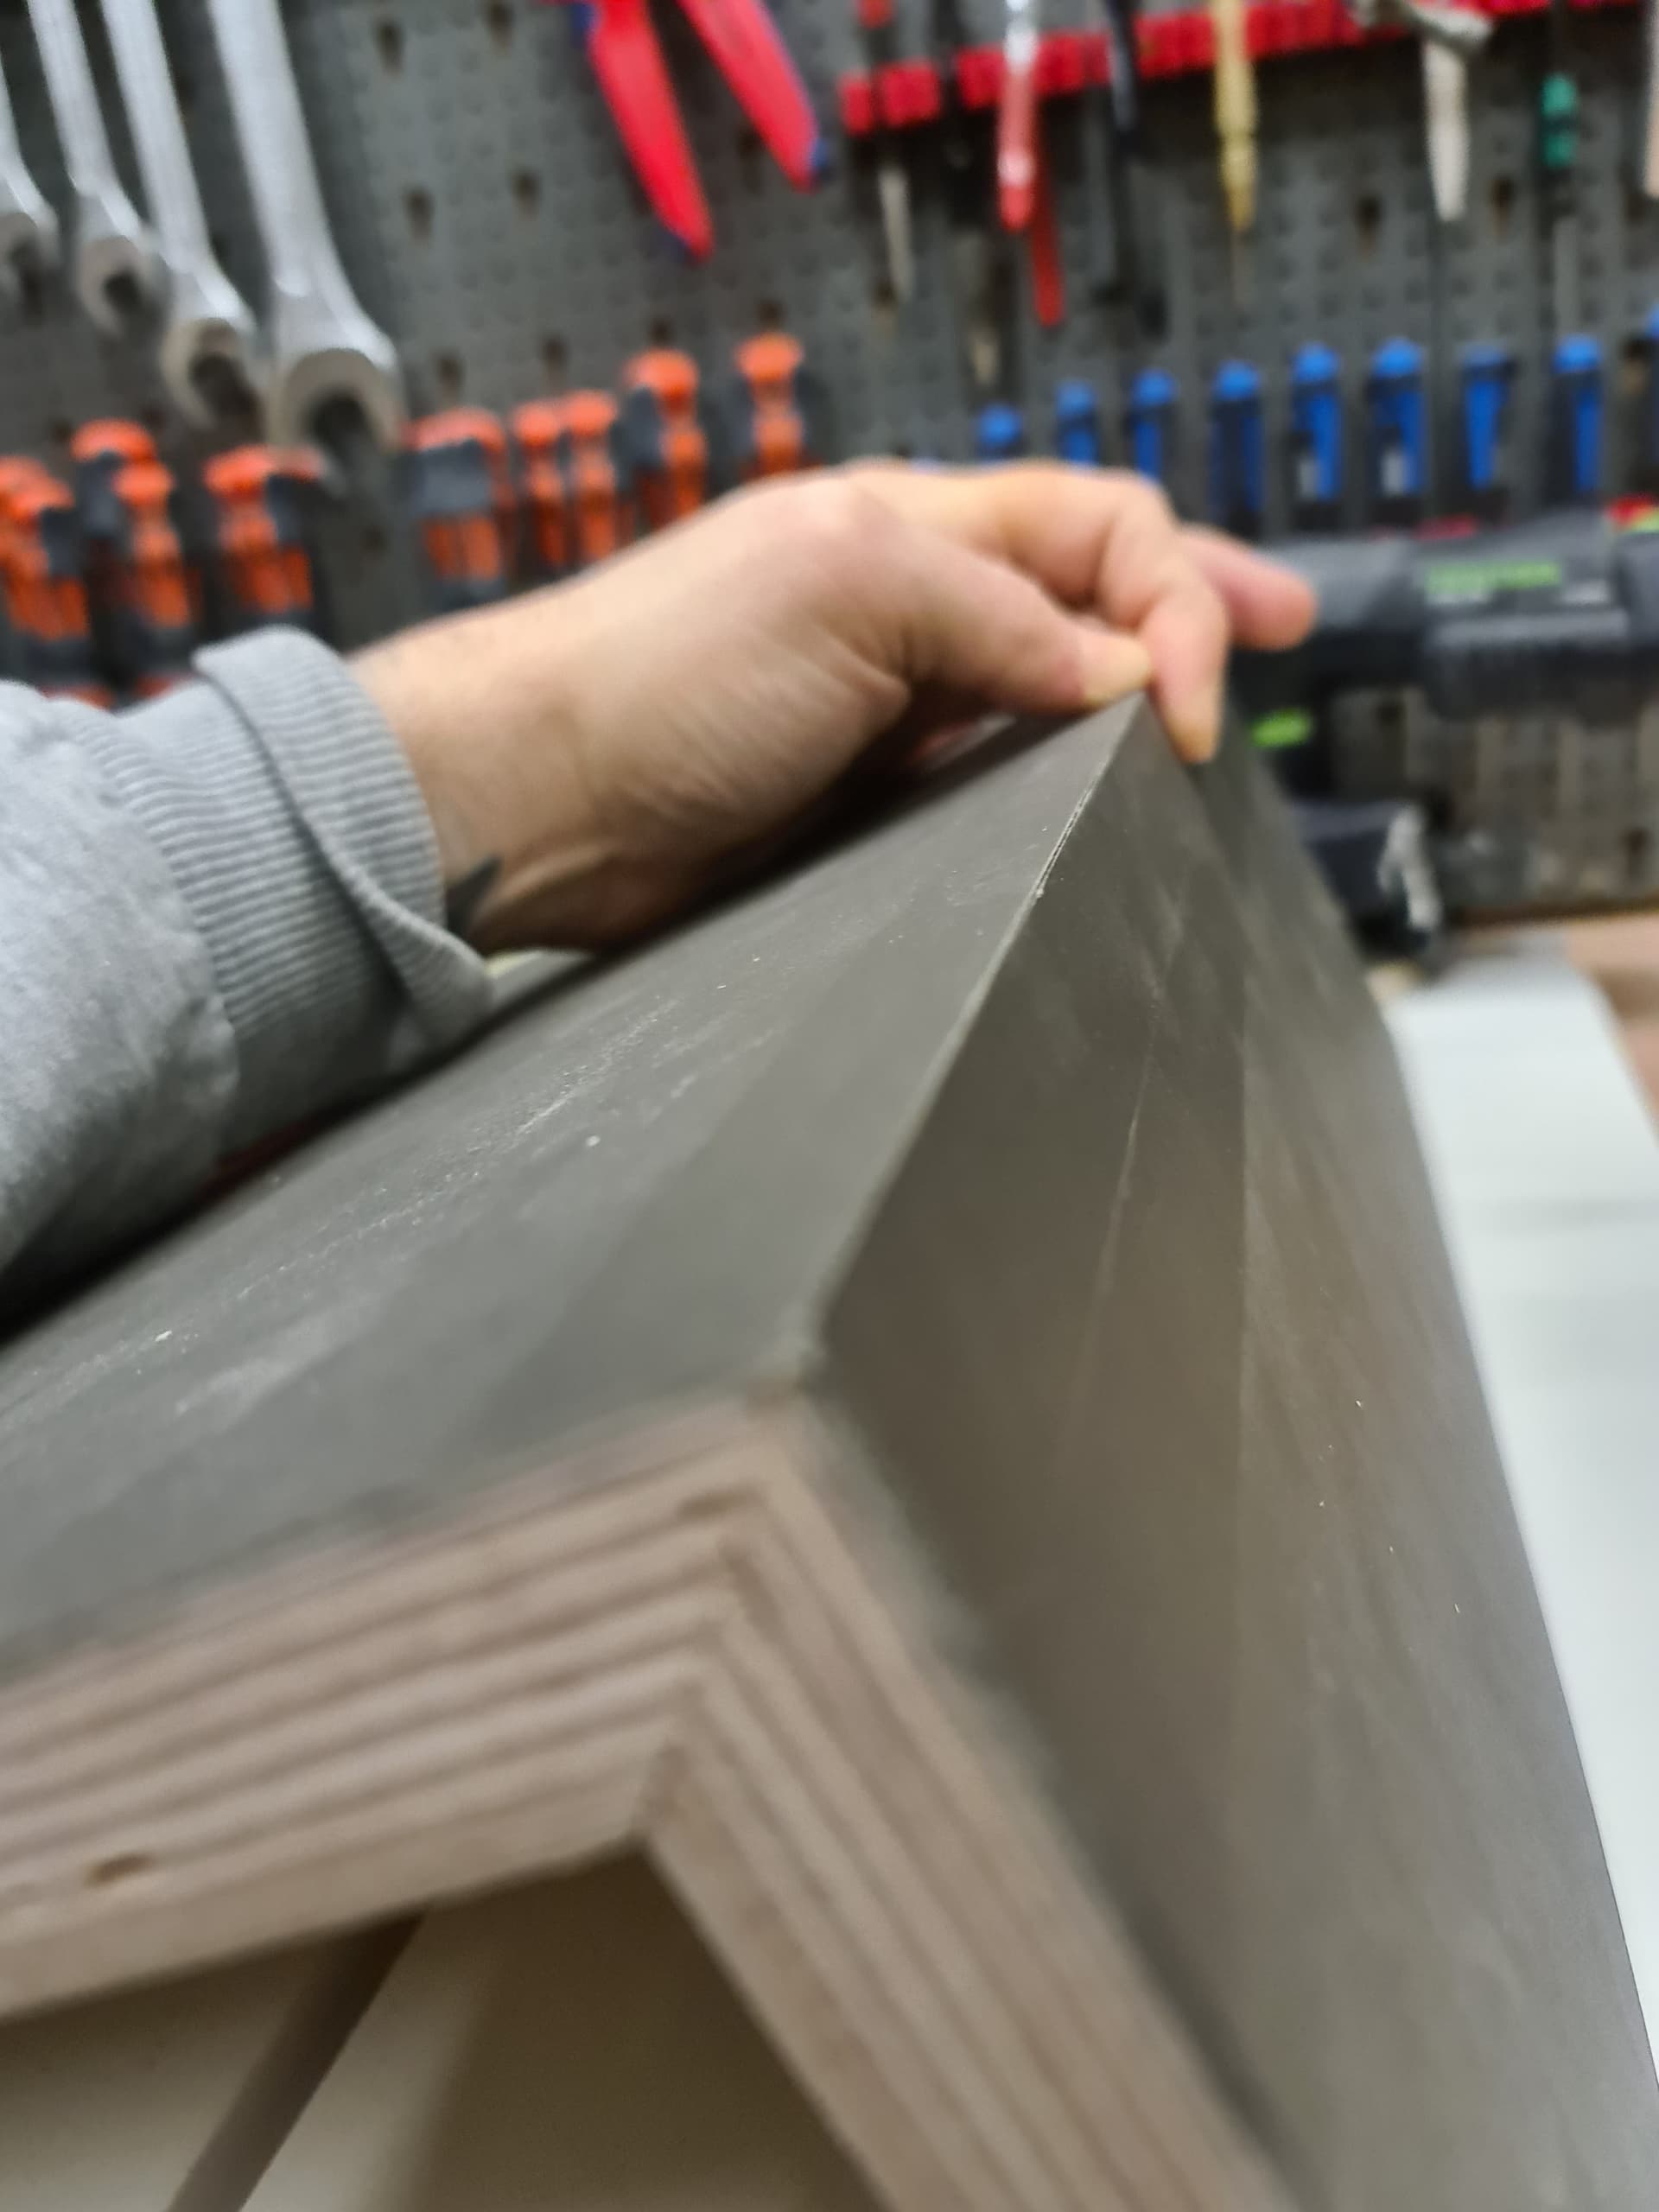
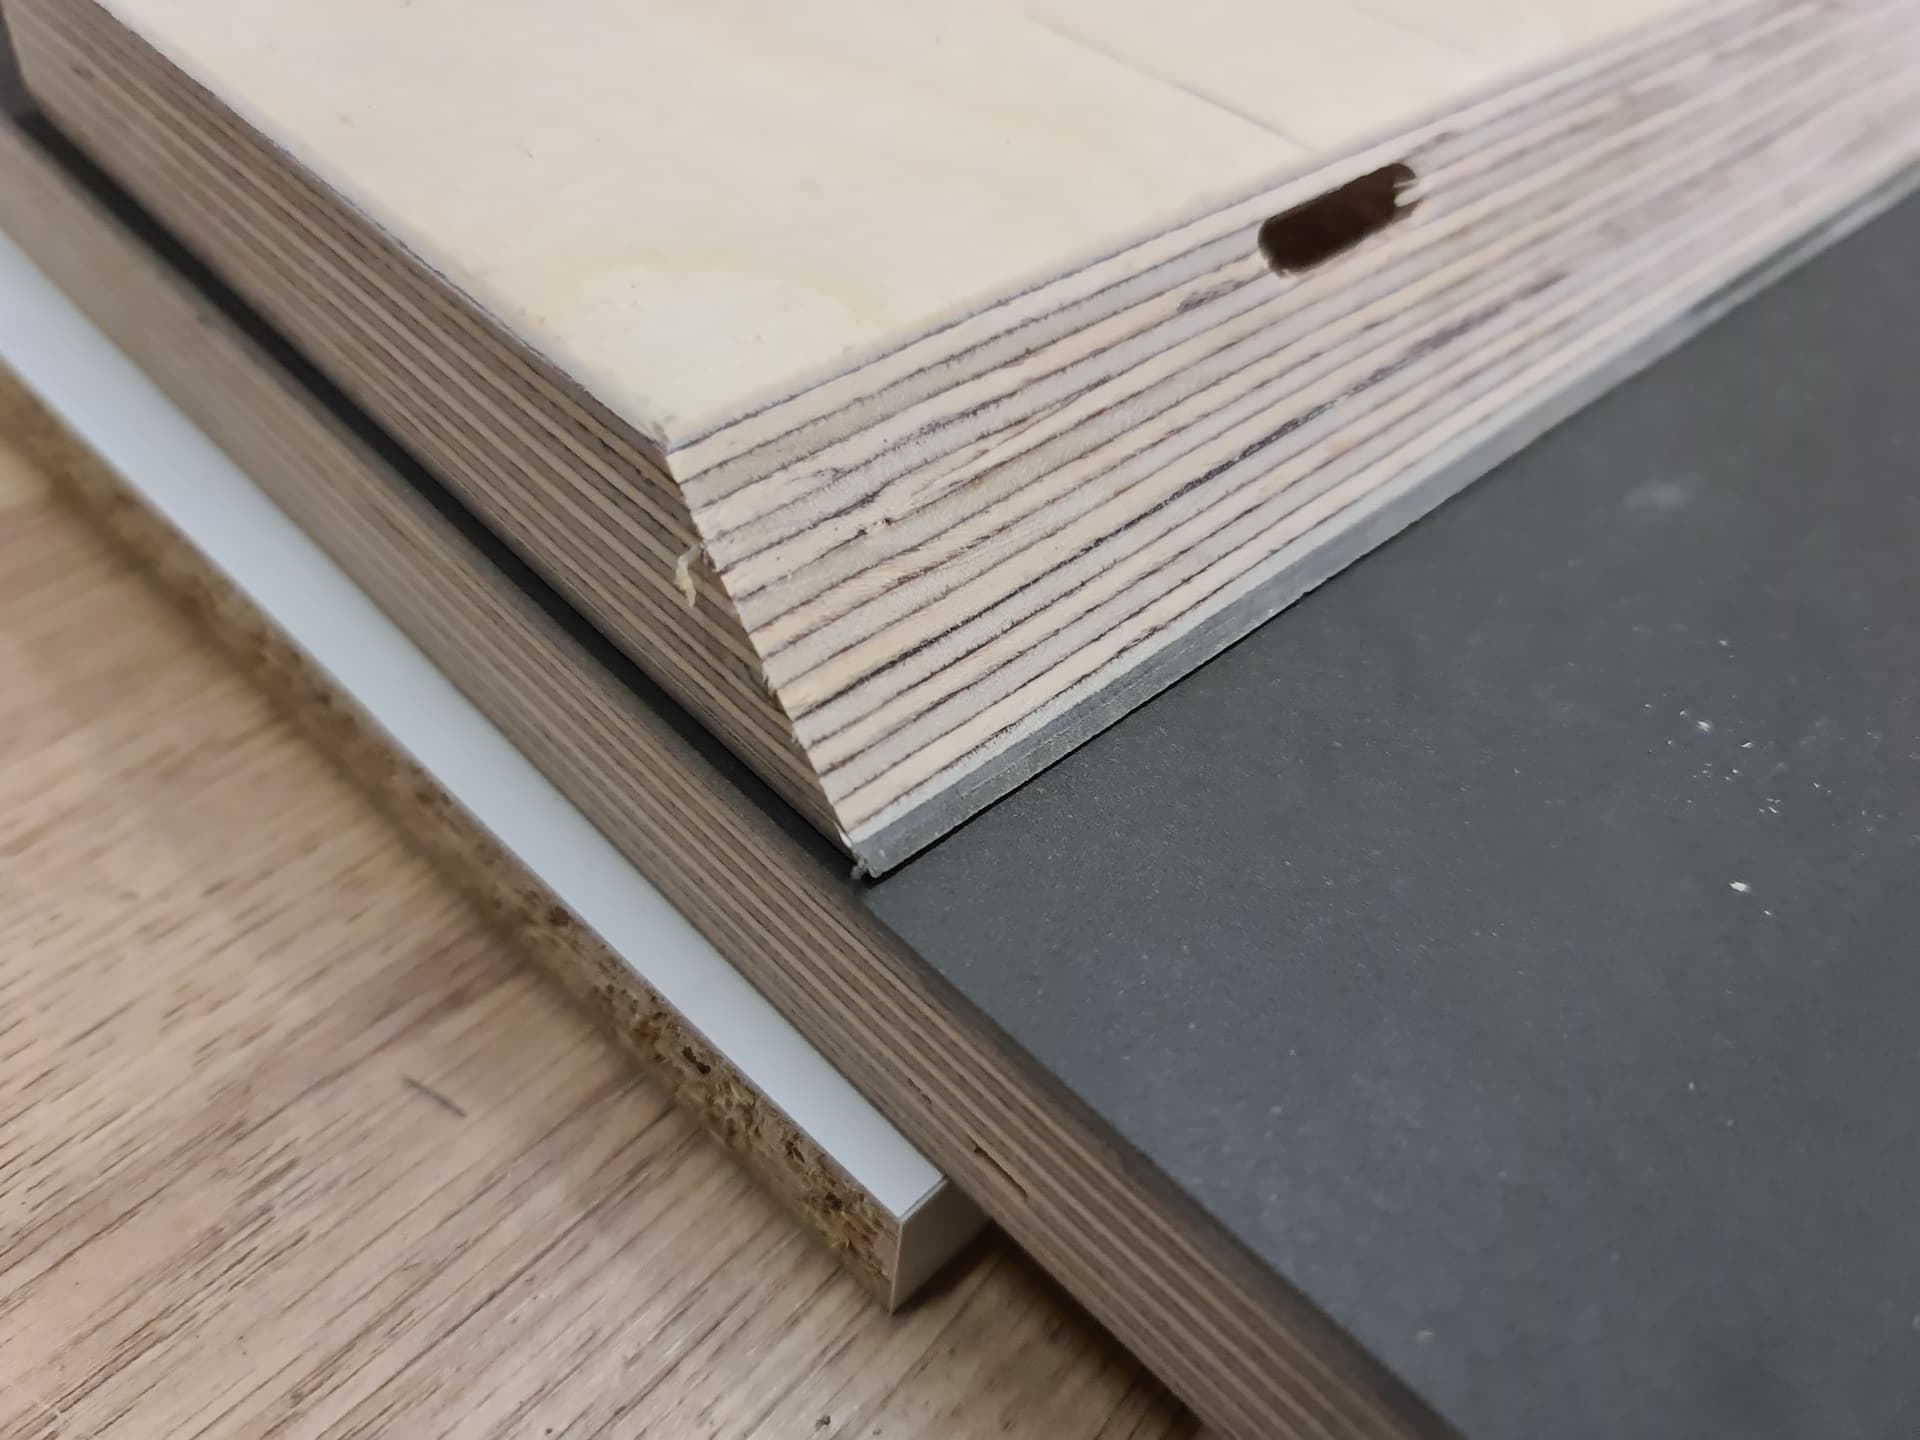
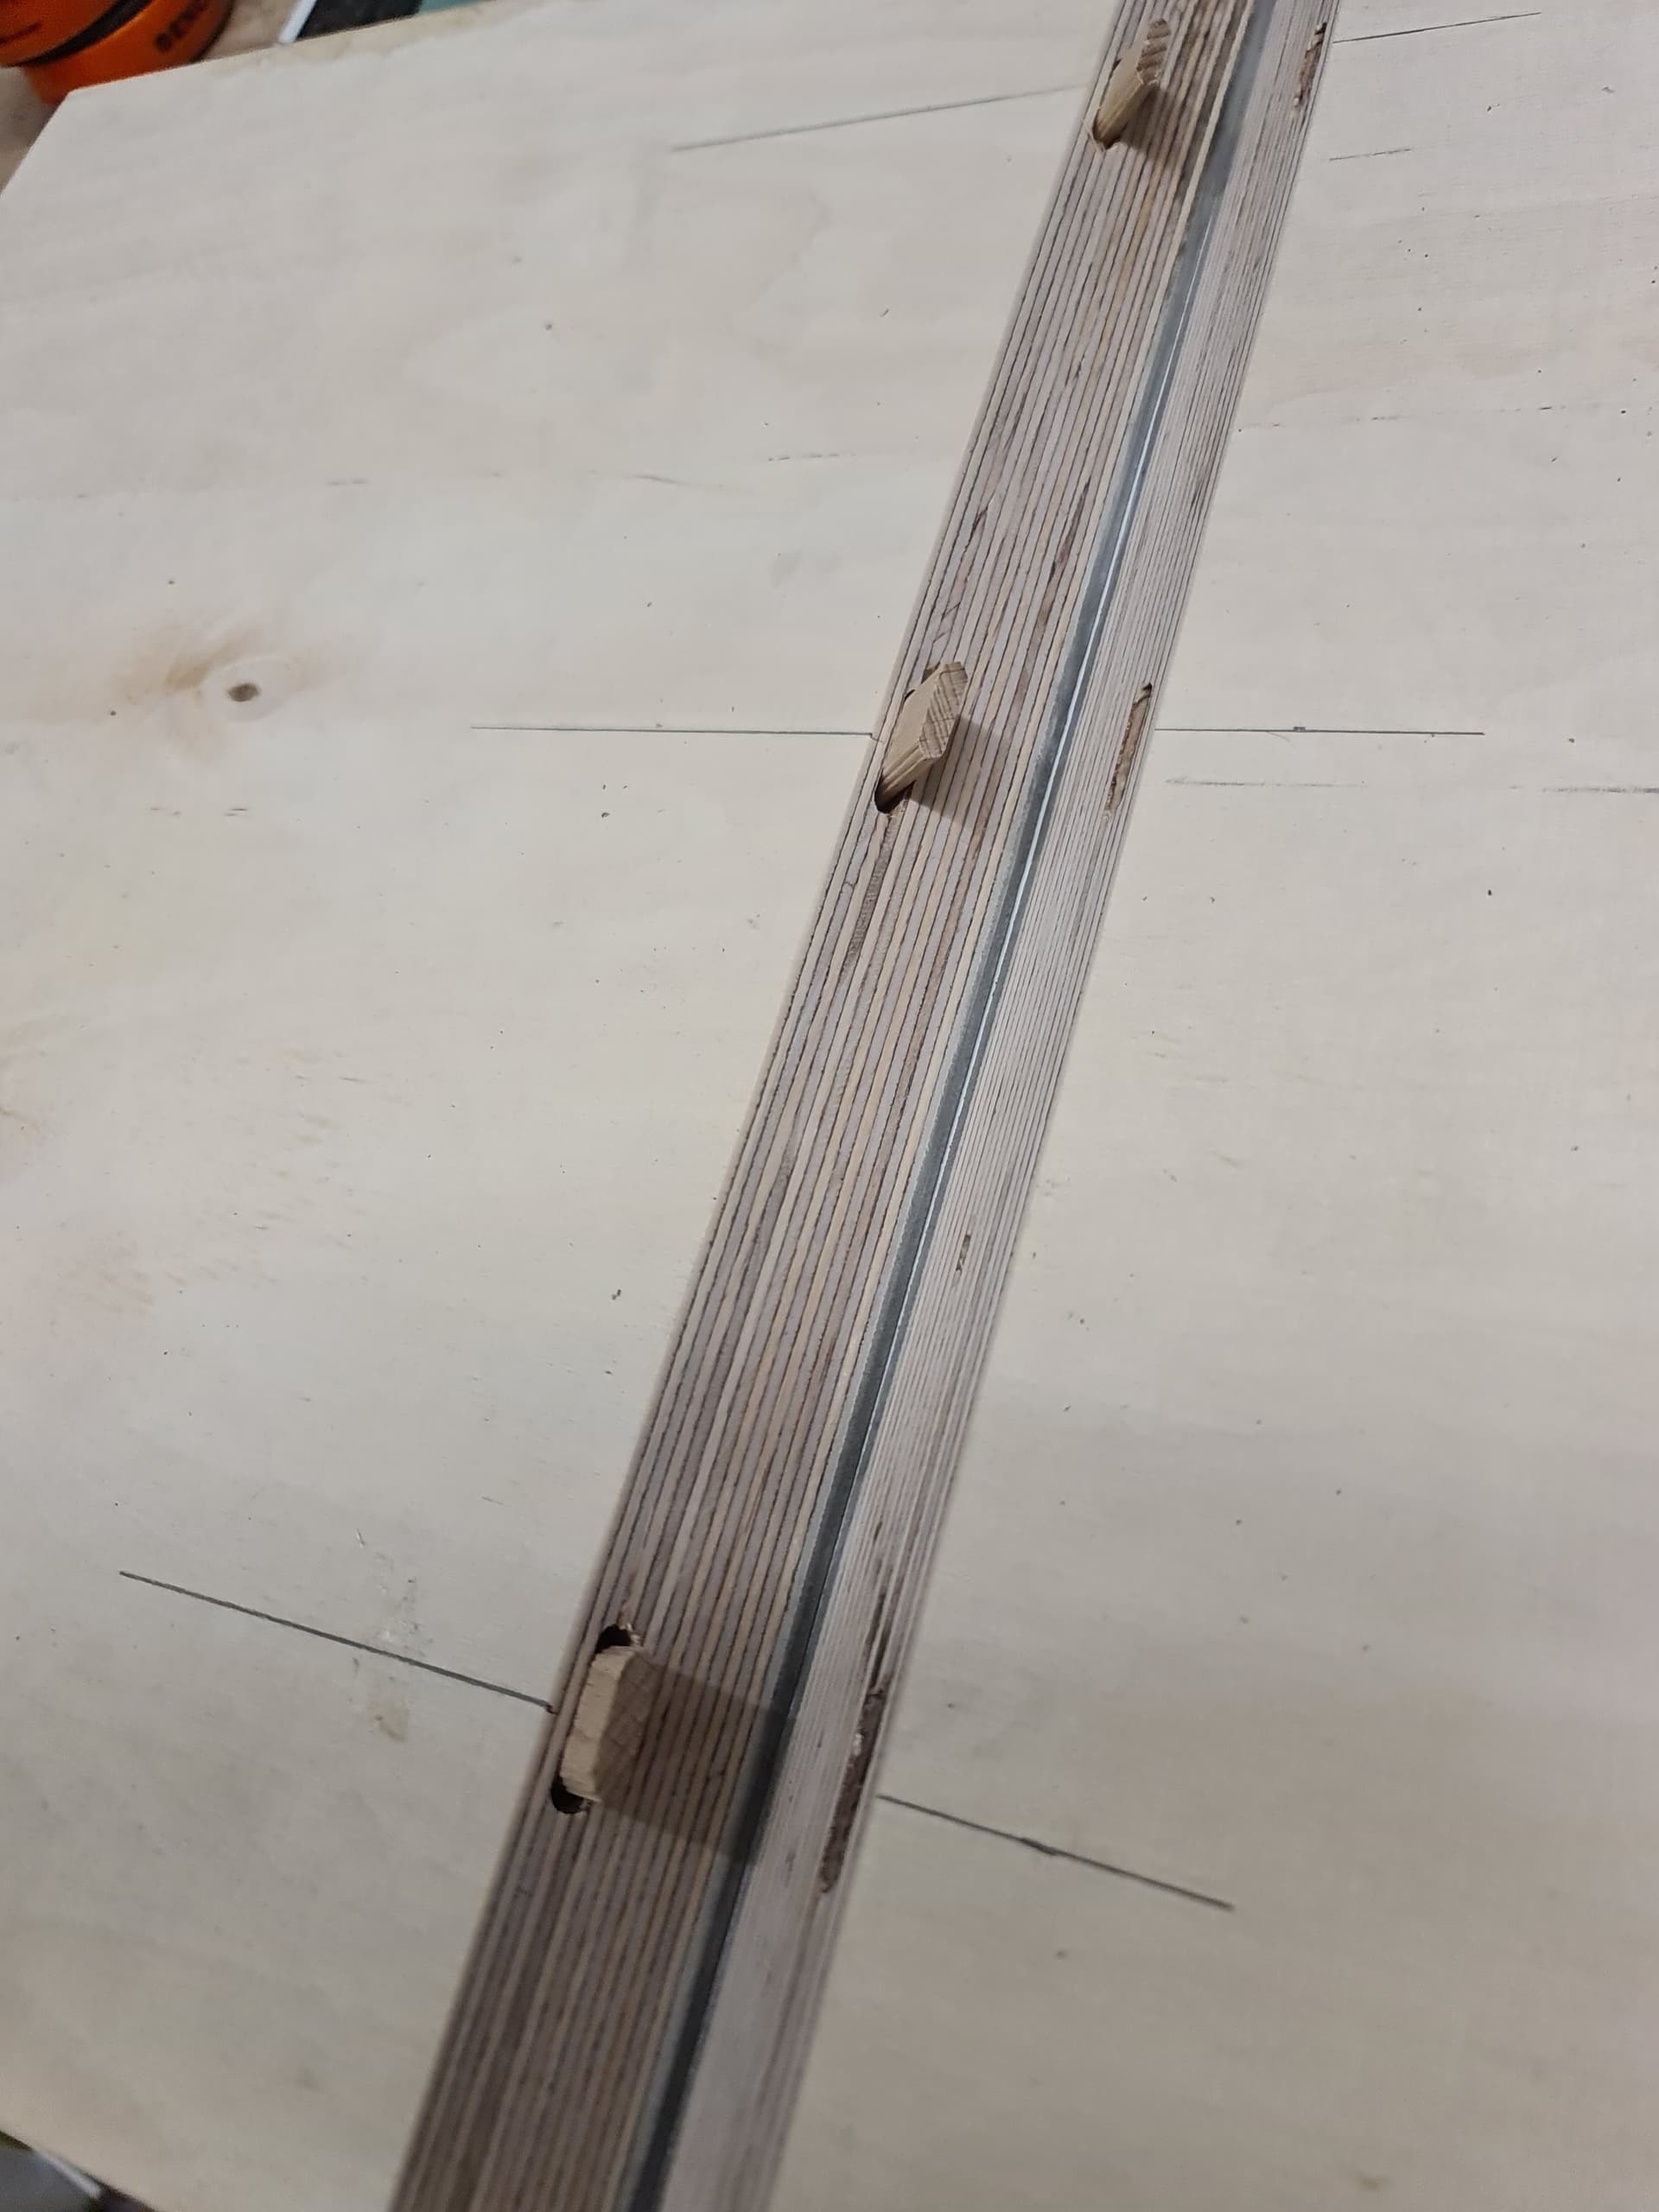
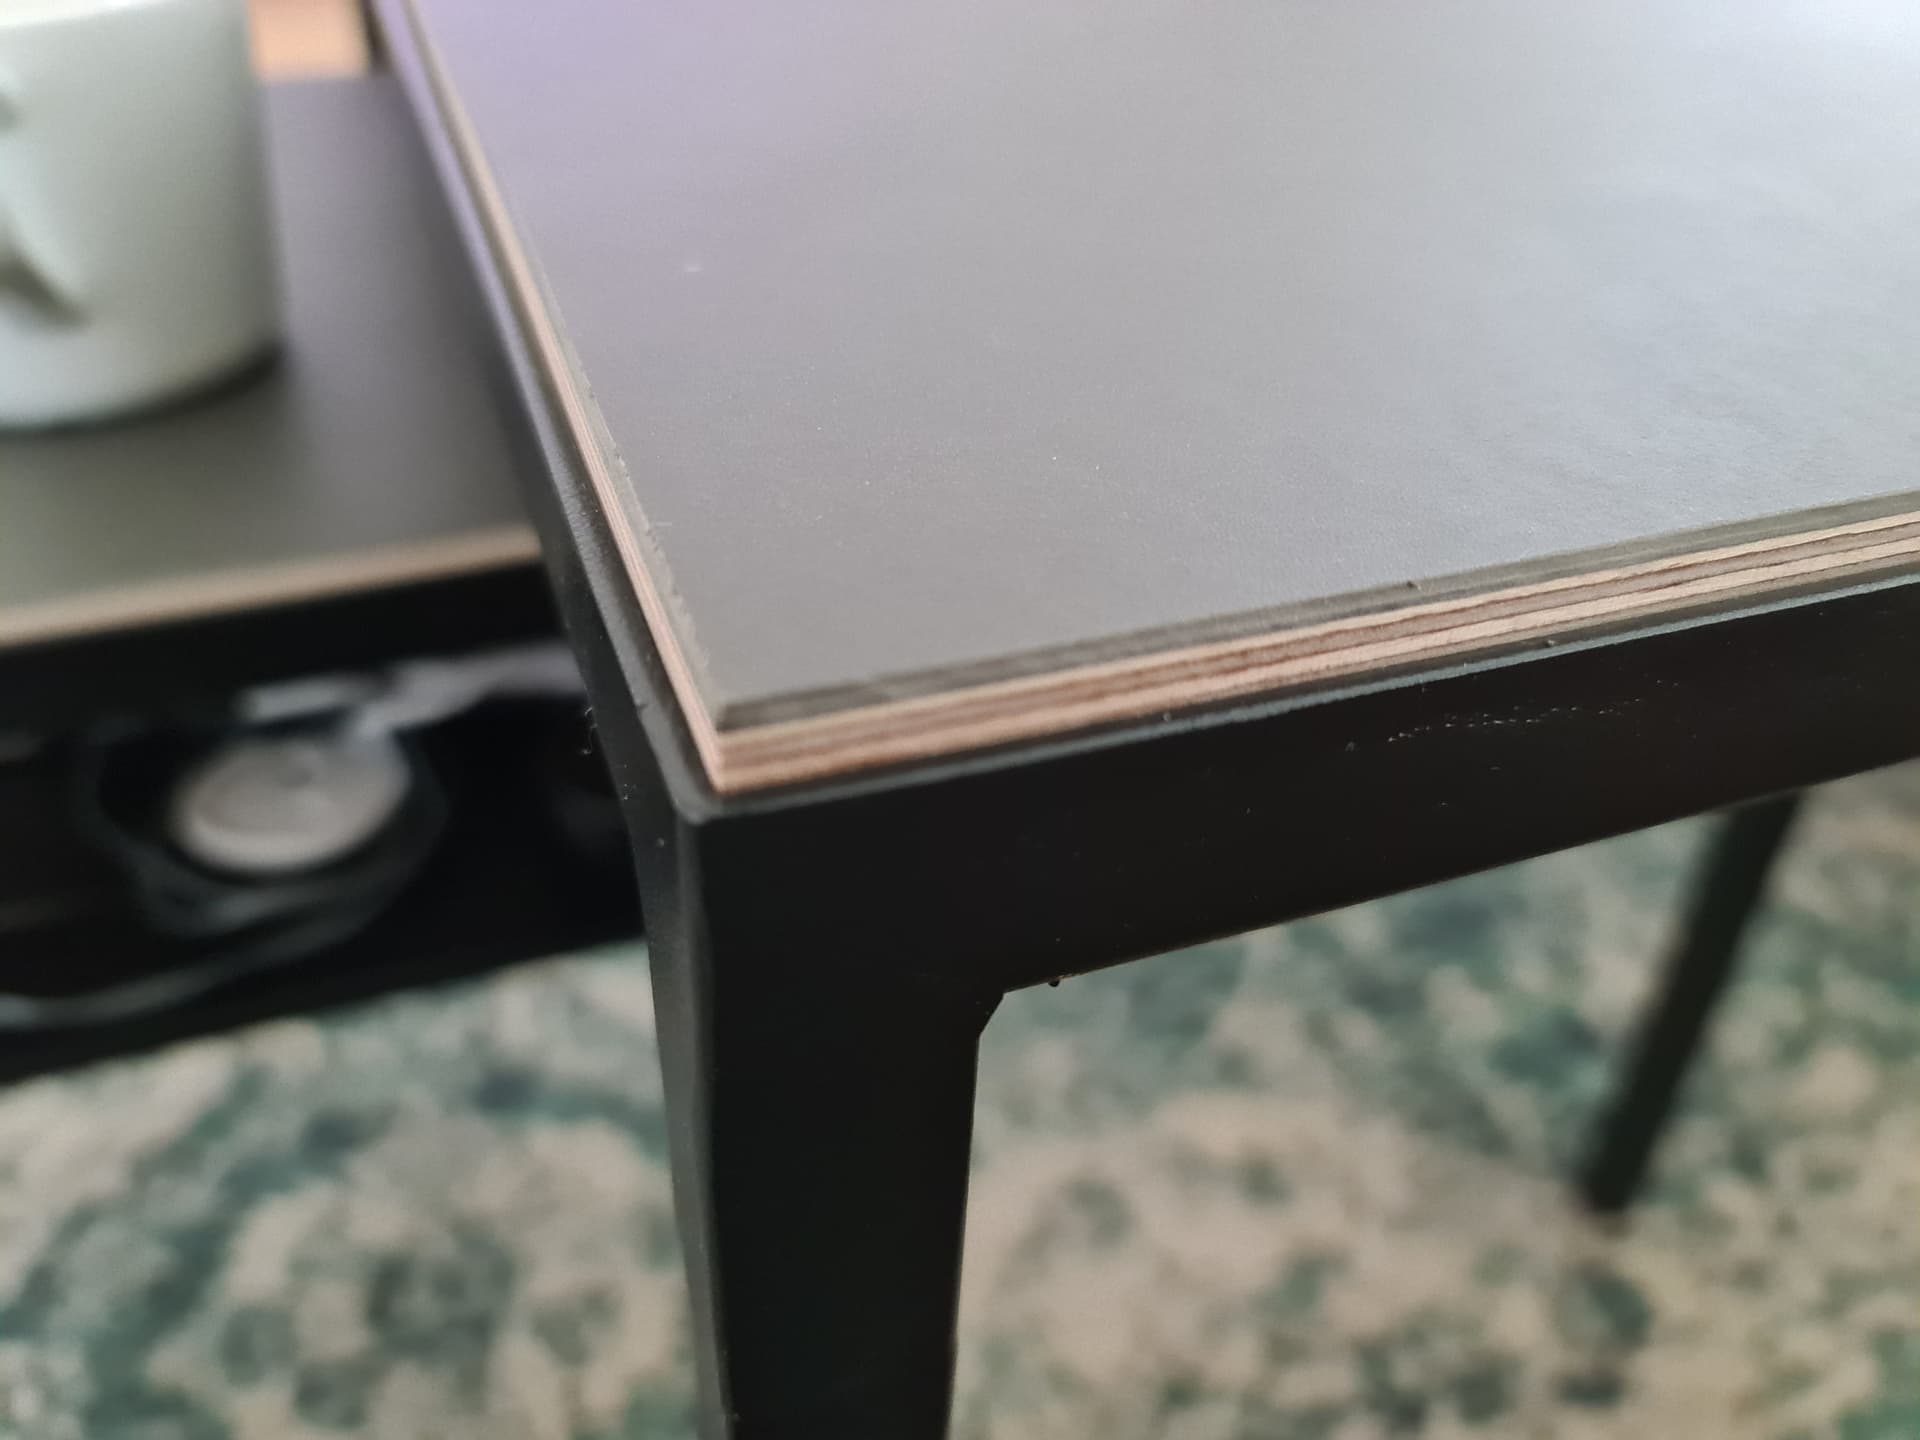
Made a test piece for the top surface wood because there are some new things involved I’ve never done before. So I bought sheet of birch plywood ( A/B Grade ) ripped it roughly to size and got some linoleum veneer in a iron gray. I put it on with contact cement and cut the board with a mitre as well as used some dominos the reinforce the joint. Mitre lines up super nice and it’s cut with a Festool track saw not a stationary one (the picture is without any glue)
This was my test piece I made some mistakes on that and learned a lot about linoleum veneer how to contact cement yourself to things and what are do’s and don’ts with the material to get crisp edges… so now I am ready to get to the real deal…
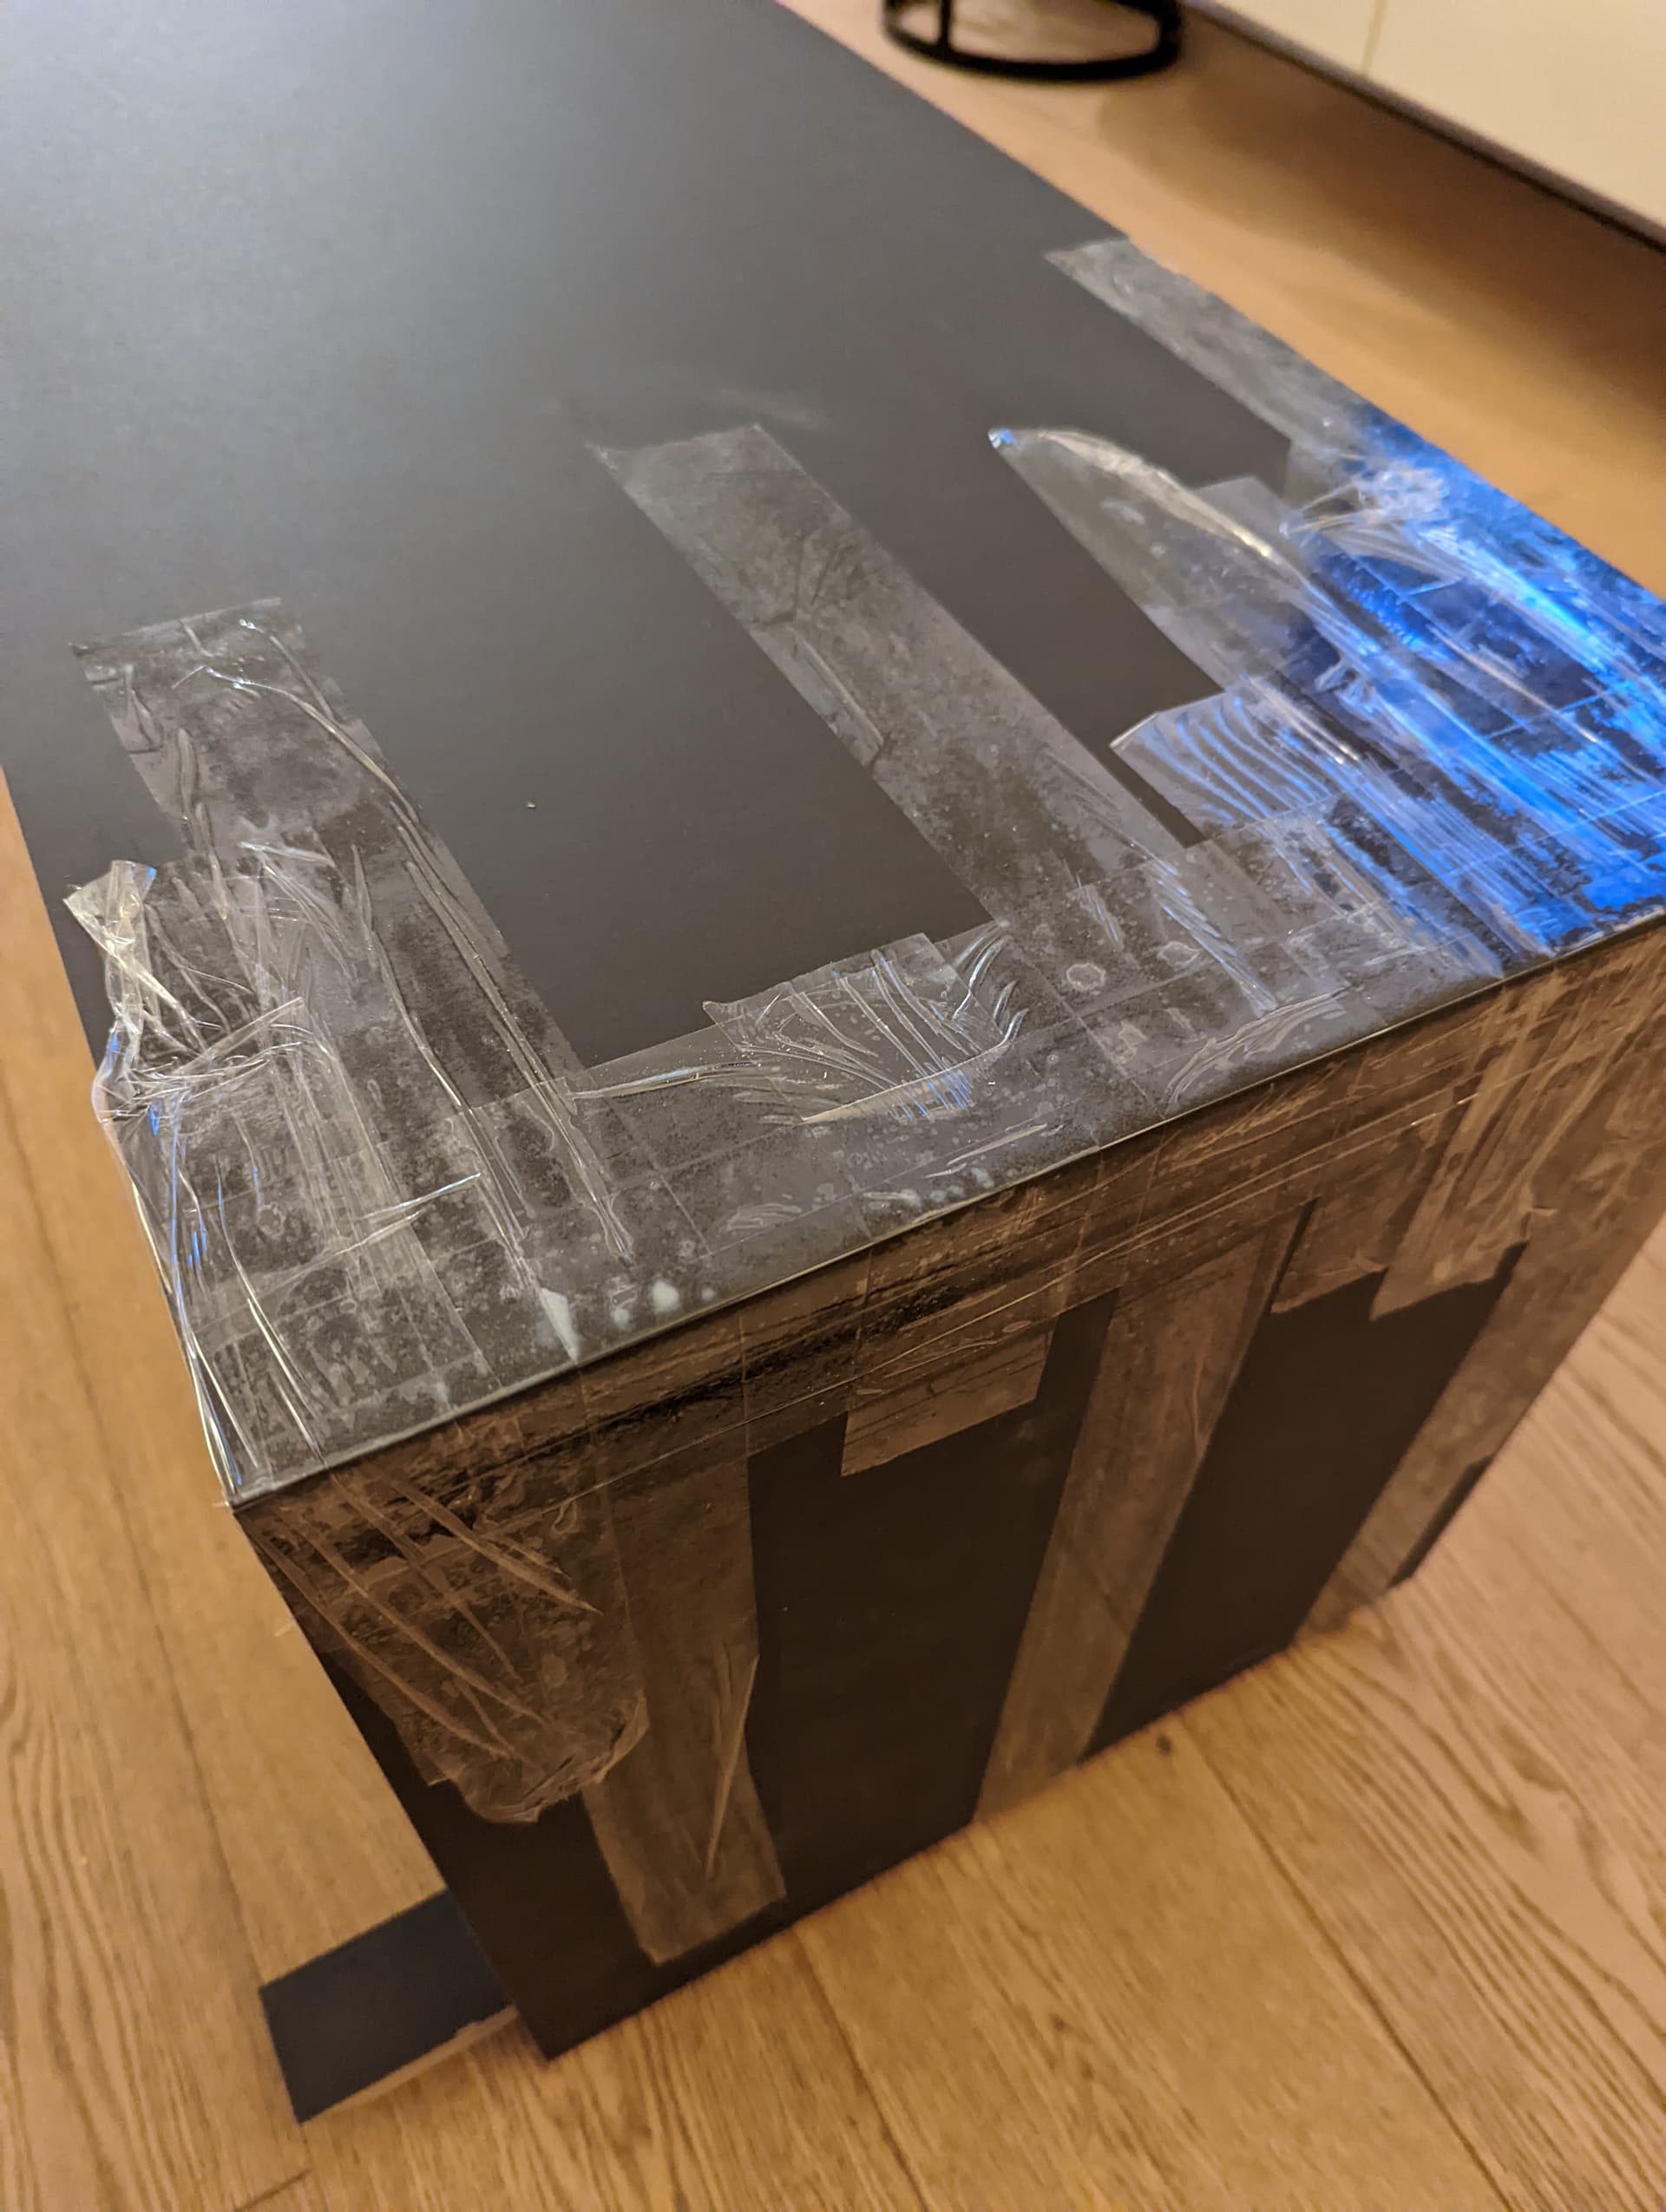
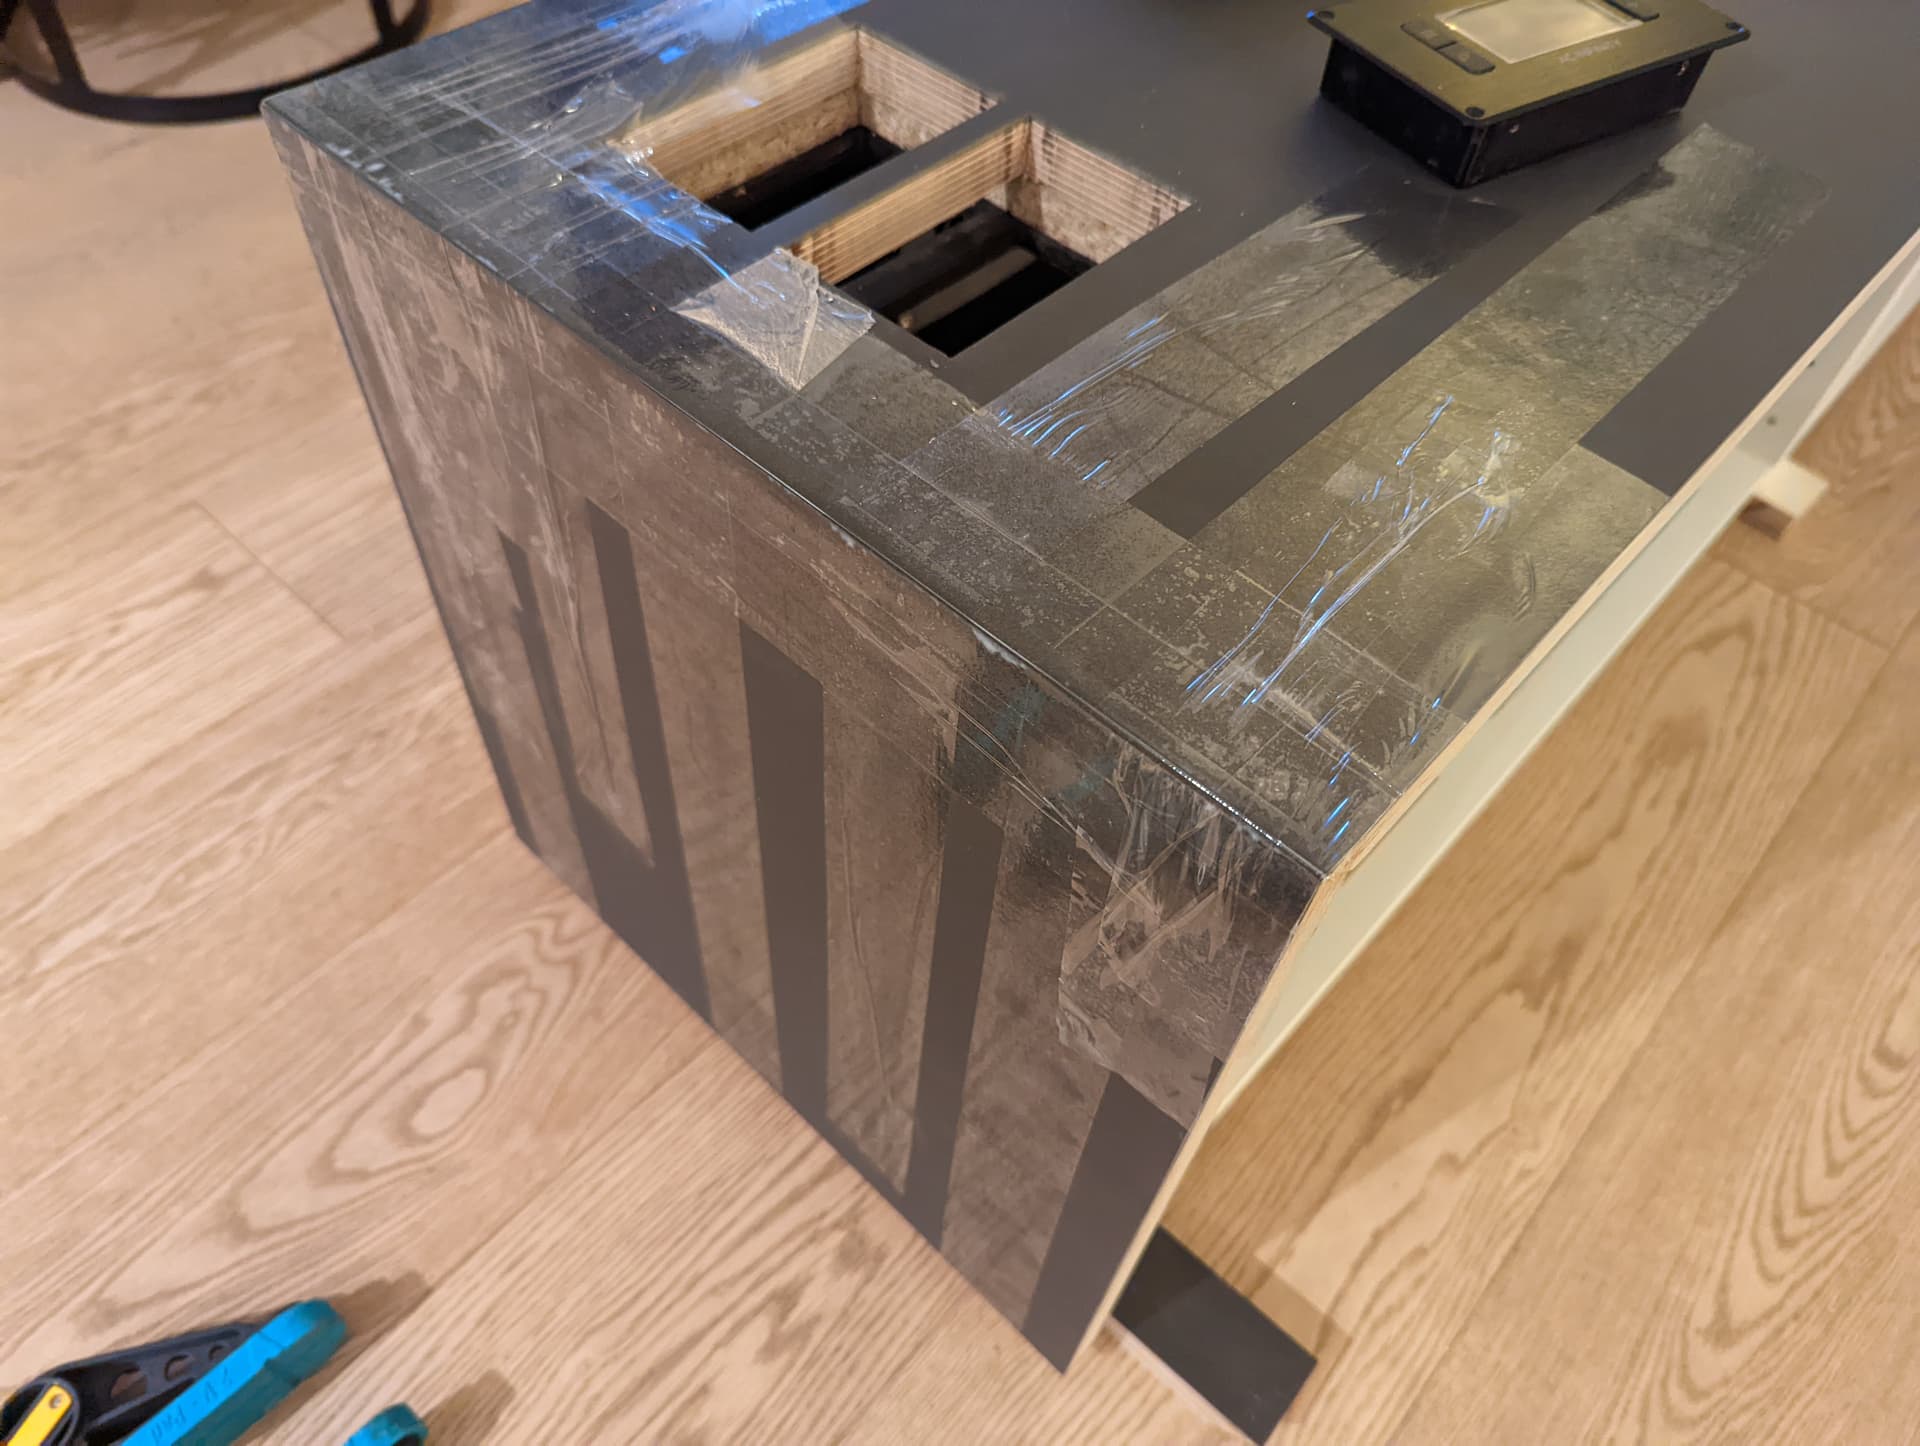
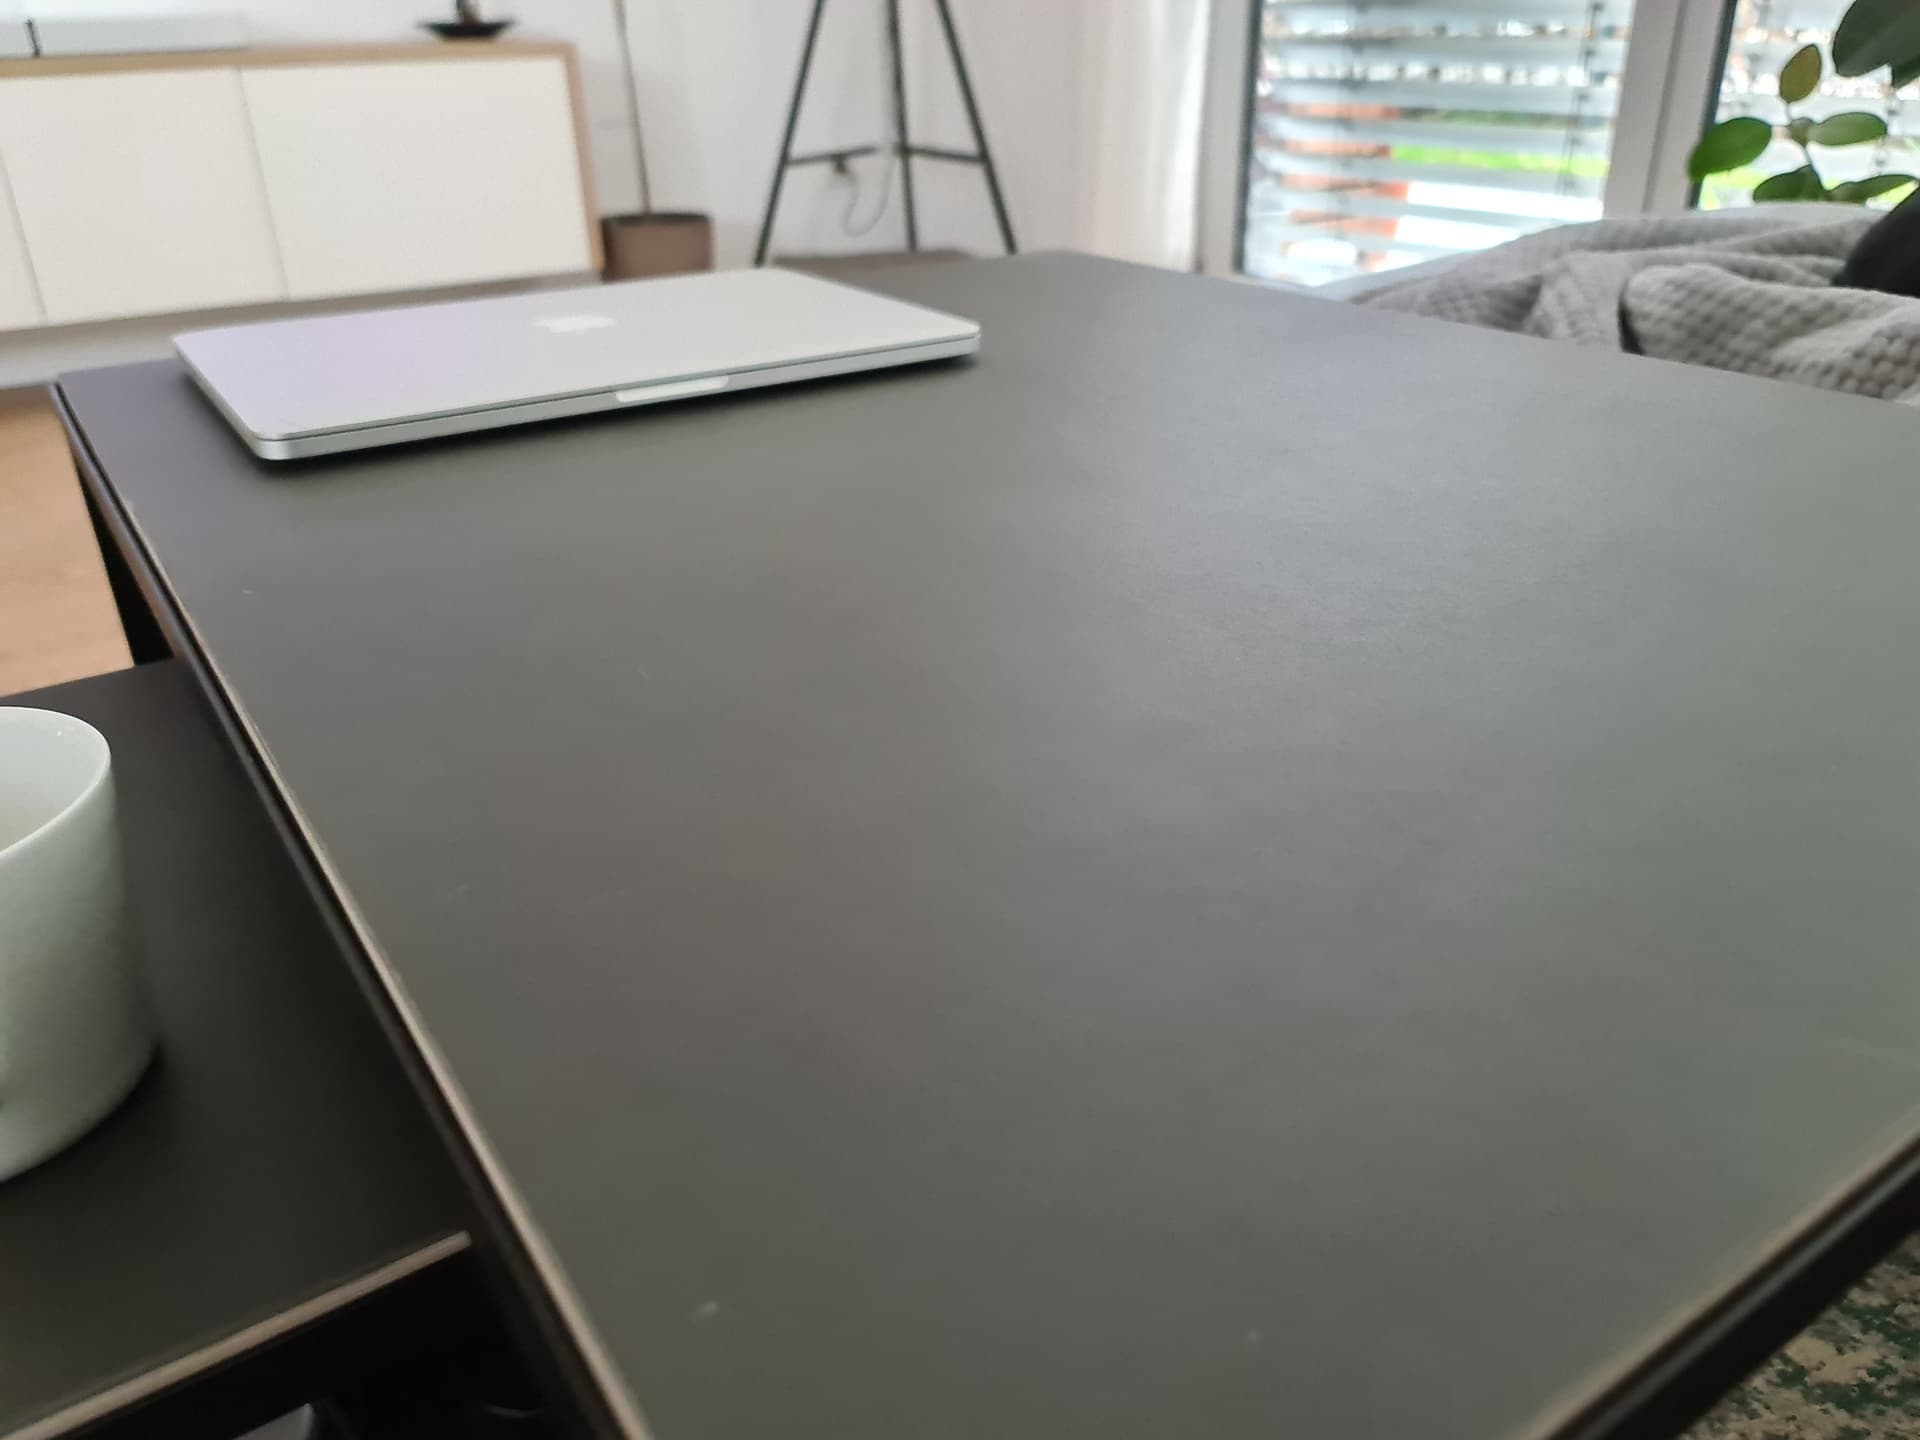
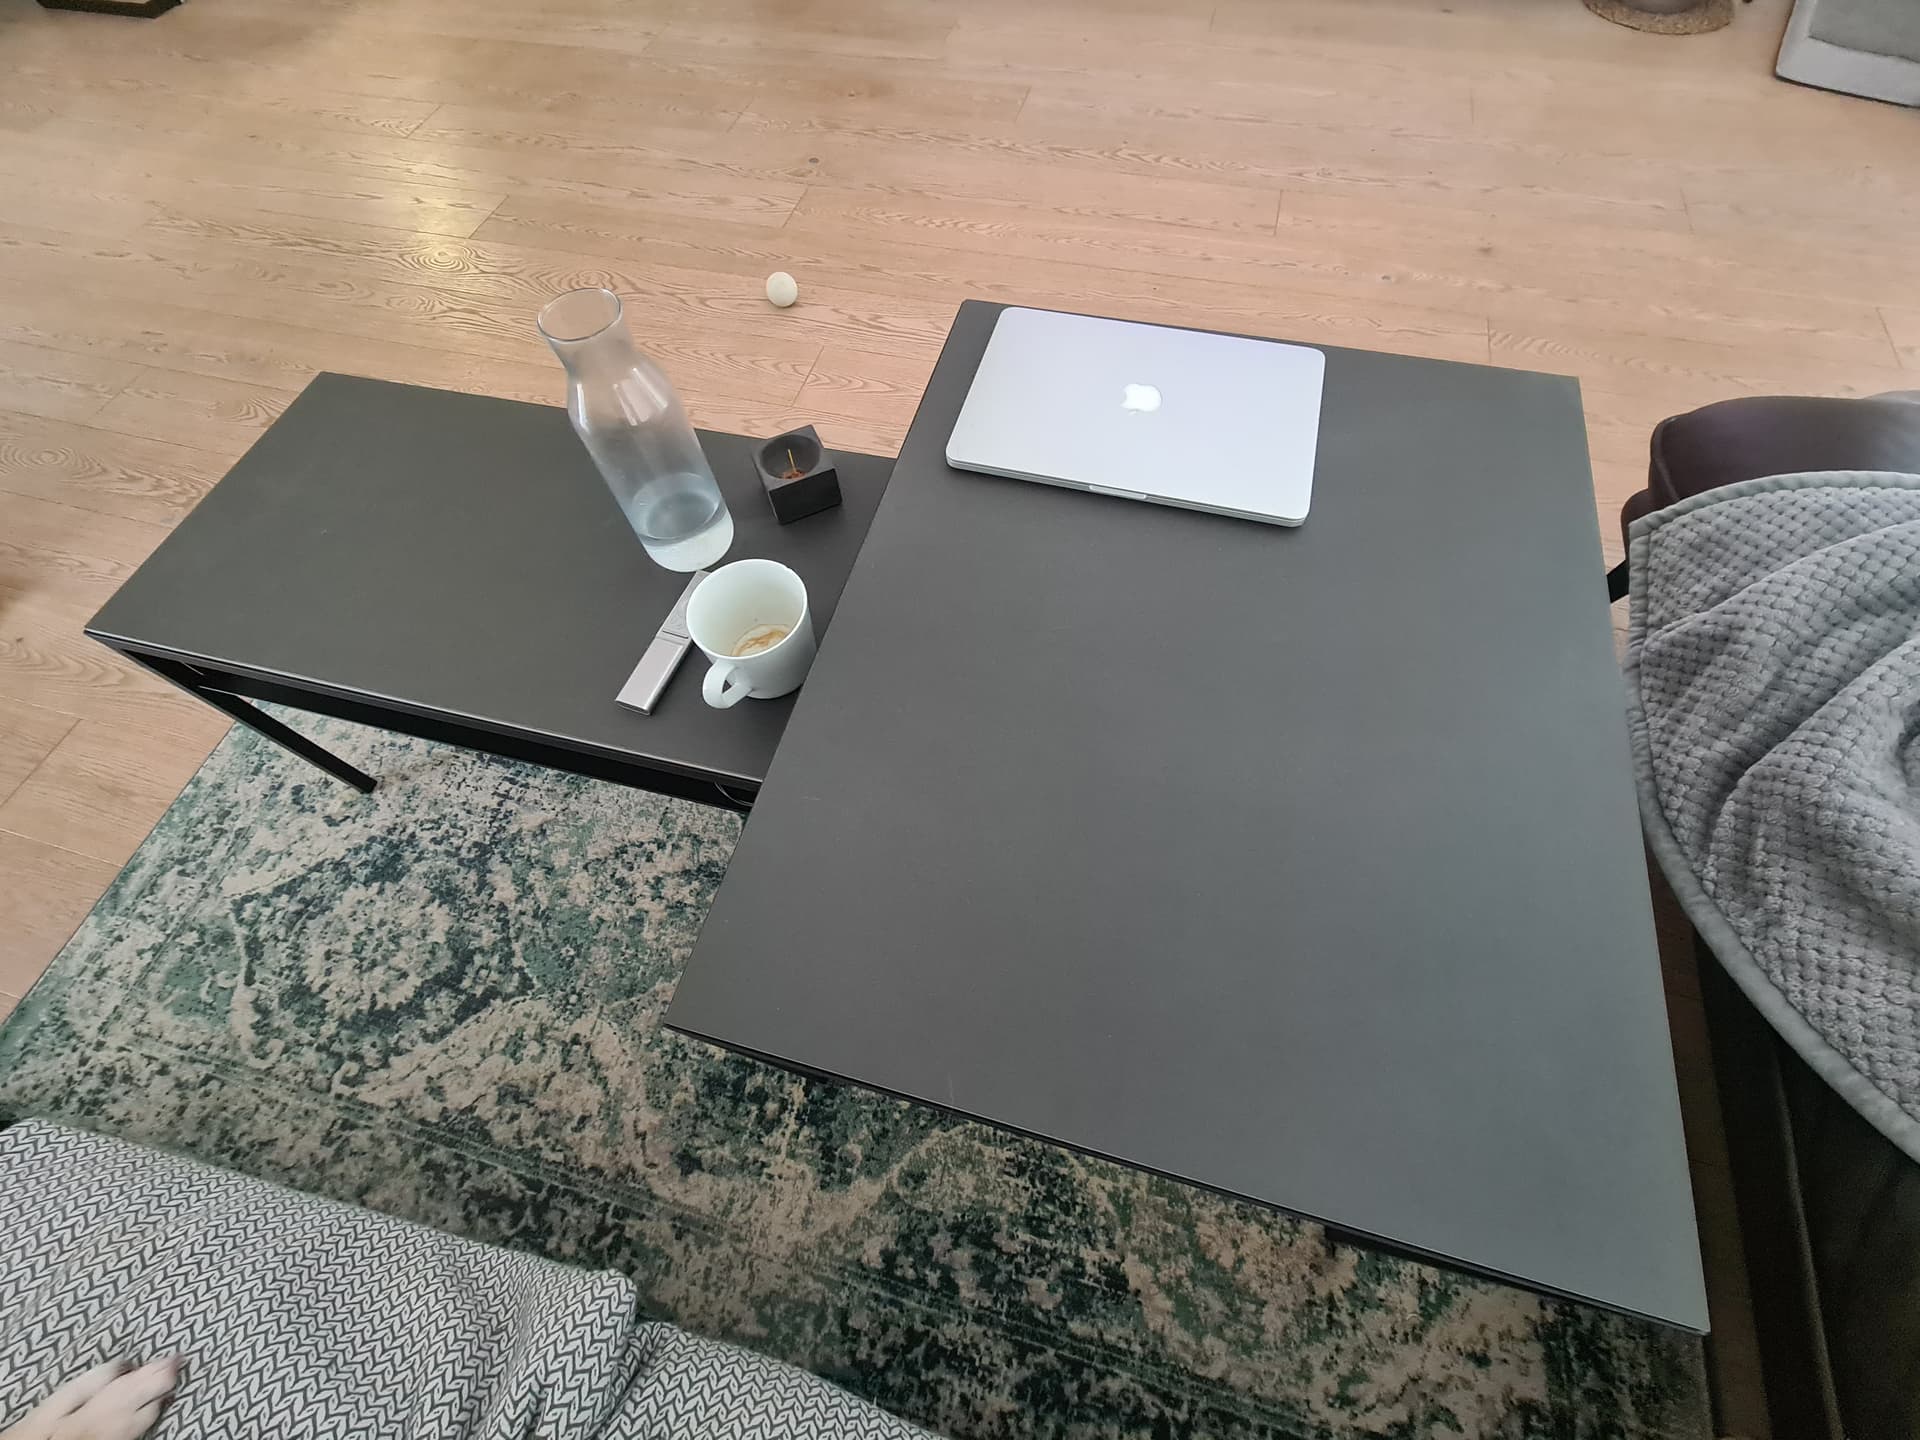
We got some cheap Ikea coffe tables and I do these boards as well ,so we got a more consistent look in our living room and some higher grade surfaces on the tables as well because they are already beat up after a year or so. But the base is solid steel nicely welded nothing to special so this stays.
Finished up the Coffee tables and could get a better feel for the material and I have to say I’m in love with that linoleum veneer/laminate whatever… natural, super robust, easy to handle, cut , sand basically everything you want and in my opinion looks super nice and minimalistic.
I copied the look of the original table and show the side as well but now with birch plywood instead of full laminate so I get a more consistent look over the living room
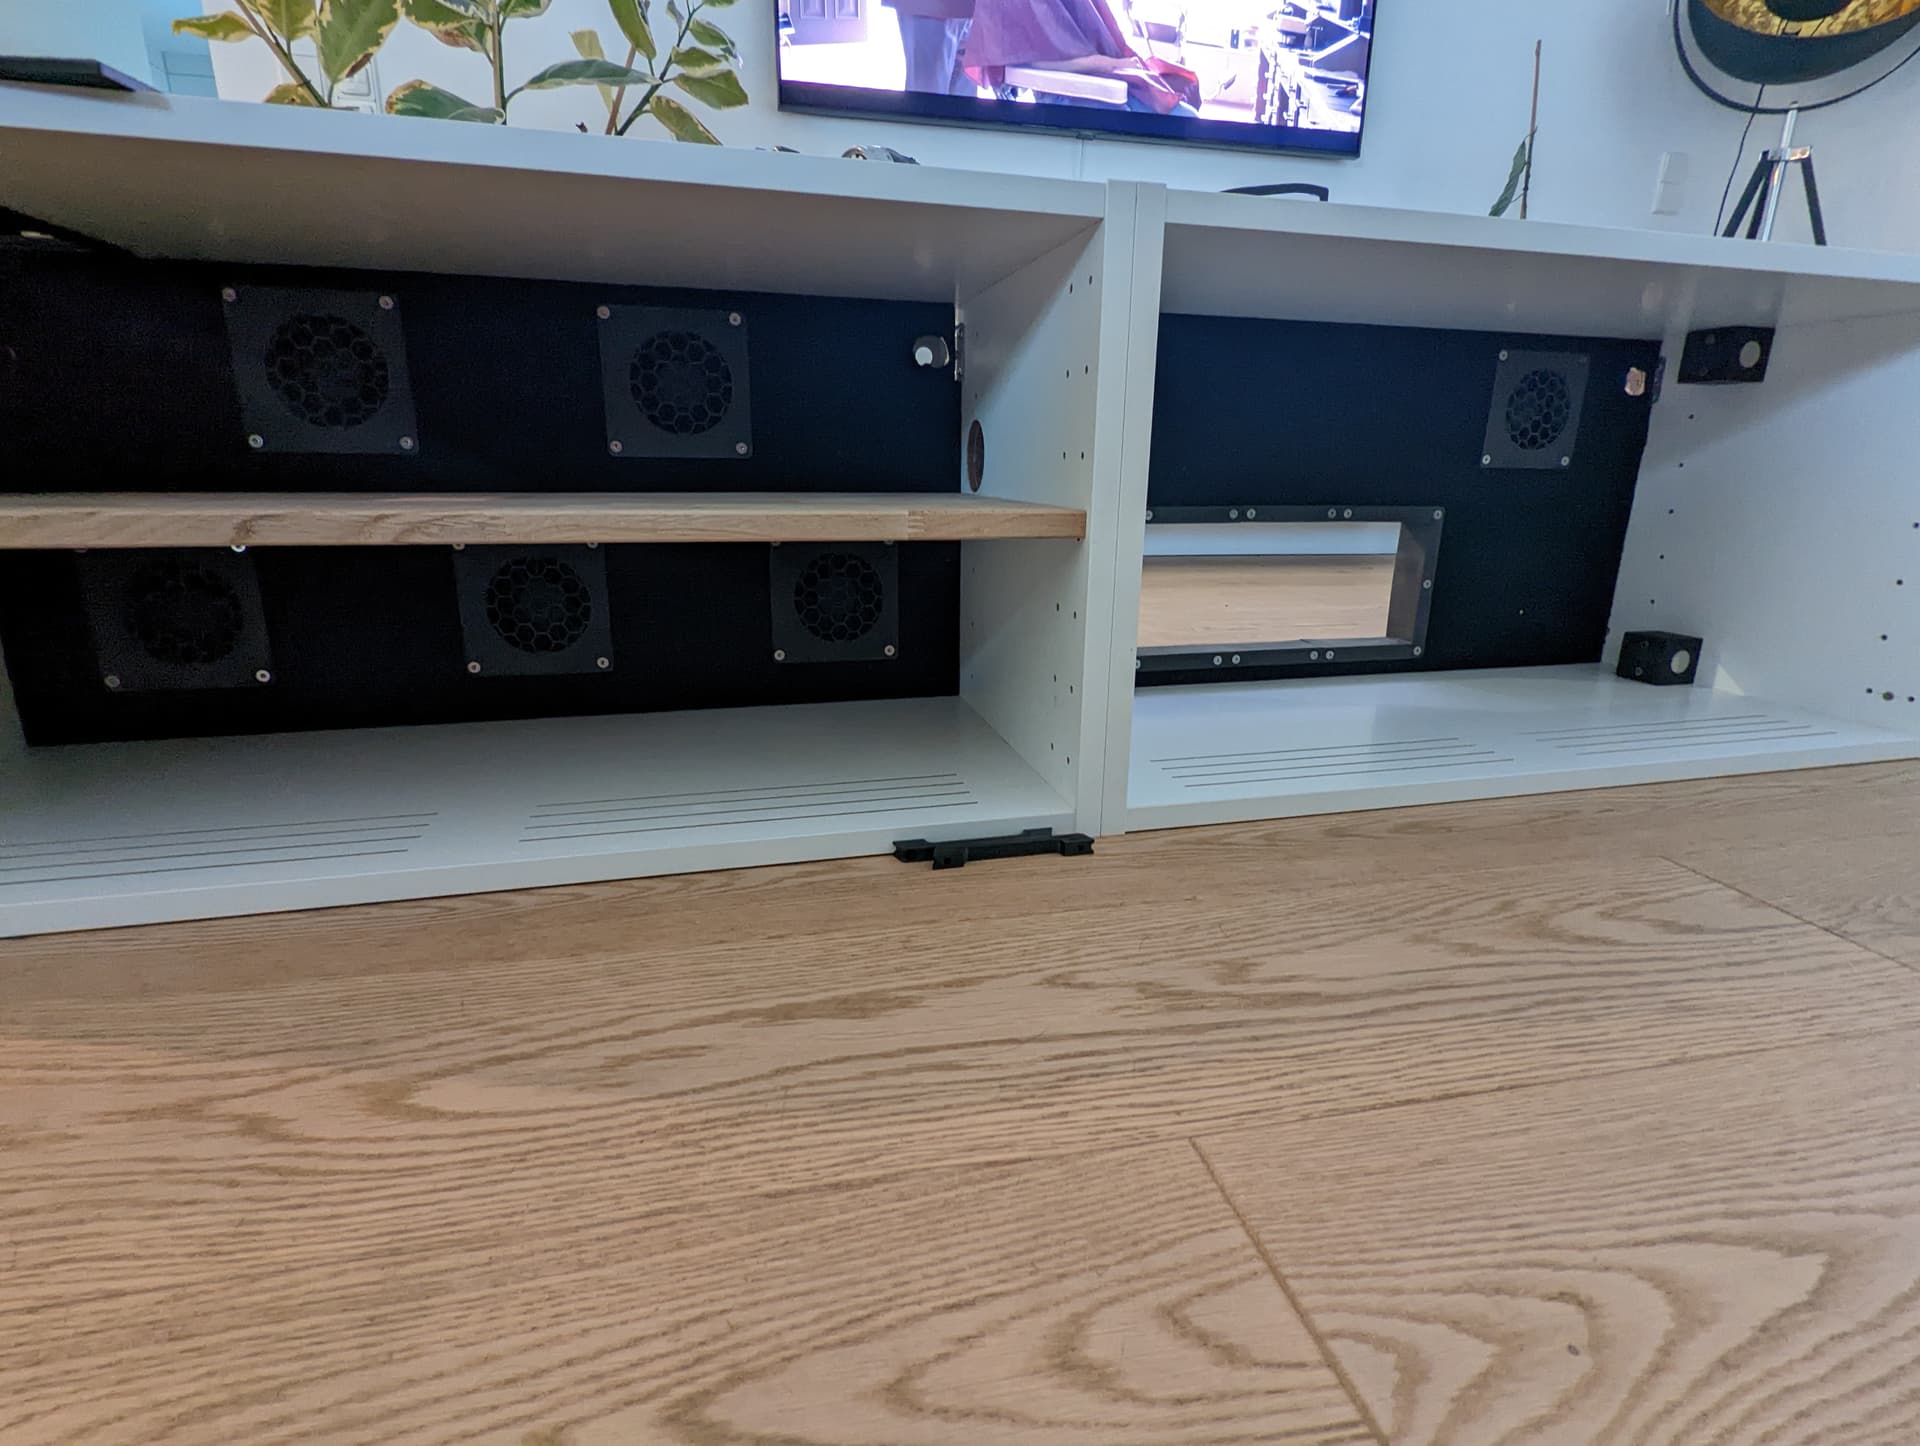
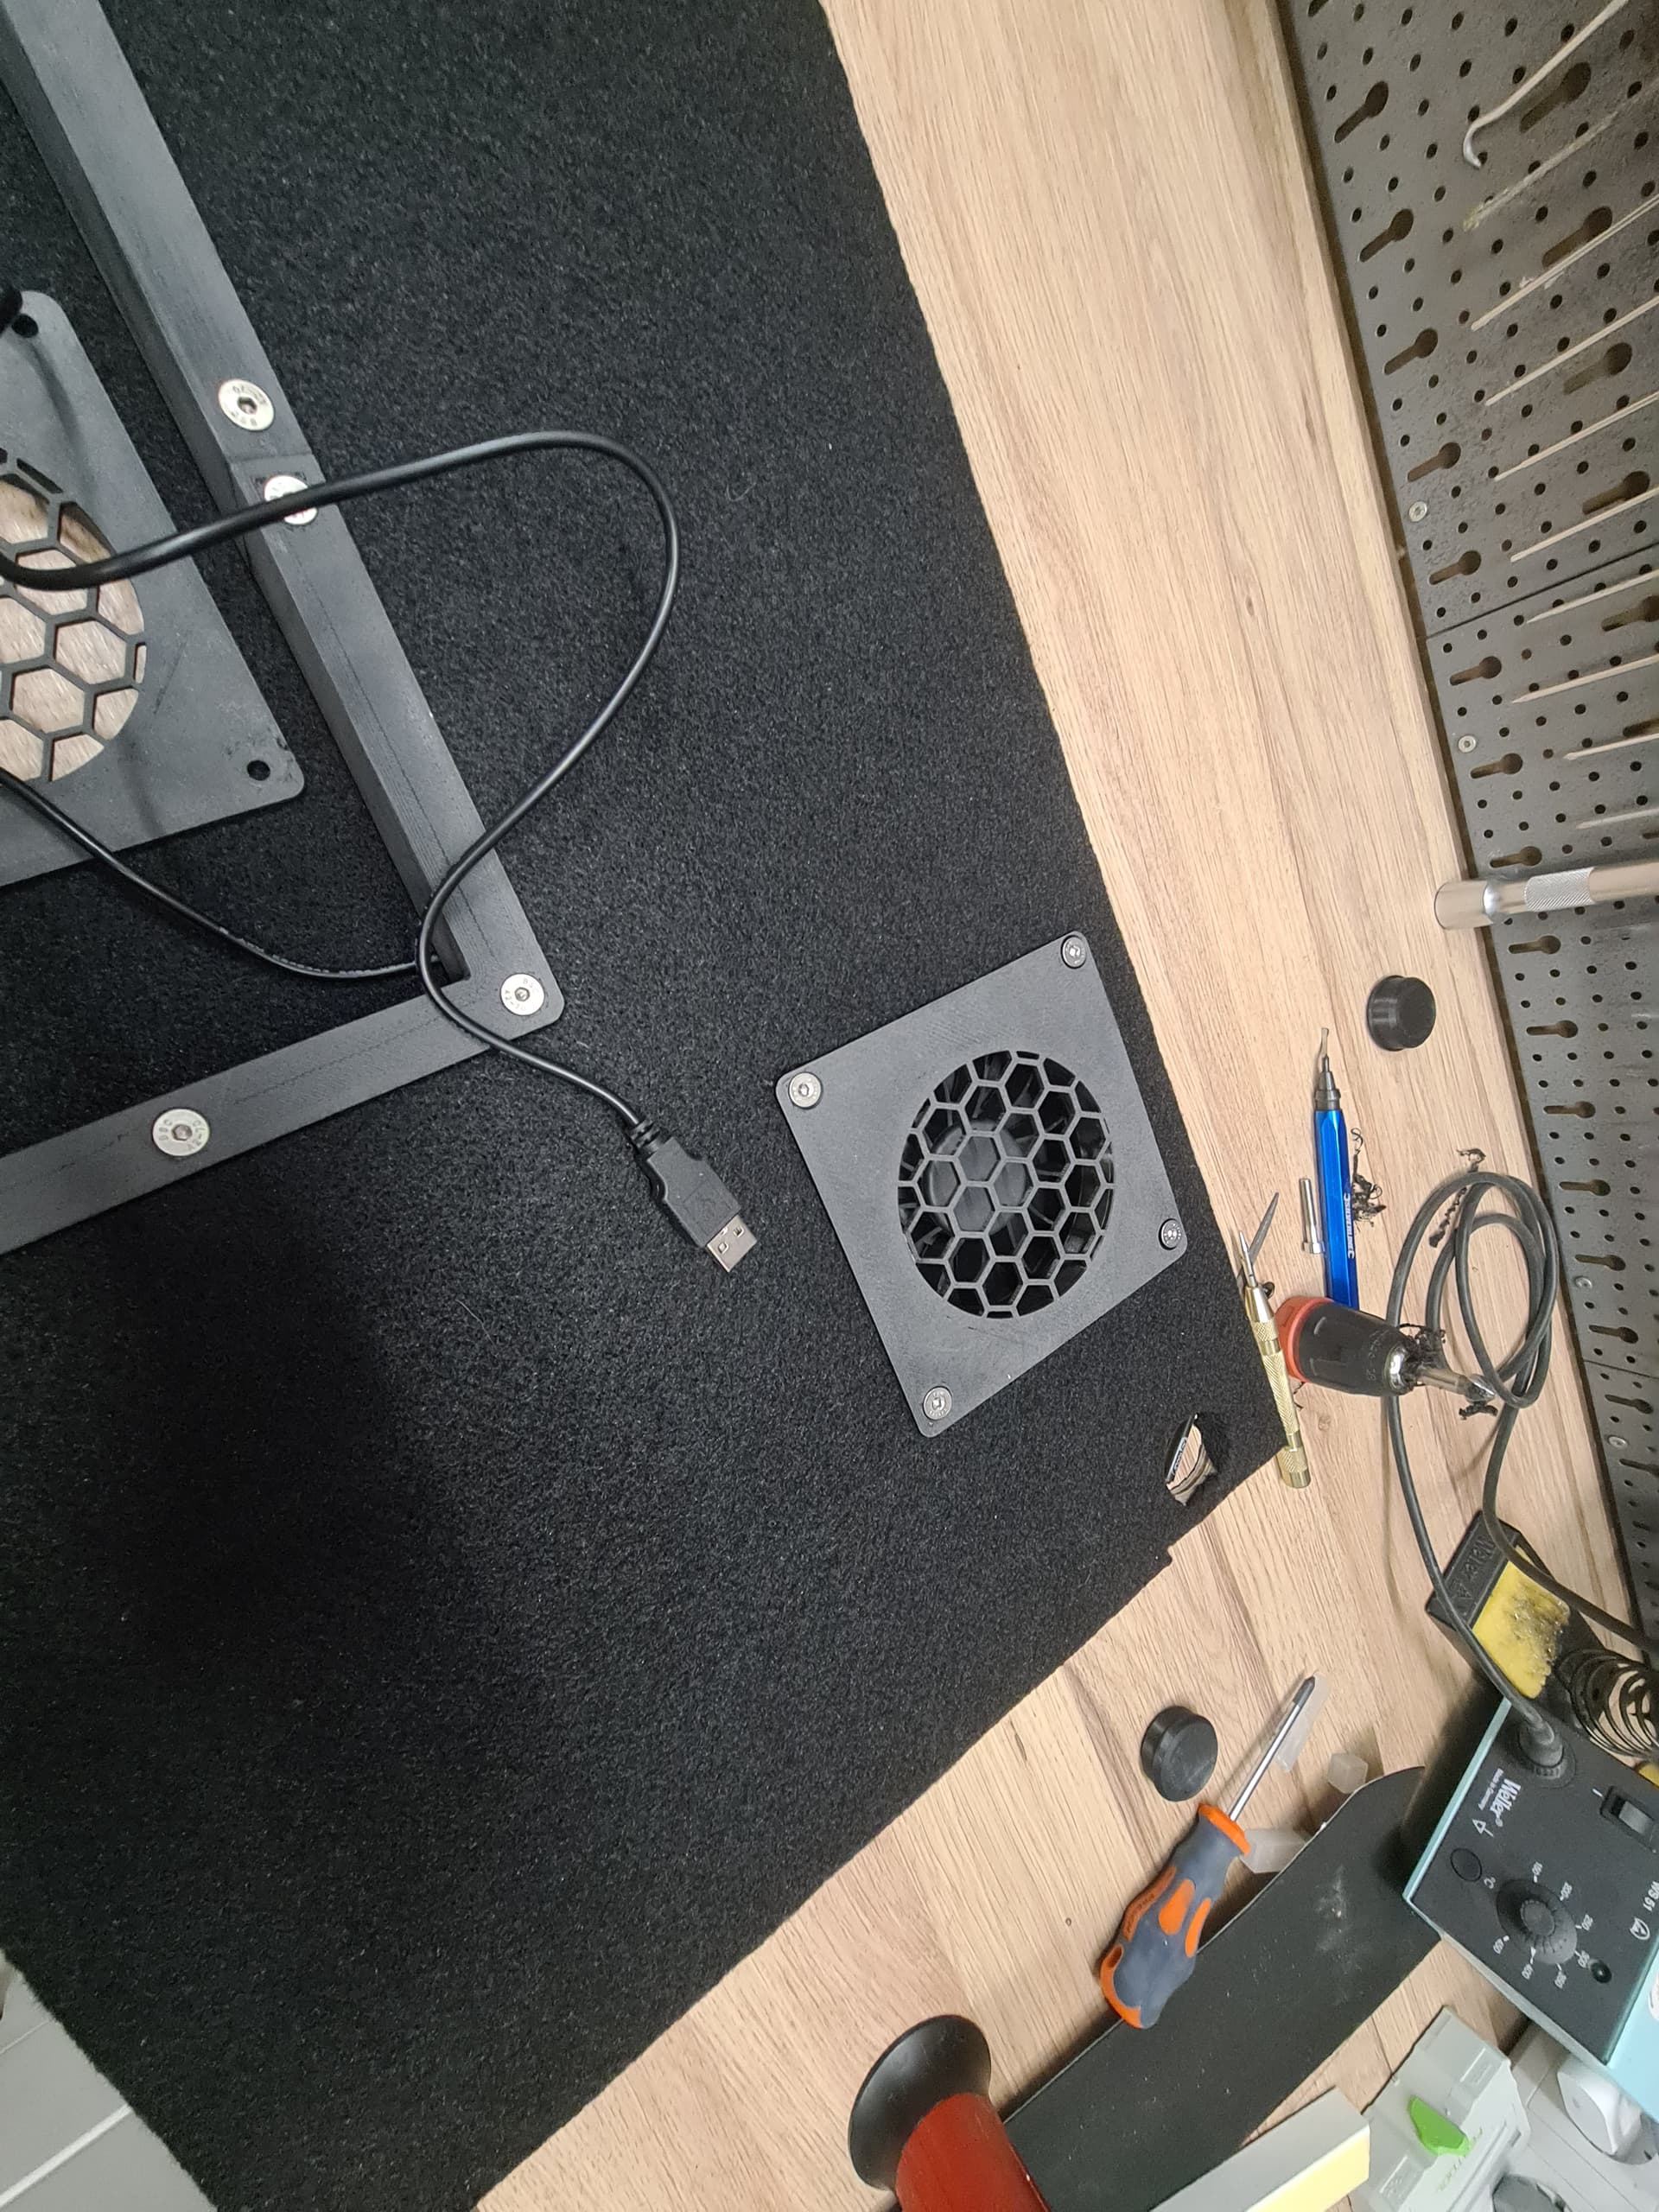
Finished the internals so far and hoked up all the fans tidy nice and neat some may say that’s a bit too much for something you can’t see… and I am absolutely with you but that’s the story of my life basically.
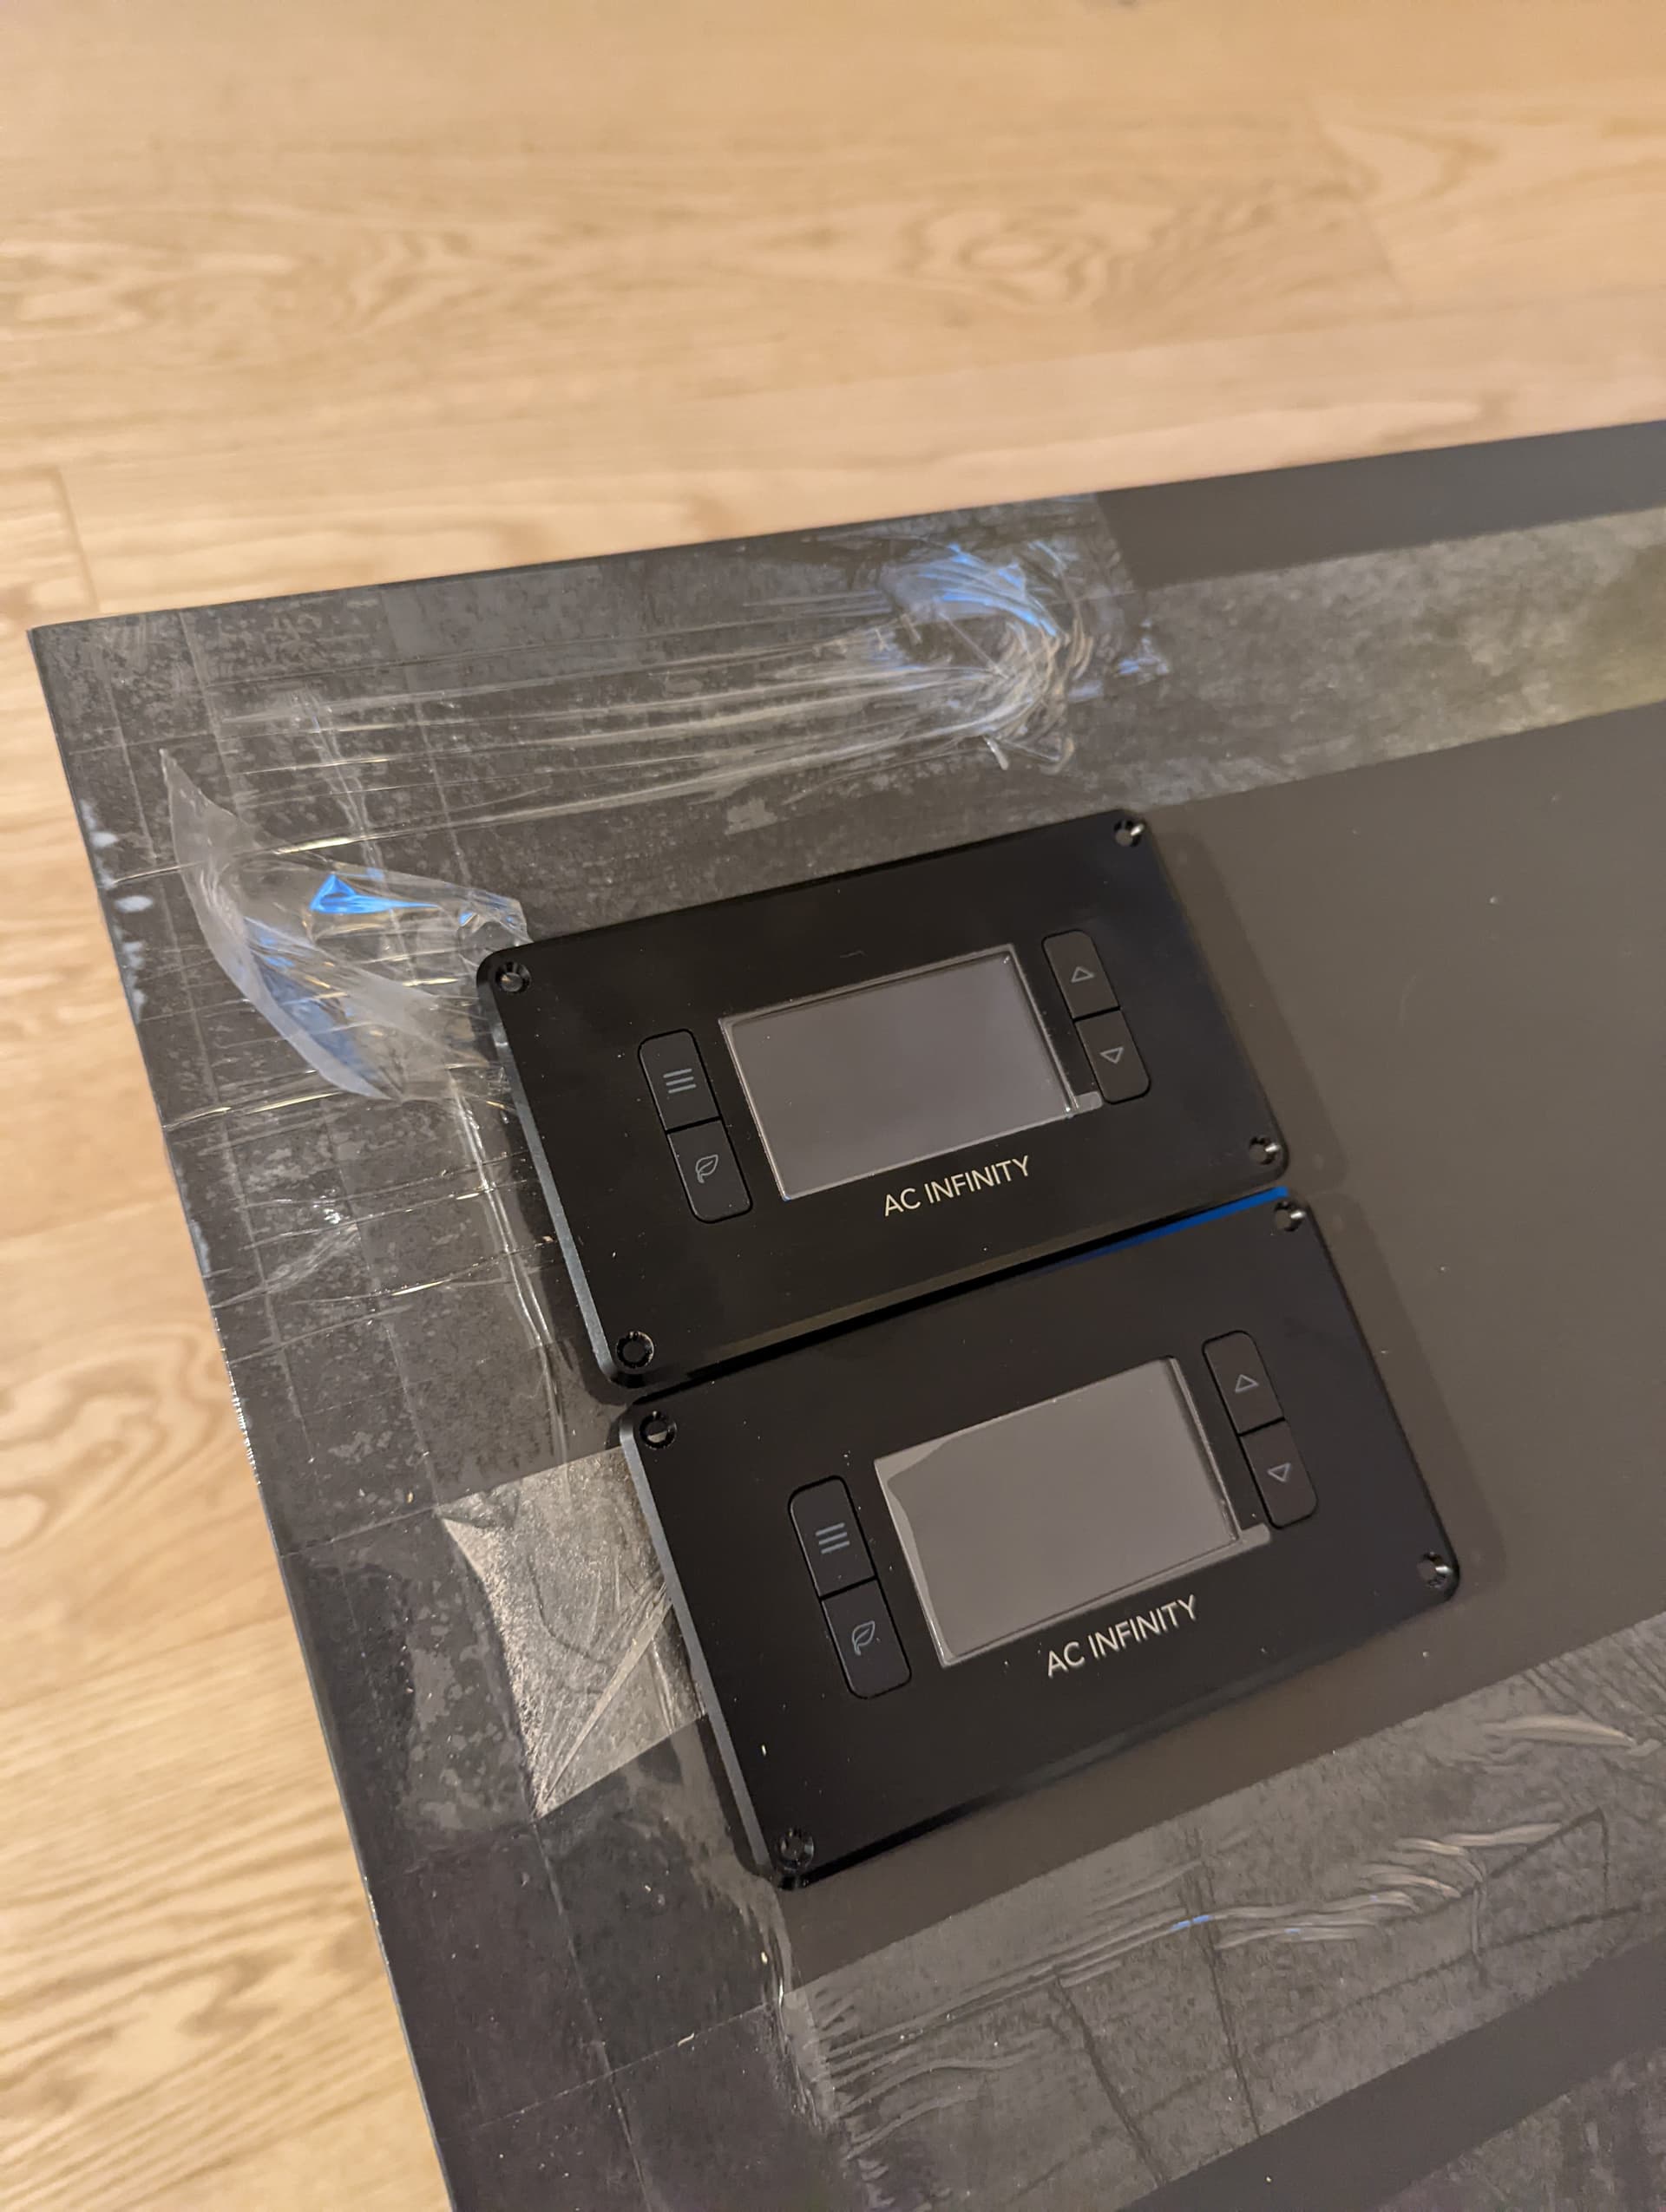
Today I am cutting the outer shell board and insert the control panels.
Linoleum boards are on top. Mitres still drying but everything worked out really nice (even it took ages and I quadripple measured all the stuff)
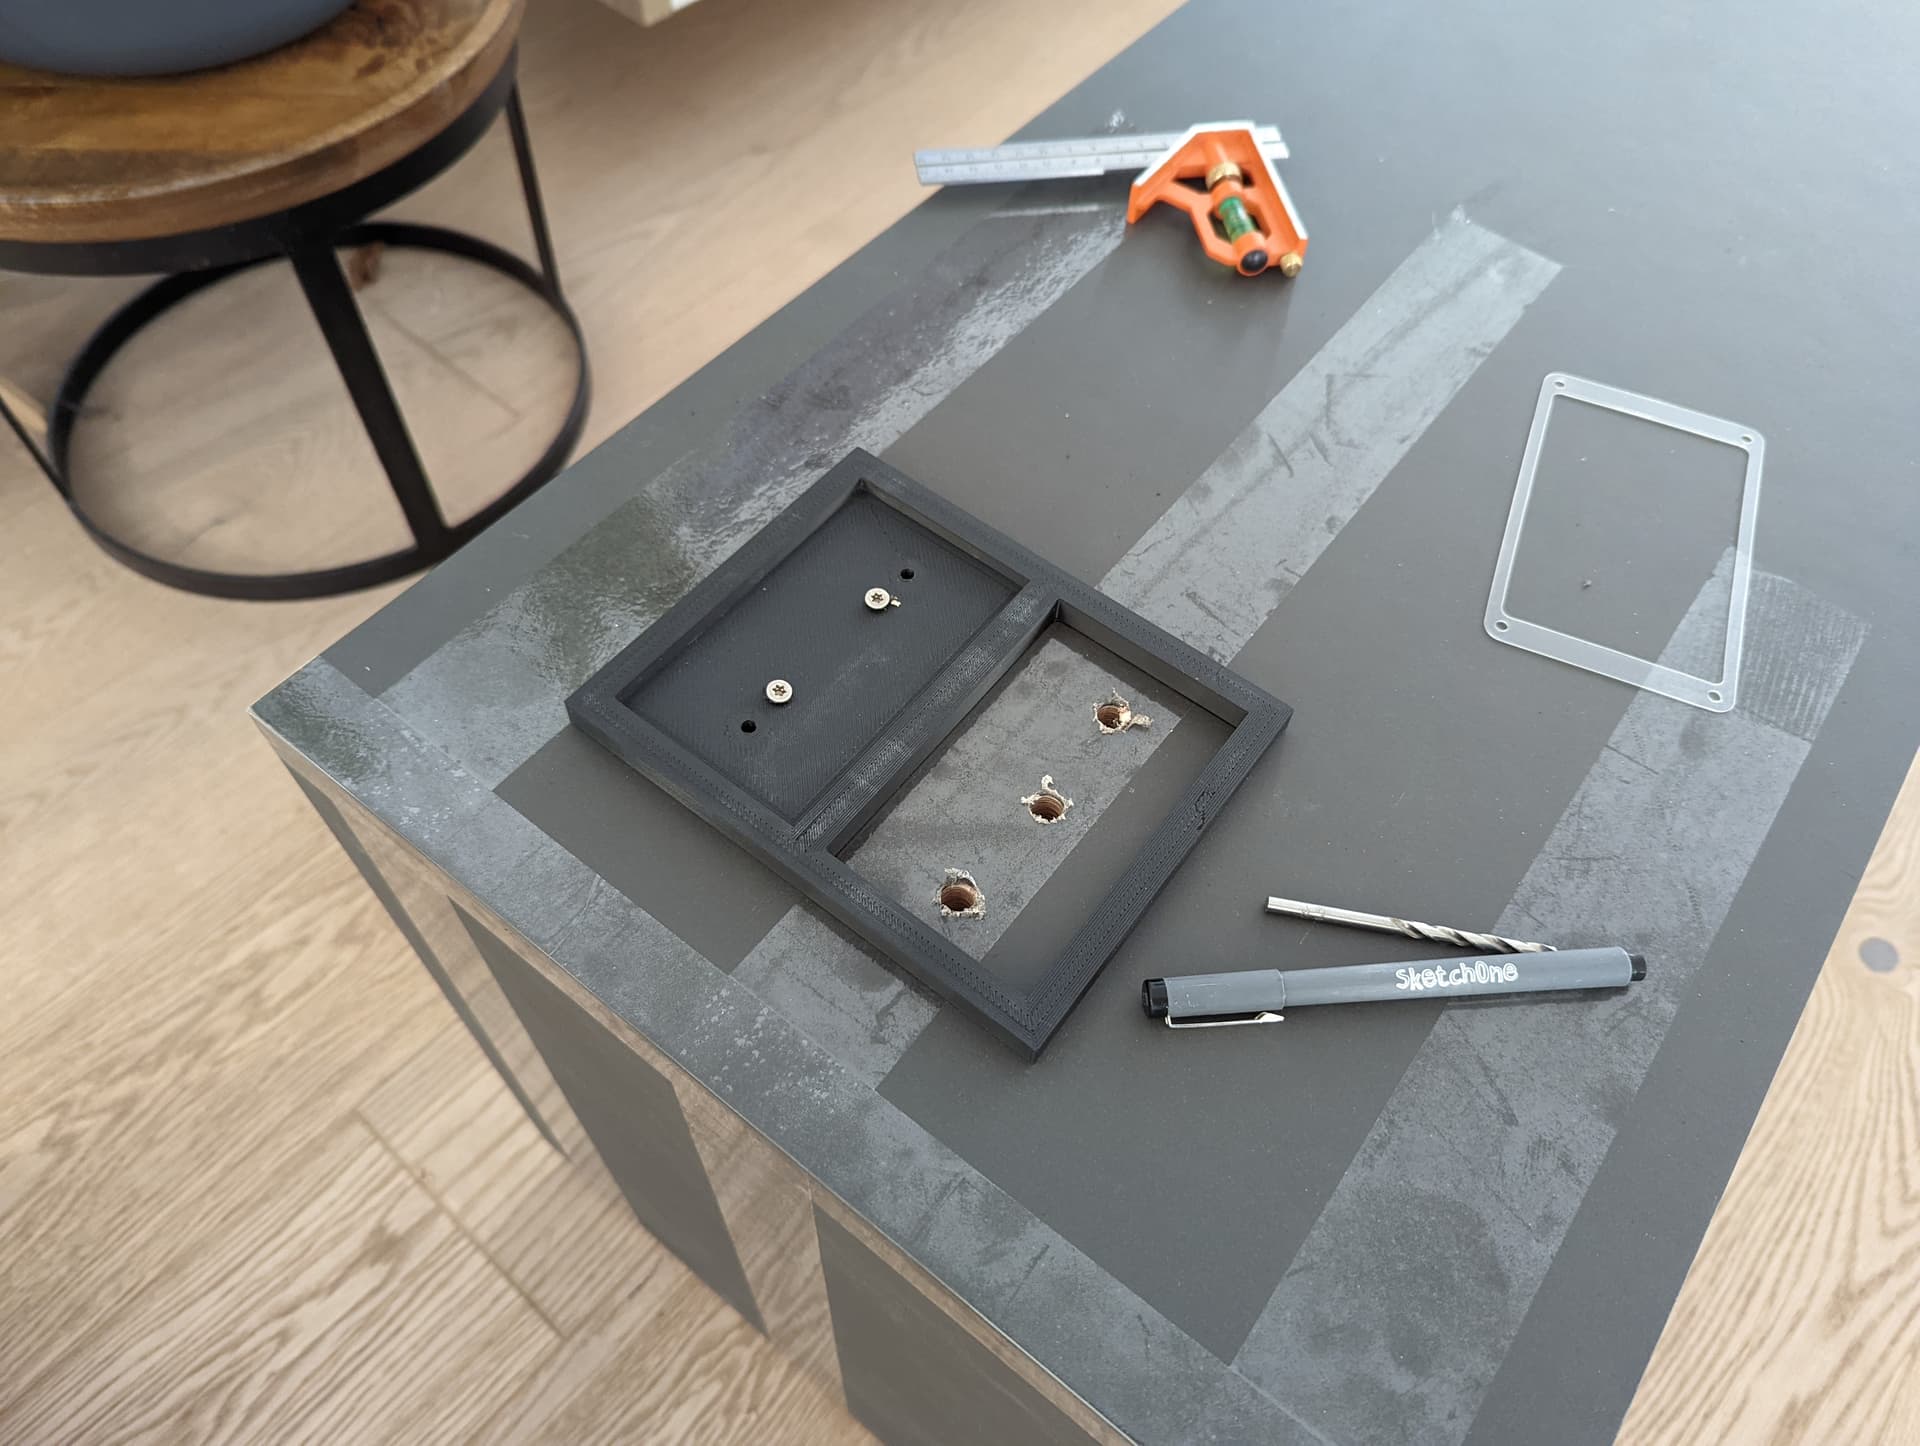
Even the display cut out I made a 3d printed jig to route them out and have some plastic frame underneath so I could poke some indexing pins through to align top and bottom
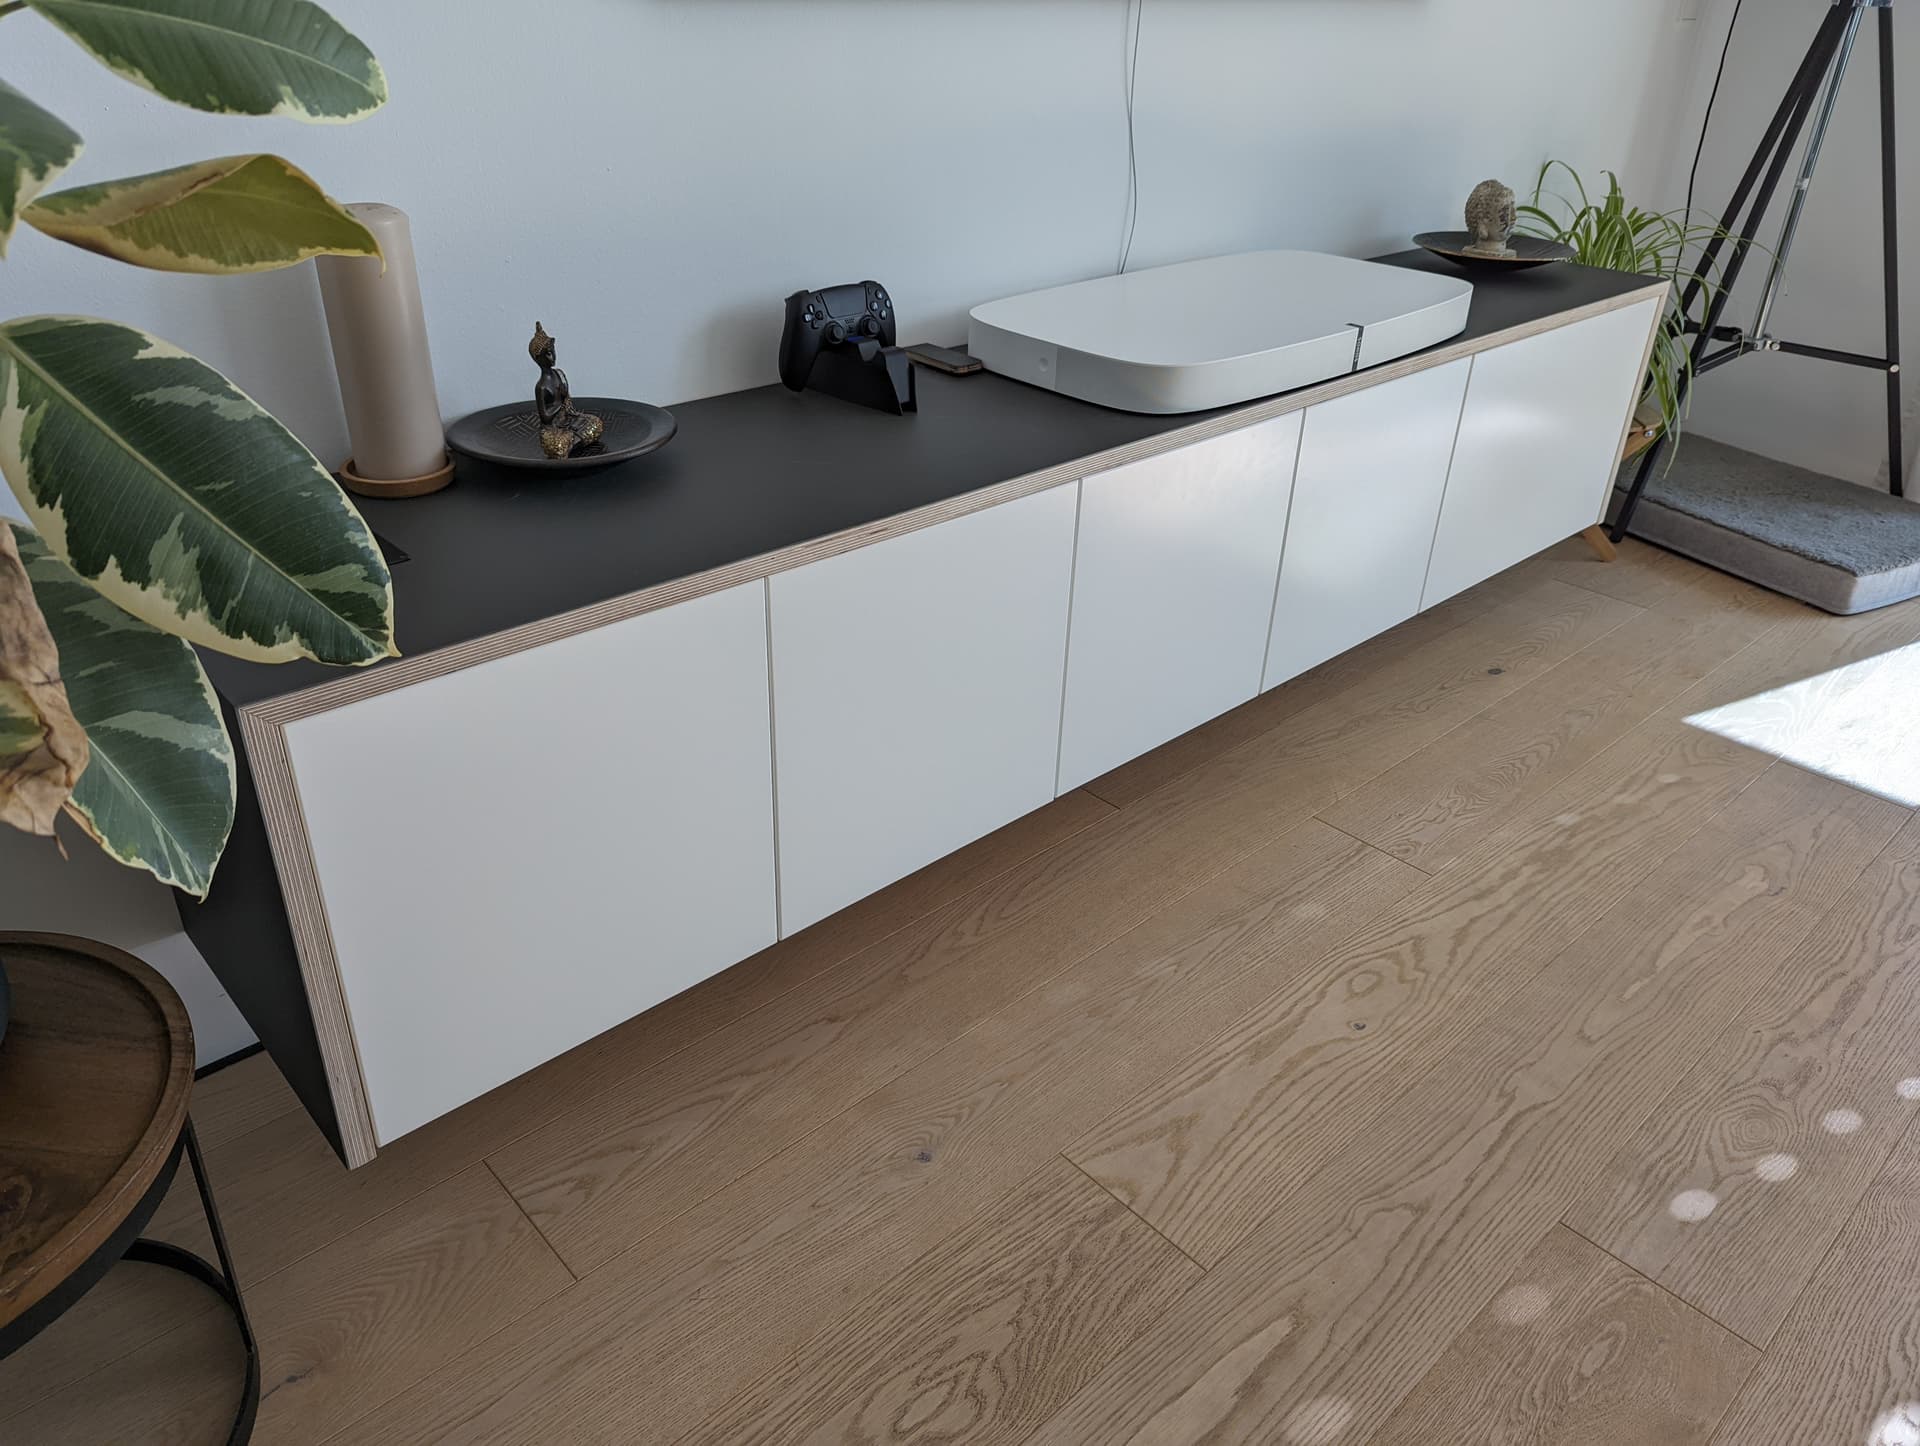
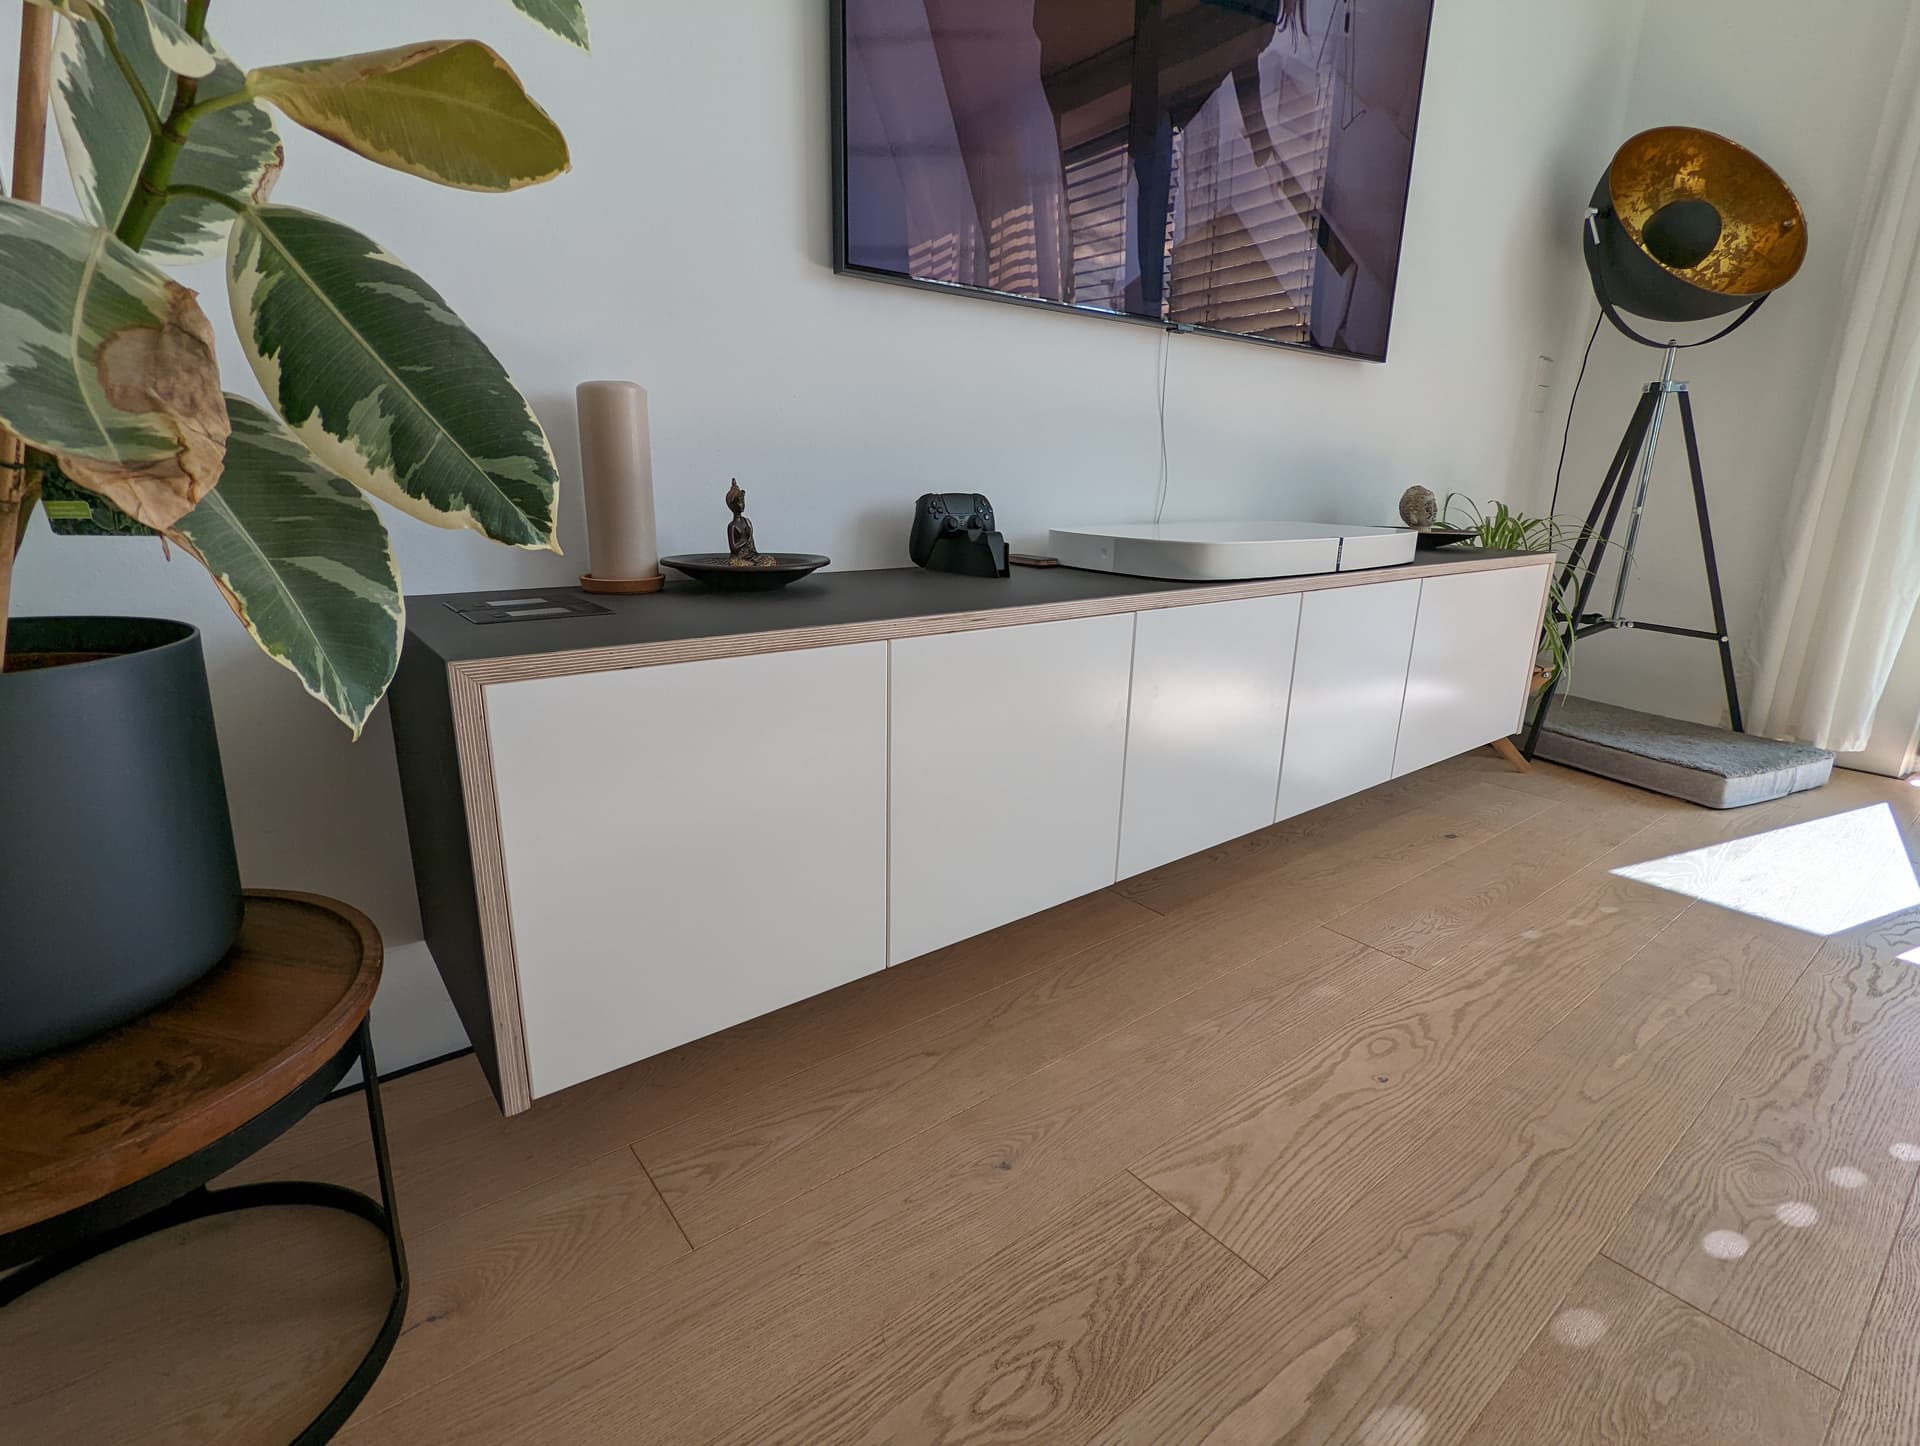
Done everything worked out super nicely Ps5 can be used with closed doors and temperatures are handled super well. The smart home side of the cabinet is much cleaner now and all ports behind the pegboard can be accessed without a hassle.
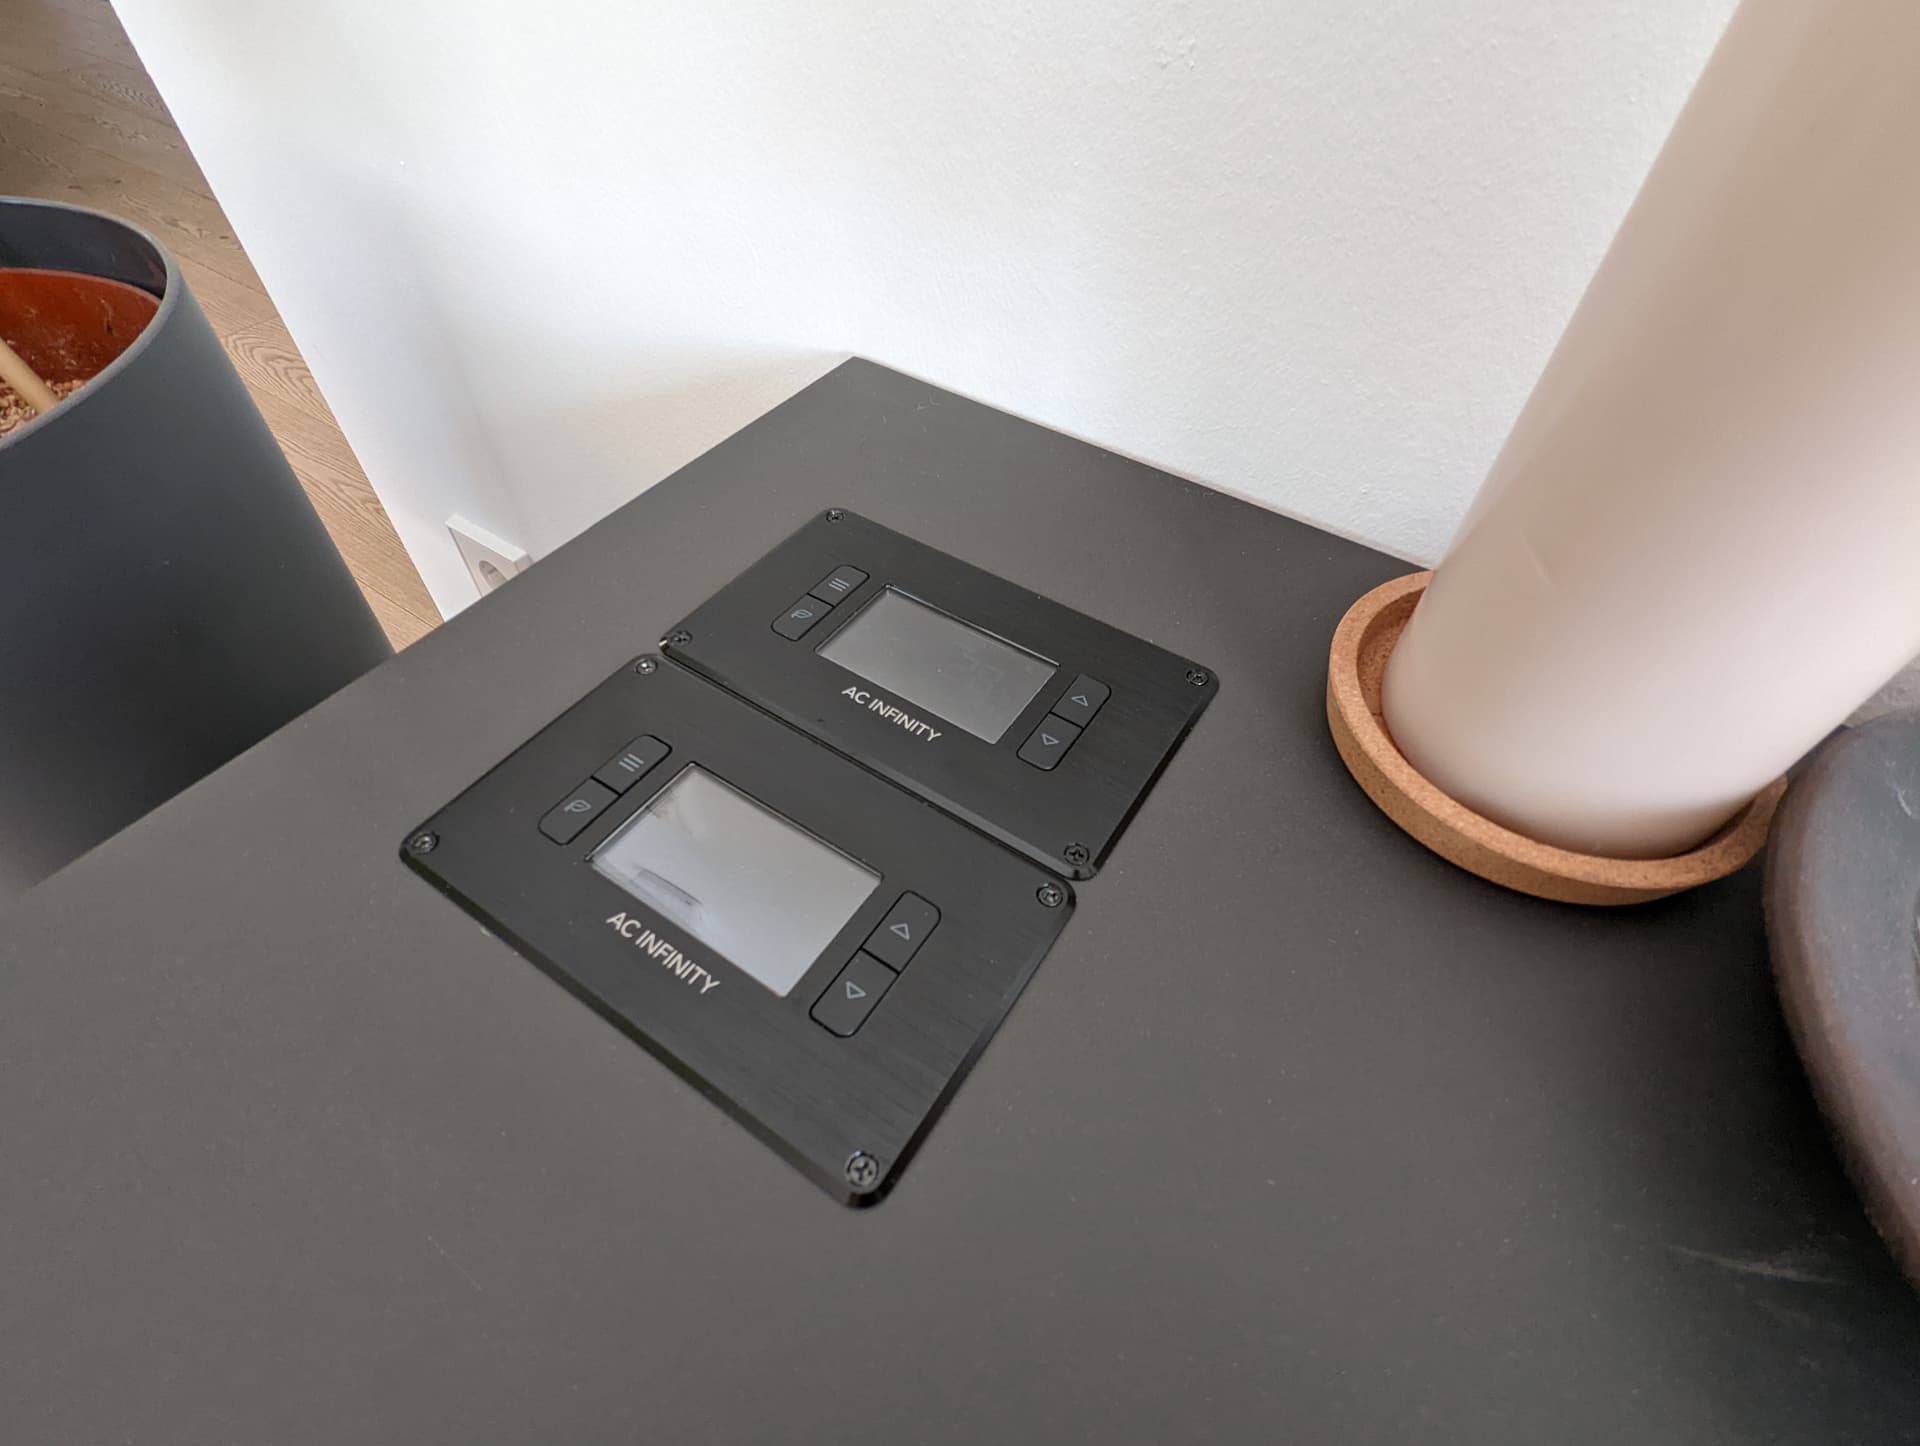
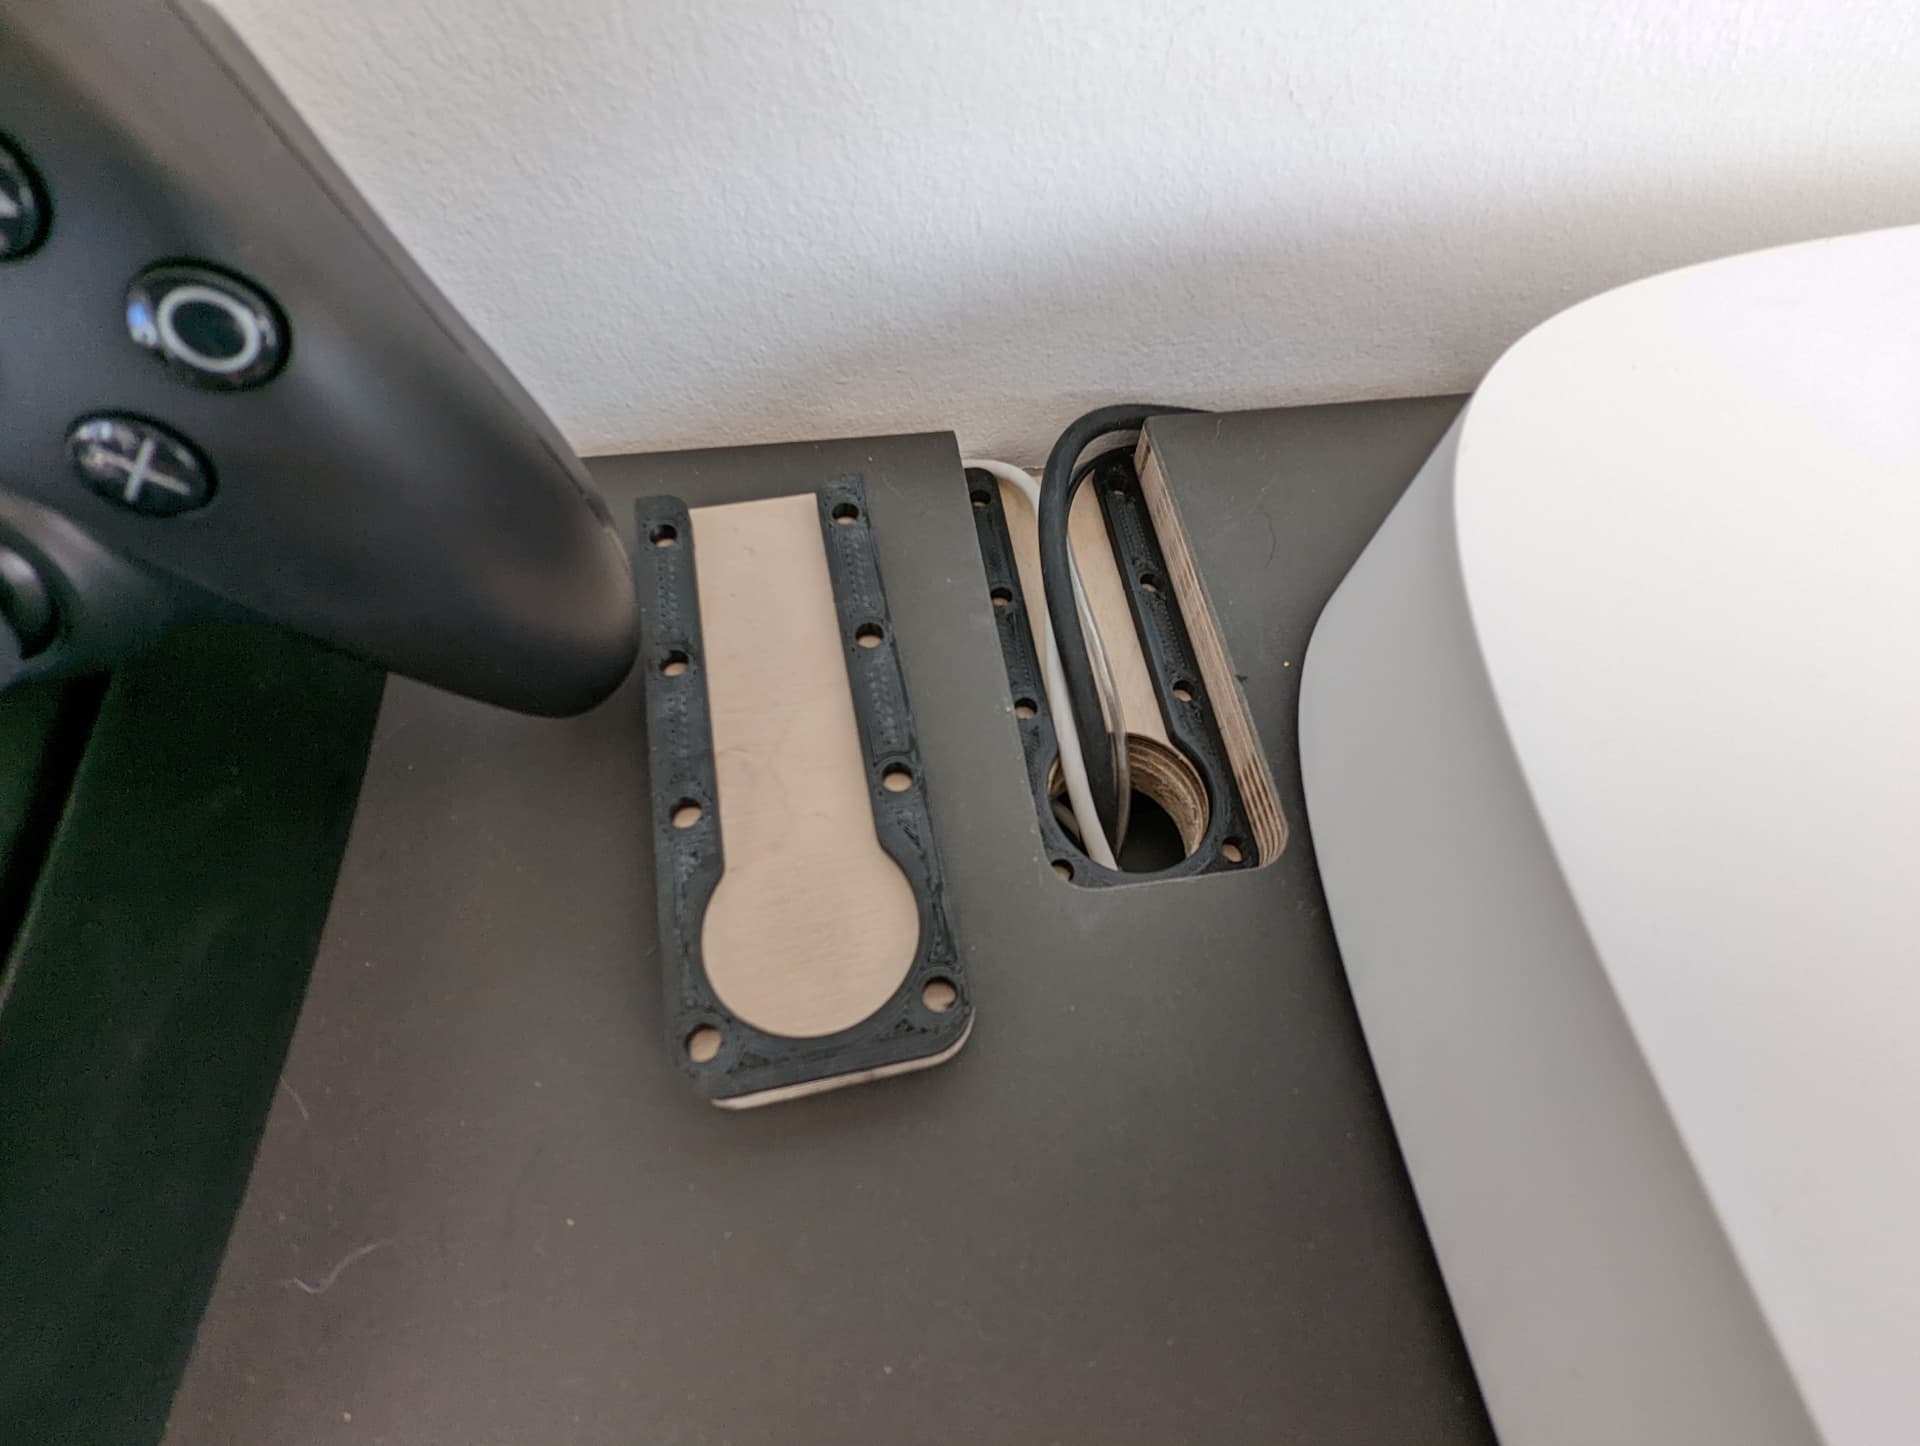
Still missing some magnets for the cable pass through but they hopefully will arrive sooner or later and then the little latch snaps on its position.
@Intohouse Thanks a lot. I got a bit clearance to the wall so I can lift it up from there but yeah otherwise I have to press it up from the inside.
I thought about a recess for a finger ledge but opted against it because it’s not often used… on a desk build I would mill a recess in it to lift it up easier.
 . On top of that comes the requests of my wife no visible stuff or open cabinets or diffusing materials like waved rattan or slatted wood what so ever clean and streamline it should be like the rest of our furniture white and oak.
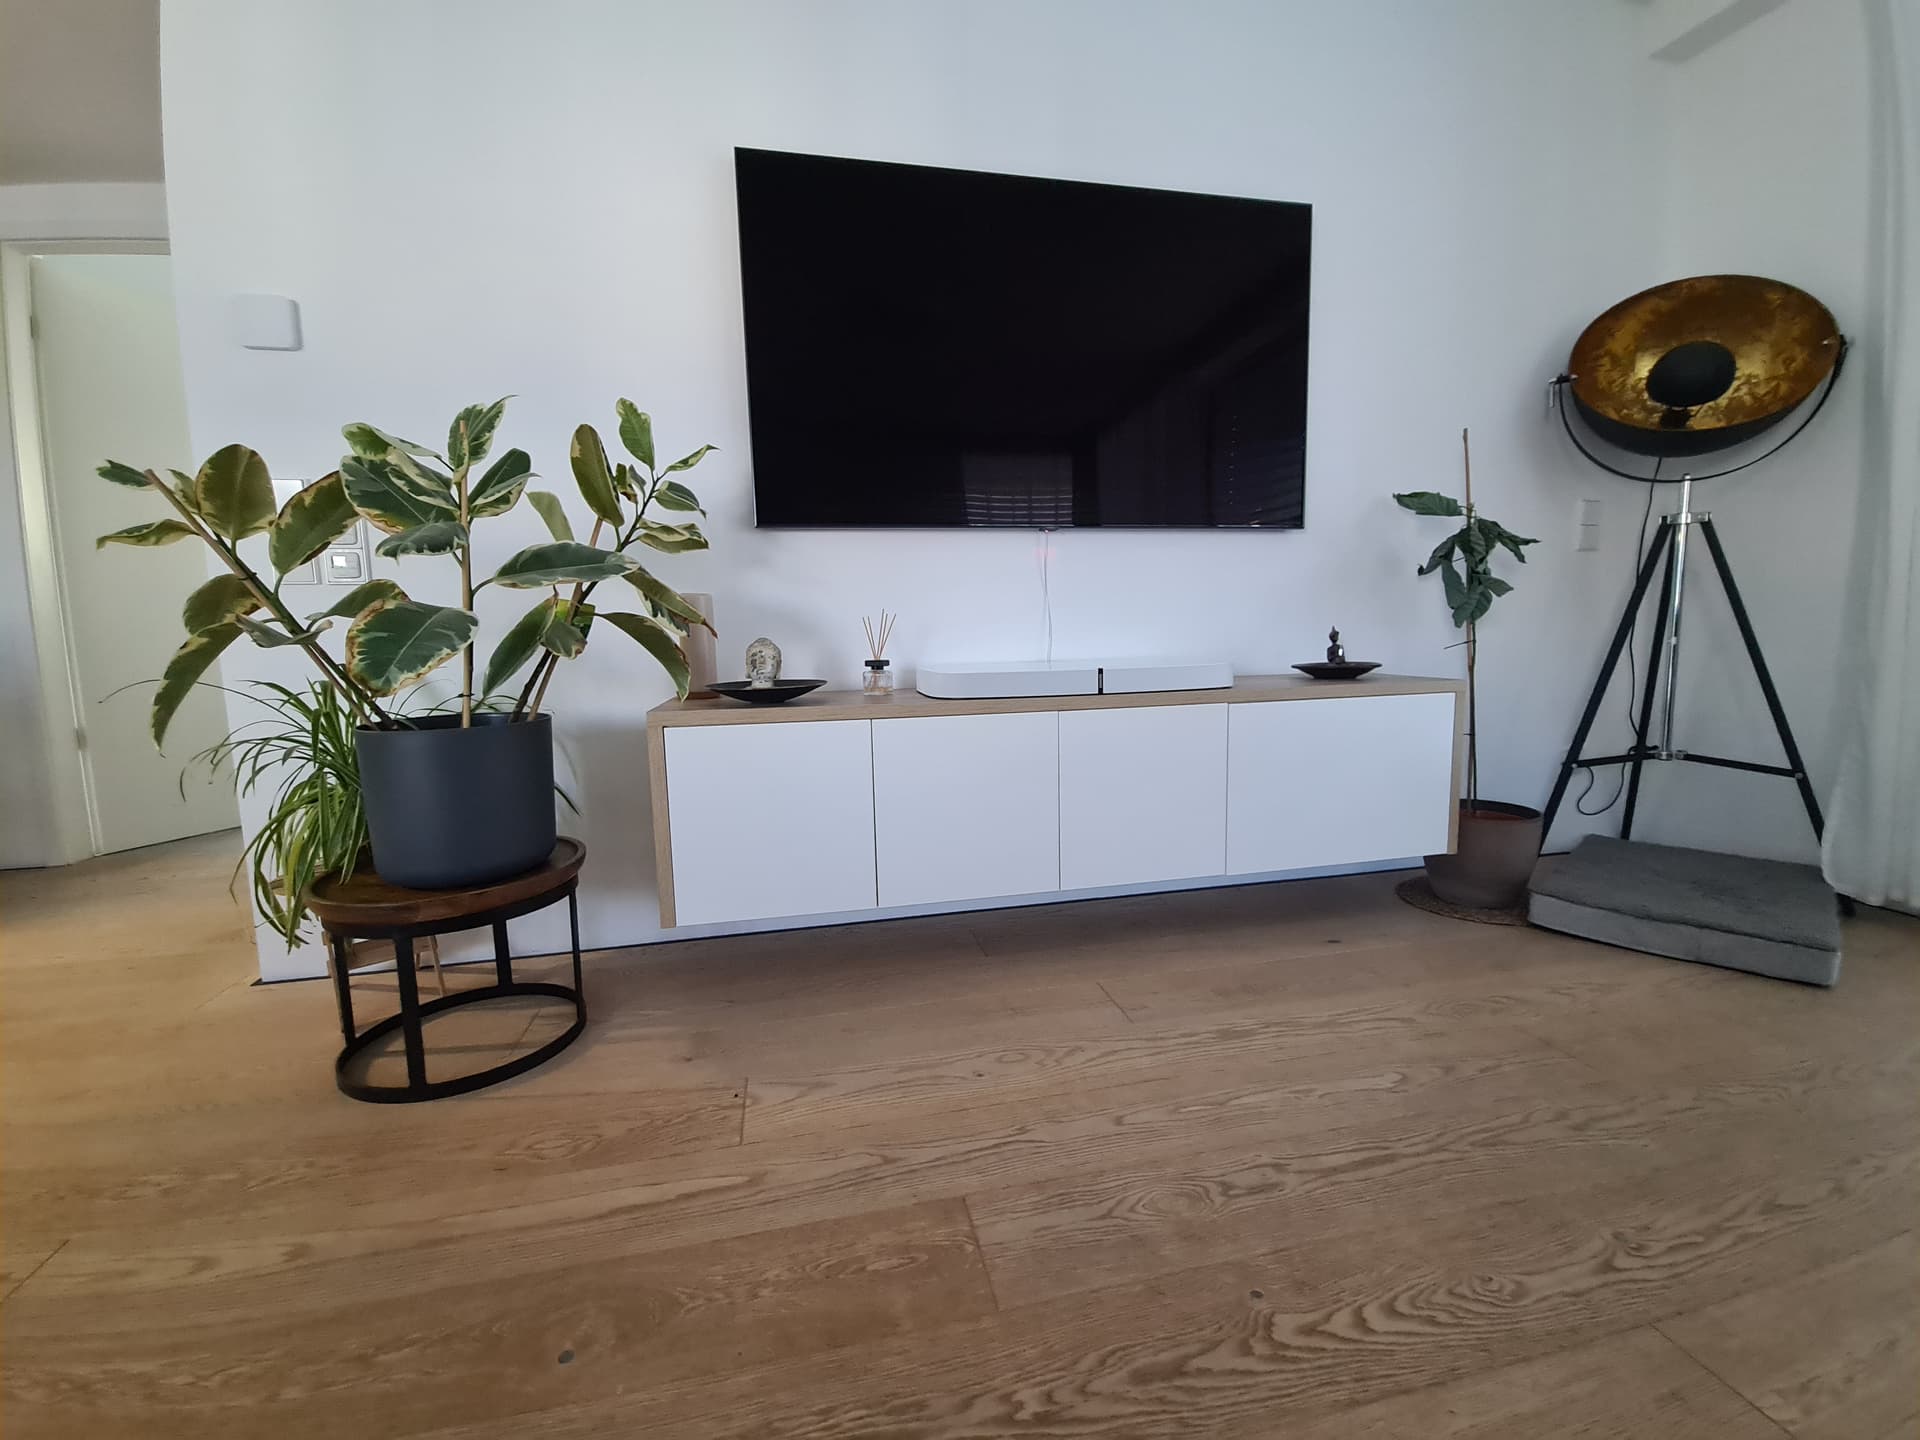


 some may say that’s a bit too much for something you can’t see… and I am absolutely with you but that’s the story of my life basically.