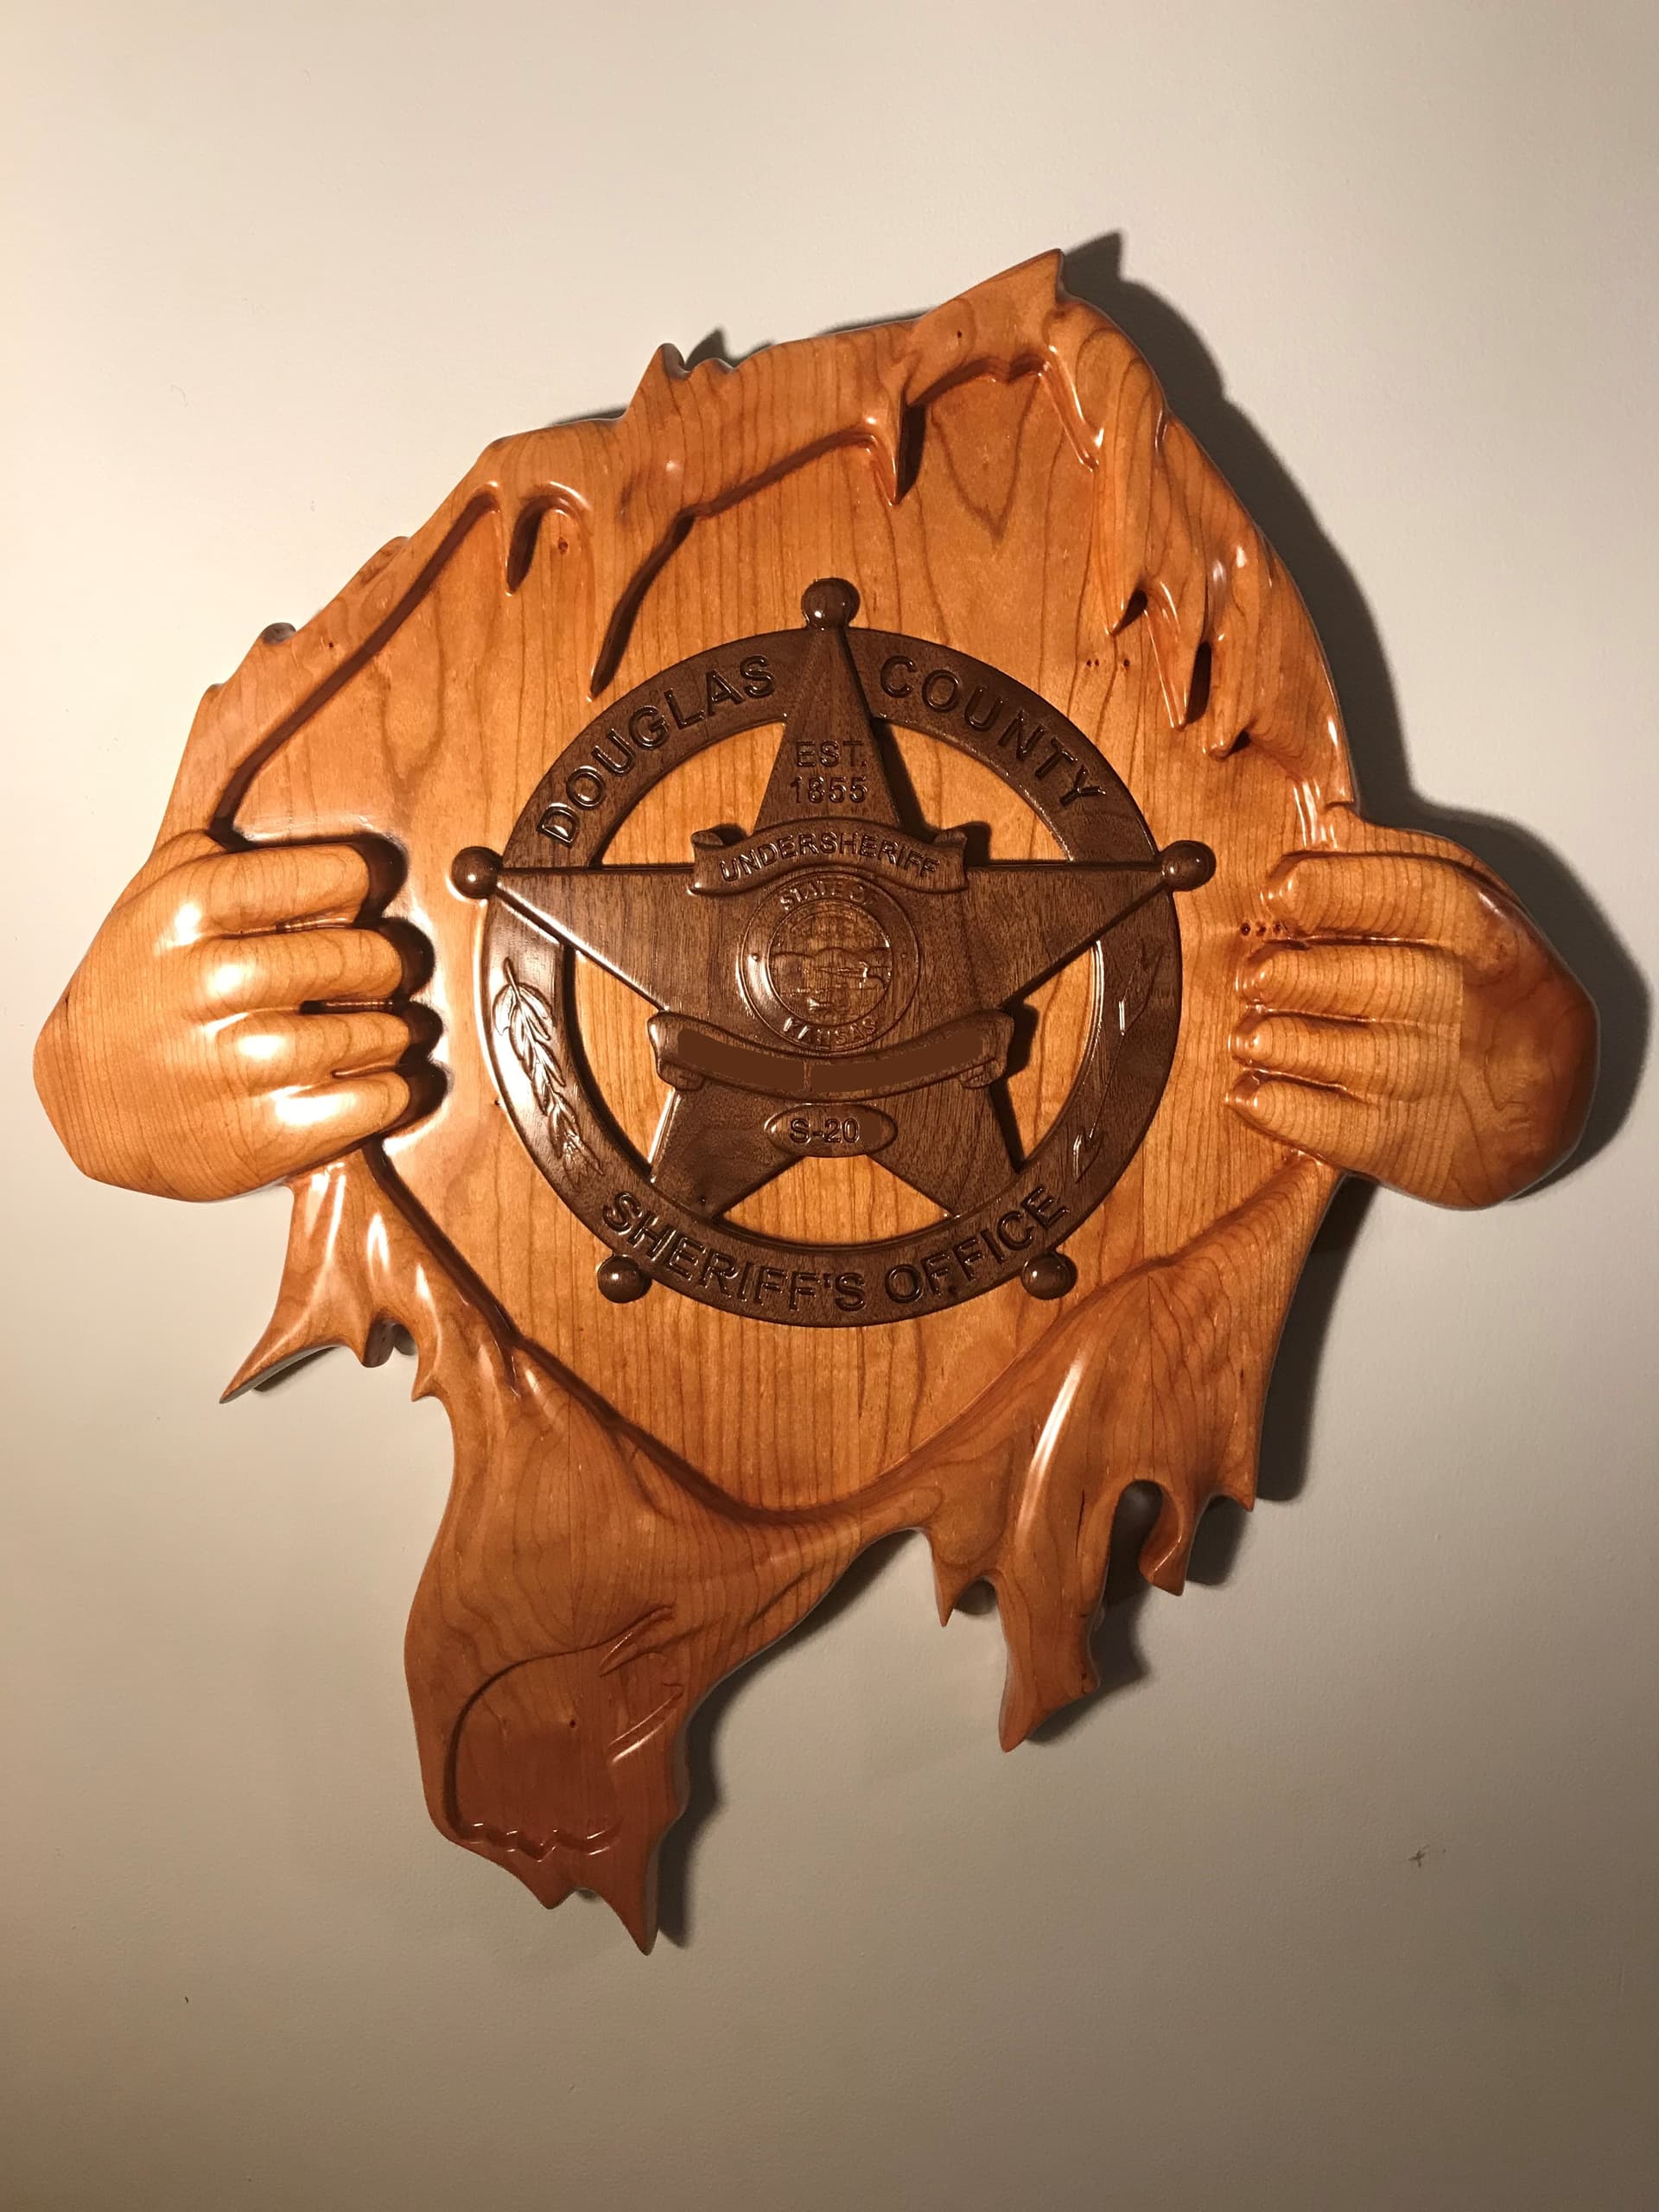
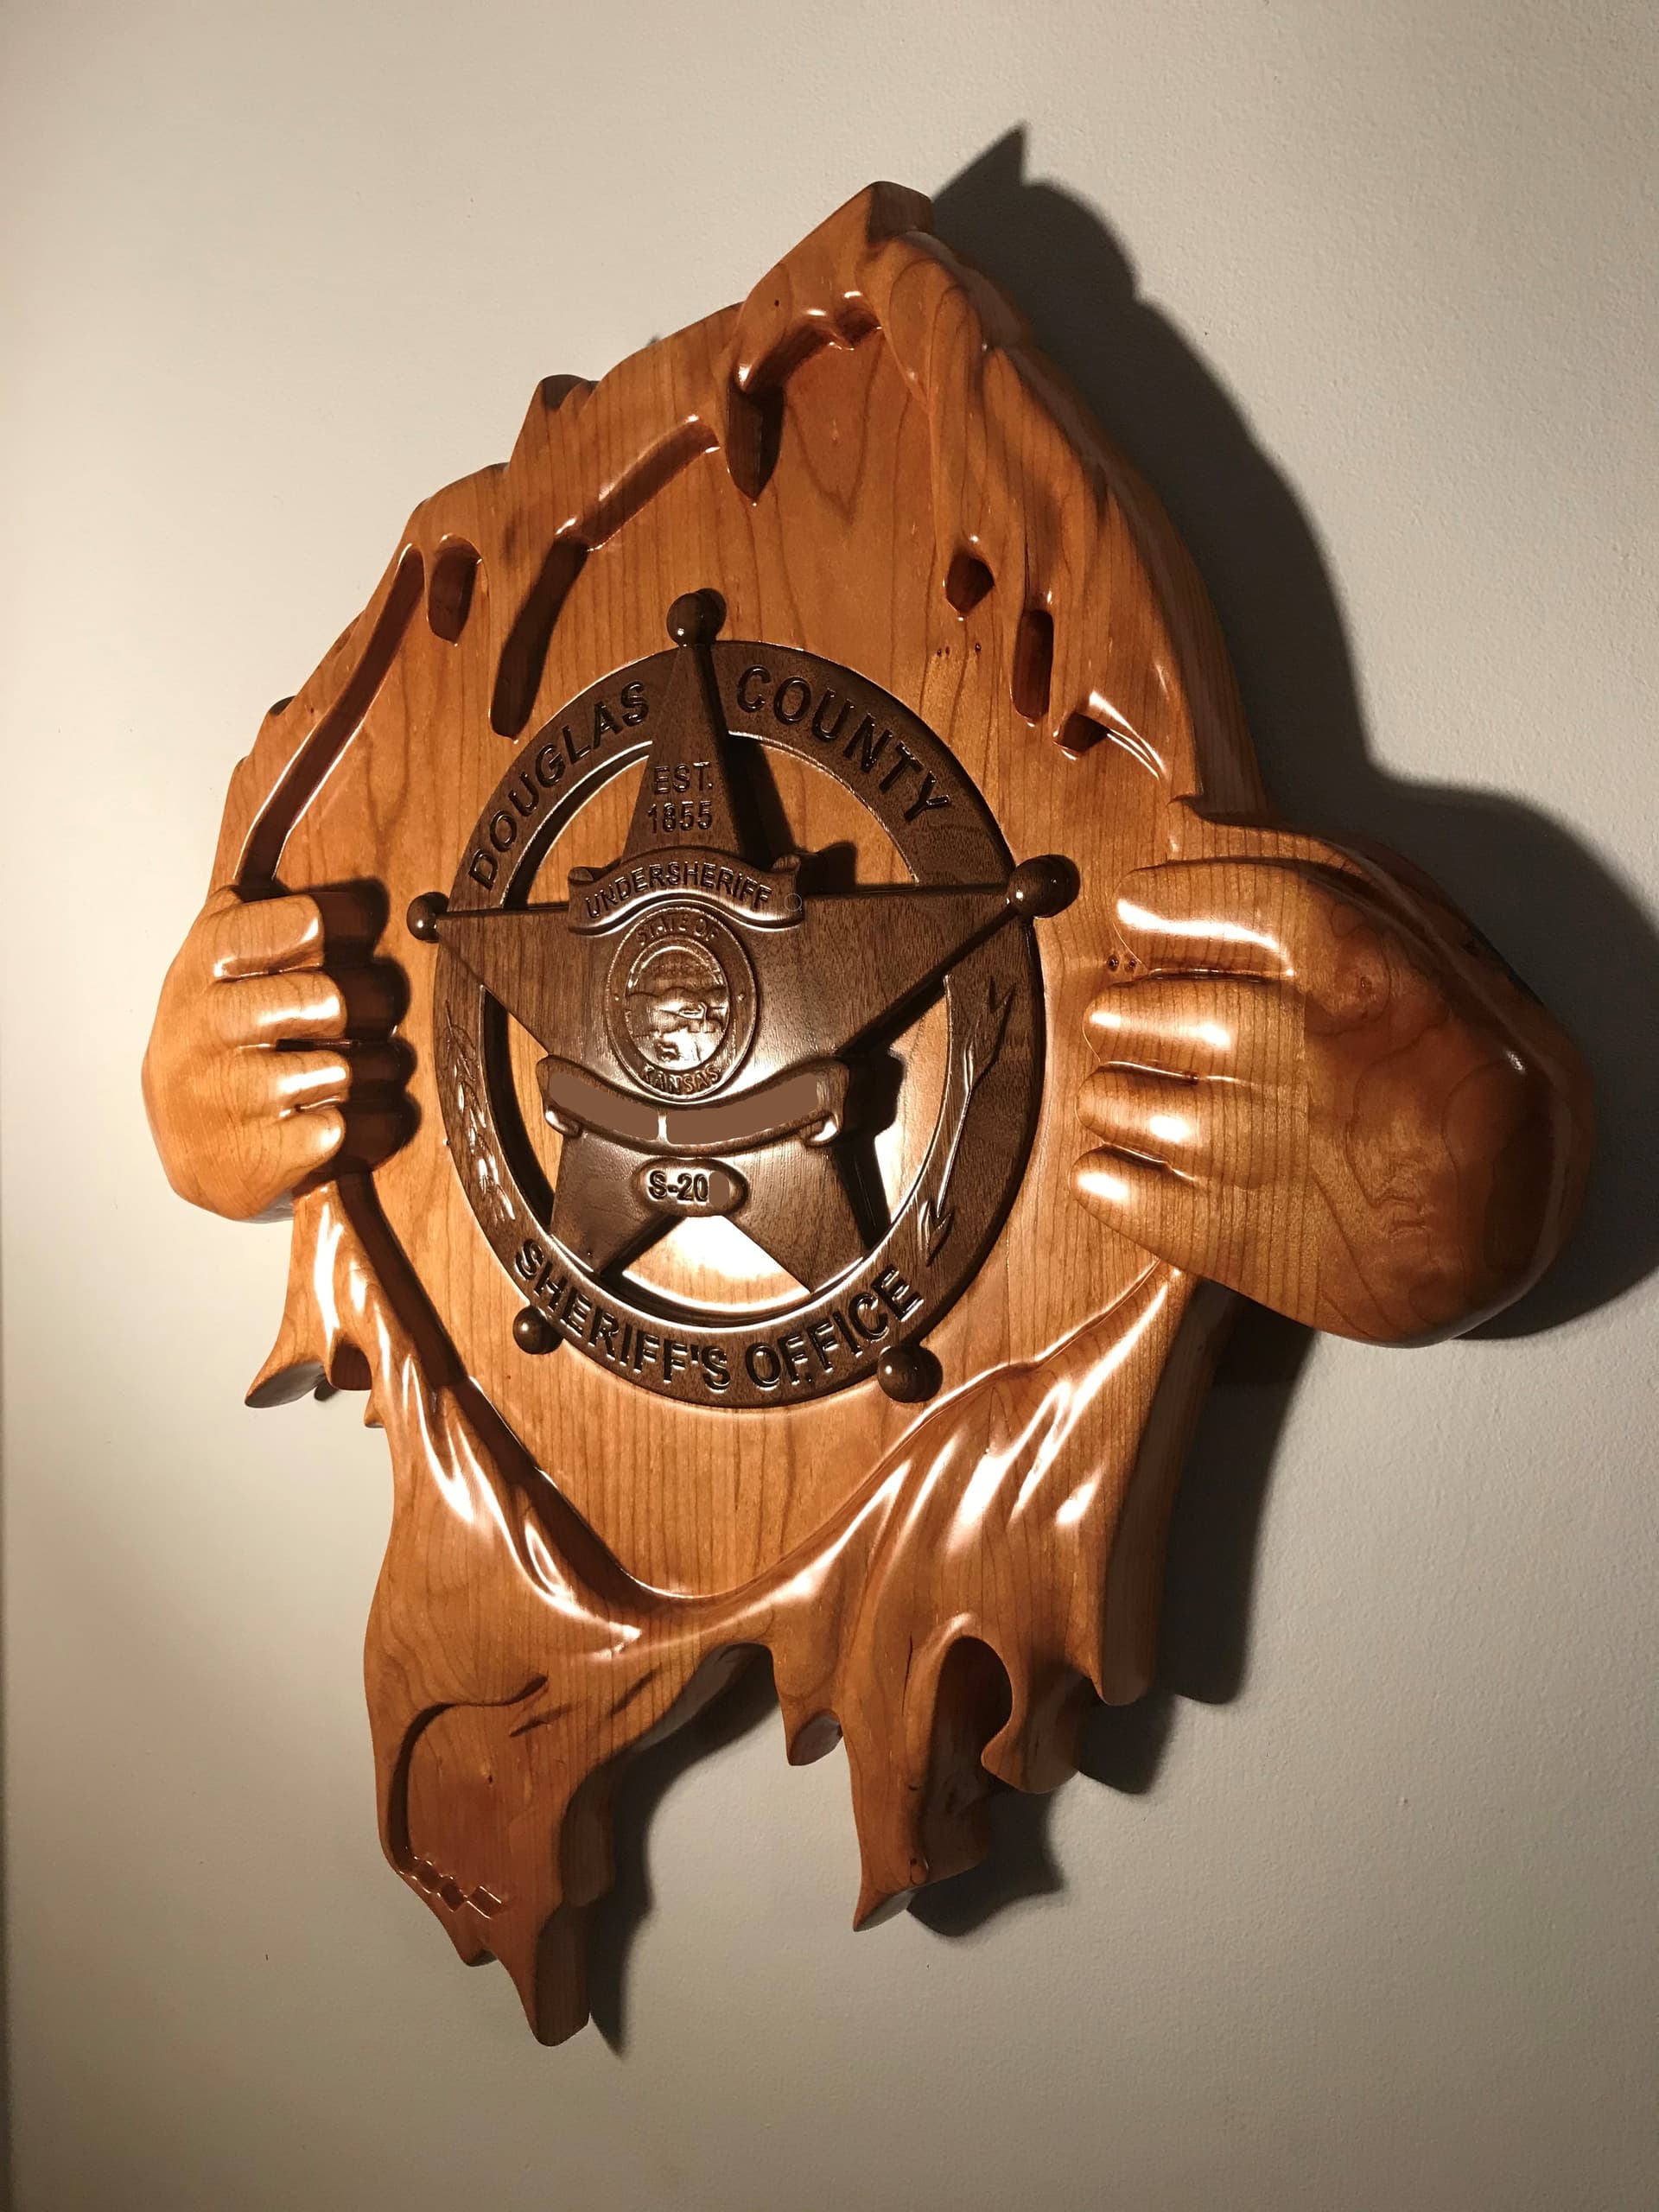
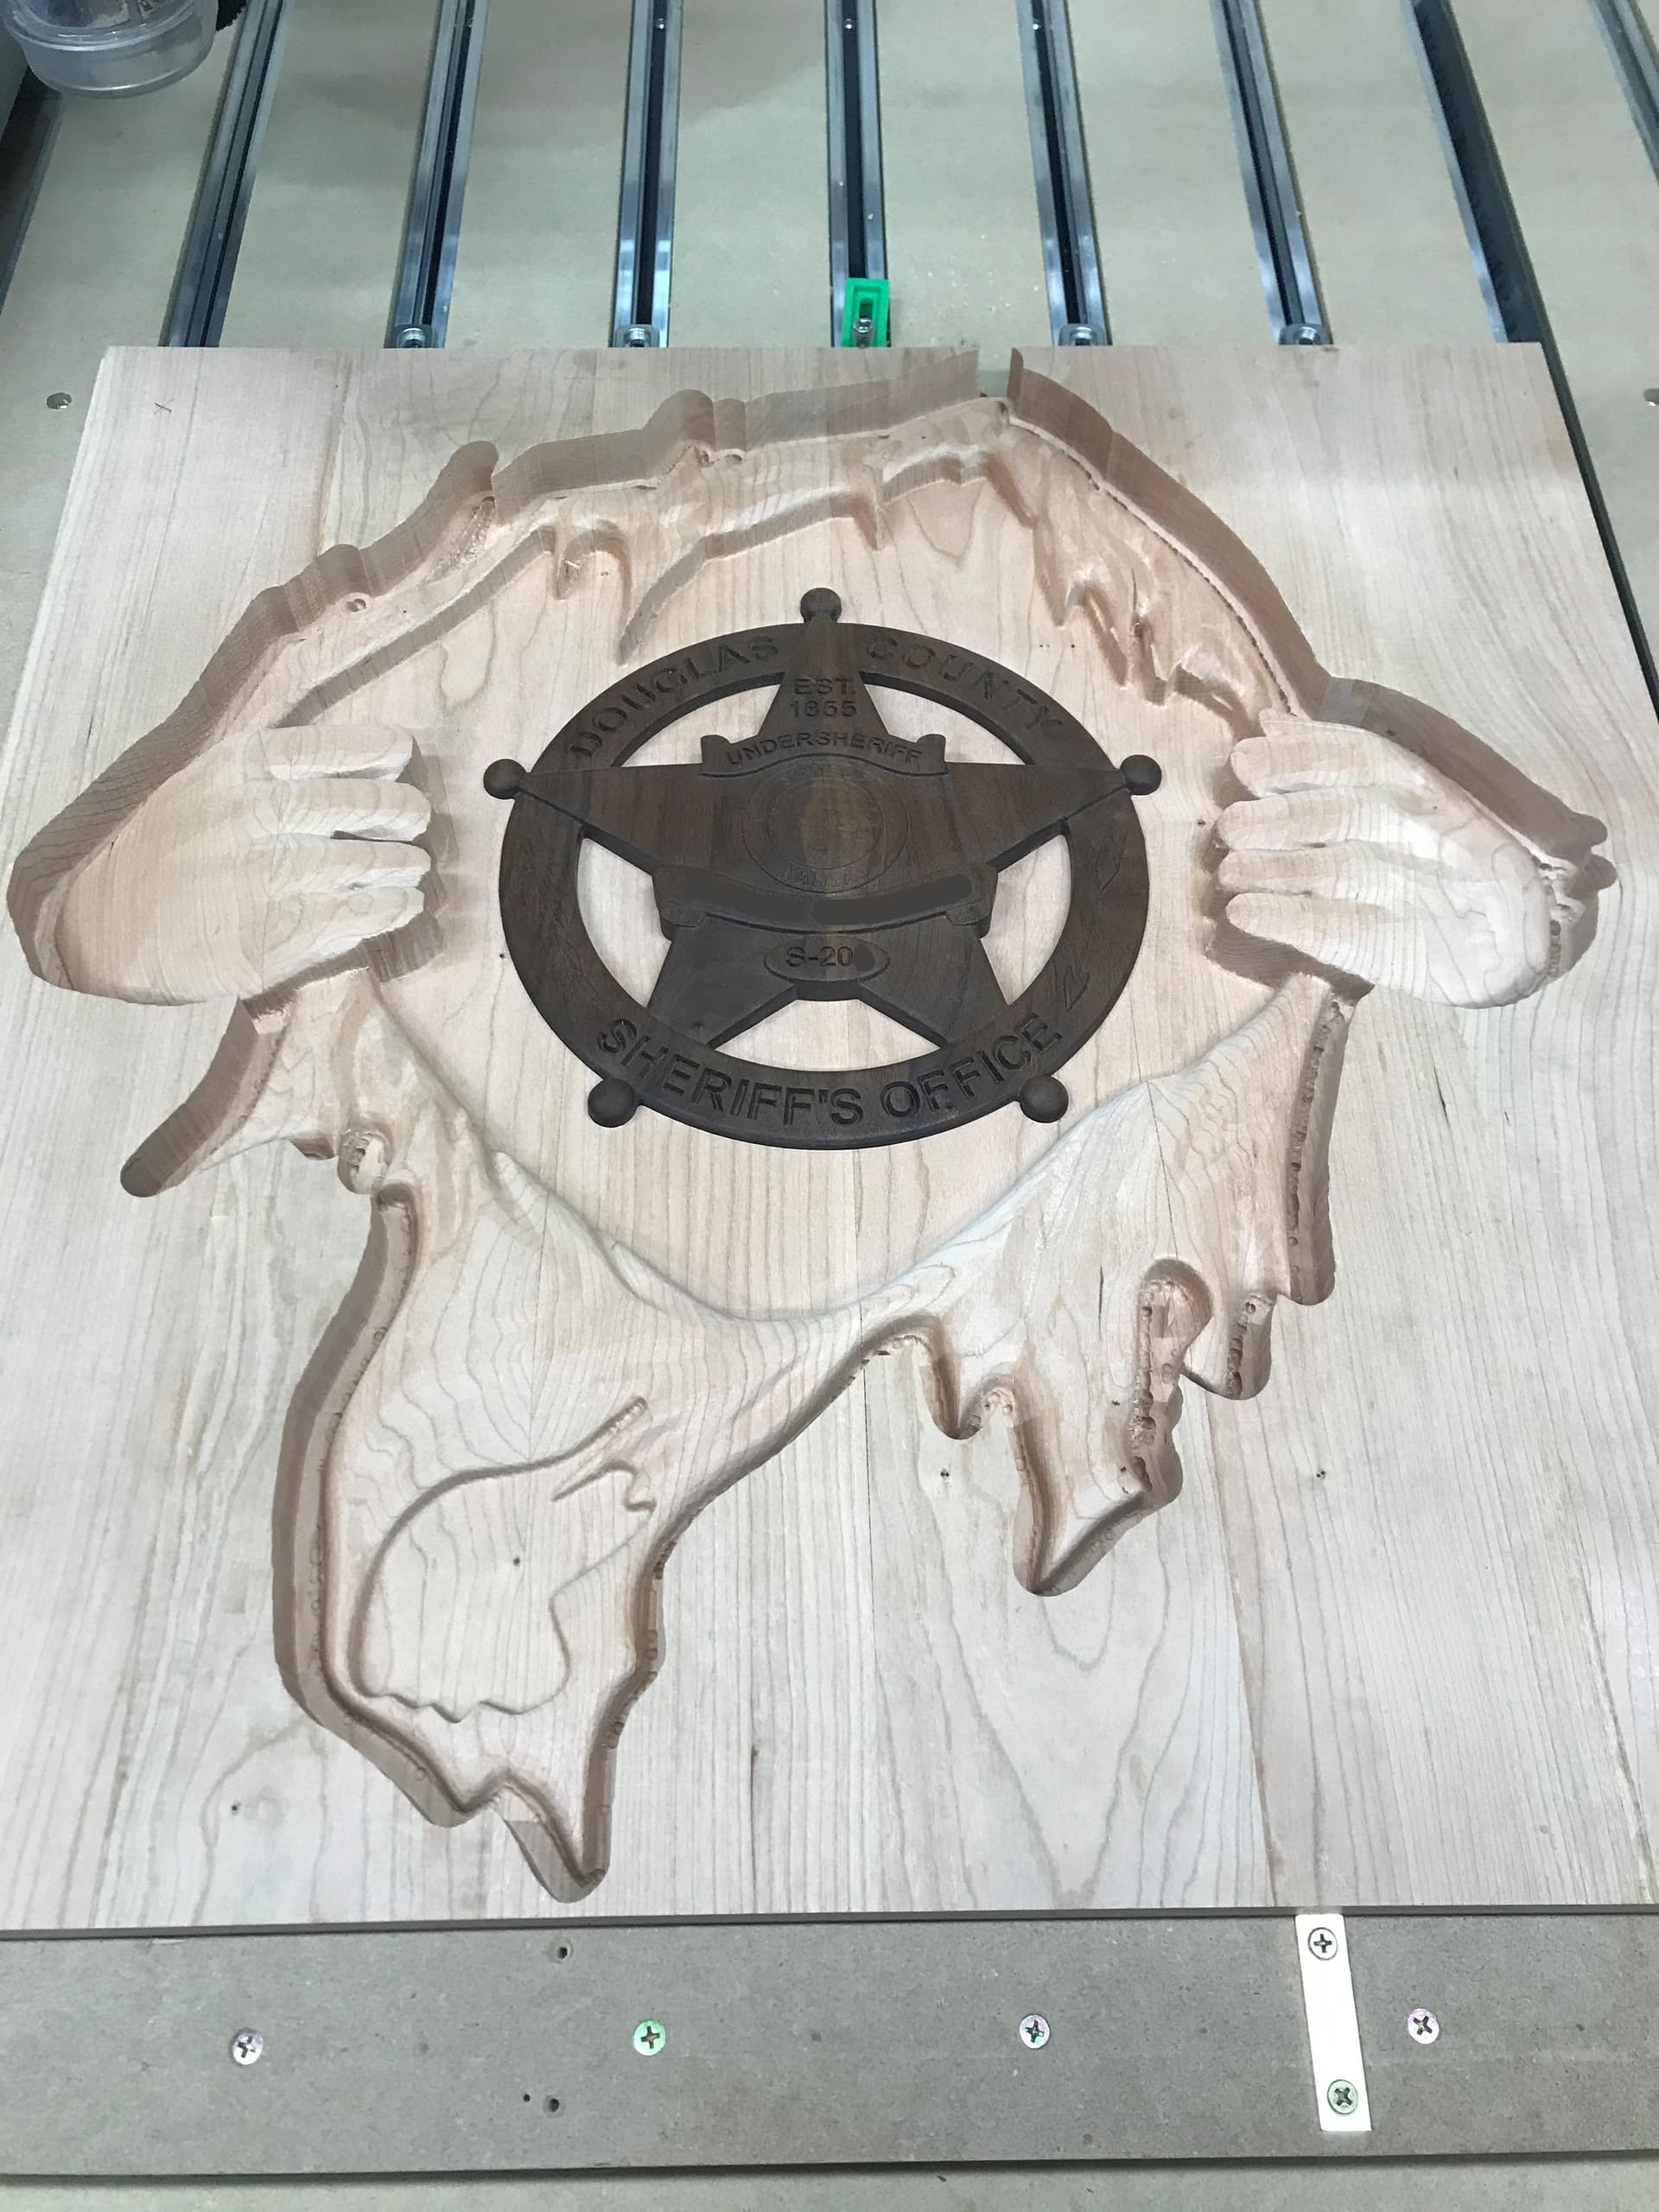
I have been doing a lot of 3D projects lately. This one is an office sign that I made for a friend of mine who is a female law enforcement officer. She was recently promoted to the number 2 position in the agency and is the first female to ever fill that position. Since the agency was founded in 1855, I thought that was a good milestone. I am pretty proud of her career accomplishments, and she is just an all around really good person. Over time she has earned the nickname, “Super + her last name.” She is a pretty humble person and had no influence on the project, so I took my ideas and went to work.
I used 2” Cherry for the background shirt portion and 1” Walnut for the badge portion. The final project size ended up being about 21” x 23” for the shirt and 10” for the badge. All of the project work was done using V-Carve Pro on my Shapeoko Pro XXL.
For material prep, I cut all of the wood into 3” to 4” strips, planed and joined as needed, opposed the grain, and then glued up the pieces. I cleaned up the dried glue and planed again for a flat surface. The 2” shirt portion was too thick to cut through with the end mills that I have, so I needed to turn it into a double a sided carve to cut the profile all of the way through and v-carve my logo on the back. For this, I just ran that project piece through the table saw several times until it measured square.
I already had the STLs for the shirt and badge. The STL for the badge was created by Brian Koehler at DisplayVETS, and he did an outstanding job.
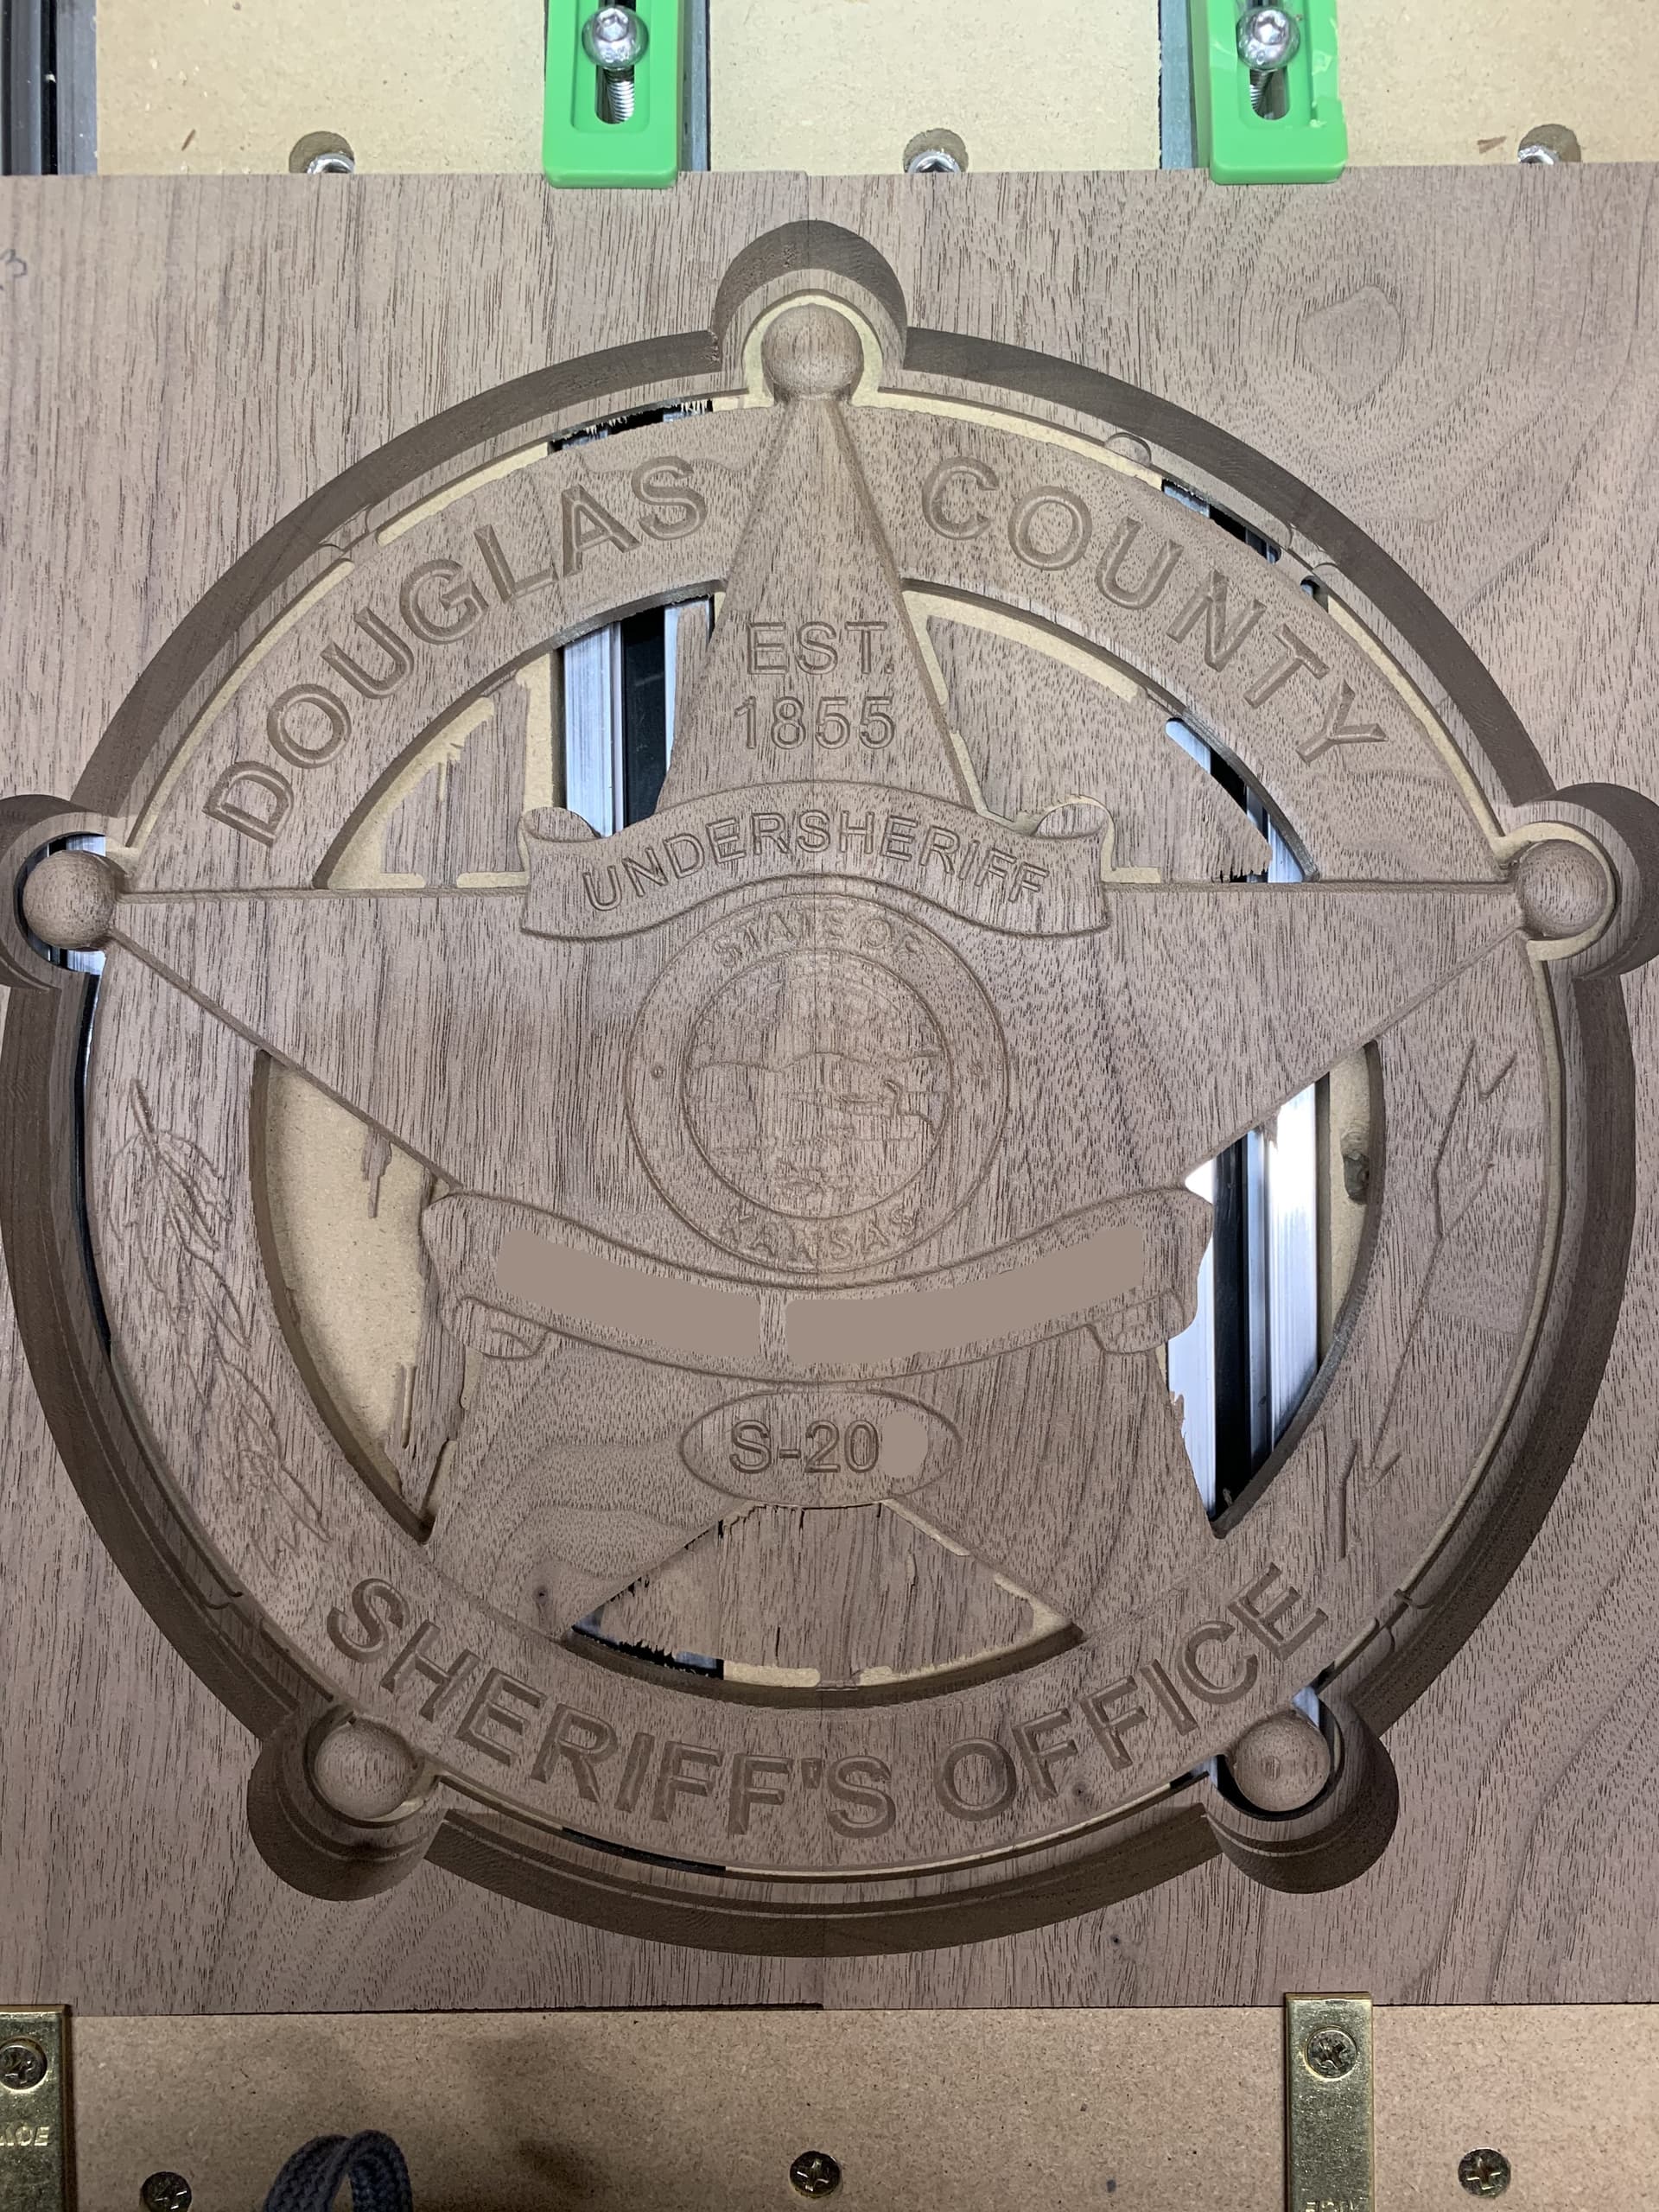
First, I began work on the badge. I needed this done, because I wanted it to be inlayed into the shirt portion of the project and needed it for test fitting when I reached that point on the shirt project. I first did a profile cut around the outside of the model with a ¼” endmill leaving about 1/8” of material. I then completed the 3D carve portion using only a finishing toolpath with a 1/16” tapered ball nose bit. For settings on my bit, I used 160 ipm feed, 70 ipm plunge rate, 8% stepover, and 20,000 rpm. Next, I v-carved all of the text using a 60 degree v bit. When this was complete, I cleaned up the vertical lines of the inner and outside edges with profile toolpaths, a -.01” allowance, and cut all the way through leaving tabs for removal. This portion of the project took about 3.5 hours.
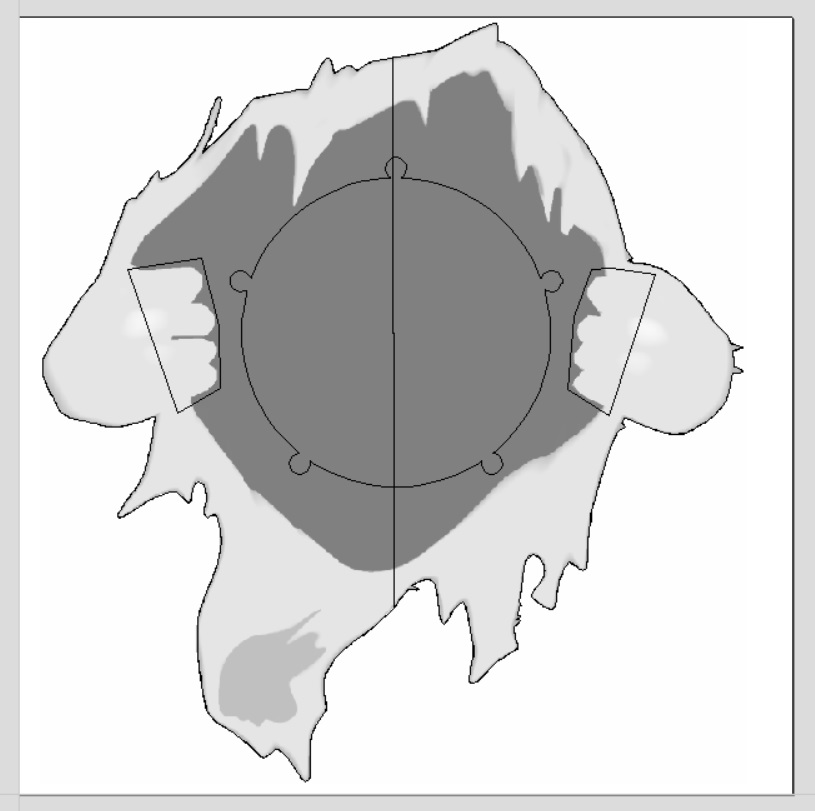
Next, I began work on the shirt portion and started off by cutting a profile around the model about 1” deep with a ¼” end mill. On this project, the depth of the carve was going to be pushing the cutting height limit of my tapered ball nose, so I used both roughing and finishing toolpaths. I set these and my boundary offsets to a point where the end mill or tapered ball nose would not dive too deep into the profile pocketed area. I discovered that I had to readjust this some for the roughing pass, because the end mill was coming a little too close to bottoming the collet into the surrounding wood.
I did the roughing passes in two parts by splitting the project down the middle with a vector and then created two separate closed vectors for each side of the project. I completed one half of the roughing pass one day and then finished the second half the next day. Each half took about 3.5 hours. For feeds and speeds on a ¼” down cut end mill, I used 100 ipm feed, 30 ipm plunge rate, 40% stepover, and 20,000 rpm. These settings have been working very well for me finish wise when cutting hard woods.
Once the roughing passes were complete, I moved on to the finishing pass. I was able to do most of the project with a 1/8” tapered ball nose with good detail. I did this part on the weekend, so I just completed the whole project at once instead of splitting it into halves. For settings on my bit, I used 160 ipm feed, 70 ipm plunge rate, 10% stepover, and 20,000 rpm. This portion took about 5.5 hours and worked out very well for most of project.
I did need a second set of finish passes, because I needed more detail on the hands/fingers that were holding the shirt open. I drew two closed vectors around those areas and set up another finishing pass using a 1/16” tapered ball nose with the same settings as the 1/8” bit except at 8% stepover. Again, this worked out very well taking about an hour to complete.
For the badge inlay, I copied the vector boundary around the badge to this portion of the project. Known from previous projects, I used a .01 allowance for the pocket that the badge would fit into. I used a 1/4’’ flat end mill for this portion using the settings of 75 ipm feed, 30 ipm plunge, 30% stepover, and 20,000 rpm.
I then flipped the project for the second side of the carve. I finished cutting the profile all the way through leaving tabs in the middle of the wood. I also v-carved my logo onto the back.
My finish pass settings are something that I have been experimenting with lately. I have read a lot where some say you want your plunge rate to be about the same or at least 80% of your feed speed. I have tried this and end up with very small horizontal lines in my projects requiring more sanding, so I reduced the plunge rate to a point where there were no lines. I still need to experiment with this to see if I can increase it some. I am not sure that is even attainable though, since the z-max rate is set to 1,000 mm/m. I would really like to hear any feedback that any of you have on this also.
The model height on the shirt portion was about 1.2” with a base height of .4”. This left a lot of vertical carve lines on many of the steep inner areas of the project. It took about a day and a half of sanding just for this portion to remove those lines. Once all of the sanding was done, I glued and clamped the badge onto the shirt portion. After it was dry, I sealed the project with Seal-a-Cell and then coated it with several coats of polyurethane.
I am relatively new to CNC work, and this project was my largest and most in depth so far. I apologize for the long post…hopefully some of this helps someone. I would also really appreciate any feedback or suggestions that anyone has to offer to improve my processes.