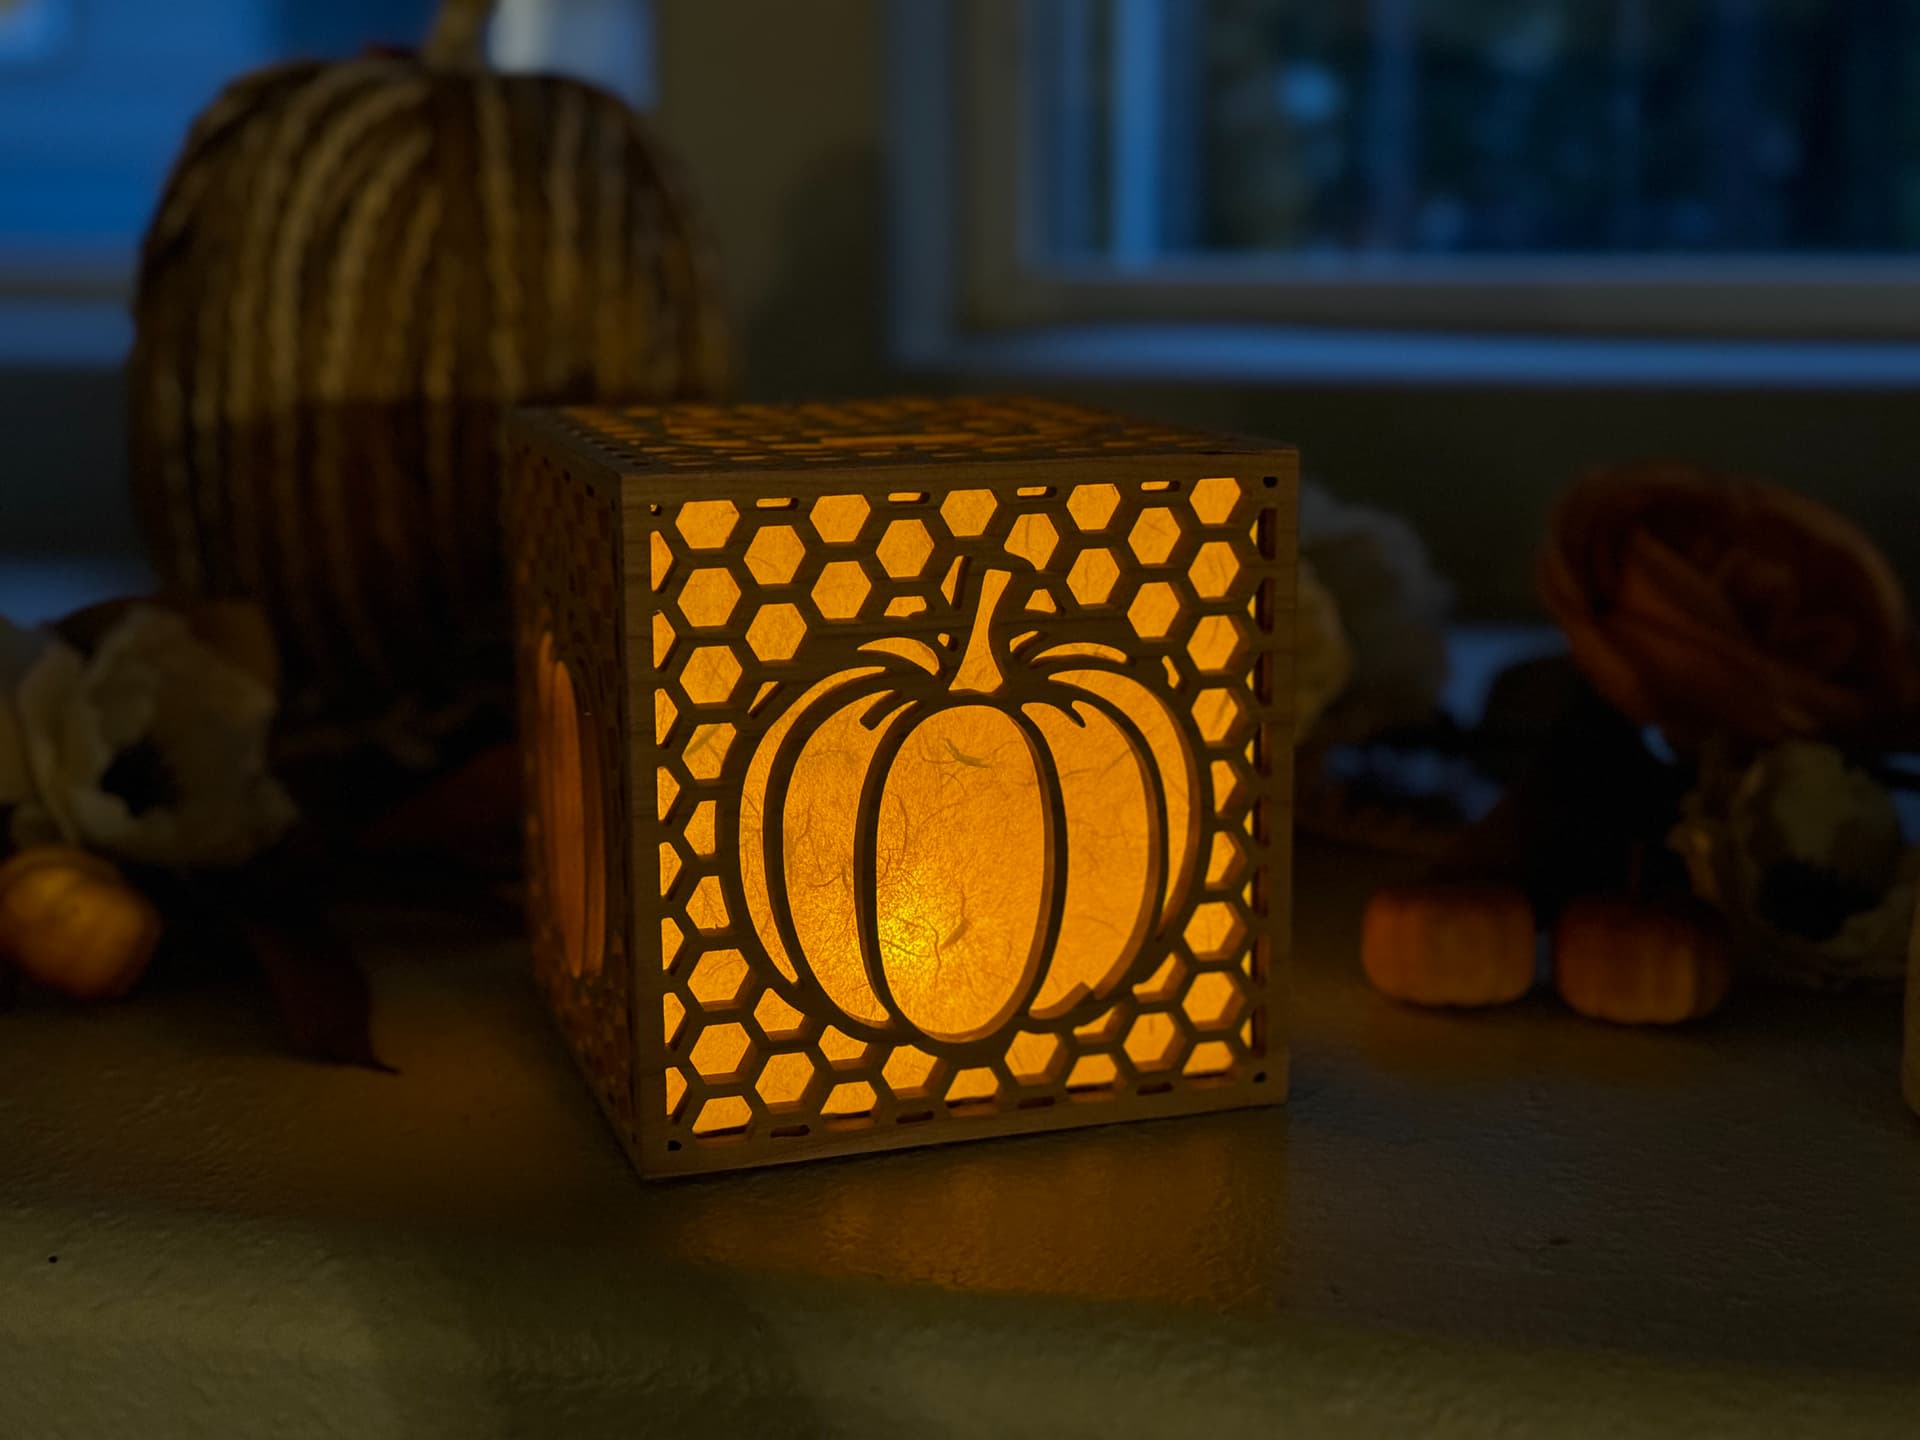
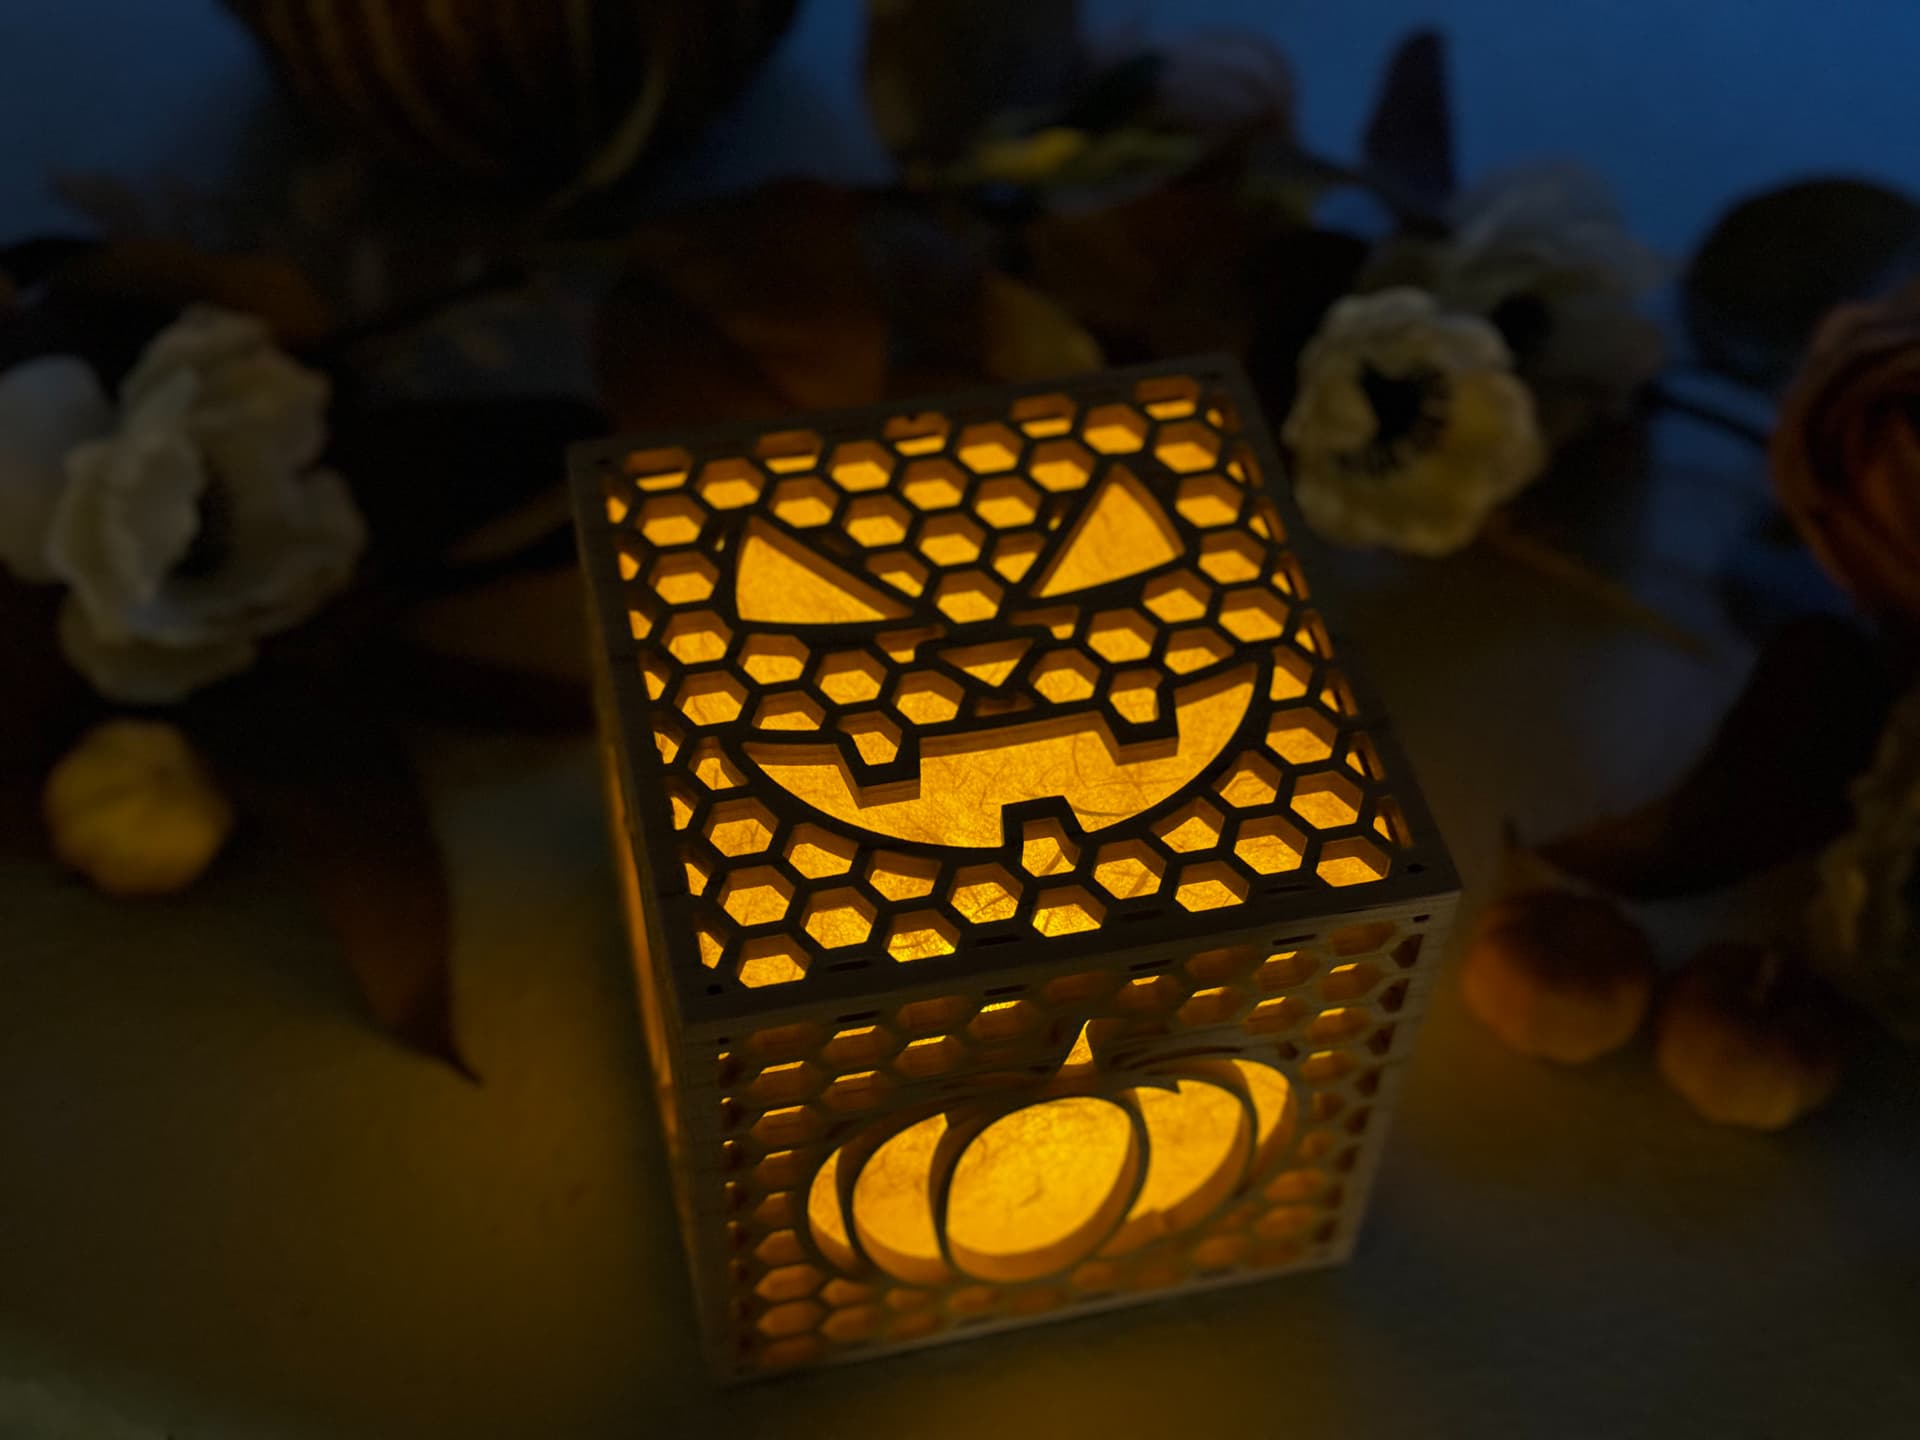
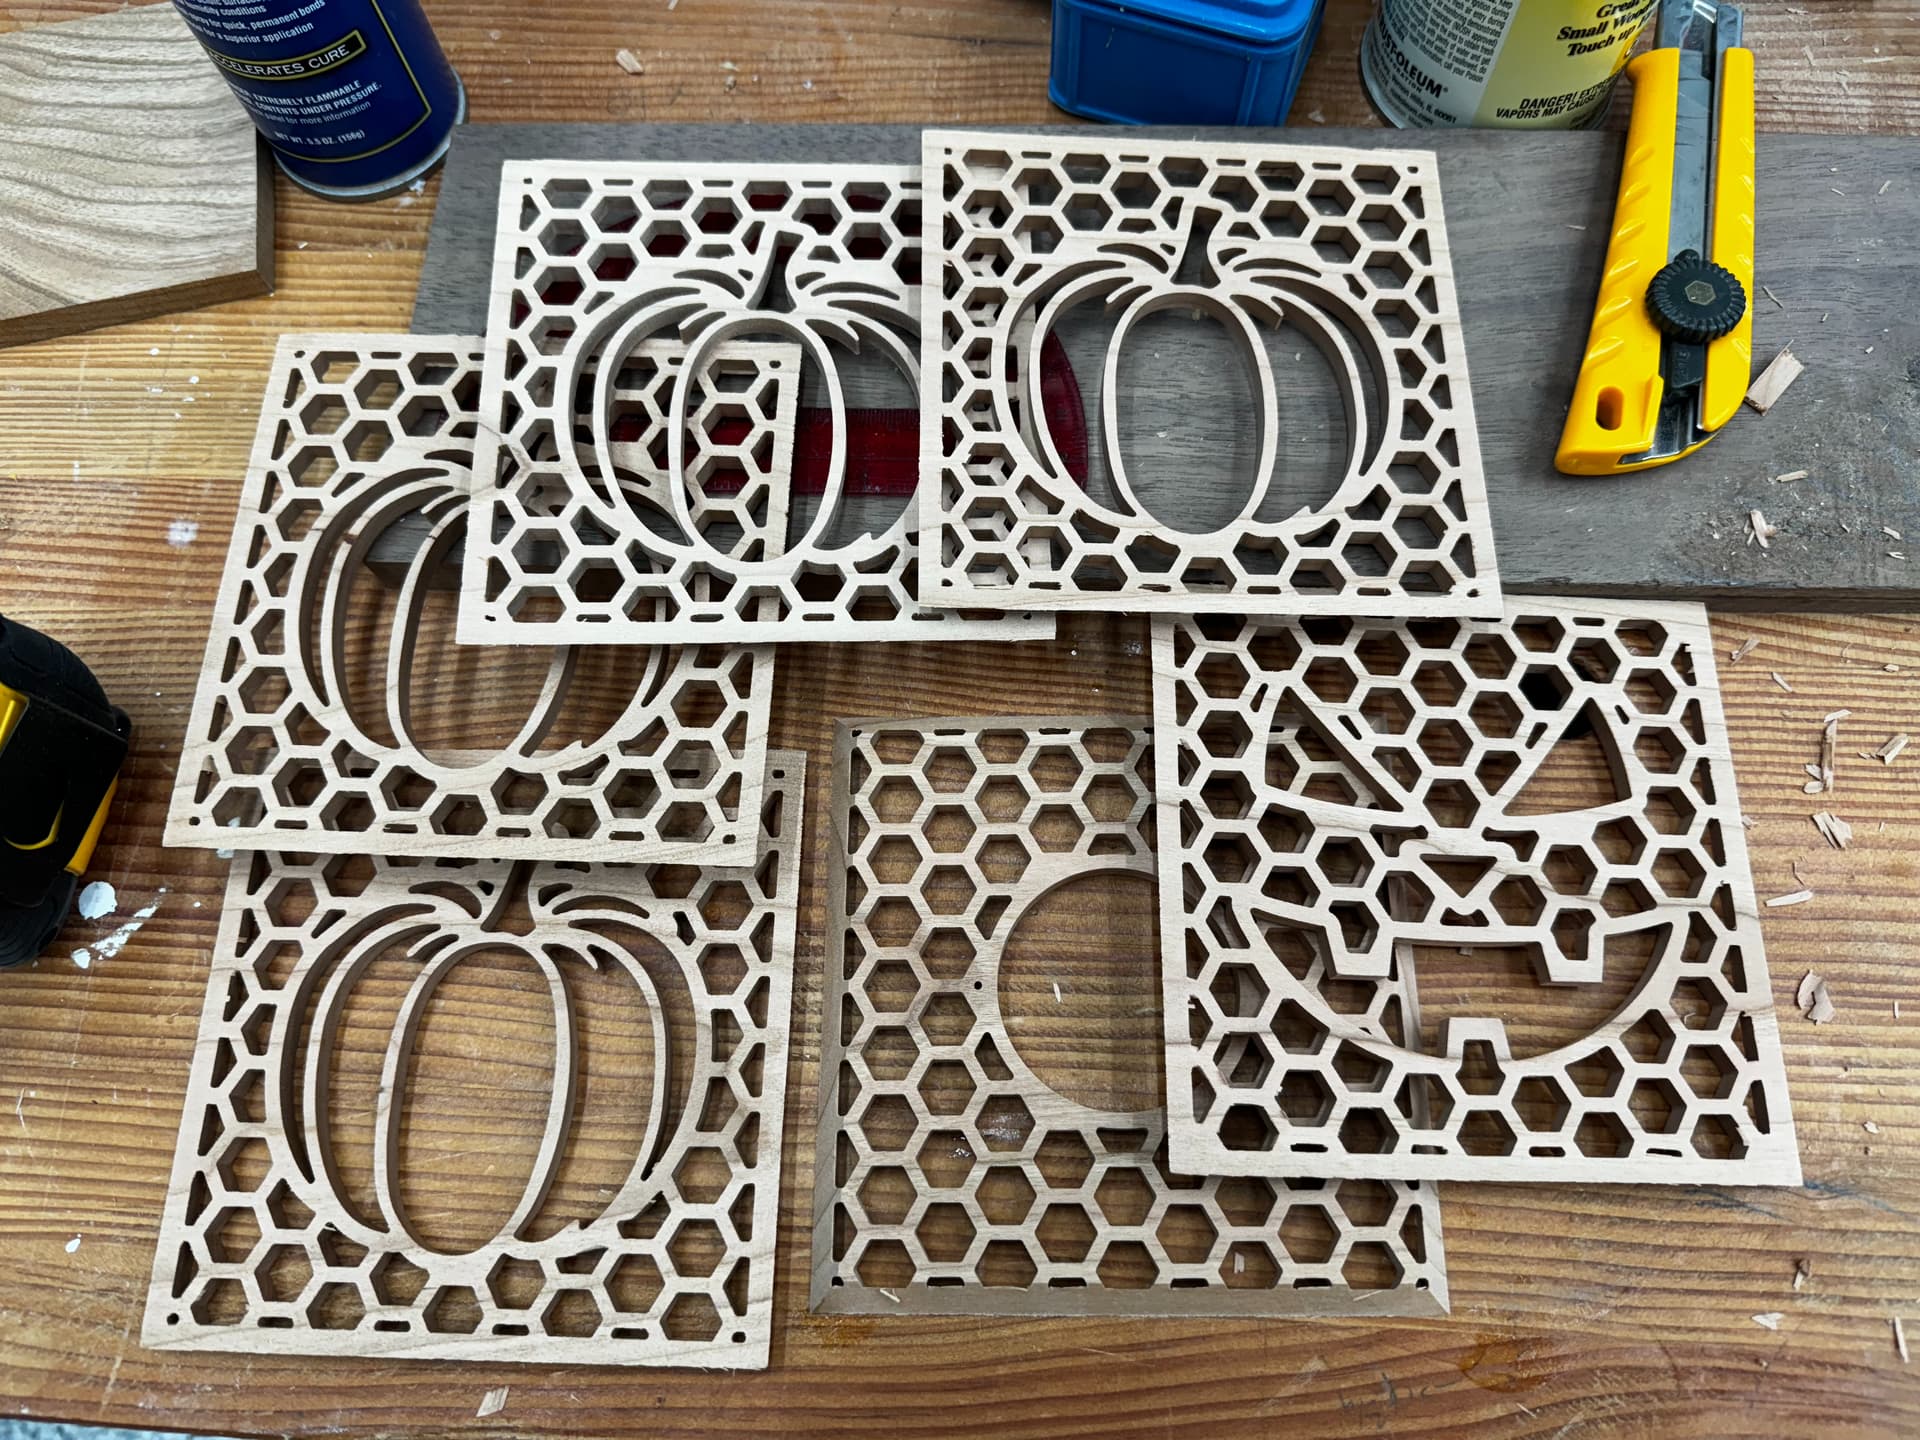
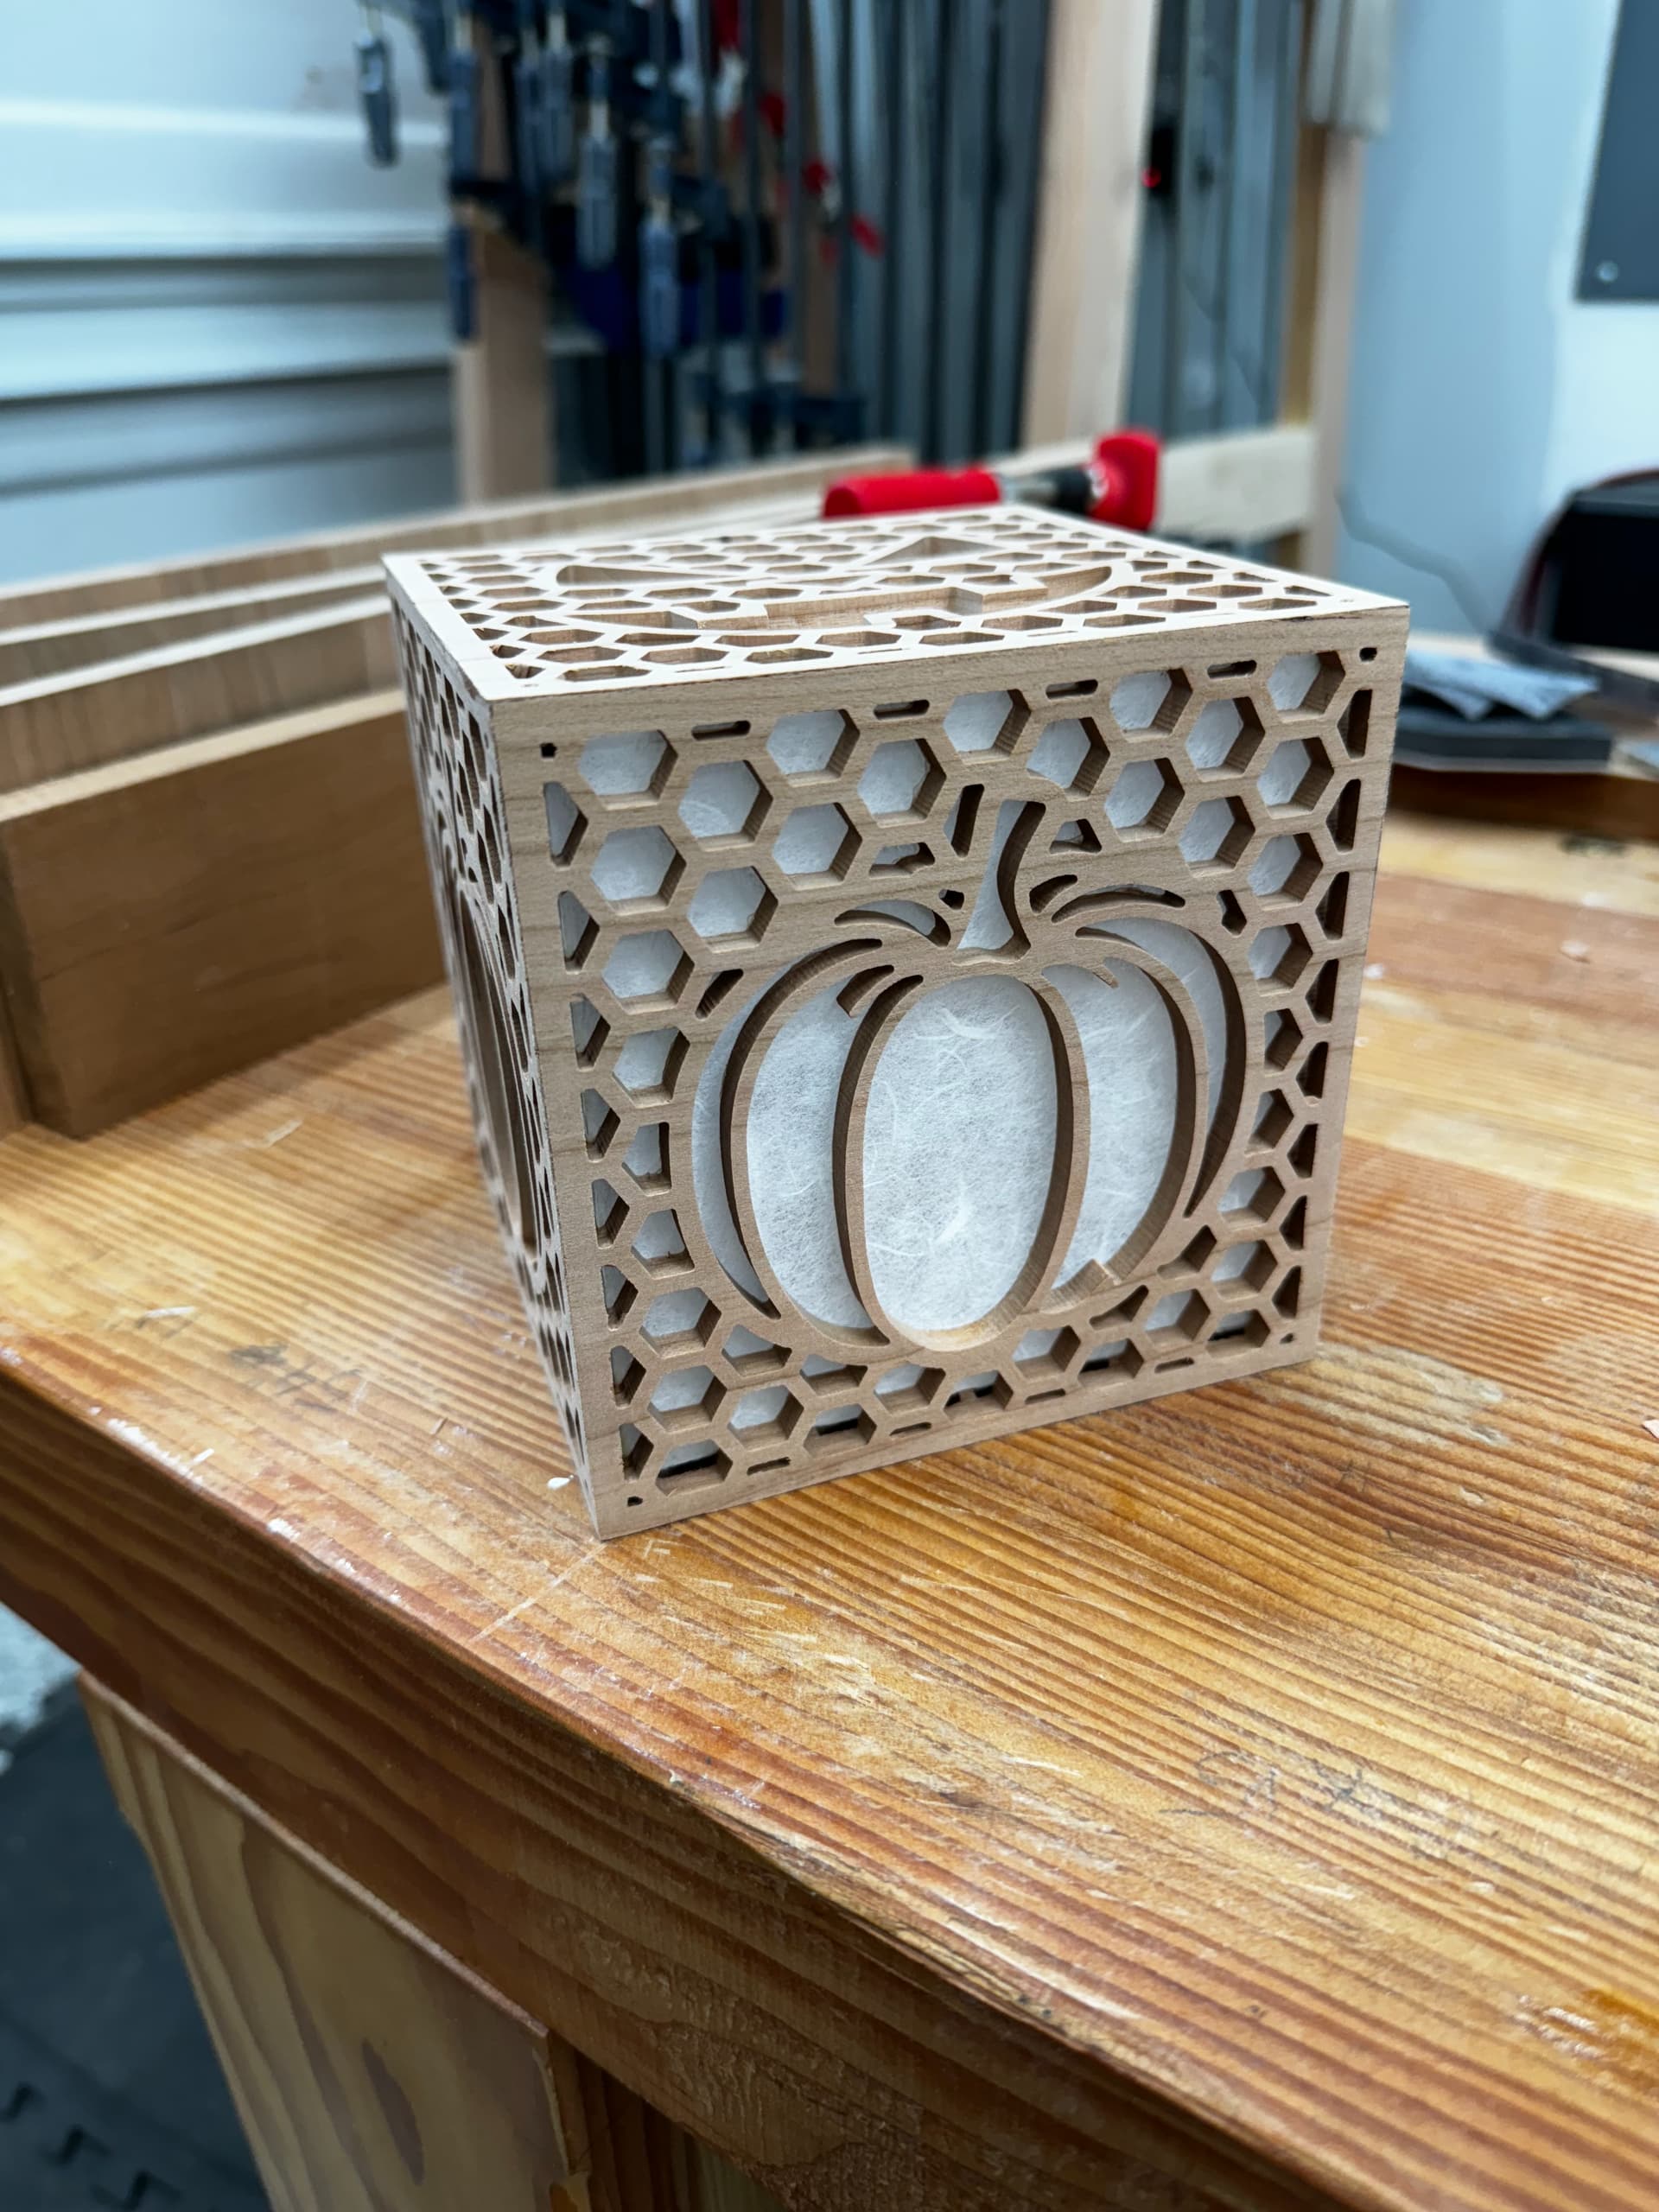
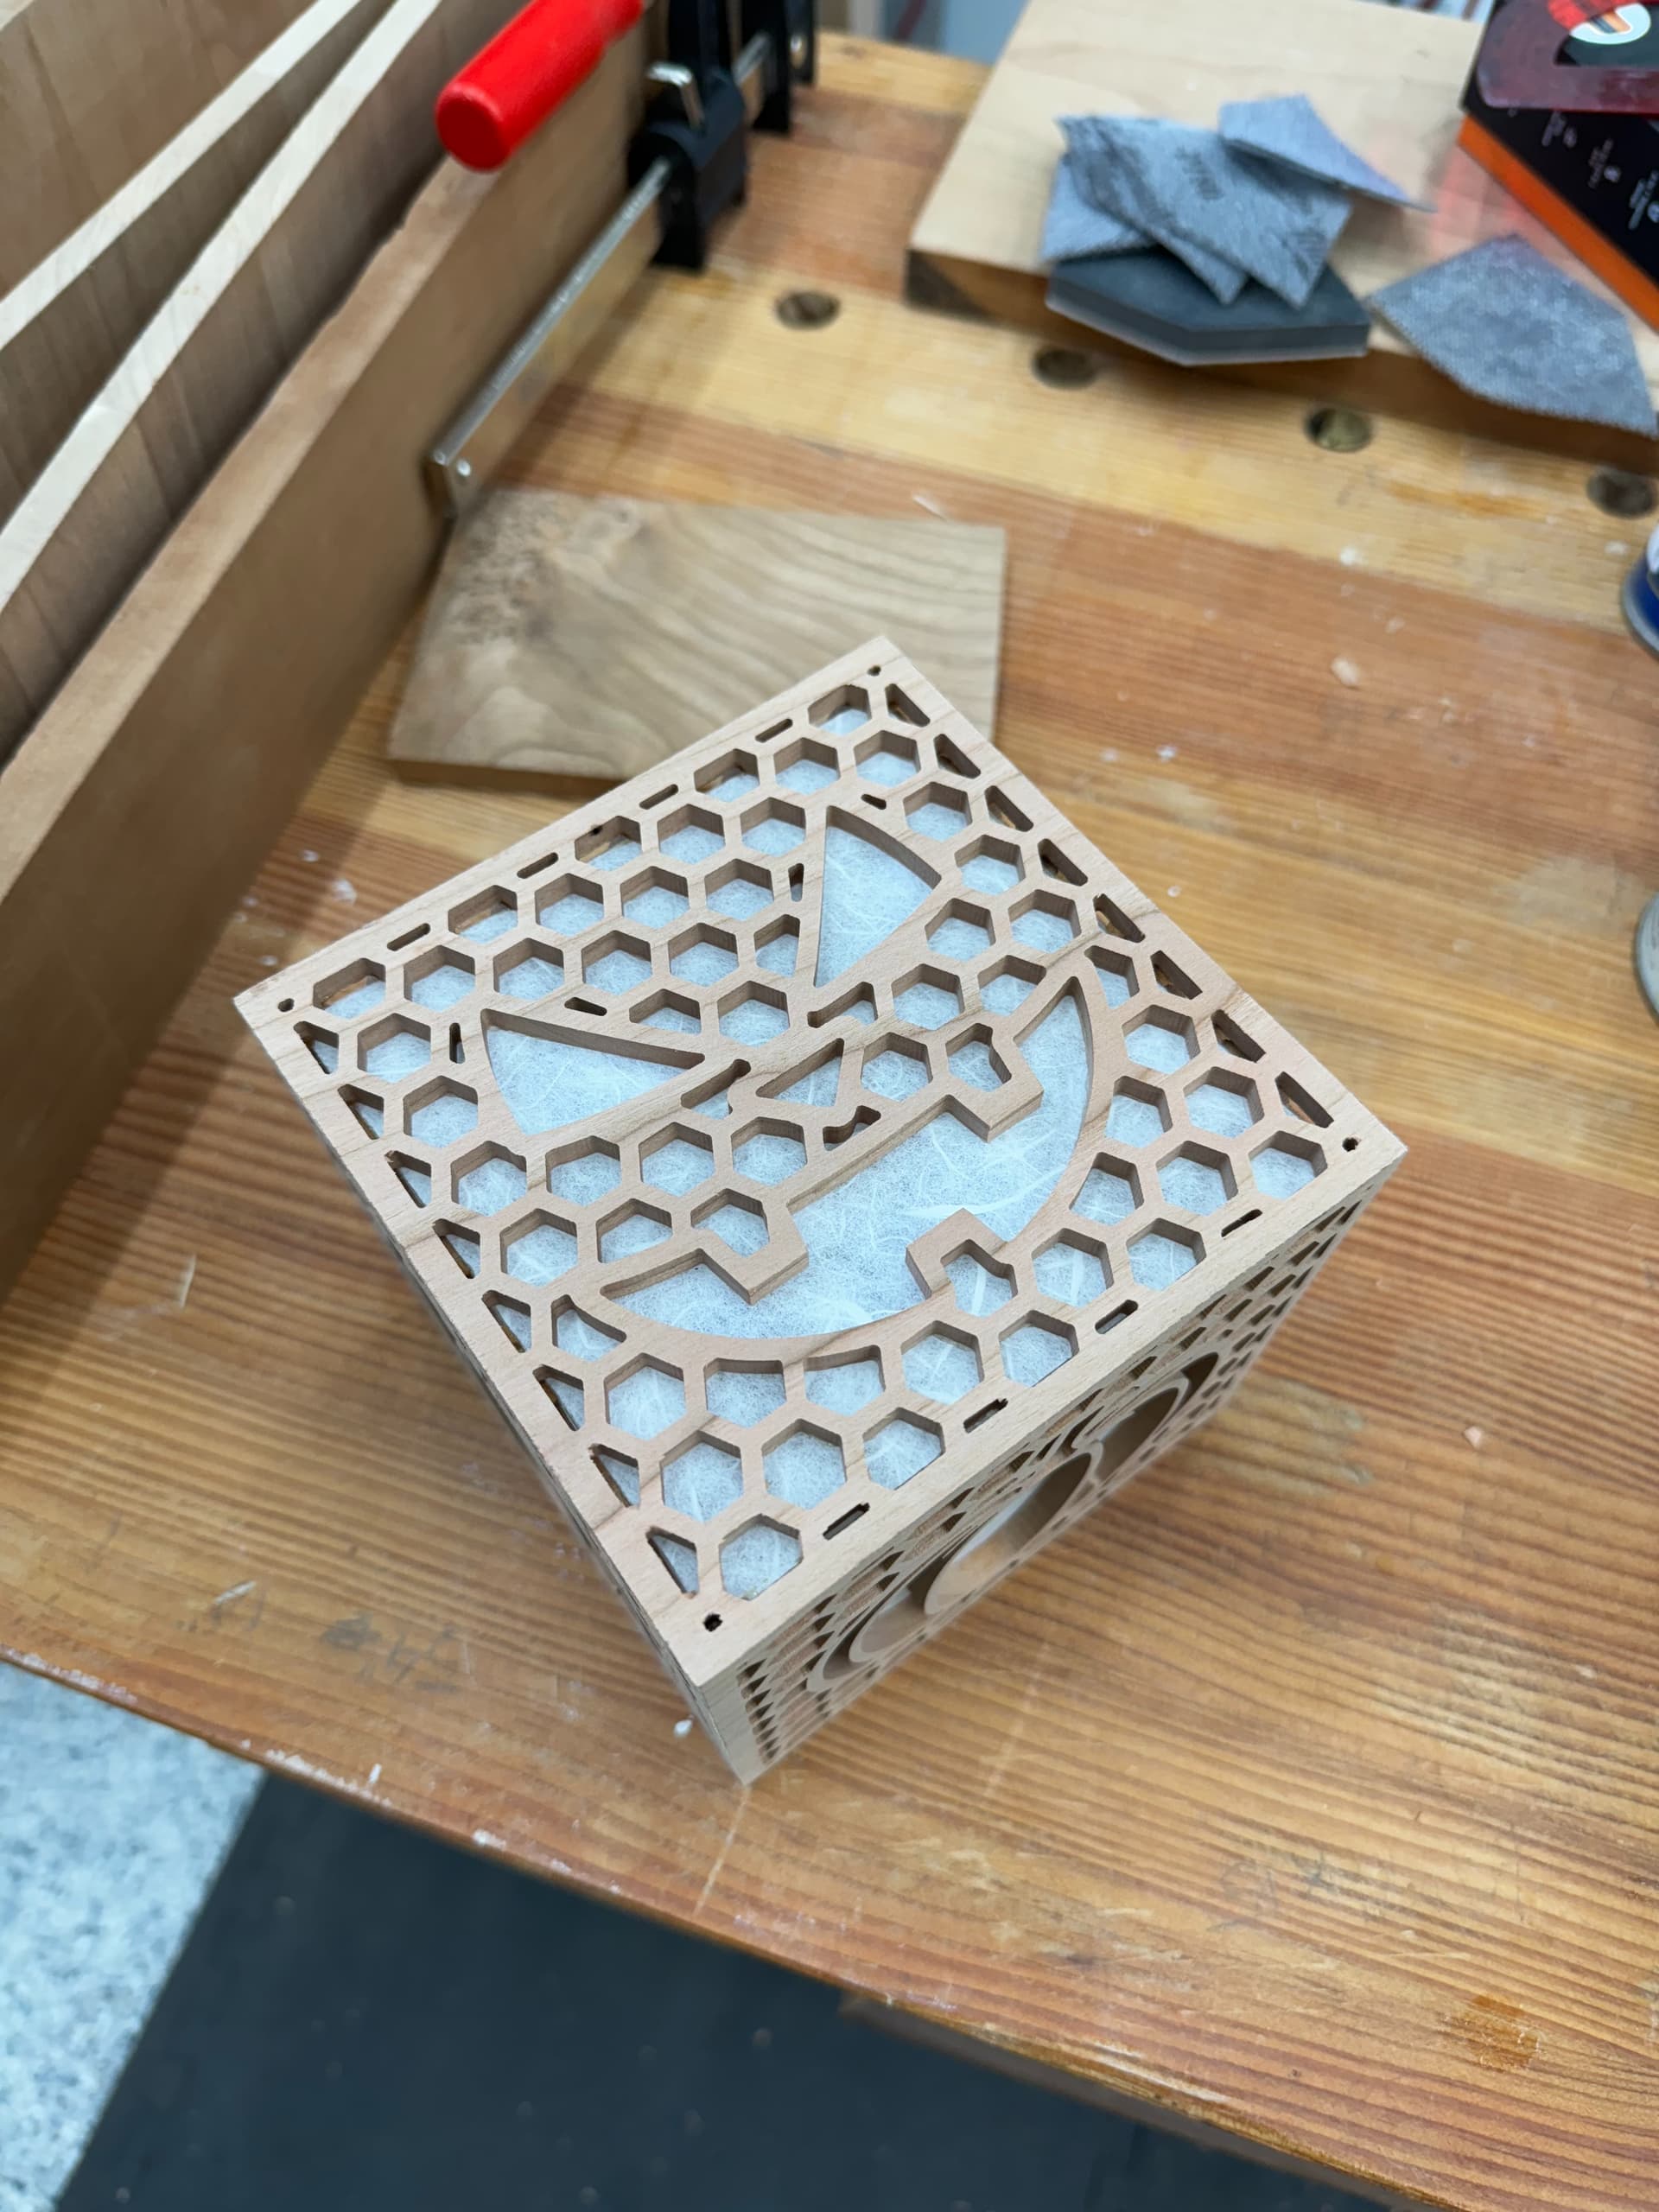
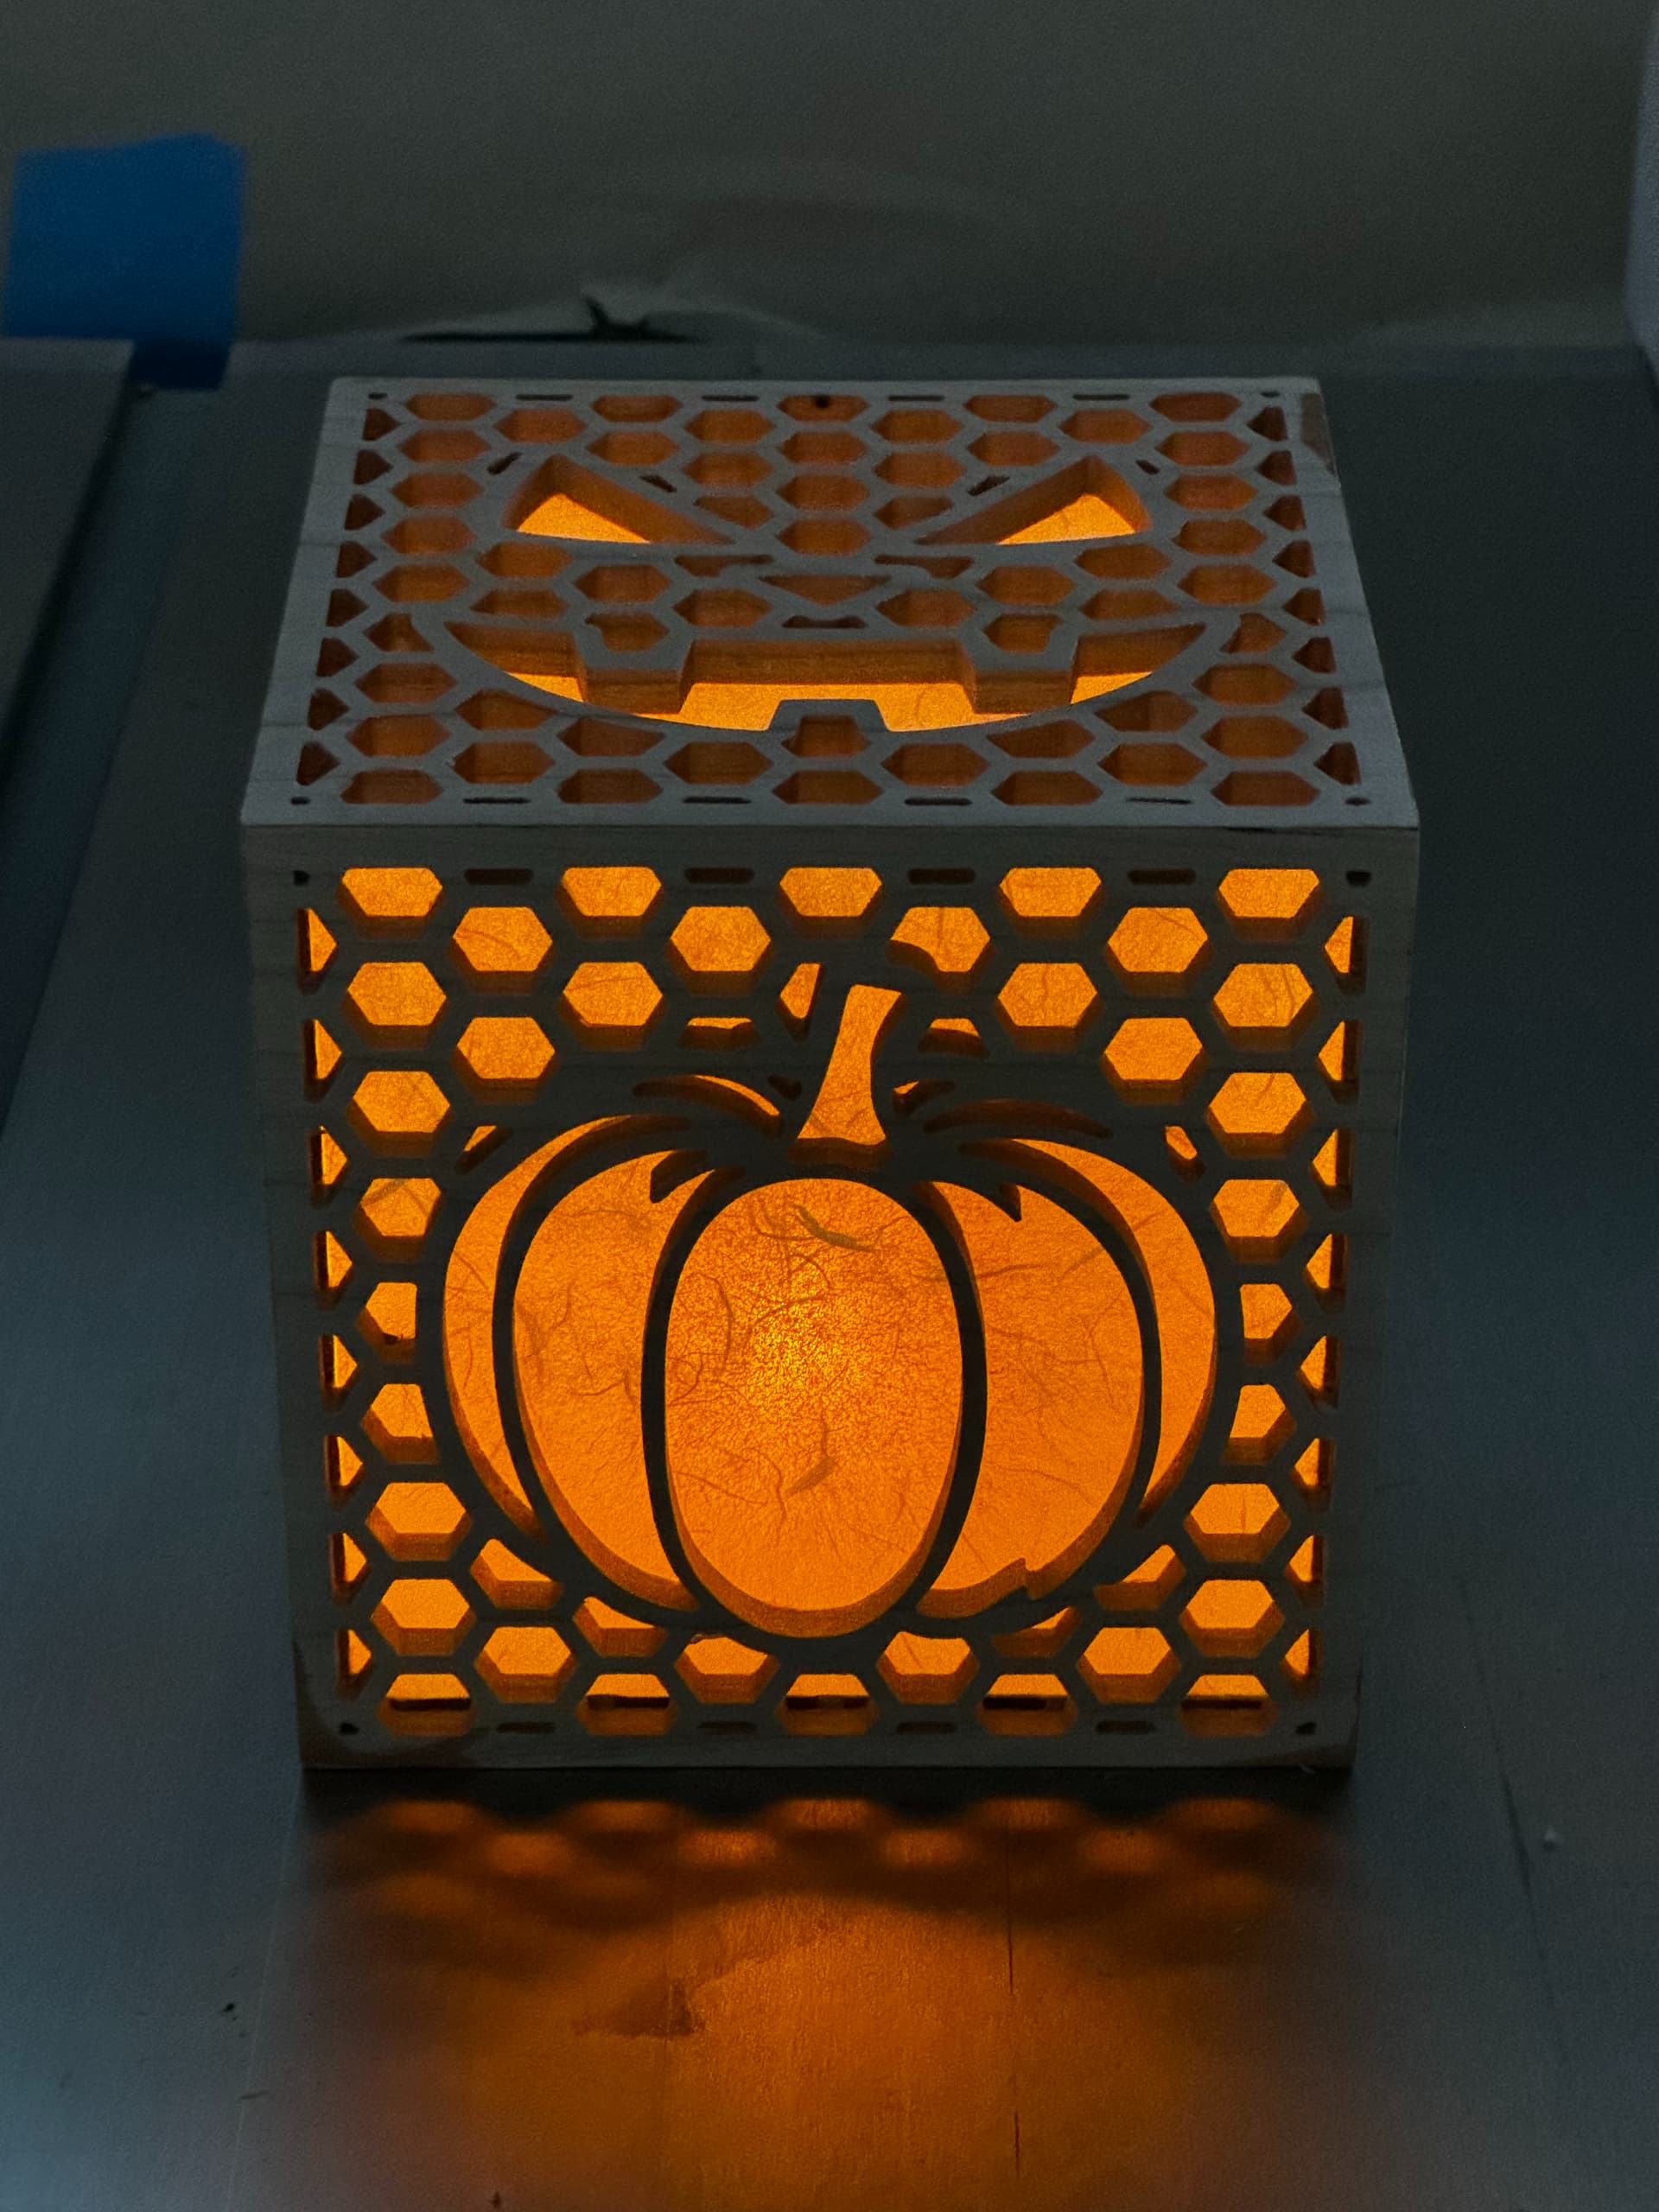
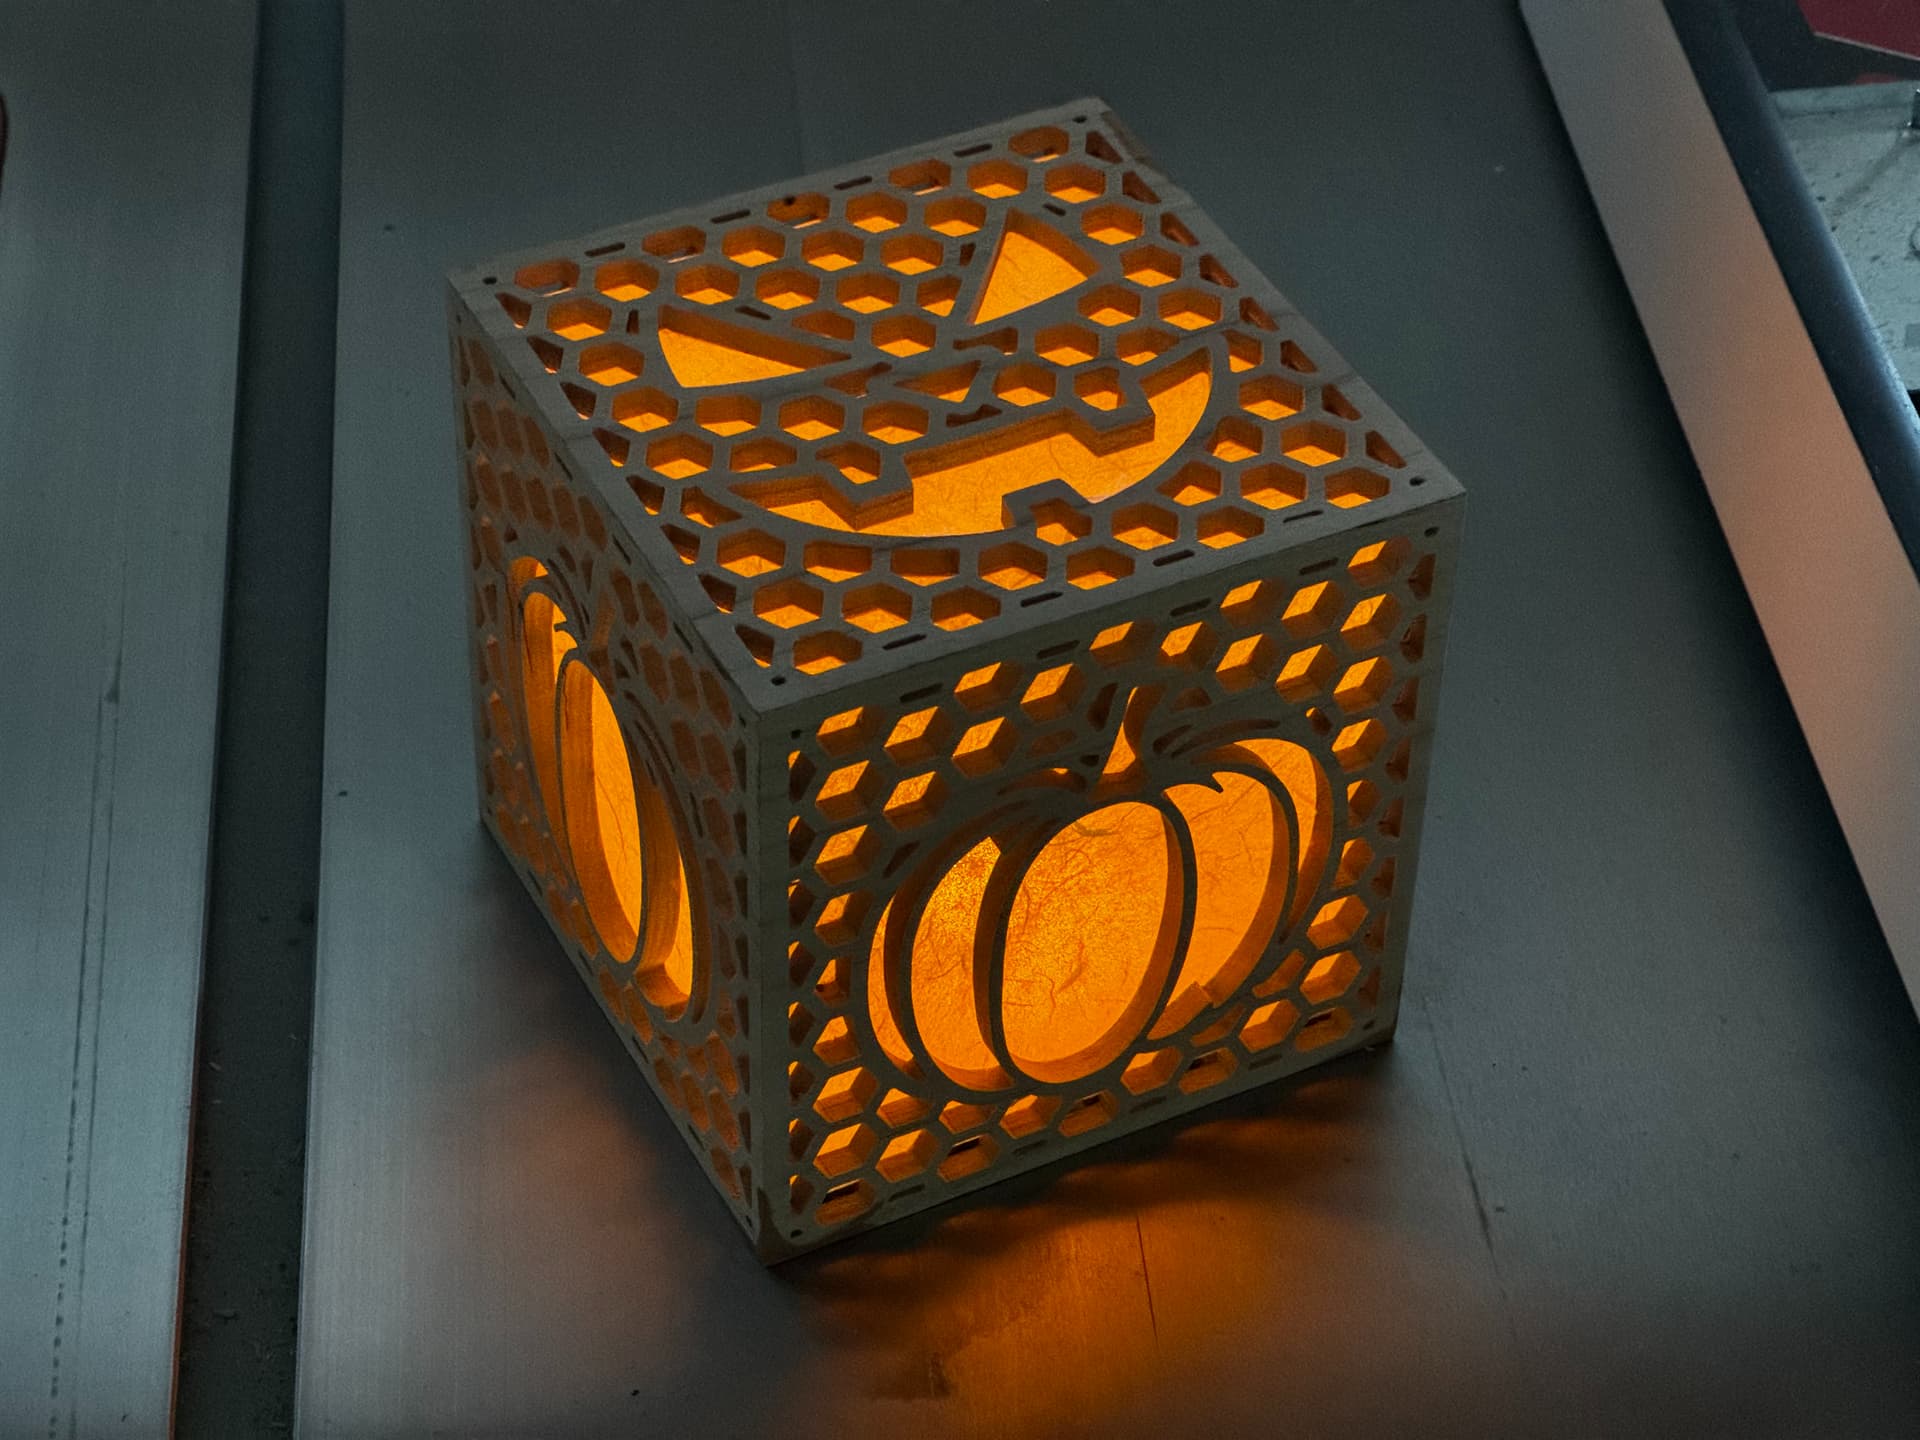
I’ve been having a good time with making cubes recently and thought that it should be easy enough to adapt one of my previous makes to a themed accent lamp. It also provides me with a way to do some trial runs involving Shoji paper for an upcoming project I’ve been looking forward to, an Andon Lamp. I took my basic hexagon grid I’ve been using so far and added some Fall/Spooky elements to get me in the season. This ended up being a pumpkin body for the sides and a Jack’o Lantern face to hide sneakily on the top for some added spook factor.
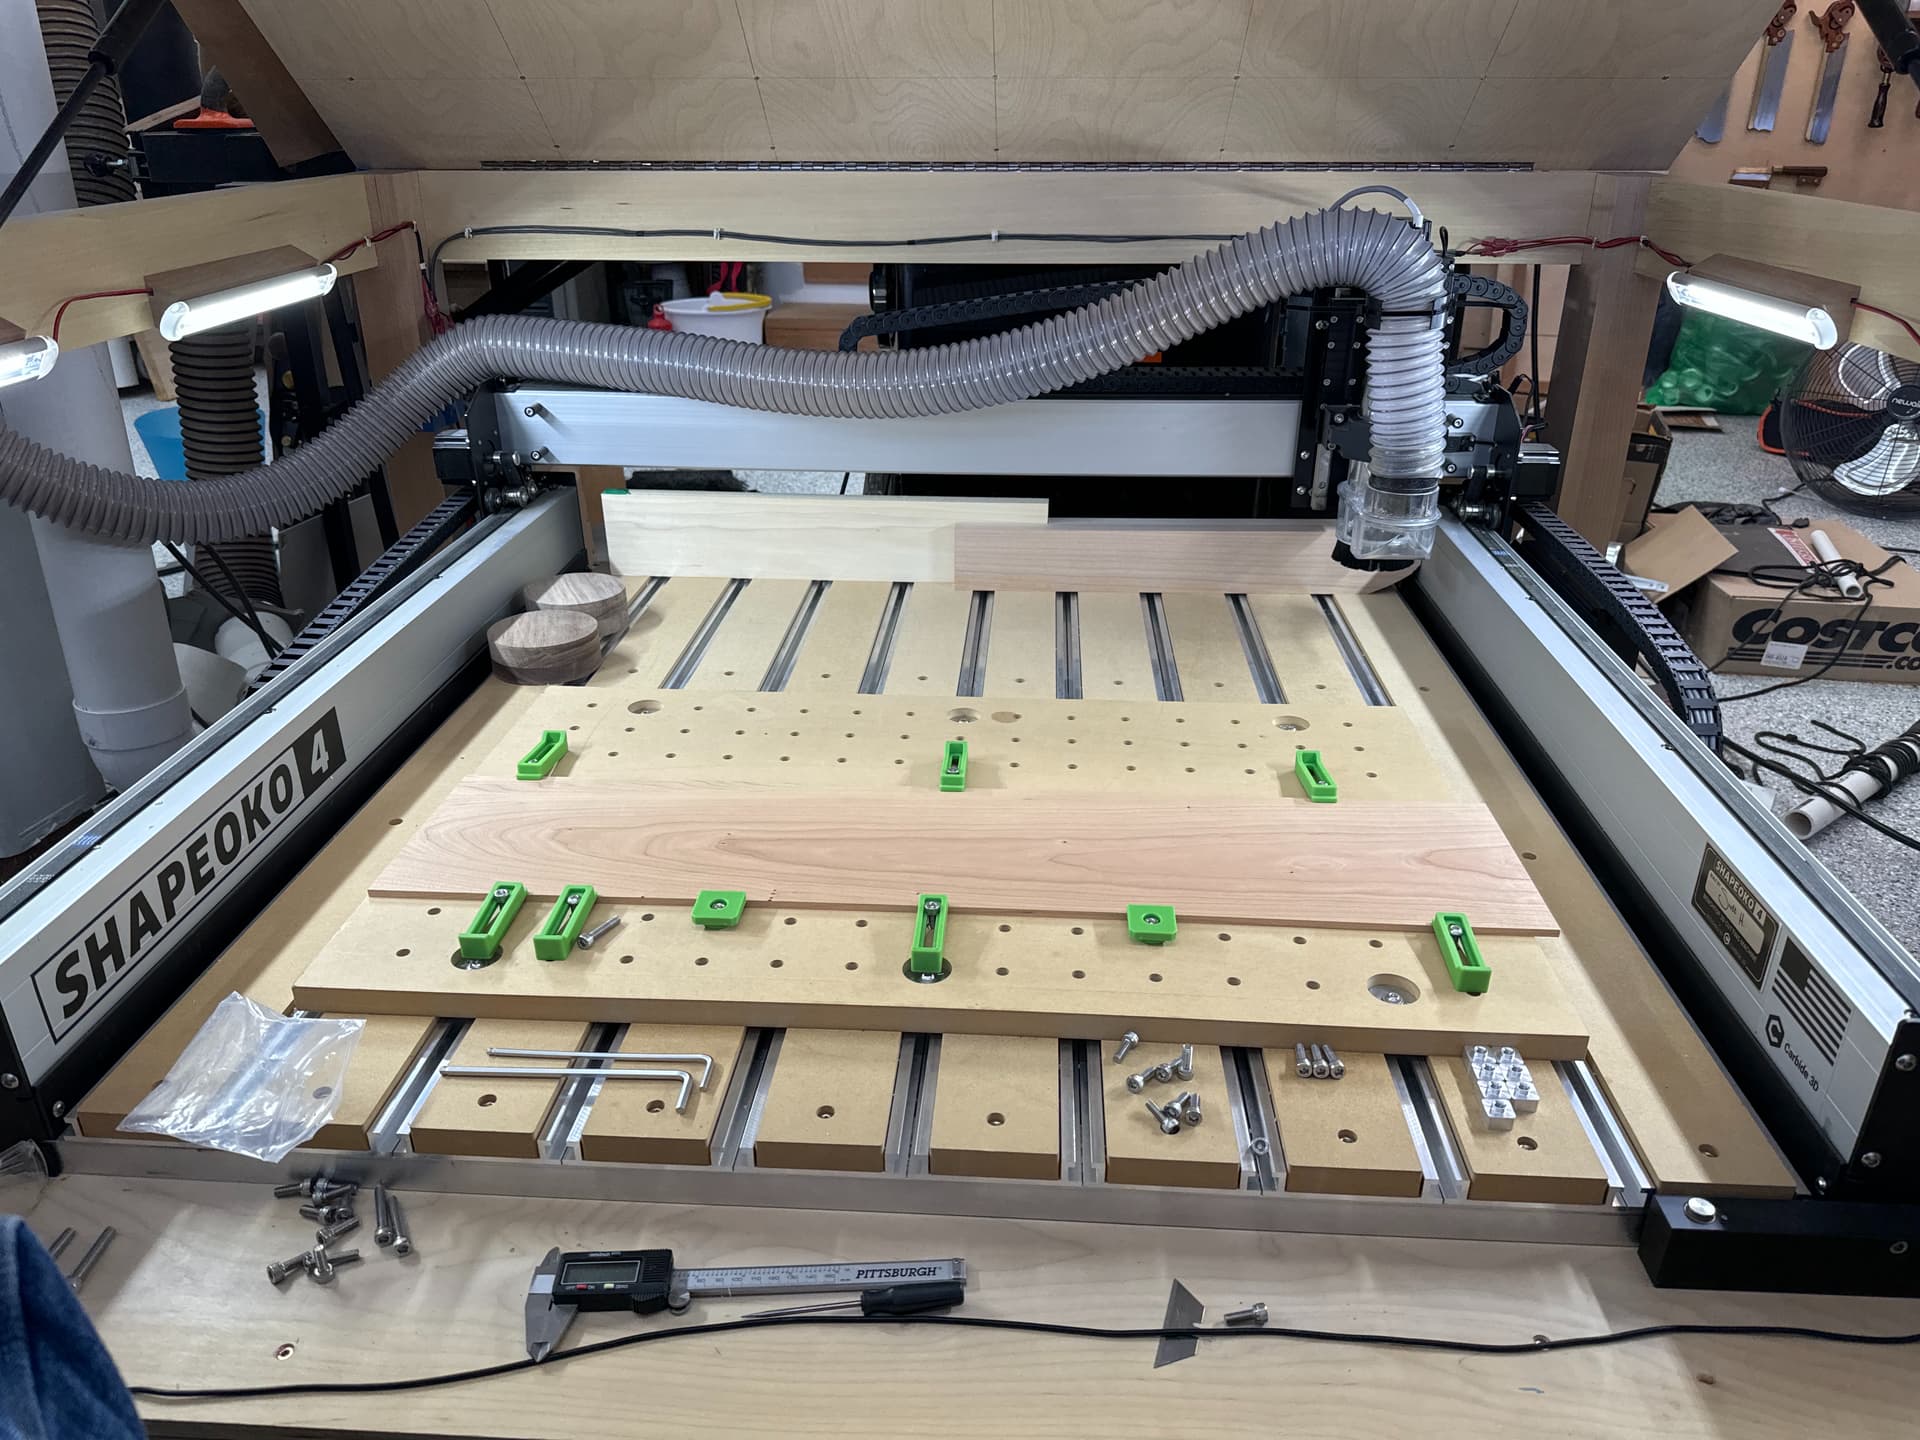
The biggest struggle for these pieces is 100% runtime optimization. I prefered to use a 1/16" endmill to maximize the crisp corner look of the hexagon grid, but the tradeoff for my quest of detail is:
-
Pocketing takes forever with something that small.
-
Running a contour pass runs the risk of the bit getting caught between the wall and newly formed offcut. I wouldn’t worry about the latter as much with a bigger bit, but 1/16" is as fragile as I’m willing to go.
I opted to use a hybrid approach. I inset a vector by 1/32" that I would rough out the space with a 1/8" bit on a contour pass. Then I would follow up with the 1/16" contour to final dimension. Even with the larger bit, running two separate passes eats up a good amount of time. Full job runtime was just a hair under 5 hours. Speeds and feeds are very conservative, but I haven’t tested enough with the smaller bits and when I push my 1/4" bit anywhere close to 0.1" DOC on slotting, it screams like an angry toddler.
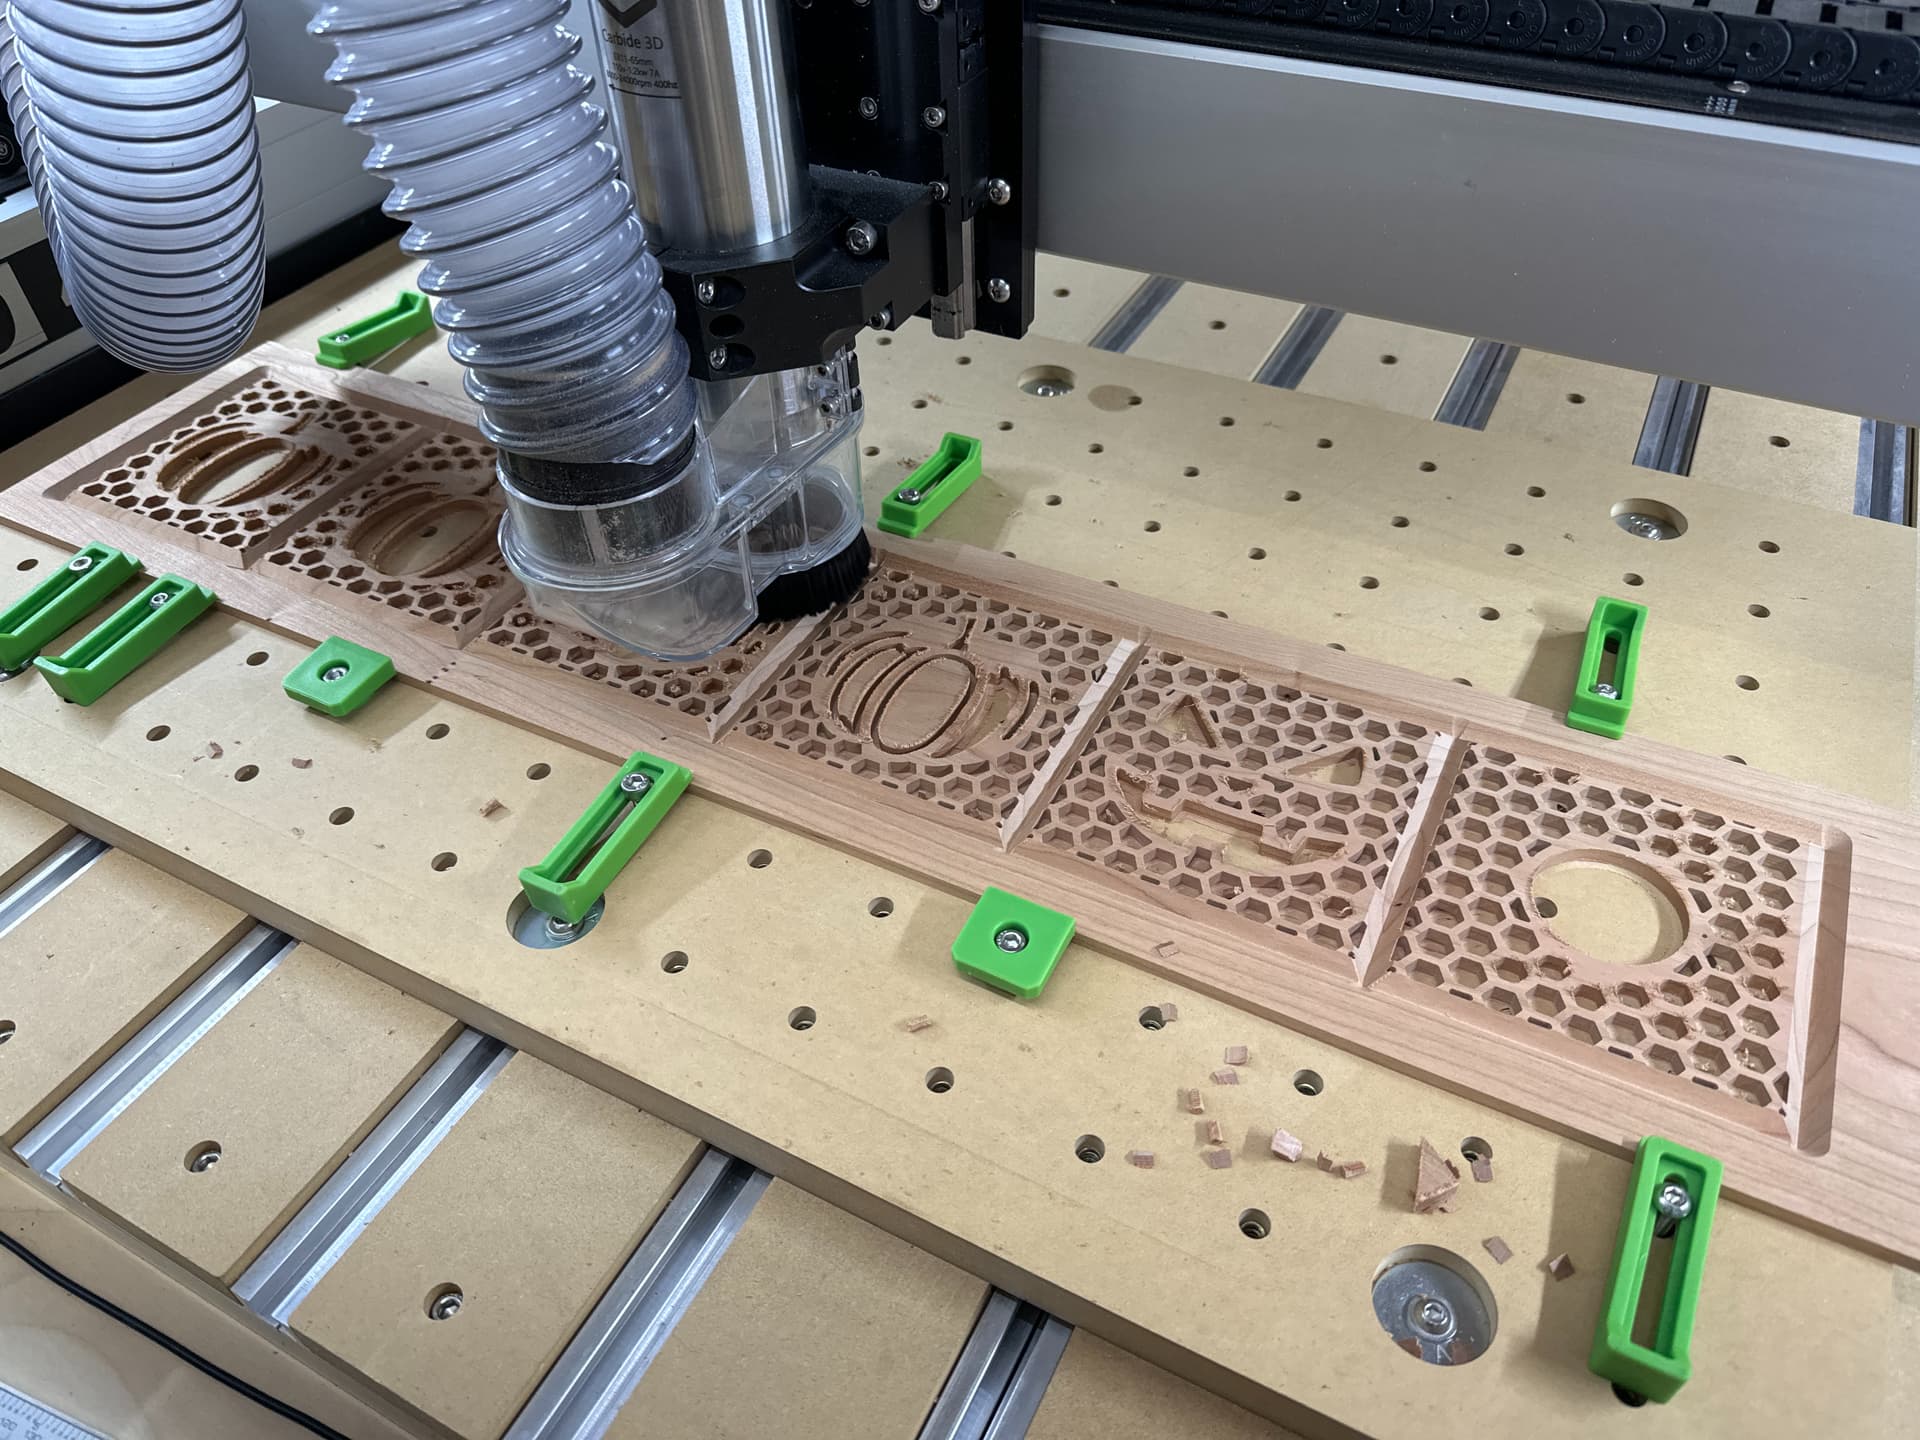
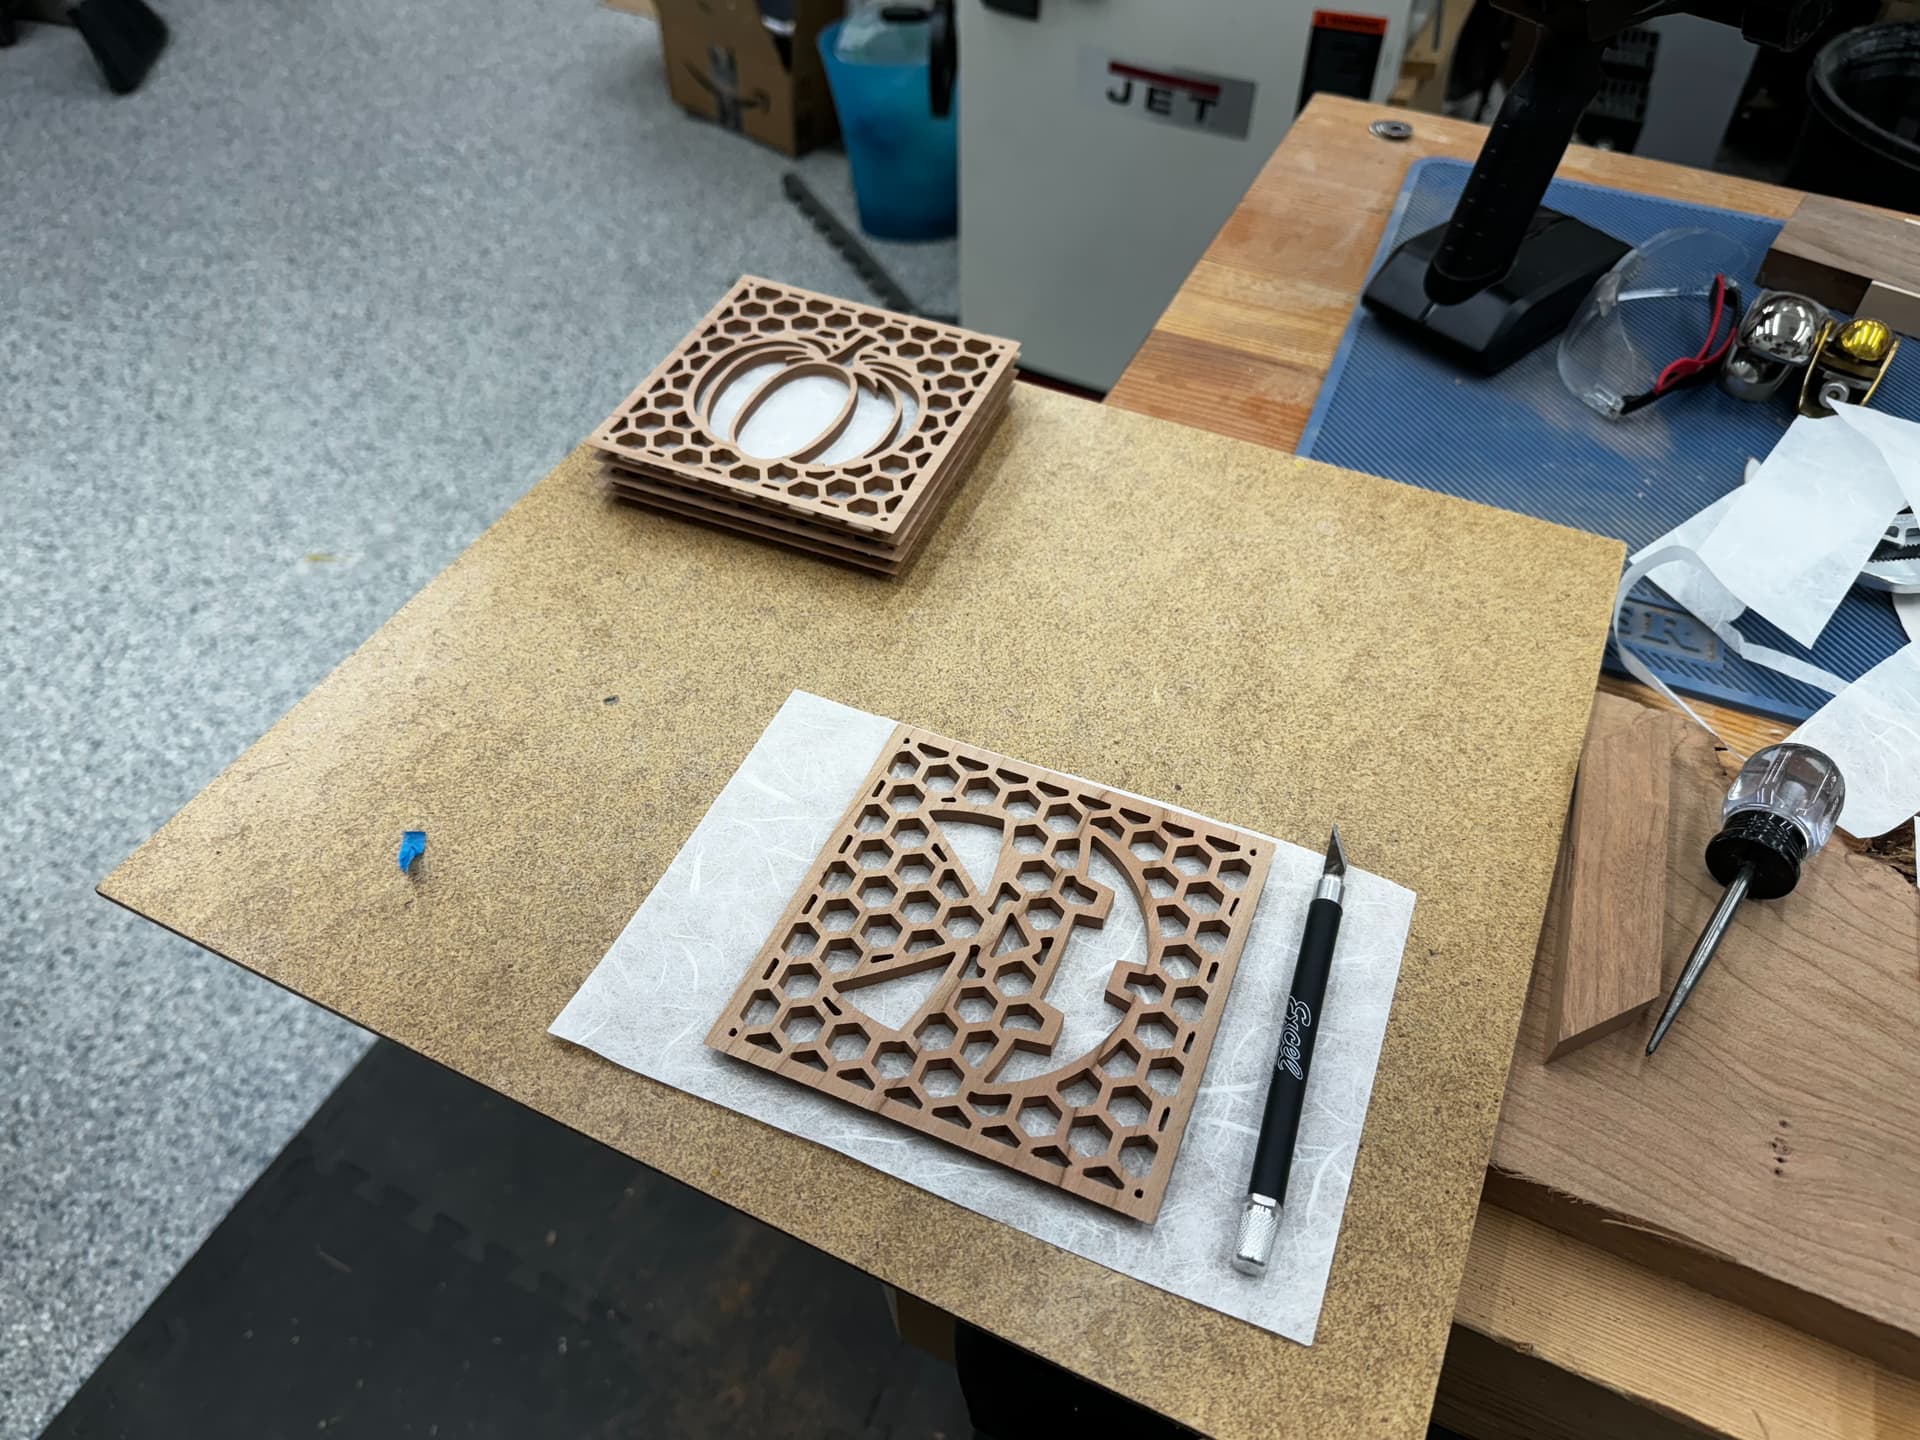
Unlike previous projects, I didn’t want to have an onion skin to sand through on the bottom of these because I wasn’t sure how easily it would be to remove with the Shoji paper stuck to the inside. I took the toolpaths to full thickness, but did not anticipate my spoilboard to be so out of flat. I still had to do some sanding on the individual pieces before I glued the paper and the body together.
For the screen, I bought generic Shoji paper on Amazon and used Titebond Quick and Thick to adhere it. At first I tried to use a toothpick to spread it, but it wasn’t thin enough. I ended up applying it, with great success, by hand spread thinly on my fingertips.
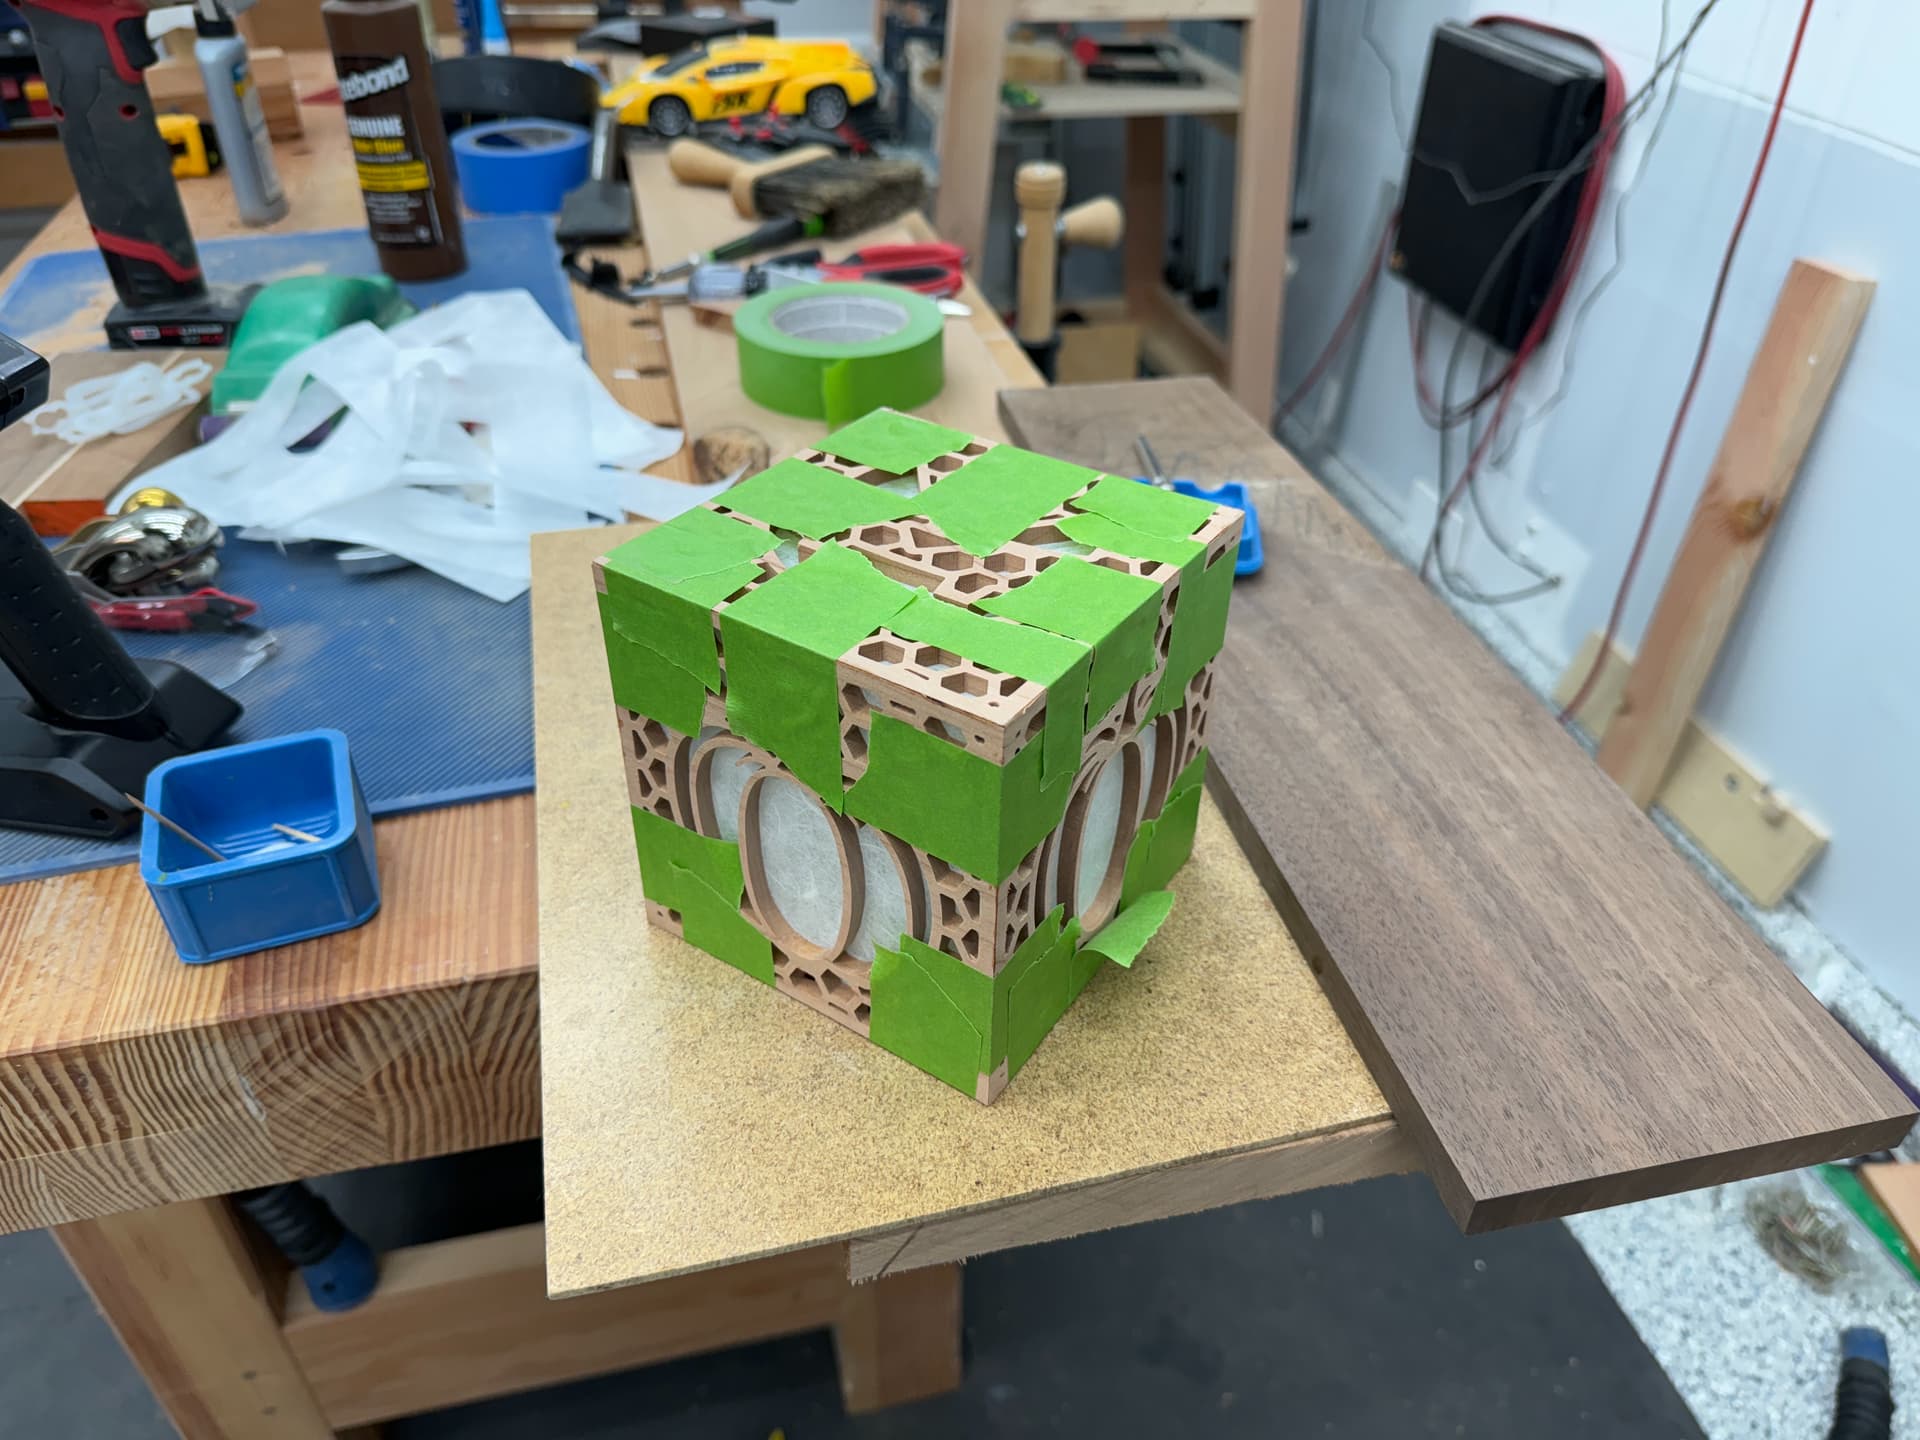
All that was left was to glue the panels together, using none better than painters tape and hide glue for the better open time. Because of my sanding, pre glueup, I had a bit of a time getting corners to be super crisp. When I inevitably do this again, I will make sure to flatten my spoilboard first and use that as my zero reference to save myself the pain of onionskin sanding.
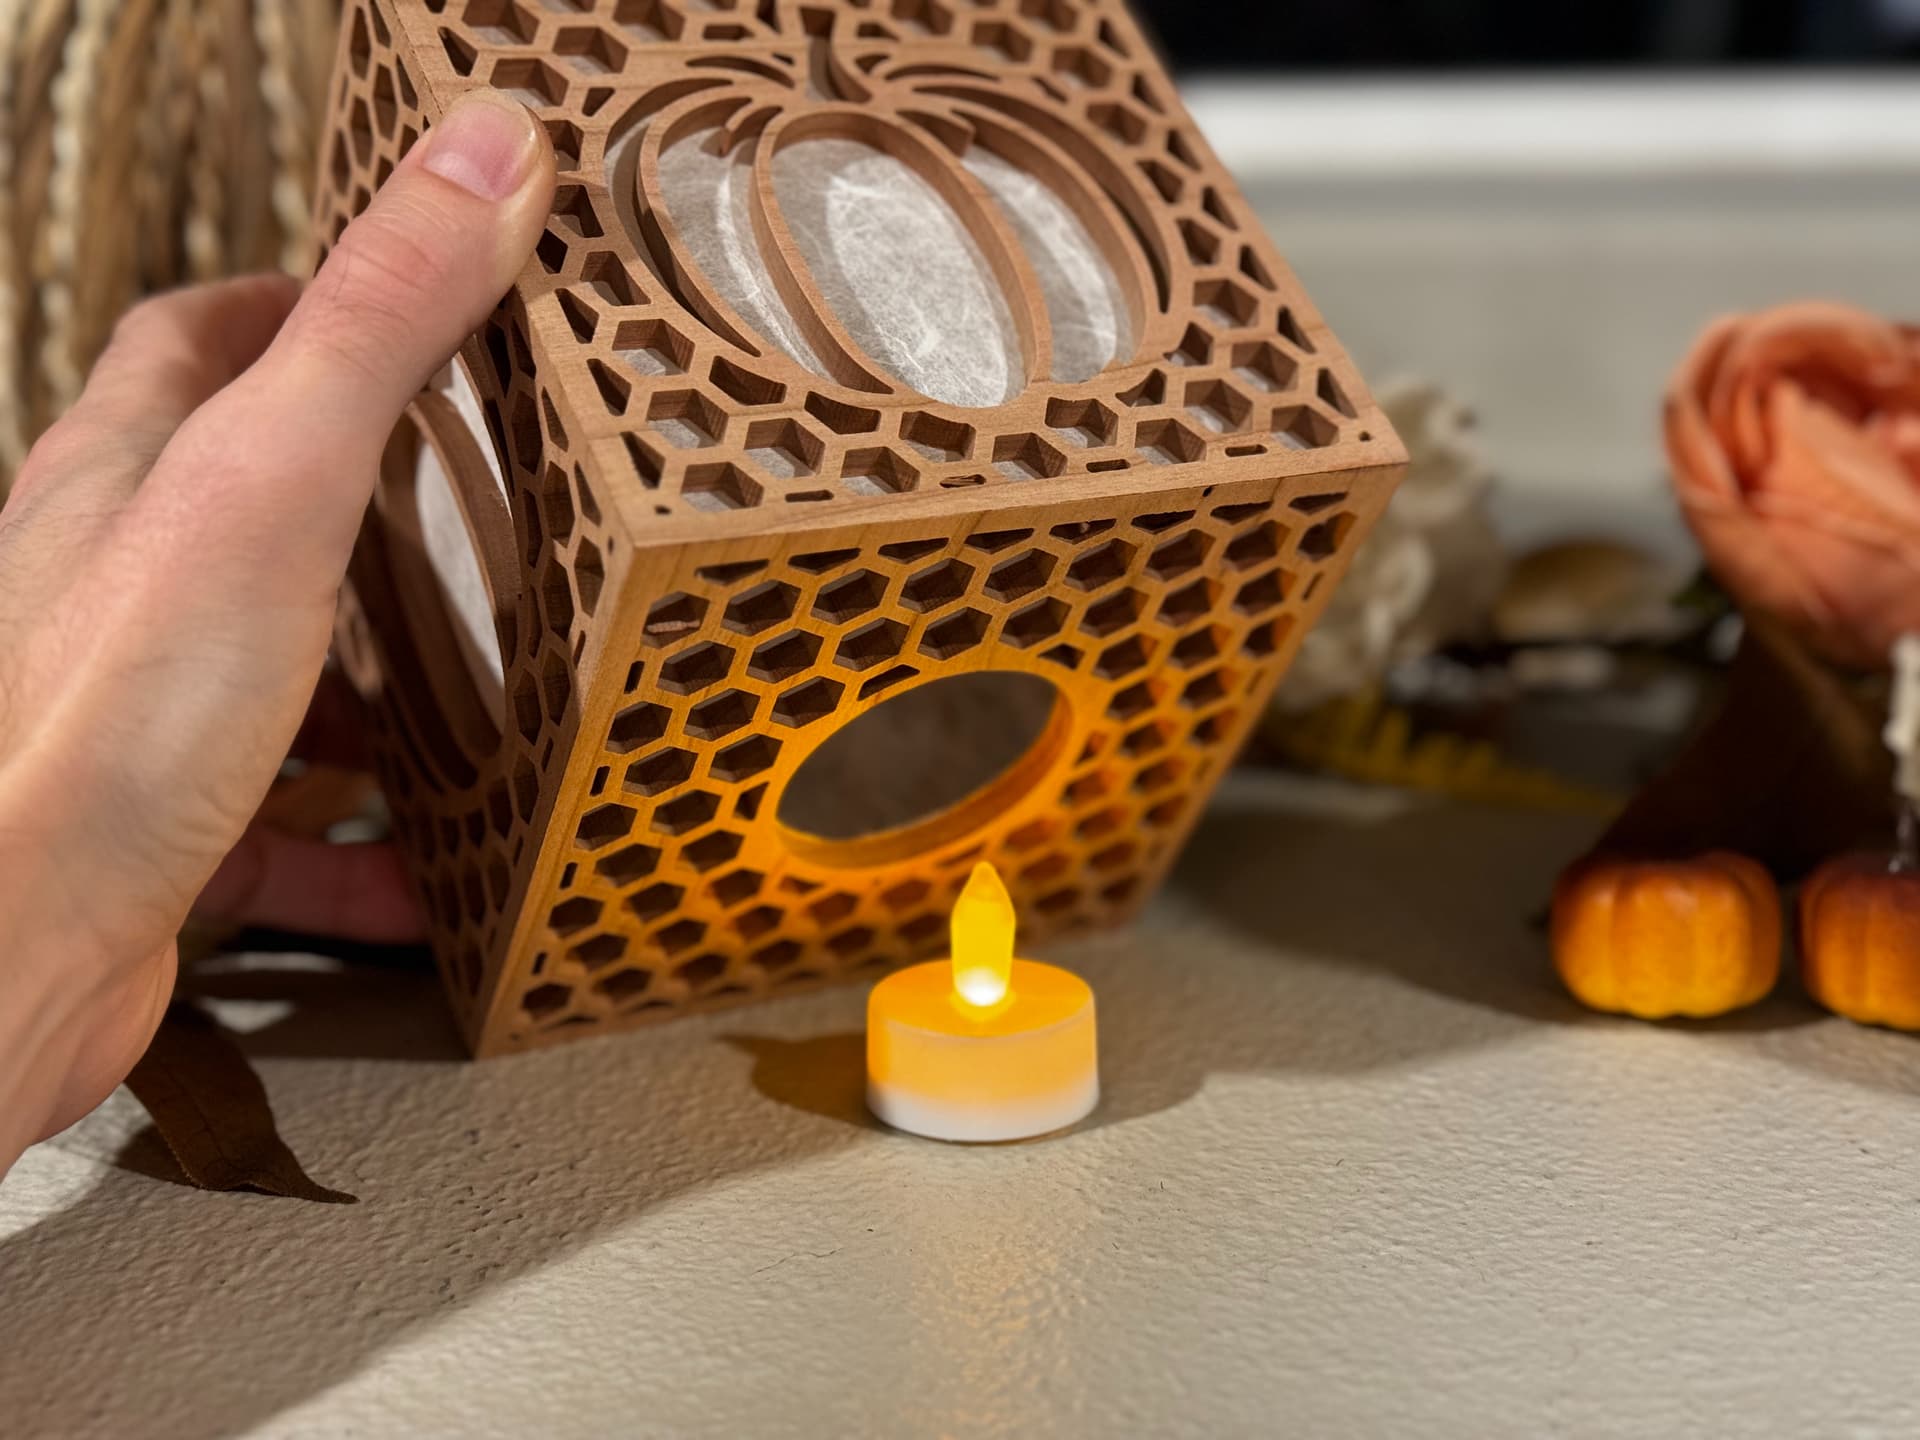
I still have finish to apply, seeing that spraying is out of the question (paper liner). I will likely apply thin coats of shellac to build a thin but appreciable finish. But for the time being it does well enough to sit over any battery powered tea light of my choice.
PumpkinLightBox.c2d (2.0 MB)