Community challenge #29: Spooky Season

Things got a bit busy both for us as a company and me personally. But! We’re back!
All users welcome, don’t shy away just because you haven’t done many projects before.

The theme for challenge #28 will be: Halloween/Fall/Autumn

Halloween is right around the corner. Children will gorge themselves on candy (that’s my plan as well). Costumes. Also it’s leaf color changing season, which is some peoples favorite time of year.

What can you make? Go crazy! Try and fit it in the theme (which is fairly broad). Some suggestions off the top of my head; candy dishes, signs, yard decorations. Maybe candy corn but made in wood (probably tastes about the same)? Winston did a giant aluminum pumpkin a while back, could do something like that! Make some leaves in different color woods as coasters? Something for a costume? Really, up to you!

Anyway, I can’t wait to see what you all come up with. Here are the Rules:

  • submit your entry in this thread
  • you can post multiple entries if you want (though you’ll only win one prize)
  • you must use your Shapeoko or Nomad
  • post pictures of the project and tell us about the process, the mistakes, lessons learned, etc.
  • include the design file. (I find this to be helpful for newer users).
  • Using tiling will give you +2 points to your vote count. This seems like a perfect contest for tiling
  • Winner will be decided by voting. Jury prize will be decided by the Carbide 3d team.

Timeline:

  • Deadline is set to November 1, 2023 midnight PST
  • there will then be 7 days for voting.
    • voting will be open to legit community members only, and the jury reserves the right to remove votes from “outsiders”, and will also break any tie.

Prizes
Doing things a bit differently this time.
Every winner gets a Crush-It Essentials kit and some swag.
First place will get their choice of cutters (up to $150 value)
Second place and Jury prize will get their choice of cutters (up to $100 value).

I’m not able to manage letting you pick something on store and let you pay partial, so it’ll be no more than whatever amount is set for the prize.

16 Likes

We made some Halloween themed activity boards for kids. Bats, Ghosts, and Pumpkin, with engraved details and “dimples” to place colored wooden balls in.

Process: Making these shapes were the most difficult part. Lots of arcs were created, and deleted at nauseam, using the Create Curve tool. Man that thing is hard to use to create a continuous shape. The pumpkin was made using a series of overlapping ovals, the bat was just some arcs and triangels, and the ghost was actually traced in Inkscape (free Photoshop alternative) and imported as an SVG. I literally tried 100 different “ghosts” using the Create Curve tool and could not even come close to a shape resembling a ghost. So I took a picture of a ghost from our Halloween decor and traced it in Inkscape!

Once I had a final design made, I’d offset the whole shape by 1/4" Outside, and Fillet all corners to 1/4" radius to create a large enough boarder that would accept a 1/8" round-over. I then engraved the original design with a 60-deg V-bit, doing 2 passes to clean up any dust/fibers that got left behind.

Mistakes Made and Lessons Learned:

  • The bat “tail” constantly broke off or chipped because I had the radius too small to begin with. I increased the radius to decrease the sharpness of it which helped a lot.
  • Pumpkin shaping took forever to make the pumpkin not look like mush.
  • Dimple-spacing took a lot of trial and error to fit exactly 10 balls and still have it look “good”. Not orderly, but not totally random.

I created a separate paint tumbling machine to mass-paint 1/2" wooden balls for another project, so I was able to paint all the balls used here with relative ease. Previously I’d shake a bunch in an old plastic container, dump on a baking sheet, and hit it with a heat gun on low. Do that 5 times and you get some really nice colored balls!

The kids LOVE these things.


bat_pumpkin_ghost.c2d (1.5 MB)

15 Likes

I made a coffin, which probably needs some explaining.

I know an artist that collects ball-jointed-dolls, and one of them was described to me as a “Sexy Korean Vampire”. I forget his name, but he was in need of a coffin… yea sure, I can make that!?

Given his height of 29", I first designed a correct sized coffin.


Cut out the sides on a table saw, and the top on the CNC.

That was the easy part.

Then the artist designed the artwork that would go on the coffin, and that was when things got more difficult.

Four of the six sides had flowers v-carved, but then repainted so they were all black on black with different finishes.


The art for the coffin top was drawn by hand (on an tablet). I imported the artwork into Carbide Create using the trace feature. Determined this would require three separate resin pours, so the coffin top was on the CNC machine for roughly a week.

First step was to provide a spooky, grayish-black background (first resin pour).

Once that had cured, the second step was to v-carve the wings and bone structure.

After that cured I then resurfaced and carved the deign in the skull.

Then resurfaced again, and started the polishing process.

So now I know how to make a coffin for a Sexy Korean Vampire.


CoffinArt.c2d (652 KB)

28 Likes

Made on the ShapeOKO4. Made with PVC Board

Broom Parking.c2d (648 KB)

17 Likes

Entry #1 from me. Another to follow in a couple of days.
Pumpkin boxes.

While not technically challenging cuts, there was a lot of them. It felt like I was in a production line.

I made 4 boxes each is 12.5 inches square and the top and bottom are 13.5 inches. Each box has a four faces and they are all different, so 16 total patterns. Most were from the CC library but a few were pulled from online and tweaked.

Major lesson learned is I should have made them a little smaller to get better usage of the material.

The faces were cut on my Shapeoko Pro but all the rest was traditional machines. These will be outside so I painted them to protect the wood.

The faces are. 1/8” luan plywood. The vertical pieces were all cut from a single 2x4 and the tops/bottoms are from glued up pine panels.

Inside I put lights that are color selectable and controlled by a remote. I lined the cutouts with wax paper to distribute the light better. Hopefully that holds out. In the pics it looks like the light source really blooms but in real life it doesn’t look that way.

Next year I may find some motors and a good way to mount them so that they rotate and show off all the faces.

Prior to the painting:

After painting:


Up on the porch, although we will probably move them down into the yard.


I cut each face on individual 10.5” square piece of luan rather than cutting multiple faces on a larger piece and then trimming because I was worried about holding a larger section down flat and didn’t want to use tape in this case.

So, I had 16 files, I don’t think you want them all here. I would be more than happy to share them if anyone cares but they are super simple.

Addendum:

I made some interlocking stands to put the boxes on so they don’t sit flat in the yard.
Good thing I used the plastic clamps.

PumpkinBoxStands.c2d (128 KB)


13 Likes

Time for entry #2 from me. We made tombstones for our front yard graveyard.
The material is cheap insulation foam from Lowes, $7 for a 24"x24" piece. I applied granite texture paint to two of them and soapstone paint to the other two (because Lowes was out of the granite).

The foam soaks up a ton of paint and reacts with the chemicals in it leaving a very rough texture. I had not planned on that but I like the way it looks. I had planned to put masking on after the paint and then carve and paint the lettering and designs. However, the surface was so uneven after the top coat I knew that masking would not work so I used epoxy on all the lettering and designs. It was a pretty good amount of epoxy but I really like the shiny effect.

I bought some garage sale wire stands from Lowes and cut them in half and then inserted into the foam to hold them in place.

My 11 year old daughter did the design work in Carbide Create Pro with my assistance.

Lessons learned:

  1. The paint reacted with the foam
  2. The font on one was a kind of small and detailed for the epoxy so I had a little spillage that had to be wiped up and looks a little dirty
  3. The bumpy nature of the surface caused me to select certain sections and cut deeper multiple times to get something that would hold the epoxy.
  4. The font for “Dee Cayen” required a lot of cleanup because of the vectors overlapping.

I will get some spooky lighting on them for night time.

The text and images are a mixture of things from Carbide Create and things downloaded. I will post the files, but if you don’t have the fonts it may not work for you. In some cases I converted to curves to work on it but others it is still the text object. If you have trouble let me know and I will find the right font and let you know where to get it.

tombstone4.c2d (352 KB)
tombstone3.c2d (496 KB)
tombstone2.c2d (1.0 MB)
tombstone1.c2d (980 KB)


14 Likes

I made couple of Halloween signs using the photo V-Carve toolpath in Vectric VCarve Pro. I combined four different pictures together for the carving.

The first was a smaller sign (12" wide 20" tall) as the prototype to see how the carving would look.

This is after the first sanding.

This is the final completed test.

Once I was happy with how this turned out I started on the main sign. This one is a 64" tall and 34" wide sign. I used three pine planks that I had in my inventory. I had originally planned to make it a 60"x32" so I could trim the ends and sides to keep it straight. However, once glued together everything lined up perfect (wonders never cease).

The glue job. After planning the boards to ensure they were all the same thickness, I used a couple of heavy pieces of petrified wood I bought a few years ago in Arizona’s Petrified Forest National Park to help hold down and keep everything level.

Next, I needed to set up the Shapeoko so I could put a large piece on and keep it aligned. I made some blocks that could attach to the far side of the machine (again using the Shapeoko).

Because of the size of the sign I used the tiling feature. I set it up into three parts. I could have done it in only two but wanted to ensure the cuts in between each encompassed certain features of the design. I used the bottom of the alignment block as the reference point for each of the tiling parts. Lot of people like to use pegs to keep the piece aligned as it moves from one part to the next. However, as the bit would be covering the whole piece this wasn’t an option. I used the C3D #302 60° v-bit for the cut at a 45° angle.

Once the cut was done, I used 2 1/2 cans of black spray paint to cover the whole piece.

After letting it dry overnight, I used an orbital palm sander with 60 grit paper to sand off the paint leaving the just the carved pictures. Next, I used some amber shellac to give it an orangish Halloween color.

Here’s the finished project.

24 Likes

I love that effect. It’s great. I had t thought of painting after carving and then sanding the top layer.

1 Like

I wanted to try something quick and simple for bit changes. So I found this template in Carbide, added the text and setup the tooling. 1/8bit, 1/4 bit, and V bit. The material is Styrofoam.

I used double sided tape to hold it down, worked very well. I tried to make sure the bit didn’t go down too far because the tape will gum up the bits (found out the hard way).

Used spray paint for color, the black wanted to melt the Styrofoam. So, very quick light coats and it gave a cool weathered look.

13 Likes

My son got a Link (Zelda) costume and he said that he wanted me to make him a shield to go with it. So I whipped this up on my S3XXL.

36457B1A-5AB2-45A7-8518-5E91DDBC38BC_4_5005_c


F90DA4CB-311F-4198-A5BA-FAA5BAC34F35_4_5005_c

15 Likes

Made a Halloween themed welcome porch leaner on a Shapeoko Pro 5. Used MDF to carve out the design.

First step was to use a 1 1/4in surfacing bit to clear out the material around the design.

I used the rest machining feature for several bits to carve the detail of the design.
1/4 down cut end mill


Next bit used was the 1/8 down cut end mill.

Also used 1/16 and 1/32 down cut bits to get the small details of the spider webs and skeleton bones.

Finally cut it out with a 1/4 down cut bit.

I hand painted the sign using black, white, orange and gray paint. A few pictures of the finished porch sign.


Lessons learned: Clearing the material around the design and the small details of the design made this a long machine time. I probably should have carved the design into the wood instead of clearing the material around the design, that would have saved a lot of time.

What I would do differently: Instead of cutting the sign out in a rectangular shape, I think I should have cut it out in the shape of a coffin. I am happy with the way the sign turned out.
skelly.c2d (968 KB)

17 Likes

Every year, we do a big Halloween display and each year we build props based on a new theme. This year was Alice’s Nightmare in Wonderland. One project was to build a “Rabbit Hole”. After ruling out digging a big hole in the front yard, we came up with the idea of trying to combine the hole with the spinning falling effect of falling down the rabbit hole. To do this, we decided on a hypnotic spinner that would be cut on the CNC using epoxy pours for the black and white of the pattern.

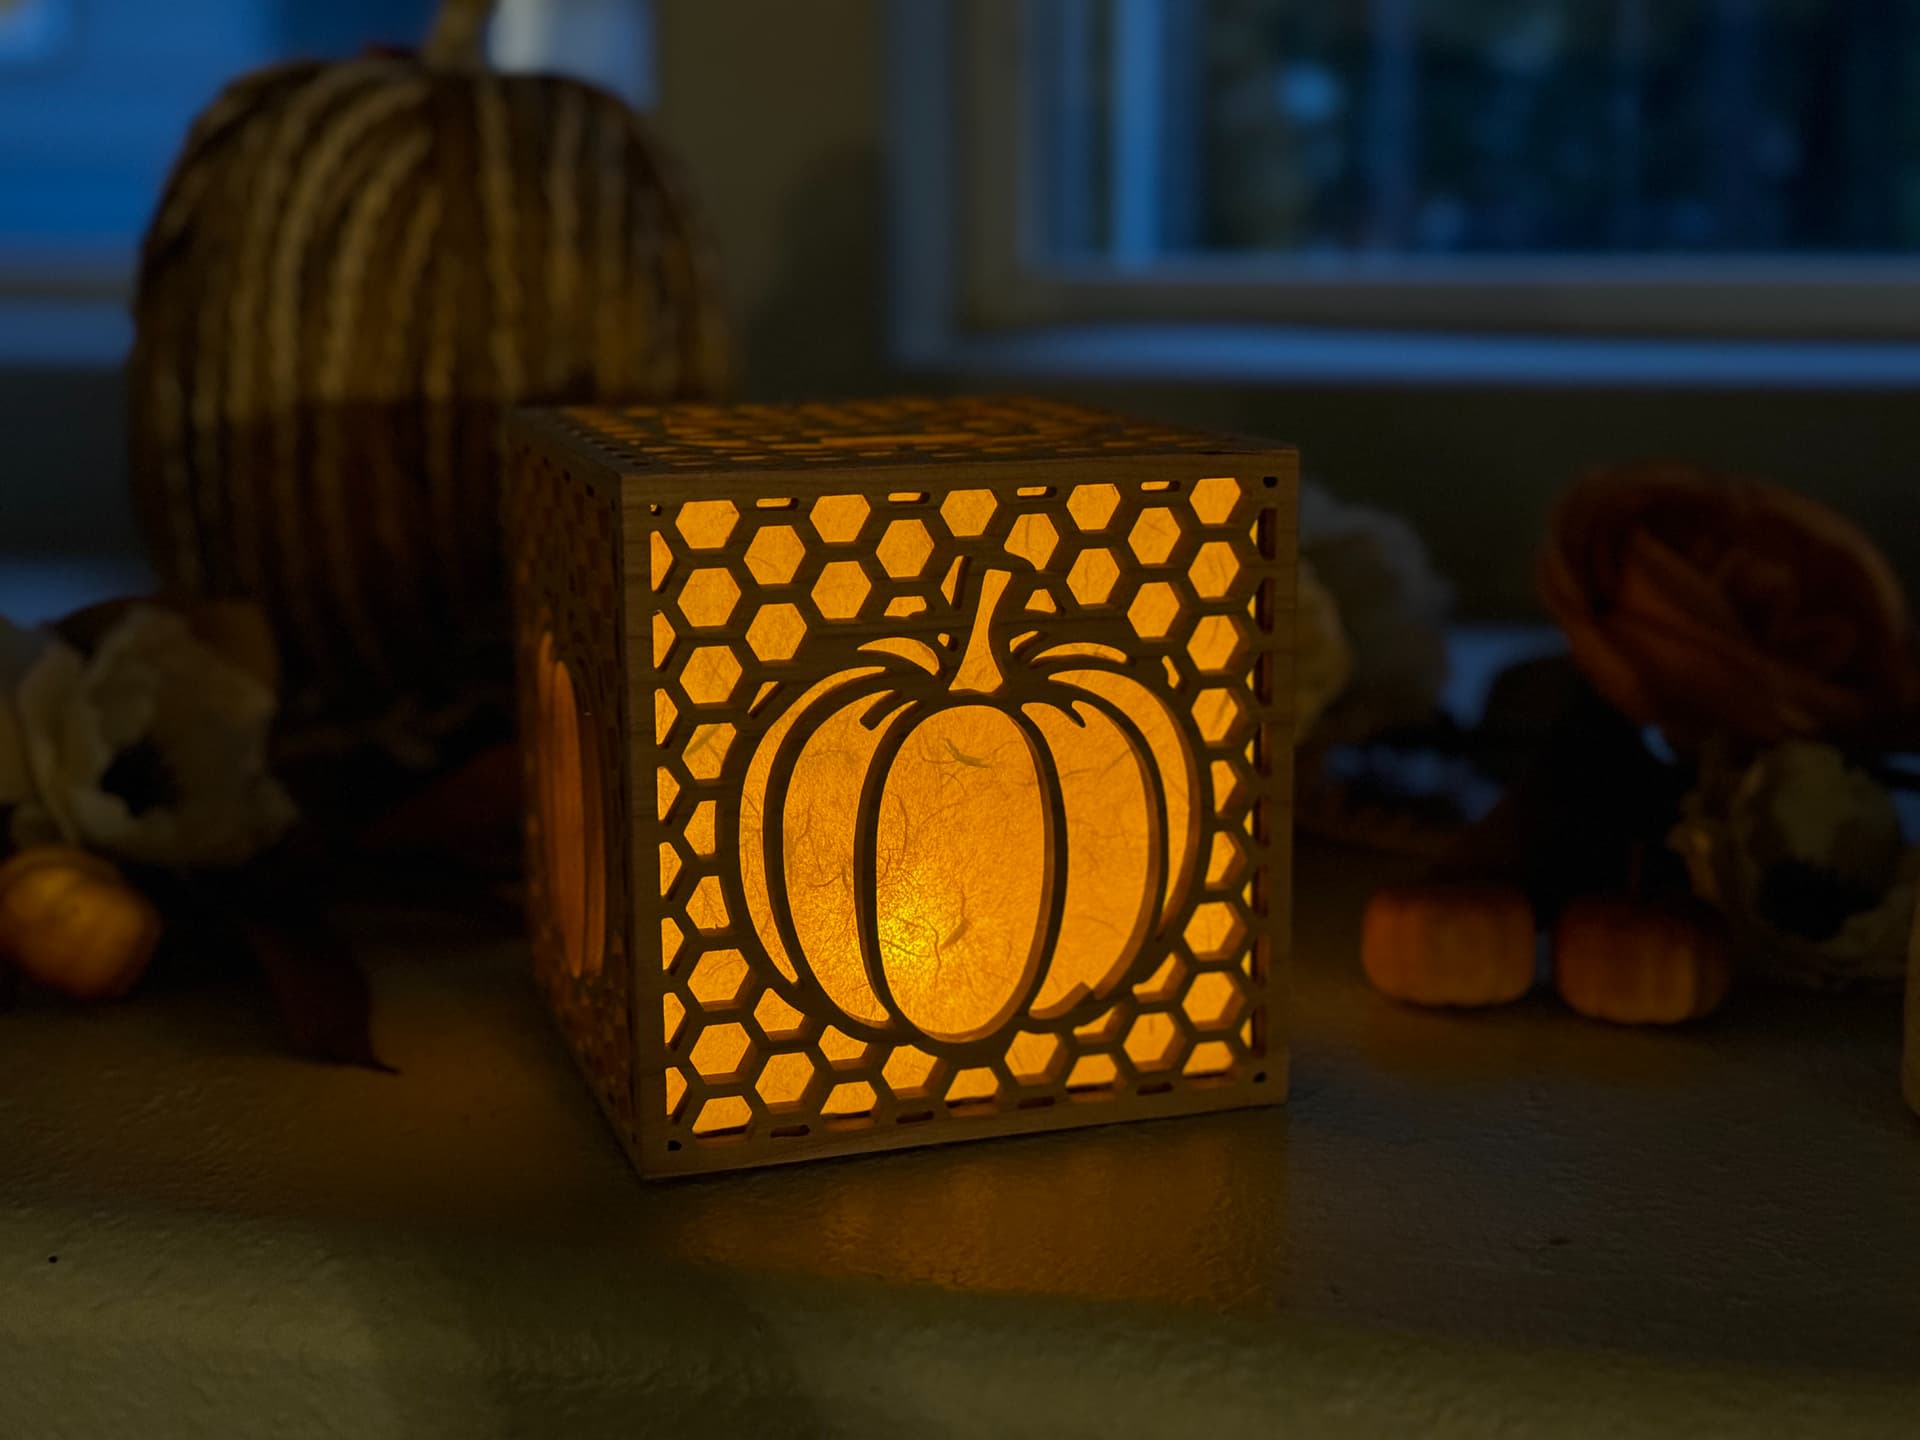
Here’s the finished product:

and a short video of it in action:

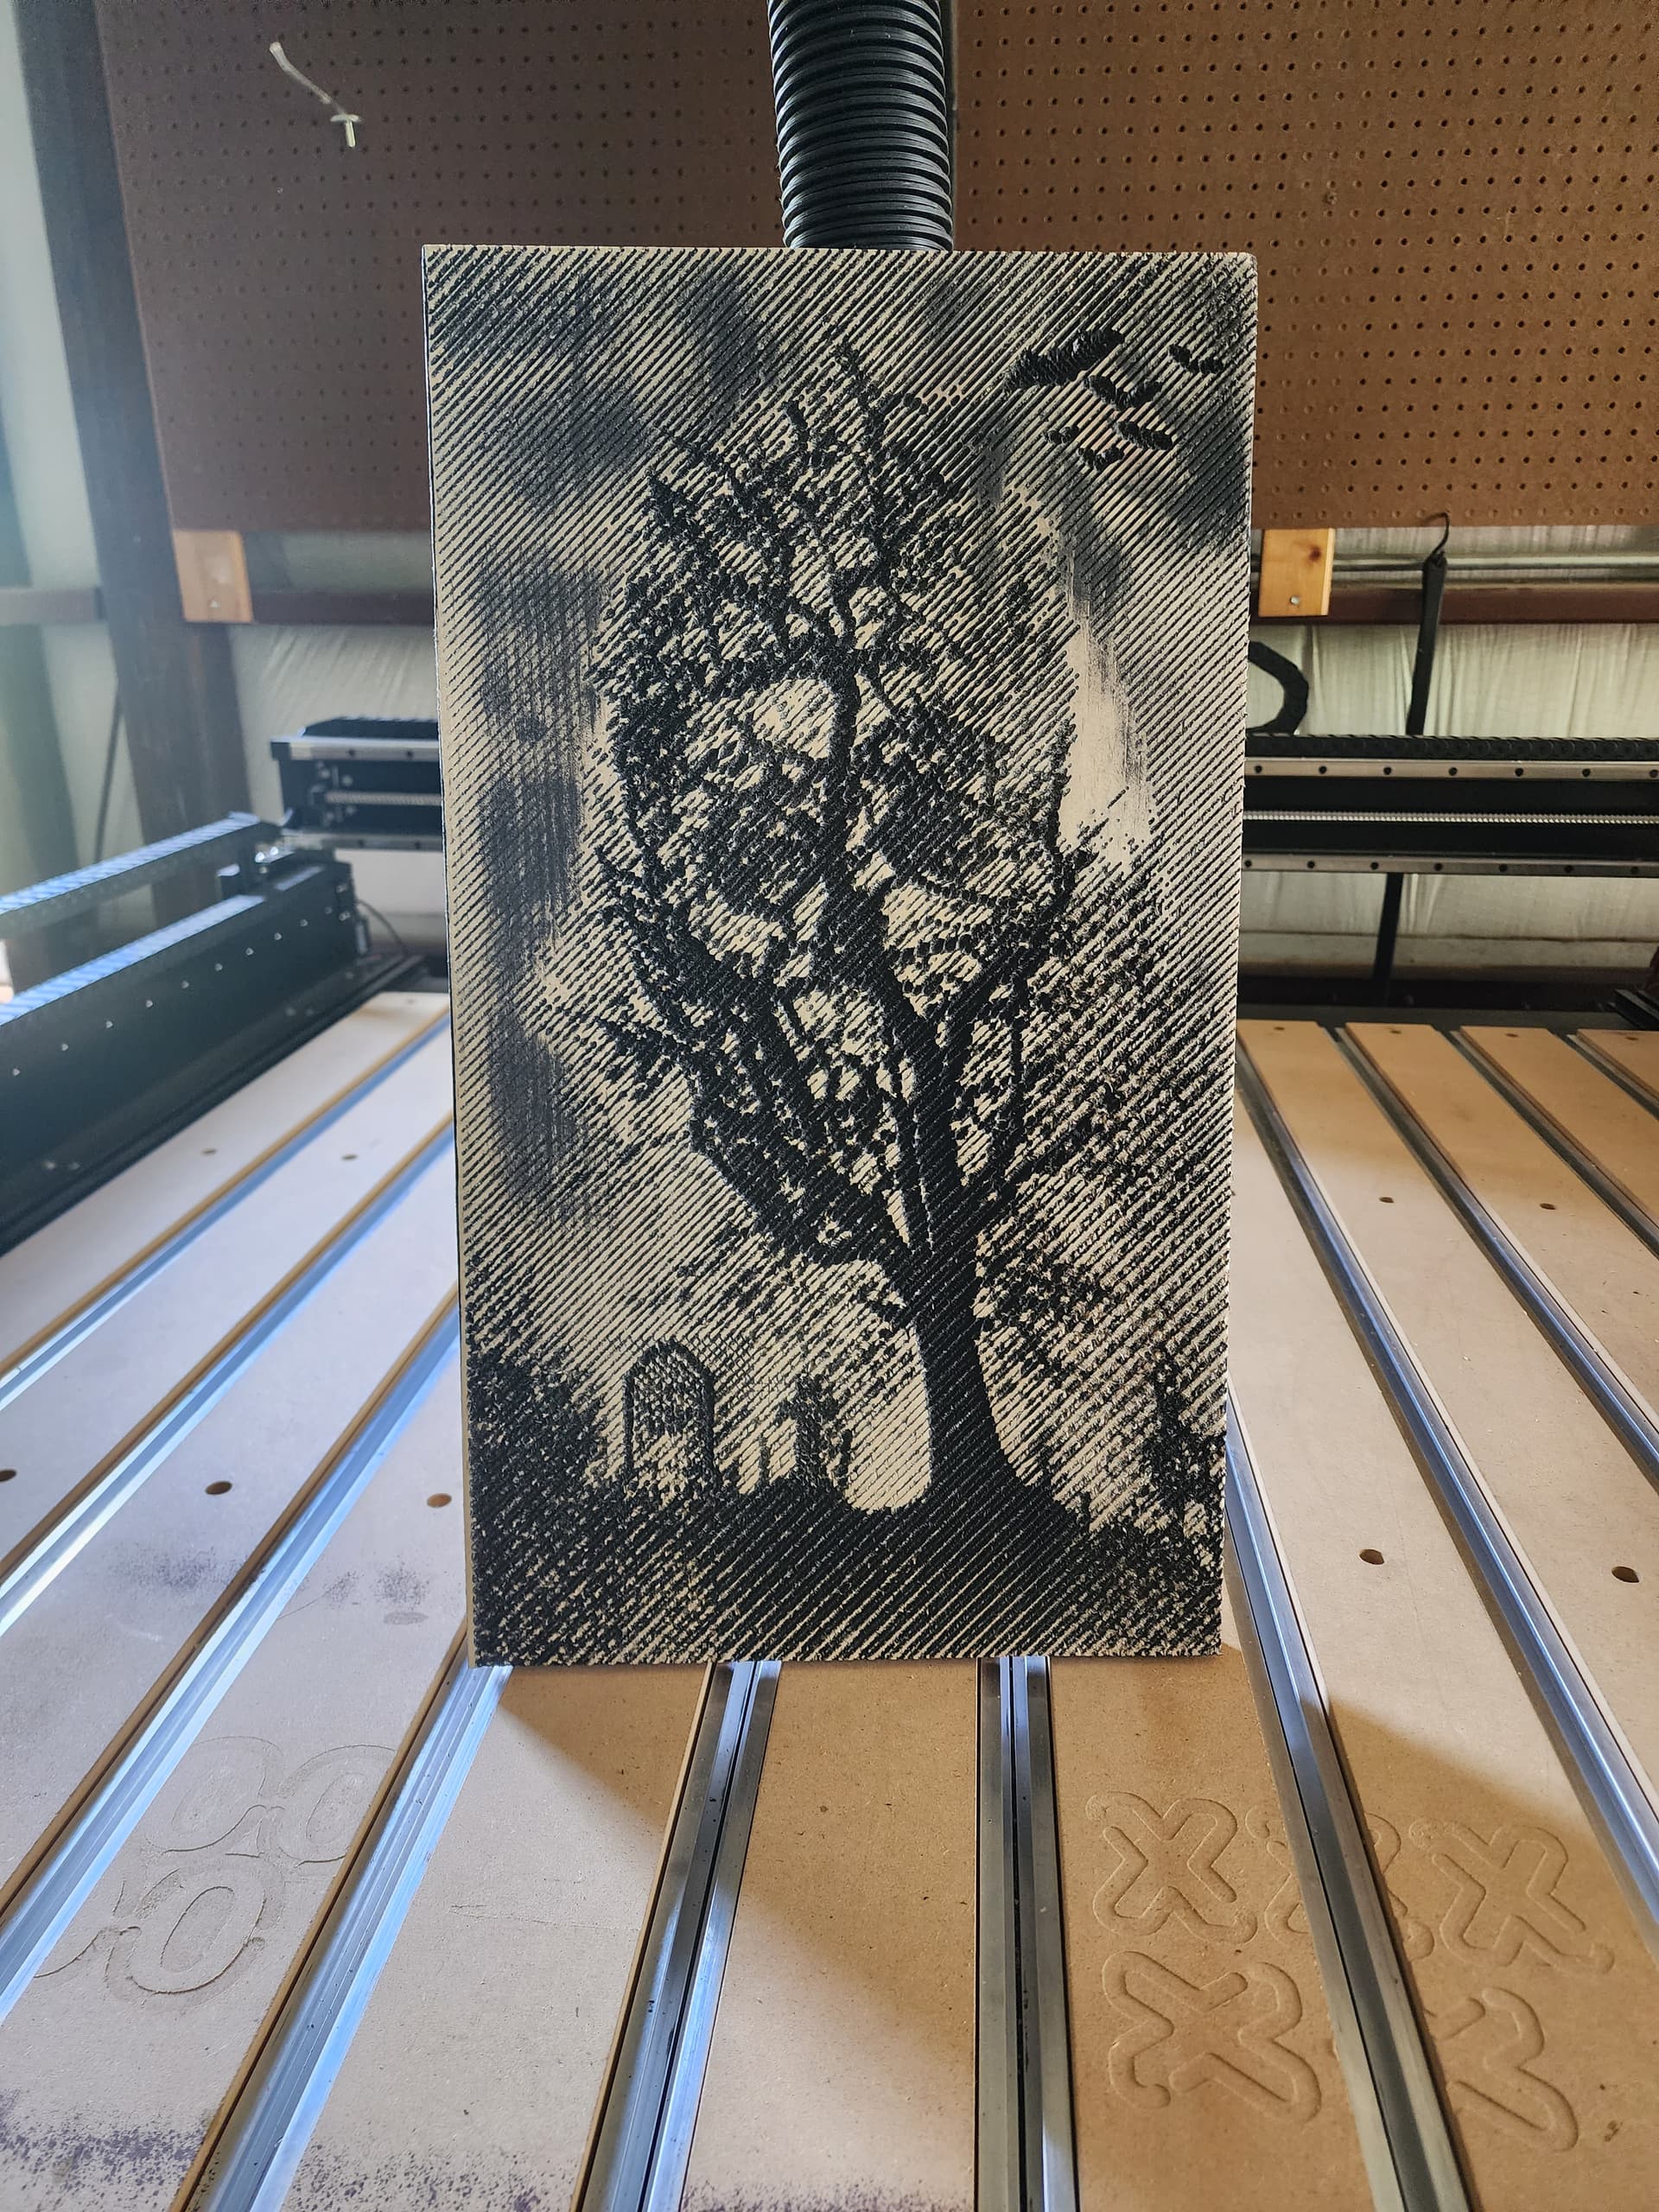
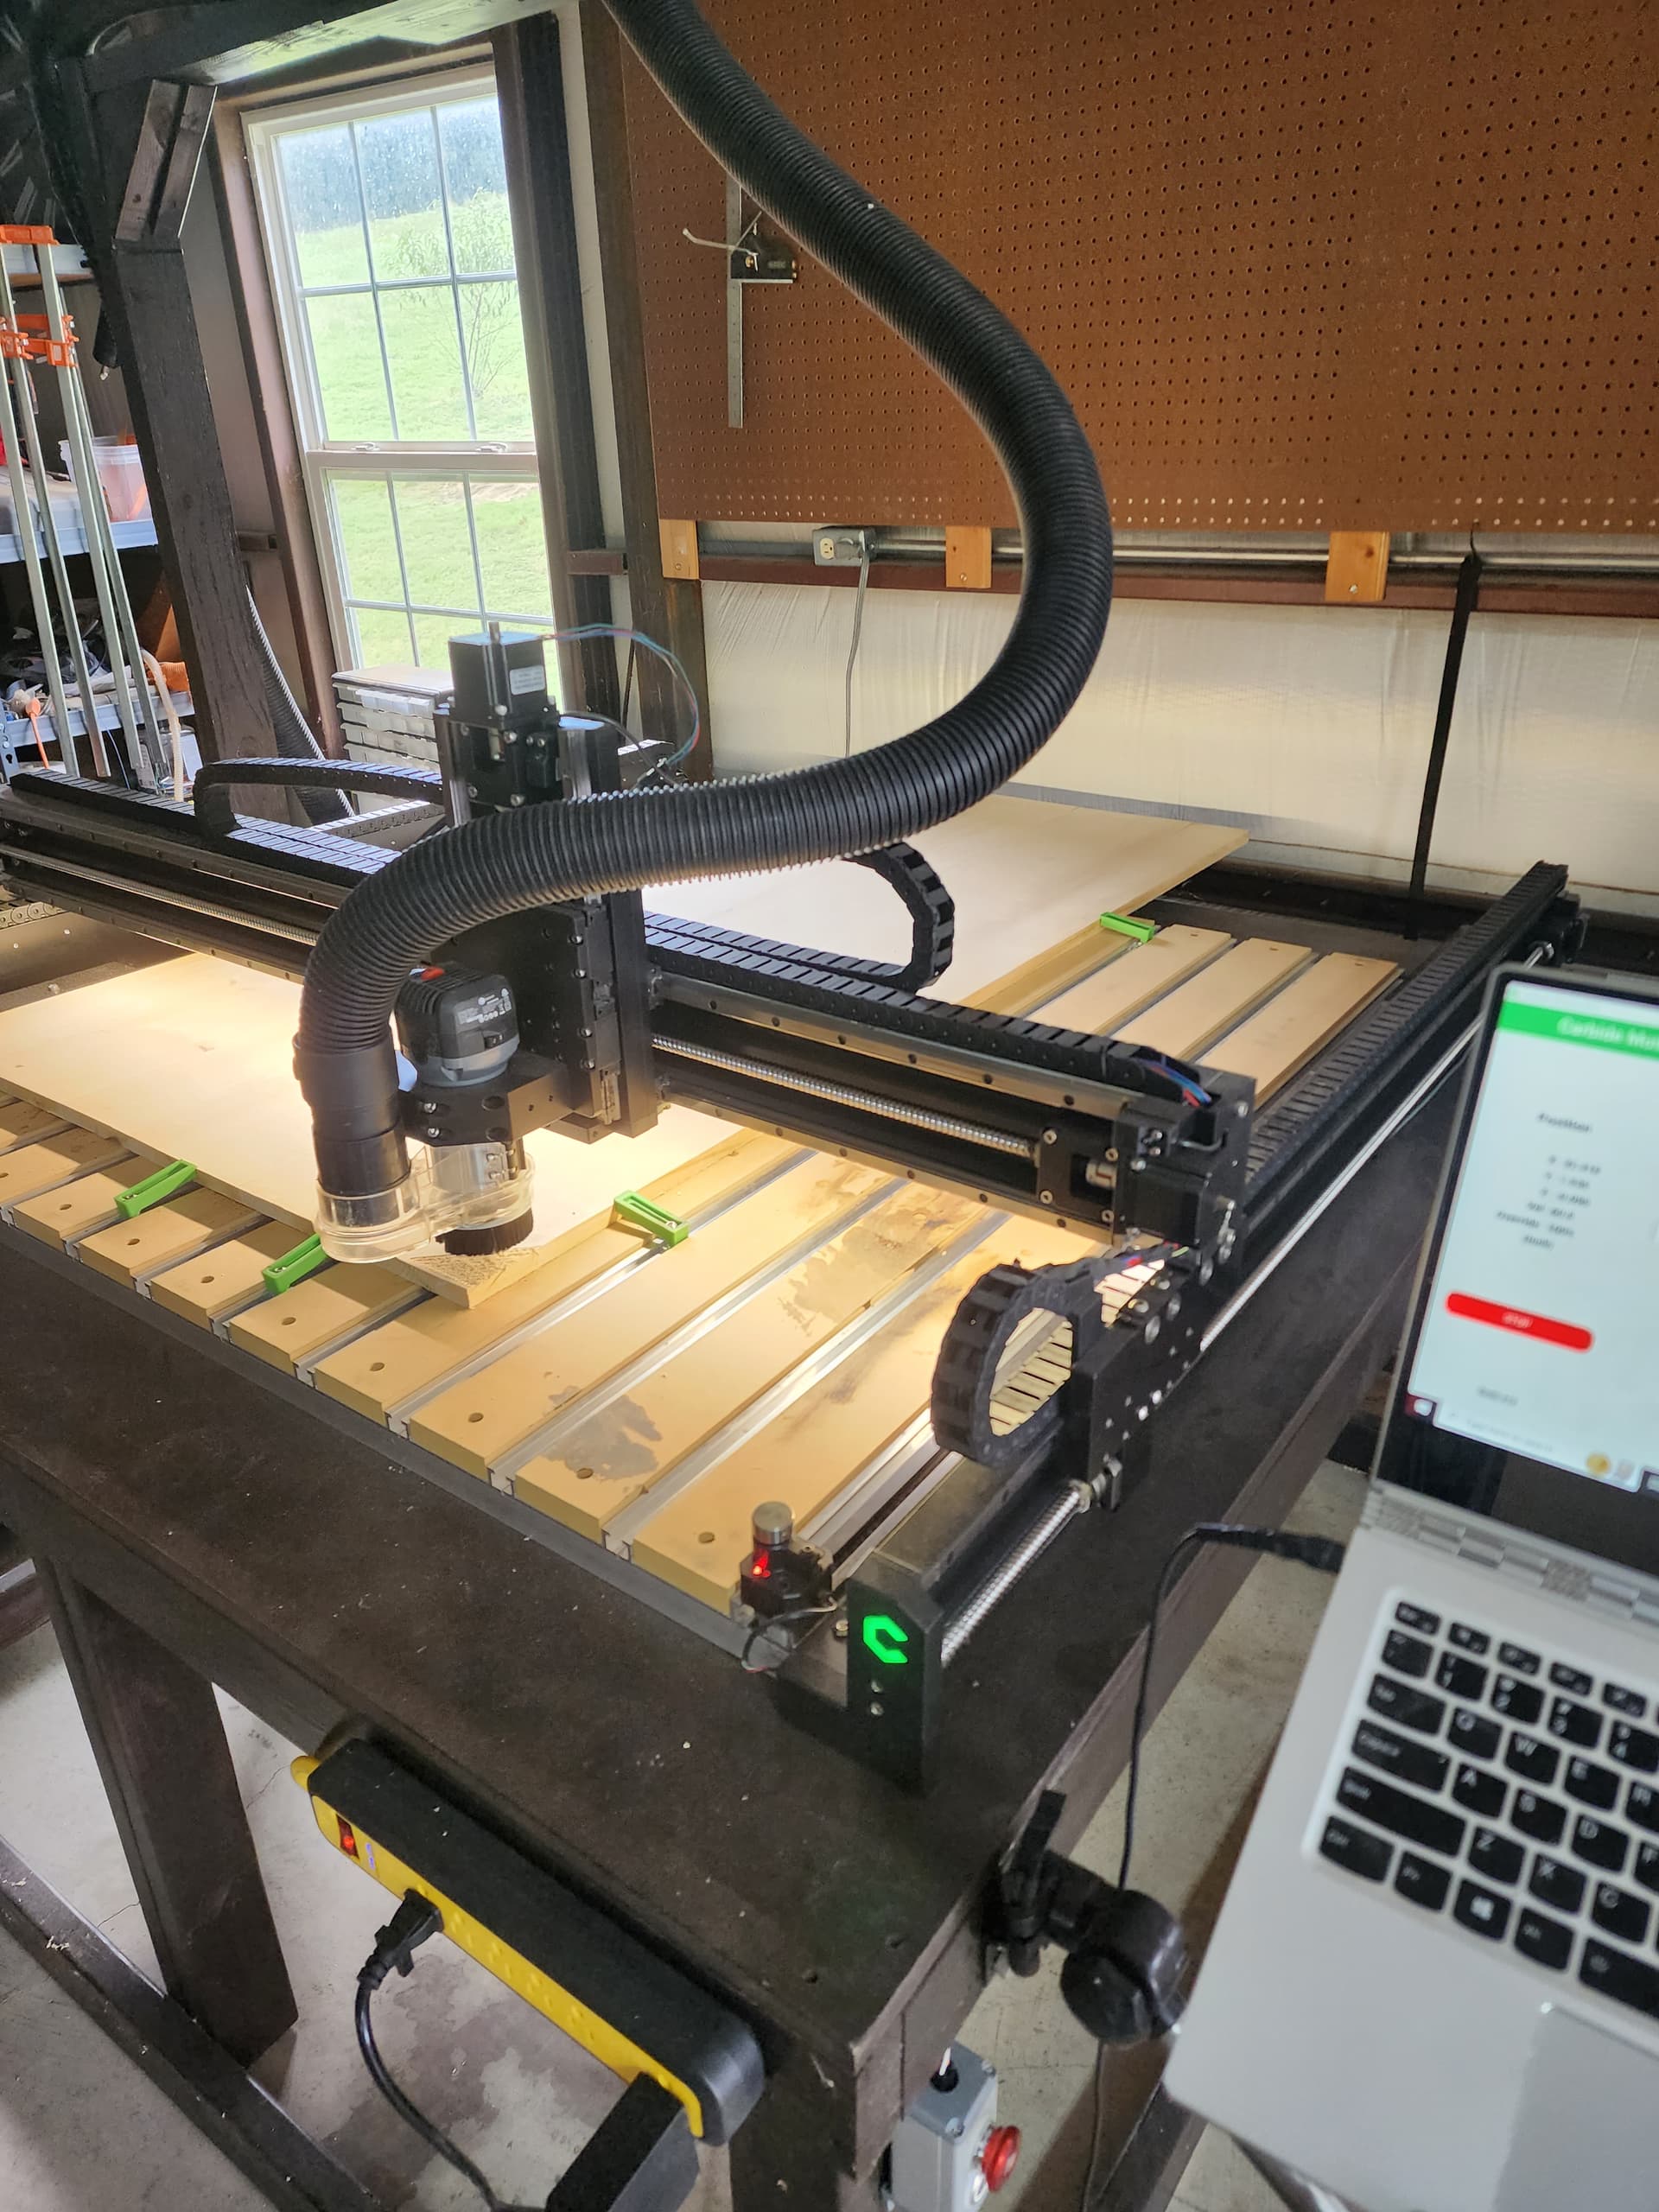
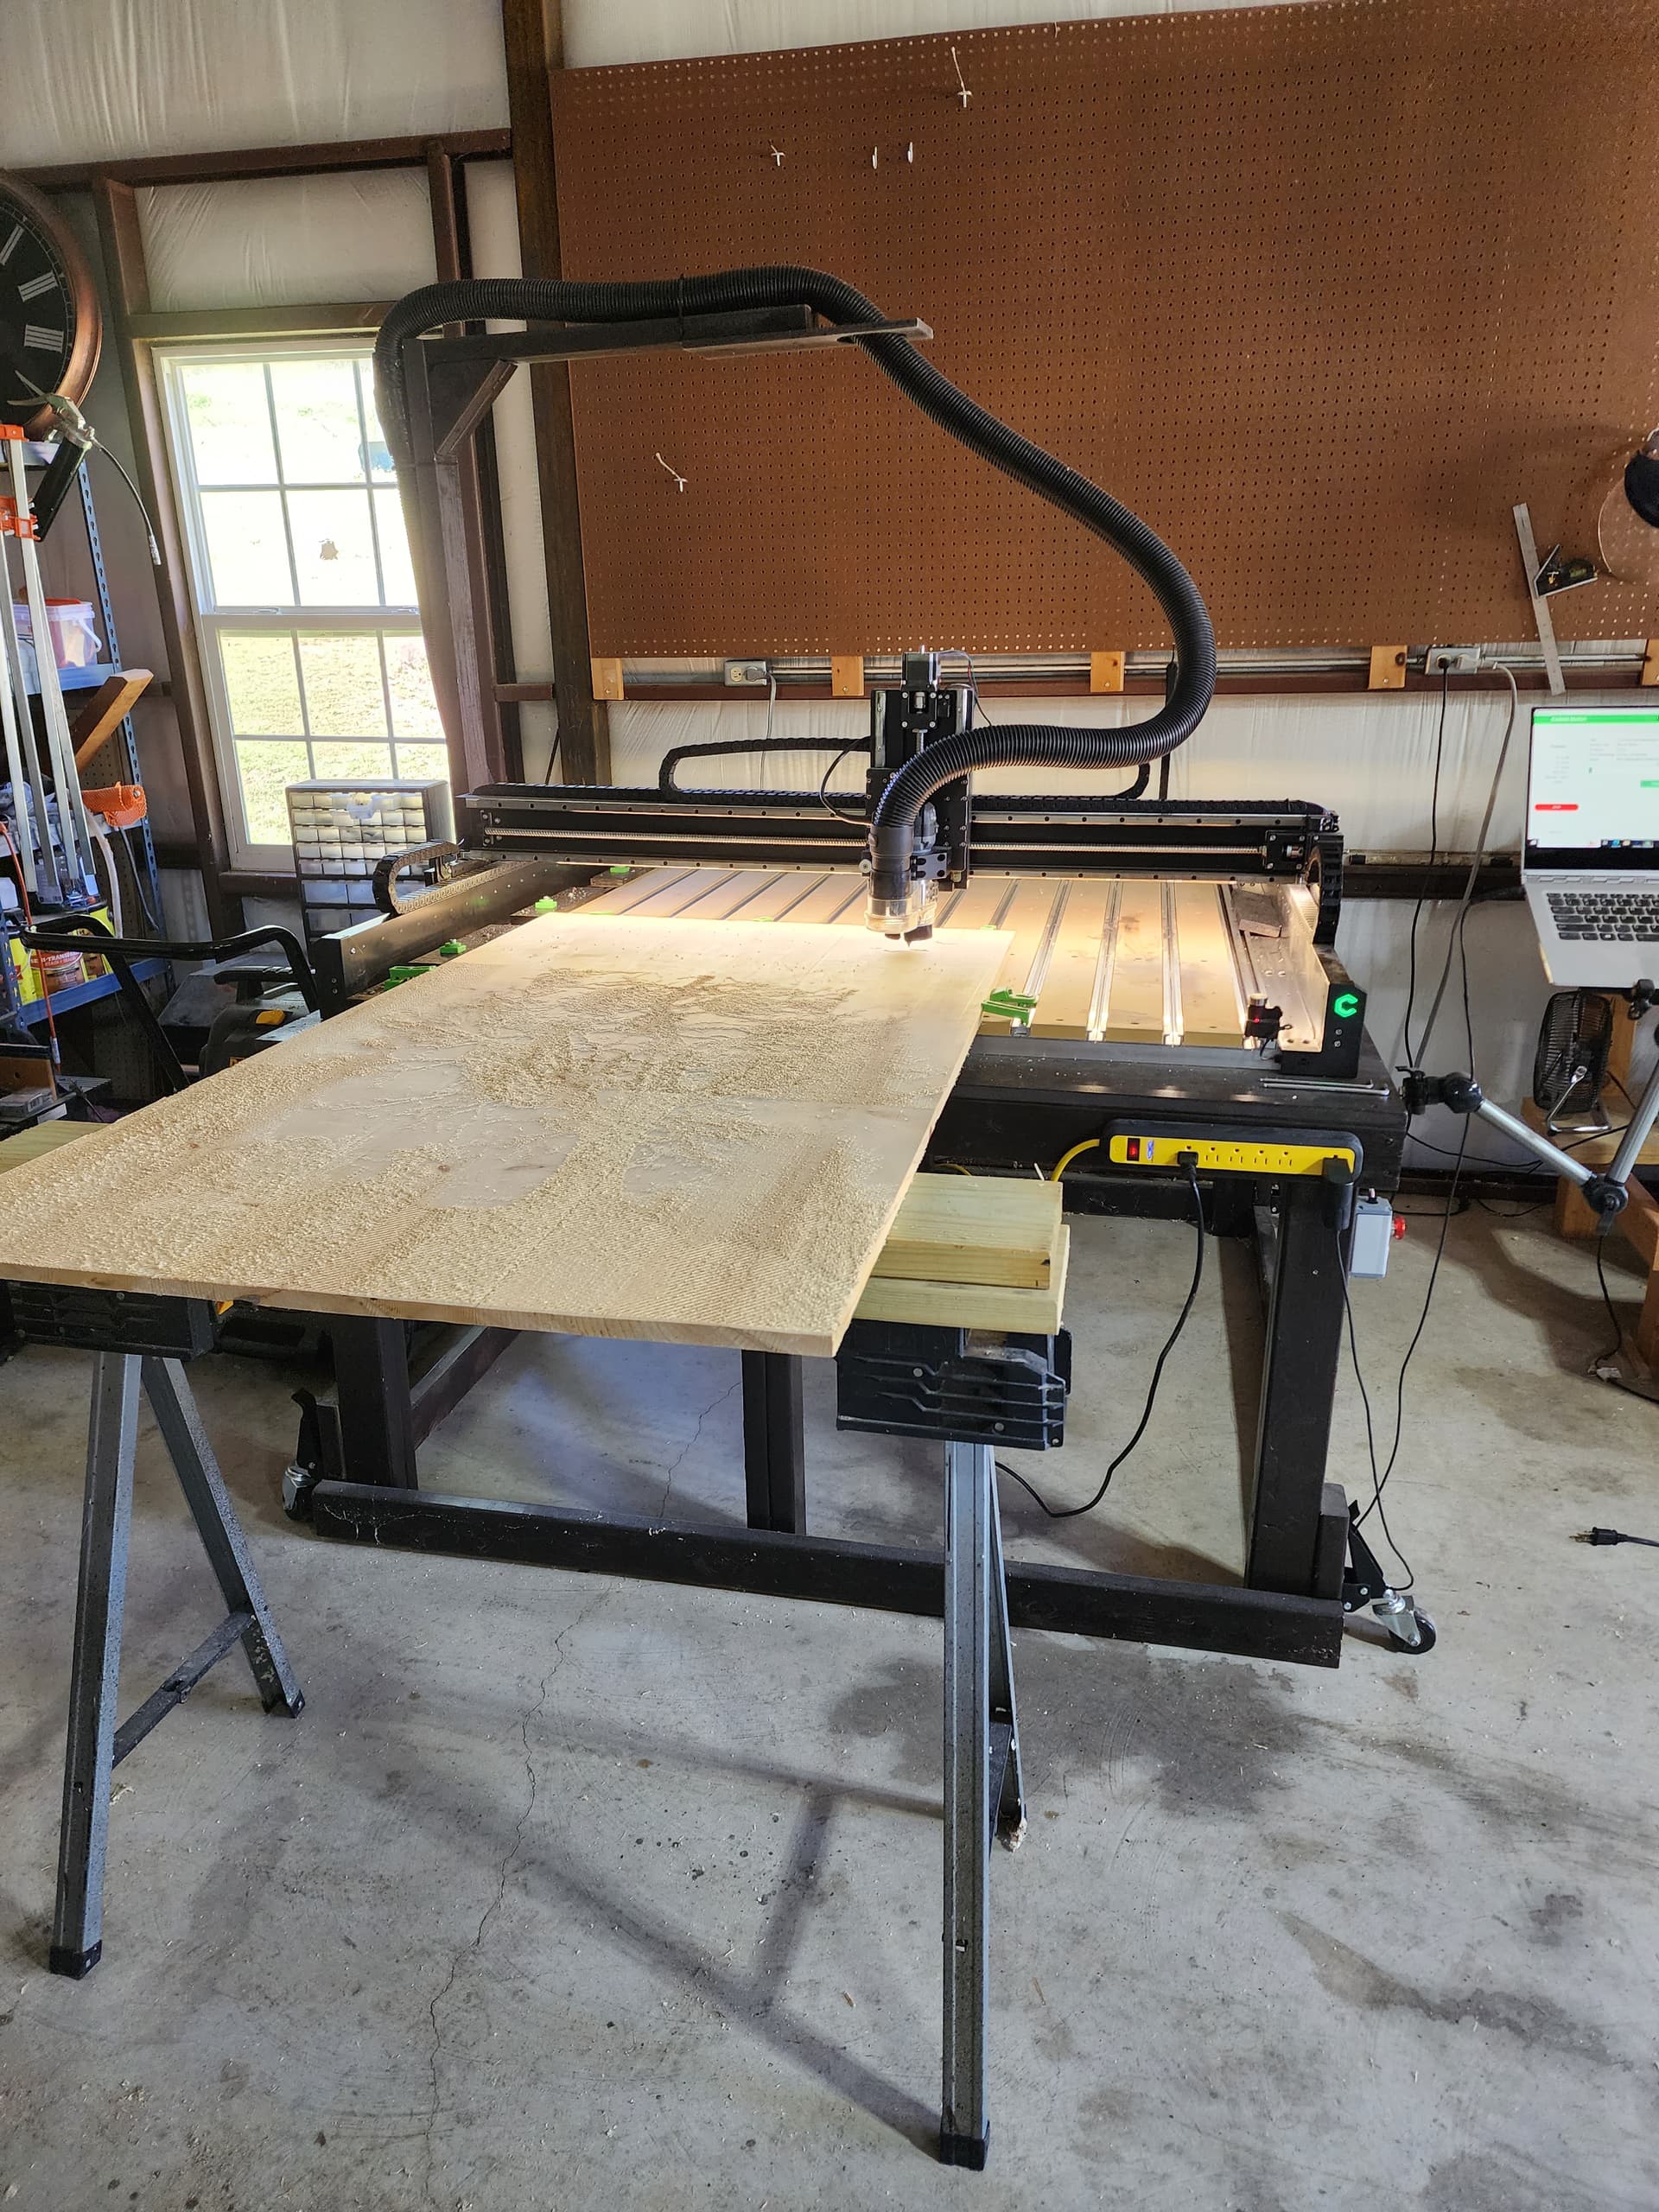
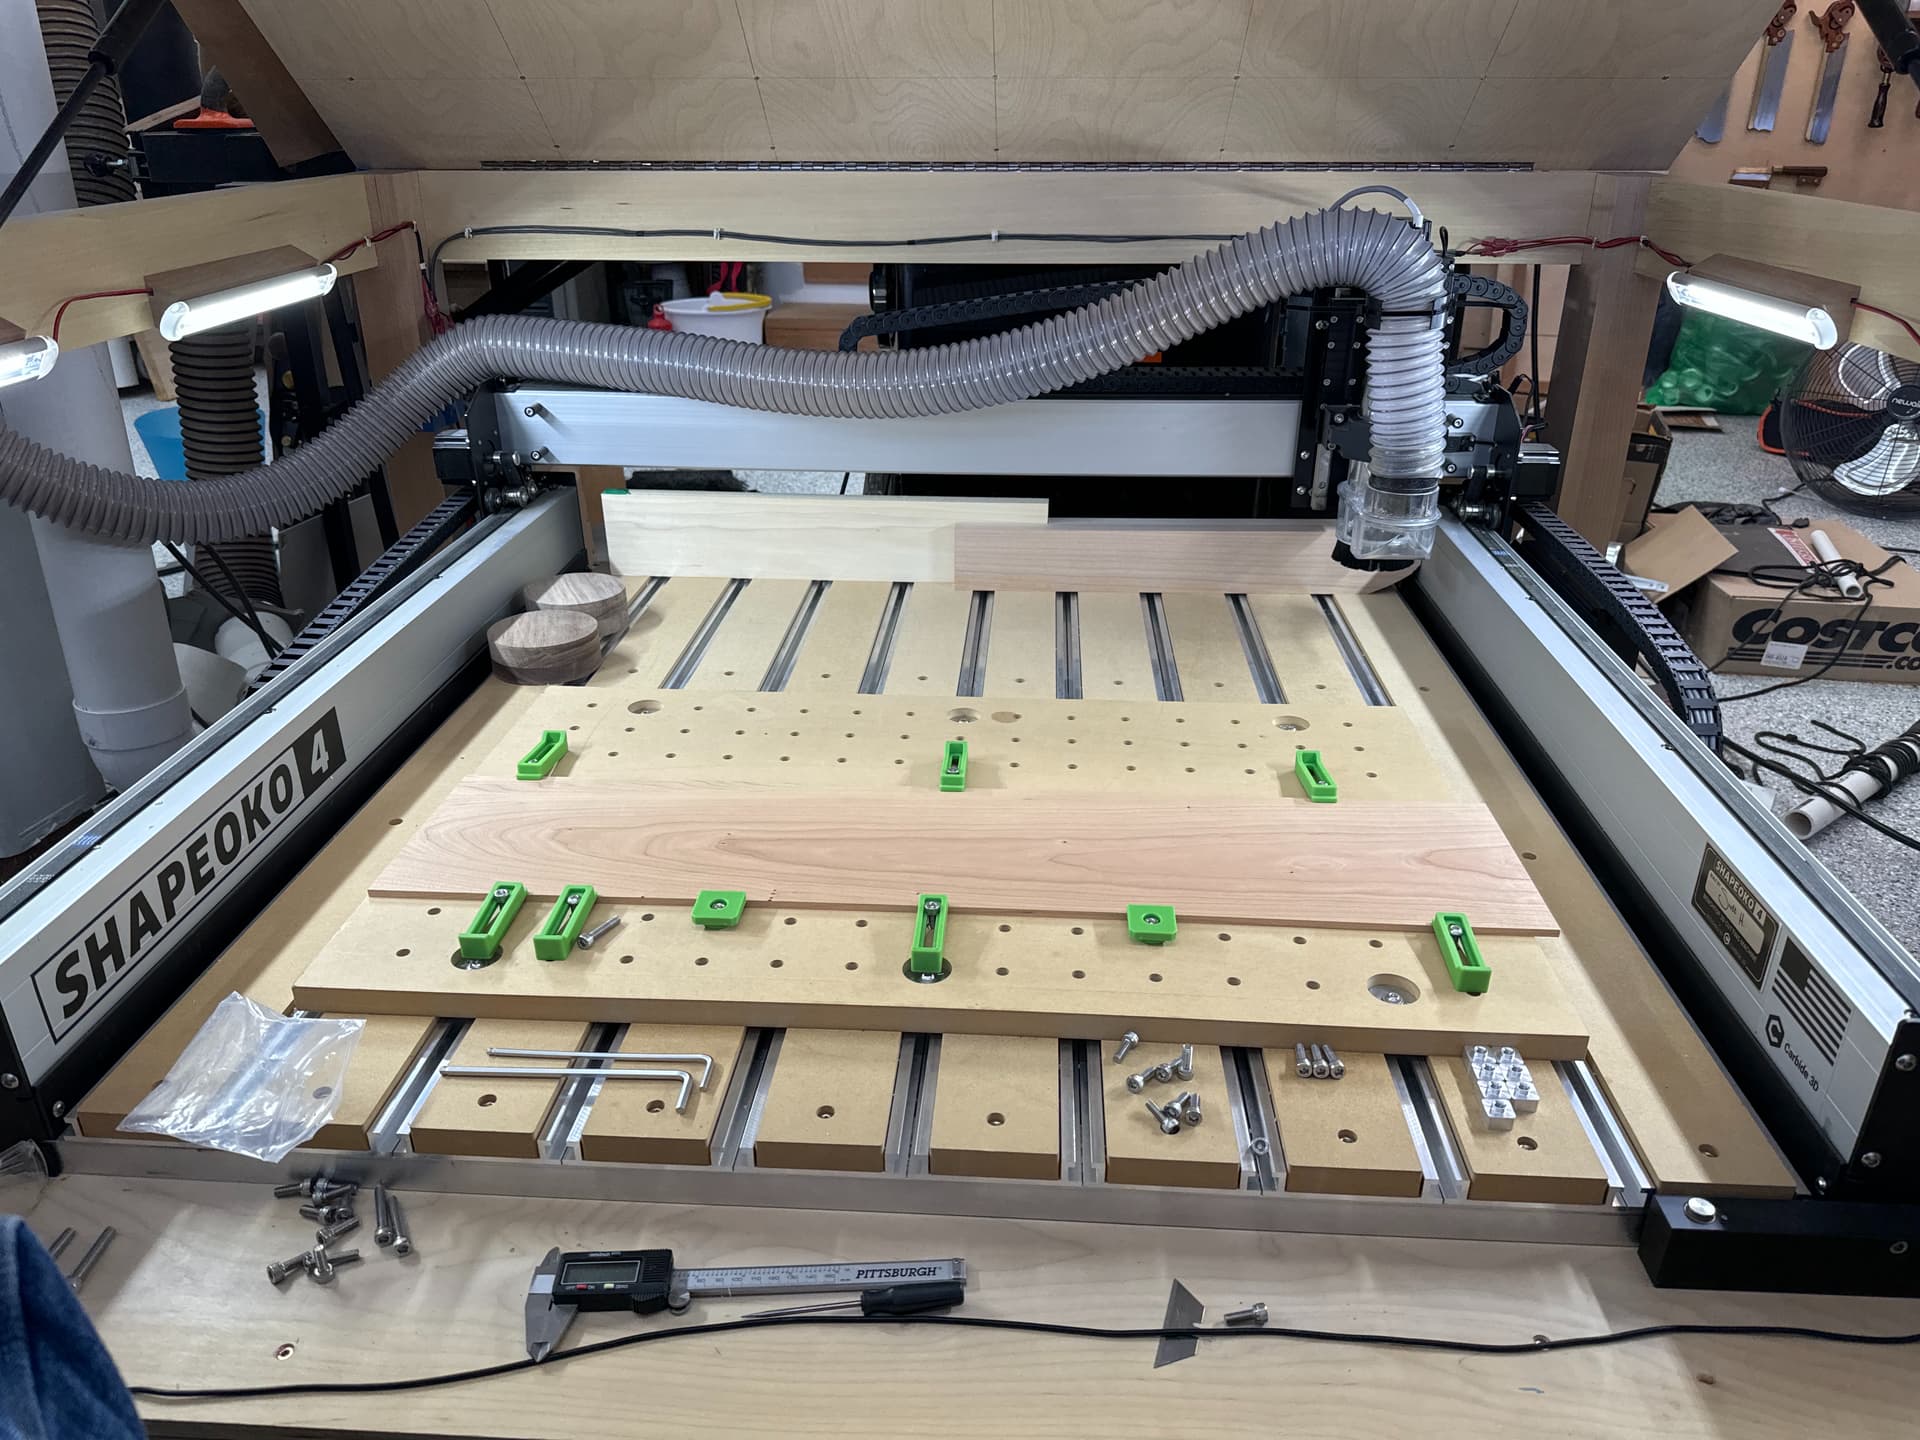
The spinner itself is 30" in diameter and cut on my Shapeoko 4 Pro using 2 tiles. It is cut out of a piece of PVC panel and the entire top surface is epoxy. It is mounted underneath to a motor. The motor assembly is built from aluminum extrusion and 3d printed parts.

I use CNCjs and a 3d touch probe purchased from amazon for my probing. This lets me very accurately (and easily) find the center of a hole. The design and machining was all done in Fusion 360 which let’s me use a hole center as the zero point for a job.

The series of jobs that I ran to get to the final product and how I set the zero for each part:

  1. Cut the underside to cut and tap mounting holes for the motor hub and drill a through hole.
  2. Flip the project and use the center of the through hole as my zero point, carve a new hole for setting the zero point and carve out of an overflow area to contain any excess epoxy I poured.

I used a second hole for the zero point because I stupidly setup the first job so that it was flipped side to side for the remaining jobs which meant that the first hole was cut 30"+ to the left side of the machine from where I was referencing it. I wanted to use a hole closer to where I was probing it to mitigate any error that 30"+ distance could have introduced. I’m sure it wouldn’t have mattered but I erred on the side of paranoia rather than make a mistake.

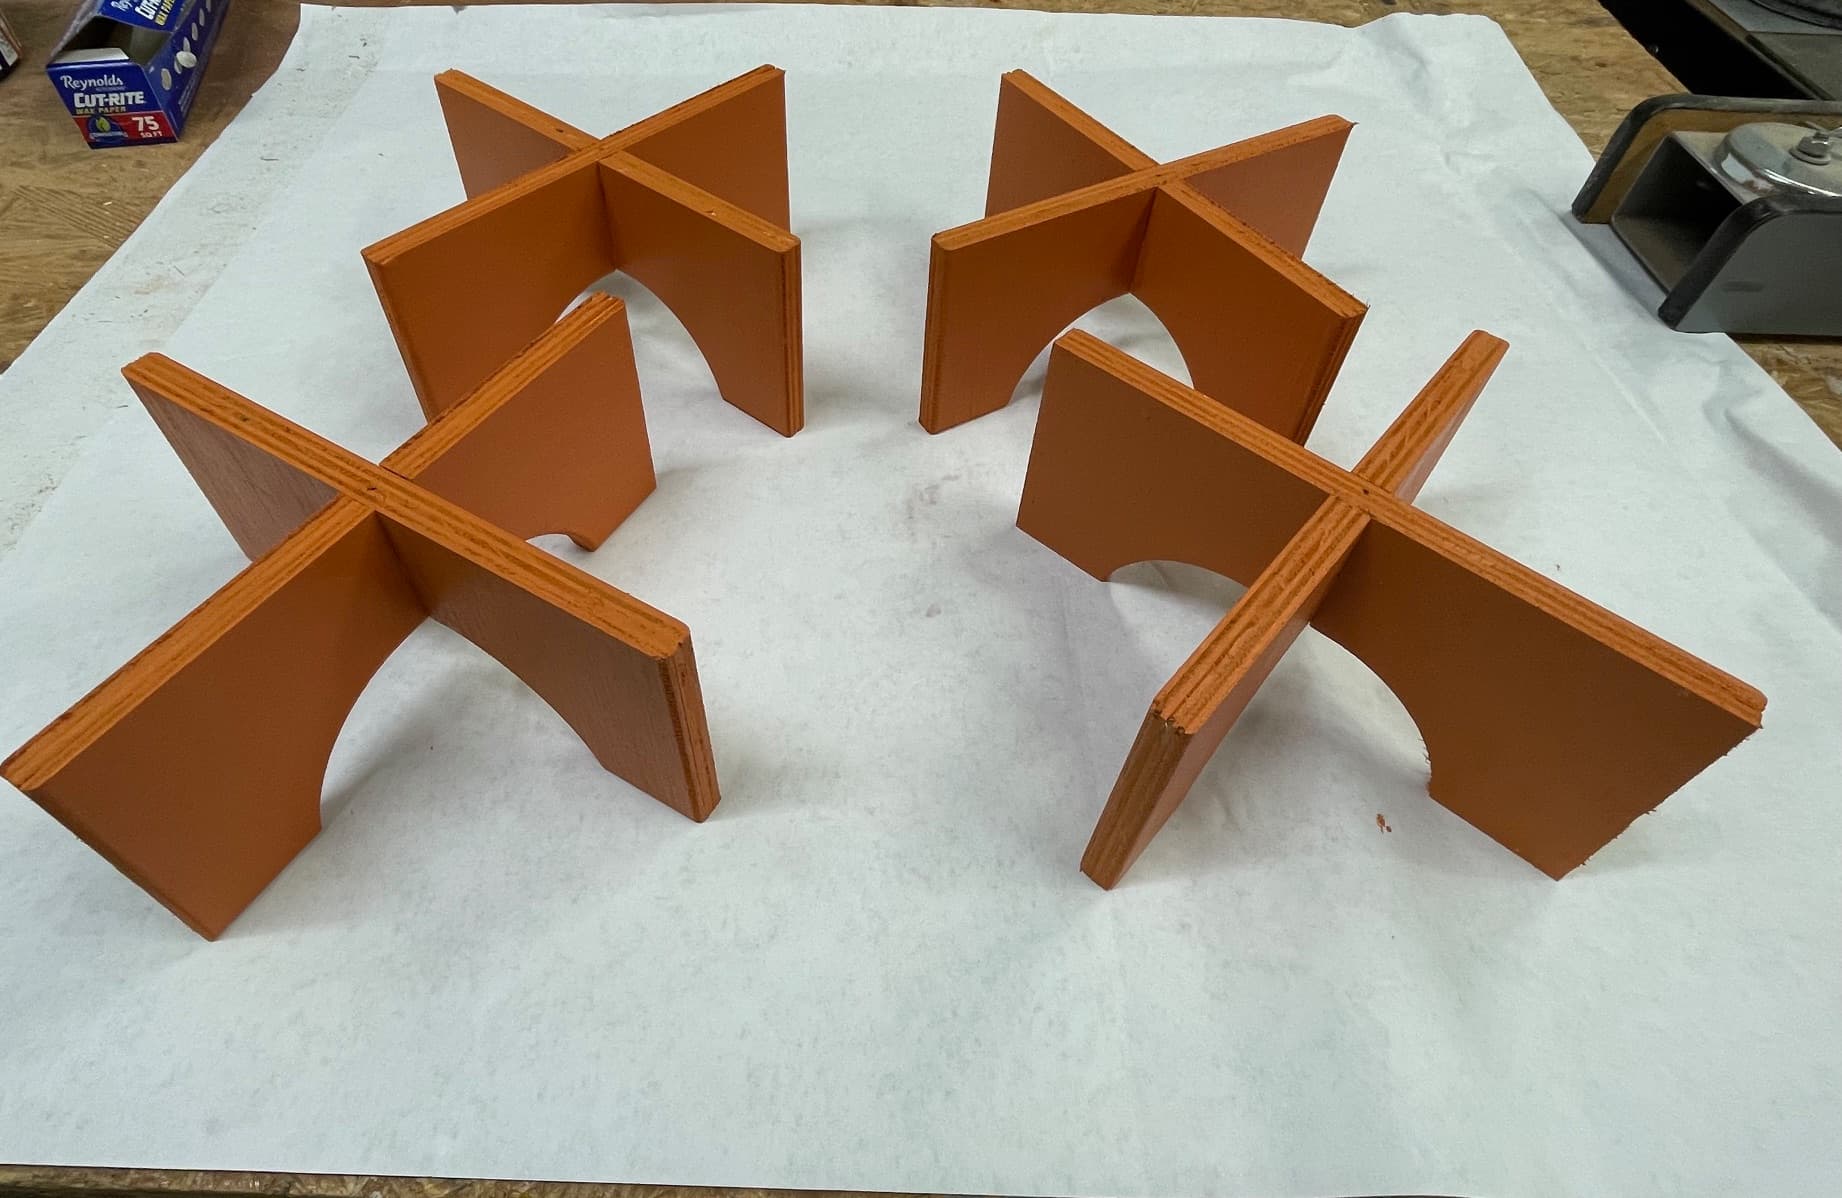
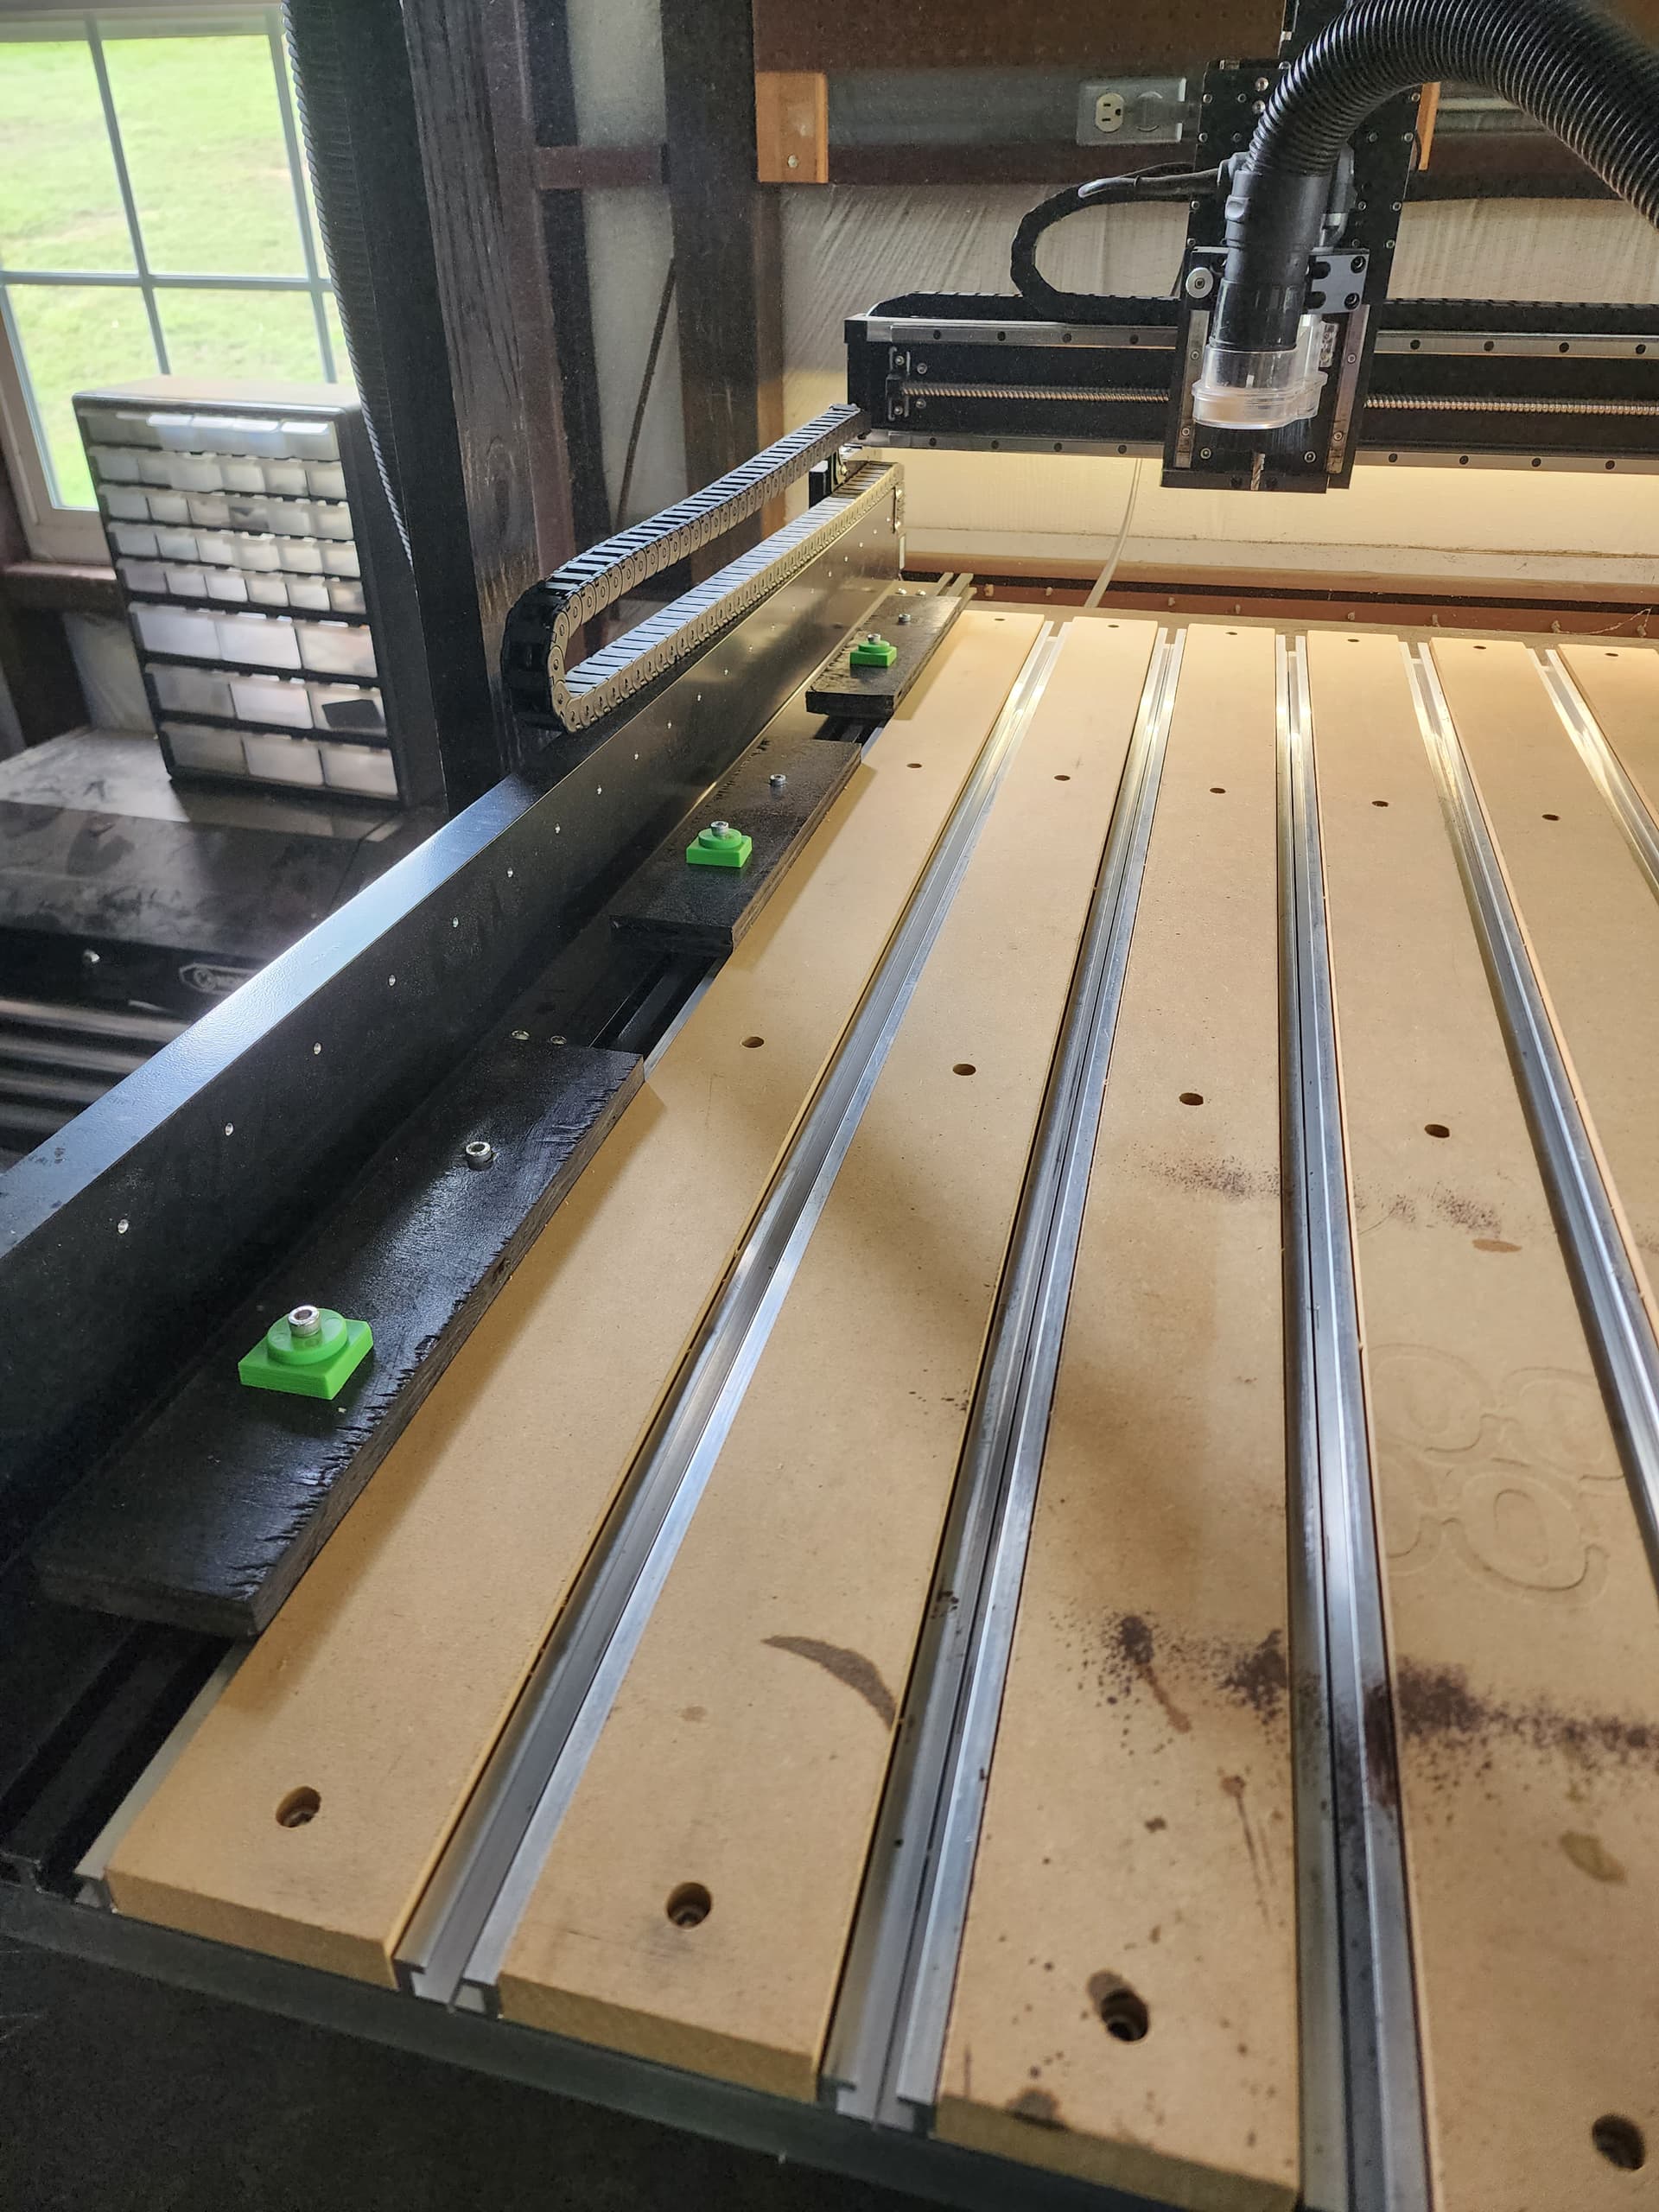
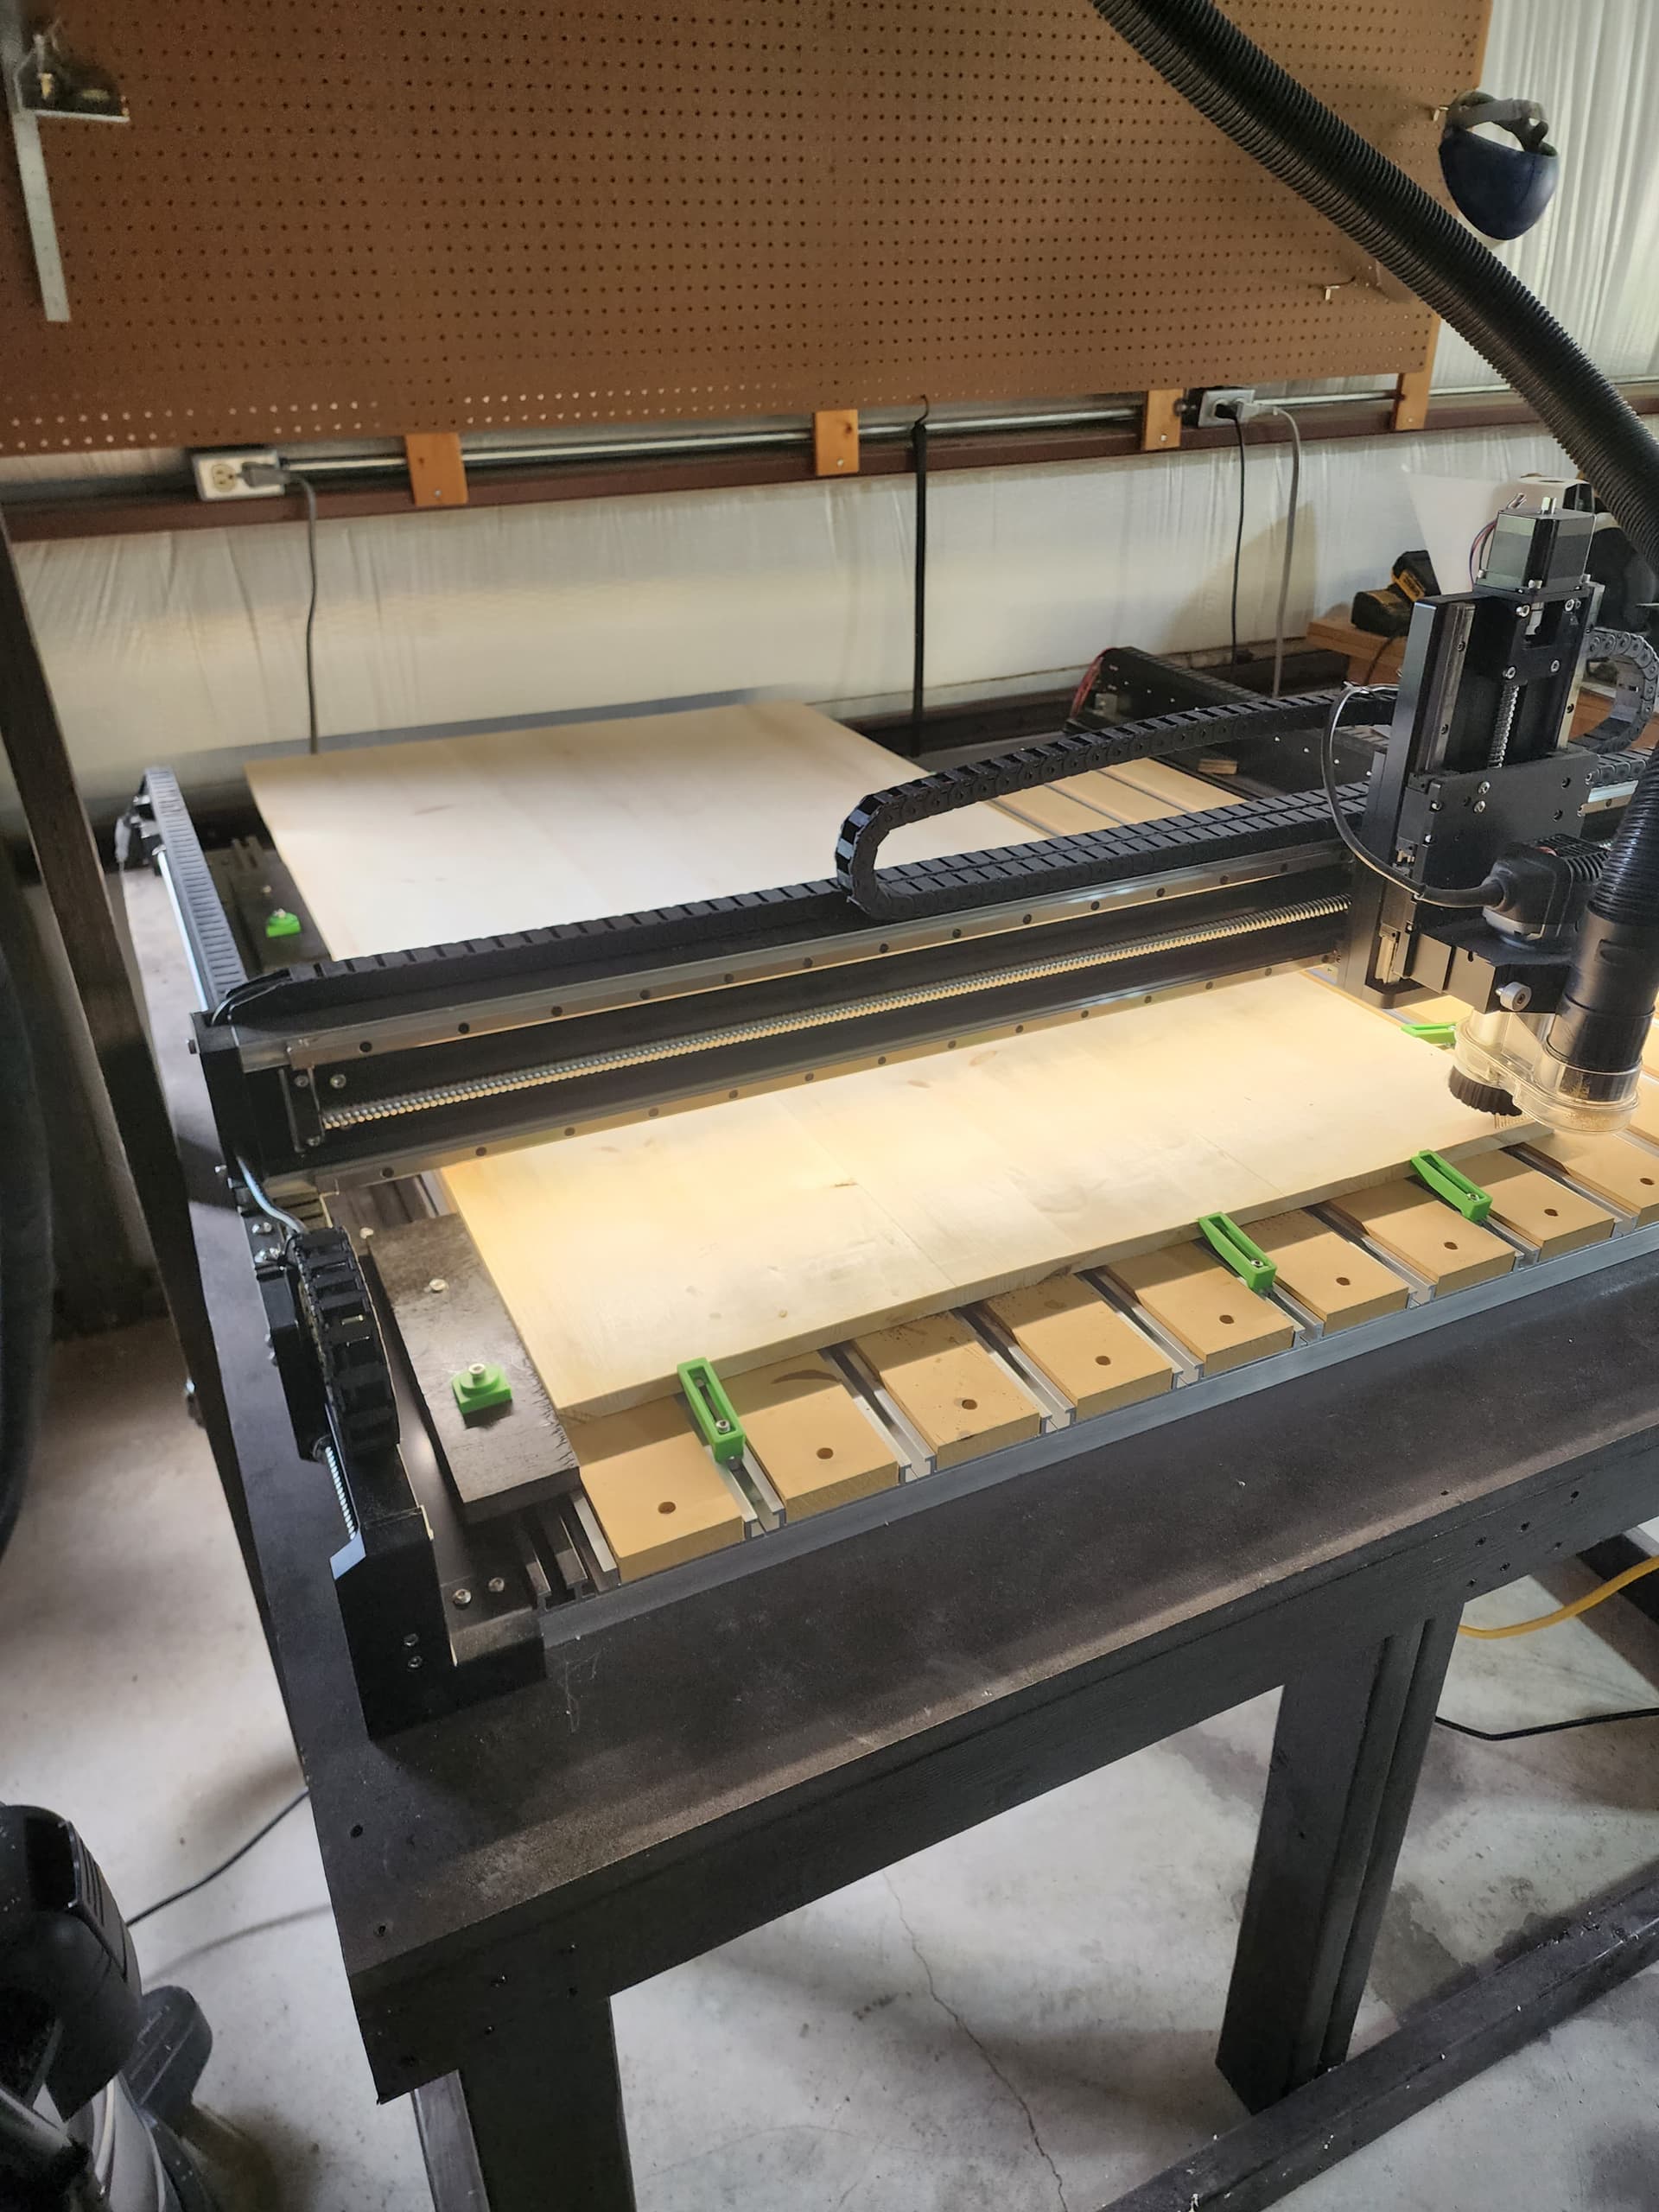
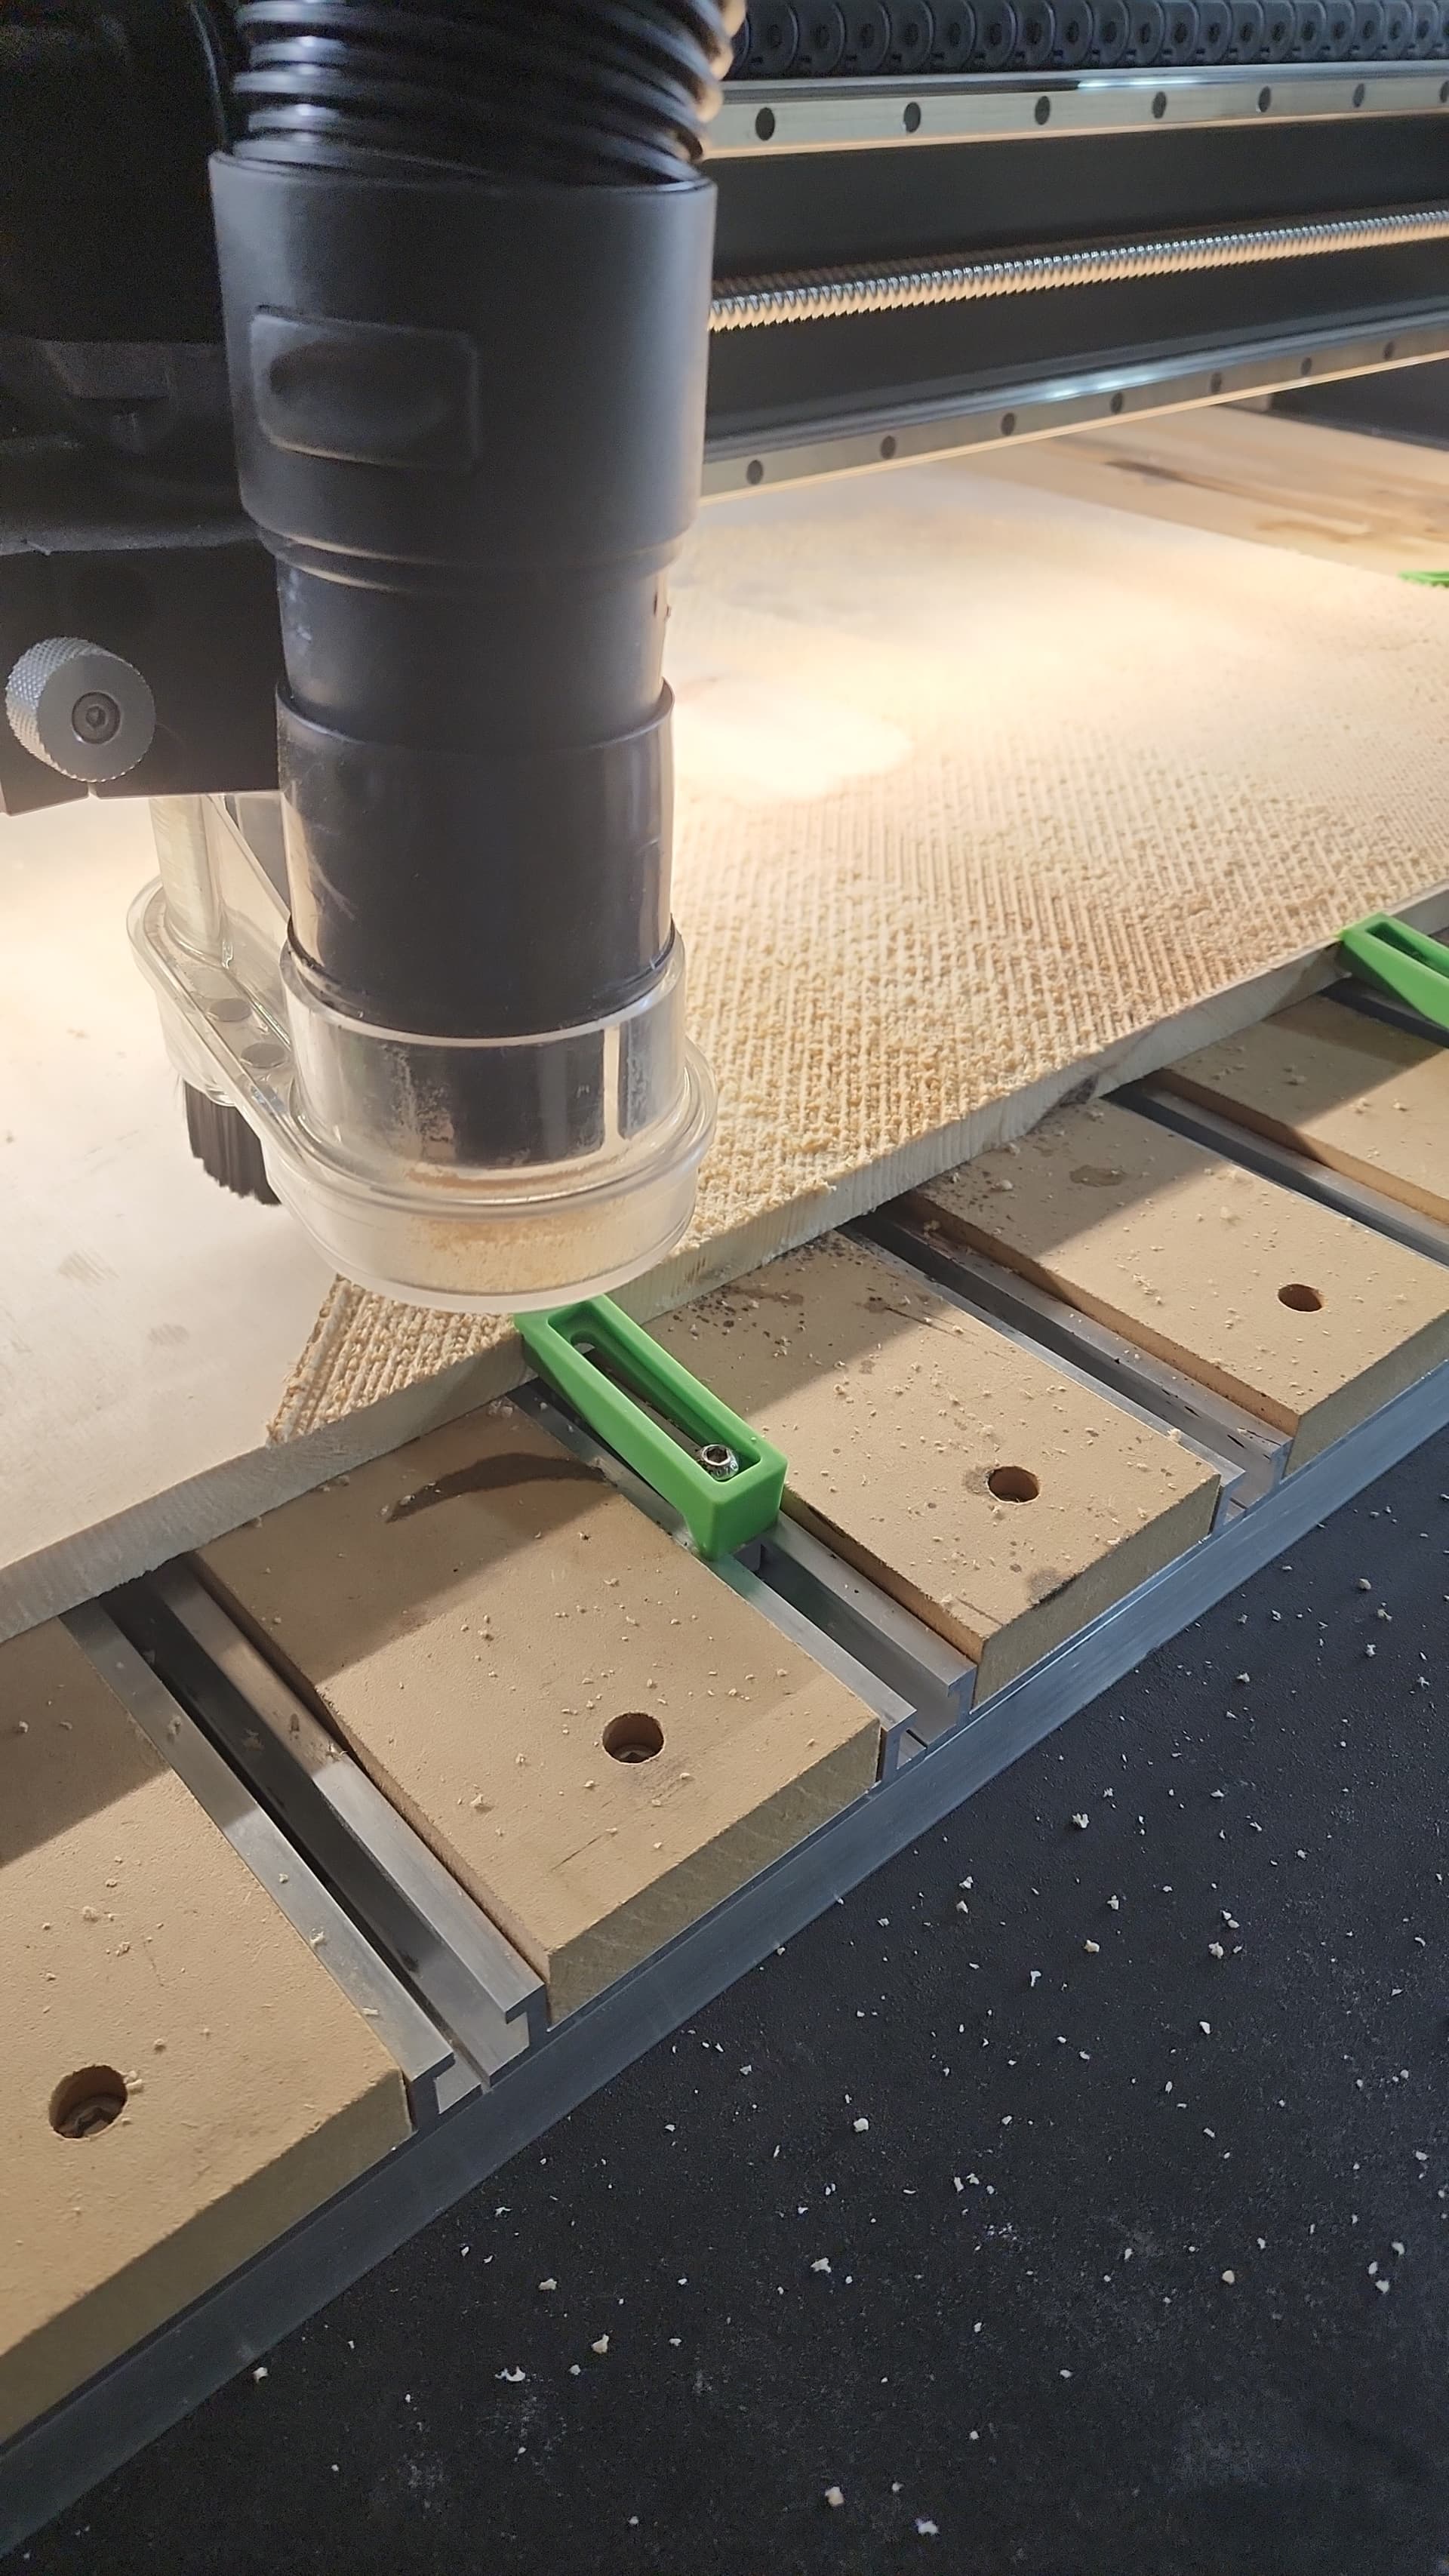
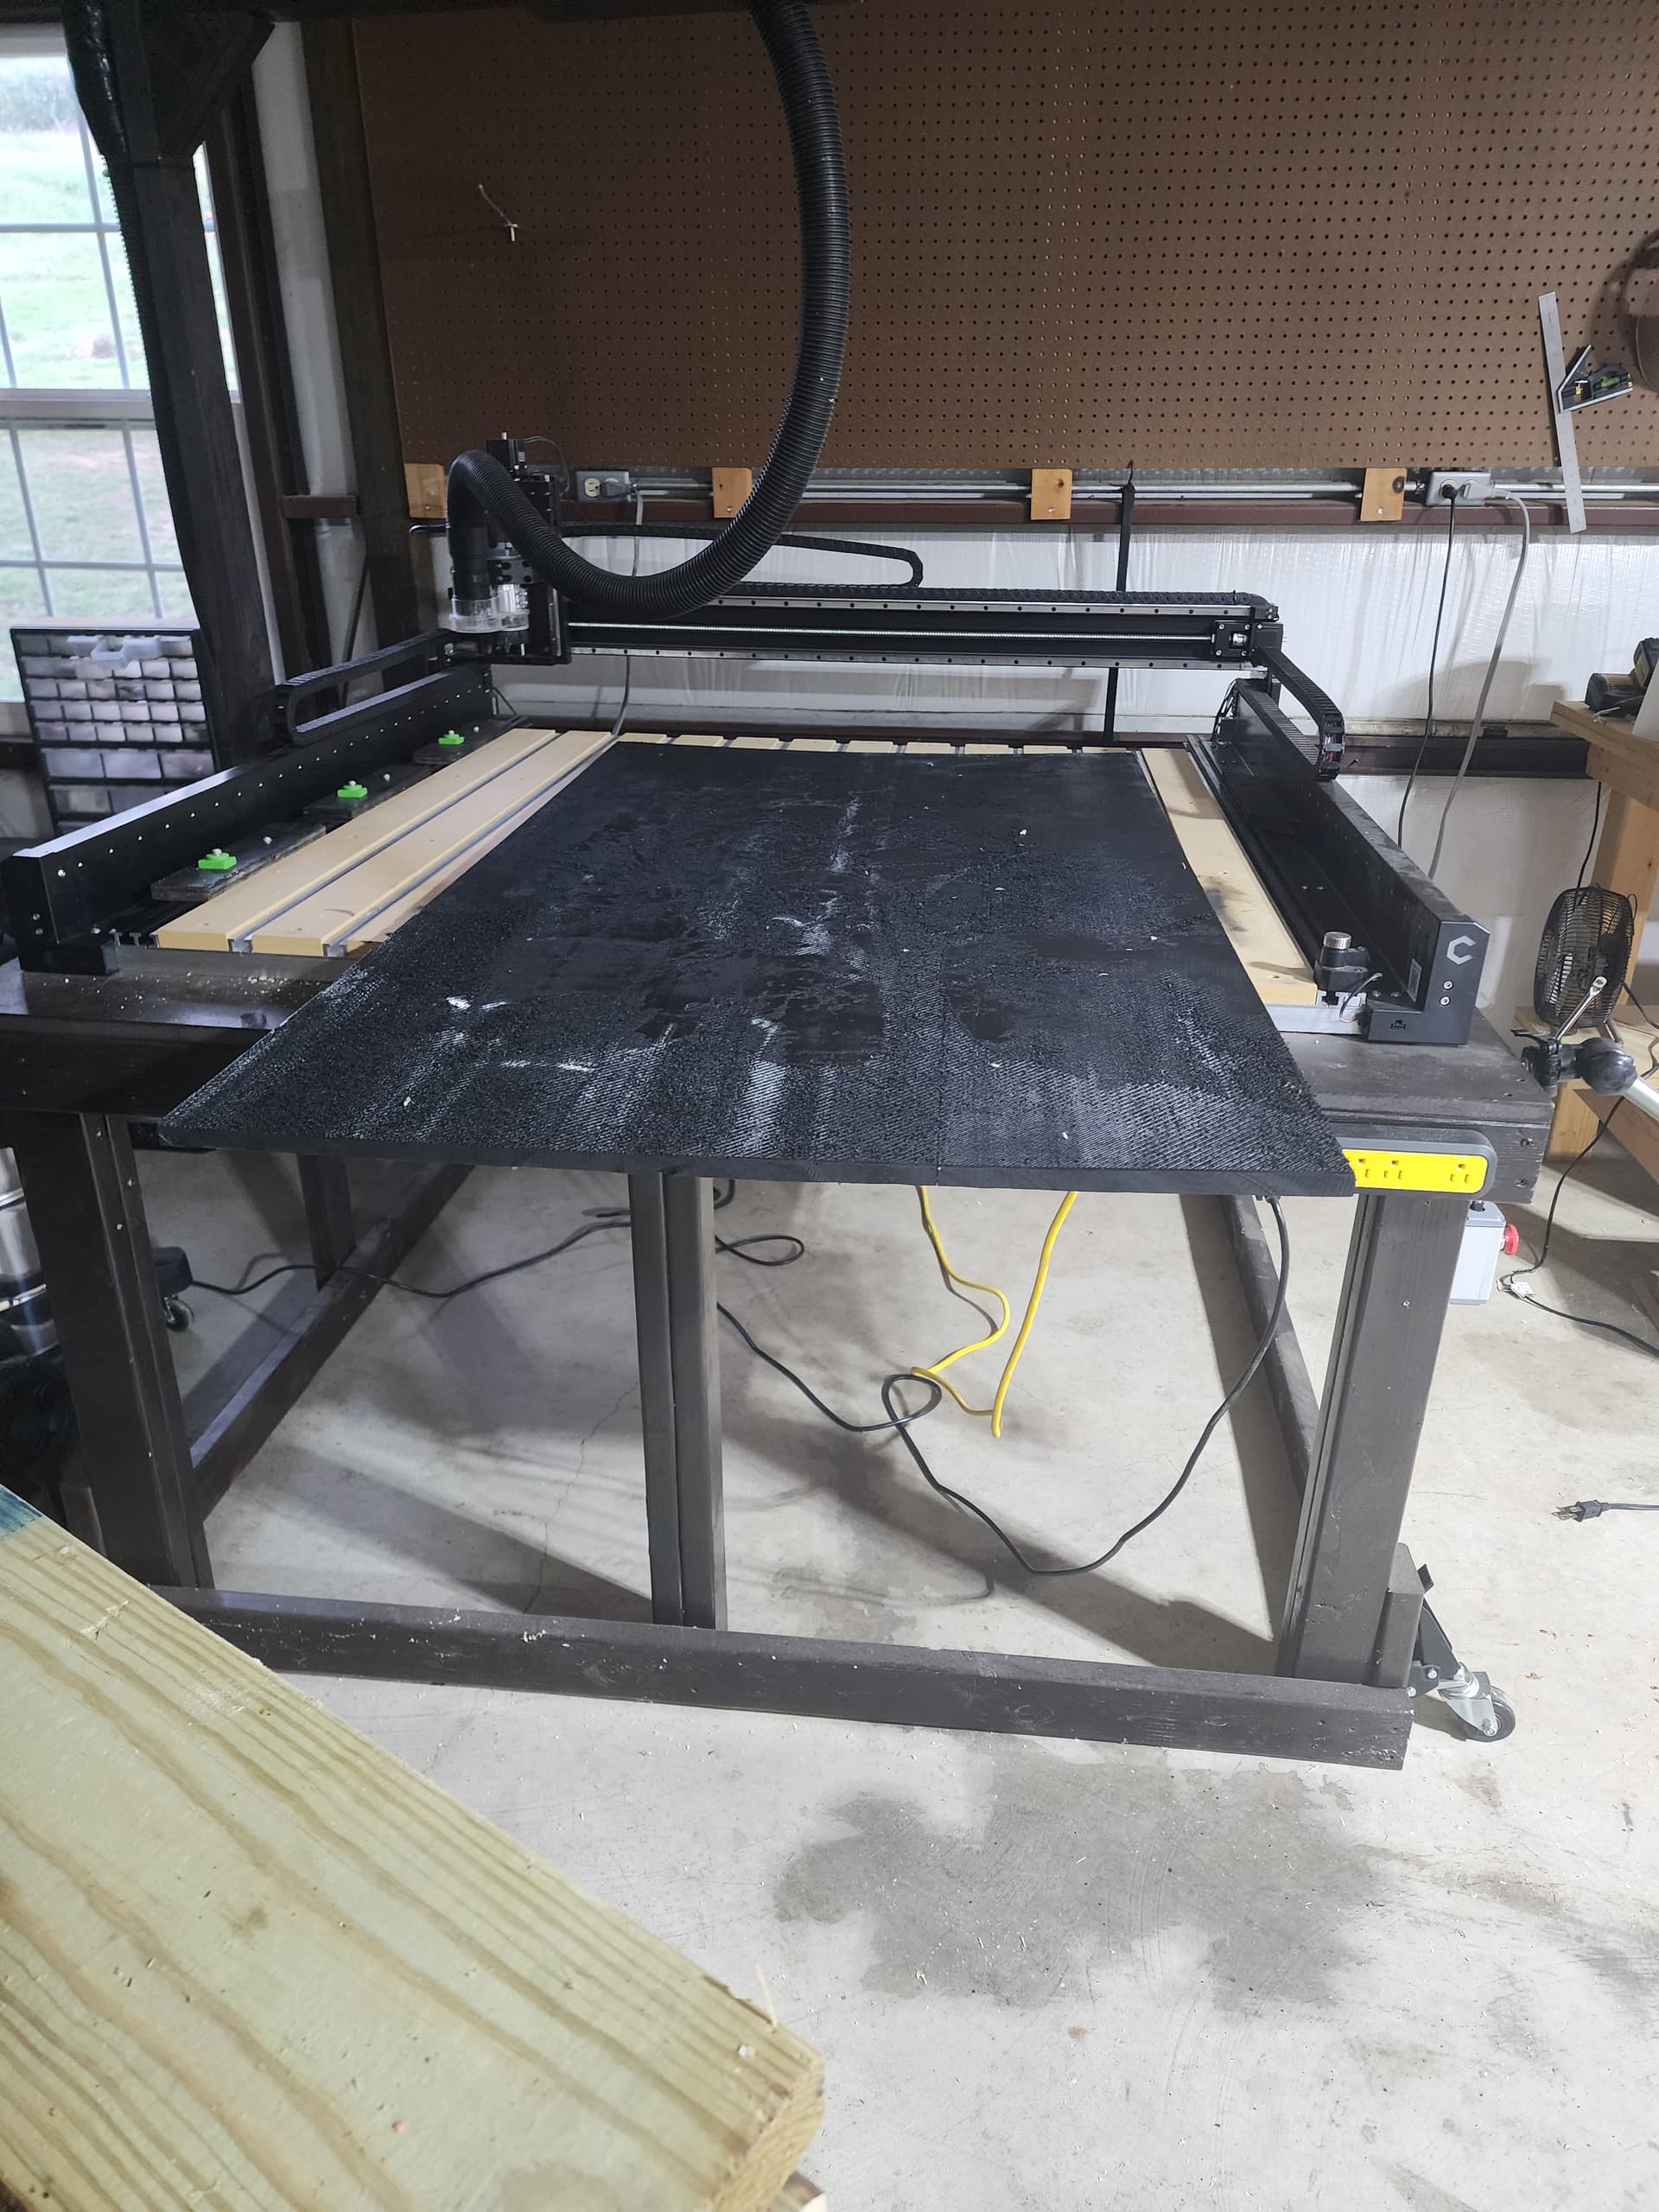
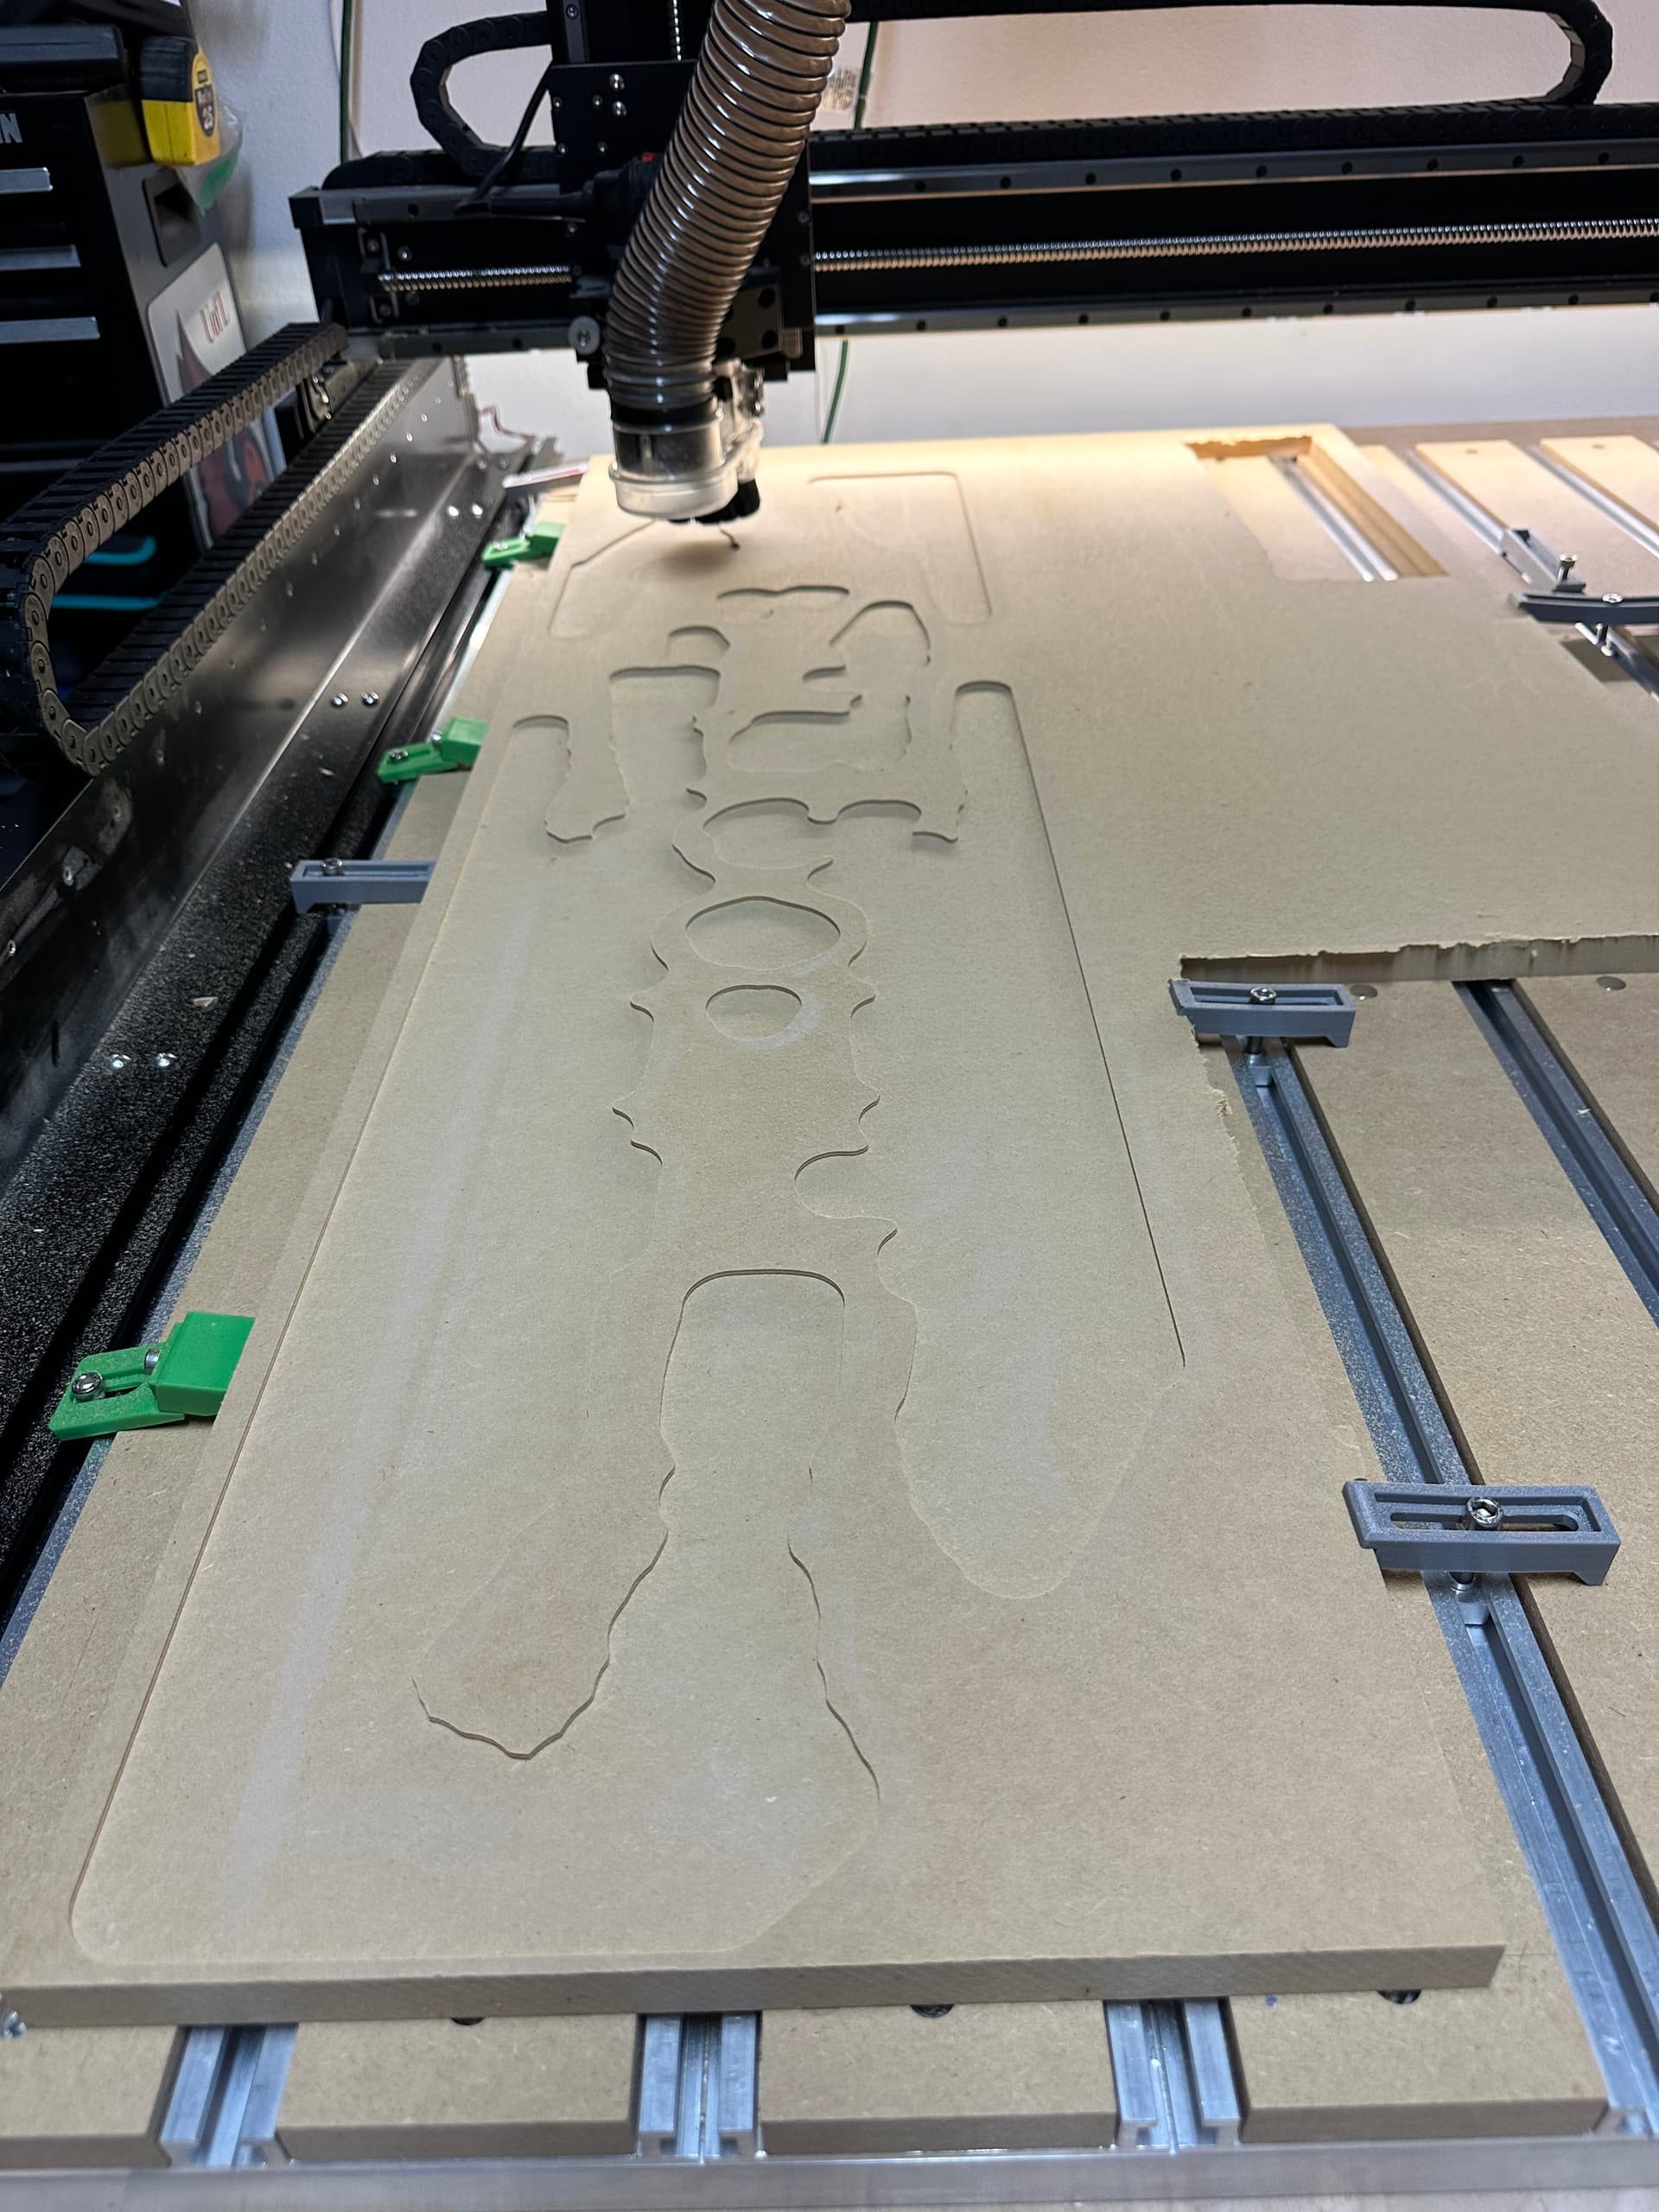
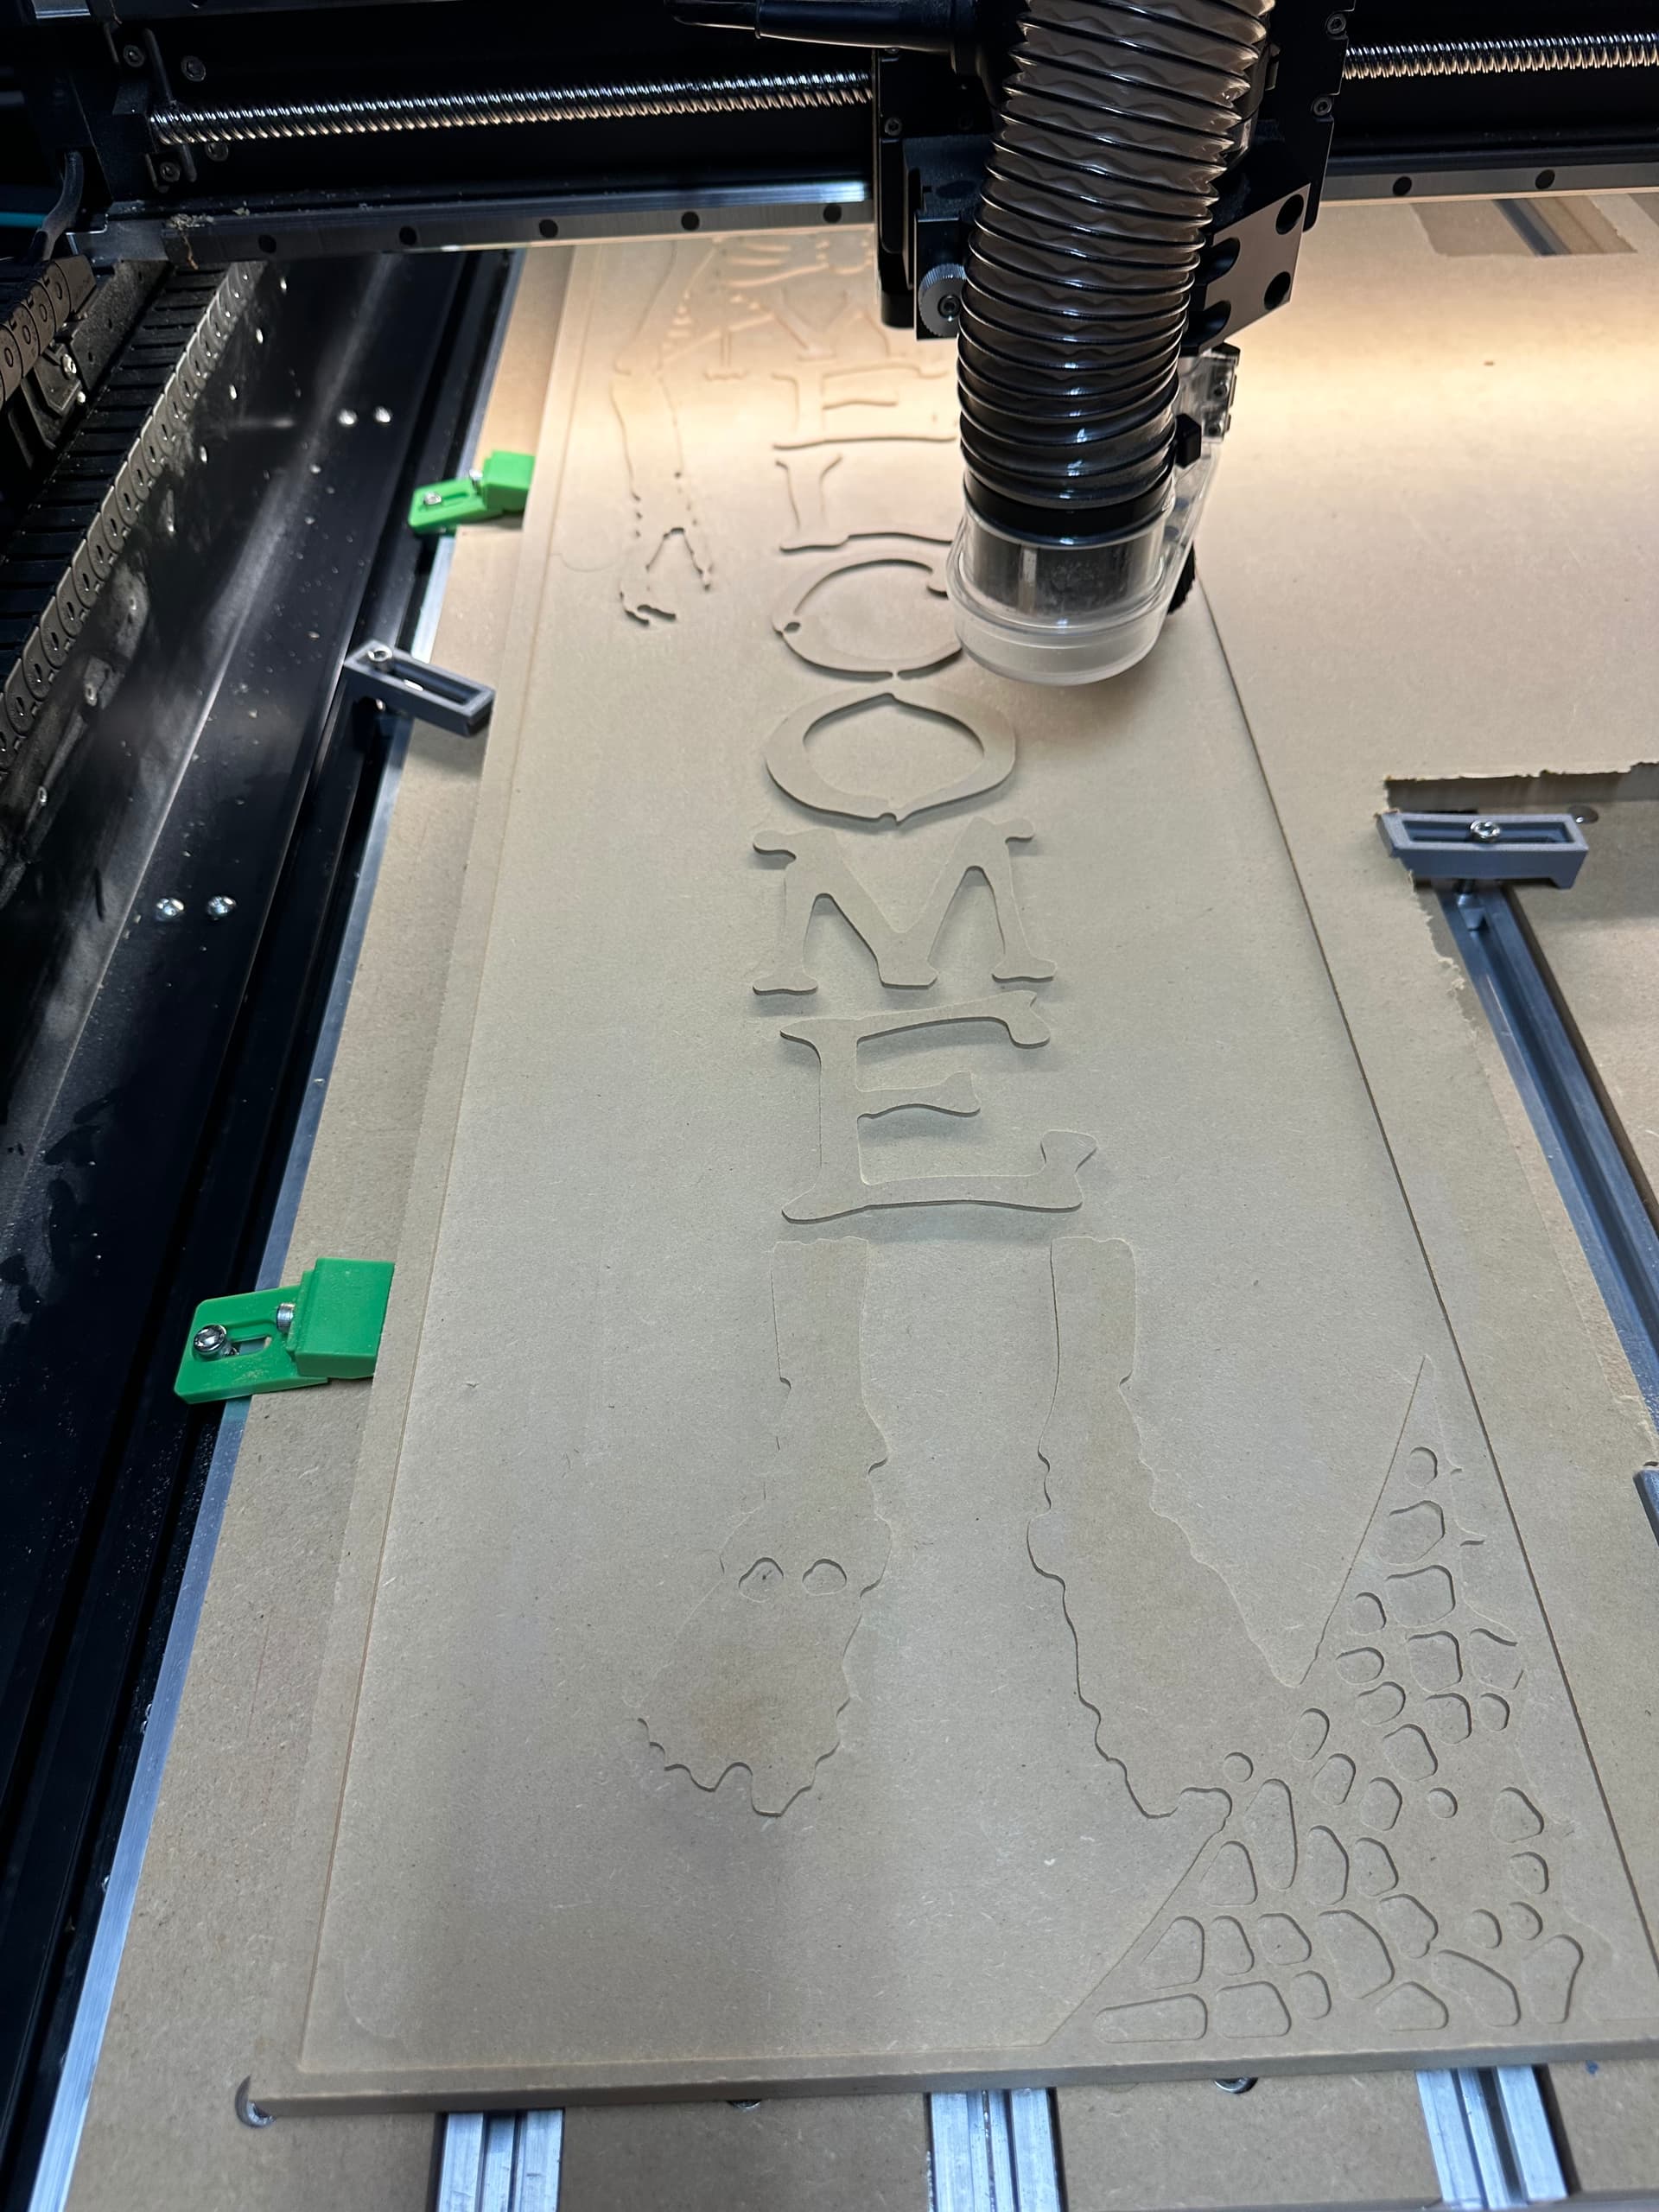
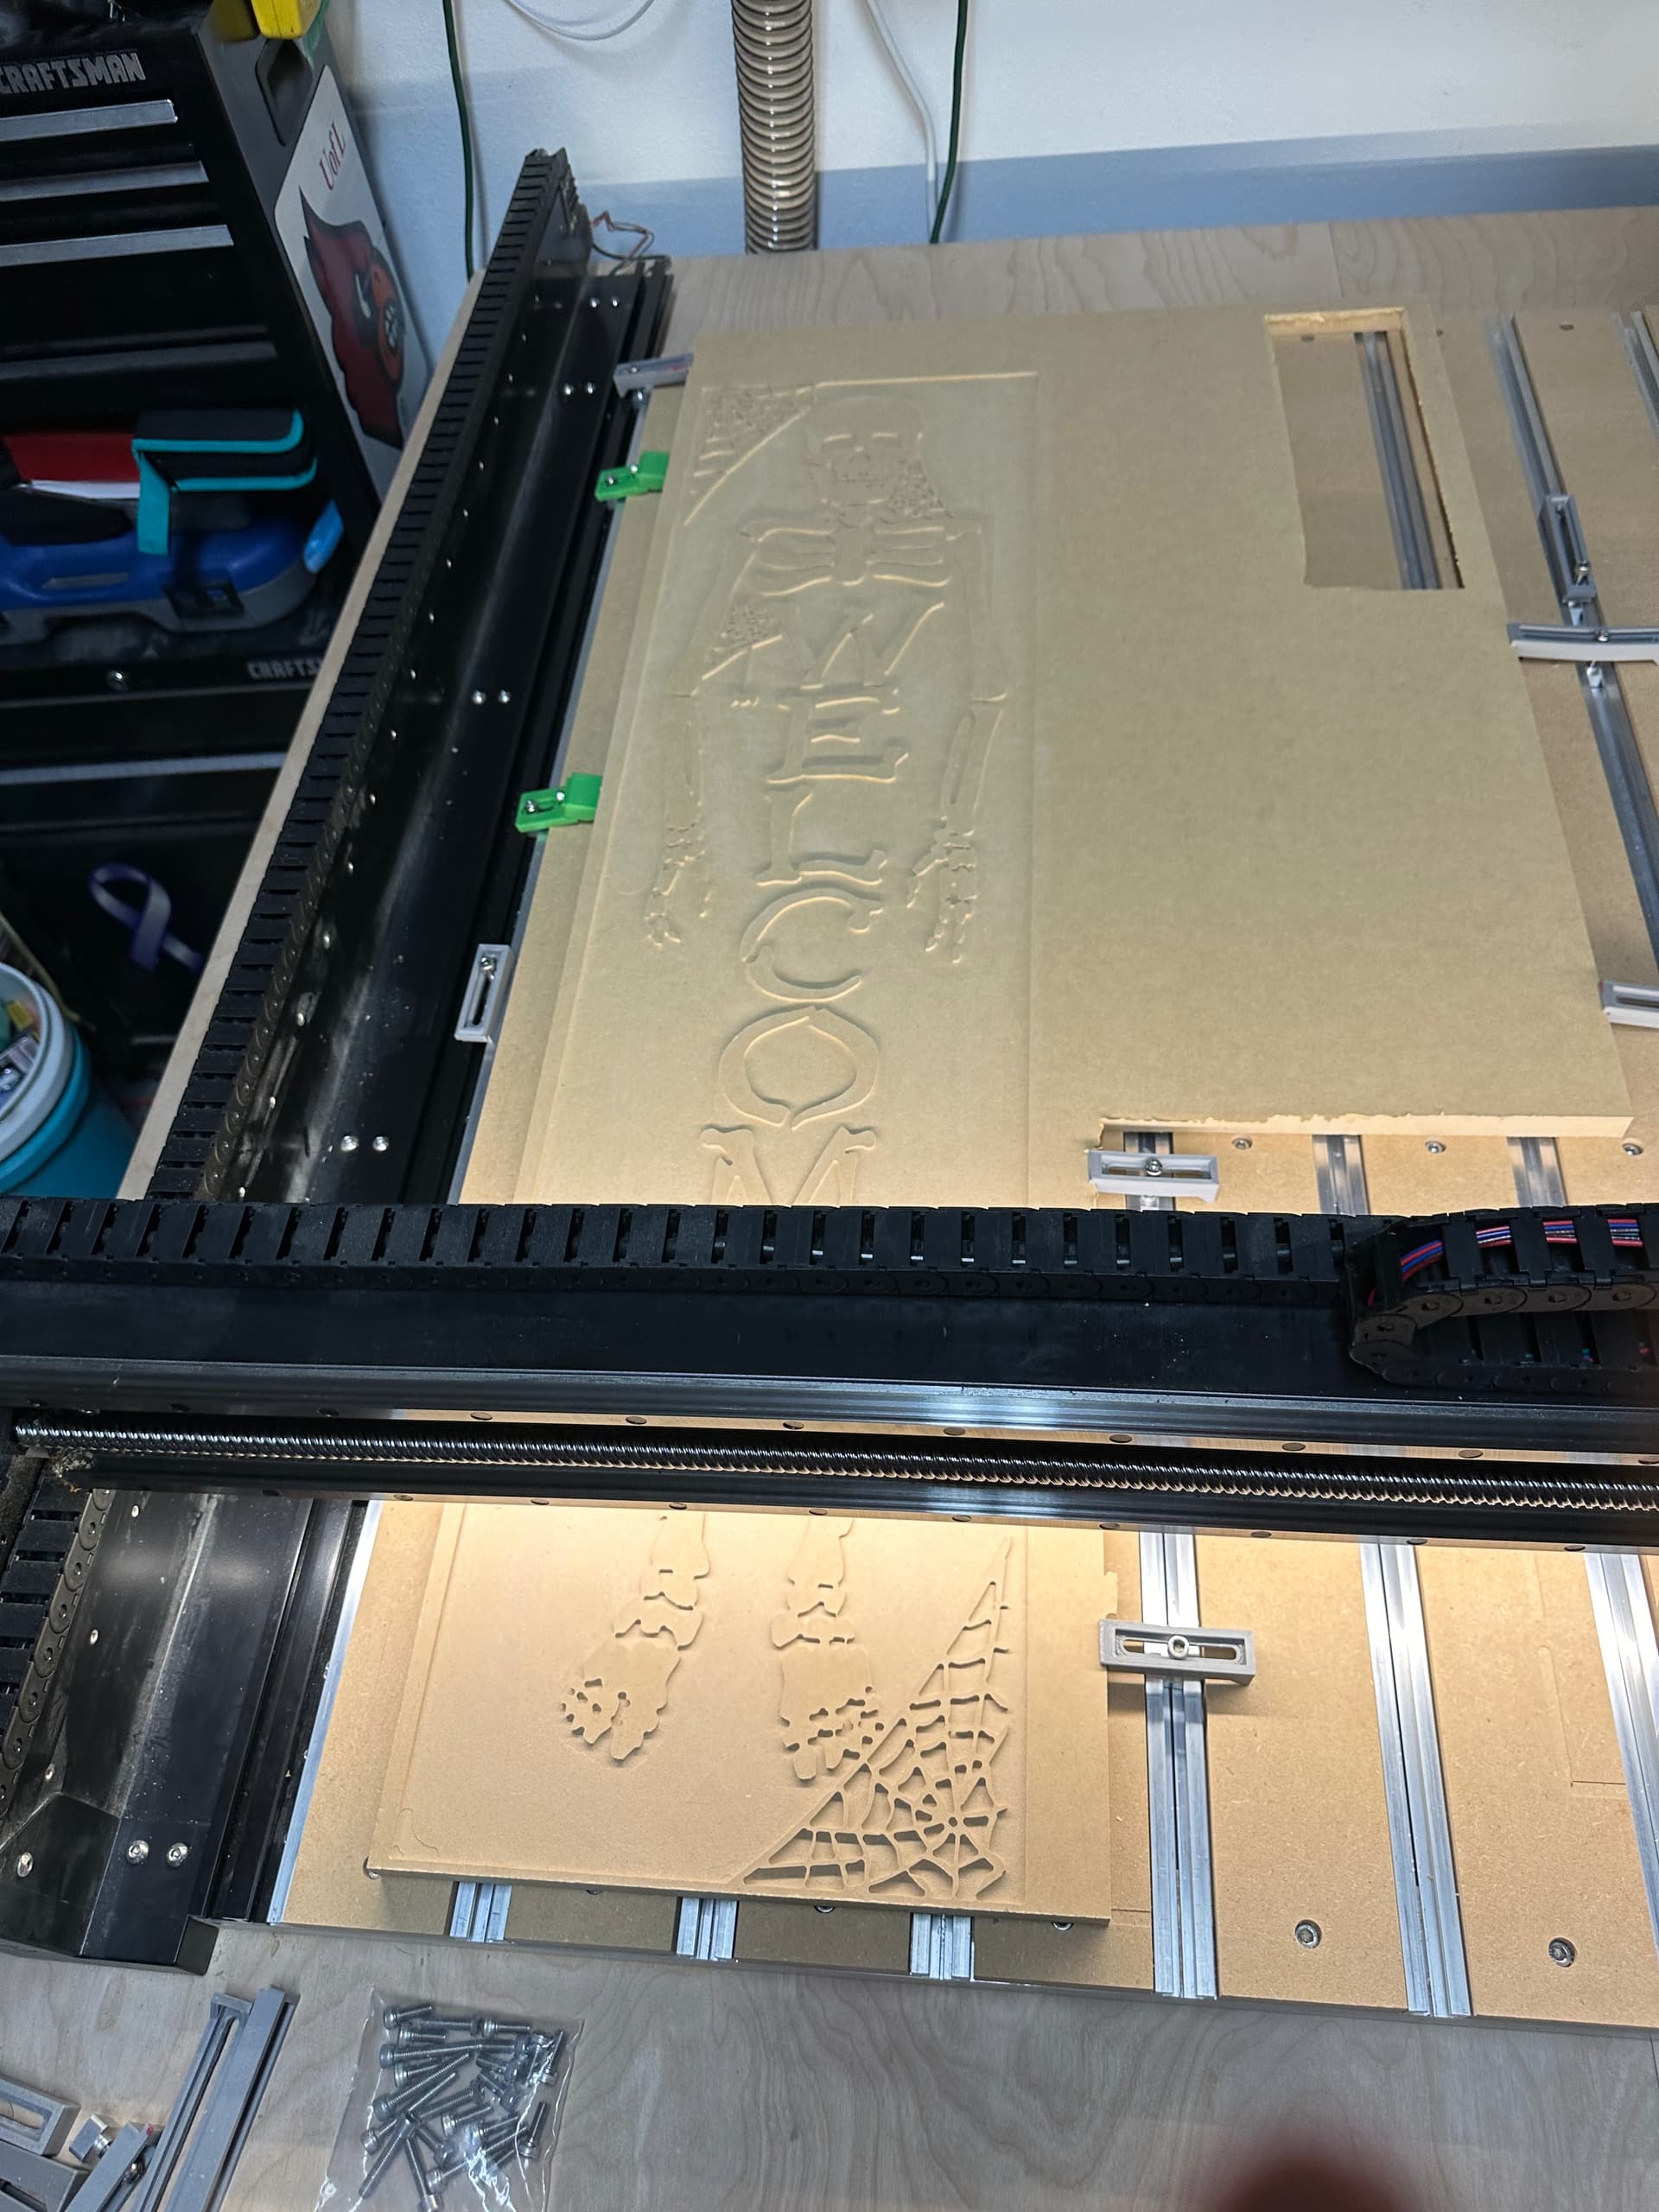
From this point forward, all jobs are tiled and the second part of each tile is setup by sliding the material forward so that the first tile overhangs the front of the machine but the zero’ing hole is still within the machining boundary. I have a SMW bed and used 3 vices mounted in the bed to form the fence that I slid the material along. For a sacrificial wasteboard, I have a couple of HDPE cutting boards that I mount over the aluminum bed.

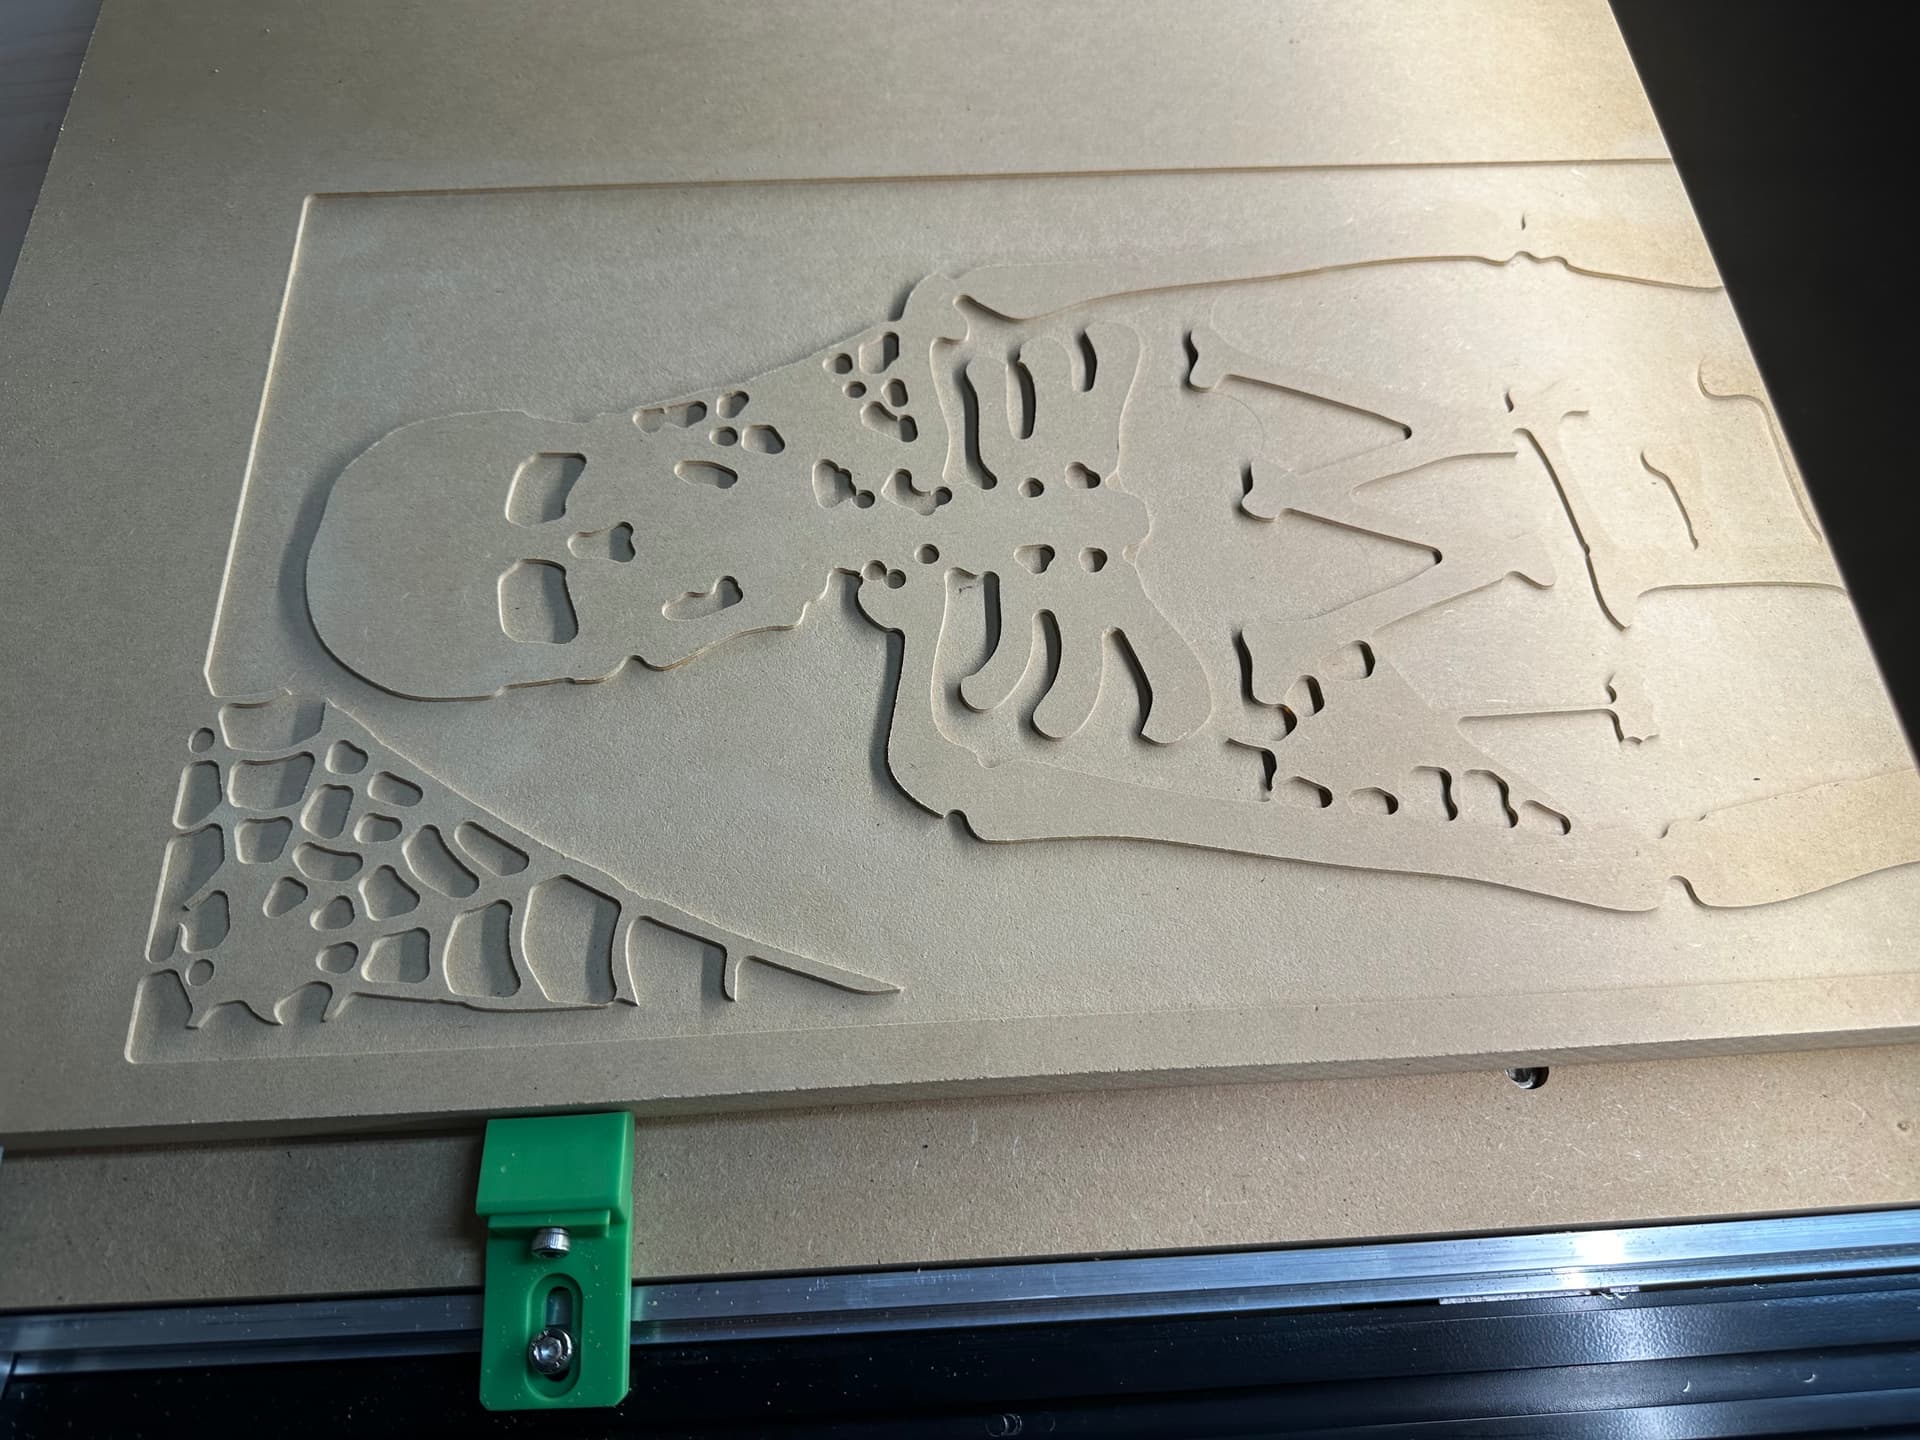
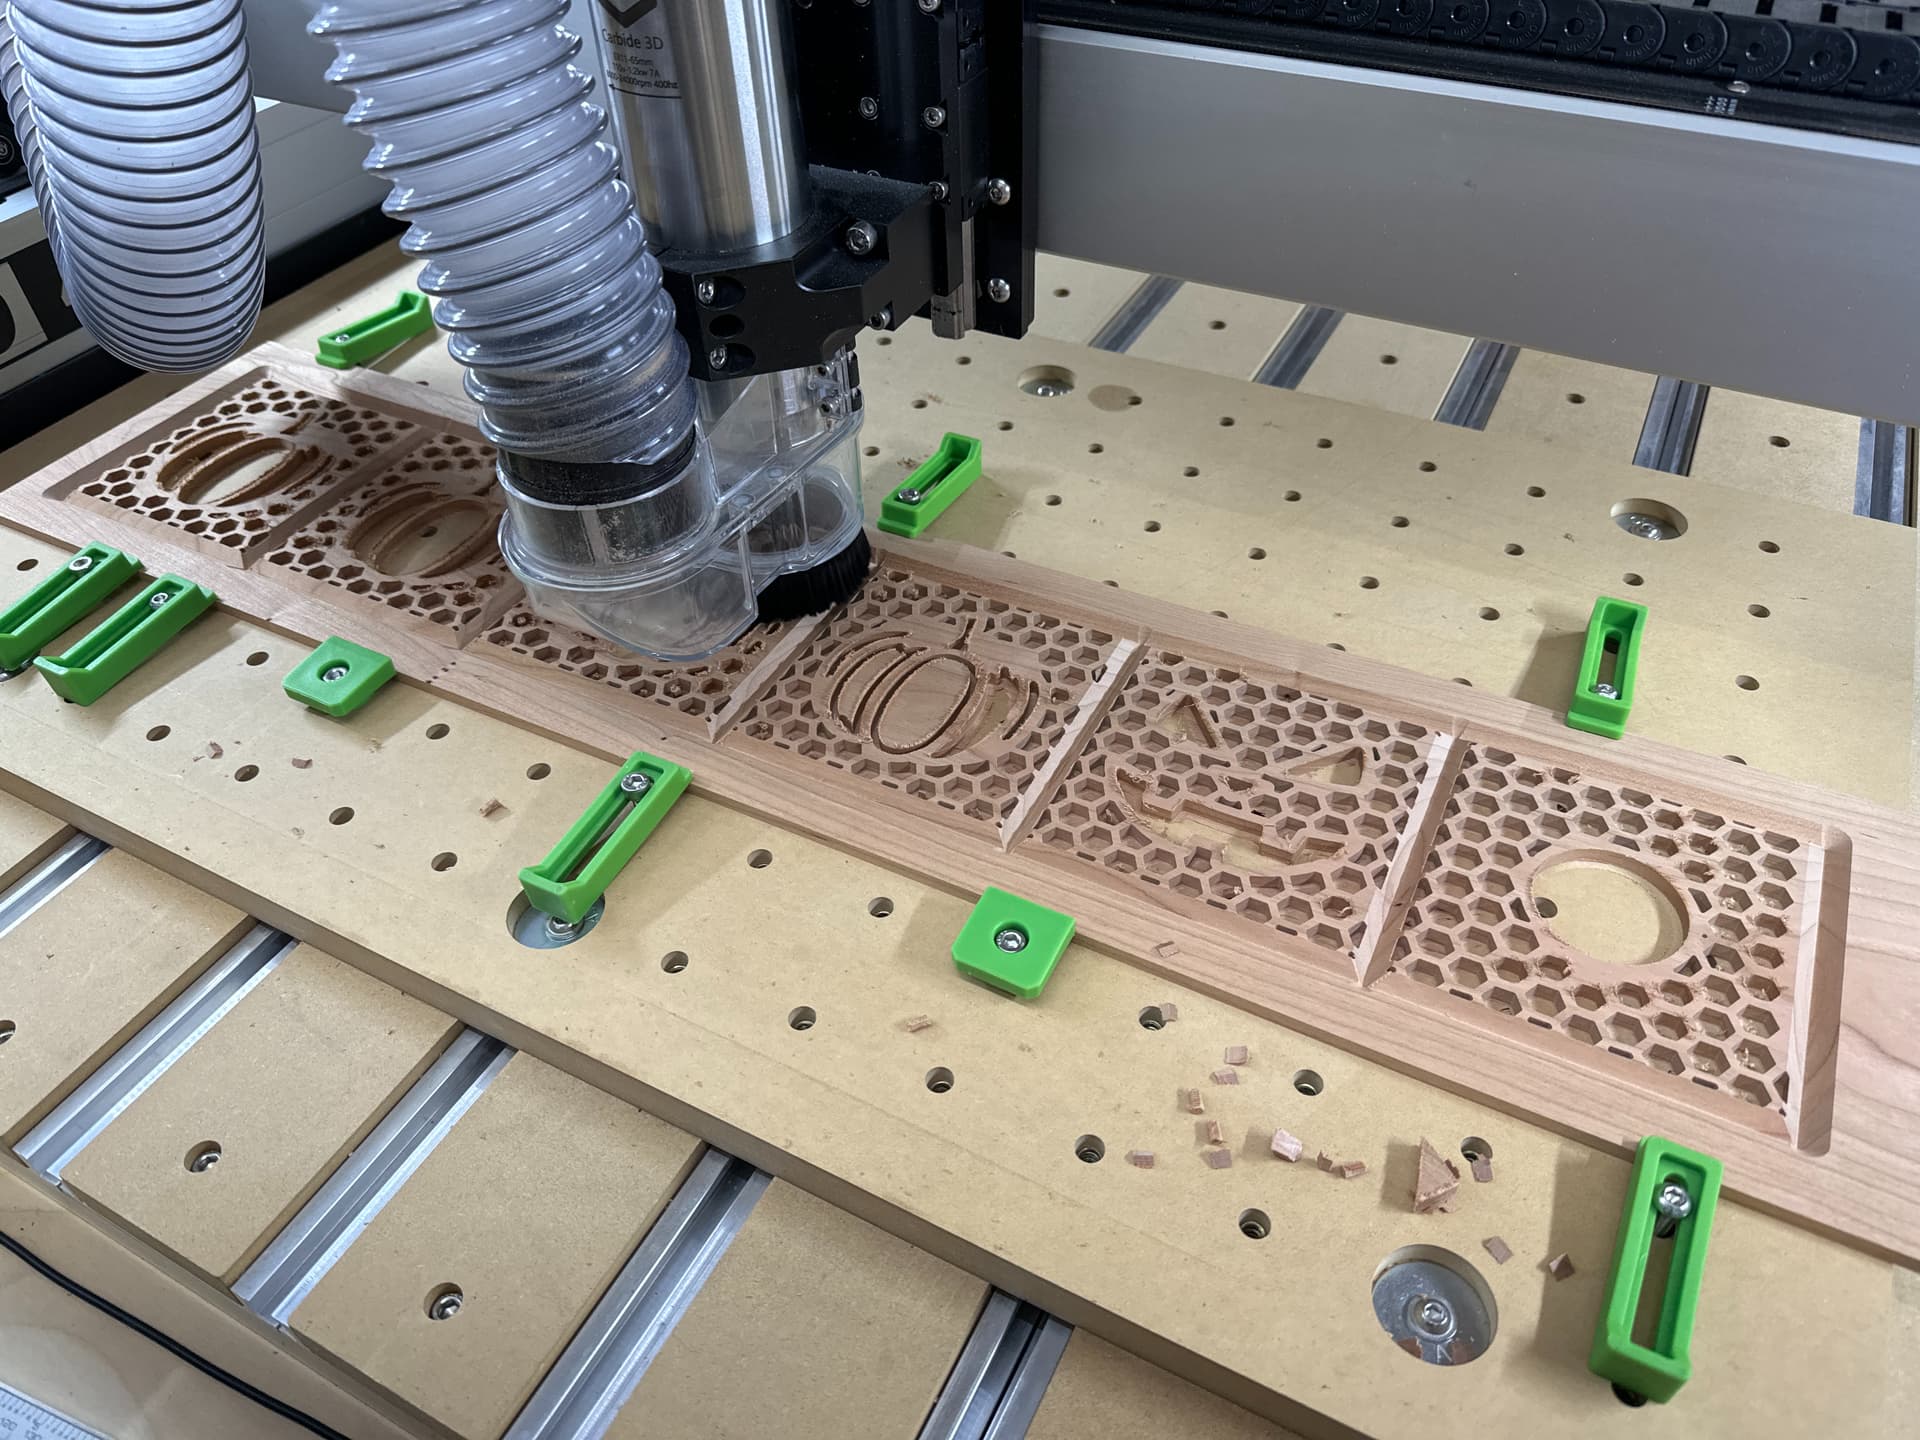
  1. Carve out all the black areas in tile 1. I setup the carve to carve excess areas where the tool wouldn’t be able to reach since I was coming back to do a more precise carve for the white later.
  2. Ditto for tile 2.

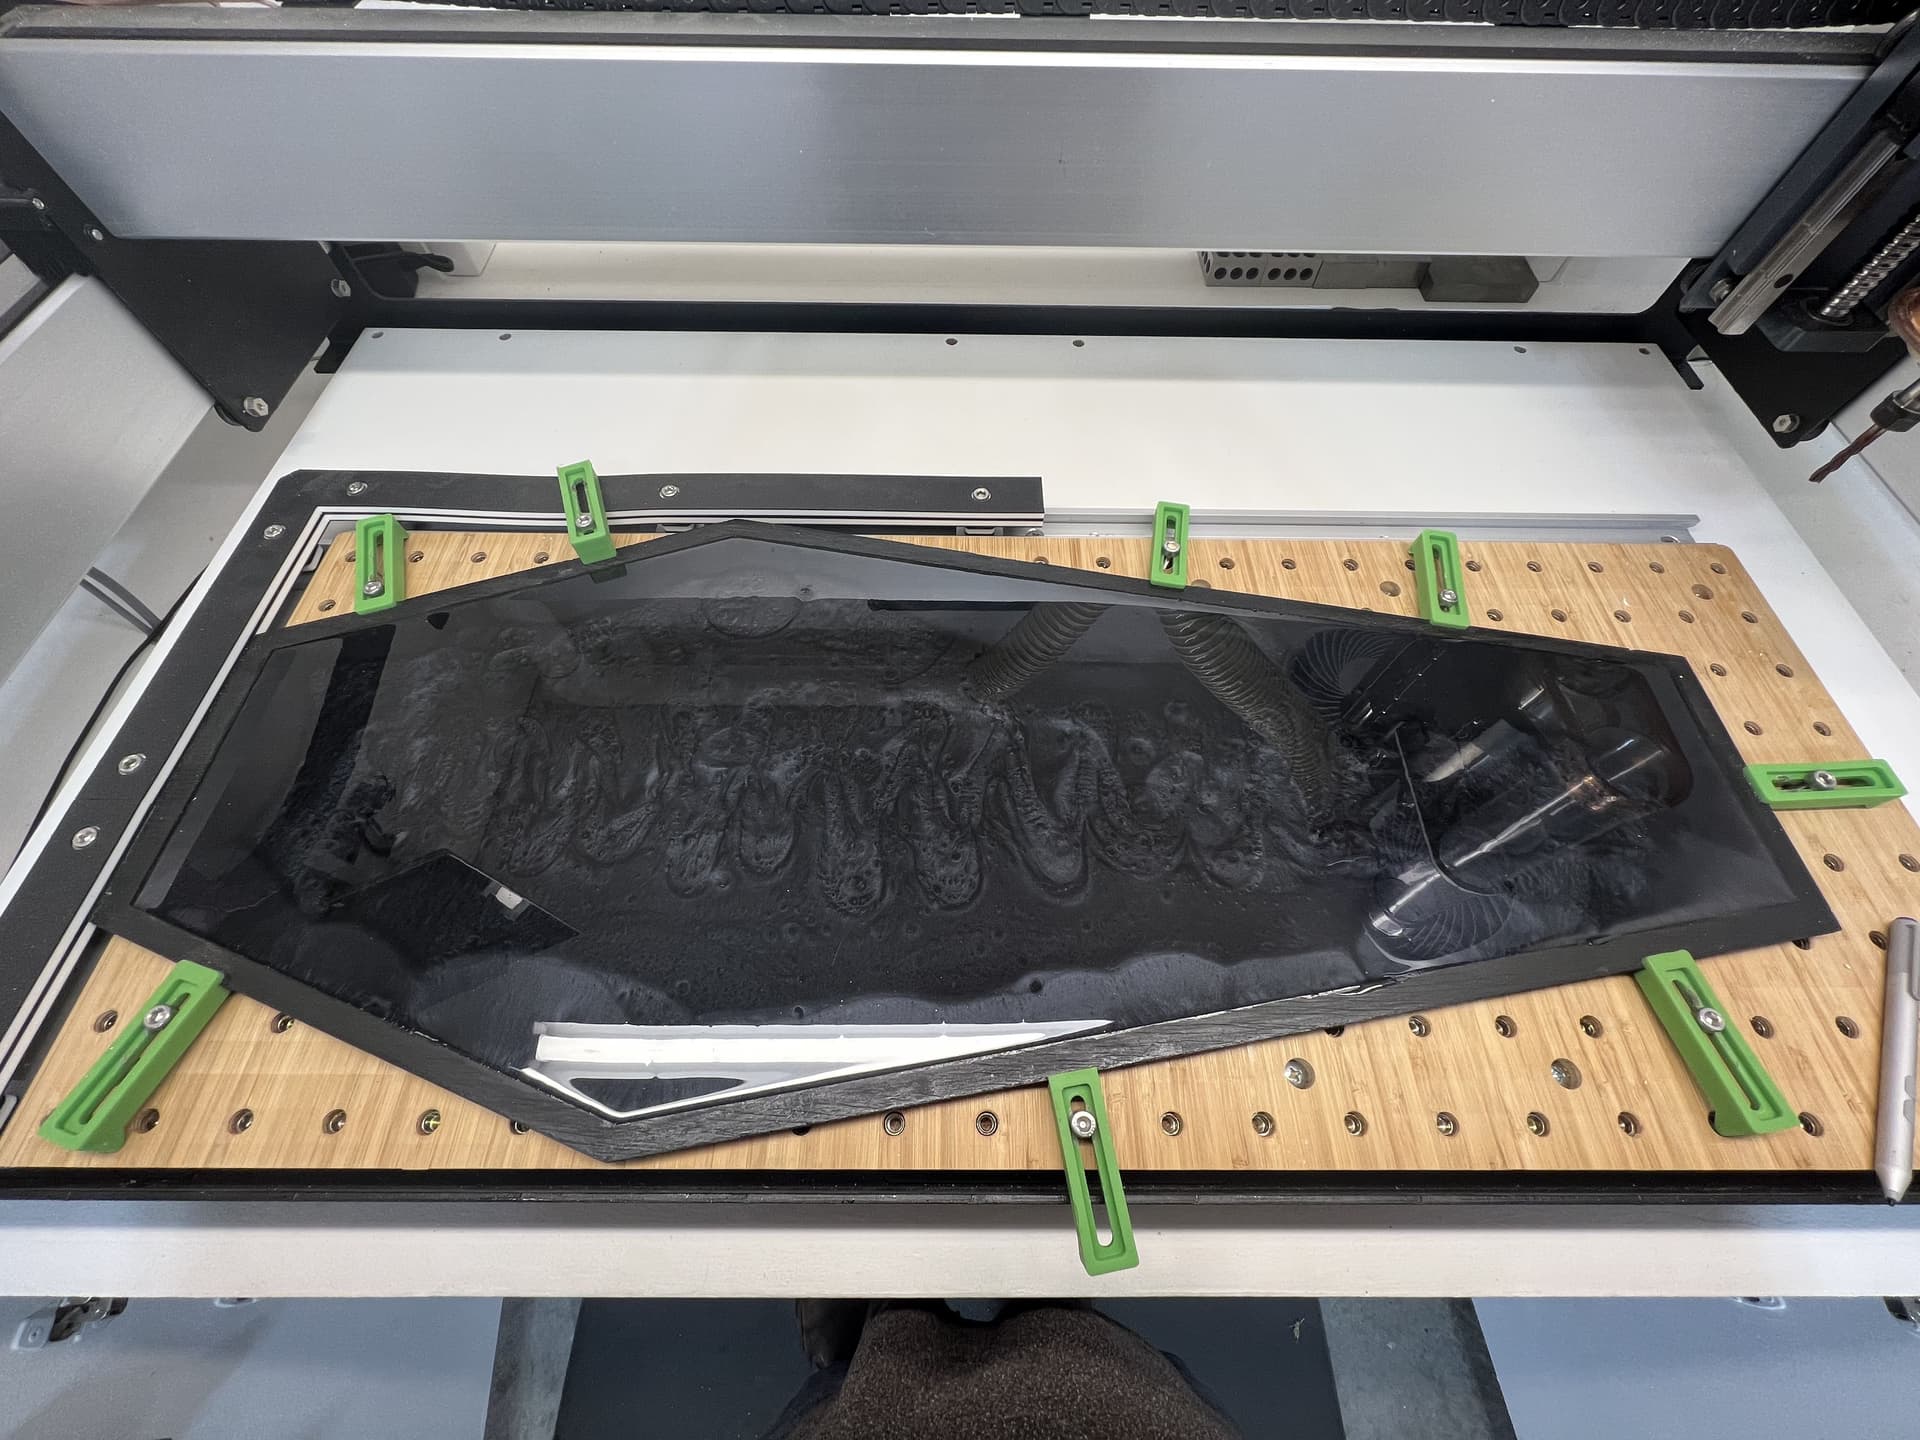
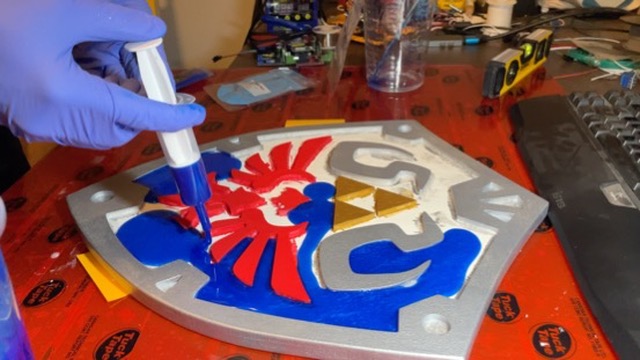
Pour all the black epoxy and let it cure.

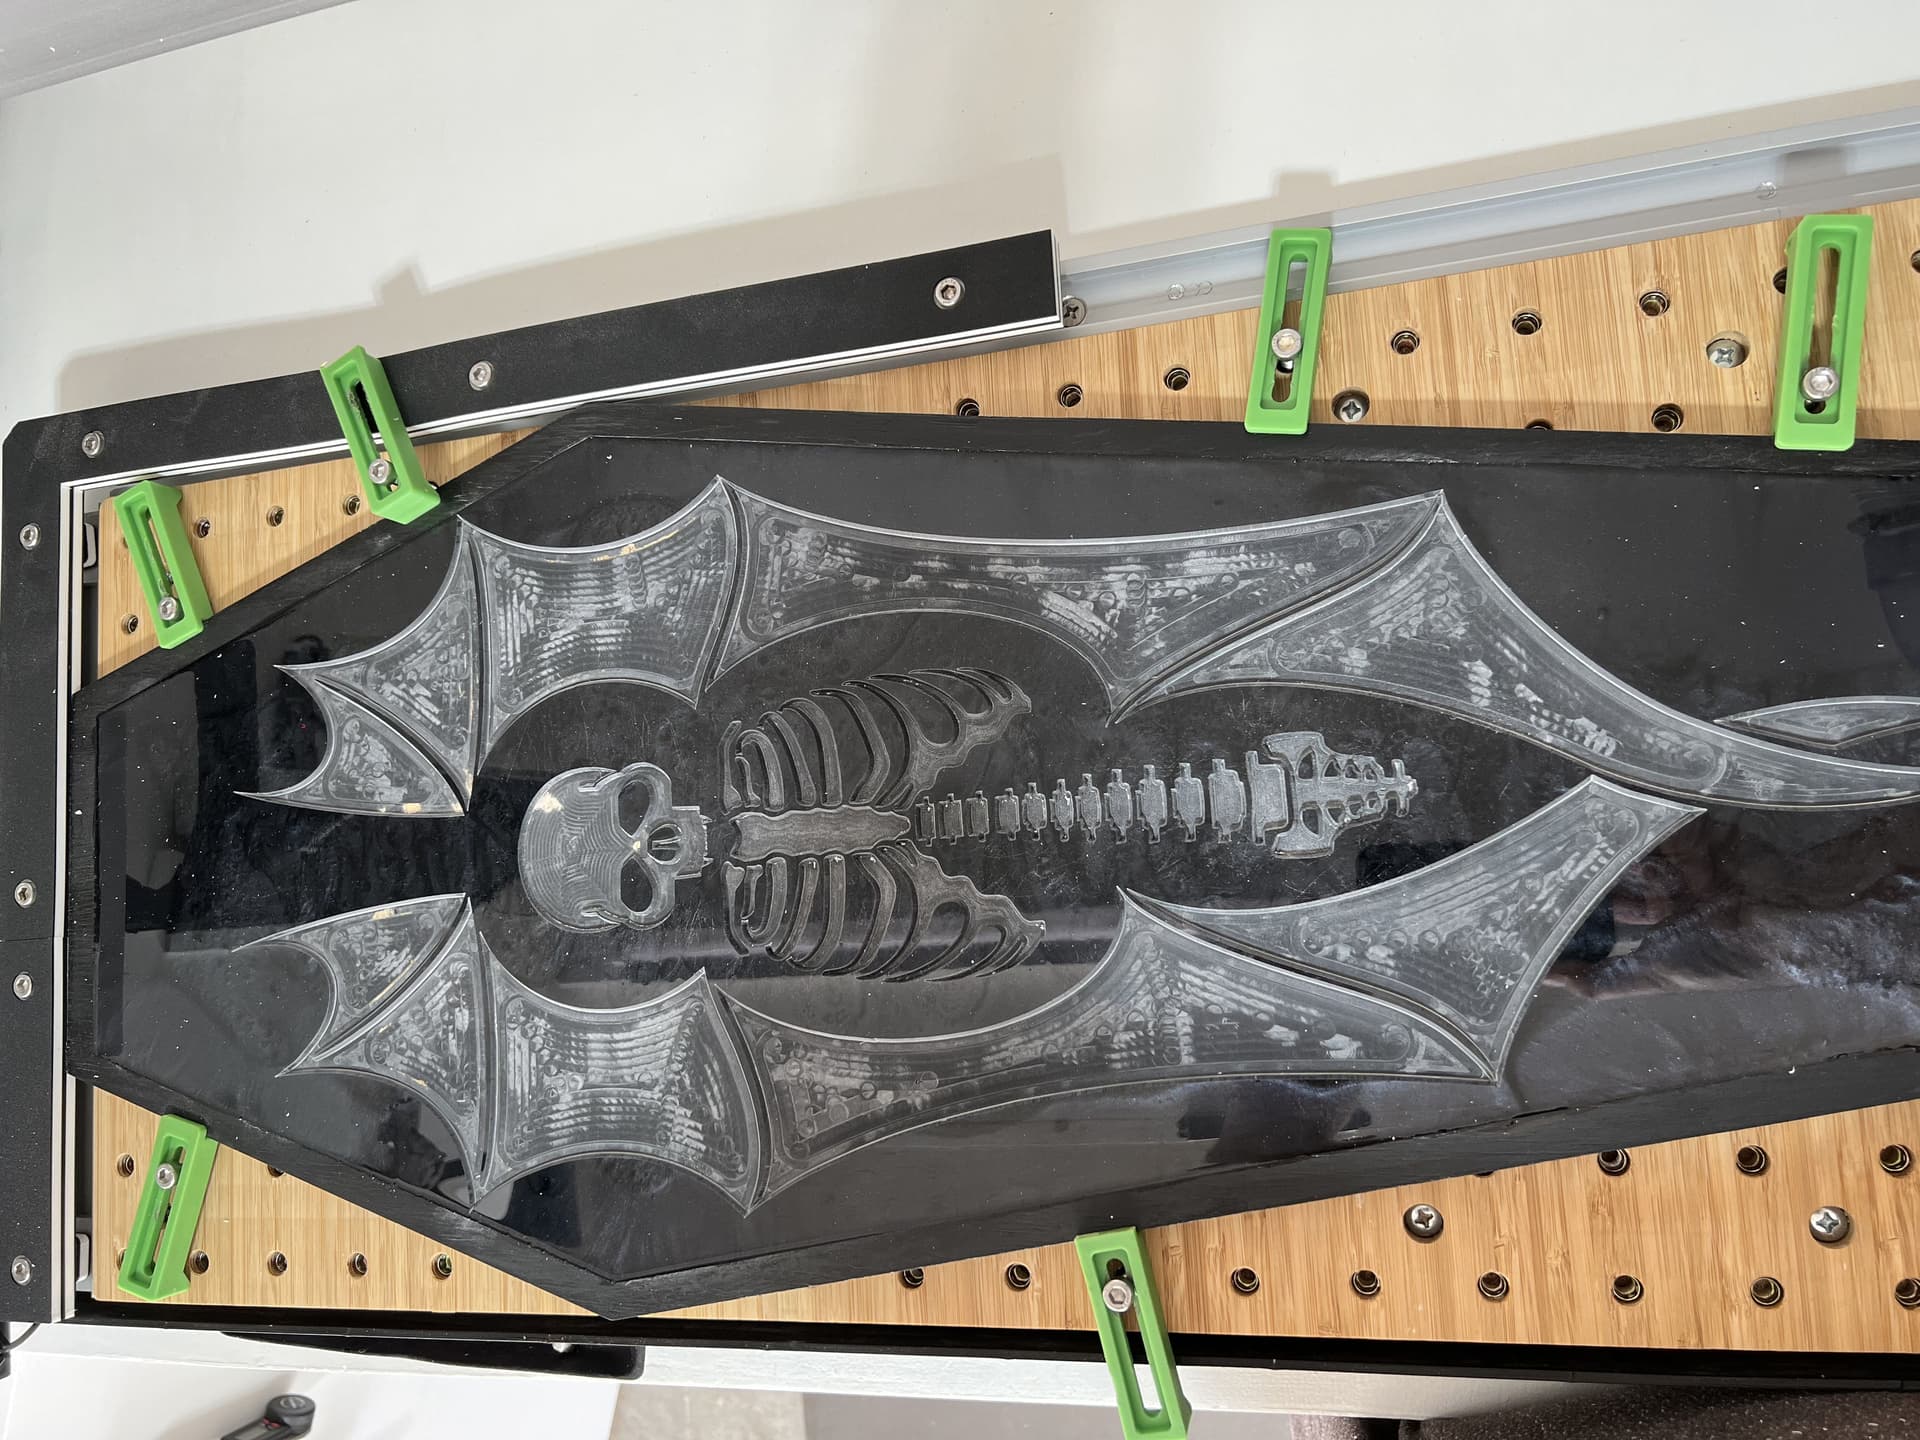
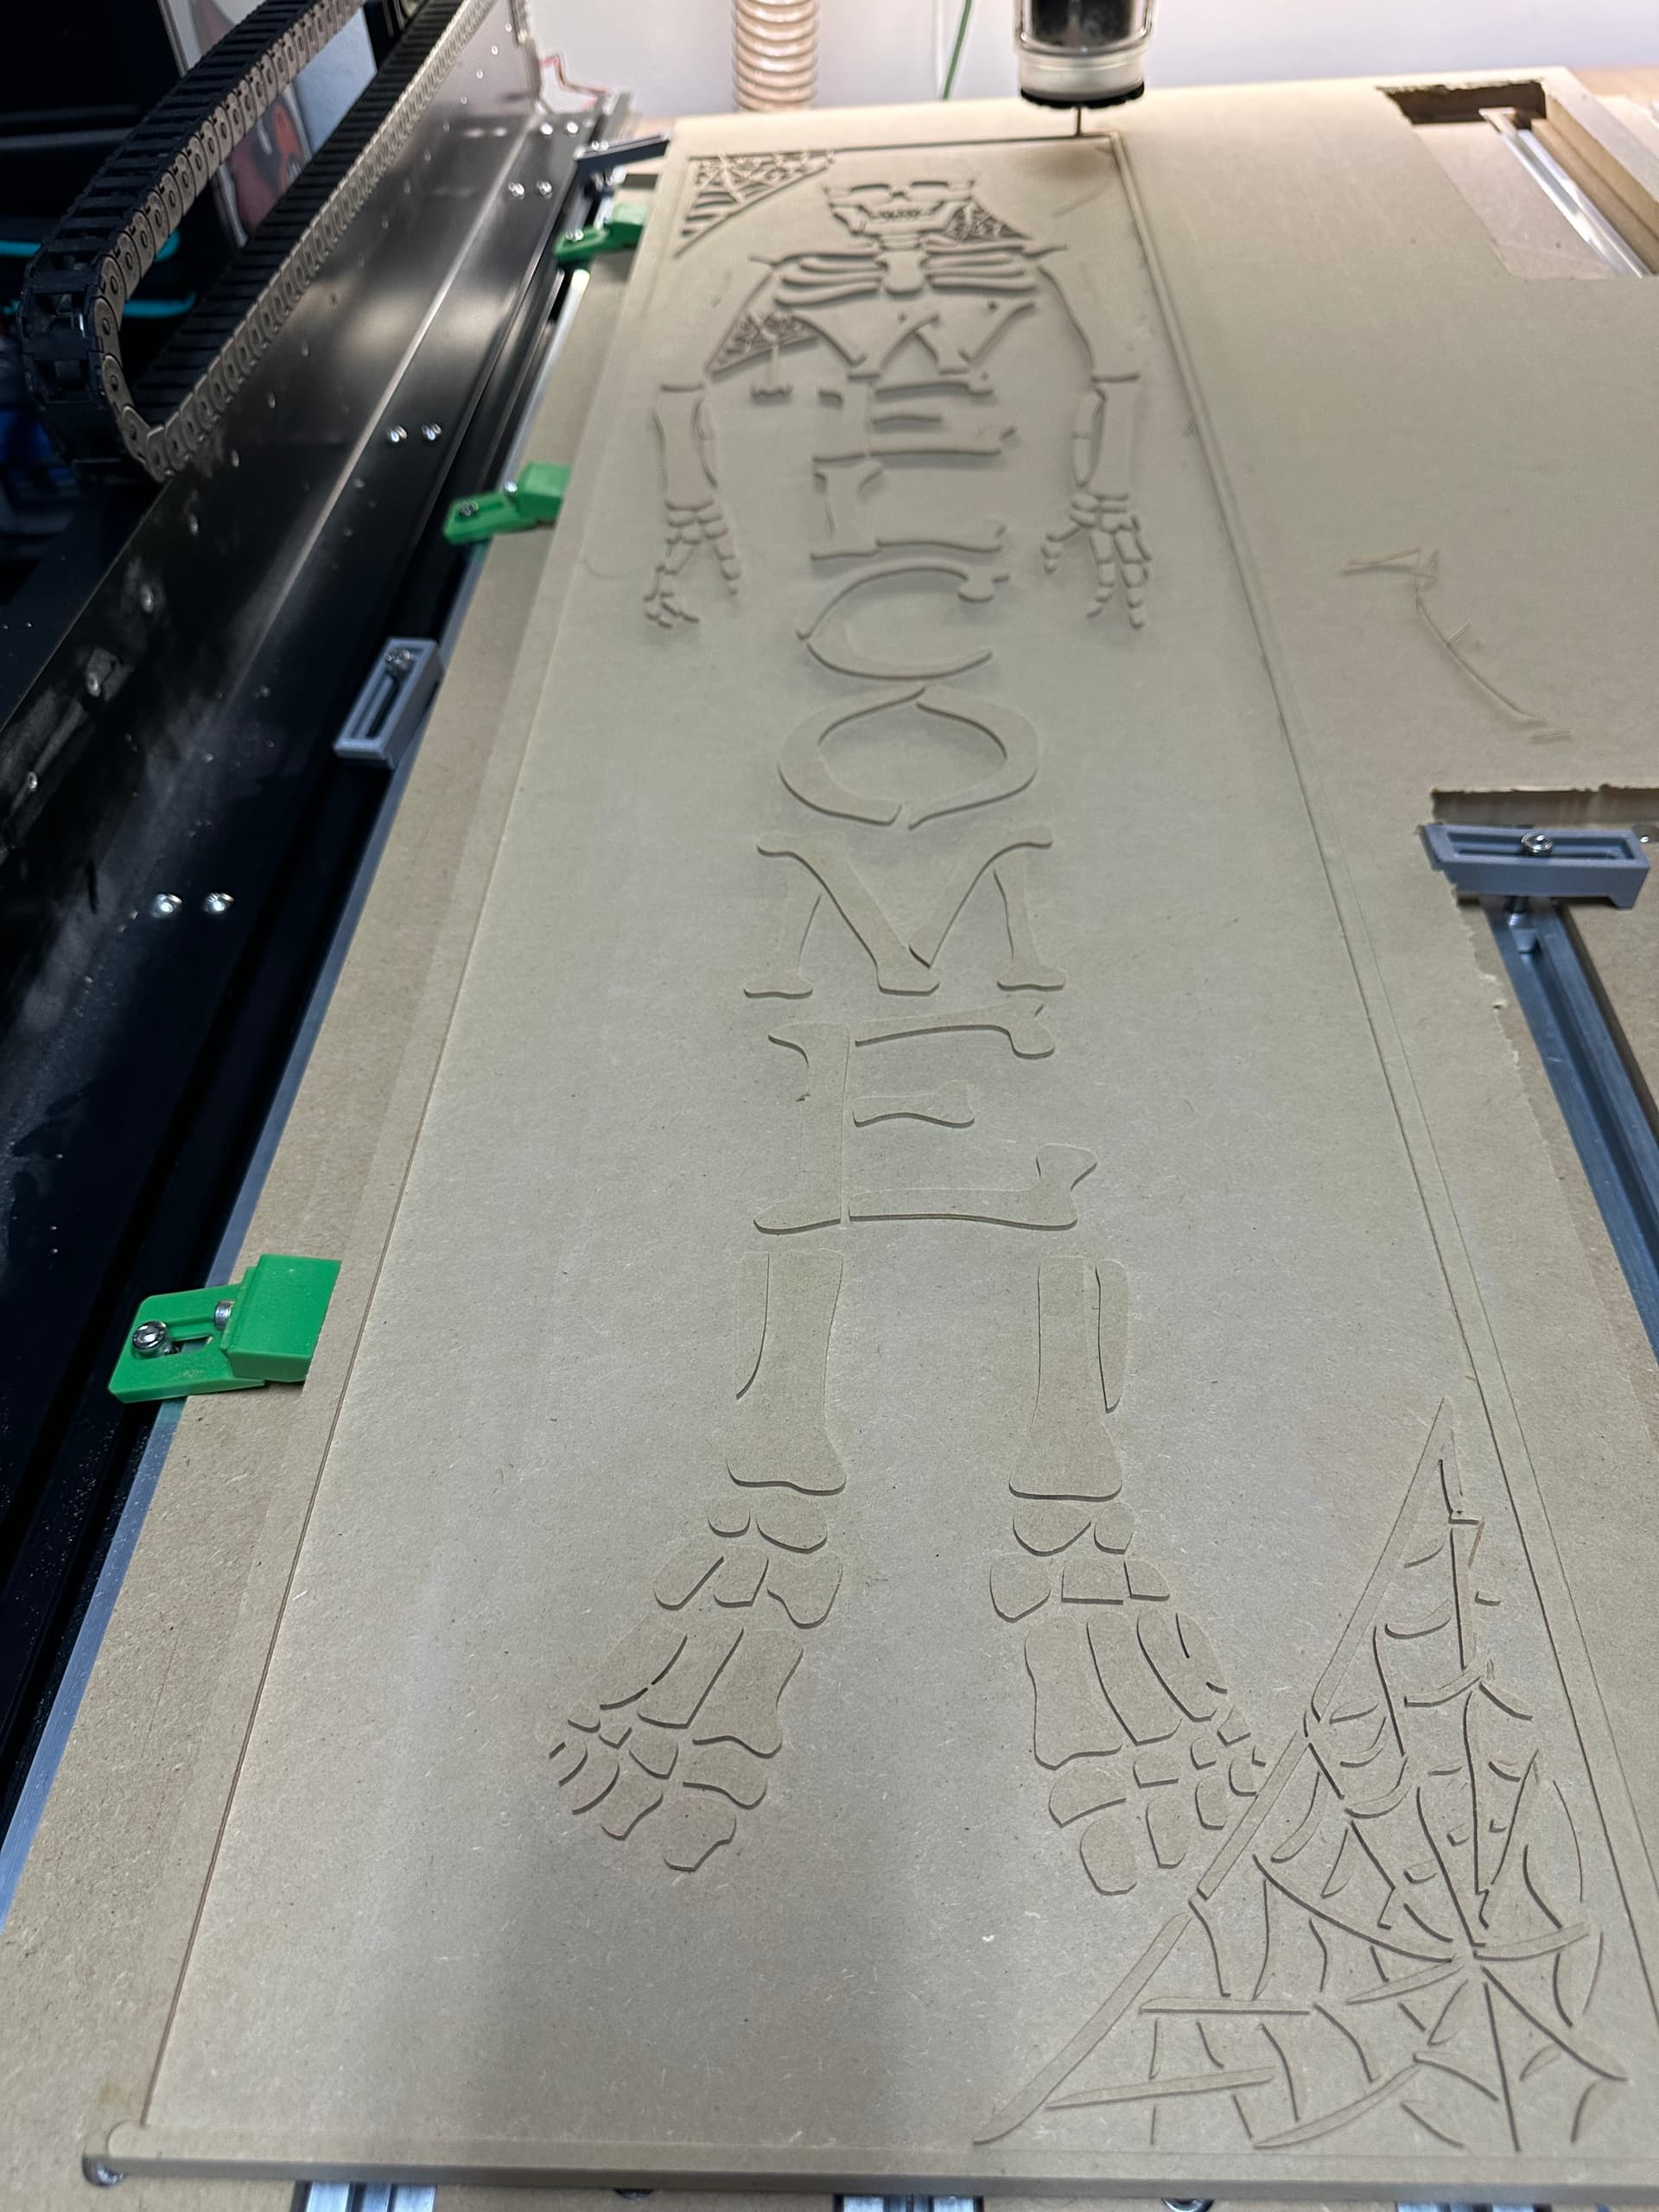
  1. Carve out all the white areas in tile 1. I ended up using 1/4" and 1/8" o-flute endmills and a 2mm 3 flute endmill to get into the very small areas. Where the very tiny points meet on the outer edge, I took advantage of the overpour area and cut a little excess area around the spinner to give me a crisp point.
  2. Ditto for tile 2

Pour the white epoxy.

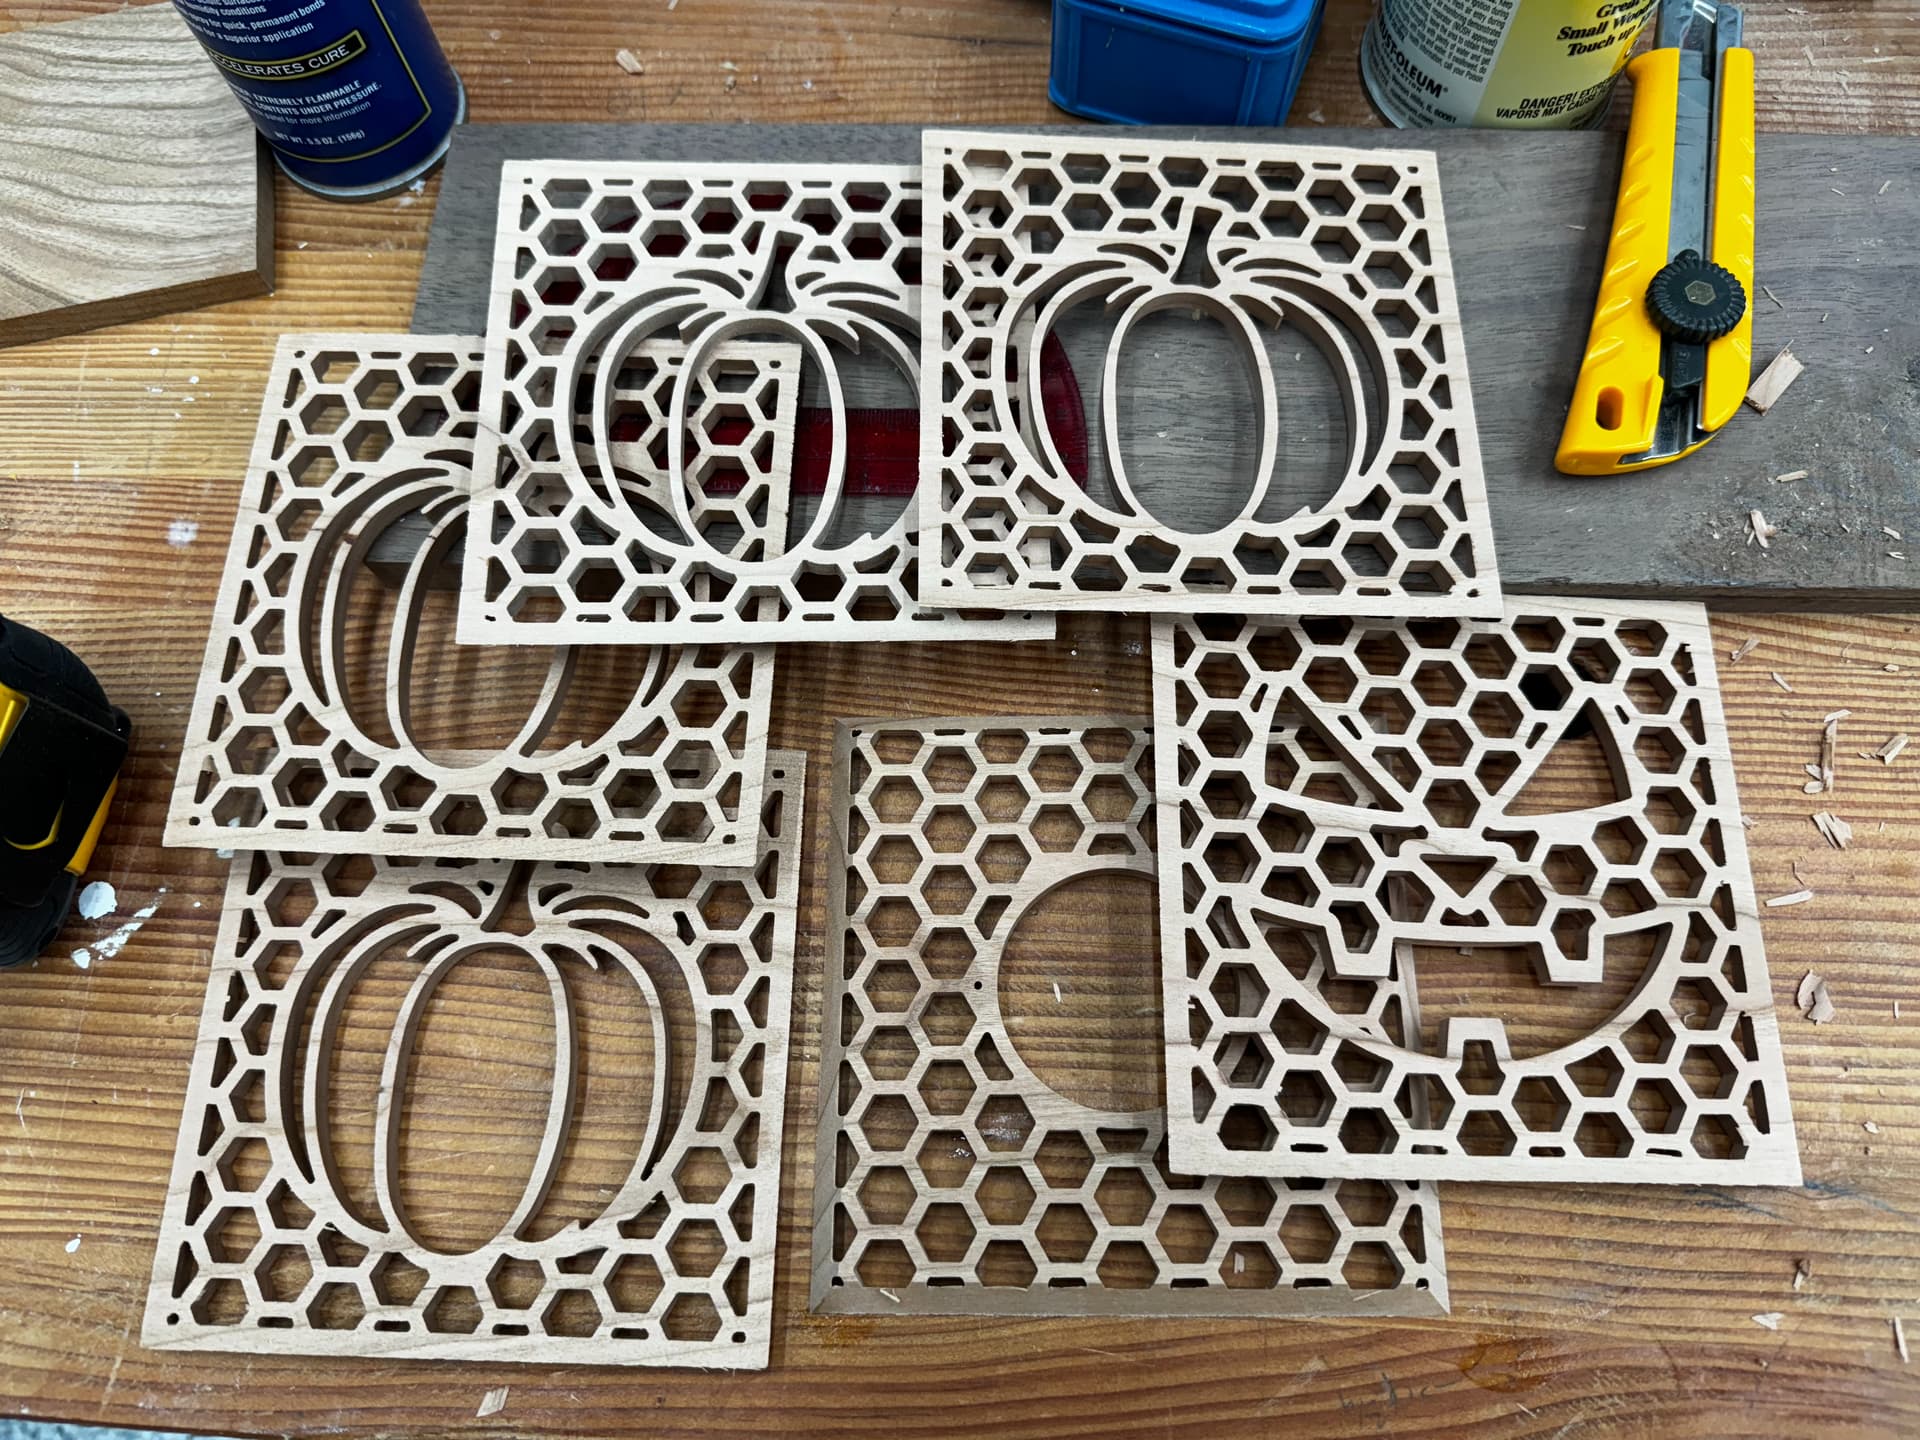
  1. Through cut the outer profile with tabs to hole it in place in tile 1.
  2. Ditto for tile 2.

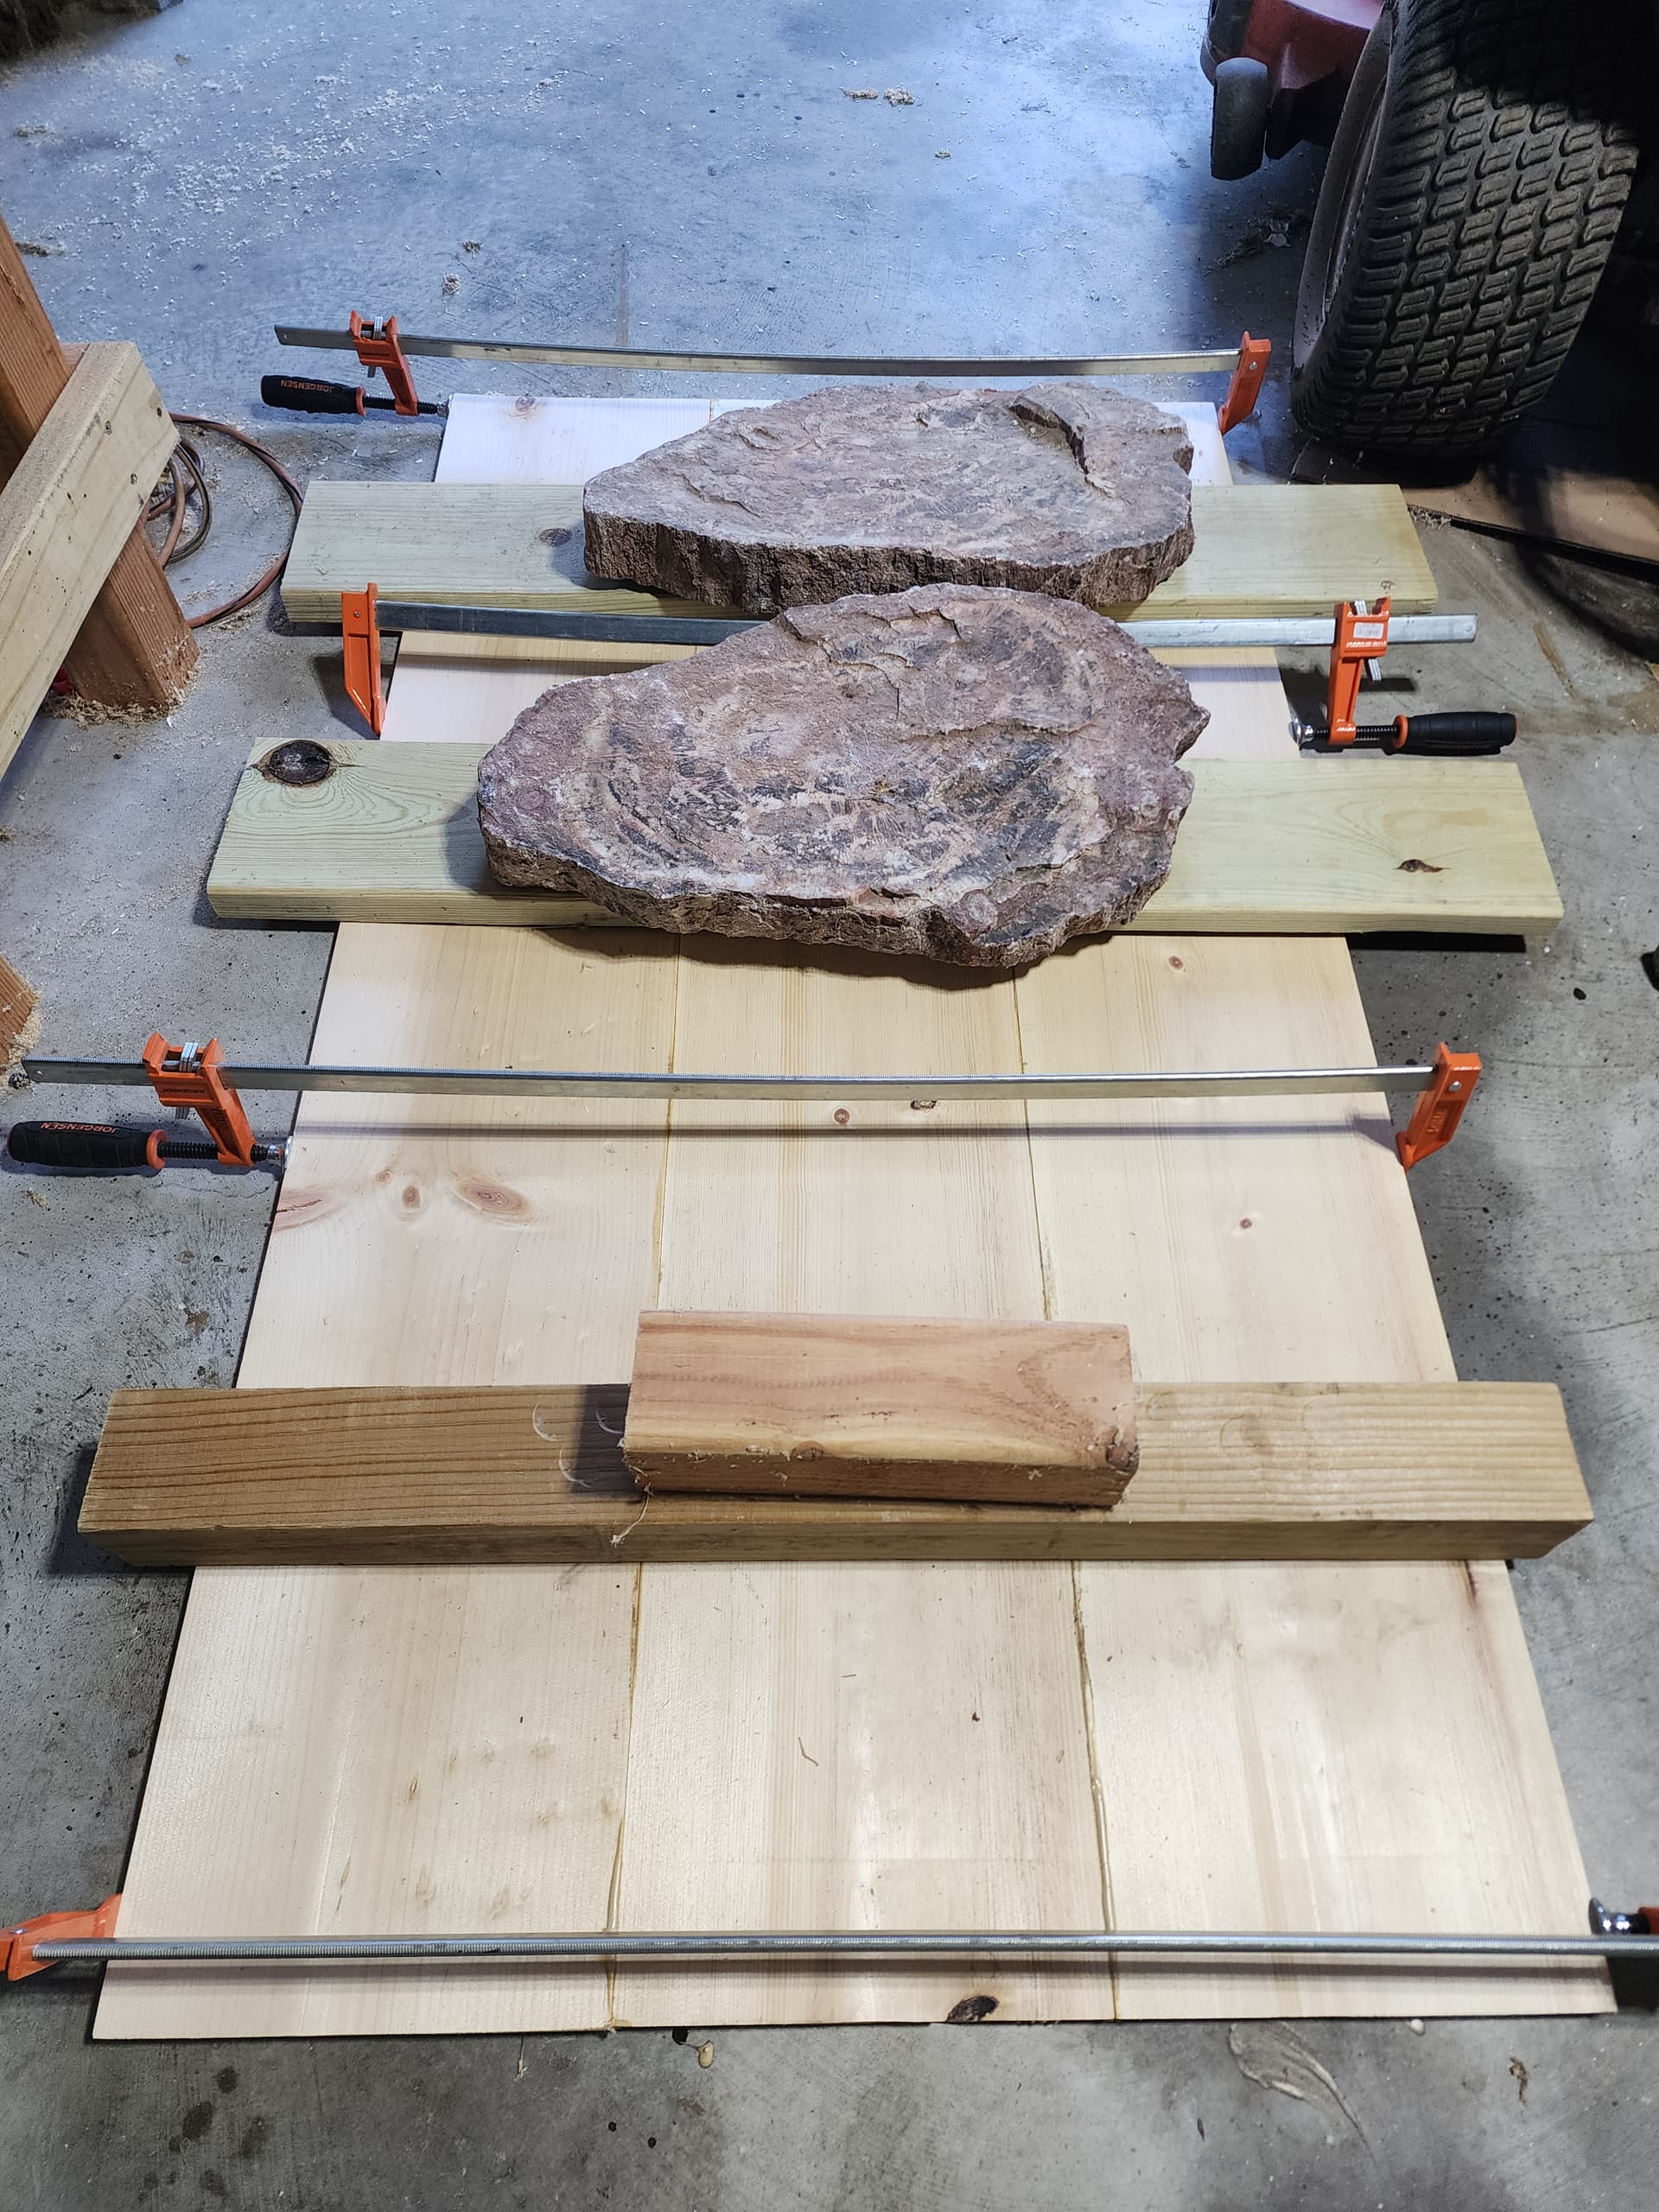
I learned a ton on this project. I learned that 1/2" PVC panel purchased from a big box store is incredibly warped. I struggled a lot with work holding. I used double sided tape to hold it down and then added some hold down clamps in some places that were prone to warping off the double sided tape including a few custom 3d printed clips holding the front of the material down. If I were to do this again, I would probably take 3/4" PVC trim board and glue up a large enough piece so that I could surface both sides to get a flatter project.

This was also my first attempt at pouring epoxy. I have poured other polyurethane plastics using molds in the past so it wasn’t completely foreign but I had to figure out a process for actually doing these pours. I ran through a series of test projects to figure out fun details like that the cheap measuring cup which came with the beginner epoxy kit was horribly inaccurate and combining information in the internet to derive a weight based measurement to solve problems I was having with the pour not curing properly.

I’m not going to bother including the design file as this was all done in Fusion 360 and is made up of several files combining the 3d parts and the CNC parts. If someone ends up doing something that is similar, let me know and I’ll try to pull all the files together for you.

9 Likes

I’ve been having a good time with making cubes recently and thought that it should be easy enough to adapt one of my previous makes to a themed accent lamp. It also provides me with a way to do some trial runs involving Shoji paper for an upcoming project I’ve been looking forward to, an Andon Lamp. I took my basic hexagon grid I’ve been using so far and added some Fall/Spooky elements to get me in the season. This ended up being a pumpkin body for the sides and a Jack’o Lantern face to hide sneakily on the top for some added spook factor.


The biggest struggle for these pieces is 100% runtime optimization. I prefered to use a 1/16" endmill to maximize the crisp corner look of the hexagon grid, but the tradeoff for my quest of detail is:

  1. Pocketing takes forever with something that small.

  2. Running a contour pass runs the risk of the bit getting caught between the wall and newly formed offcut. I wouldn’t worry about the latter as much with a bigger bit, but 1/16" is as fragile as I’m willing to go.

I opted to use a hybrid approach. I inset a vector by 1/32" that I would rough out the space with a 1/8" bit on a contour pass. Then I would follow up with the 1/16" contour to final dimension. Even with the larger bit, running two separate passes eats up a good amount of time. Full job runtime was just a hair under 5 hours. Speeds and feeds are very conservative, but I haven’t tested enough with the smaller bits and when I push my 1/4" bit anywhere close to 0.1" DOC on slotting, it screams like an angry toddler.


Unlike previous projects, I didn’t want to have an onion skin to sand through on the bottom of these because I wasn’t sure how easily it would be to remove with the Shoji paper stuck to the inside. I took the toolpaths to full thickness, but did not anticipate my spoilboard to be so out of flat. I still had to do some sanding on the individual pieces before I glued the paper and the body together.

For the screen, I bought generic Shoji paper on Amazon and used Titebond Quick and Thick to adhere it. At first I tried to use a toothpick to spread it, but it wasn’t thin enough. I ended up applying it, with great success, by hand spread thinly on my fingertips.

All that was left was to glue the panels together, using none better than painters tape and hide glue for the better open time. Because of my sanding, pre glueup, I had a bit of a time getting corners to be super crisp. When I inevitably do this again, I will make sure to flatten my spoilboard first and use that as my zero reference to save myself the pain of onionskin sanding.

I still have finish to apply, seeing that spraying is out of the question (paper liner). I will likely apply thin coats of shellac to build a thin but appreciable finish. But for the time being it does well enough to sit over any battery powered tea light of my choice.


PumpkinLightBox.c2d (2.0 MB)

26 Likes

From your previous posts of cubes, I was beginning to think you were super human! :smiley:

I’m glad to find out that your good looking cubes are the result of hard work, skill and attention to detail. +1

1 Like

I like the shoji paper idea. I used cheap wax paper held in place with painters tape on the ones I posted above as they would be sitting outside in the elements.

I love this look for something inside or on the porch. Maybe next year or maybe adapt for Christmas.

Were you able to use Boolean operations to combine the images with the hexagons without hours of node trimming/editing?

EDIT: I like your sled as well. Do you feel like it gives you an edge perfectly parallel to X when you slide it in? Do you have to spend time adjusting when you take it on/off or do you have some bits underneath to register in the T Track slots?

I agree with Tex, your cubes can’t be done with normal human abilities. They have definitely inspired me to try making some.

1 Like

All the design was done with boolean operations. It was confusing at first, but I’ve finally figured it all out that it’s not too big of a deal to do anymore. The sled is actually just a jointed piece of lumber I’ve had kicking around on my workbench for a while. It definitely helps me get the miters lined up straight without a lot of fuss. No need to worry about anything else than a sturdy straight surface to rest the pieces on while you get the tape put on for alignment.

Many thanks to you and Tex! They are quite a lot of fun.

Looks to me like super human patience is the main requirement.

Would putting some “keys” on the side of the miter joints aide in alignment or just make things worse? Like raised spot on one side and recess on the opposing side.