I have read some older posts regarding keyhole operations in CC and am at a loss. I have CC v7 and do not see a keyhole option. I am guessing I am missing it. I see in the post that someone using a beta version was creating them, would love some feed back on where this operation is located. I created one for a plaque manually, would be great to just write a quick keyhole program so I don’t have to remember my measurements, (this whole getting old thing sucks LOL).
-
Create a circle to mark where the keyhole enters. It doesn’t matter the size, the keyhole path uses the center.
-
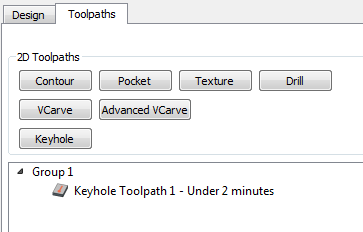
Under ‘Toolpaths’, select ‘Keyhole’. You’ll probably want to change the depth. You can also change the length and the angle the rest of the keyhole is relative to the entry point.
If you don’t have a ‘Keyhole’ option in your toolpaths, you likely need to upgrade CC to the latest version.
3 Likes
Found it thank you. no idea why I did not notice it prior.
Next question though, it appears that you have to make a circle and it centers itself in the middle of said circle. I am hoping that after I add a new tool. that it wont try to fill/pocket within the circle.
I set up a custom tool for my Frued Keyhole bit. The key is to get all the measurements of your bit and input them. Basically you make a full depth plunge and then the bit runs forward as far as you want it and them reverses to the entry hole and plunges back up.
Here is the database for my Frued 70-104 Keyhole bit. This is only valid for this model bit and may need to be modified for another model and/or brand.
| number | vendor | model | URL | name | type | diameter | cornerradius | flutelength | shaftdiameter | angle | numflutes | stickout | coating | metric | notes | machine | material | plungerate | feedrate | rpm | depth | cutpower | finishallowance | 3dstepover | 3dfeedrate | 3drpm |
|---|---|---|---|---|---|---|---|---|---|---|---|---|---|---|---|---|---|---|---|---|---|---|---|---|---|---|
| 701 | Freud | 70-104 | 701 Keyhole | end | 0.39 | 0 | 0.25 | 0 | 0 | 2 | 0.125 | 0 | 10 | 60 | 16000 | 0.4375 | 1 | 1 | 60 | 16000 |
I have used this custom bit to make quite a few key holes on the back of projects for hanging on the wall. Works well. I originally went to t he Frued site and their Feeds and speeds are incredibly high for this bit on a Shapeoko.
Here are some key holes I put on the back of a plaque. Notice there are 3 holes. One is centered and the other two are 6 inches apart. The reason for 3 is so the person can hang it by the middle one alone or with 2 to keep the project perfectly level. It is important to put the holes at exact spacing to aid in hanging your project on the wall. I usually make a paper template to go along with the project so the person hanging has a template.
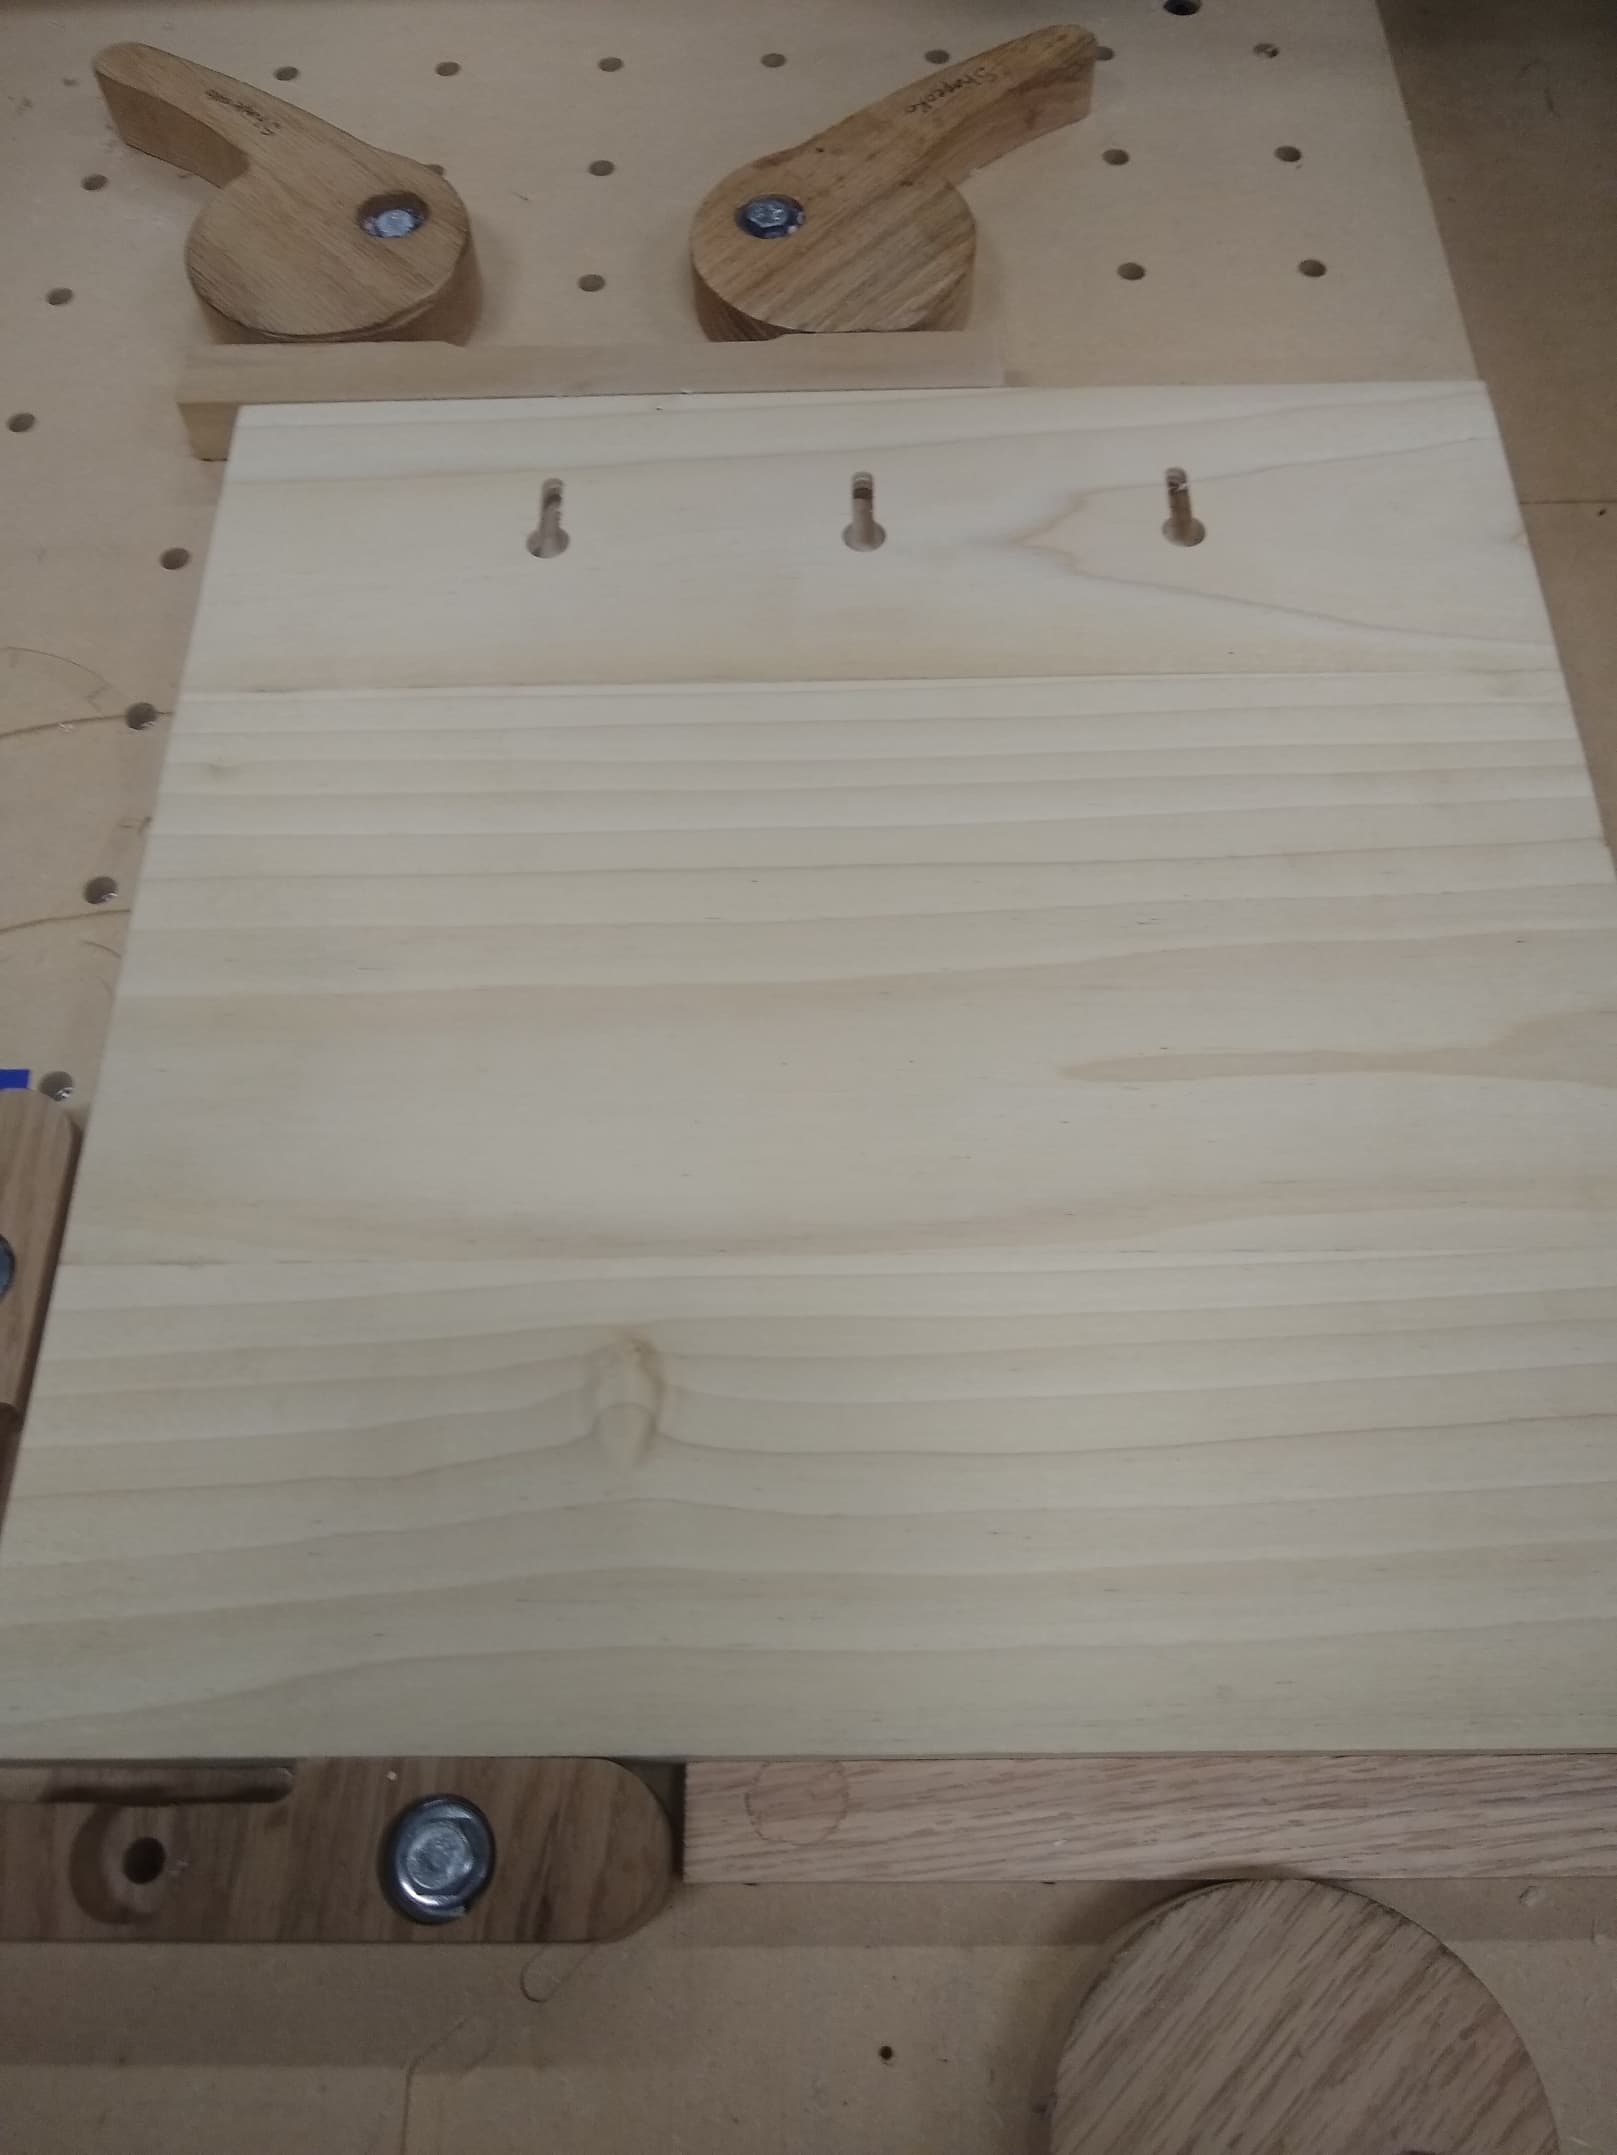
In the custom tool database my depth of cut is .4375" and that was determined by measuring from the bottom of the big end to the top of the small cutting flutes and just a little subtracted. So a key hole needs to plunge in full depth and not in thousands of an inch like regular end mills.
4 Likes
The ‘Keyhole’ path doesn’t use anything about the circle other than its center. It’s used solely to mark the start point of the keyhole. There’s no filling or pocketing.
2 Likes
I have created a Keyhole with pecking.
I believe this is the file.
Keyhole Slot Left 2 Right.c2d (44 KB)
Here is the Gcode file if you prefer.
Keyhole Slot Left 2 Right.nc (1.2 KB)
It is about 3 inches in length and runs horizontal what I call left to right. This allows for centering and balance for one screw or nail. You will need to adjust the width to work piece to center properly.
This was created for a 0.25 bit but I use a 0.50 keyhole bit and it works great.
1 Like
This topic was automatically closed after 30 days. New replies are no longer allowed.