Hello to the group. I have, what I hope is a very basic question.
I’m having a hard time getting the letter function to work for me in C.C… I’ve looked for tutorials and in previous topics but I didn’t find anything specific to creating text and placing it in my stock for pocket milling. It’s a very basic operation, I want to use a square end mill not a “V” end mill. Again my challenge is just creating the text and placing it in my stock setup in C.C. I want the lettering to be an island in a very basic rectangle.
Thanks in advance and sorry to bother with such a basic question.
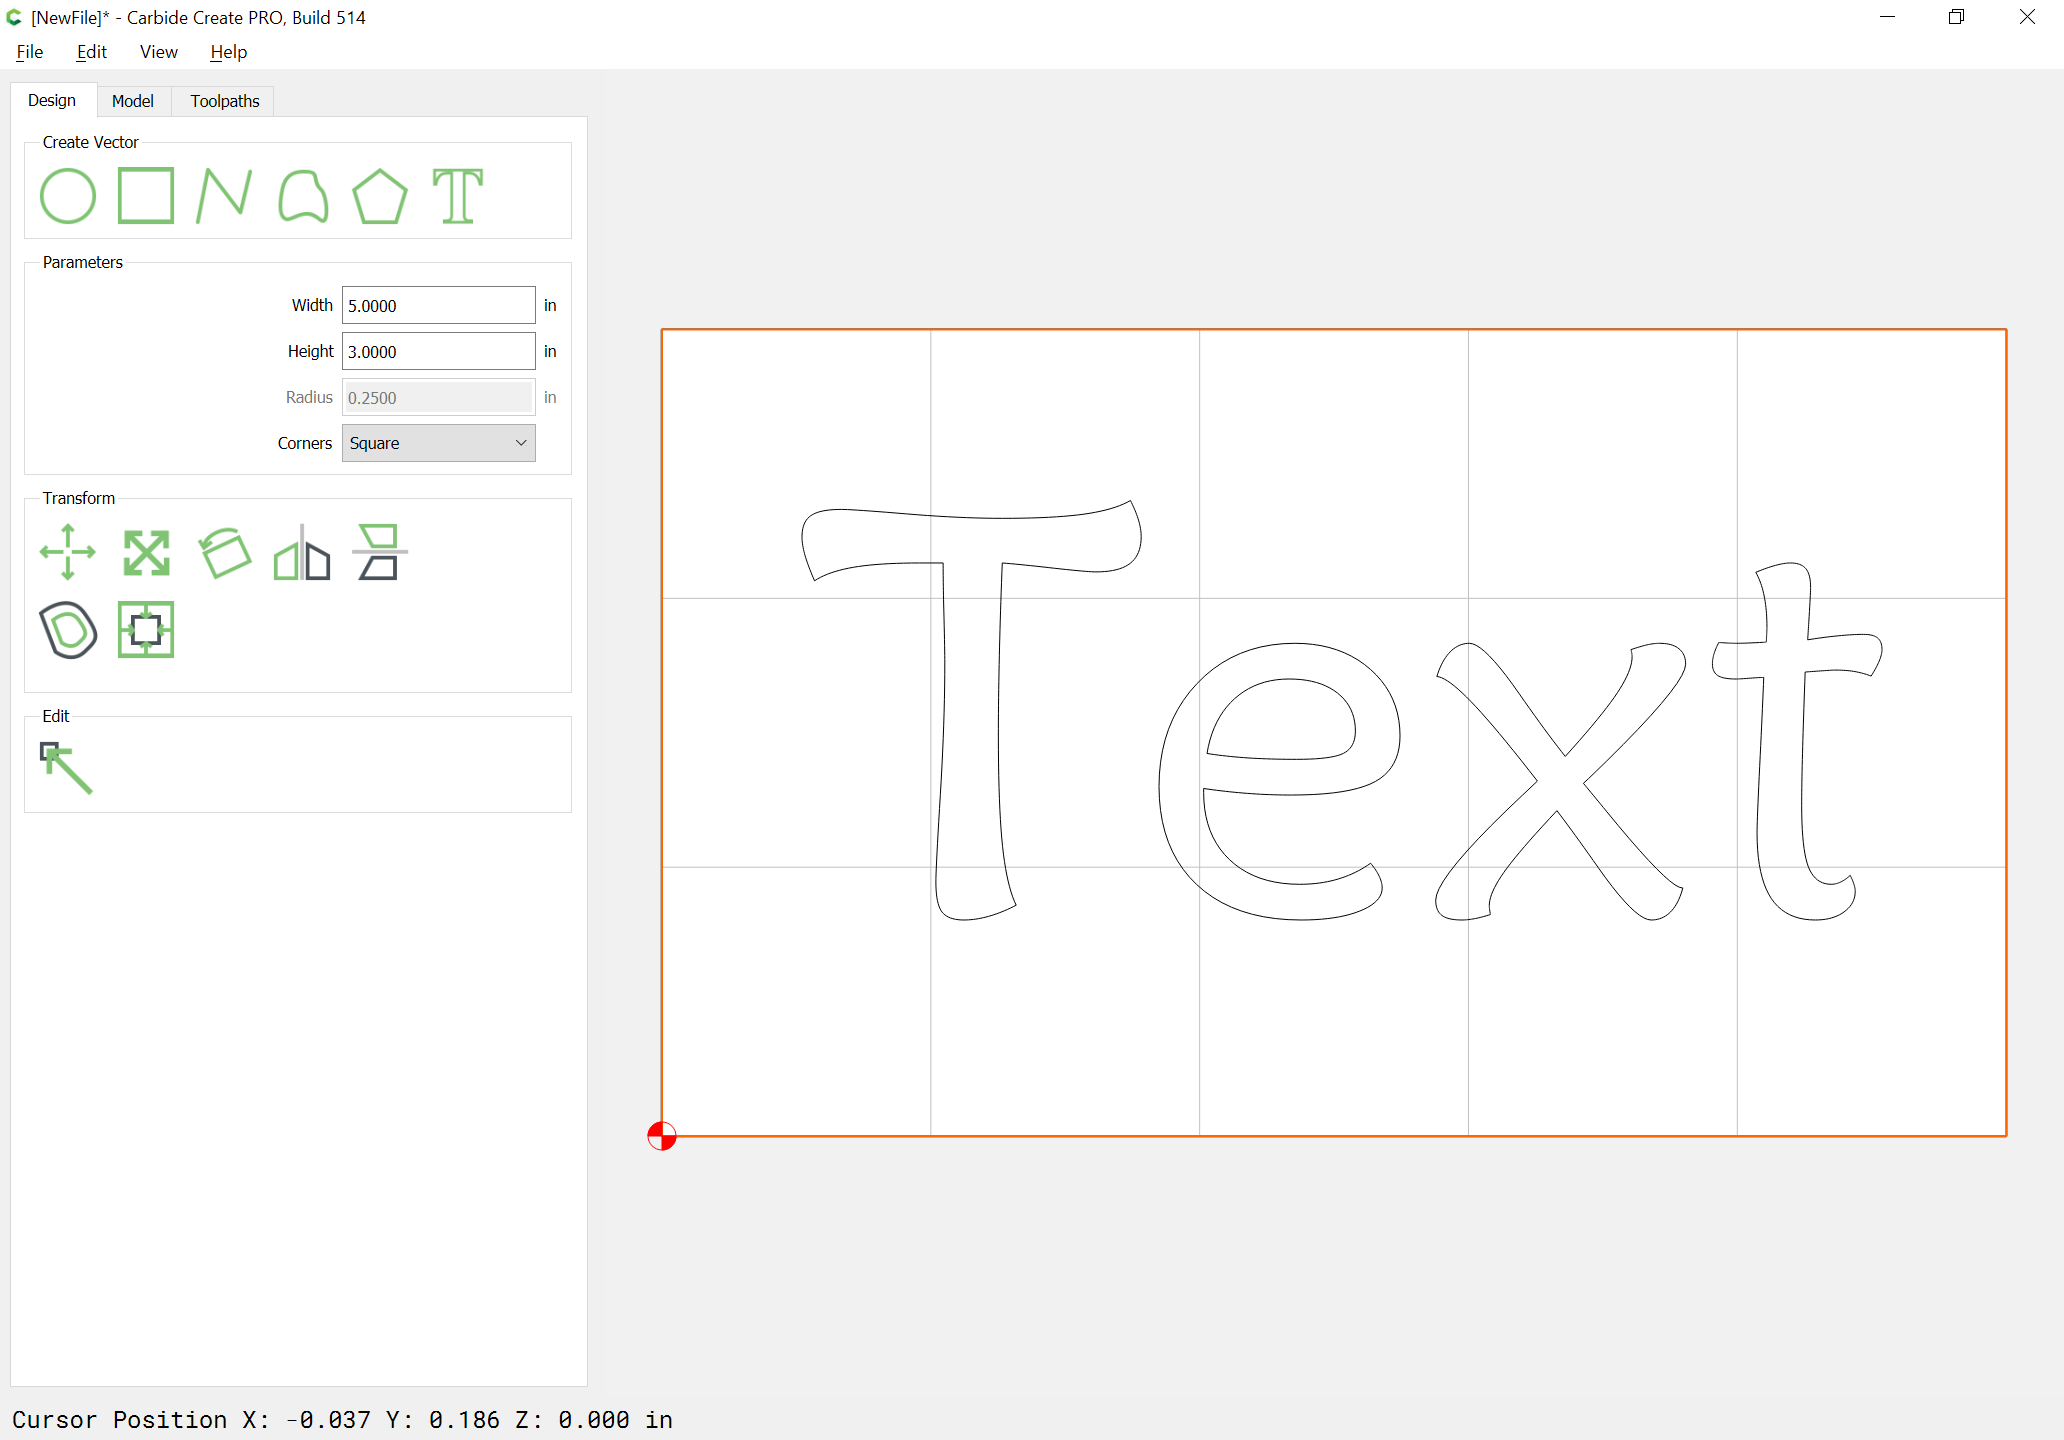
The usual difficulty here is setting the text at a size which the endmill can cut out.
First, set the text:

Then draw a surrounding rectangle:
Then switch to the toolpath pane and select both and assign a Pocket toolpath:
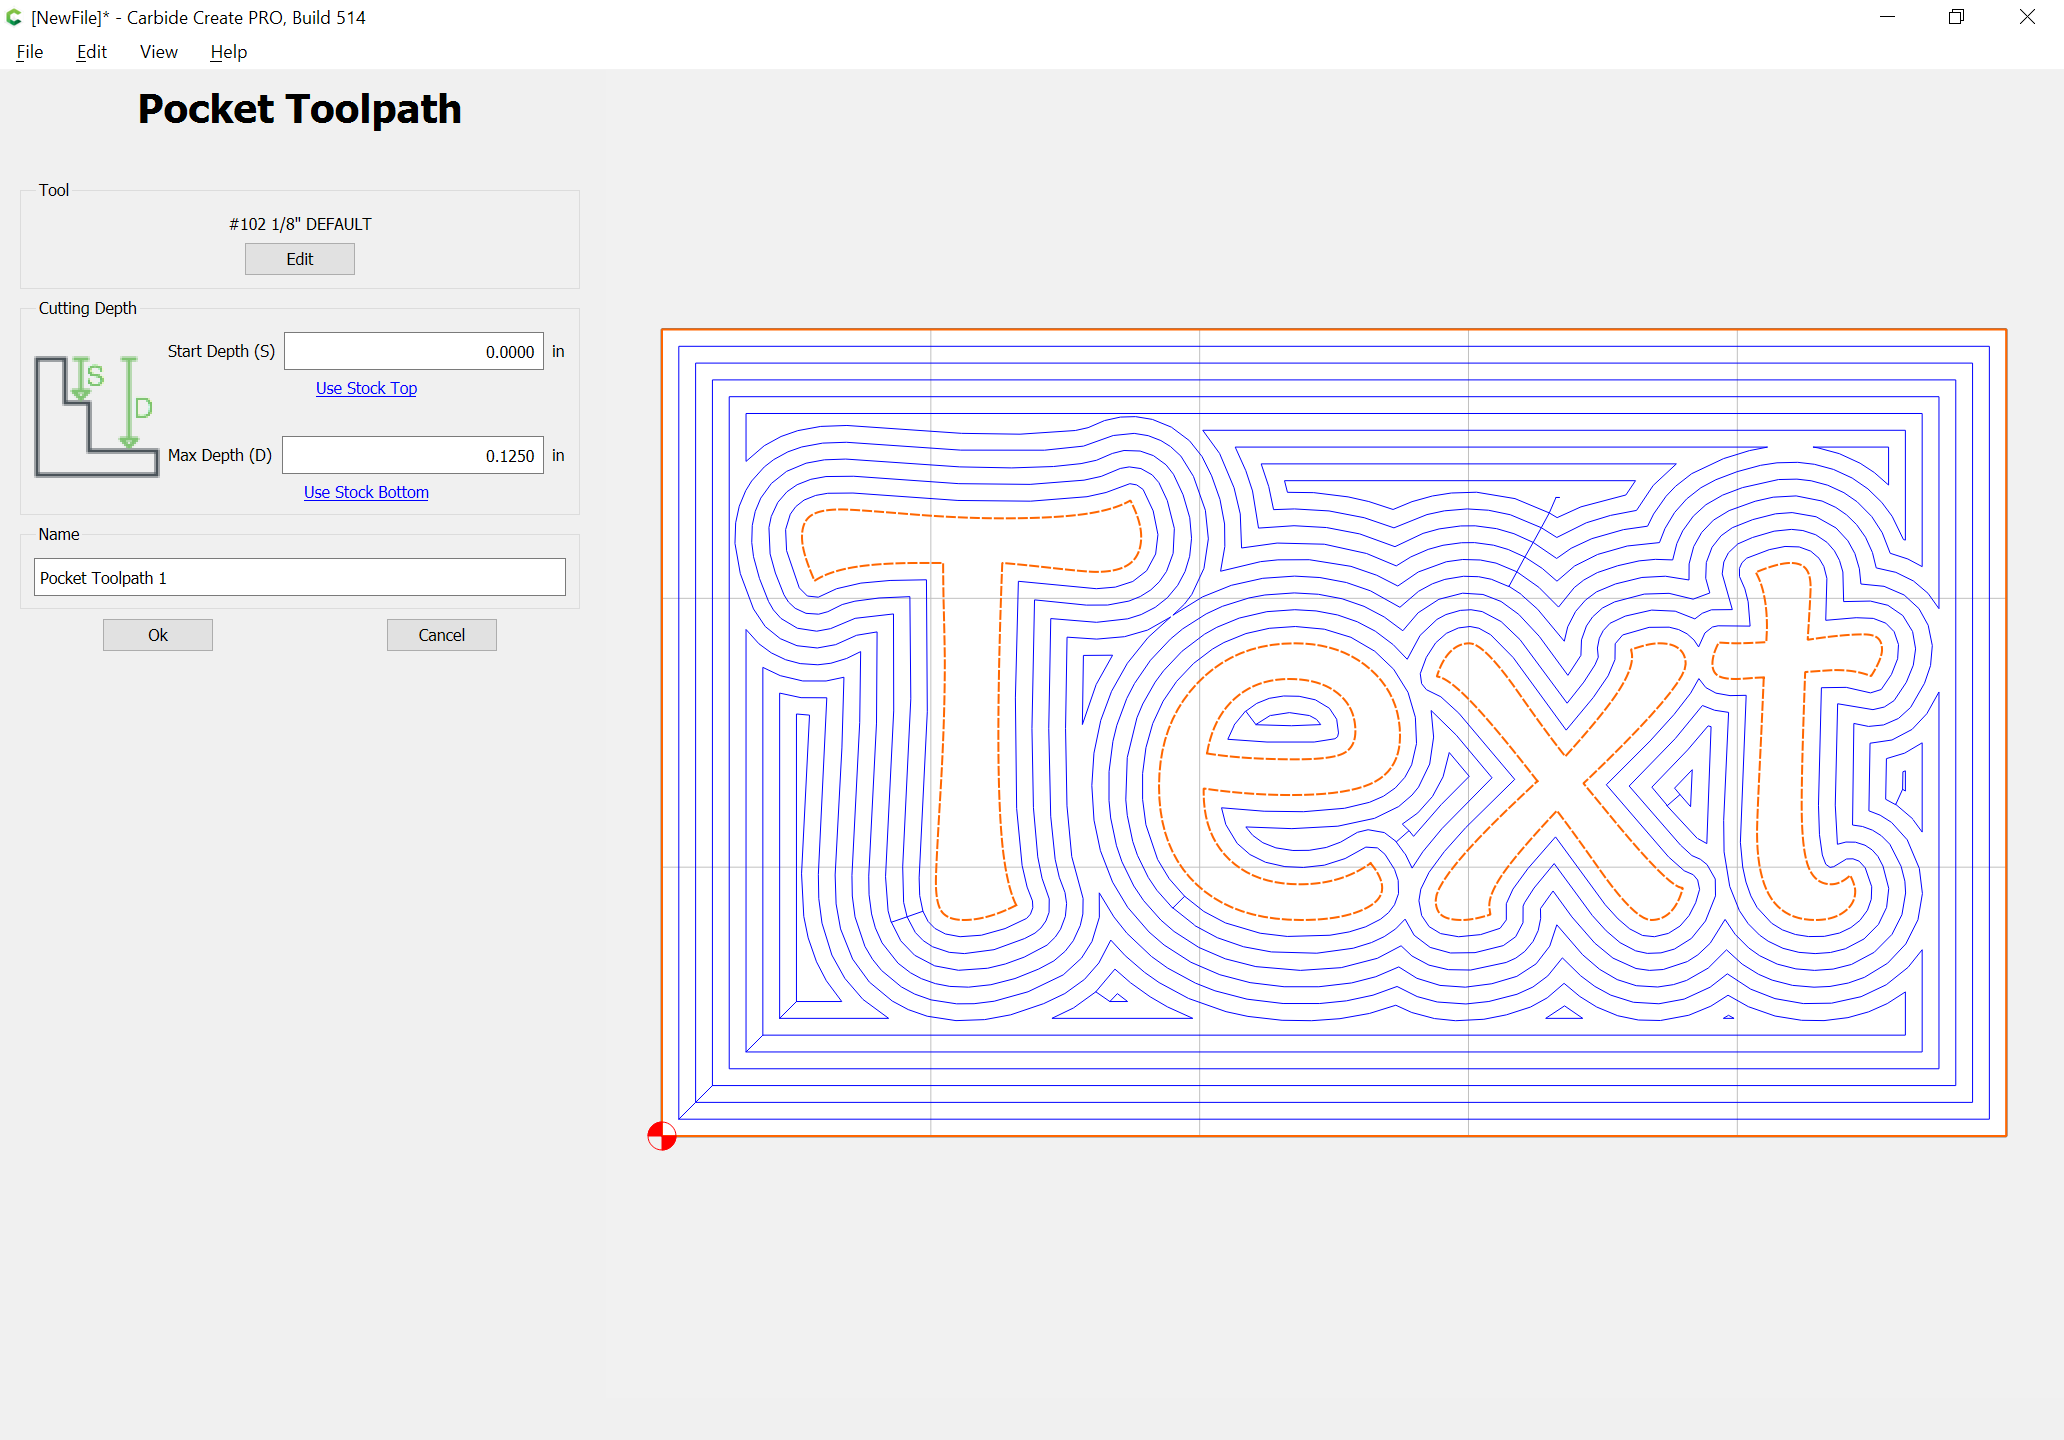
which previews as:

1 Like
Will. Thank you for your prompt response! After about 80 tries I finally zoomed out to find all my words. I was zoomed in to tight to see them. It figures as soon as I posted my dilemma I’d figure it out.
Regarding the sizing of the end mill’s I’ll do a rough and then a second rough with a smaller diameter end mill then do a finishing path. If you have any ticks or shortcuts I’d love to hear them.
there’s a trick you can do with the setup that will used
if you rough with, say, 1/8th endmill using a pocket (like Will did), you don’t need to do a full pocket with 1/16h… as long as the finer endmill is half or bigger of the roughing one, you can do just a contour of the text… which is much quicker than a full pocket operation.
(and you can do a 1/32th after the 1/16th since it’s half again)
2 Likes
Anytime you want to pocket text and the preview does not show all the letters cut your endmill is too big or you text is not big enough. That said a 1/16 inch end mill takes forever to pocket out letters so if possible for me I try to make my text larger until I get a good preview.
1 Like
My trick on this sort of thing is Advanced V carving w/ pocket clearing — better detailing, faster cutting.
1 Like
I was just trying this yesterday and ran into an interesting (to me) discovery. I was trying to make a sign with raised letters in dry redwood. I noticed that the clearing path would occasionally create long shards of debris, which would sometimes break off parts where the raised letters will be, ruining the project. My quick solution was to cut the fine details first to isolate the raised letters from the rest of the project. I then did the clean out using the larger endmills and it worked pretty well. I do not know if this technique is necessary on hardwood.
I wonder if there is a downside to this technique…
Bill
1 Like
If I’m understanding this procedure, your first cut is a slot with a narrow endmill; not the best for precision or bit survival.
1 Like
Hi David.
I agree that it is not the best solution, it was the only way to defeat the 3 inch long chip outs. Various feed and router speeds made little difference.
Still learning. It’s a slow process for me! 
Thank you Fenrus and ALL. My plan is to take the approach Fenrus recommended. But I appreciate everyone’s help! I’ll share with the group when the dust settles after Christmas. Suffice it to say I’ll be milling sterling with various end mills but for this project I’ll use square from 1/8" to 1/32" Probably going between .100" to .085" in depth. I’ve milled a lot of sterling but never using CADCAM. I’m open to any feedback and I’m happy to share my experiences going forward.
1 Like
This topic was automatically closed 30 days after the last reply. New replies are no longer allowed.