I’m a student researcher at the University of Arizona and my group recently got a Nomad3 for making up custom experimental apparatus and jigs which I’ve been in charge of. Our experiments take place in vacuum chambers, which requires parts to be made out of aluminum, and some are also in a cryostat (super refrigerator) which requires high thermally conductivity and so those parts have to be made out of copper. I’ve gotten some good use out the machine already and I’m impressed that its able to make parts up to experimental quality.
I thought I’d share some of my projects and how they were done, especially the copper pieces, as I haven’t seen anyone else milling bulk copper. I hope the information is useful.
Example Pieces: Chip Sample Holders
These are “hats” which sit on top of optical posts and provide a platform for safely and reliably loading and positioning experimental samples in and out of vacuum chambers. I designed them to be simply approachable with top down 2D milling; that is, having distinct levels where each successive one may be cut without running into those above. Different layers were ‘sliced’ into .svg files and then imported into Carbide Create which was used to generate tool paths.
Aluminum Room Temperature 4x Sample Holder:
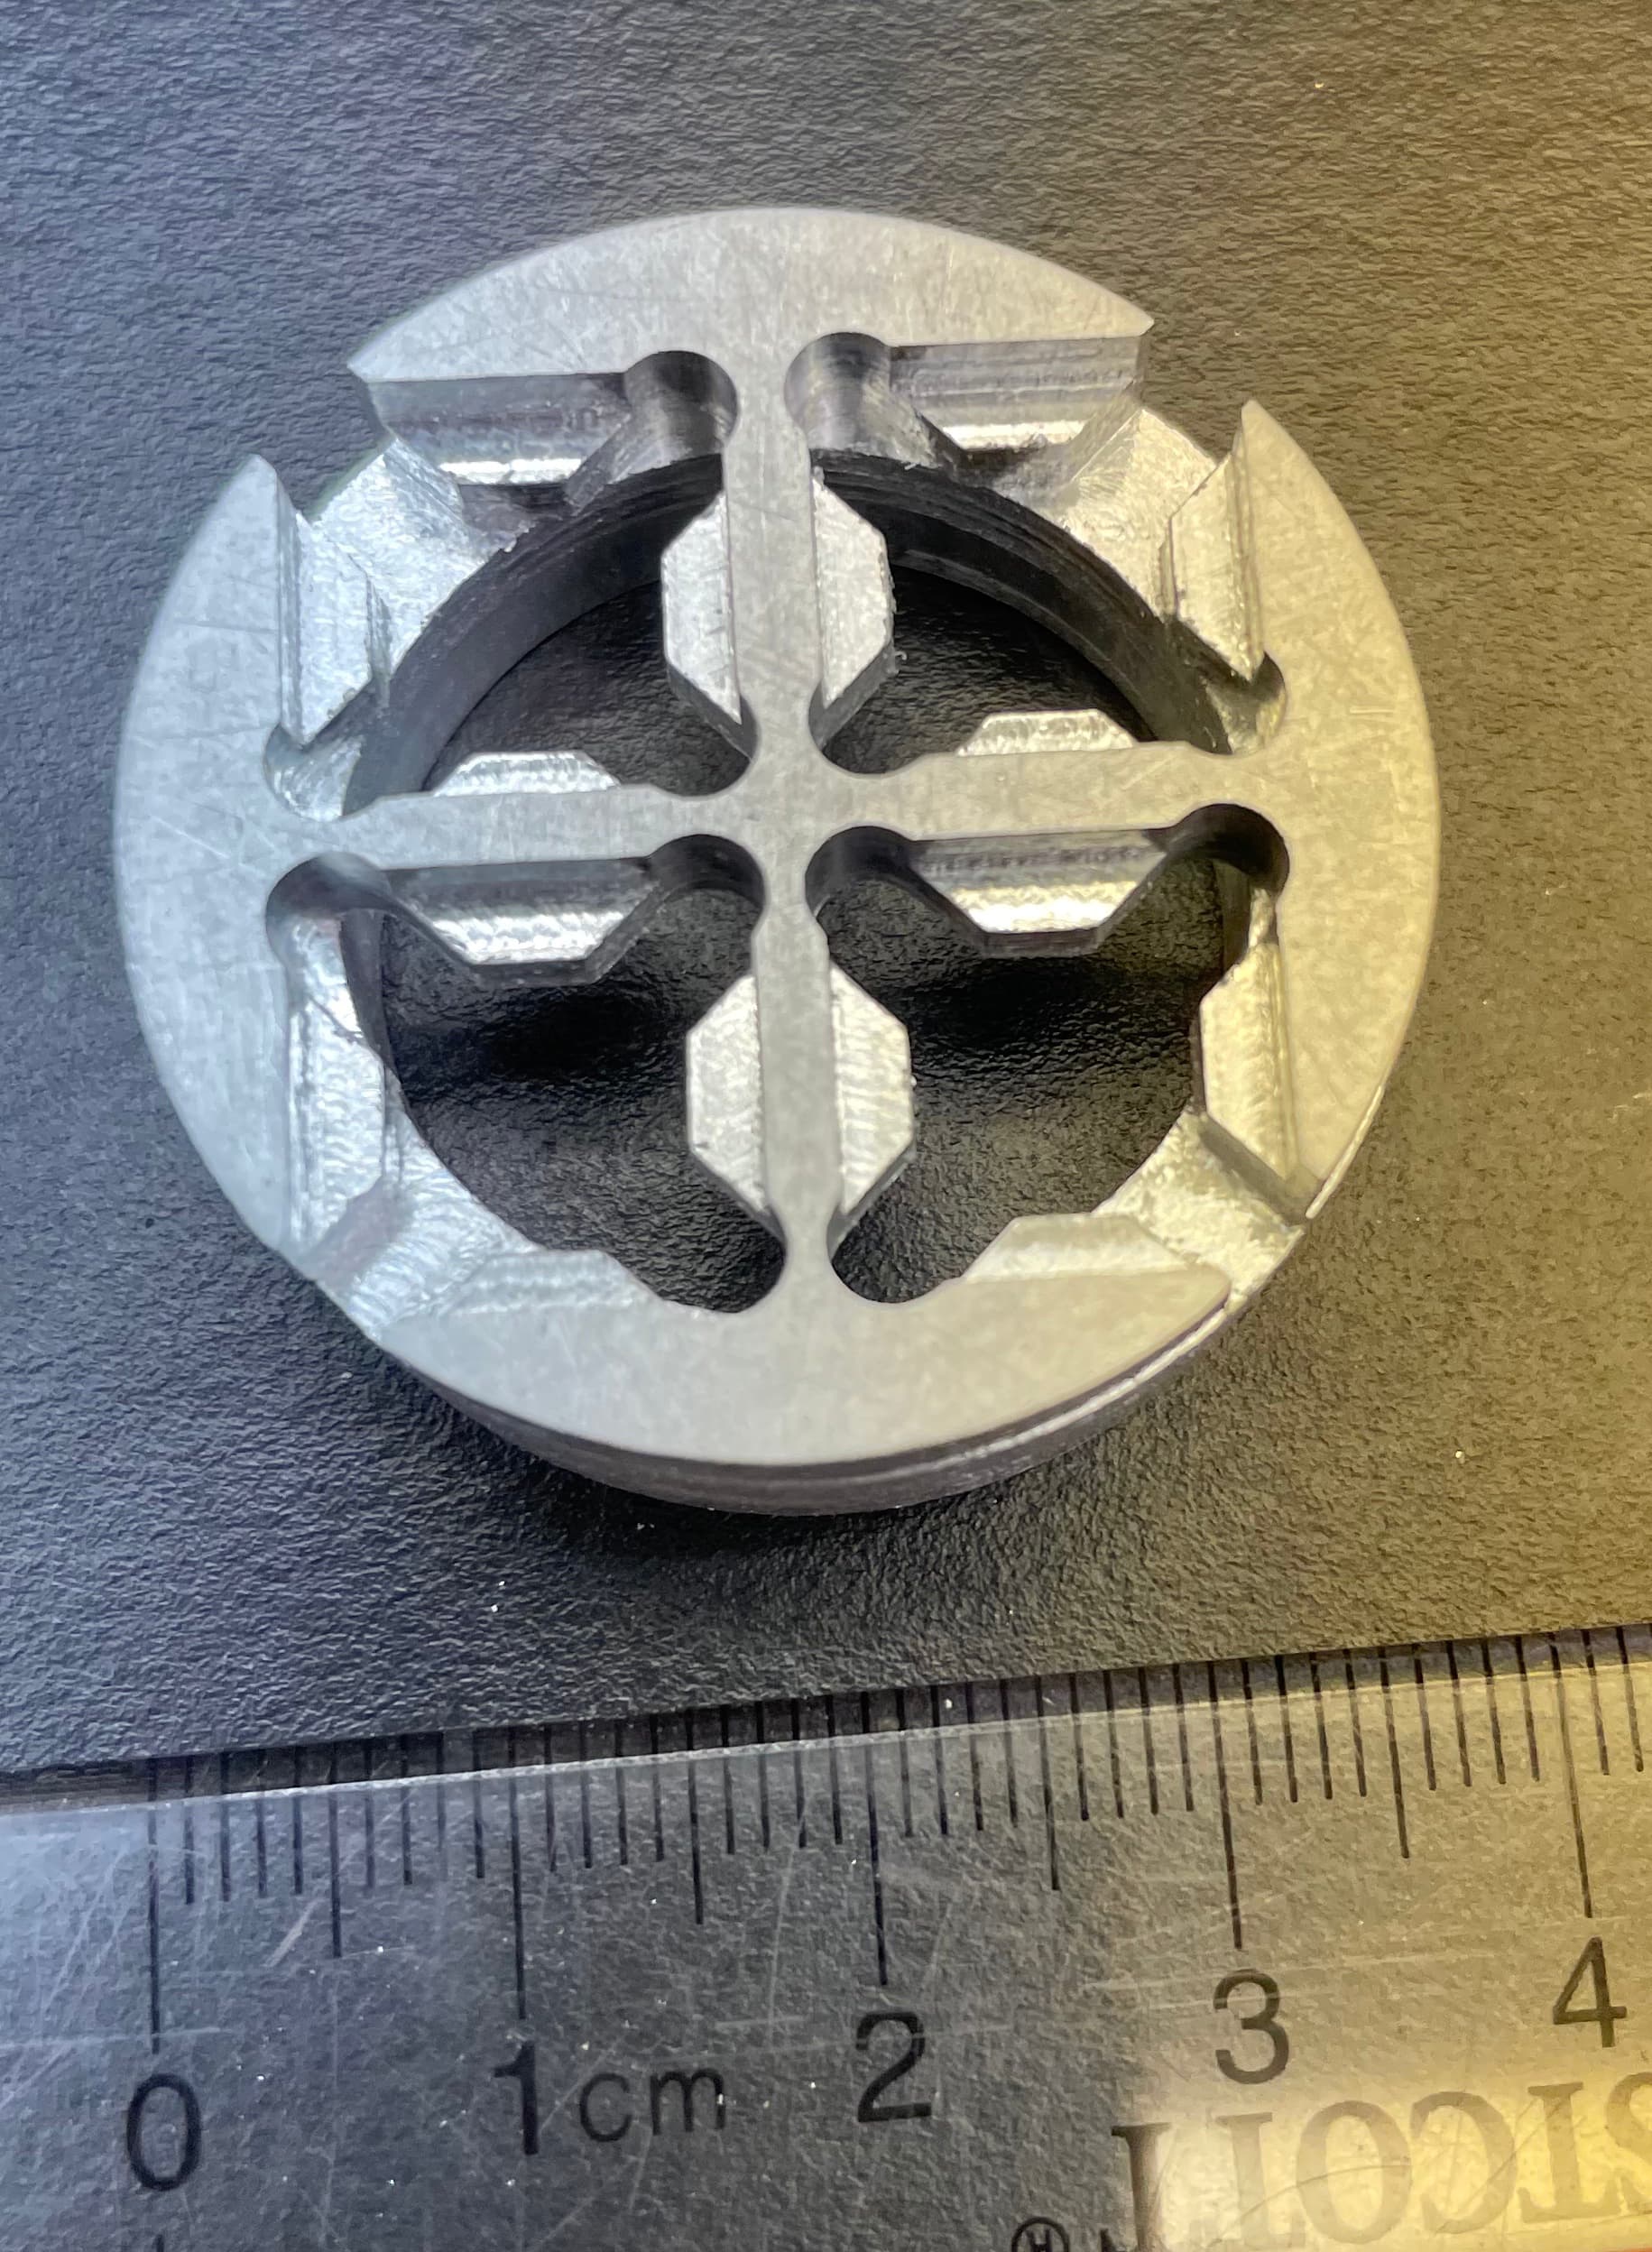
This was milled using a Speed Tiger 1/8" end mill. The Carbide 3D standard #102 1/8" end mills also work just as well. Cut in open air with no cooling. A small spindle fan, as included with the Nomad 3, was used for clearing chips.
Aluminum cutting parameters for a carbide 2-flute end mill:
Feedrate: 20"/min
Plungerate: 5"/min
RPM: 24,000
Depth per pass: 0.008"
Equivalent Chip Load: 0.0004
These are largely the default parameters which Carbide suggests for cutting aluminum and they’ve worked well for me thus far. I have tested a variety of different parameters including more standard ones found on large 5-axis mills, but find that these don’t work very well on the small desk-top machines, especially with no cooling. As a general rule, I’ve aimed for very small chips to avoid heat build up, which is simply accomplished by a very high spindle speed and a conservative feed rate.
Copper 4 Kelvin Refrigeration Single Sample Holder:
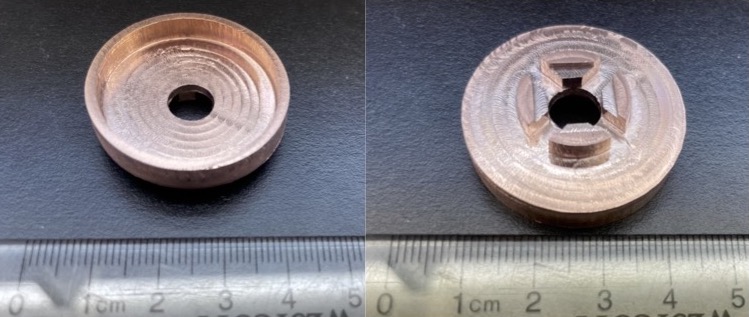
This was made using the same Speed Tiger 1/8" end mills, cutting in open air with no cooling and a small spindle fan for chip clearing.
Copper cutting parameters for a carbide 2-flute end mill:
Feedrate: 8"/min
Plungerate: 1"/min
RPM: 21,000
Depth per pass: 0.006"
Equivalent Chip Load: 0.0002
Important Note on Cutting Copper: You need sharp tools! This means new tools. Once the end mill blunts even a little, the cutting quality vanishes, the machine will start making horrible, loud noises, and you risk snapping end mills. Copper will wear them fast; I’ve found you get about one bulk cut per tool, even with conservative parameters. Worn tools are still good for cutting wood and plastic, but not metal.
The example above had three large bulk cuts: stock shaping, top, and bottom; each about 2 hours long and each one used up a brand new end mill. I am experimenting with cutting wax as a method for reducing tool wear and if anyone has other ideas to help with milling copper then I’d love to hear them. In any case, if you are cutting copper, do so with the expectation of using up end mills.
To achieve the nice shiny and smooth surface, I run a polishing cut with another brand new cutter. These final polishing cuts removes almost no material so doesn’t wear out cutting tools. I find that since the tools wear down during the course of a large cut, they leave behind an amount of grit on the final surface. This can be easily sanded away, but I like taking the polishing cut since it both cleans the part and trues up the final dimensions.
The parameters chosen give exceptionally small chips and keeps both the tool and stock from over heating. This is especially important for cutting copper; if the tool heats up it will friction weld itself to the part. After long program runs, about 2 hours of continuous cutting, the end mill and part are only slightly warm to the touch and are safe to handle with bare hands.
Workholding:
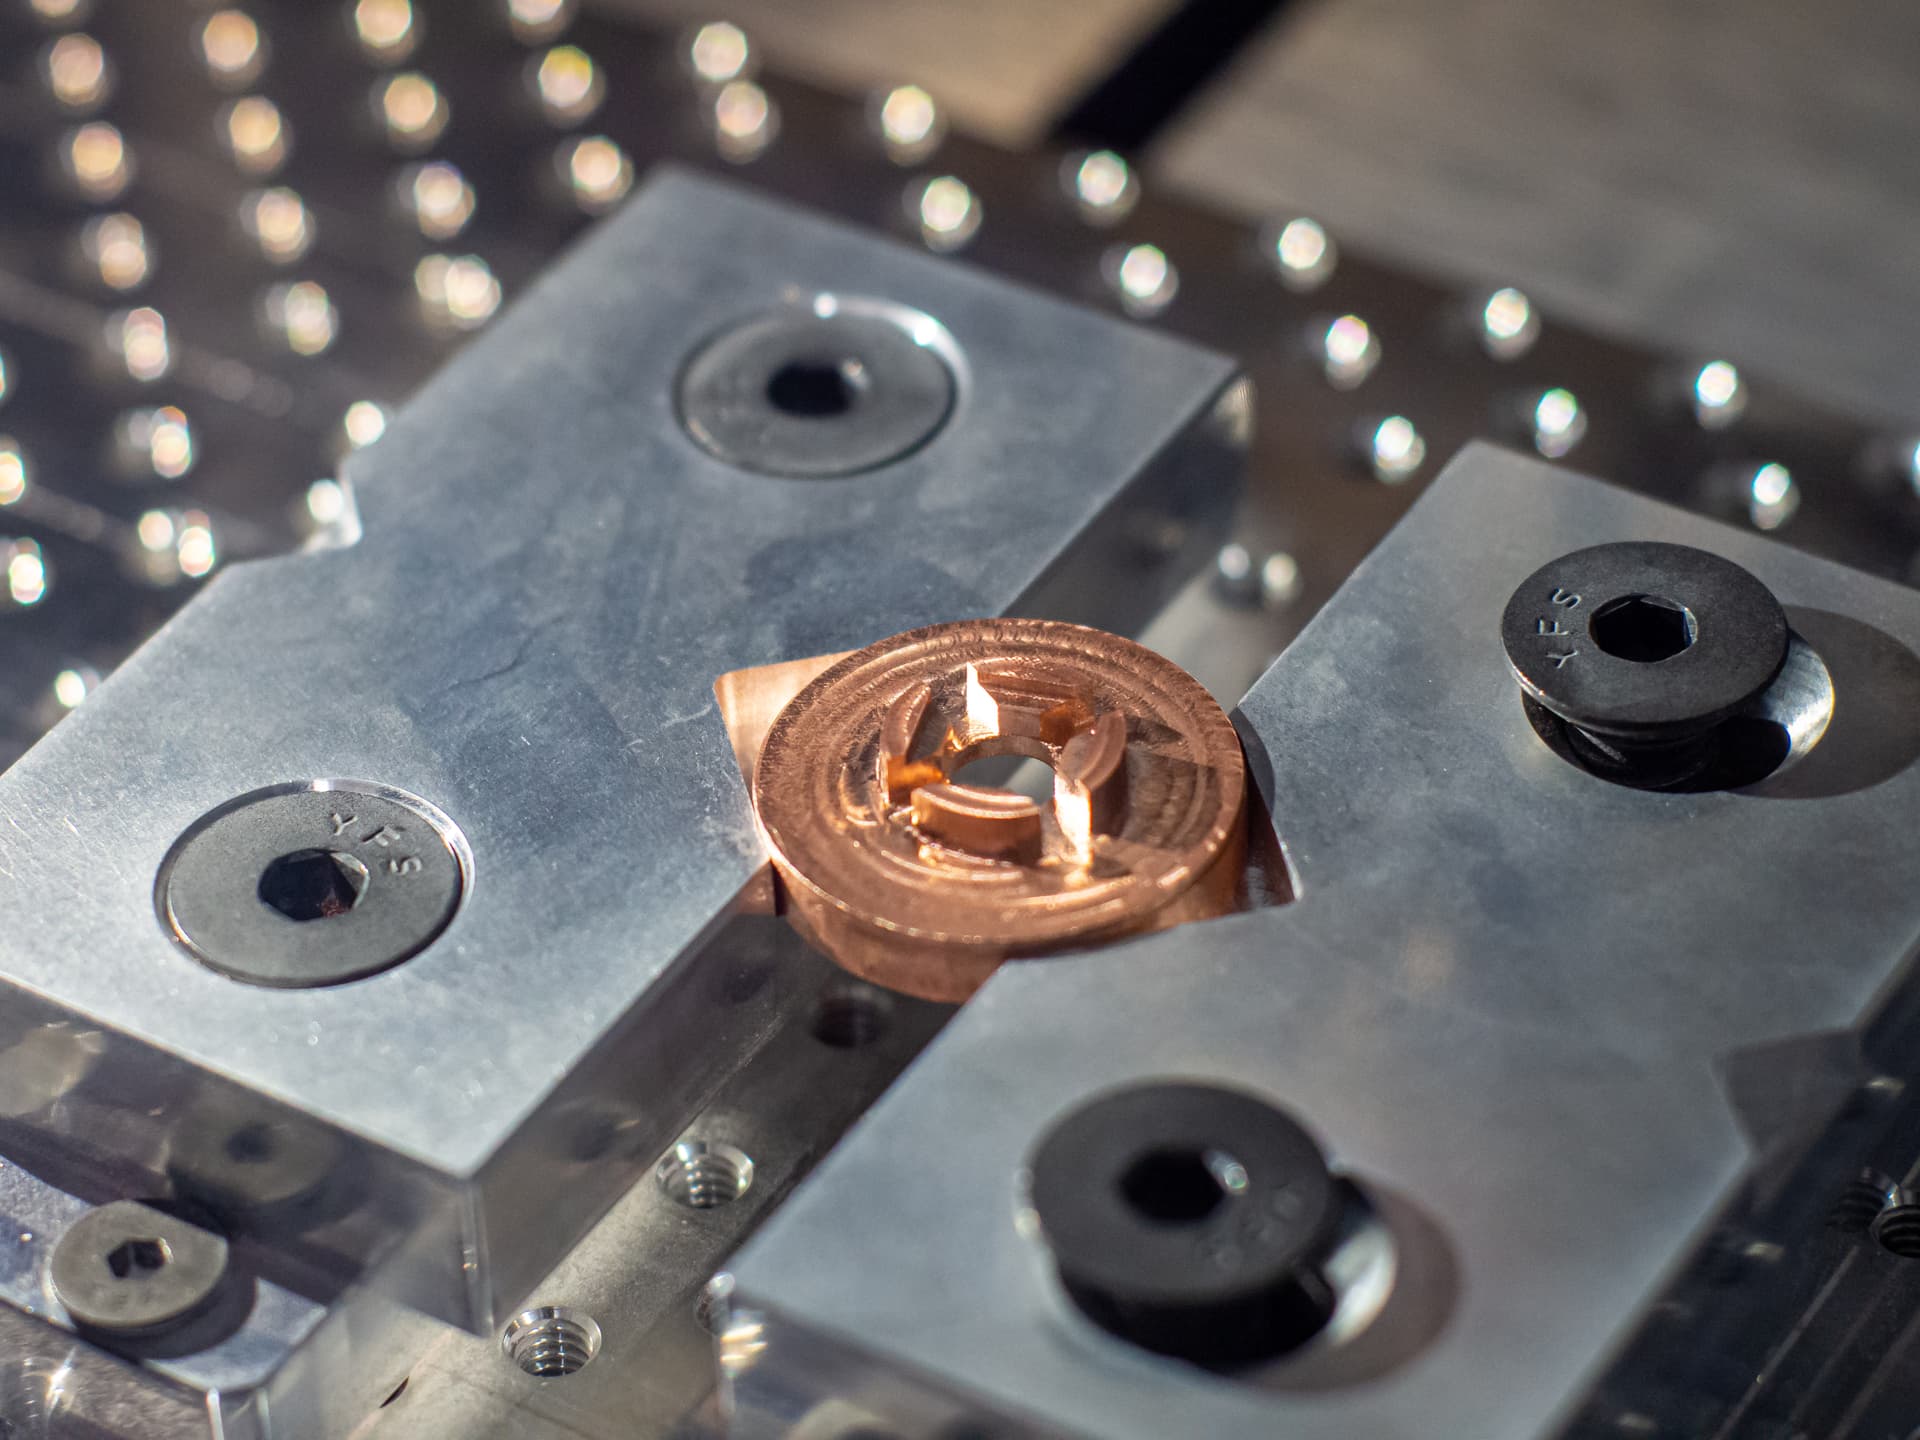
In order to hold circularly symmetric parts, I use these modular vices with aluminum soft jaws, cut with a v-groove. This establishes four points of contact for reliable work holding up to and including metals. This method also allows for the parts to be flipped over halfway through the process and the zero to kept with an accuracy of ~5 thou (0.1mm, or a literal hair’s width). If anyone is interested in this method for zeroing on circular parts I’ll make a separate post on that, it’s easy with this approach.
Note that the design of the parts only has one face with square features. While the radial zero may be kept very well, there is no control over the spin of the part. If both sides must have squarely oriented features, parts need to be cut from square stock and then circularly interpolated.
While the parts are rather specialized, here are the CAD files for the parts if anyone is interested:
Single Sample Holder Rev 3.stl (52.4 KB)
4-Well Plate Rev 12.stl (127.1 KB)