I’m trying to cut out some shapes in 1.3mm thick aluminium on a Nomad3 using the #112-Z cutter. I believe the alloy is 6061 but I might have been misled.
The sheet is first clamped and some mounting holes are pocketed. Then the clamps are removed so that the outside profile can be contoured and some internal cutouts also contoured. The internal cutout sections are also held down by screws (M2.5 machine screws into a Acetal base)
The default feeds and speeds resulted in a very tortured sounding cutter. I reduced the depth of cut from the default 0.2mm to 0.1mm and sprayed WD40 into the contour track very few laps. This cleaned up the burrs on the top surface, and controls the noise, but it’s still not a great solution.
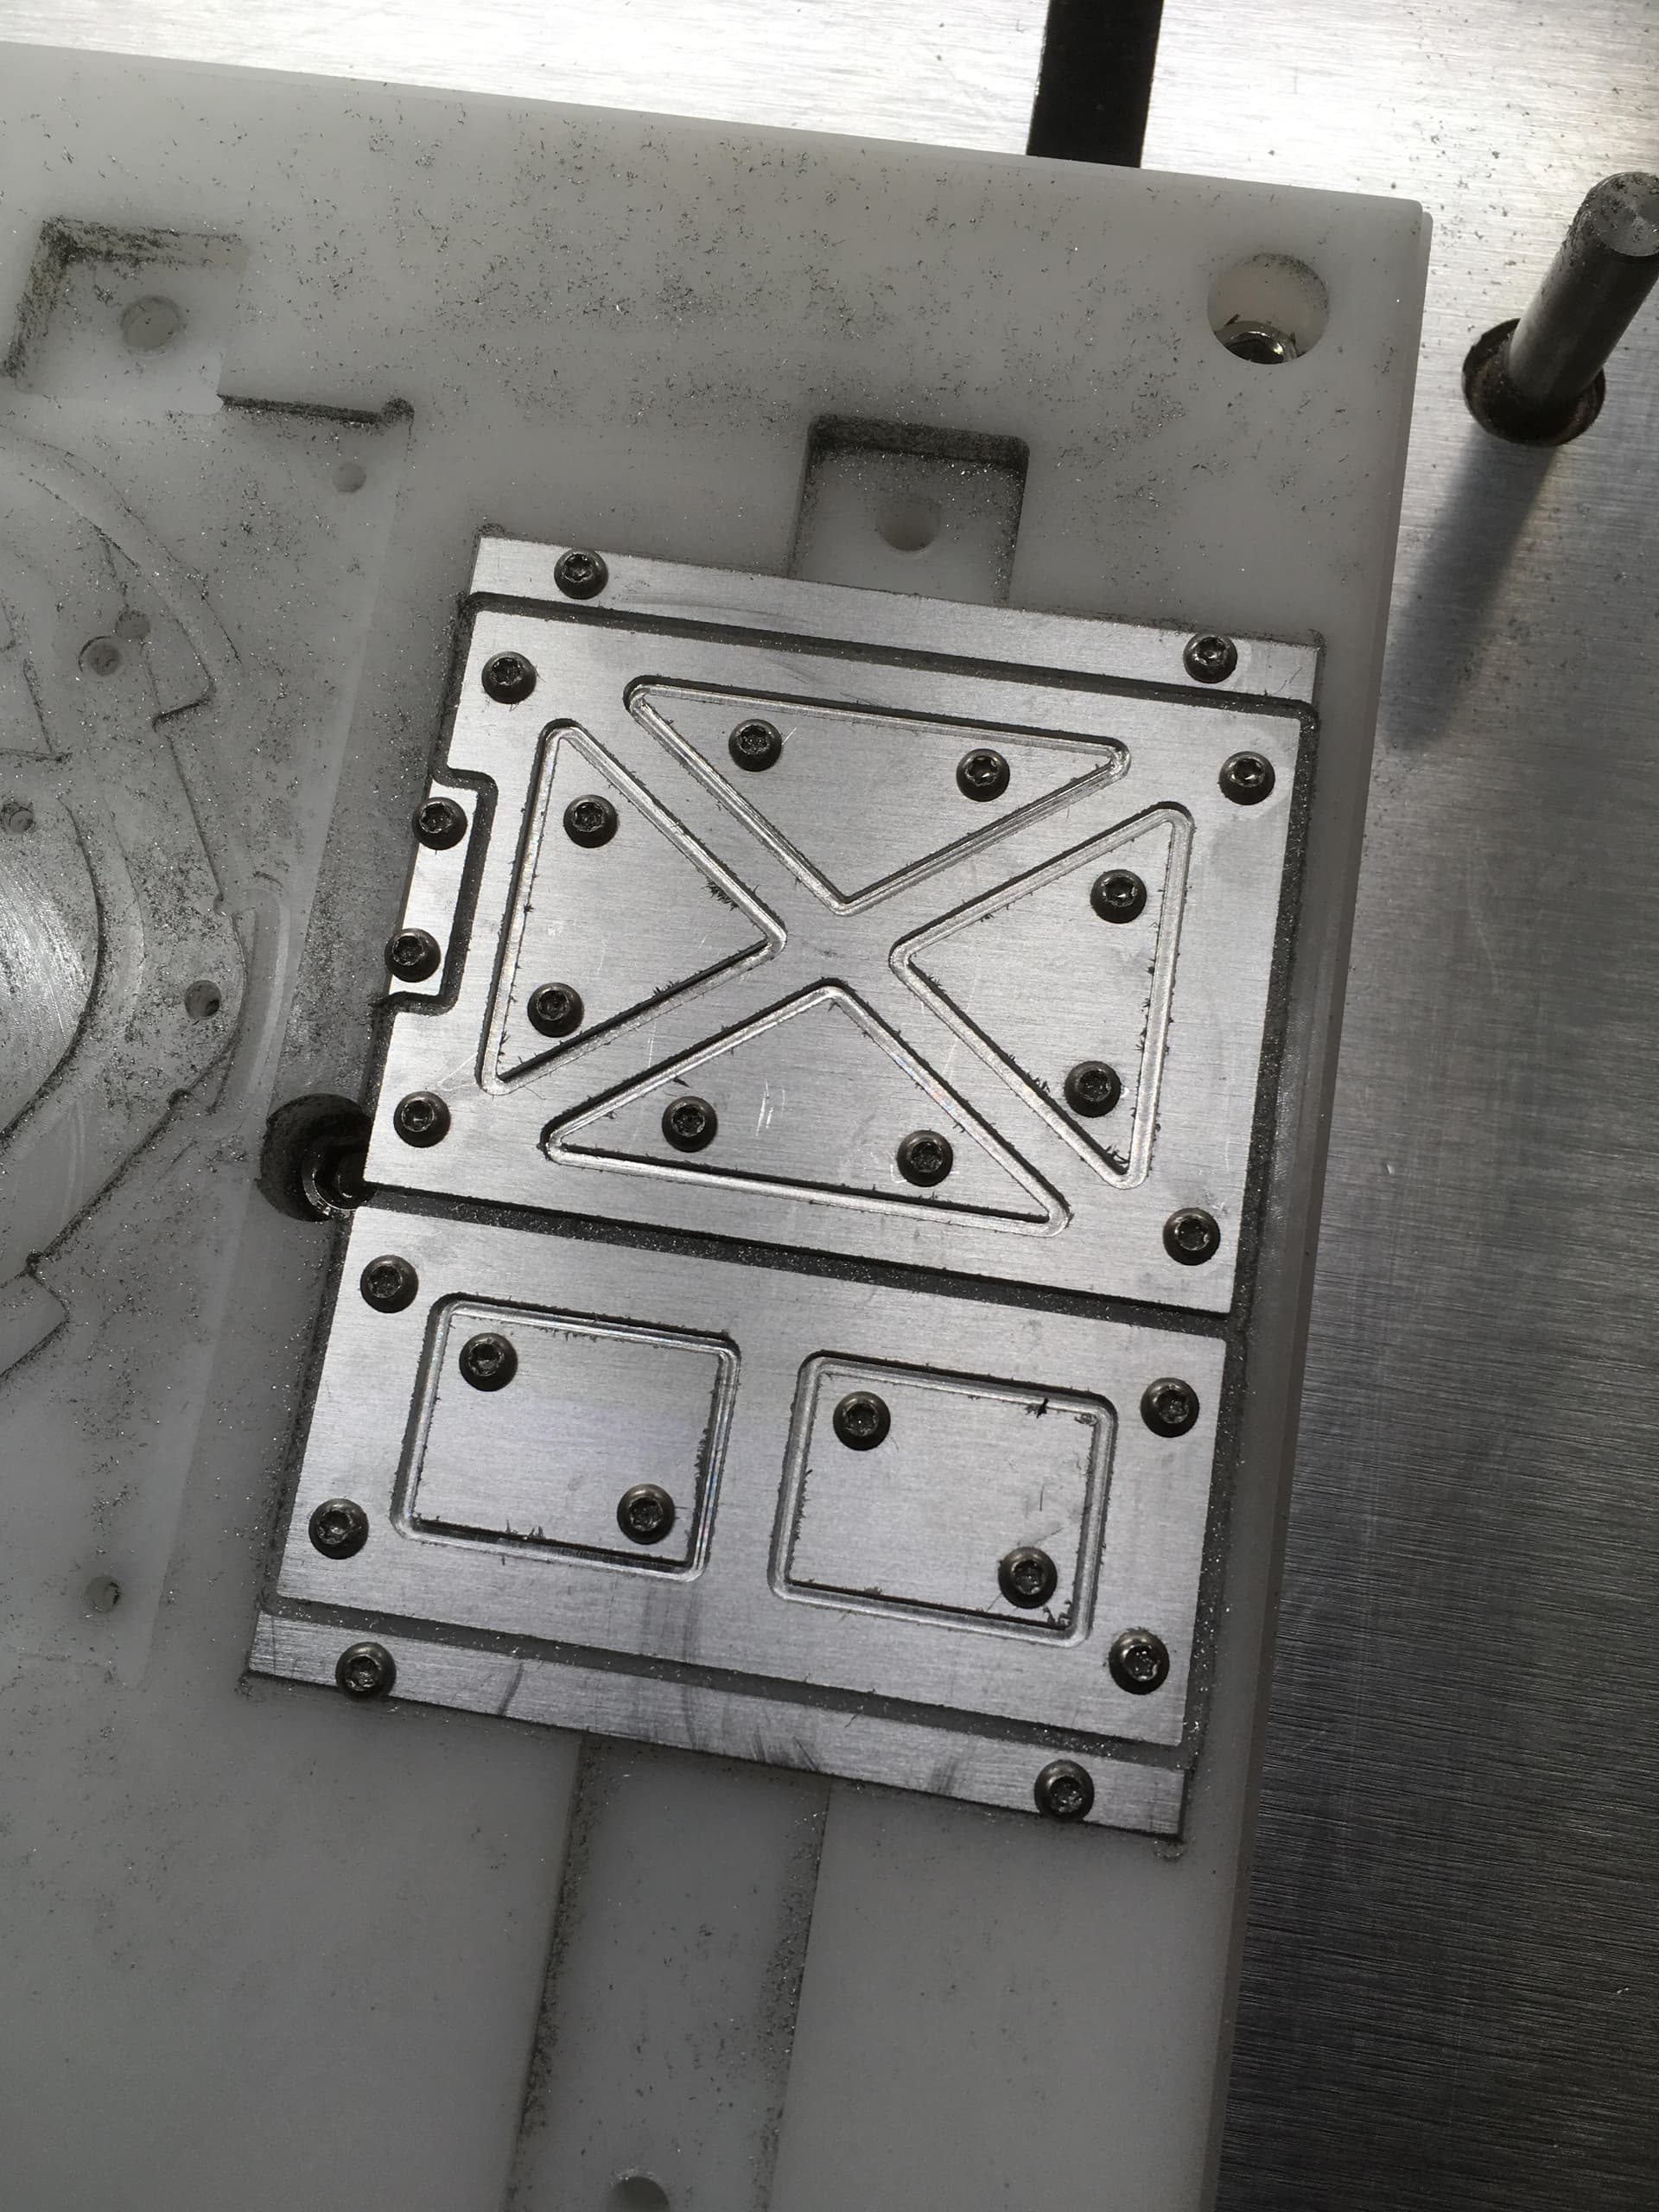
I tried reducing the cut further to 0.05mm and this meant I only had to pause and lube twice during the full 1.3mm total depth. The two little parts in the photo take about 90mins of machining time.
I don’t mind it taking that long, but I do worry about being so far away from the default values. I know that many folks here say the lubrication is essential for aluminium, but I would really rather avoid it if I can. I haven’t had the same issues with the #102-Z bit using the default settings.
Would I be better reducing the feed rate rather that depth of cut? Am I just wearing out the bit by running it too gently and I should learn to put up with the noise?
Has anyone found a setup that works well using the little #112-Z on dry aluminium?
I ran it through FSWizard & got the same F&S (24000 rpm, 20ipm (~500mmpm)
However it’s showing 0.109" (2.75mm) DOC, and 0.011" (0.25mm) WOC/Stepover
It looks like you are slotting. i.e. using the entire width of the cutter, so about 1.5mm
So based on CC numbers you should reduce your depth to about 0.0012" (0.03mm)
But, if it’s cutting well at 0.1 or 0.05mm, I would stick with that.
Check out that video from @wmoy from the Nomad Pro days (you can just multiply the RPM AND feedrate by 2.4 if you want to leverage the higher max RPM of the Nomad3)
You may also alternatively consider double-sided tape / tape&glue workholding to remove the need for manual changes in the workholding during the job. For small pieces like that it works just as well.
I wouldn’t say that lubrication is essential, I would rather say that keeping the temperature of the cutting area below the aluminium melting point is essential, and lubrication is one way to do it. The other elements are to avoid rubbing (i.e. having a high-enough chipload), and making sure chips do not get stuck and are not recut.
The chipload for 24k/20ipm is a little low for my taste (20/ 2 x 24k = 0.0004"), you may be borderline-rubbing and things may improve if you increase feedrate by 50%. By the way, Winston’s F&S from the video, extrapolated to 24k on a Nomad3, would be 34ipm, not 20.
Also make sure your endmill is still nice and sharp, a dull endmill will result in rubbing too.
To prevent chips from being recut, a typical solution is to install an air blast aimed at the cut (a number of Nomad users have done that). As far as I am concerned, and for aluminium, on a Nomad it’s a better strategy than lubrication (steel is a different beast), and a much less messy one too.
Thanks for your replies. I have a plan for the next step combining both sets of advice: I’ll reduce the pass depth further to 0.03 and then manually tweek the feed rate using the buttons on CM. I’ll have a chance to do this later today and report back.
@Julien: I sometimes do use double sided tape, but when I’m making more than one of anything I use a jig. It’s a weakness - an obsession - some say a disease …
Cutting dry at 24k, 0.03 mm depth per pass, at 813mm (32inches) per minute, gave clean results without scary noises. This works out at 160% the default feed rate. The next +10% feed rate step started to make unhappy noises, so I backed it off.
Twice, it started making a rougher noise. I paused the job and used my thumbnail to clean out some accumulated swath from the flutes. None of it had welded on. Then I closed the lid and re-started. The bad noise had gone. I imagine that an air blast system would fix this issue.
It’s still roughly 2 hours, but at least I’m not having to keep pausing to spray. Obviously this is too slow for a production environment, but for prototyping it’s fine
Told you it’s counter-intuitive, biting slightly more into the material tends to stabilize the endmill, and keep it from oscillating/bouncing off the surface, which produces the horrid sound (chatter).
Now that you have the feedrate dialed in, you may want to incrementally increase the depth per pass too (until the machine starts complaining again and then back it off). Winston used 0.2mm depth per pass in that video, so I think you should be able to triple or quadruple your current DOC, but again the machine will tell you.
Cutting at too low a DOC can actually have the same result as cutting with a too low chipload: if the bottom of the endmill does not bite deep enough into the material during the cut, there is a risk that it will rub/melt the surface as much as cutting it, and then you get chatter again.
I must jump in here and recommend using single flute endmills.
I find that 2.5mm single flutes are the sweet spot for the Nomad 3.
But 1.5mm single flutes are amazing too on alu compared to any multi flute.
Just for when you go into higher volume, and you will not be disappointed in the results either.
Also - Instead of slotting on the outside. Using CC create an offset about 10% larger than the width of the endmill for the contour, and then pocket it instead.
I usually do pocket with some margin rather than this narrow slot approach. The 2.5mm mounting holes. for example, were all pocketed with the #112-Z.
I guess I wanted to try something new. It does have the advantage of not producing much swath!
I did have a 1/8th single flute, but I broke it when it was less than 10 seconds old, when some double sided tape let go . I haven’t got around to buying a new one. I didn’t know they came in 1/16th too.
I have two more sets of these things to make, so I’ll try some more aggressive depth of cut variations and let everyone know how it goes.
I tried the 0.05mm depth per pass with the faster 800mm/min feed.
This resulted in much more chatter with a correspondingly rougher surface finish on the walls. Nothing actually broke, but I’m not emotionally brave enough to run a machine that sounds in pain. I went back to 0.03mm. I’ll finish the prototype run on those settings and next time set things up to use a thicker bit and pocketing.
Meanwhile I’l looking at aquarium pumps for an air blast. (There’s no compressed air available)