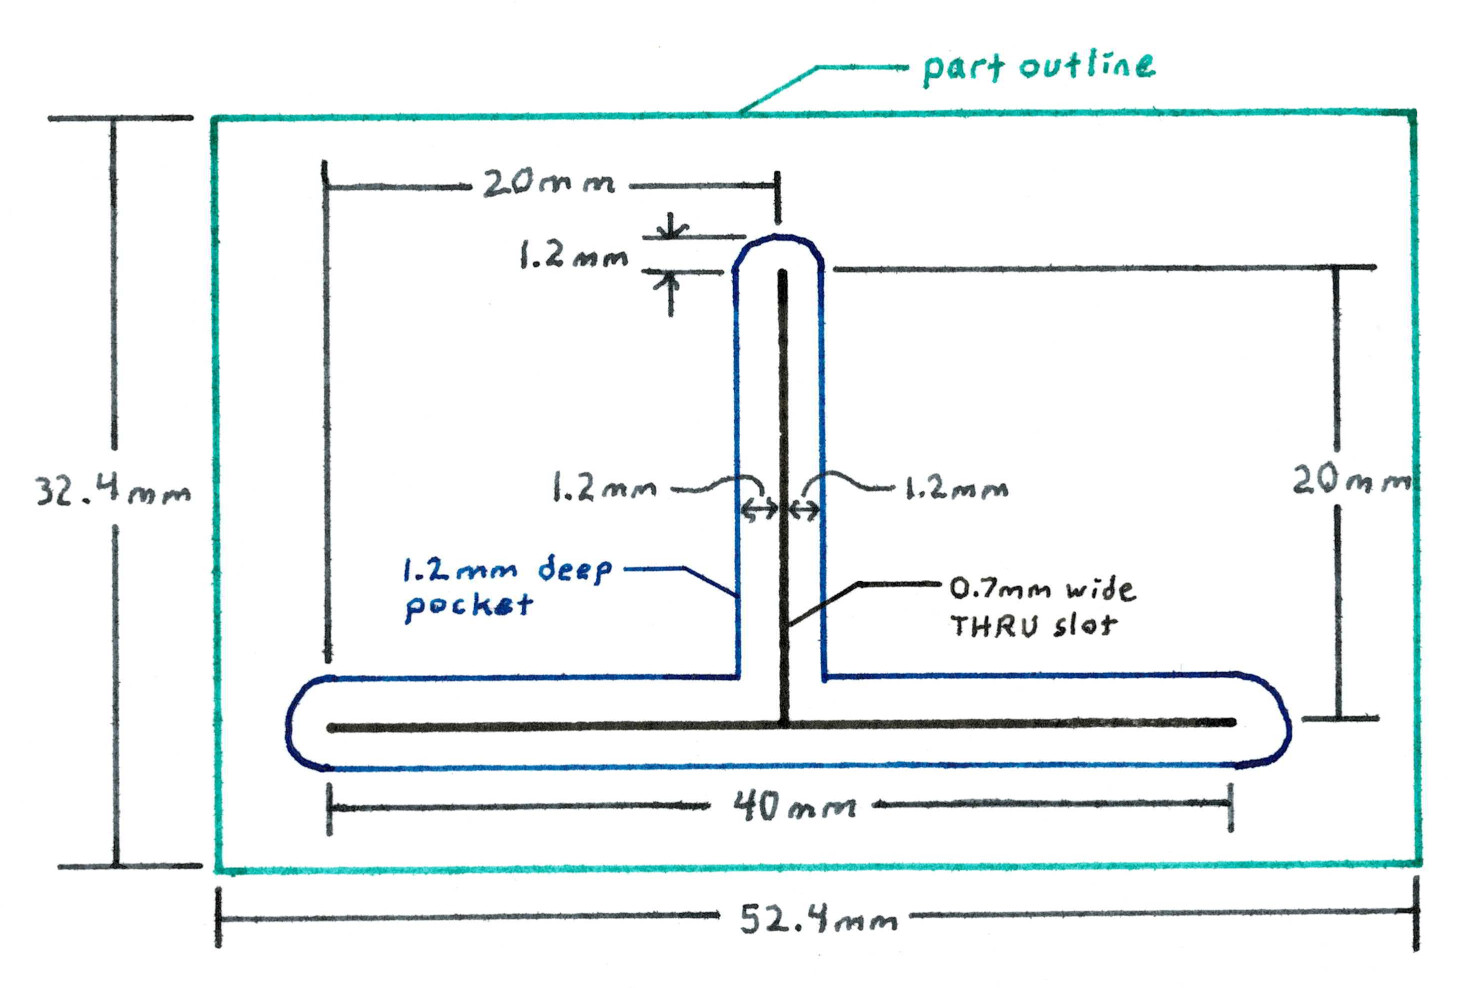
I’m considering getting a Nomad 3 to make drafting stencils in acrylic, likely 1/8" thick clear cast acrylic.
Some of the stencils would involve cutting a ~0.7mm (~0.028") wide slot all the way through the material for line art with a technical pen. This slot would be surrounded by a pocket with 1.2mm (0.047") width on either side of the slot and 1.2mm (0.047") depth to create an inking edge (prevent ink from wicking between stencil and paper). I would probably cut the pocket first, so the narrow slot would need to be cut to ~1.98mm (~0.078") depth.
Is this possible to do in acrylic with the Nomad 3?
What kind of bit is good for this? I was thinking the 0.5mm (0.0196") extended reach 1-flute cutter from Precision Bits for the narrow slot and perhaps the 1.59mm (0.0625") ZrN 1-flute cutter from them for the pocket.
Finally, suppose I want to make a drafting triangle out of a square piece of acrylic on the Nomad 3. Is it possible to align the workpiece so square to the machine that I would only need to cut the diagonal part of the triangle? Or is it recommended to work “inside” the starting material and cut all the way around the part being created for best accuracy?
Thank you so much for offering to cut an example part. Here’s a drawing of a simple test article; let me know if it makes sense or not. Idea would be to use 1/8" thick acrylic for the piece.
I cut some one mill, thick laminate. I had a very hard time keeping it flat. If I have to do it again I’m gonna make myself a small vacuum table so that’ll hold it flat in the middle. Keep it from bouncing around just some thoughts.
Ah, yes, that part is not clear. I intended 1.2mm to the edge of the 0.7mm slot, so 3.1mm total width for the pocket, but it would be fine as an example part either way. I’m primarily curious if the 0.7mm through slot turns out.
And thank you, but it’s not exactly by hand. I have a drafting board with a parallel bar and triangles.
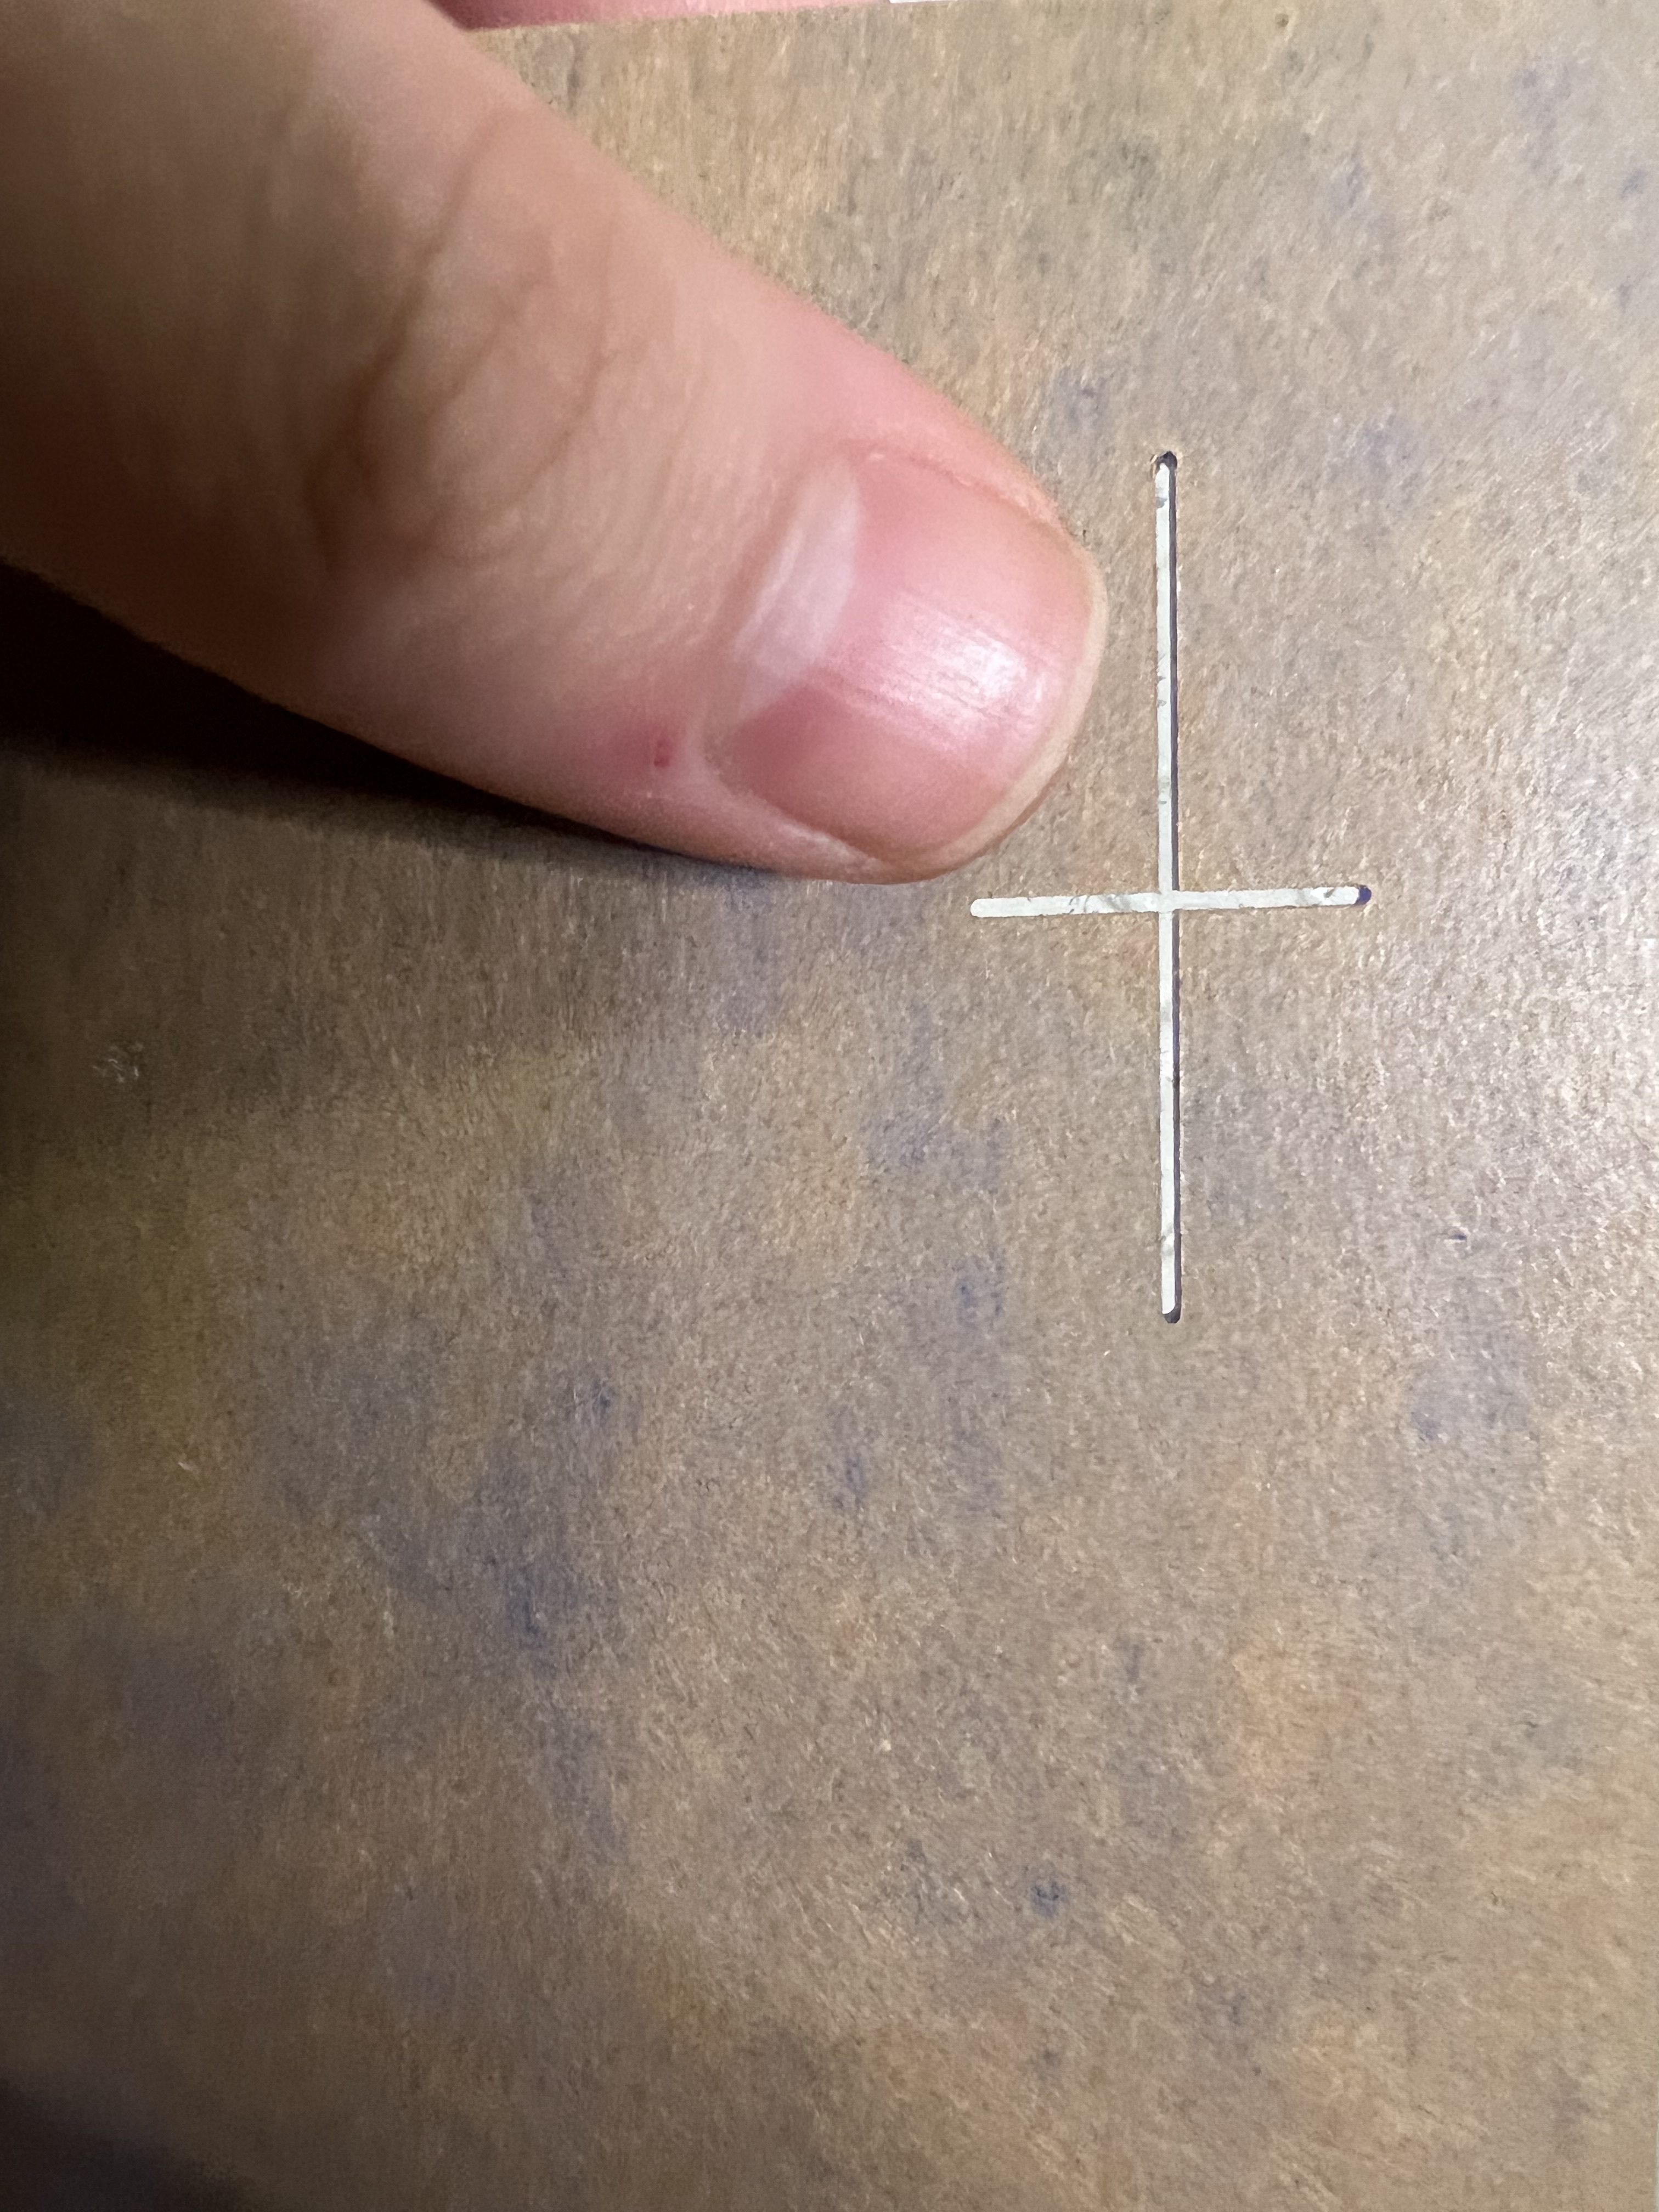
So my stock is quarter inch but i went to 1/8" to sort of simulate it. Went down 1.2mm (used a 2mm corncob endmill to pocket it)
Then i want down to 1/8" depth with a 0.8mm corncob endmill… the corncobs were already out
Good news: I’d wager you can run these pretty successfully and consistently. I put in very little effort and used carbide creates default “hard plastic” params. Just a pocket for slot clearing and a contour for the small slot.
You could probably spend some time on params and throw a little air blast on it to really shoot for consistency. Even without all that it’s pretty good.
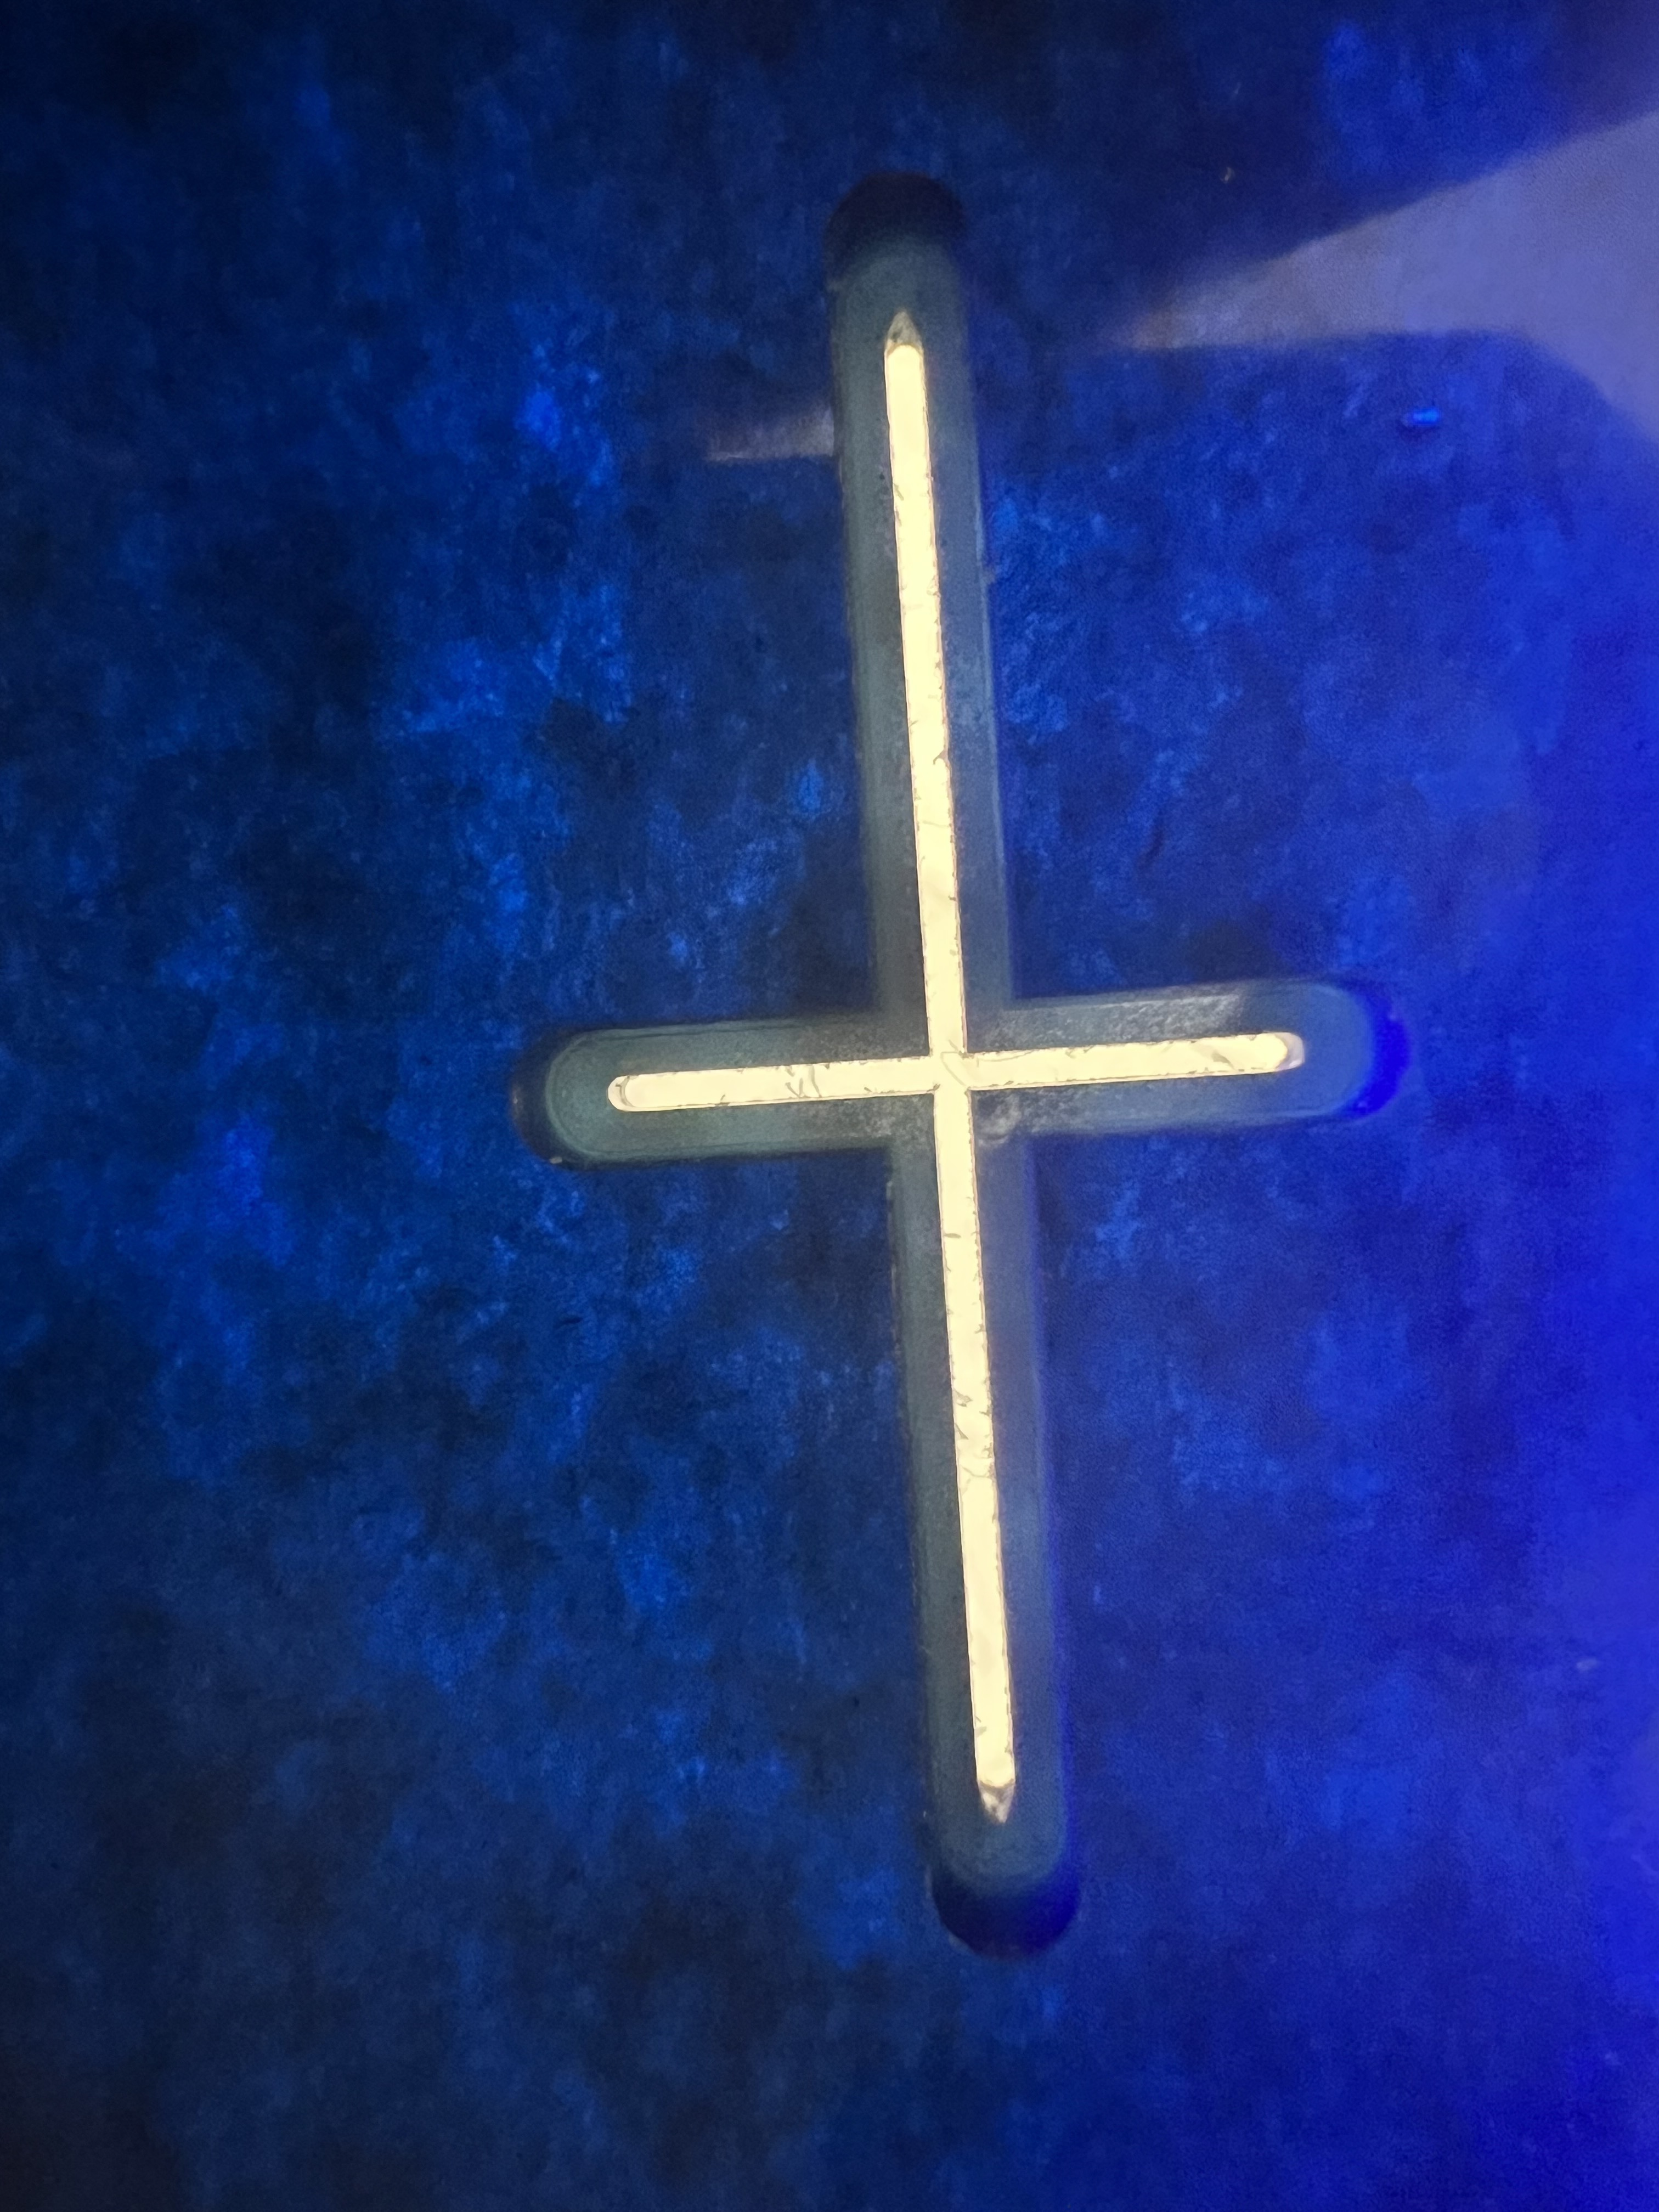
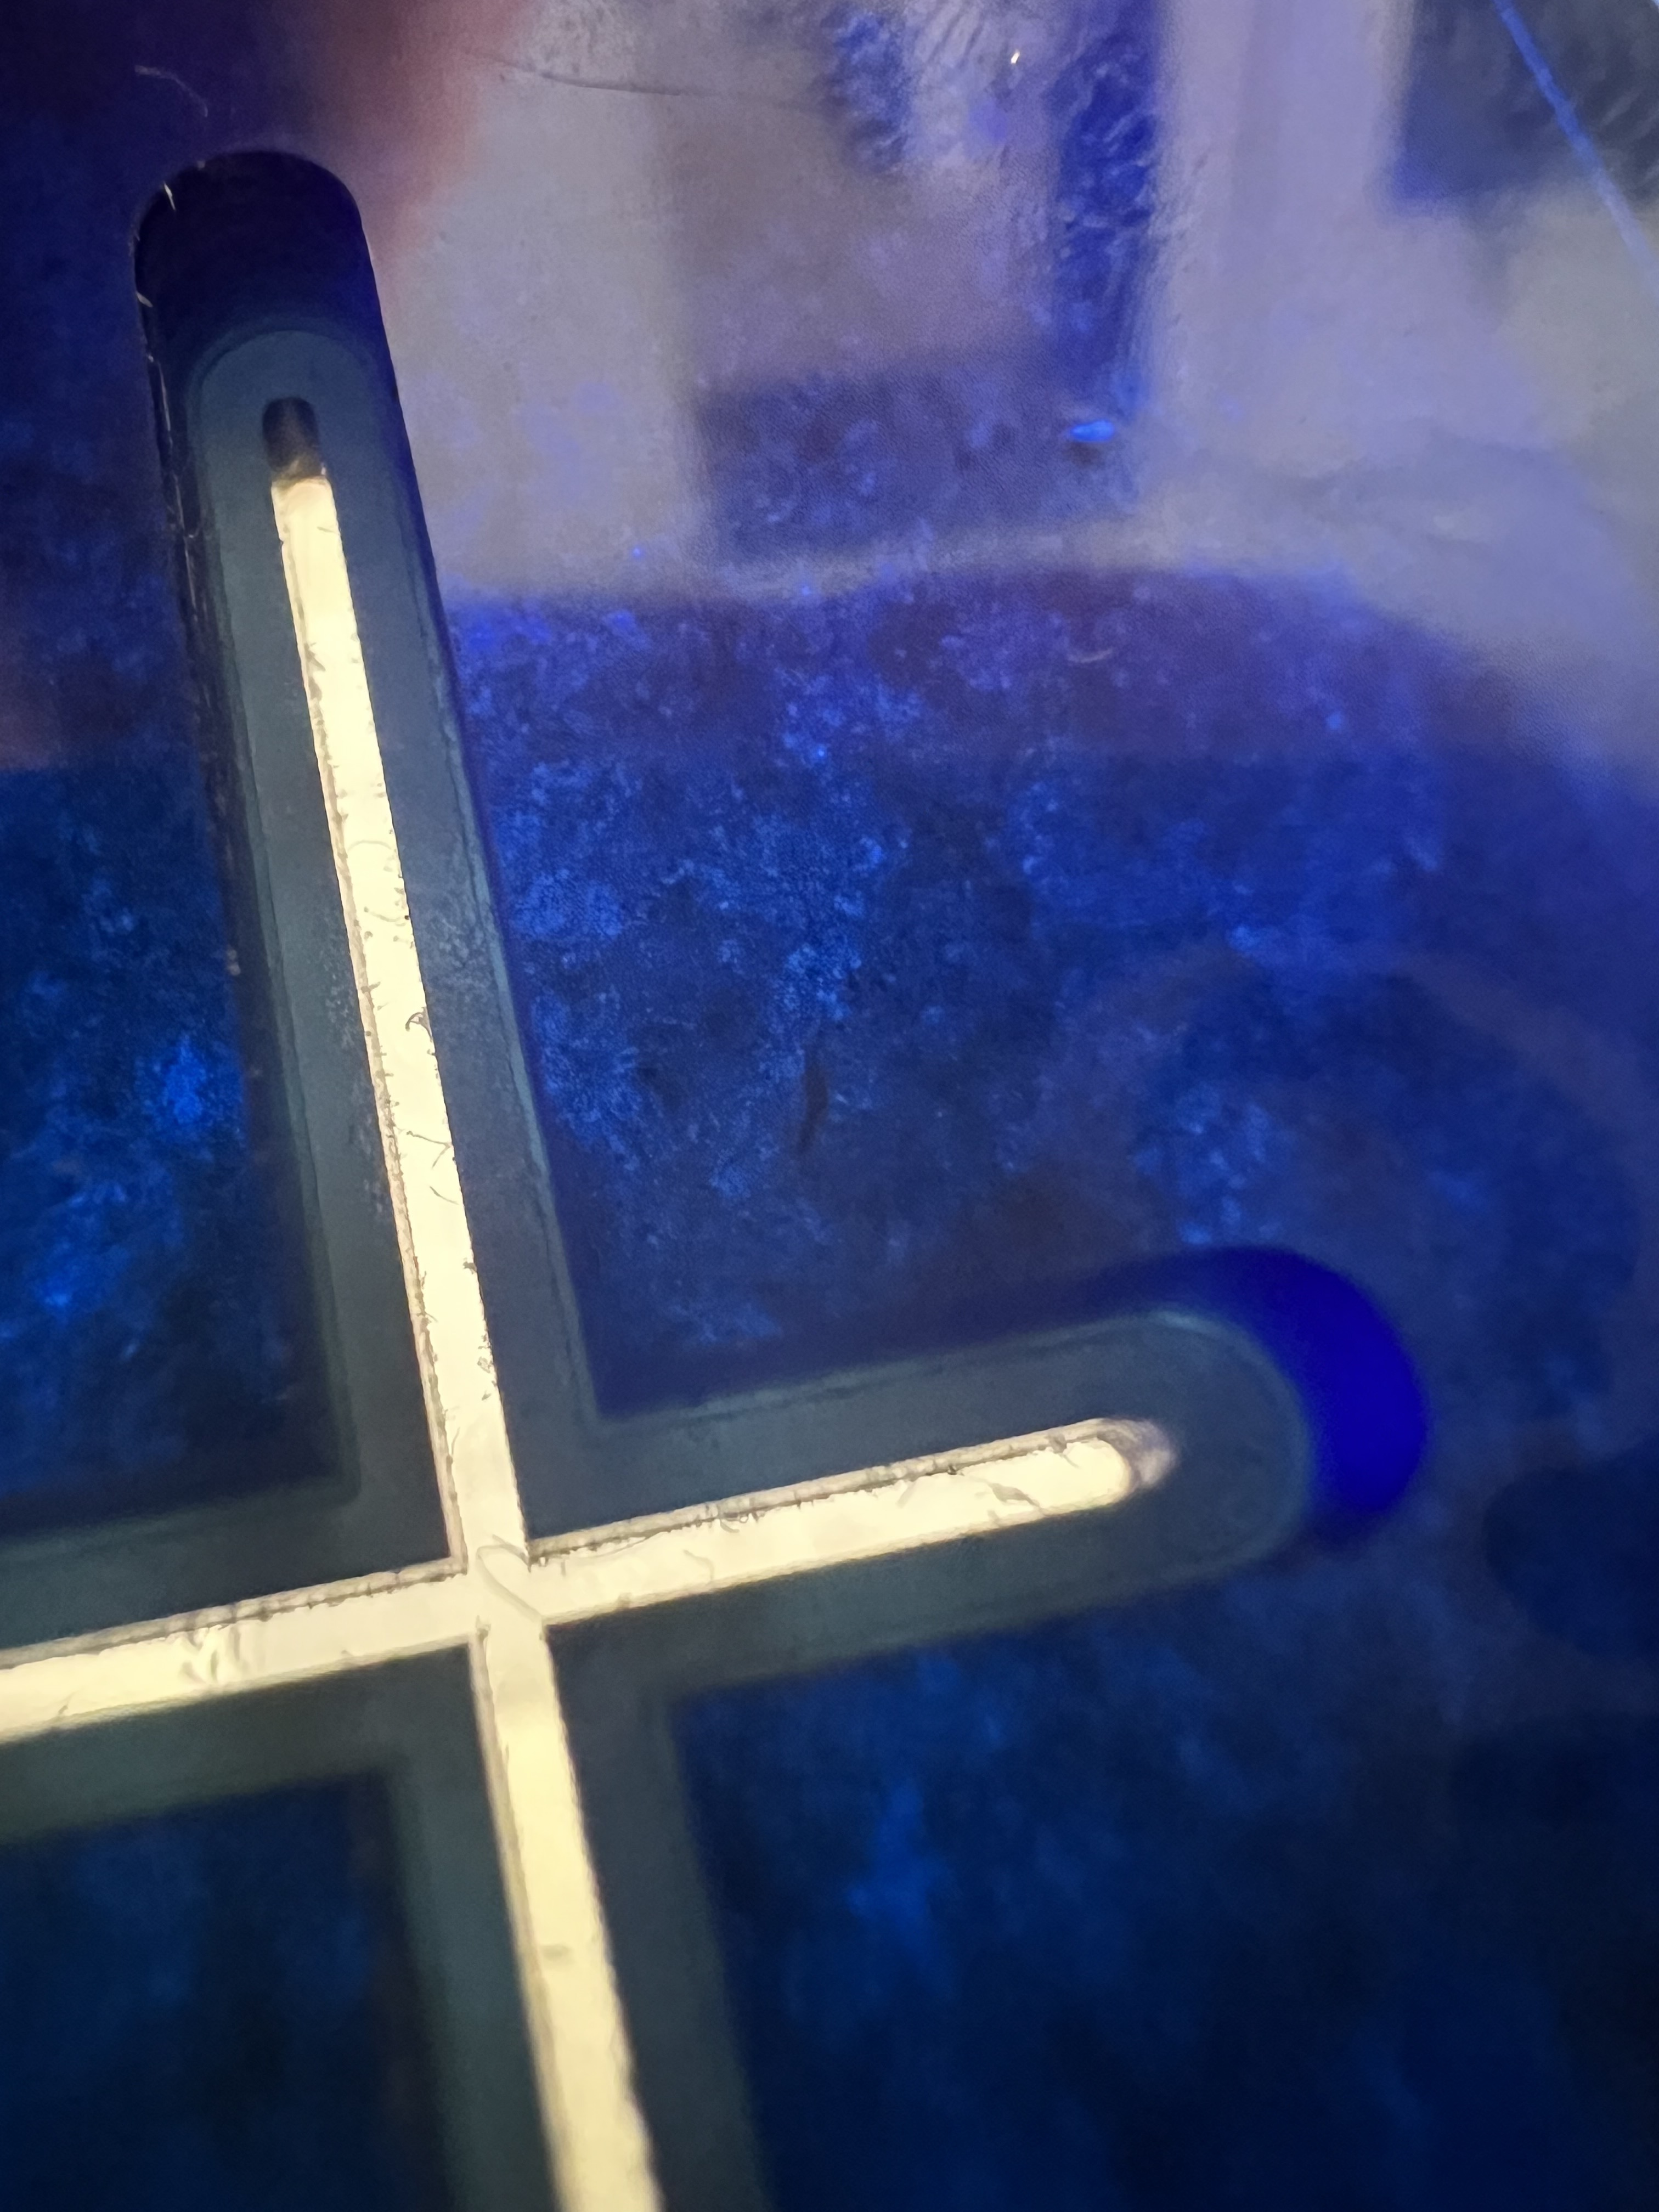
Since it doesn’t go all the way through it enables some cool shots.
PS: sometime in the next day or two I’ll dig out the 1/8" acrylic scraps and a real 0.7mm fluted endmill. I’m interested in making some of my own stencils since it seems promising. Gotta try and make one so i can actually draw my logo
I’ll report back on the results
Usual preface, I’m with PreciseBits so while I try to only post general information take everything I say with the understanding that I have a bias.
Most of this looks like it was already addressed (props to @HeuristicBishop for demoing it). But I wanted to add a couple things.
You don’t need high aspect tooling for this cut. You are much better off taking the larger cut first then cutting your smaller slot into it. A good rule of thumb is, all features of a tool will be used, either for or against you. So extra length of cut, tool length, necks, tip styles, etc. are going to have effects.
I’d also say be careful if you are going to pocket this with something like a 0.5mm. On the second pass you will only be taking 0.2mm at the most (depends on CAM and toolpath type). That means that you will run into chip thinning and a minimum cutting feed for the slot could have too low of a functional chipload when it steps over, melting the plastic. As an example, a 0.5mm tool, cutting a 0.1mm stepover, will need to go 1.25x the slotting feed to hit the same chipload as slotting.
The other common things to watch for with micro tooling are deflection, hold down, and runout. But I’ll stop here for now. Already wrote too much for an “already addressed” post.
Let me know if there’s something I can expand on or help with.
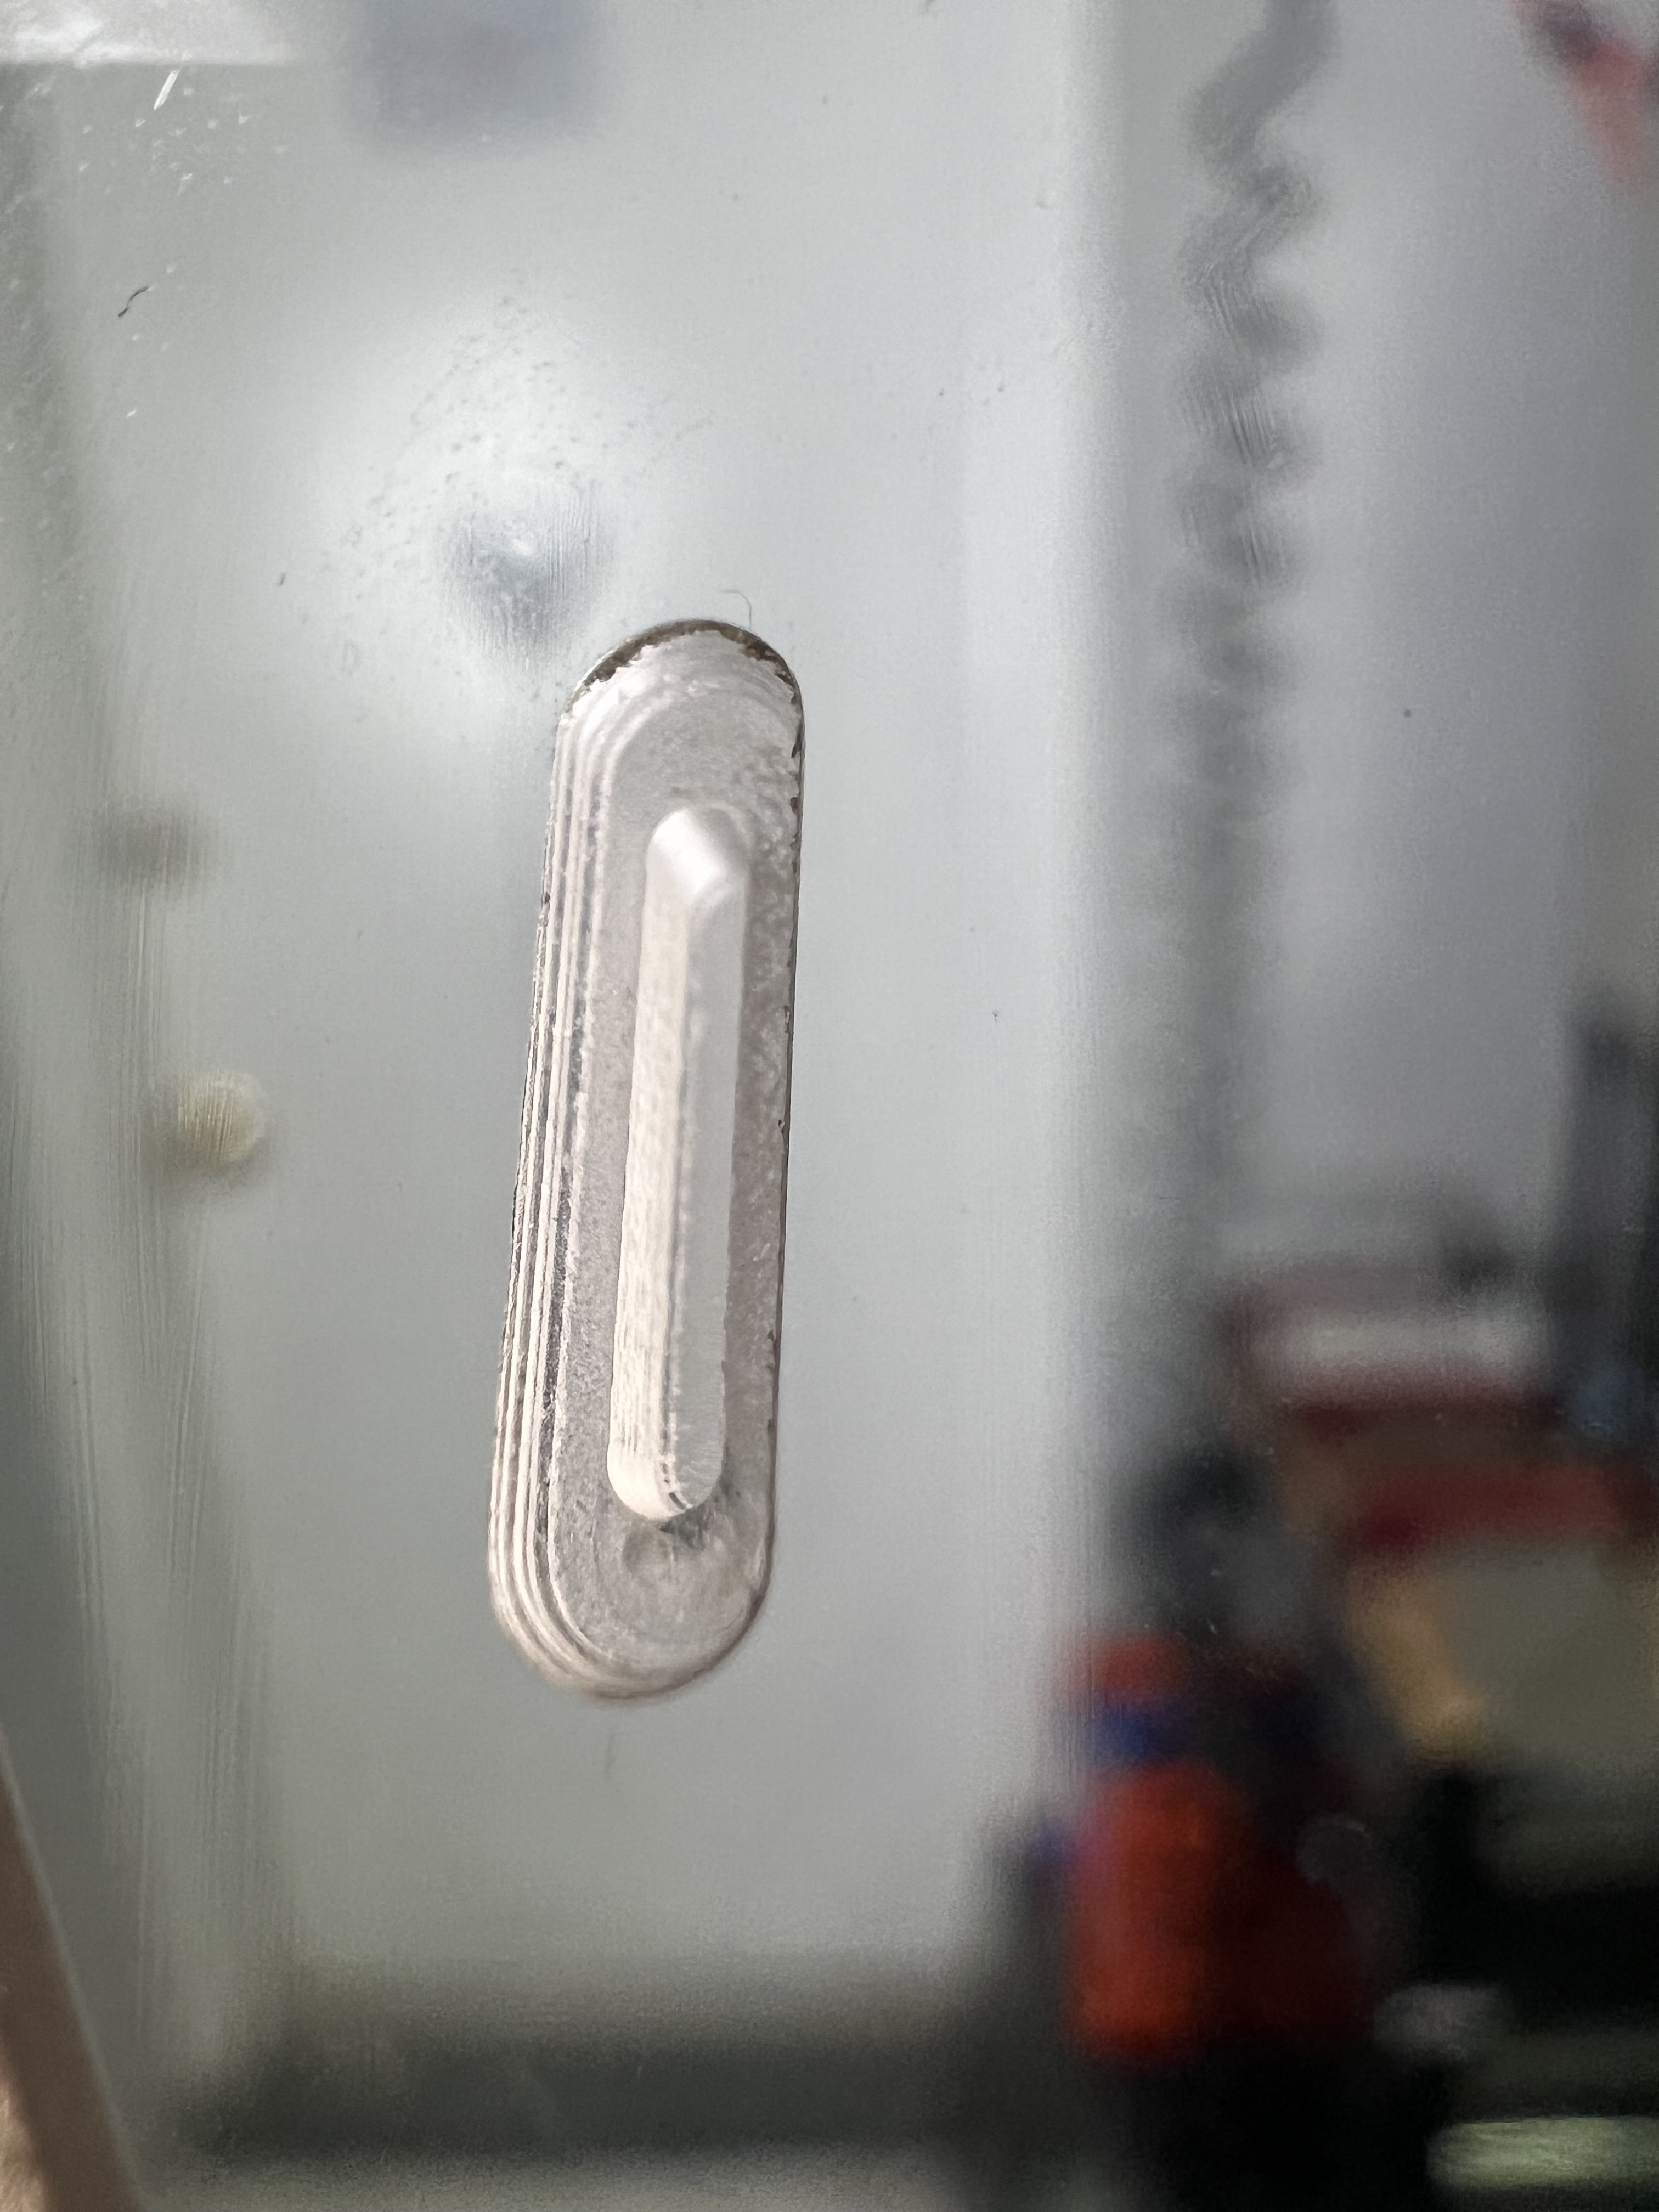
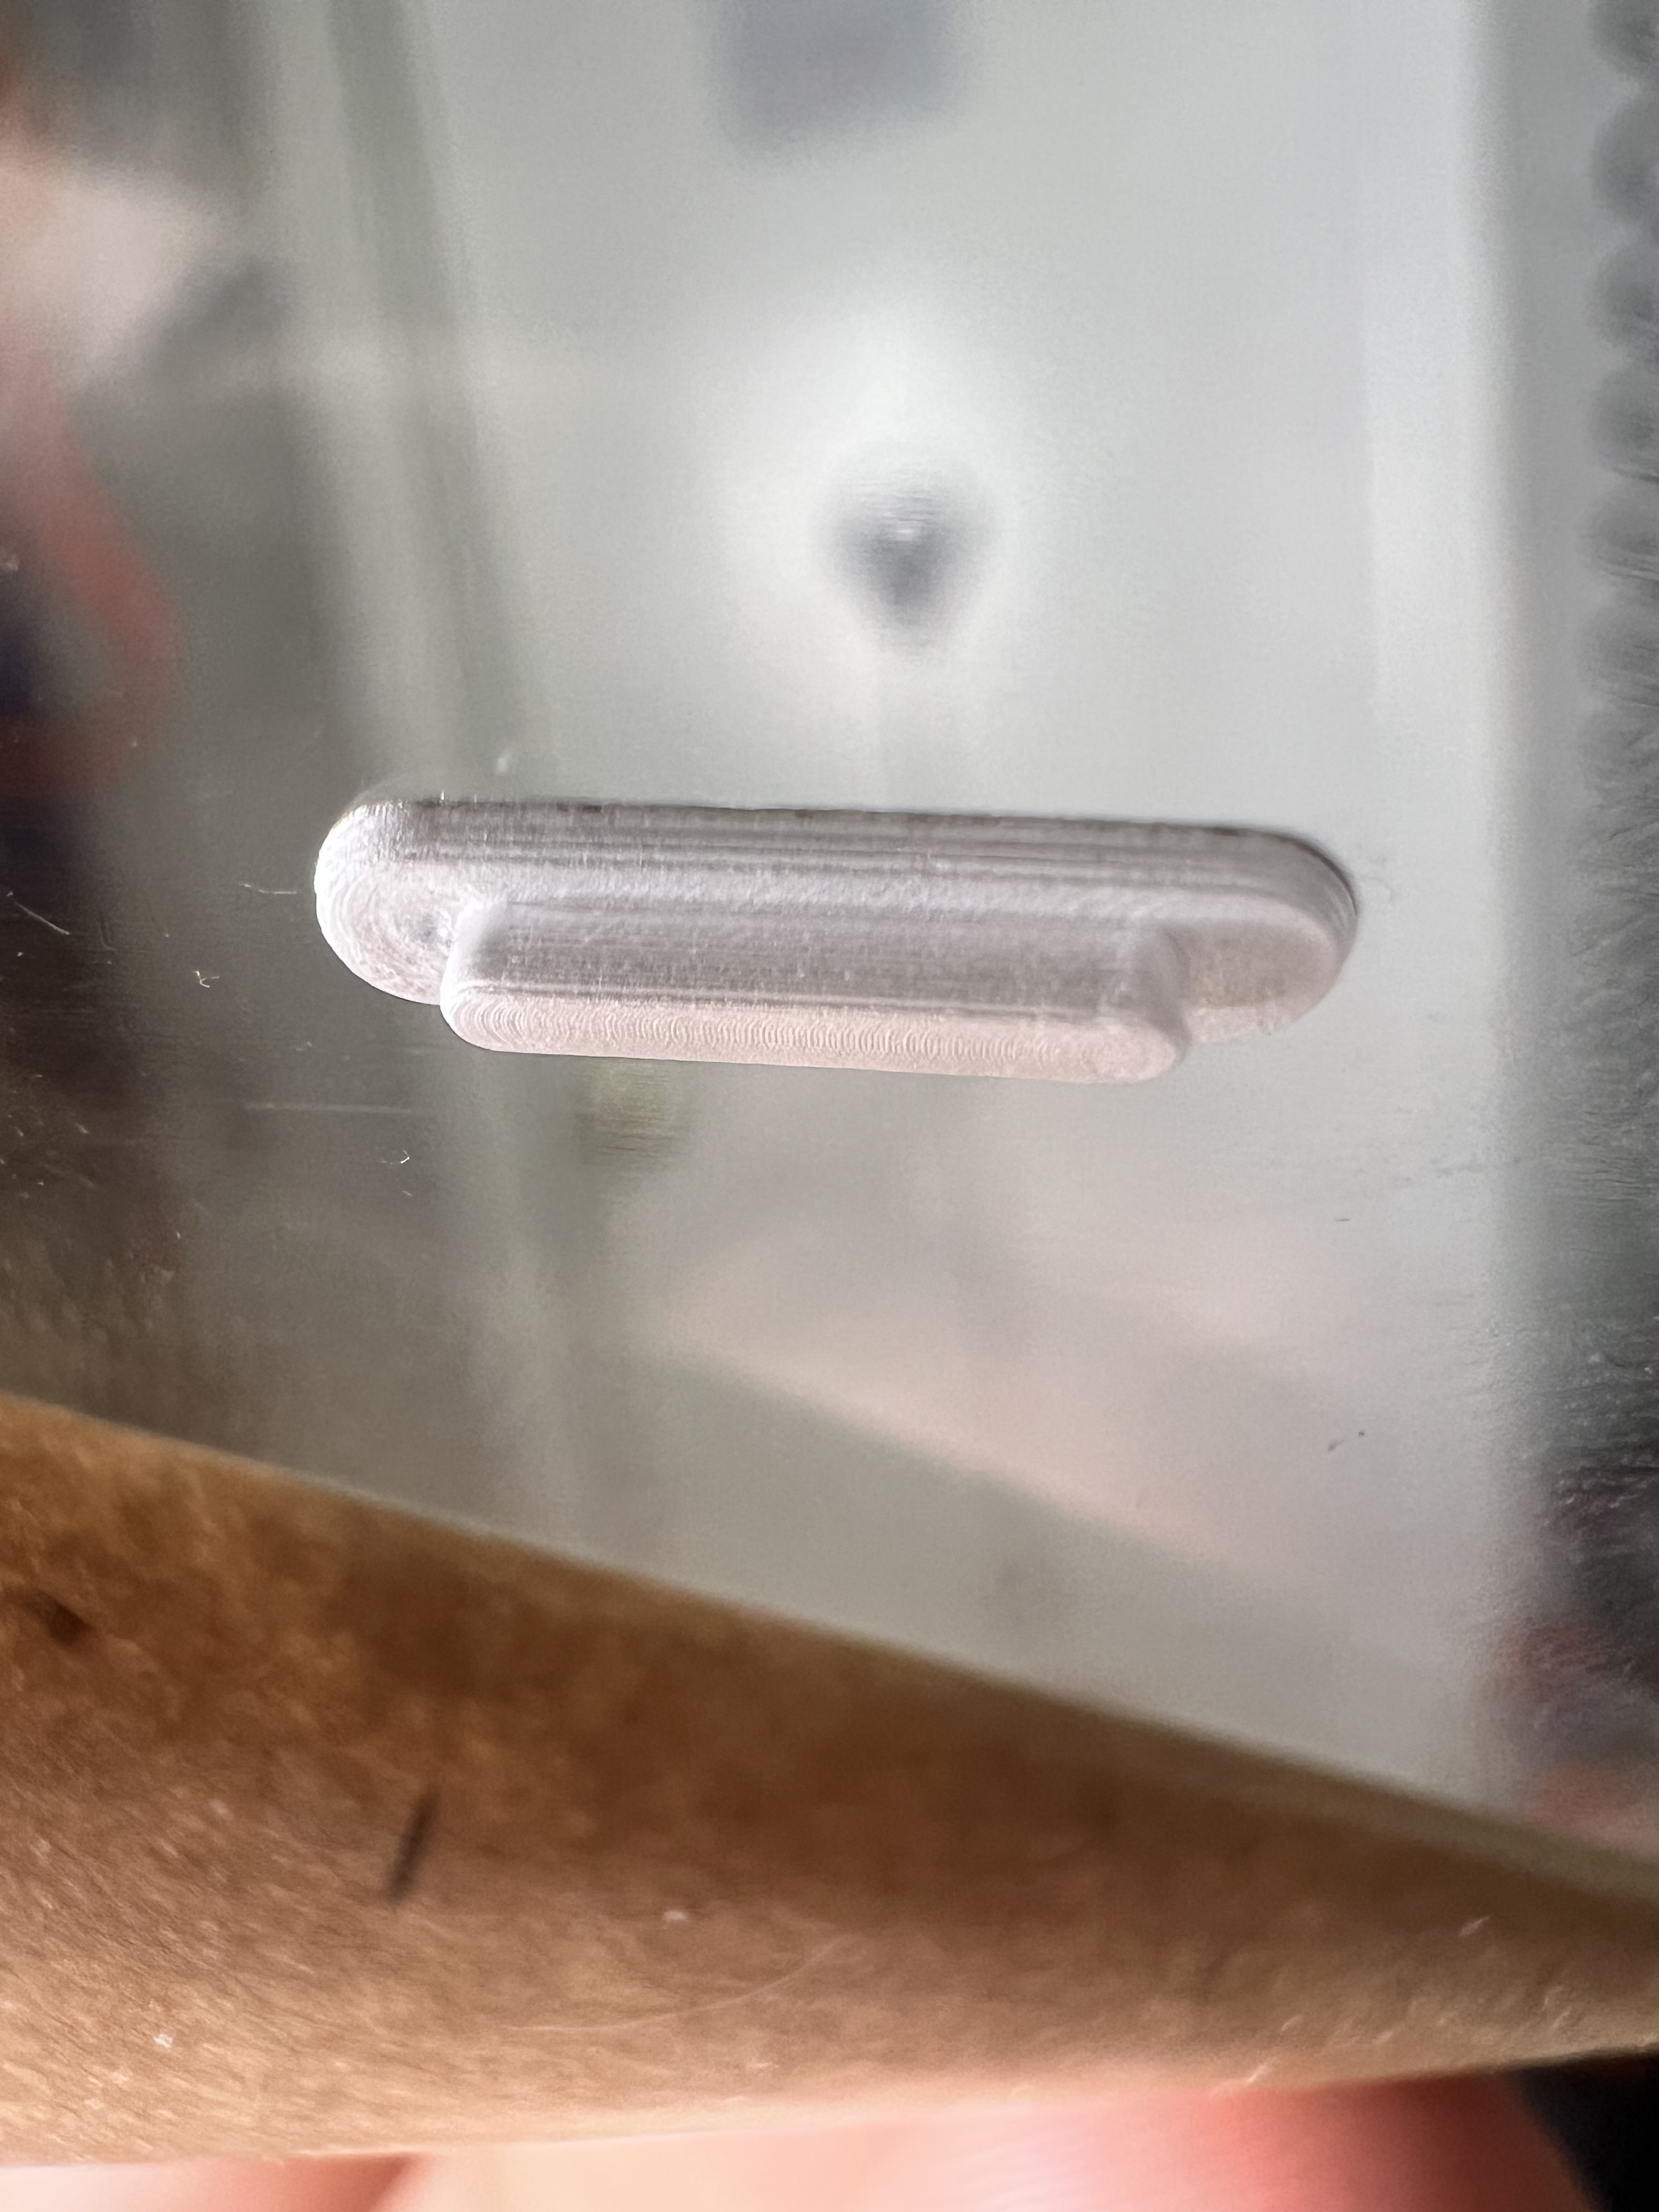
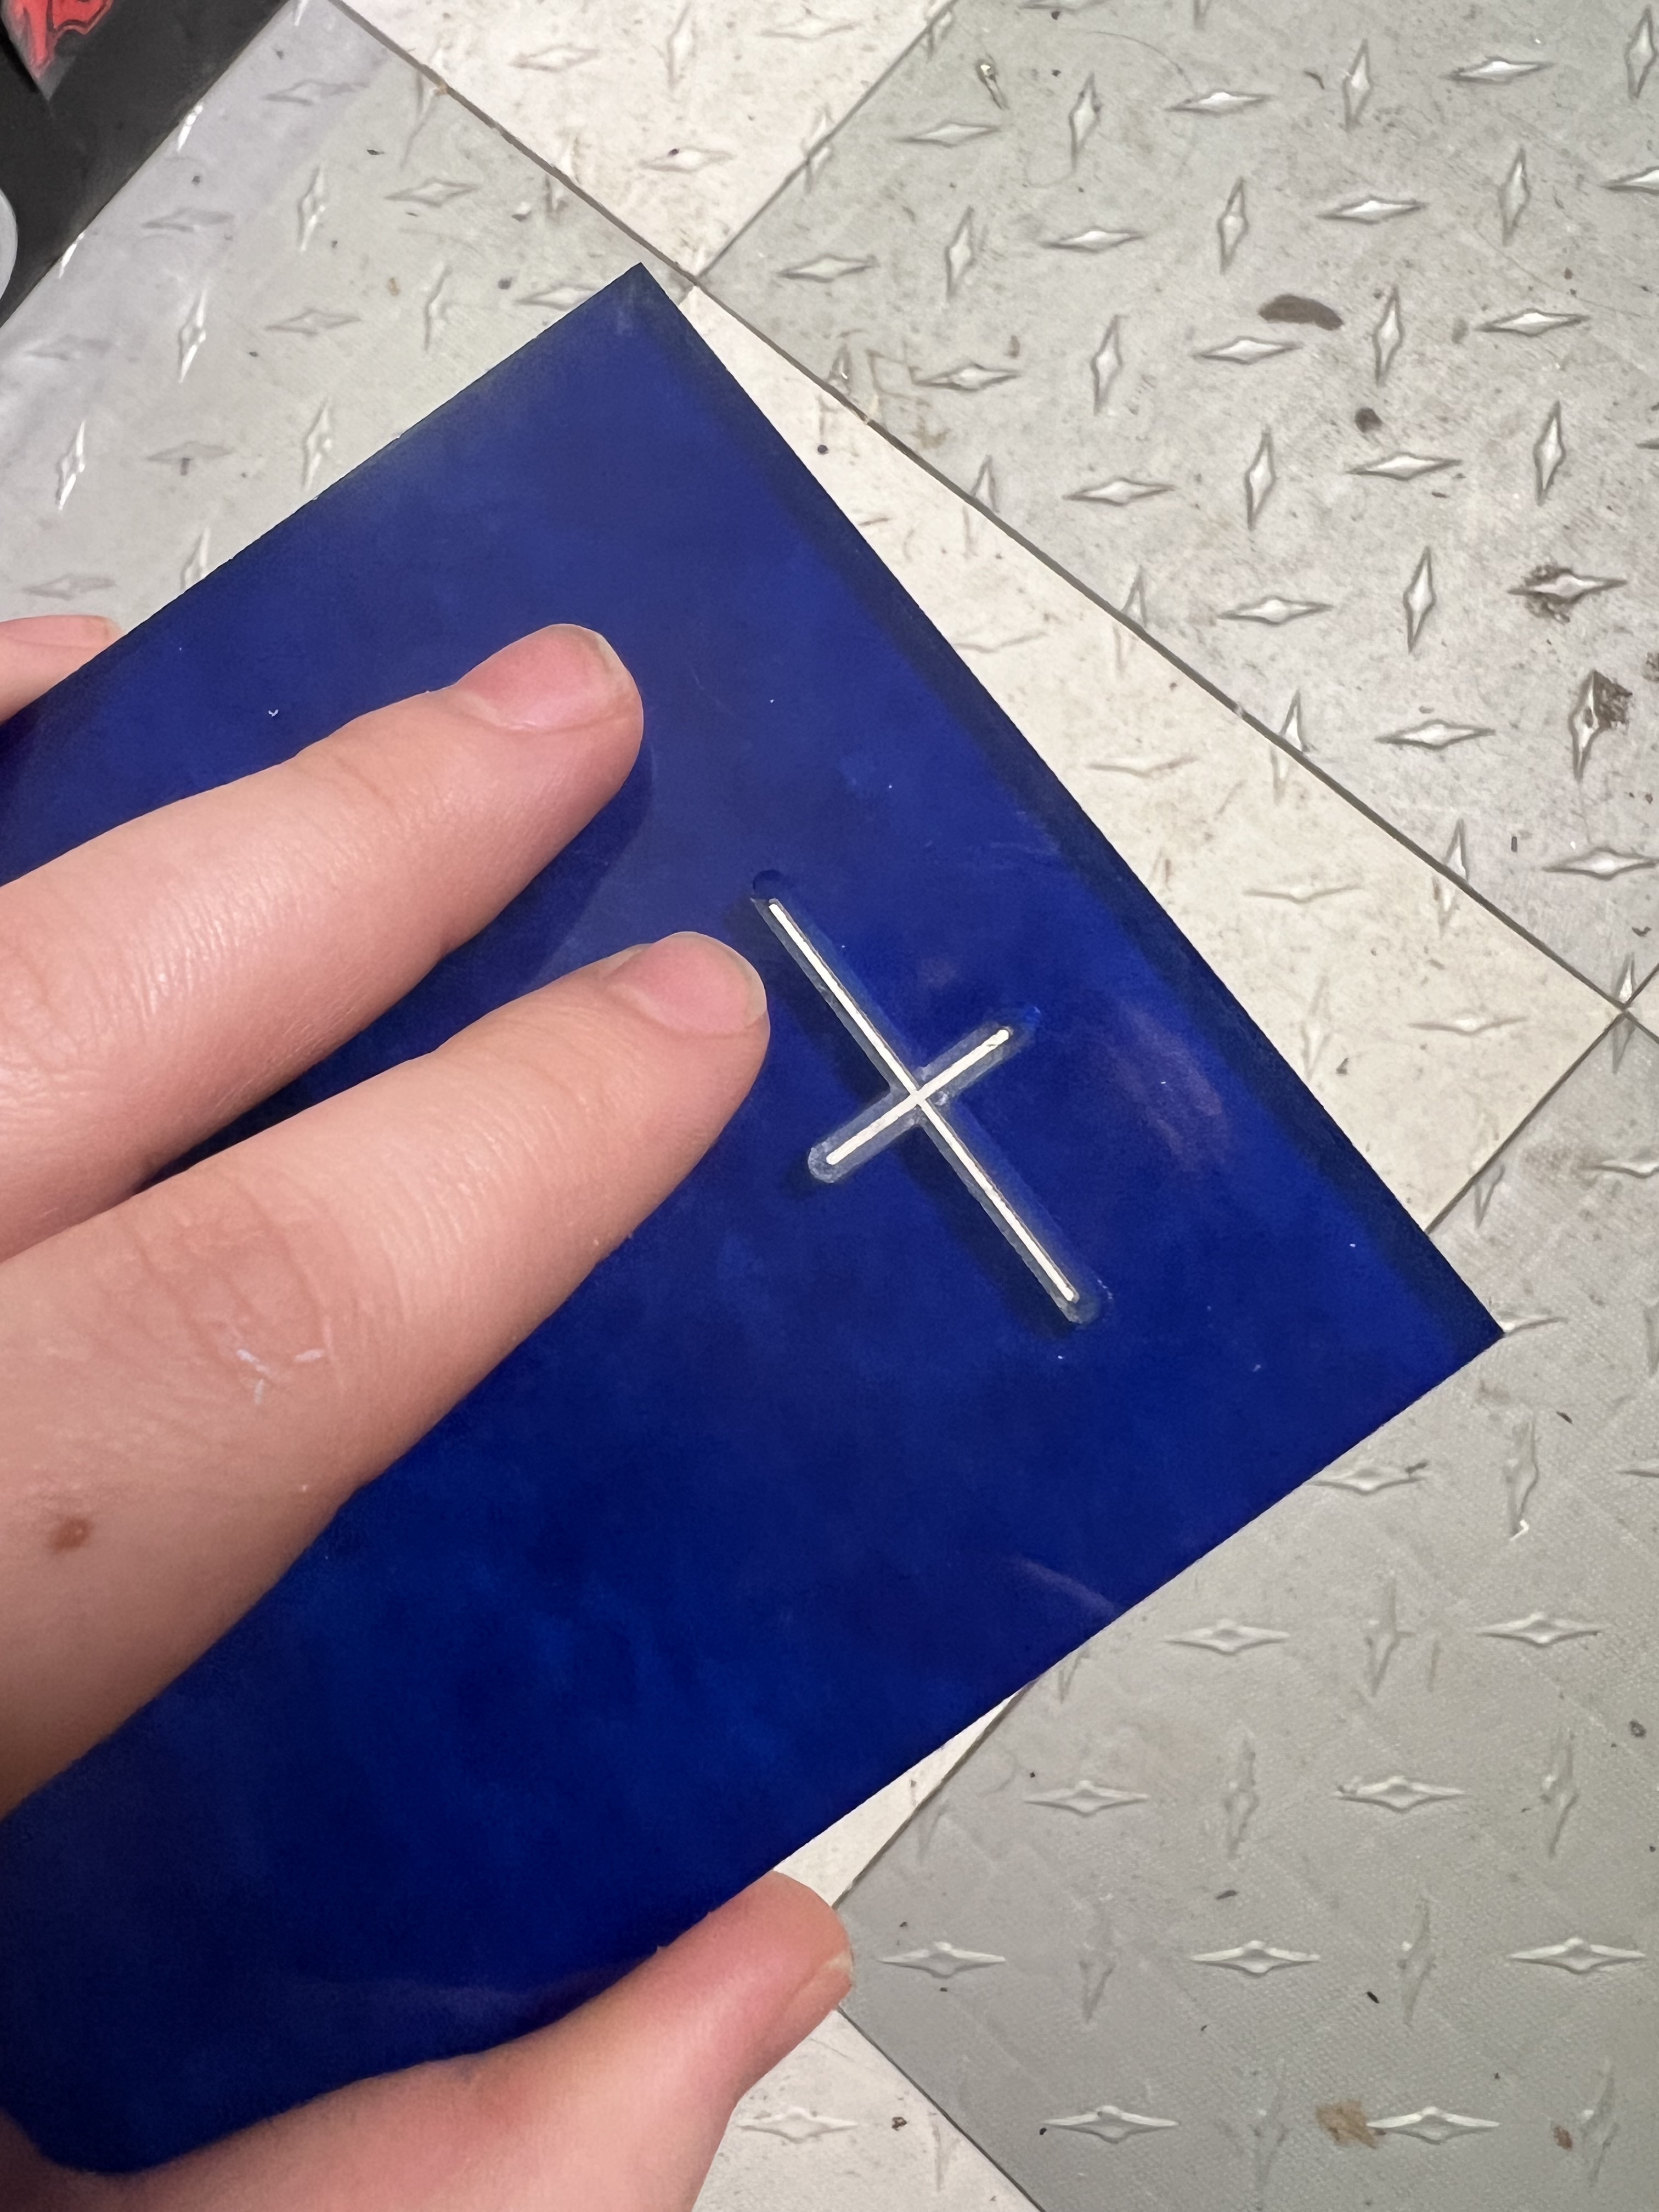
So @_ben I got as close as I’m going to get with the stuff i have on hand. More good news, I’m now very confident you can run these without issue. (At least, I’m confident I could run them… so I’m assuming you can as well considering I’m a perfectly mediocre machinist)
I still only had ~.25" acrylic so i slotted the large slot down to 1/8" to try running the small tool all the way through.
The small tool i had on hand is still 0.8mm but it’s a more traditional fluted cutter. Worked beautifully with a standard plunge and full slotting. At no point was i worried about the cut. All in, less than 2 minutes for a 20mm X 40mm cross.
I’d say it’s totally doable.
Now I’m not affiliated with precise bits but i will say they’ve got the tools and the knowledge to help you out if you want to pursue this. (The same can be said for carbide 3D… except for their admittedly non-existent selection of truly tiny endmills)
Anyway, if you’ve got any additional questions just let me know. Or ask TDA because he actually knows what he’s talking about