Been troubleshooting some cut issues for a while, after fixing and eliminating a lot of other problems (loose v-wheels, stretched belts) finally got down to bearing play on the router. I didn’t measure it, but could grab the collet and feel the physical movement up and down. I’d guess at around 0.005 - 0.008" range based on the cuts I was was seeing, which really showed up in aluminum. So, time for a rebuild!
I looked around and could not find comprehensive instructions on what’s needed and how to get everything apart. Wanted to document that here so anyone trying to do the same knows what you need before you get started. The parts are cheap, order a couple sets to have on hand and you can rebuild this thing in about 30 minutes. (I made the mistake of only having the bearings, here’s everything)
Parts
If you’re lucky enough to have a Dewalt service center nearby (which I do here in Dallas), you can pick parts up for free and the prices are surprisingly low. Another site, MM Tool Parts, also carries all the parts.
Dewalt Toolservicenet
MM Tool Parts
| Diagram | Description | Part # | Cost (11/2022) | Needed | Note |
|---|---|---|---|---|---|
| 50 | Insert | A26125 | $1.96 | 1 | |
| 52 | Nut L.H. | A25250 | $1.19 | 1 | |
| 53 | Upper Bearing | N110359 | $2.06 | 1 | |
| 51 | Lower Bearing | A27537 | $3.95 | 1 | |
| 21 | Magnet | A27330 | $4.36 | 1 | If using manual controls |
| 59 | Brush | A27343 | $6.17 | 2 |
Tools
| Tool | Note |
|---|---|
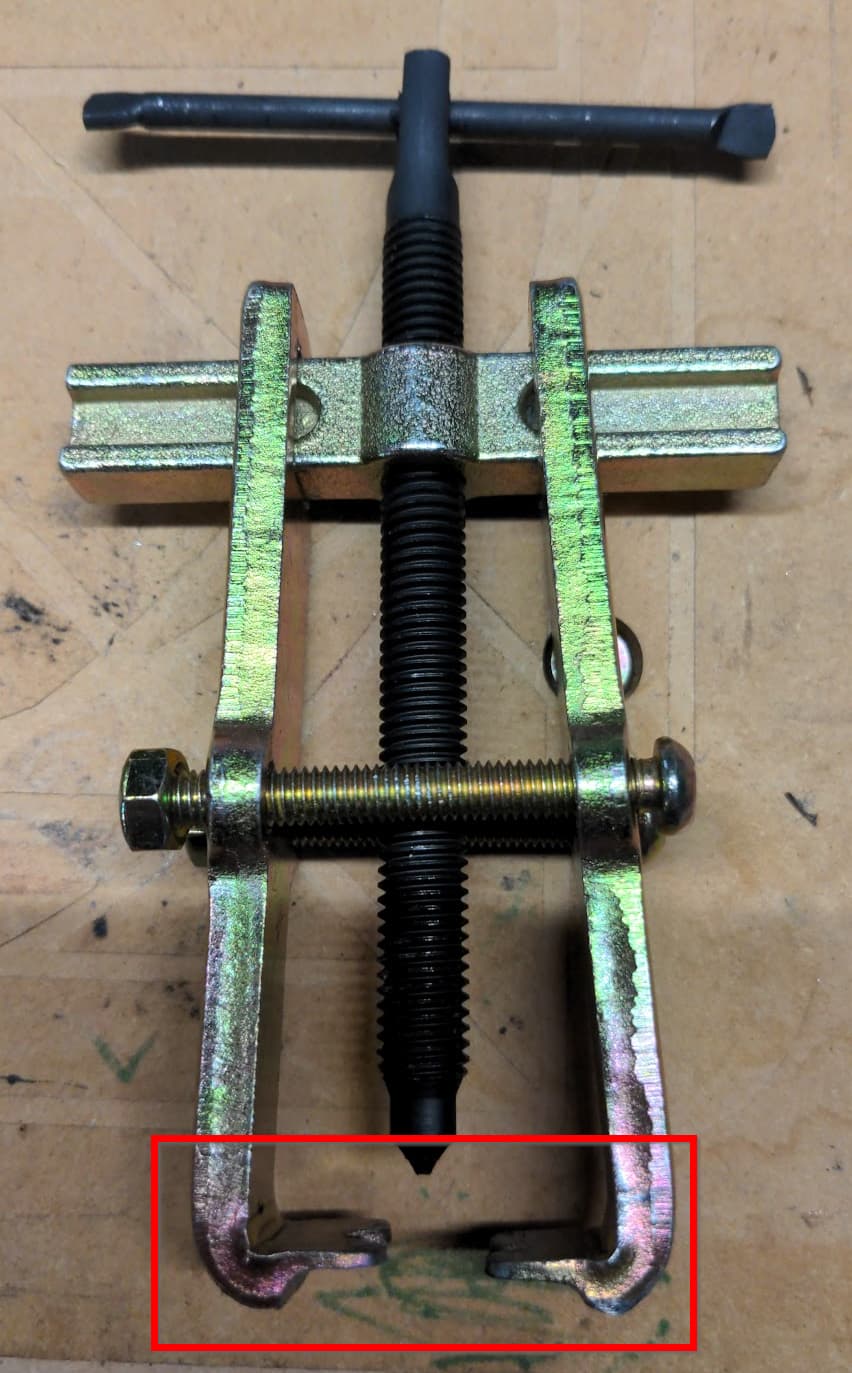
| Bearing separator | This is needed for the upper bearing, I modified this one from Amazon |
| Screwdriver | Flat |
| Screwdriver | Torx T-20 |
| Mallet | Rubber or wood, something that won’t damage threads |
| 2-pin spanner wrench | Good lock ring pliers worked for me |
| 19mm deep socket | For the spindle nut above the collet |
| 5/8 or 17mm sparkplug socket | For tapping the bearings back on |
| Needle nose pliers | Removing the brush spring |
| Allen wrench 1/4" | Removing top magnet |
The Process
Ensure your router is fully unplugged and disengaged from power!
- Using the torx t-20, remove the 4 screws from the top cover and the bottom screw underneath the power cord
- Remove the top cover
- Using needle nose pliers, pull back on the brush spring and move so it is resting with tension on the bar on the right side
- Disconnect the LED light wires
- Hold down on the spindle lock button, then, using the 19mm socket, remove the spindle nut above the collet that rests on the bottom bearing
- Remove the two screws holding the spindle lock in place and remove it (NOTE: watch the spring)
- With the router on its side, grasp the outer case firmly with one hand then use a mallet to tap the end of the spindle to disengage it from the lower bearing, the spindle and inner plastic insulator will now slide out
- Separate the outer yellow insulator case/magnets from the spindle shaft
- With the 1/4" allen wrench, remove the top magnet from the spindle (NOTE: Left Hand/Reverse Threaded!)
- Using the bearing separator, remove the top bearing (NOTE: I had to heavily grind down the jaws on the tool I bought to get them to fit, you need a very slim set of jaws to get in there. I tried clamping the bearing in the vise and tapping the end with hammer and brass slug, but just ended up with marred threads. It is really tight on there!)
- Position your new bearing on top and using an upside down spark plug socket, tap it into place (NOTE: make sure the socket you use transfers the hits to the inner ring, not the black seals or outer ring)
- With the outer aluminum case upside down, attempt to use a spanner wrench or lock ring pliers to remove the black plastic spanner nut holding the lower bearing (NOTE: Left Hand/Reverse Threaded!)
- After you’ve stripped through the completely inadequate holes and realized it’s frozen in place, grab your flat blade screwdriver and mallet
- Tap the screwdriver into the plastic nut, going away from the threads, when you have enough leverage pry it out
- Remove the lower bearing and insert by tapping out from the inside with the handle of your screwdriver
- Replace with a new insert and bearing (NOTE: Replacing the insert is not strictly necessary, but it takes a lot of heat and mine was a little brittle - for $2 worth doing now)
- Replace the plastic spanner nut to hold the bearing in place (remember, reverse threaded)
- Put the spindle back through the lower bearing, it should go on with minimal resistance, but you may need to tap it into place
- Install the spindle lock
- Holding down the spindle lock, reinstall the 19mm nut
- Install the magnet above the top bearing (remember, reverse threaded) (NOTE: A new magnet is not necessary, but if you break it or cross thread it, good to have one on hand. The magnet is only needed if you are using the original manual controls, not needed if you have converted to SuperPID)
- Slide the inner yellow insulator back into place, minding the position of the LED wires, reconnect the LED
- Remove the old brushes and replace, reposition the springs
- Replace the top cover and put back the 4 top screws and 1 screw under the power cord
Photos
I wish I had taken more photos on the way, but this should give you an idea of the critical areas.
Had to grind the jaws down on this to about 1mm to remove the top bearing.
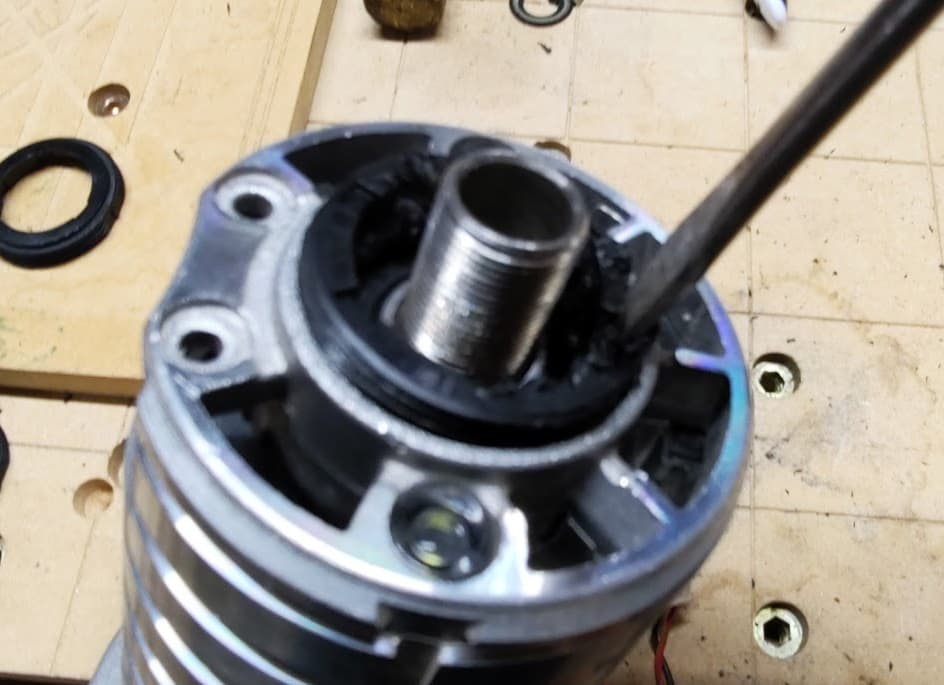
Using a screwdriver to pry out the old plastic spanner nut.
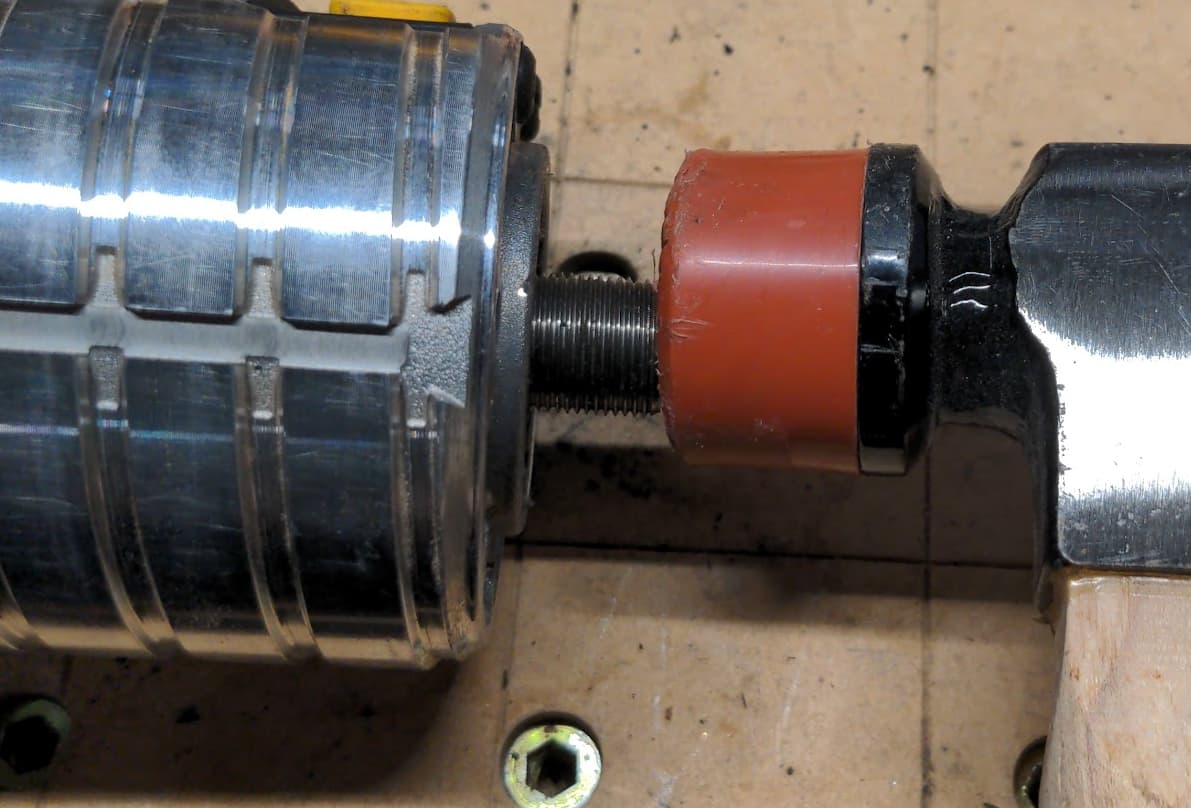
Tapping out the spindle with a mallet
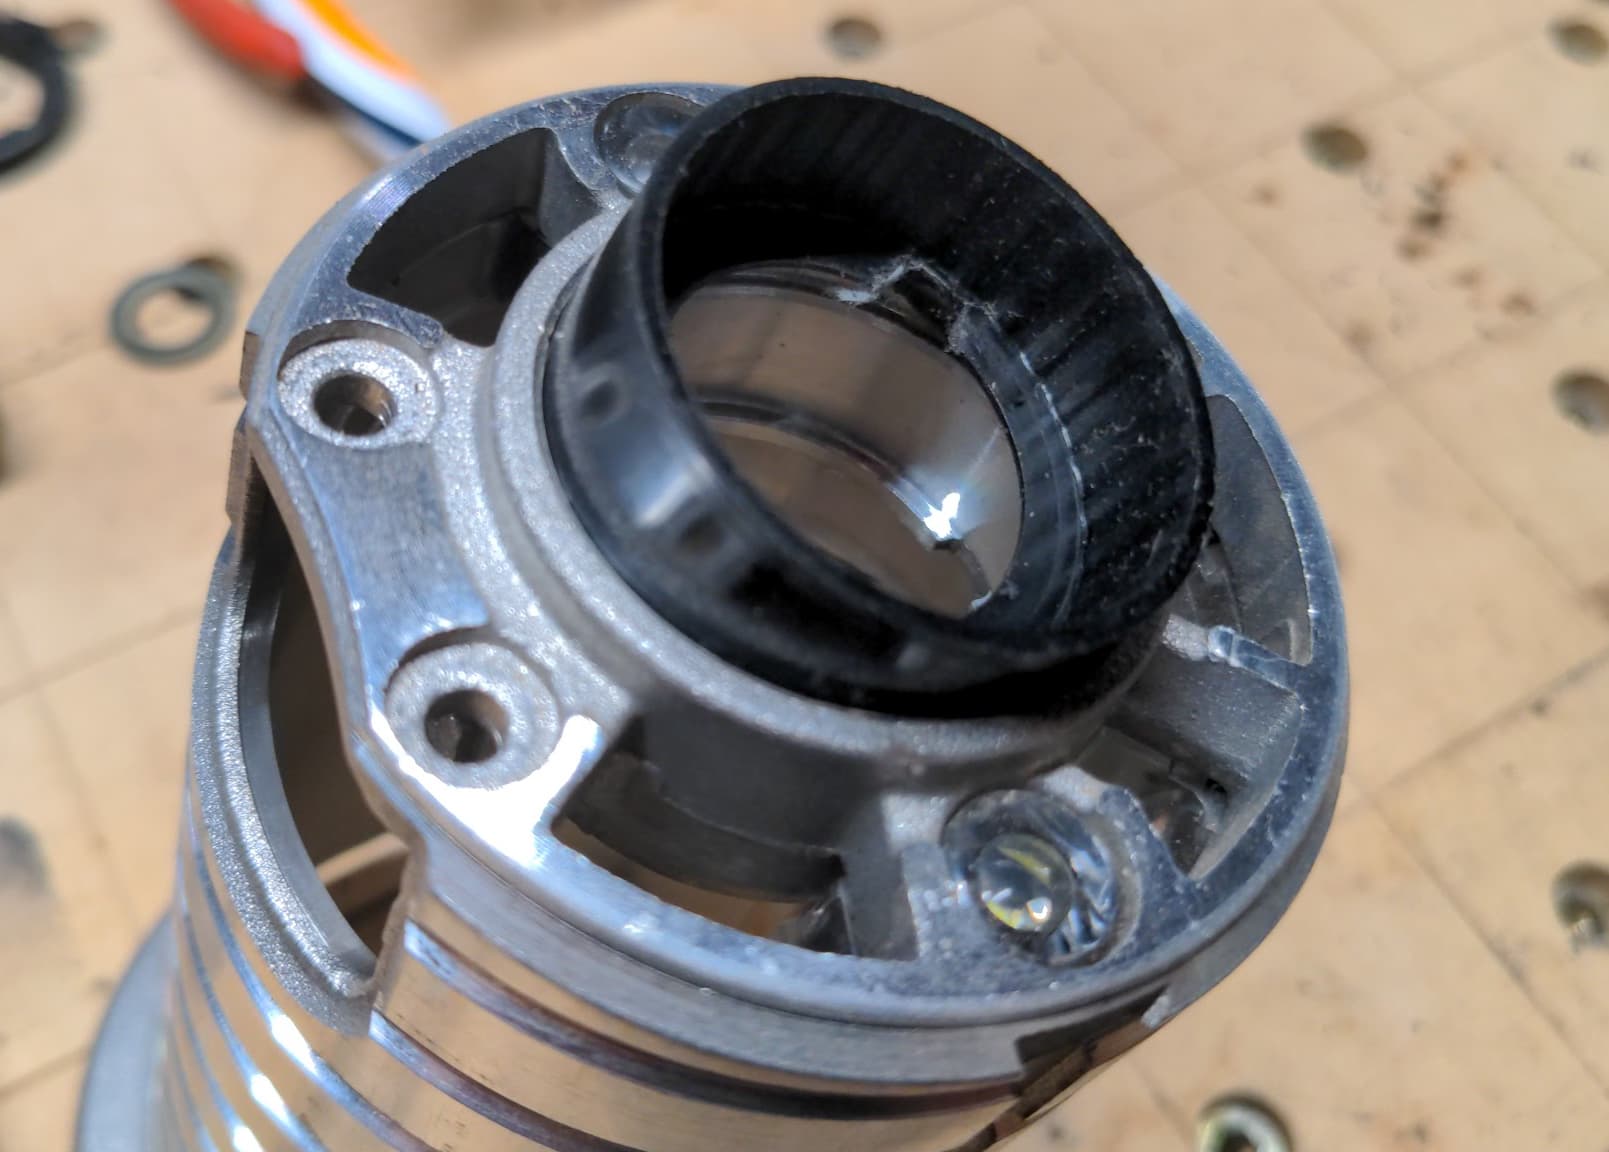
Plastic bearing insert, for $2 replace this piece of plastic
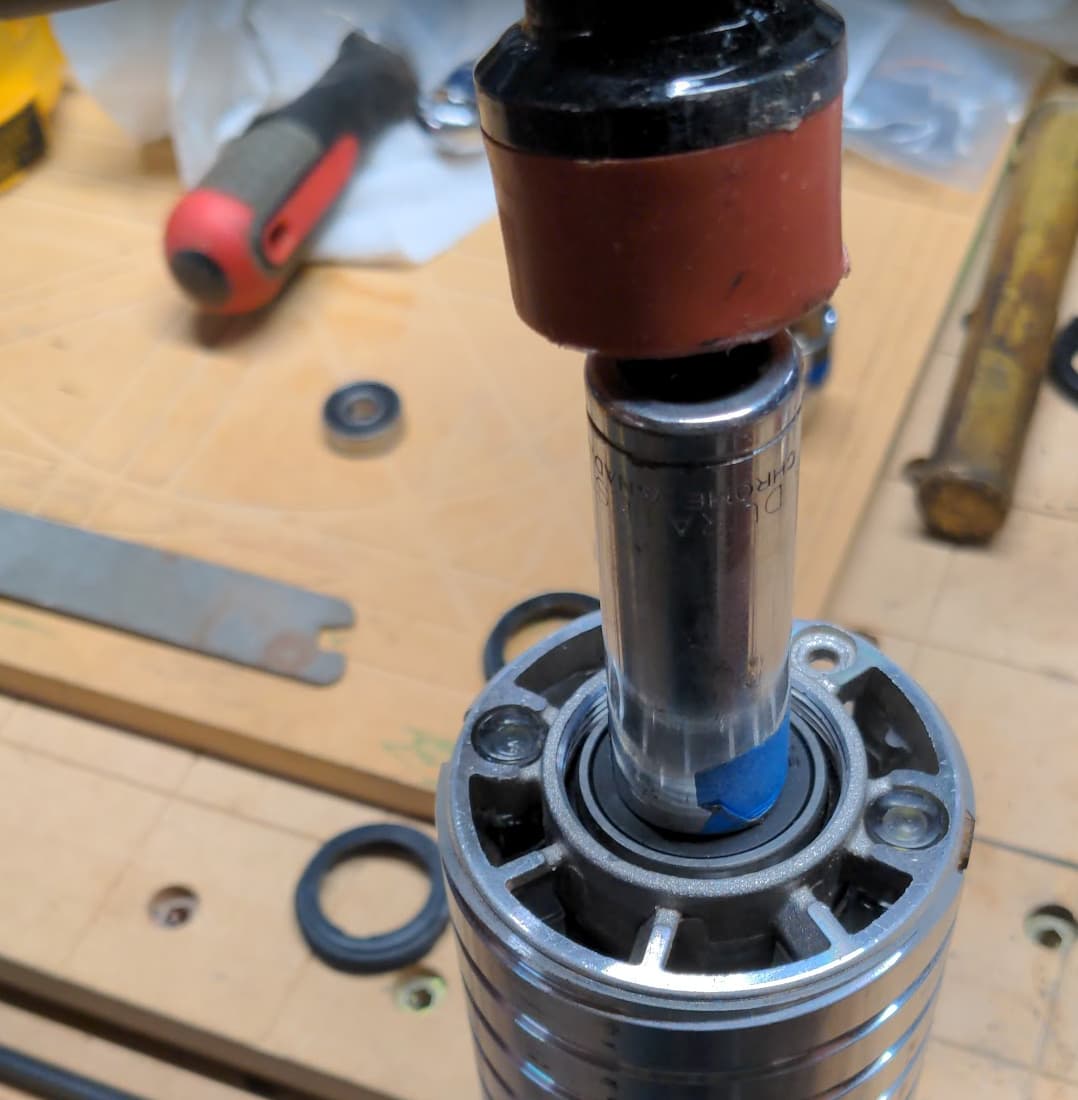
Tapping new bearing into place with 5/8 sparkplug socket (make sure it is hitting the inner steel ring and not the black bearing seals)
Reinstalling the spanner nut with snap ring pliers

Hope this helps someone else rebuild theirs. It goes pretty quick if you have the right tools and parts on hand. The important one is that plastic nut - lots of posts about that being impossible to get off without breaking it. For a few bucks, order all the parts that way you aren’t stuck if something breaks.