Can you pretty please give me an option to have Motion not instantly send the gantry to the home position at the end of the cut? Having it stop, and just pop up to the safe height is fantastic.
Often, I have clamps that are just out of the cut path, but are directly in the way in the return to home.
CM has been updated a lot lately. My SO 3 goes directly to the back from the last cut when a job is finished. Mine does not go to the home position. Now if I pause and then stop it goes to the home position. That is normal behavior. Maybe on newer machines it goes to home so hopefully others will chime in to the behavior on newer machines. Not sure if at the end of the job that a pause would work to keep the Z from returning to home position. You might try that. Then when you get your clamps moved you can hit continue.
The newer machines have the hybrid table. I created a file for making a long L bracket to register work on the bed. It also has cam clamps that are whatever thickness you want to make. I use either superglue and painters tape or the cam clamps. I do have a supplemental spoilboard that has 1/4-20 tee nuts at 2" spacing. Maybe a supplemental spoilboard sitting on top of the hybrid table would work.
Here is the file for the long L bracket and cam clamp.
If you are interested in a supplemental spoilboard I made a document to help with the construction. It is for an SO3 but is adaptable for any machine. Just change the spacing for the hold downs.
Neat! I didn’t see this! I didn’t mind running cncjs (got a beefy rpi4 before they became impossible to find), I just upgraded my shapeoko to a 4 Pro and it has the tool length measure thing attached.
Do you use that at all? I lived my entire Shapeoko 3 existence without it (I never change tools during a job, I’ll simply have different cut paths for different tools).
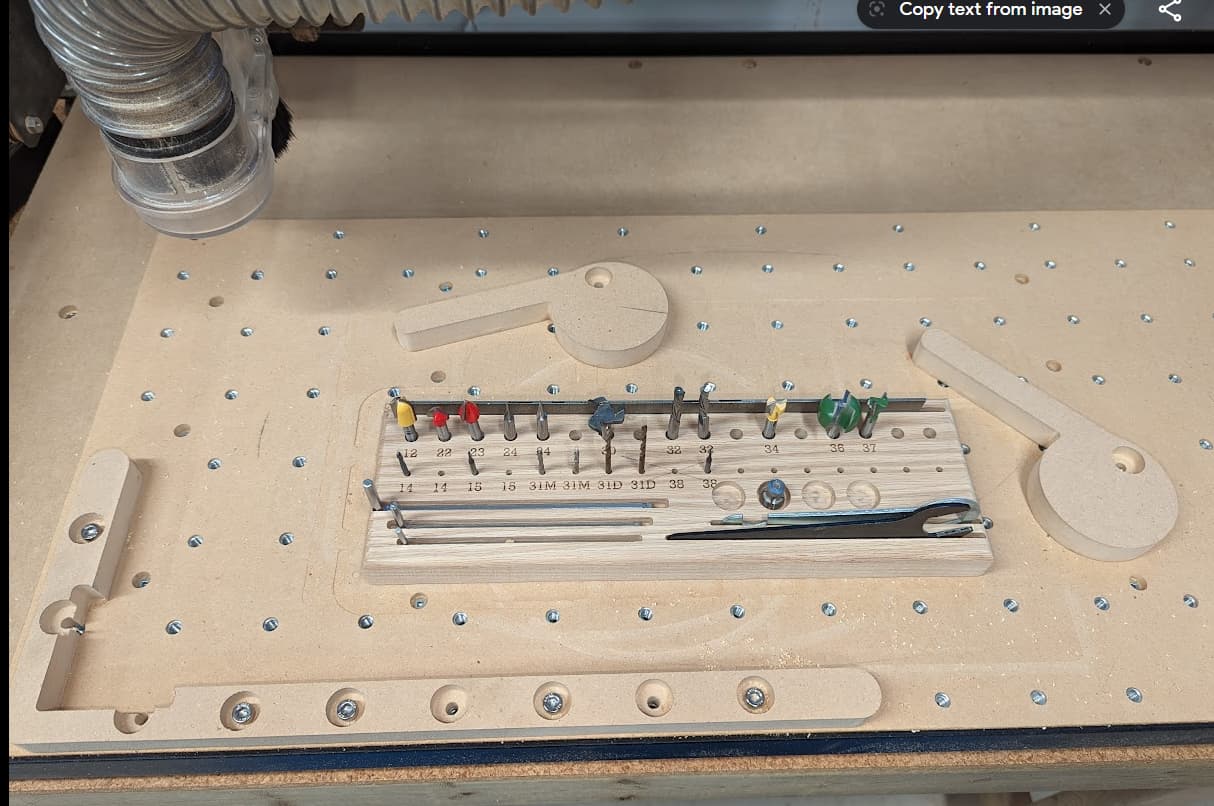
@gdon_2003 Thanks for posting the L bracket again. I have been meaning to do one of these for ages now and I finally got around to it since you provided the file. This is so much easier than some of the methods I was using for workholding. This also convinced me to cleanup my bits and tools so I made a little tray for them and then engraved the nmbers for each bit with my laser to make it easier.
Nice. When I clamp on my Long L bracket I clamp from the top to the long side of the bracket first. If I clamp from the right hand end first The material slips up. By locking it in with the long piece and then clamping on the right hand end my piece seems to stay square.
The cam clamps go in two different directions. The reason for this is the bolt tightens to the right. So on the right hand end of a project I use the clamps that turn to the right to tighten so when tightening the bolt it reinforces the tightening. If you use the ones that tighten turning left then the tightening tends to loosen the clamping pressure by the counter force on the clamp of tightening.
Since you have a supplemental spoilboard be sure to measure from the bottom of the bolt hole to the bottom of your spoilboard and get bolts that are just shy of that limit. The reason if your bolts are too long they will lift up your spoilboard and make your projects carve unevenly. So when I make my cam clamps I just use whatever thickness board I have in the shop but I make sure that the bottom of the larger hole for the bolt is always .5" from the bottom. That way no matter the thickness of the material all my clamps use the same size bolt. Then after surfacing the spoilboard you may need to get shorter bolts. To avoid that I just add washers to the bottom of the bolt head to keep the bolts from bottoming out on the base board.
Thanks for the tips on the directionality of the cams and which side to clamp first. I have a whole set of bolts for using with my previous clamping setup and have noticed the problem when clamping with a bolt that is too long. What I often do is carve holes into the actual work piece that line up with my threaded inserts when I have the space to do it. The problem was holding the part in place first to carve those holes. I expect the L bracket will make that much easier and eliminate the need on a lot of my projects altogether.