A tutorial from a question on FaceBook (Shapeoko Beginners User Group (Unofficial) | Facebook)
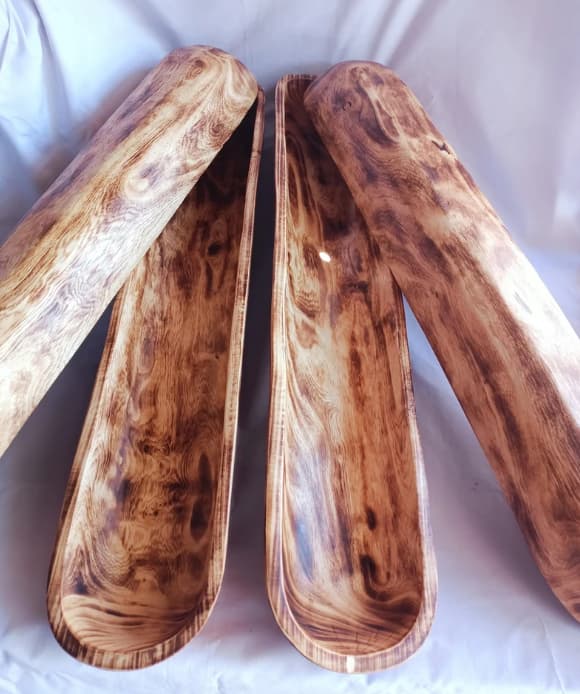
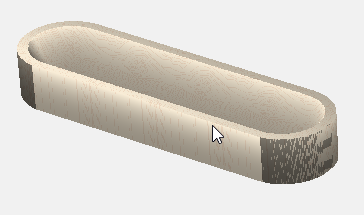
No specfics, so we’ll start with this from Etsy (New Wholesale Long Handcarved Skinny Wooden Candle Dough - Etsy)
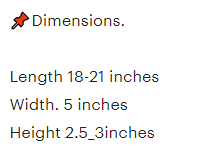
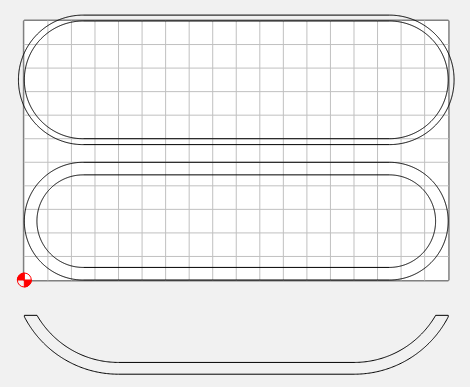
We’ll use 18 x 5 x 2.5, and 1/2" thick.
I like to start by drawing up a side/section view to help visualize how to construct it.
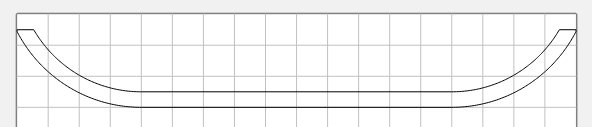
Now draw in the plan view
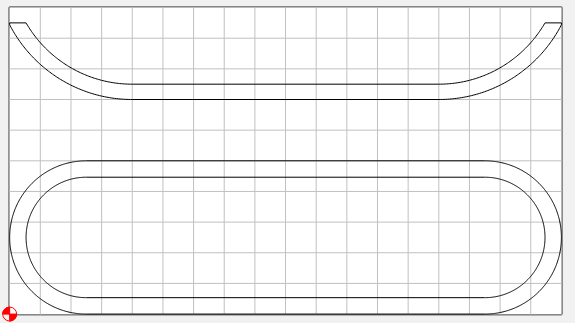
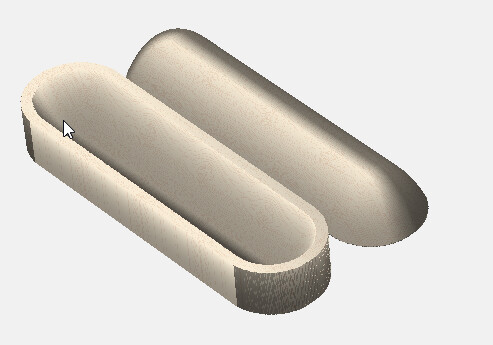
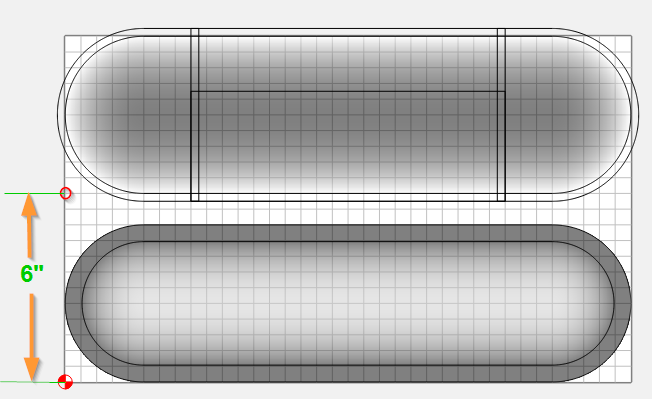
I want to model both sides in the same part. So I’ll make my stock bit bigger, move the section view off the stock & copy the outer profile for the bottom. When it comes to cutting I just need to remember that my zero point is 6" south of the corner of the bottom side. I will need to set my zero corner on the bottom cut to 6,0,0.
I’m also going to want a boundary for the bottom cut so my tool cuts all the way to the edge. I’ll use a 1/2" ball mill so I create a 0.25" offset.
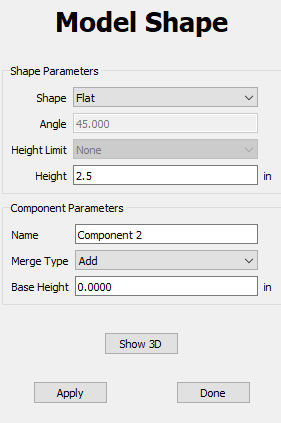
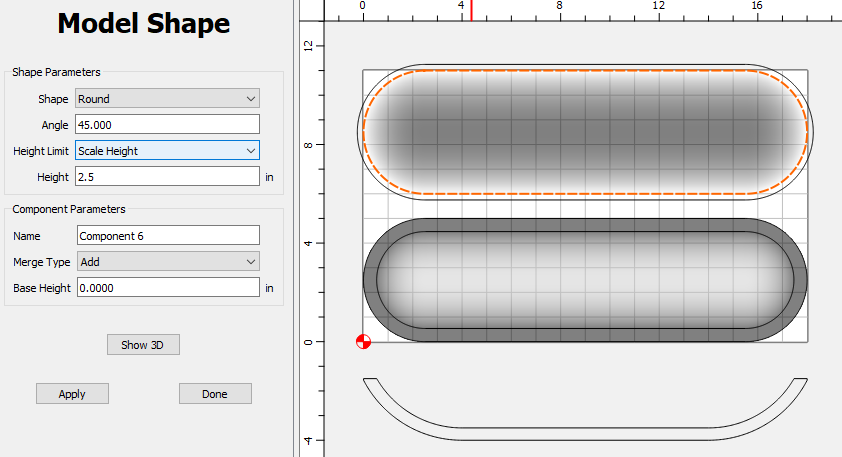
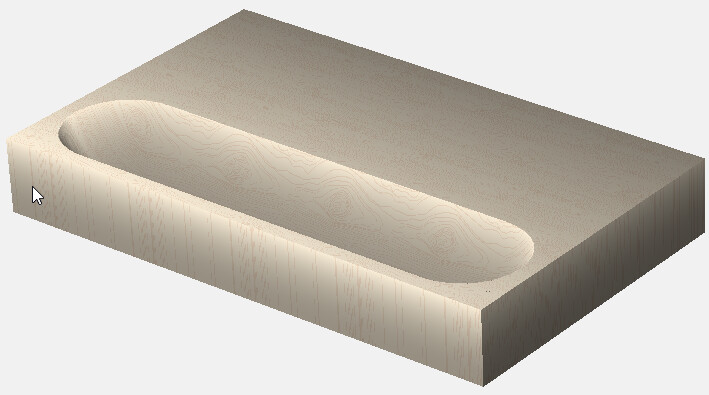
To create the models, I’ll start with the top side. Select the outside vector & make a Flat component 2.5" height.
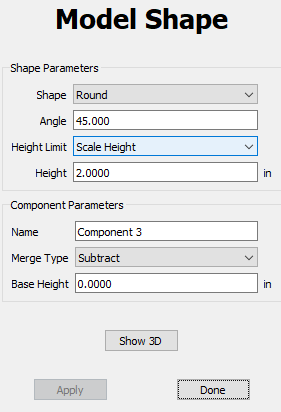
Now select the inside vector & make a Round, 45°, 2" height (Scaled), and Subtract it.
For the bottom side, Select the 18 x 5" vector, and create a Round, 45°, 2.5" height (Scaled) component and Add it.
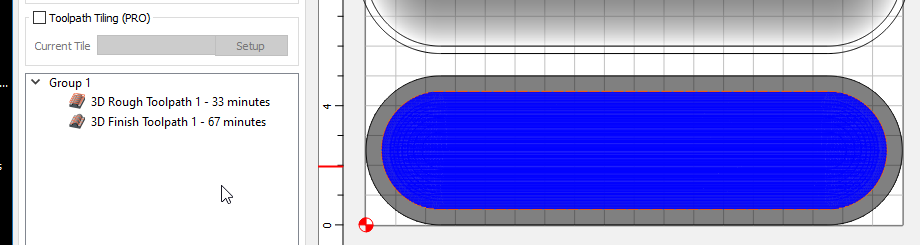
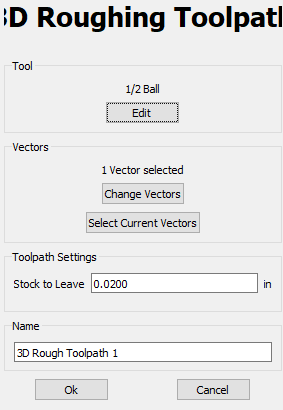
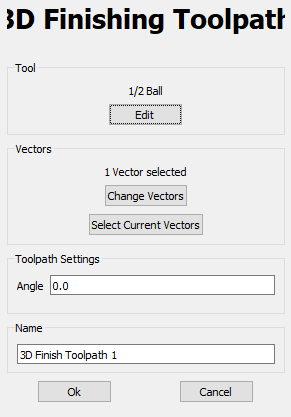
For the toolpaths, select the inner vector on the top & create a Rough & finish path.
Now the tricky part. How are we going to hold it in place to cut the bottom?
I think I’ll put a couple clamps in the middle, and machine the ends.
Then move the clamps to the ends & machine the middle.
So I’ll revise the boundary and make 3 separate boundaries that overlap a bit.
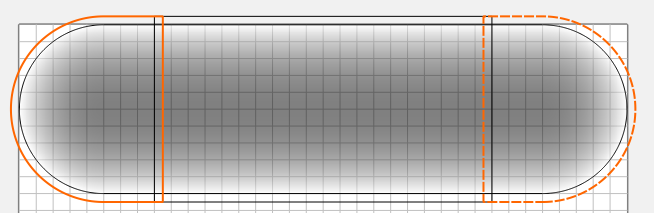
Then I just select the boundaries I want, and duplicate the existing rough & finish paths for the end & middle sections of the bottom.

To output paths, disable 2 groups & “Save Toolpaths” for the enabled group.
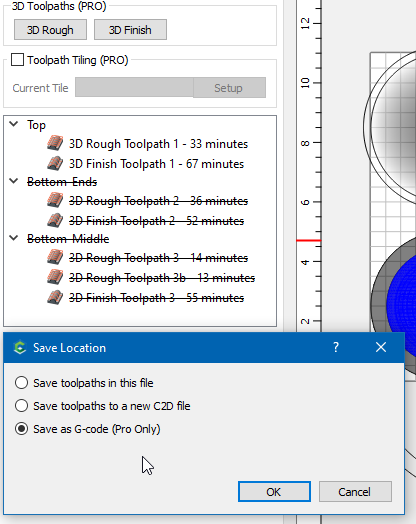
Repeat for the 2 bottom groups.
Now just remember that when you go to machine the bottom, you need to enter “6.0” in the Y box for your zero instead of clicking “Zero Y”.
dough_bowl.c2d (688 KB)