Dust hose dress with Suckit or similar boot

I use tig welding filler wire to hold mine up, but a metal clothes hanger would be just as good.

My hose has a make-shift anchor to the rear side of my Shapeoko table (and I mean make-shift), and my Dust Deputy bucket sits below. The hose is stiff enough to stay vertical unless the gantry is back at home position. I’ve had thoughts of carriage-based supports for the vac hose, but I’m still mulling over design needs.

Also using the SuckIt Dust Boot.

I made my own shoe for my XXL and ran my hose with a swivel in the middle.


3 Likes

Thank you all, especially for the pix. Some good ideas there. Now to implement, hopefully I will be able to add my pix when I have got it sorted.

1 Like

@patonclover Here’s a cool idea I found on the Suckit Dust Boot Facebook page that you might find useful:

There FB page: https://www.facebook.com/Suckitdustboot/

FYI… I have Suckit Dust Boots on both of my machines and love them! Can’t live without them.

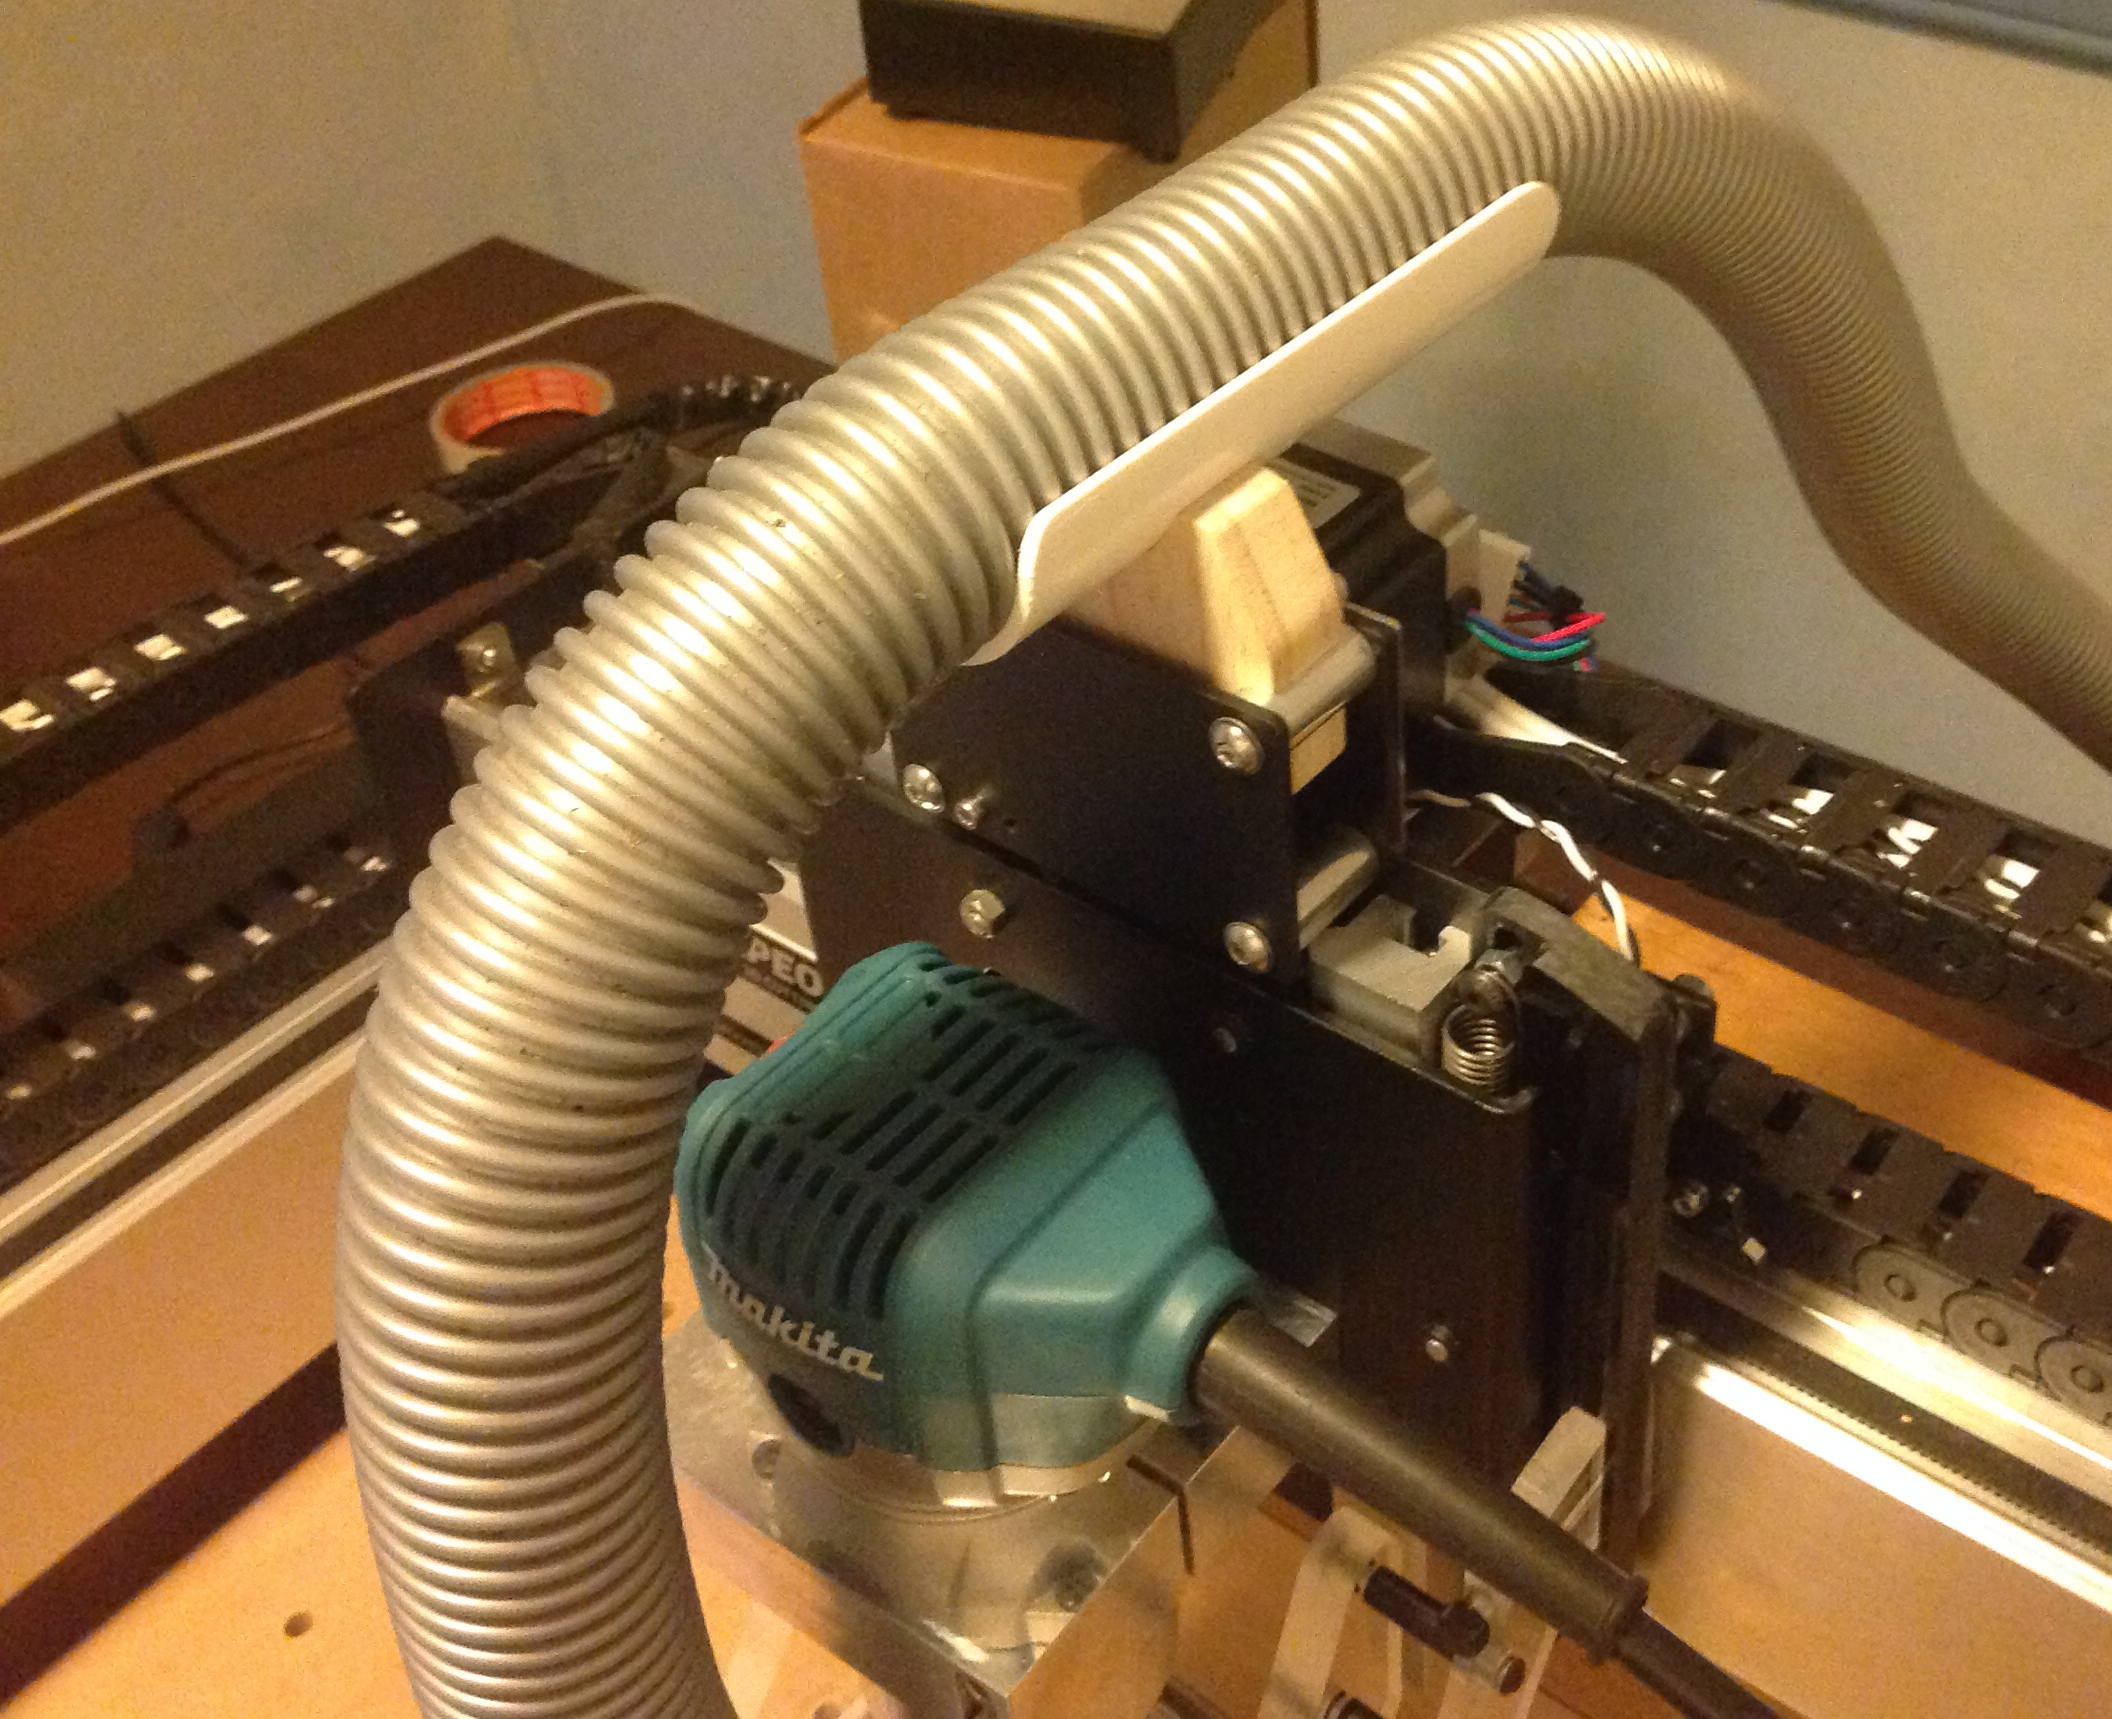
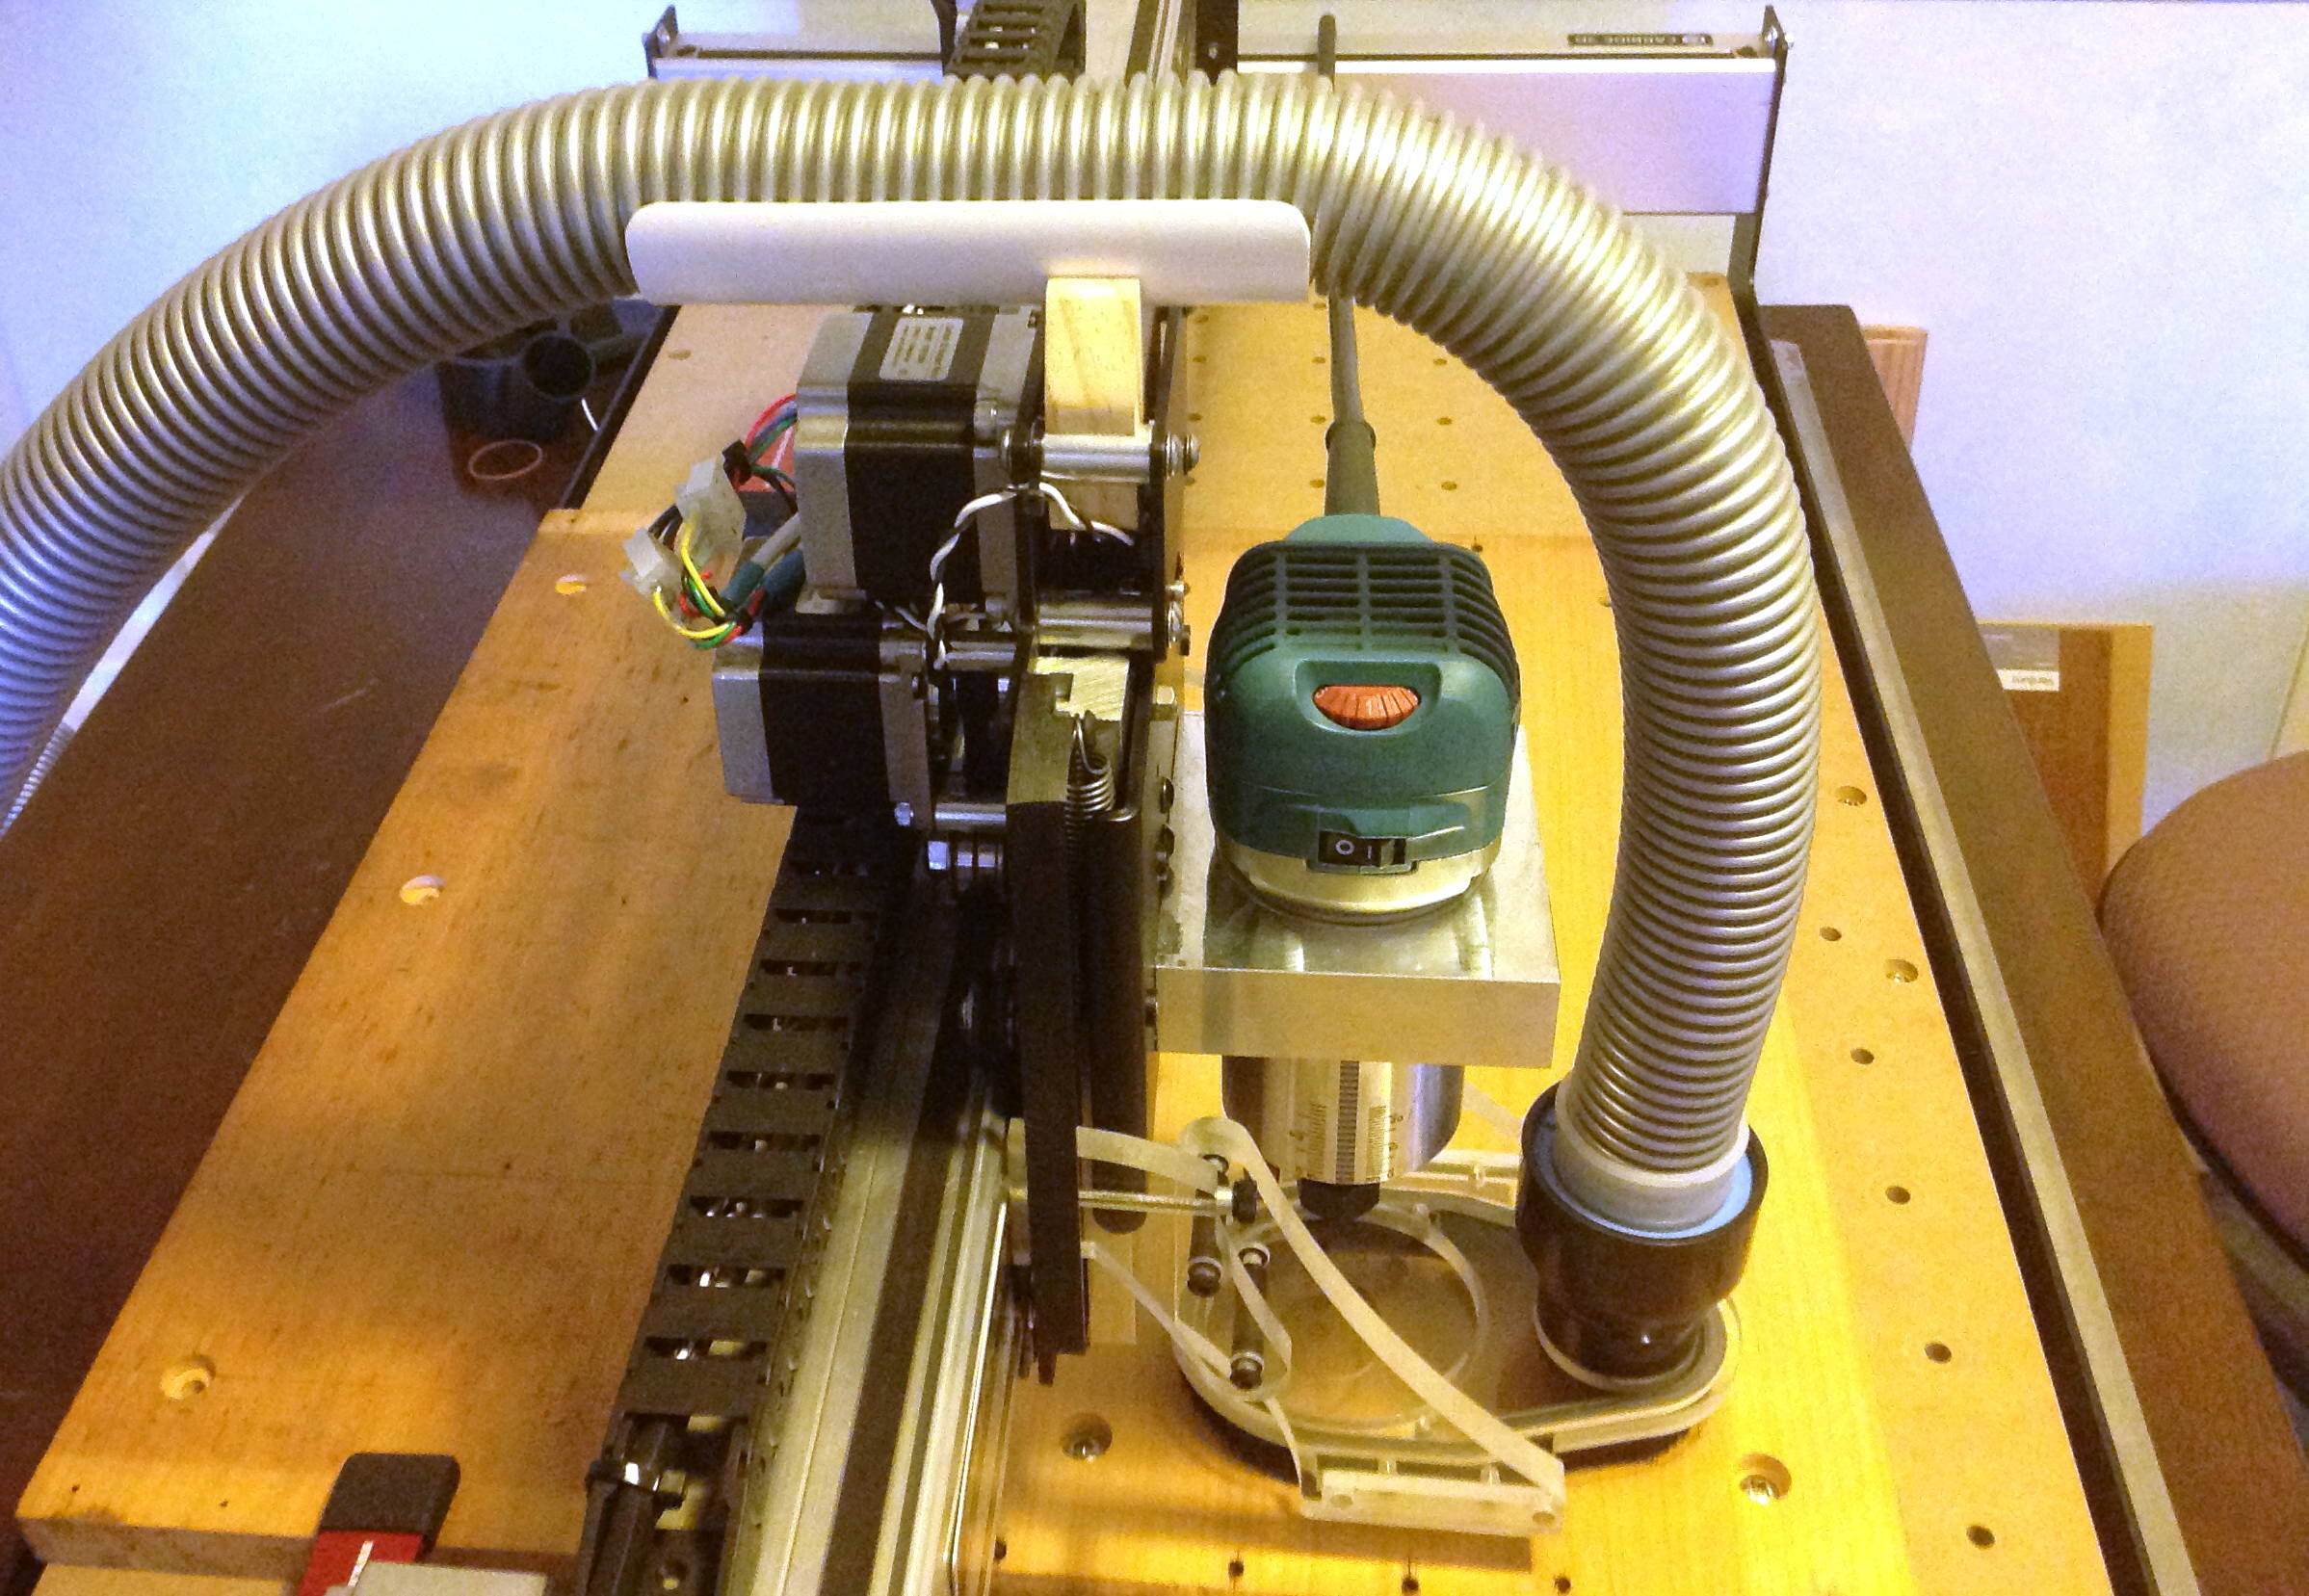
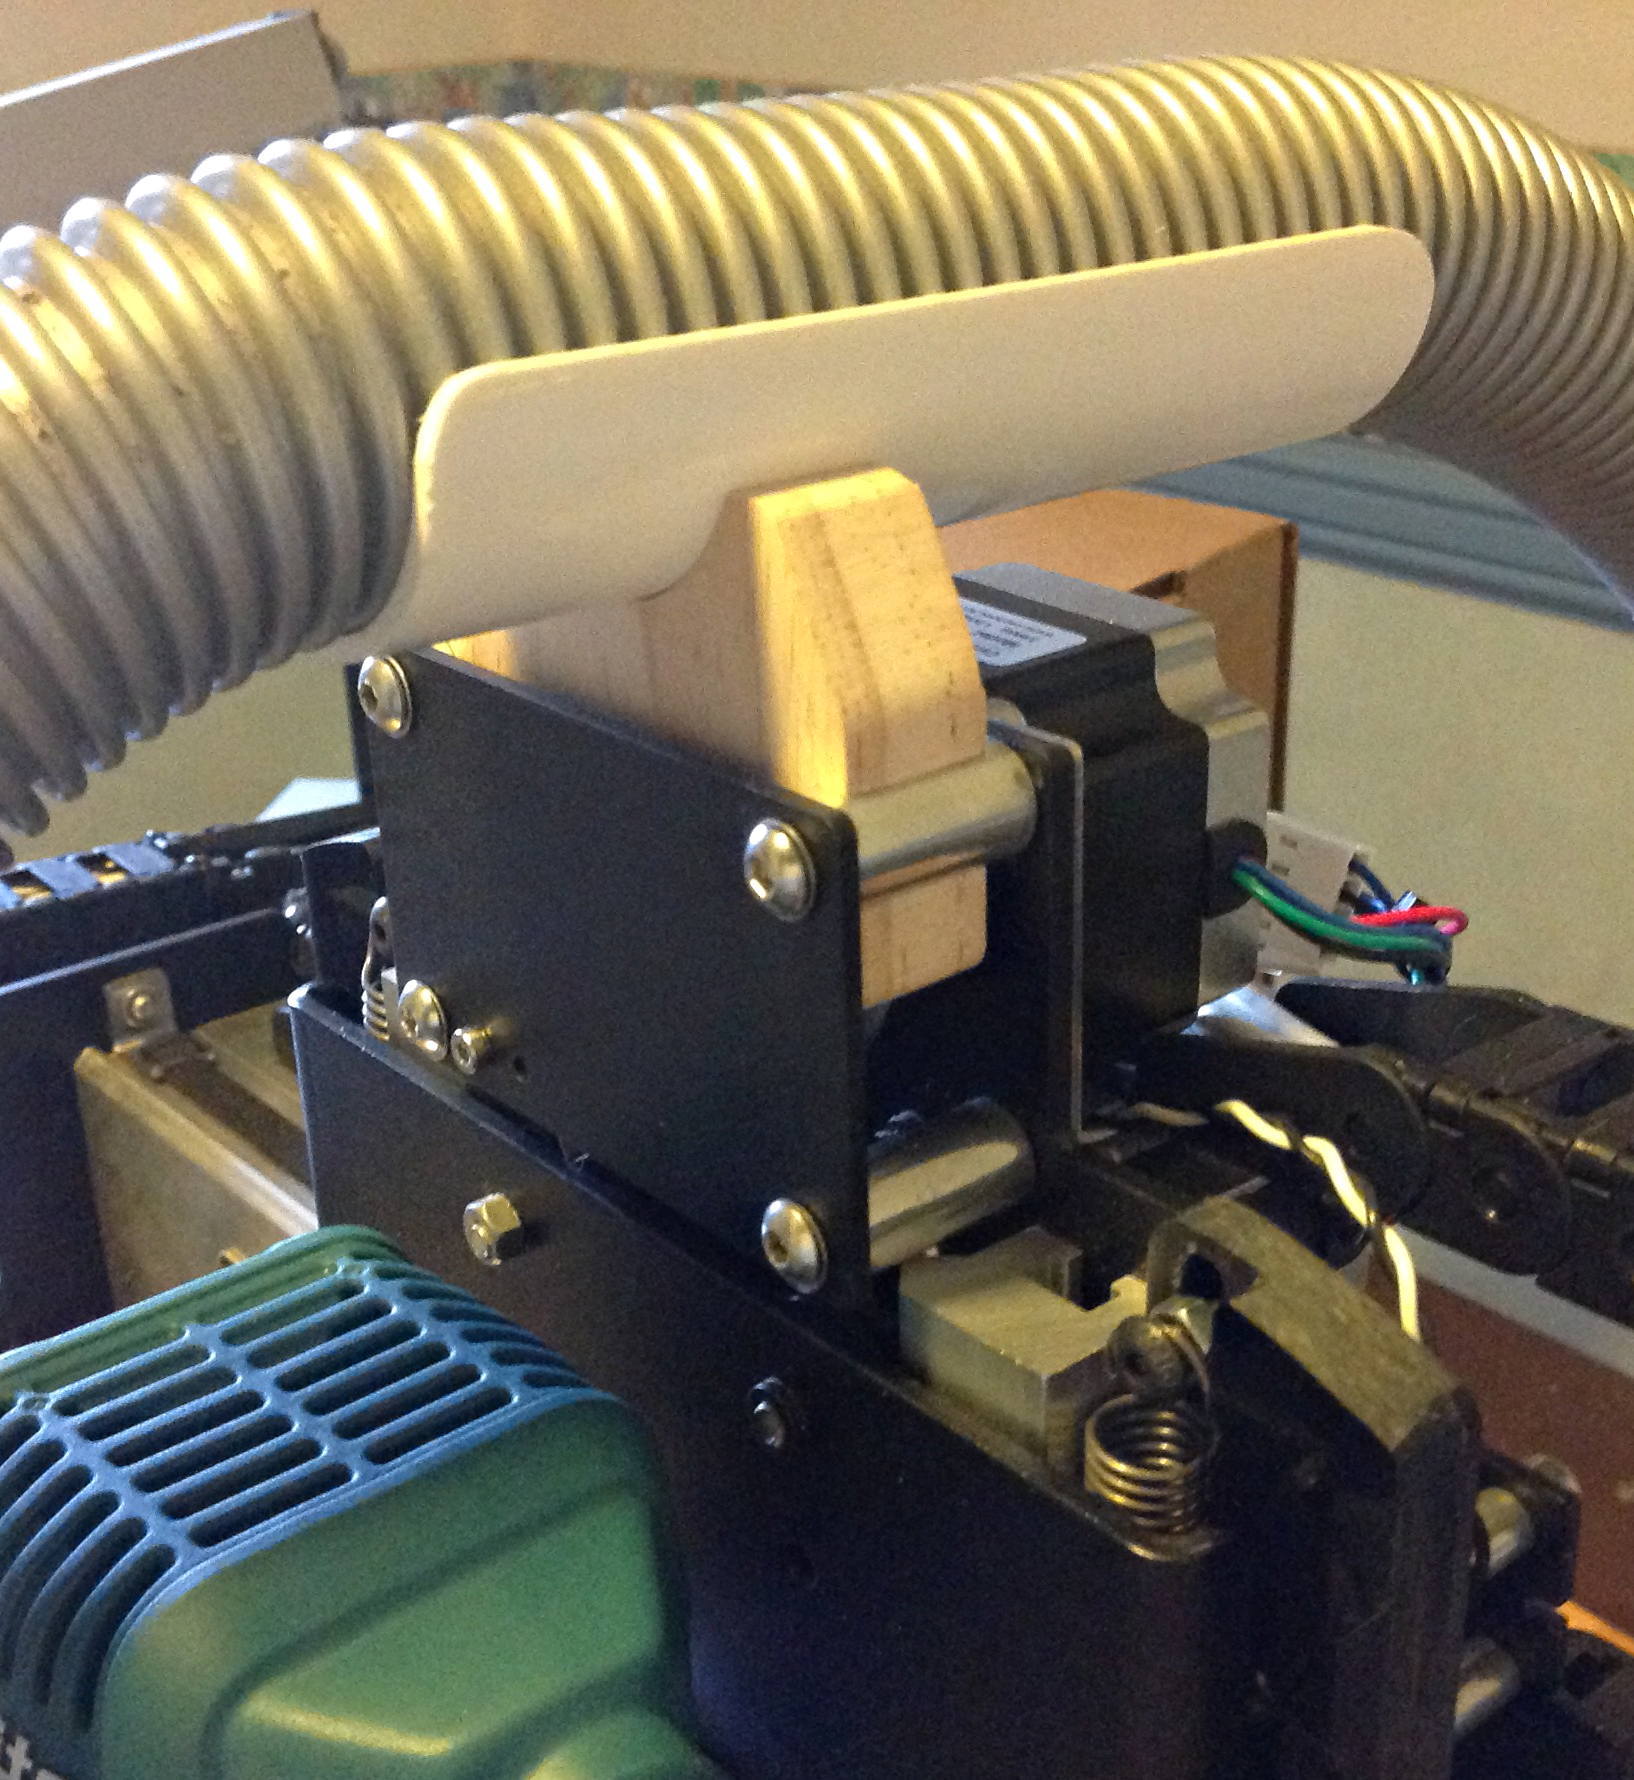
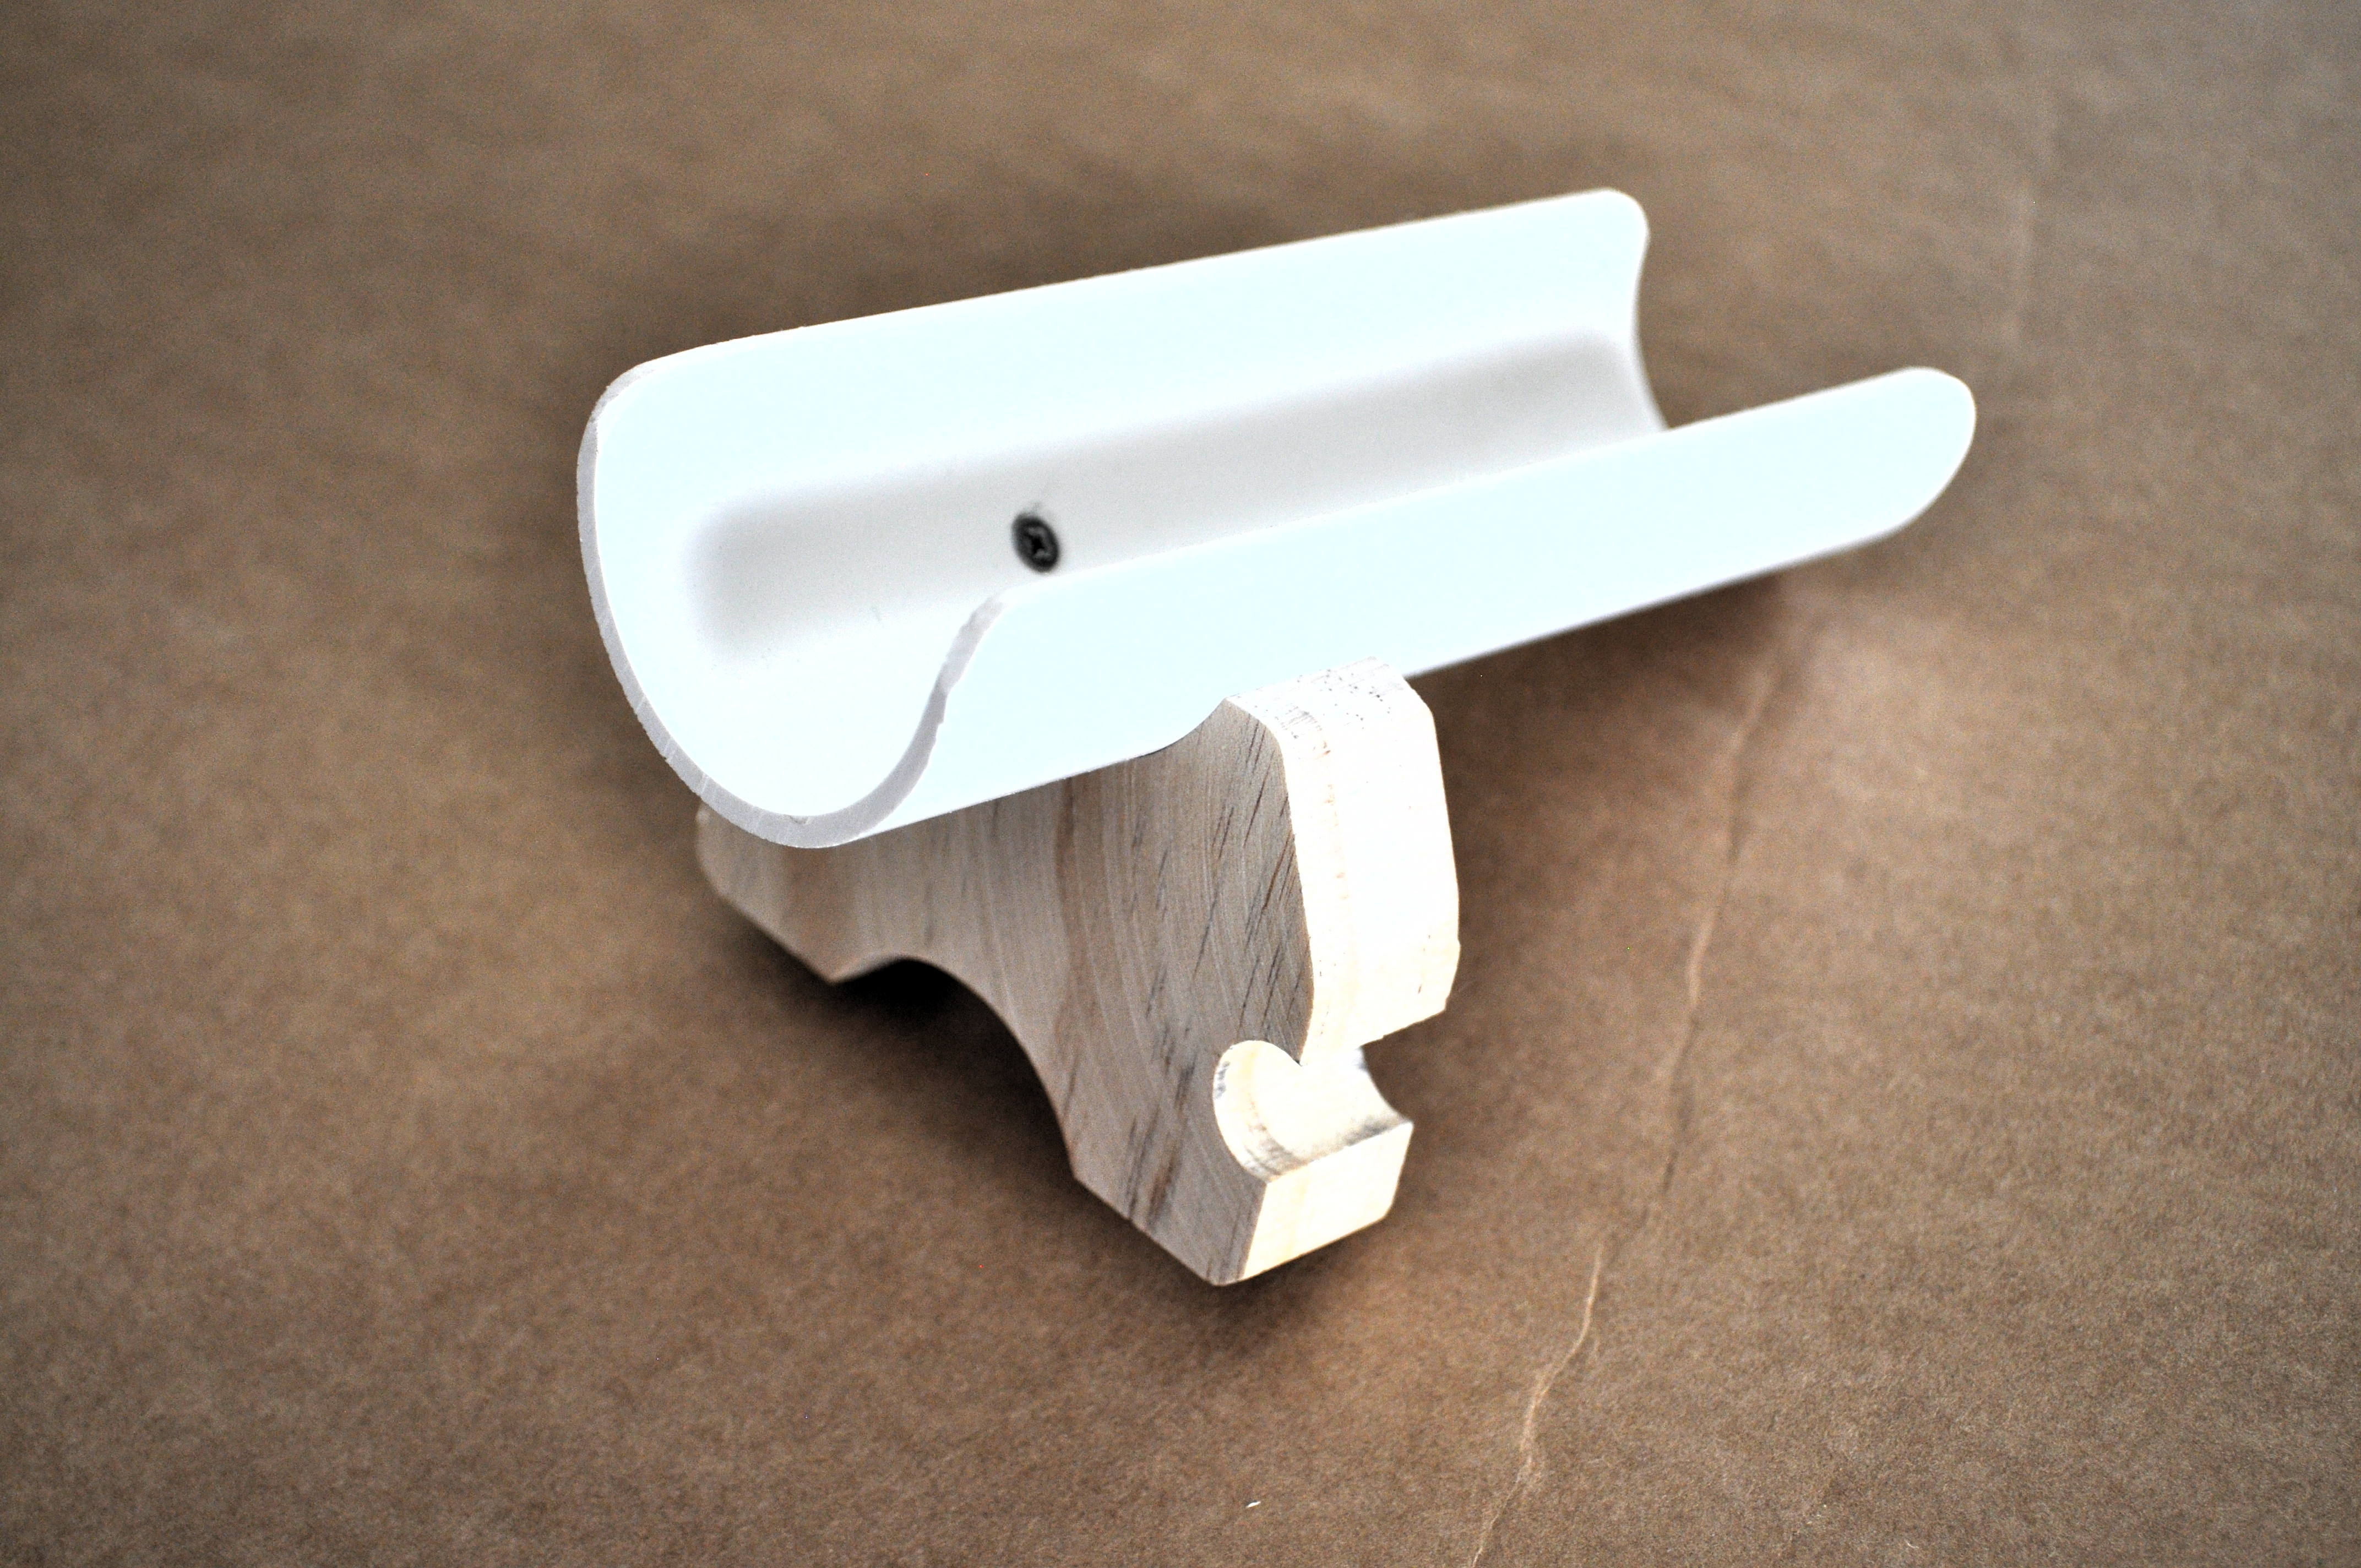
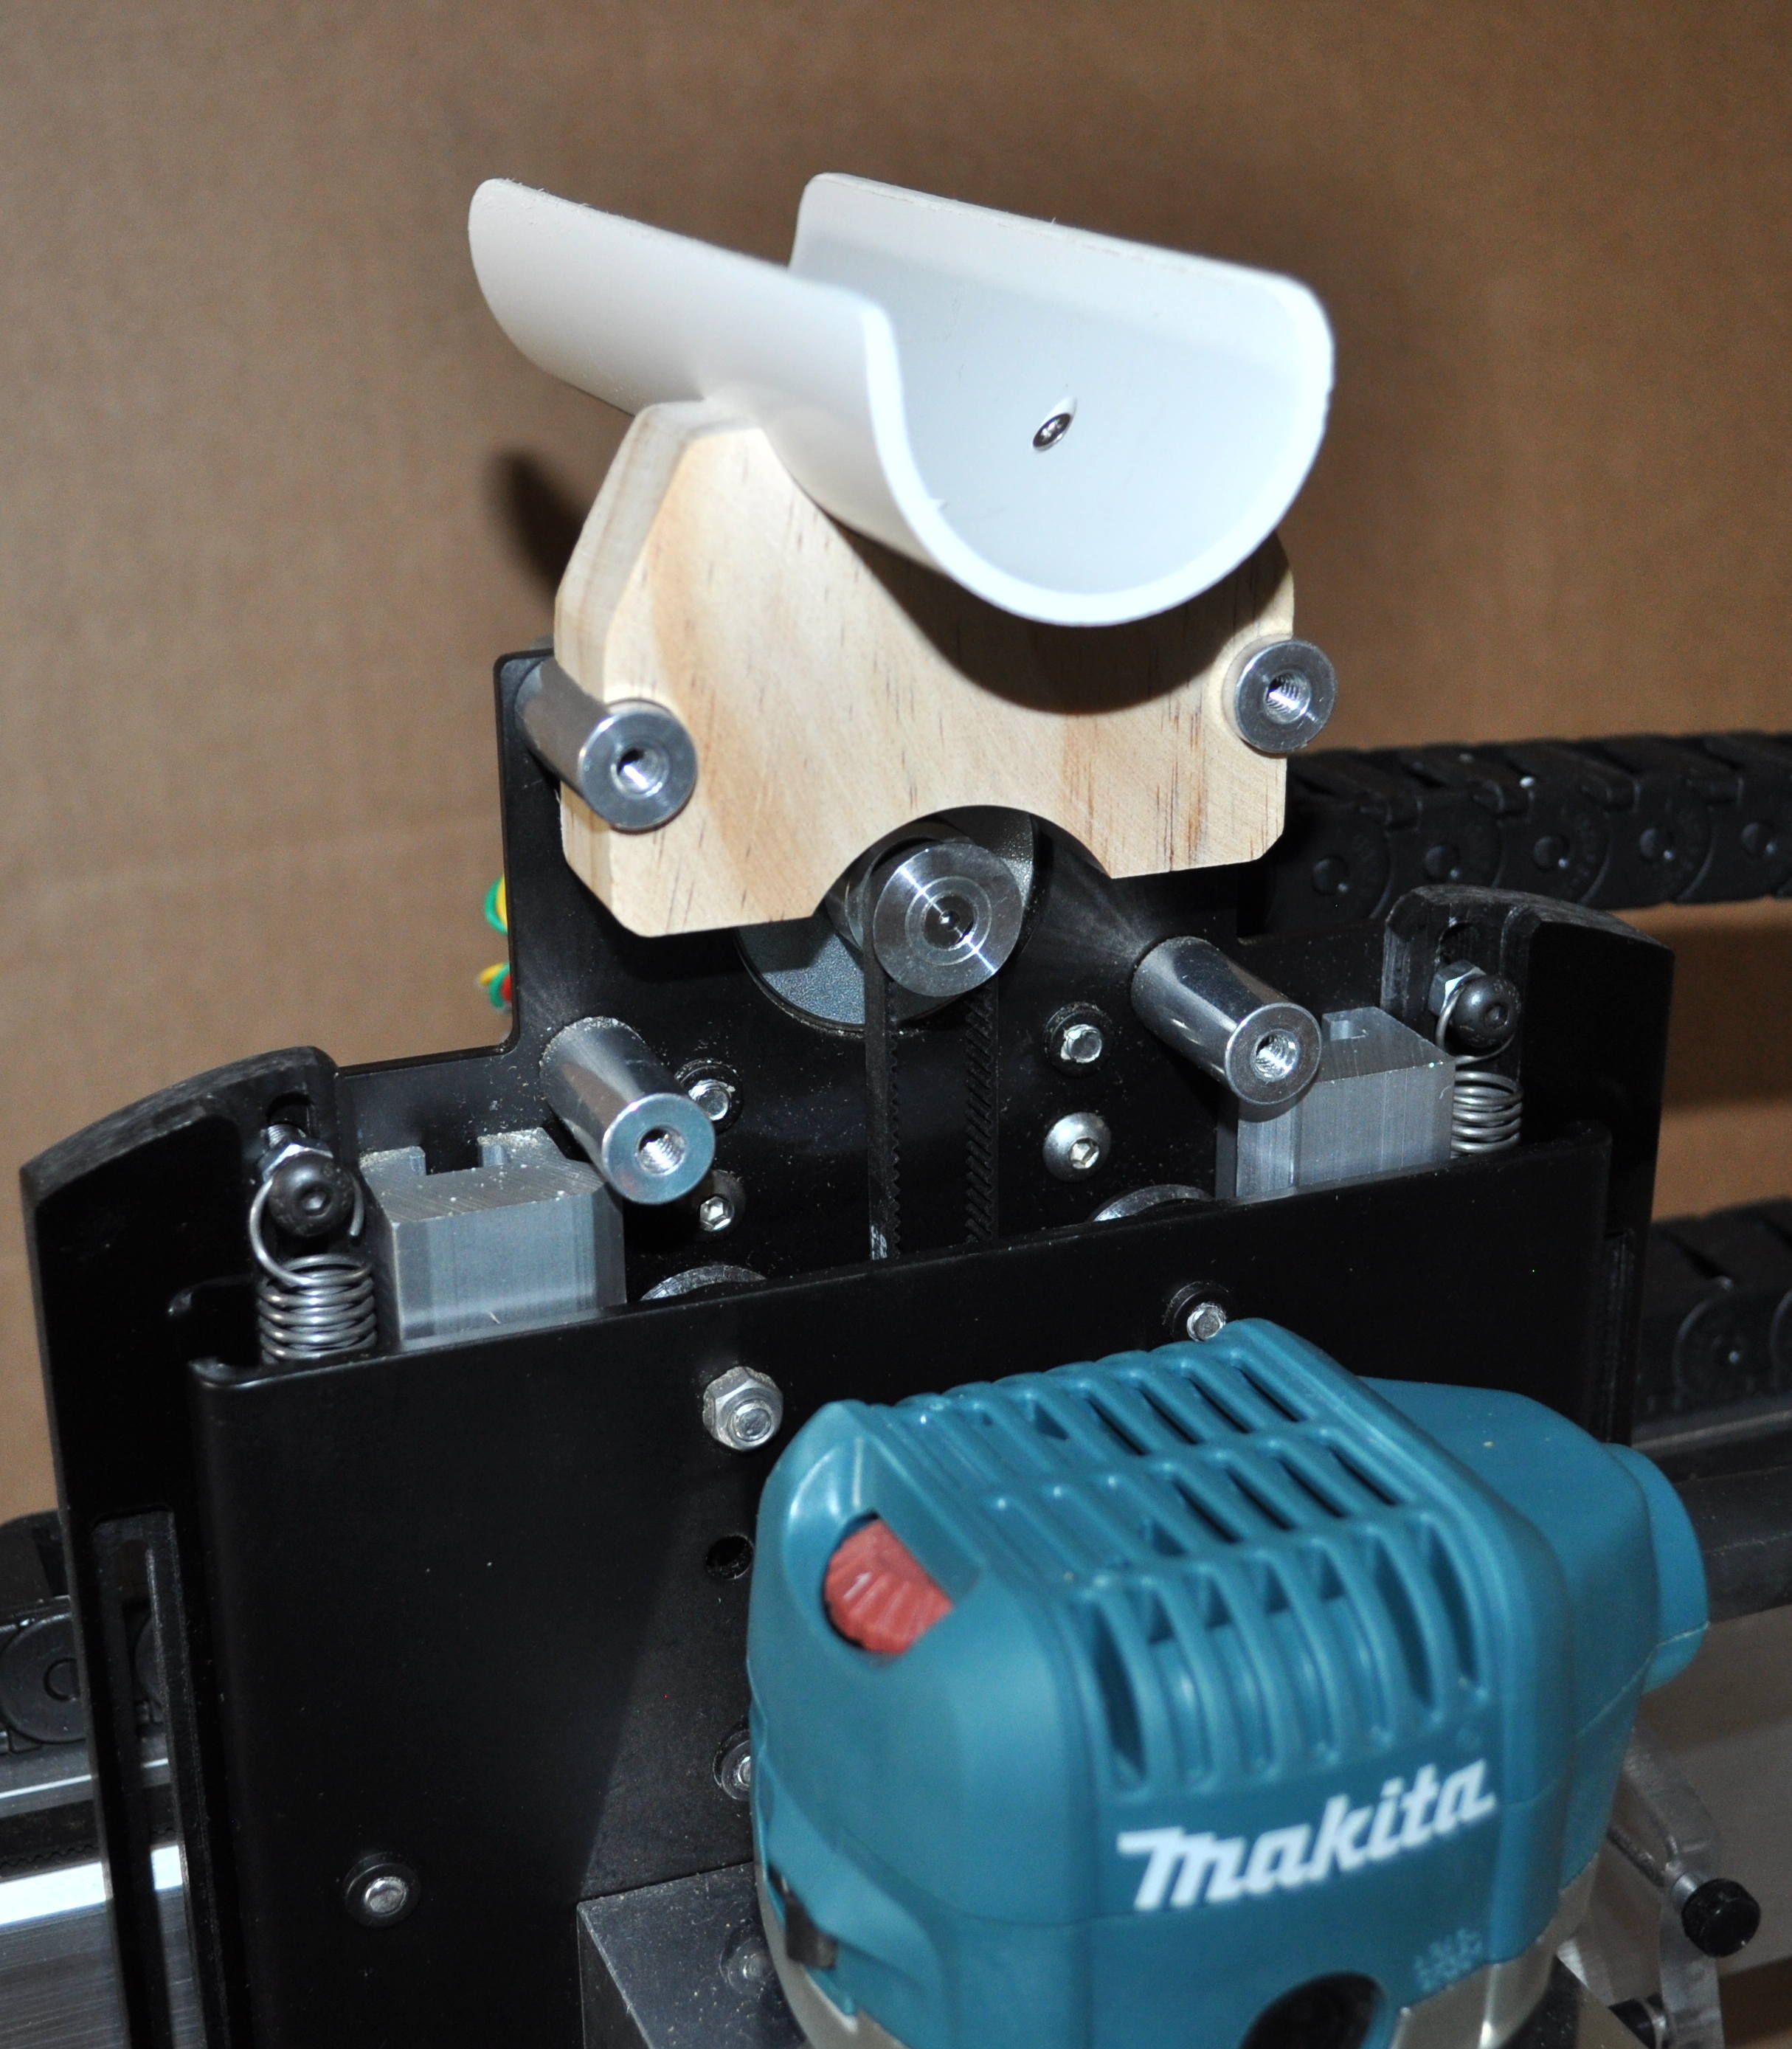
Thanks Jim. Now isn’t that interesting. Here’s what I eventually came up with which seems to work well. It is just a piece of PVC pipe (45mm from memory) that snugly fits the vacuum hose I had available.


20 Likes

Nice work… I had visions of a similar widget, however I ended up suspending the hose with some nylon cord into a ceiling joist screw-eye.

2 Likes

Just noticed this for some reason, are you still using it like this. I think this is the best solution yet, put it in the accessory contest. When I get back up and running (after Irma) I’m going to incorporate this into my setup slightly altered of course. Thanks Pat, great idea! Jude

3 Likes

Thanks Jude. Yep, still using it, it keeps the vacuum hose well away from movement. I am using it with a Suckit, not sure how it would be if your dust boot moved up and down with the Z plunging - ok I guess if you left sufficient slack in the hose. I use it in conjunction with a shop vacuum and a cheap Chinese Cyclone separator. The whole setup works a treat with very little dust in the vacuum bag or on the machine.

Thanks for the idea of submitting my hose-hold in the contest.

I am sorry to hear that you have been affected by Irma. Such a terrible loss by so many folk, No doubt it will take years for families to recover. I can only hope that you and your family have something to go back to and be able to pick yourselves up after this. Here in Queensland where I live we are not unfamiliar with the vagaries of the weather.

I thought it was like you folks get weather when you do but it’s all capital letters (WEATHER!!!). We wiil be fine (insuranced), only stuff damaged, my dust boot is to be redesigned destined to become just a nozzle pointed at the collet, built my own torroidal spiral separator which works funnominal (sp?) and my 30 yrs old kirby vacuum cleaner. For the up and down of the router I could always spring mount one side and pivot it where you have the block of wood. Thanks Pat

The natural bend radius of the hose seems to keep it from interfering with the routers movements. Super convenient!

I’m wondering if the added mass effects milling?

Since, I am in the process of considering how to build a better enclosure, I’m wondering how to integrate a dust collection hose into the side or top, whatever. Similar to the approach you have taken.

That reminds me, the local irrigation stores have many types of fixture hardware.

Thanks for the inspiration!

1 Like

No Tem, I haven’t noticed any change in performance one way or the other. Thanks for your comments and good luck with your design.

Here is a link to my post regarding my enclosure. I have my hose coming in from the top. The top of the enclosure takes most of the weight.

This is what inspired me to build my boom holder:

I saw the PVC pipe and raided the local Home Depot plumbing department, haha!! I originally had it draped back like yours, except with rigid pipe, then I decided to get rid of some bends. The way you mounted yours though was a very direct inspiration for mine. Cool stuff!!!

Dan

2 Likes

That looks really great Dan. I like the way you have extended the bracket out to accommodate the 4" hose. Unfortunately I don’t have the luxury of a high enough ceiling to take my hose upward. My solution is not quite as versatile but works fine for me.

Hi Patrick,

I really like how you make your hose bracket, It looks really neat.
I just bought my Shapeoko XL and just ordered suckit dust shoe, exactly same set up as yours.
Would you mind to share the Carbide file of the wooden bracket that you created?
I live in Sydney, my email is orrrmygod@gmail.com

Cheers

ORRR

G’day ORRR. I’d really love to share but - and I am a bit embarrassed to say this, I made it on the drill press not my 3XL. I could probably knock one up for you if you don’t have the facilities. I live in Brisbane and will PM you tomorrow.

1 Like

That would be great Patrick. I’m very new to wood work and have very basic tools.
Thanks

I came up with an idea to use 80/20 extruded aluminum to make a dust hose rail. Worked out pretty well! The hose is zip tied to an insert into the rail and slides with the action of the router.

Video: https://www.instagram.com/p/B2Va-Xdg7DV/

3 Likes

@fiero1 I recommend The Dustopper
It will keep your vacume clean and save you the cost of changing your vacume’s filter.

1 Like