Dustopper Vacuum Mount

Hey y’all,

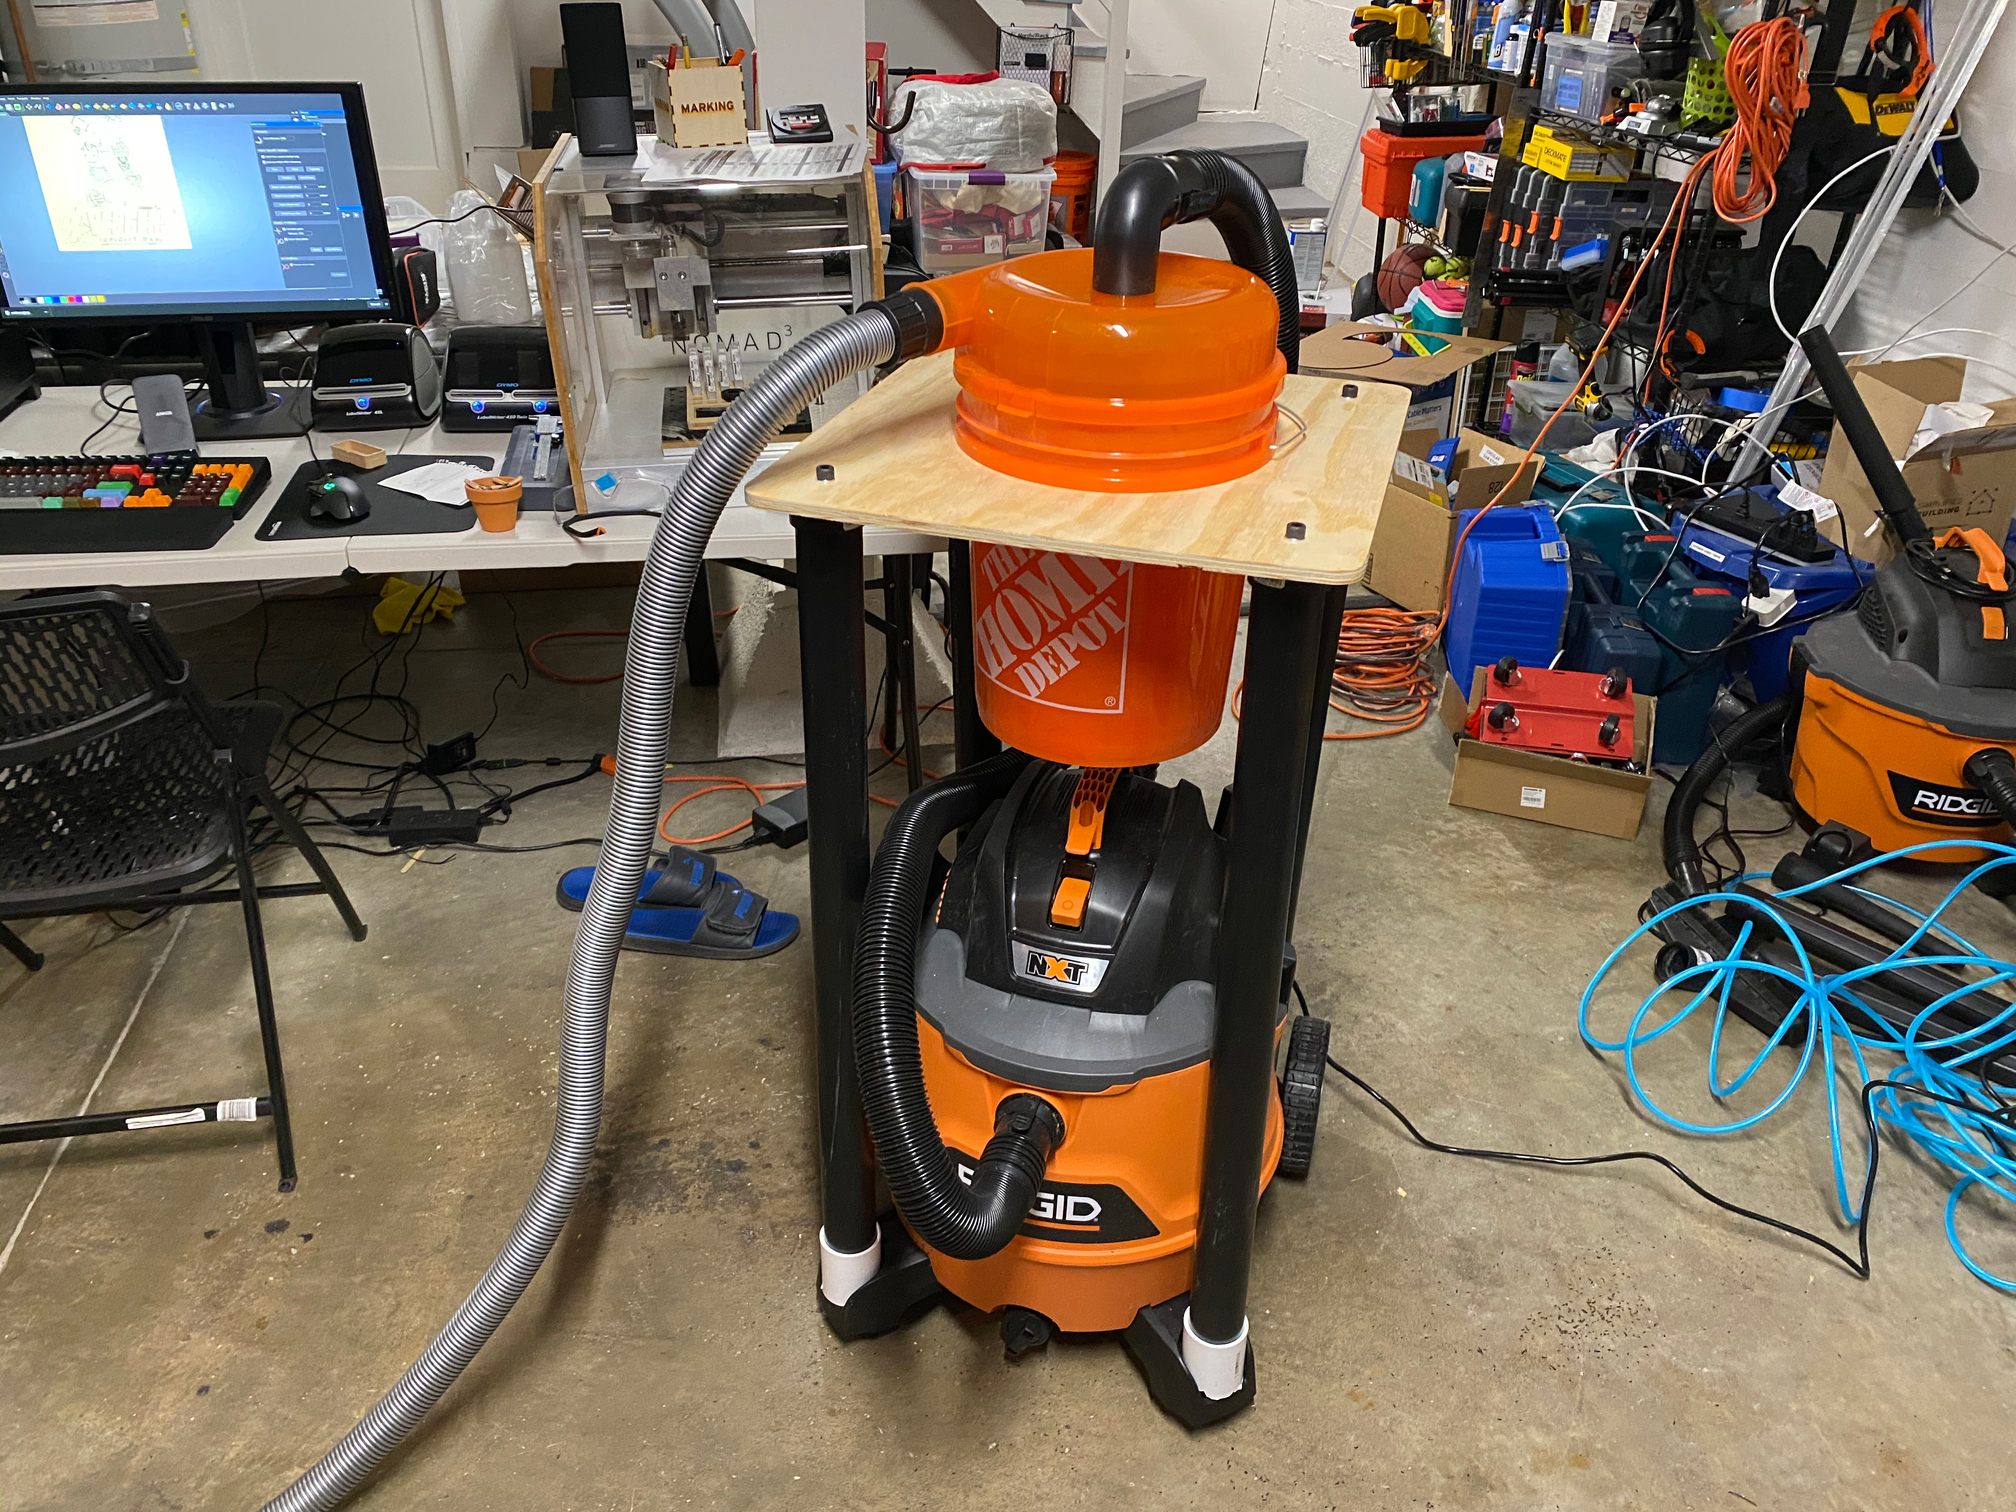
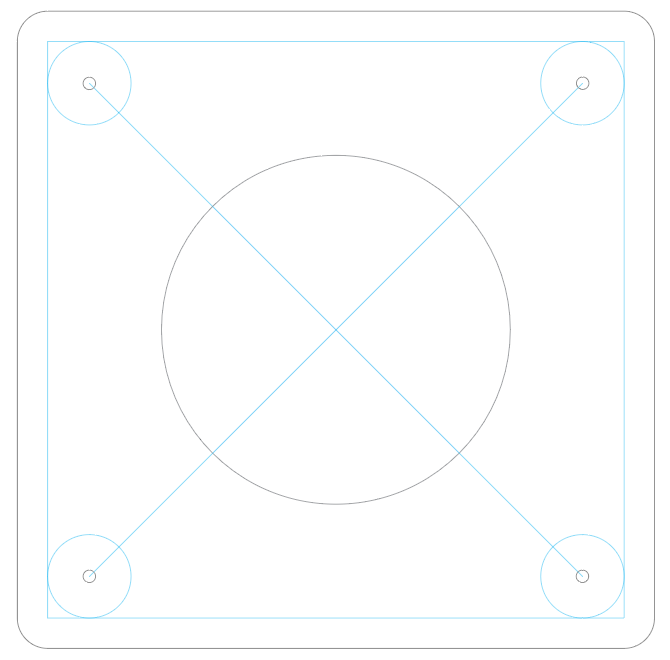
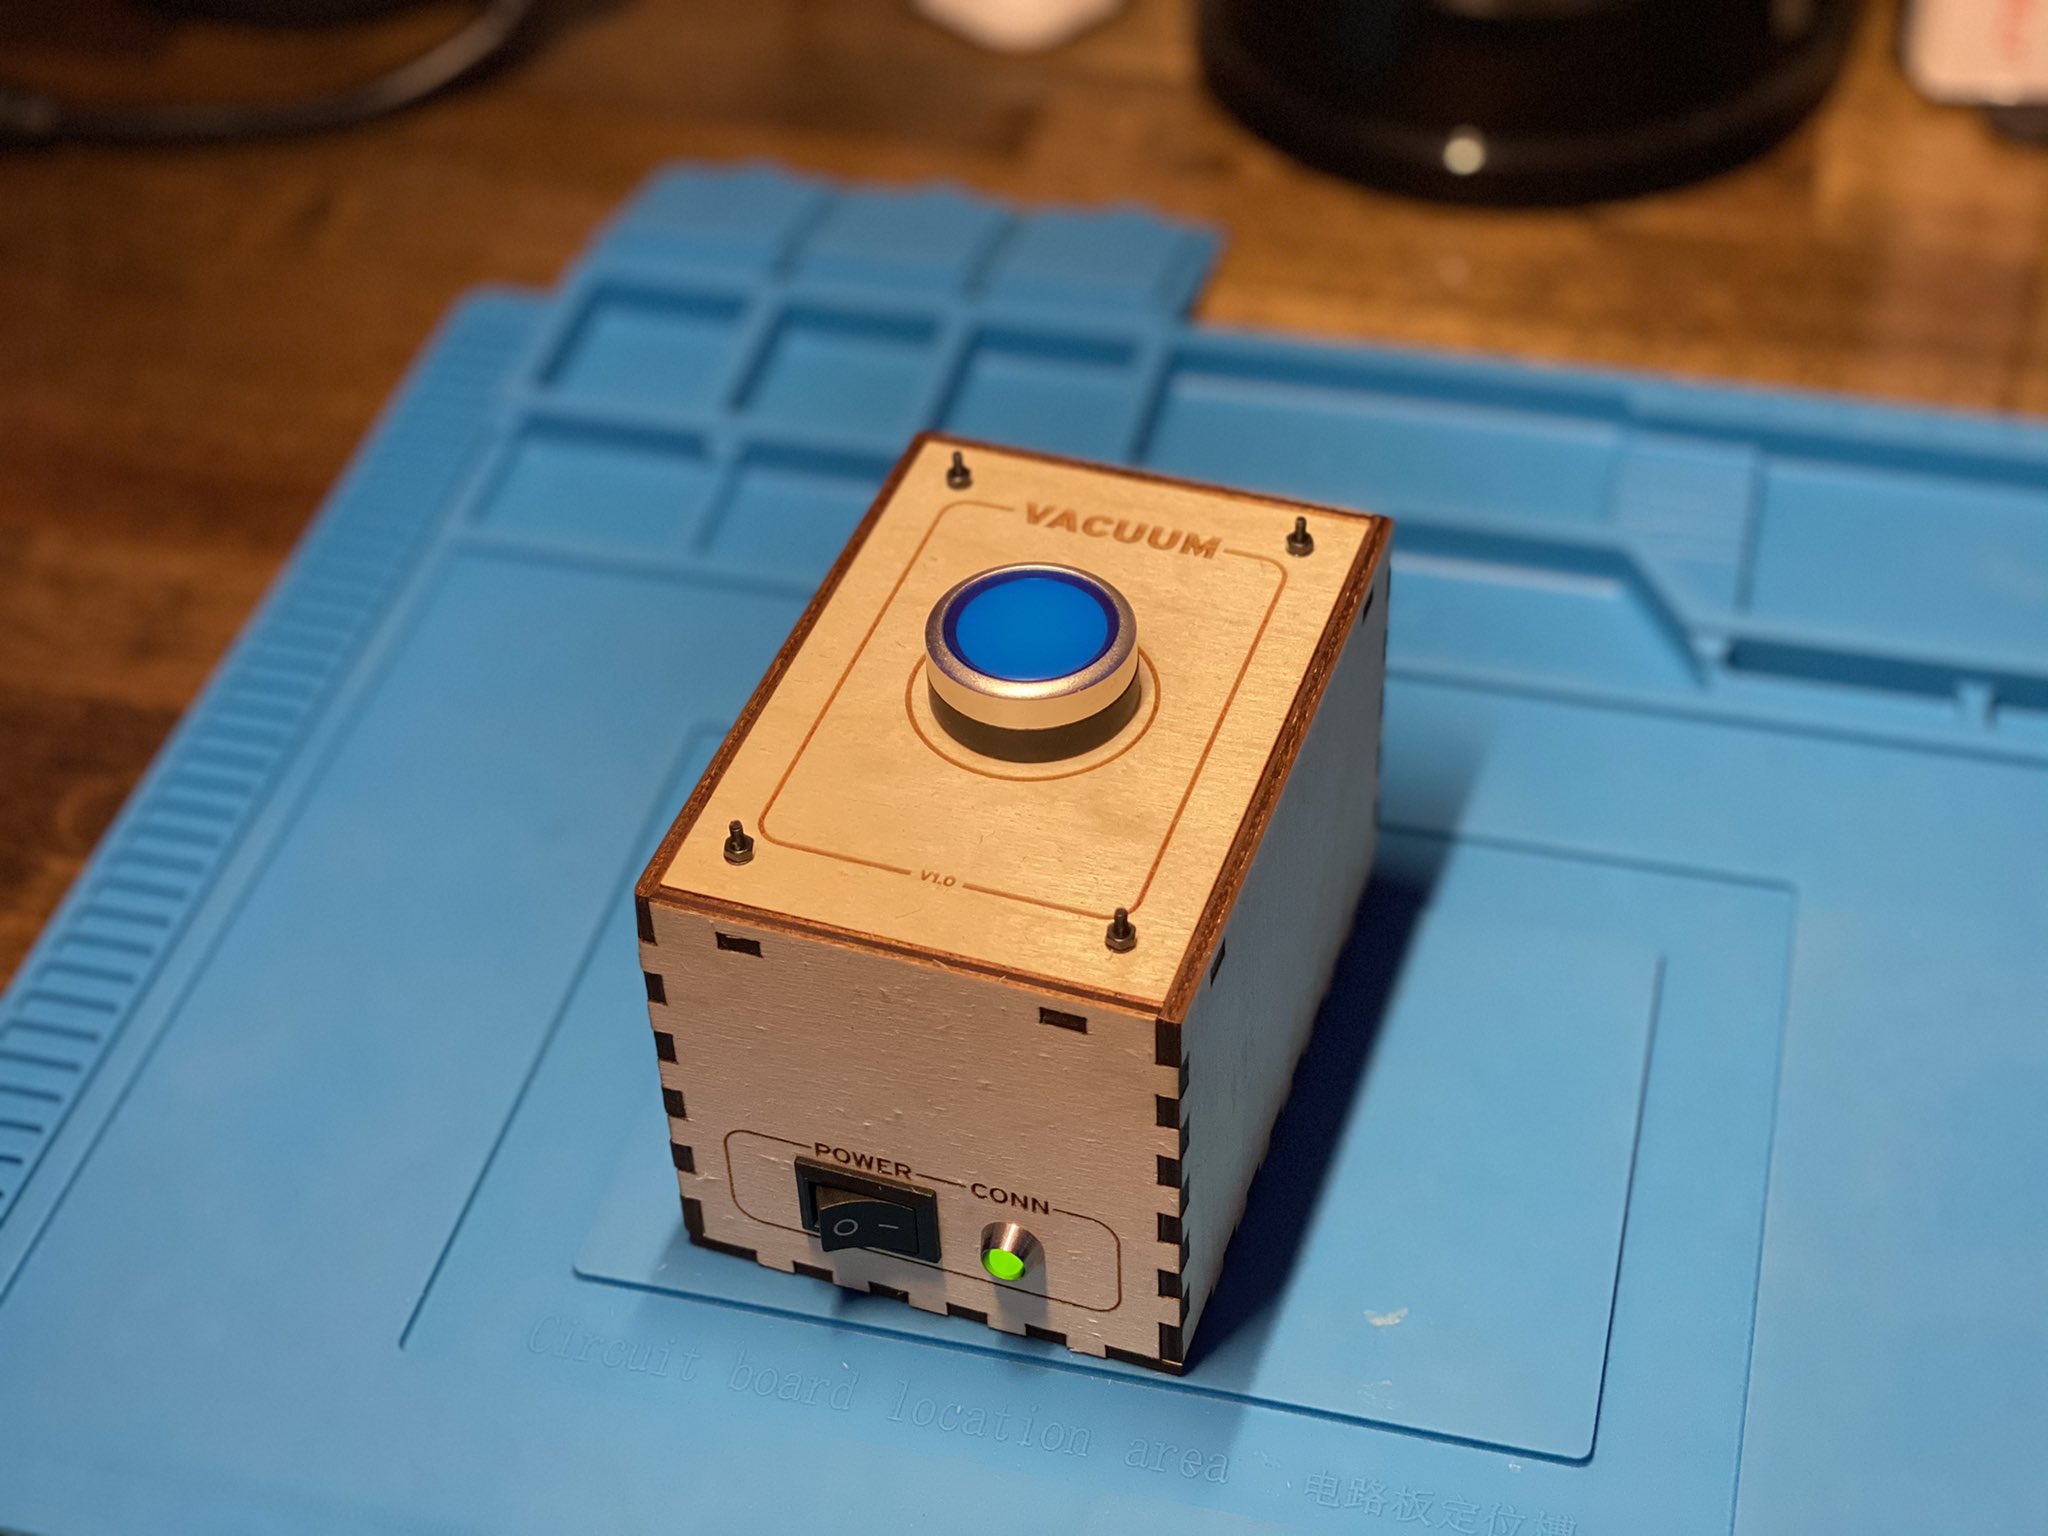
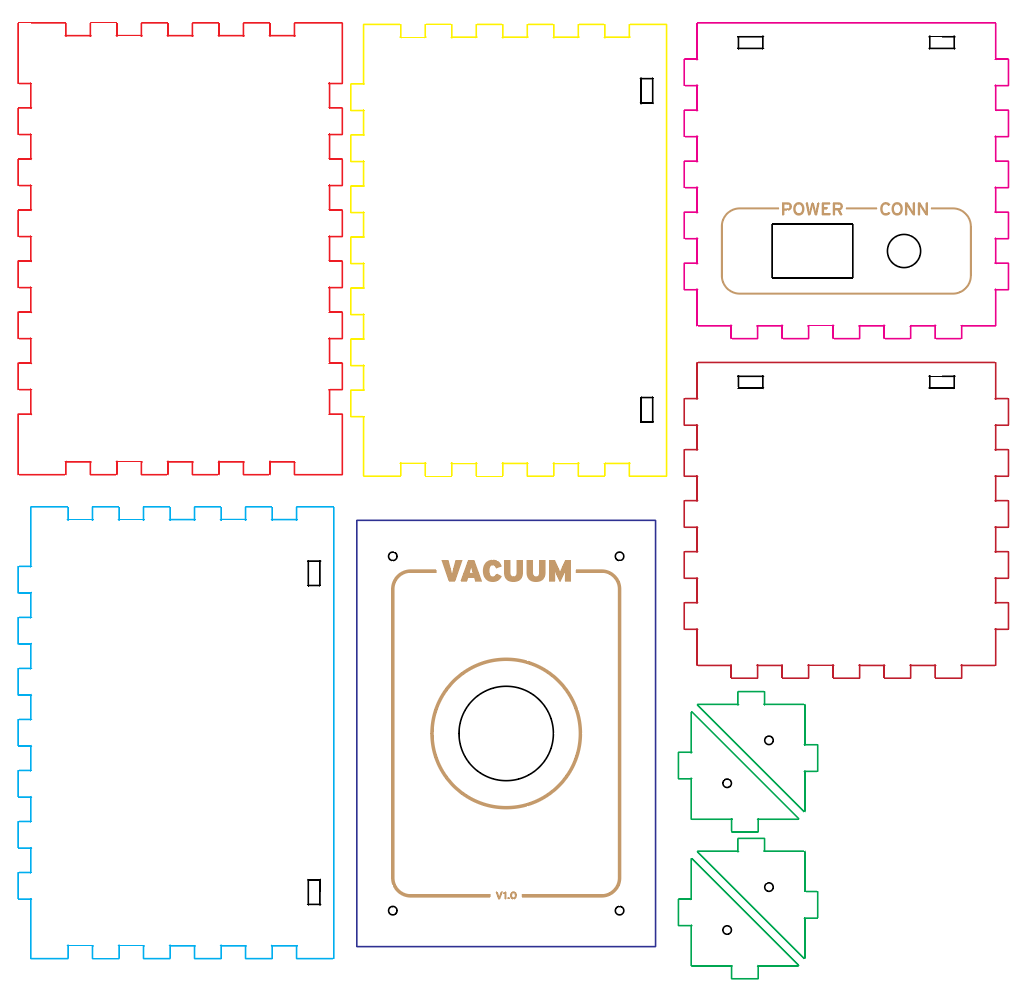
This is my first, simple plywood project with my new Shapeoko Pro. Top is cut from some cheap bc plywood.

I don’t have a great dust collection system, but something that works “good enough” for now is the Dustopper “dust collection” system from Home Depot that fits on a bucket.

Dragging a bucket around that’s attached to my vacuum was a pain! So I stole an idea off of the Googles and built this.

I wish I would have bored out some holes for a handle in the design, but I’ll end up retrofitting one on later. Good enough is good enough for now.

Mix of ABS and PVC because the orange big box didn’t have enough parts in PVC or ABS to complete it!

I used my laser cutter on some cardboard to test that the diameter of the bucket lip was correct.

A laser + cardboard is one of my favorite ways of prototyping things quickly to test things without wasting material.

Leg Parts
2" ABS/PVC Pipe
2" ID Pipe Couplers (for the base of the pipe)
2" ID Pipe Caps (for the top of the pipe)
Your choice of bolt + washer + nut to attach the top to the top of the pipe [I still need to add a washer under the lock washer… doh]

Design:

https://svgshare.com/i/SmU.svg
dust-wood-top

Box was generated via boxes.py

16 Likes

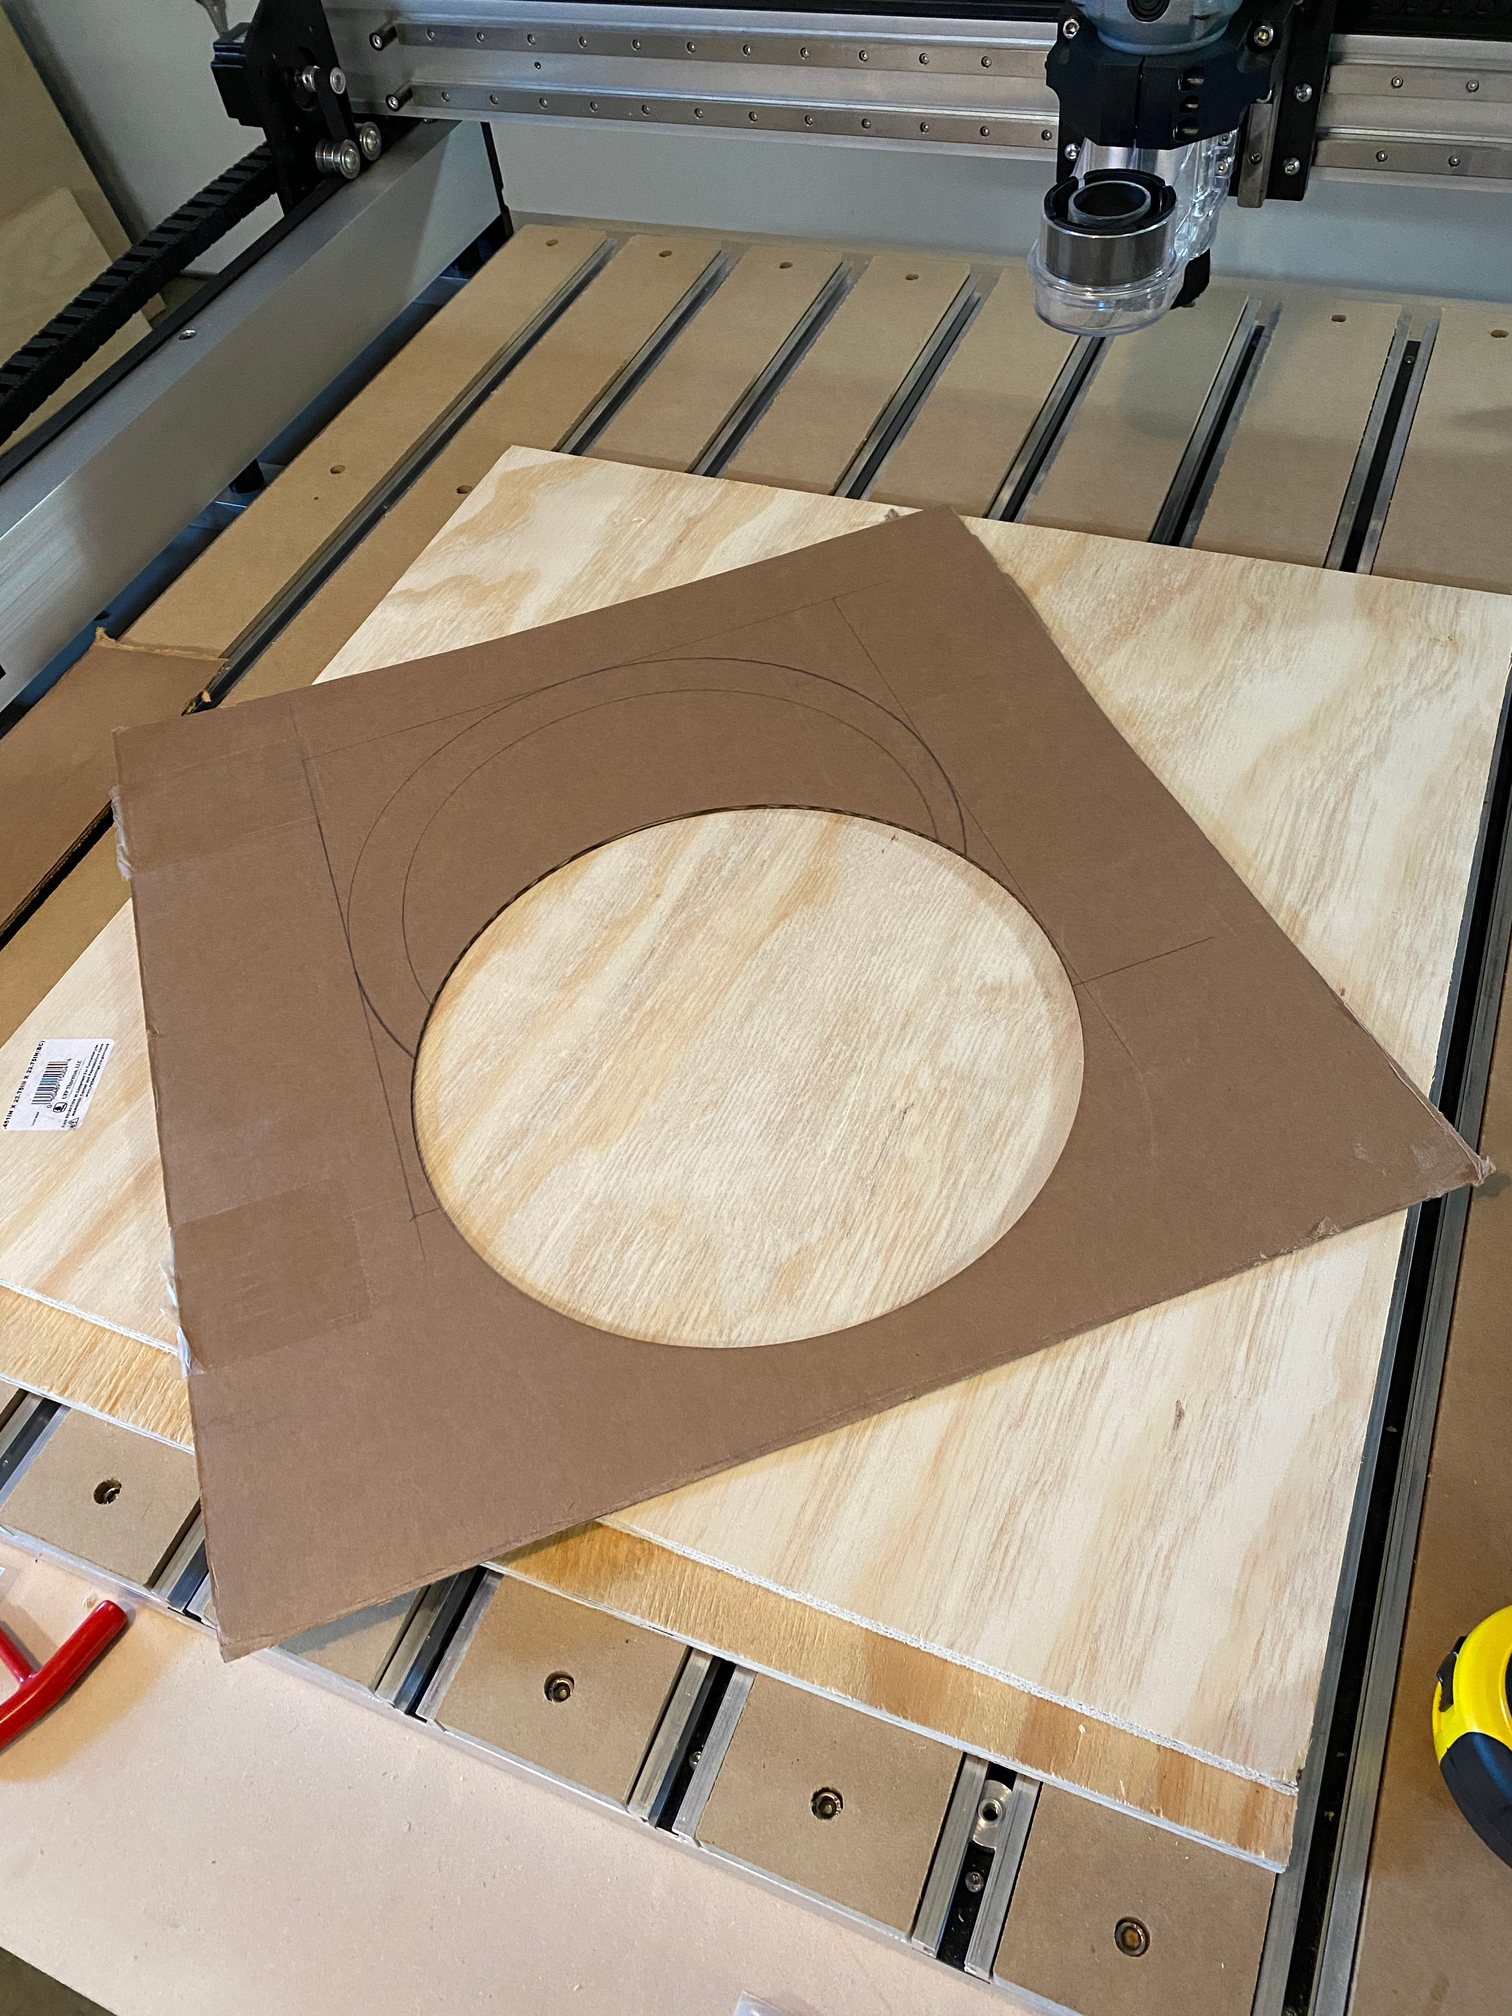
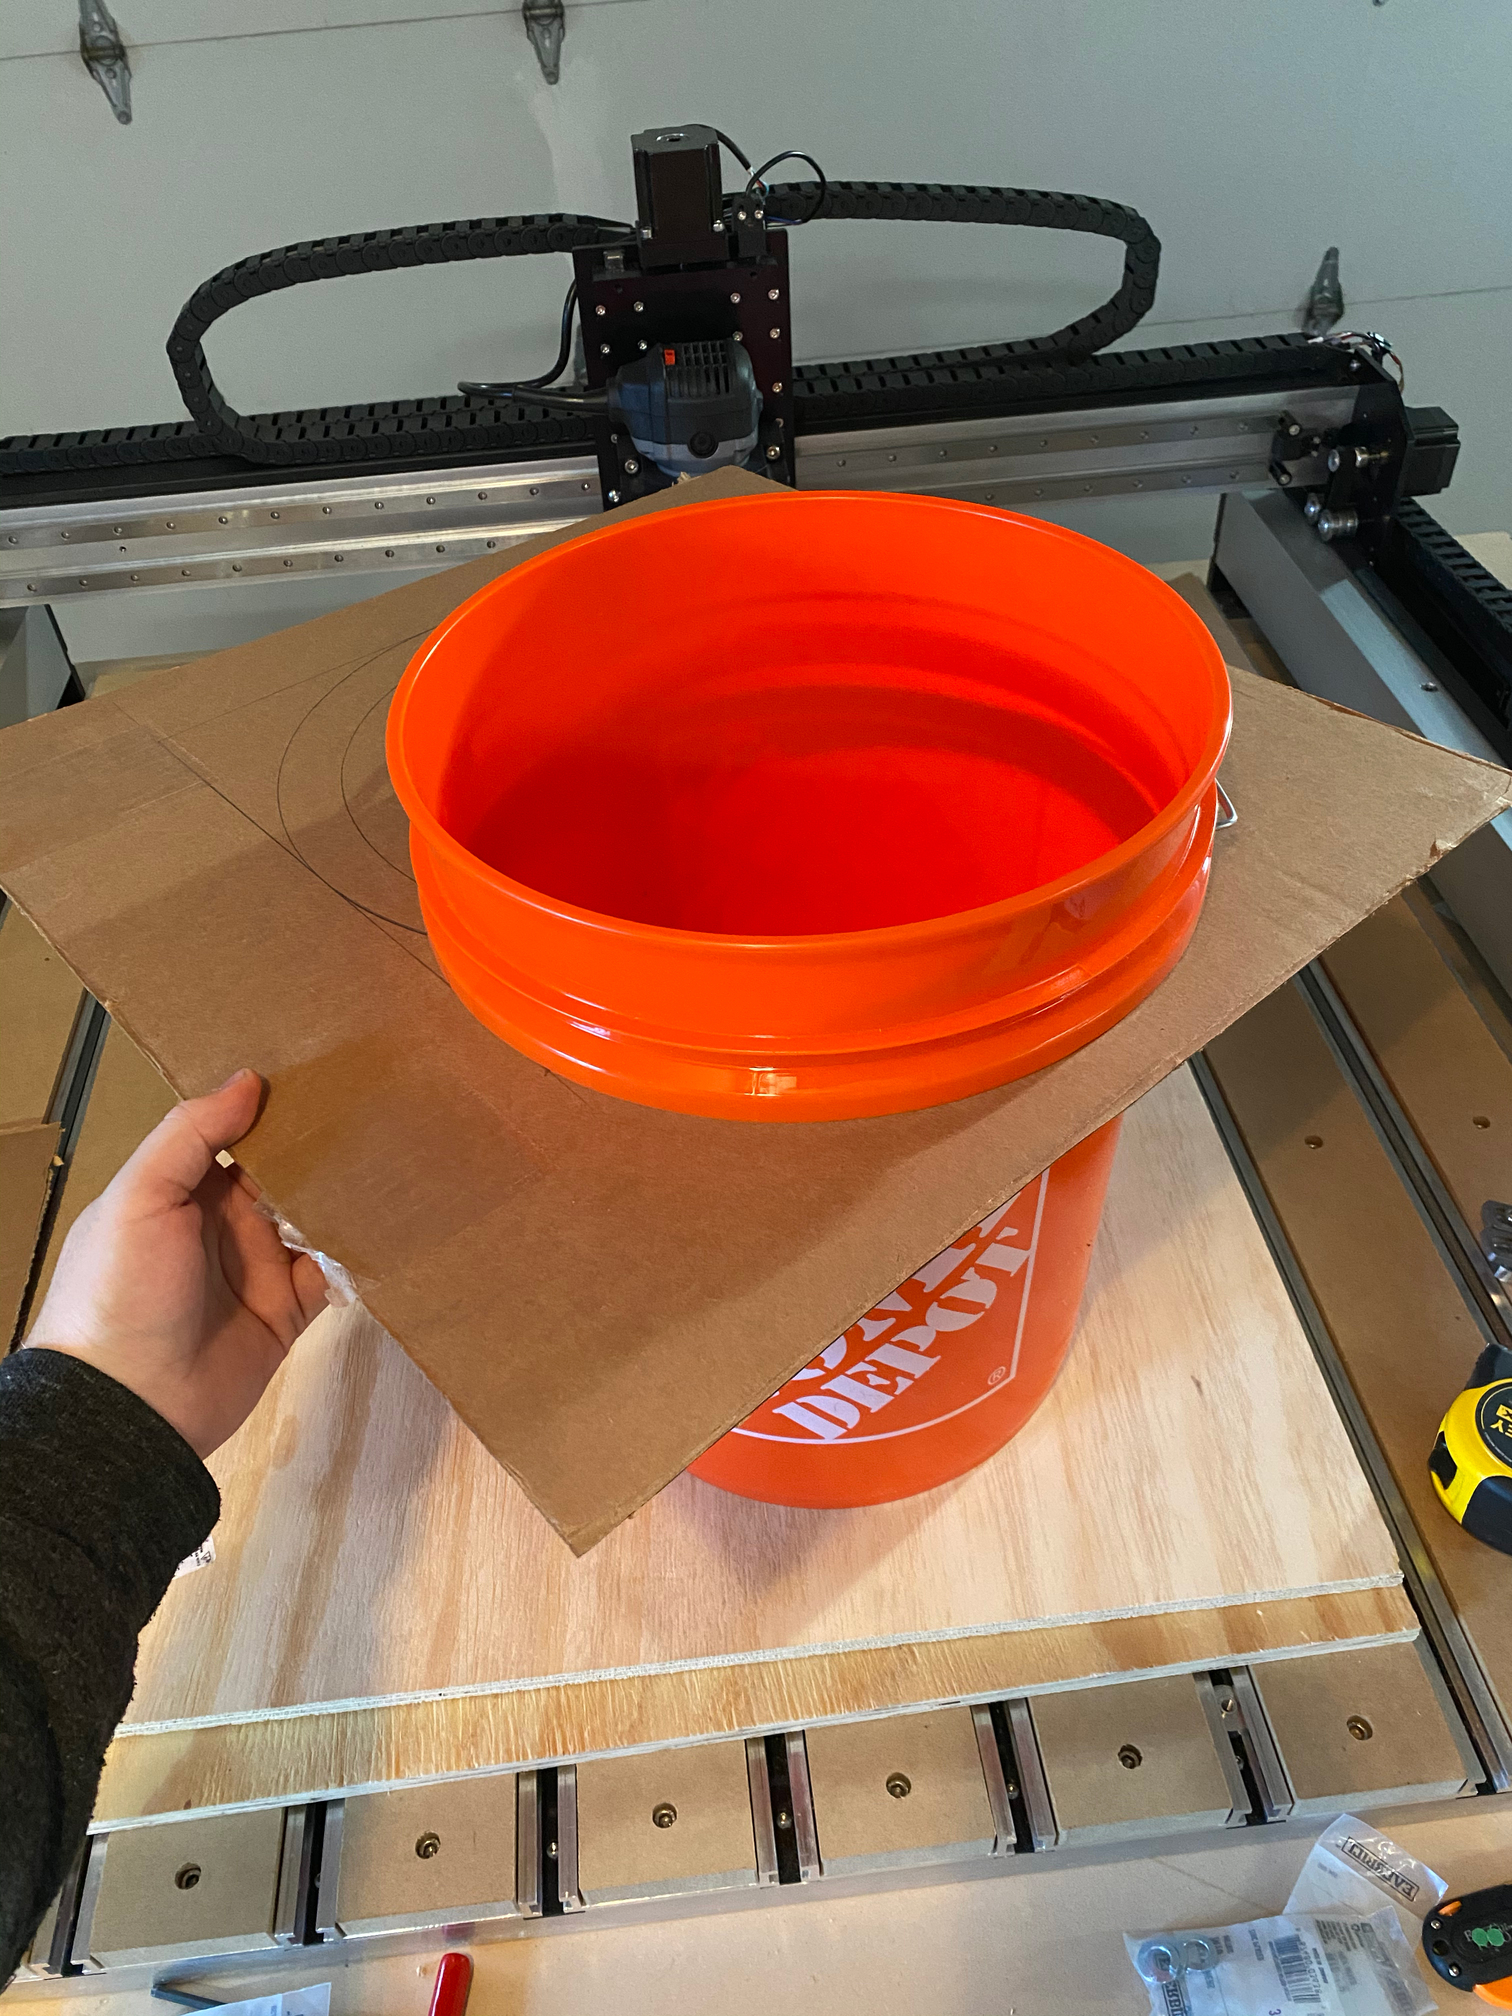
Nice solution! It’s funny how there are levels even to rapid prototyping. Many people would think cutting something out on the CNC in plywood is rapid, and it is, but paper, cardboard and scissors/tape still have their place.

I’ve had the opportunity to train a good many new undergrads over the years and teach a few workflow accelerators like that. One of my favorites is laser/inkjet printing an outline to test fit rather than jumping right to 3D printing. Flatbed scanning items is really helpful to.

That Pro is looking good!!

4 Likes

Dan, you’re so right!

I’m back in the shop again after close to a decade of living in an apartment in the city and materials are currently hard to stock up on/transport at the moment. Having to measure 10 times and cut once until I get a scrap pile again.

+1 on printing an outline. I starting using the inkjet trick a few days after getting my 3D printer when I realized that it wasn’t as rapid as I needed to be to double check my measurements.

Years back, a pen plotter was a common tool in my toolbox. It was sure handy.

1 Like

Great set up
So how well does it keep the dust out of the shop vac?
and where did you get your hose fittings and hose
Thanks
Jeff Peters

Awesome, I have a similar setup that just broke so I’m going to use your design and try that instead. Thanks for sharing.

1 Like

So how well does it keep the dust out of the shop vac?

Does pretty well so far. Shop vac has a minimal layer of dust inside but the rest of the material is in the bucket.

Dust Deputy style cyclone separators are better than what I have, and I’ll probably upgrade to this in the future: https://www.oneida-air.com/dust-deputy/wet-dry-vacuum-kits

where did you get your hose fittings and hose

The black one came with the RIDGID vacuum (the Dustopper also comes with one, but it was too short for this use case).

The other is a Bosch hose that fits inside of a 2-1/2 hose port.

The other end is a weird Festool style end, but with some adapters (listed on the Amazon page) you can hook it up to about anything.

I made a wireless button last night for me to toggle the vacuum on/off within the shop.

Small video of it in operation on my Twitters: https://twitter.com/minglecm/status/1346593926833082368

A wee bit over-engineered, but I grabbed what I had in stock and connected it to my existing home/shop systems.

Momentary push button is connected to an ESP8266 (WiFi) which publishes a small toggle message to MQTT (message broker).

My Home Assistant instance is listening to the MQTT topic and when it receives a message, it toggles a z-wave outlet that the vacuum is connected to.

In the future I’d like to skip the toggle button entirely and have it turn on automatically.


I didn’t have small enough wood screws so I ended up using a machine screw upside down and a nut. I’d like to change this if I make another version.


Design:

https://svgshare.com/i/Srq.svg

4 Likes

Hi could you tell me what program did you create the file for the box parts for your switch
Jeff

1 Like

I suspect it was one of the online box generators. I discuss this sort of thing at:

https://willadams.gitbook.io/design-into-3d/fingerjoints

and the following chapter.

2 Likes

Will is correct, I used a generator called boxes.py. I used the electronics box version with no outside mounts configured.

Font is “Interstate”.

2 Likes